Nancy Hiller shows how to recreate two of Davies’ decorative effects
When John Ruskin enumerated what he called the ‘moral elements of Gothic’ in The Stones of Venice, he included that of ‘redundance’ in the realm of design, offering the corresponding virtue of ‘generosity’ in people. As the final entry in a list ranked according to importance, redundance – or generosity – was, in Ruskin’s view, the least essential, yet still worthy of inclusion.
Explaining what he meant by redundance in design, Ruskin wrote that ‘in the most characteristic buildings, a certain portion of their effect depends on accumulation of ornament…’. The emphasis here is on two points – the accumulation, as well as the ornament. Given that Ruskin generally urged simplicity and self-denial, some may view the inclusion of redundance in this list as a bit of self-contradiction. But as in so many cases involving Ruskin, the apparent contradiction melts away with more nuanced elaboration: in an ideal world, we would be satisfied with noble austerity. But insofar as truly good design should speak to the unsophisticated, no less than to the refined, ‘the richness of the work is, paradoxical as the statement may appear, a part of its humility.’ To put this in more straightforward terms, if your minimalist, white-painted concrete-floored flat that’s designed to look as though no one actually lives in it strikes your cleaner as barren and lifeless, you may need to wipe a bit of toffee off your nose. ‘No architecture is so haughty as that which is simple,’ Ruskin continued. ‘That humility, which is the very life of the Gothic school, is shown not only in the imperfection, but in the accumulation, of ornament.’ Good design, at least according to Ruskin, should not be socially exclusive.
The Cotswold School
Some particularly lovely examples of redundance, which I prefer to call by the name of its human counterpart, generosity (because really, generosity versus redundance is a no-brainer, isn’t it?), are to be found in furniture of the Cotswold School. The best known of the Cotswold designer-craftsmen were Ernest Gimson and Sidney and Ernest Barnsley; they were followed by Edward Barnsley, Sidney’s son. A number of craftsmen who worked in Gimson’s shops are also intimately associated with the style, among them Peter Waals and Norman Jewson. And surely one of the best-known names associated with the Cotswold School is that of Gordon Russell.
The influence of the Cotswold School spread far beyond that geographic region. Arthur Romney Green, who lived just outside Bournemouth, visited Gimson’s workshops in 1904; his subsequent work reflected Gimson’s impress so strongly that it is identified with the Cotswold School. Romney Green introduced Stanley Webb Davies to the characteristic elements of this furniture style: simplicity of form, the use of solid timber, clean lines, exposed joinery, decorative chamfering, and repetitive patterns carved within bounding lines.
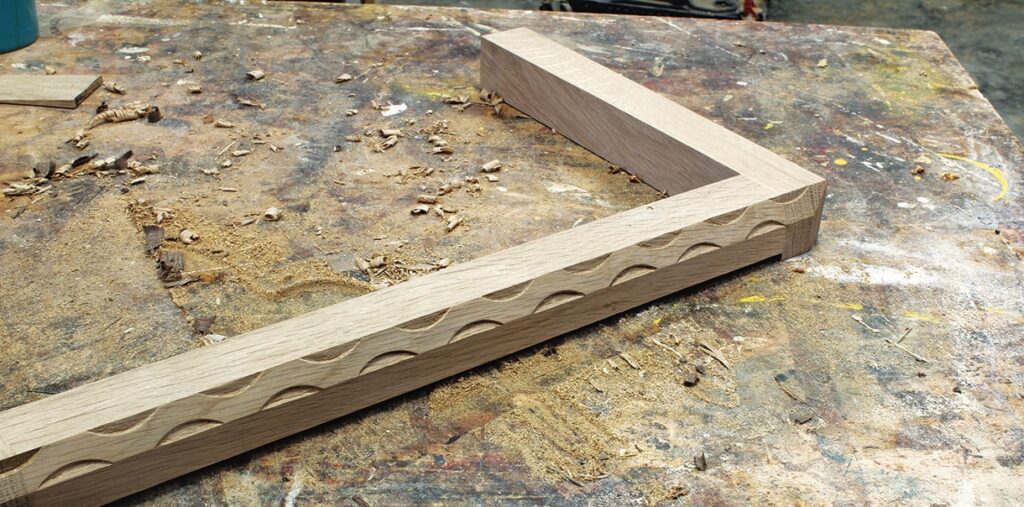
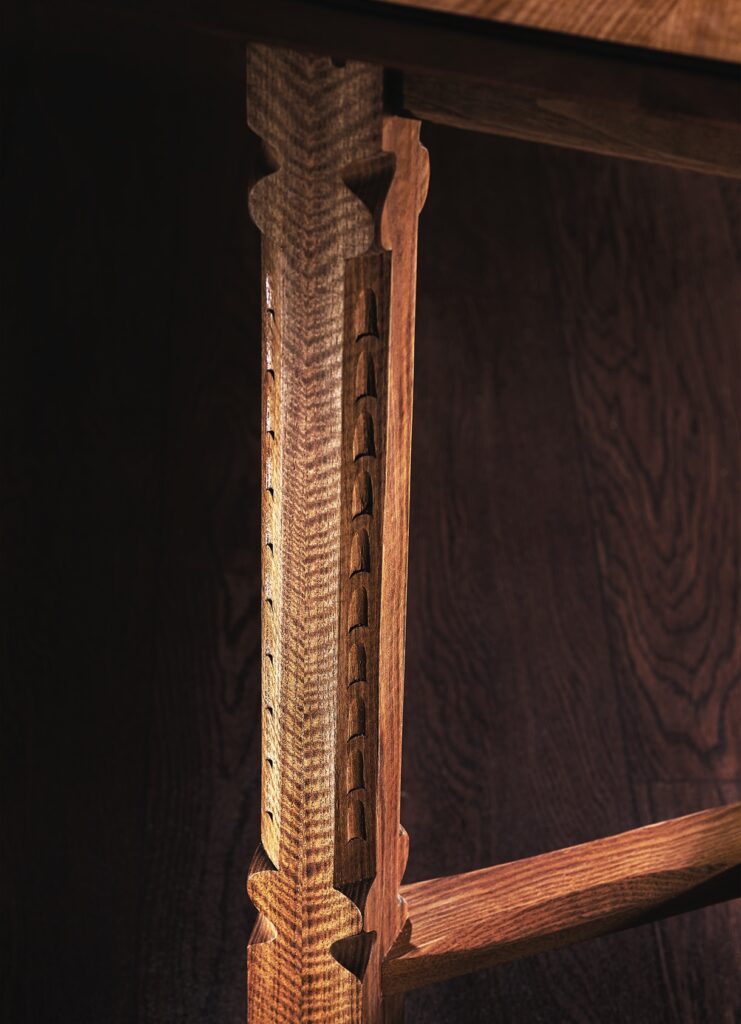
Davies employed several varieties of such ornament, among them the alternating chamfer that creates an undulating effect on stretchers, gouging on chamfered edges (sometimes with one rounded end, sometimes with both ends rounded), and a ribbon-like strip he called an alternating thumbnail. One of the most intriguing aspects of Davies’s decorative carving patterns, at least for me, is how modern they appear: they would have fit perfectly into 1970s décor.
Here’s how to achieve two of Davies’s more modern decorative effects.
Alternating thumbnail
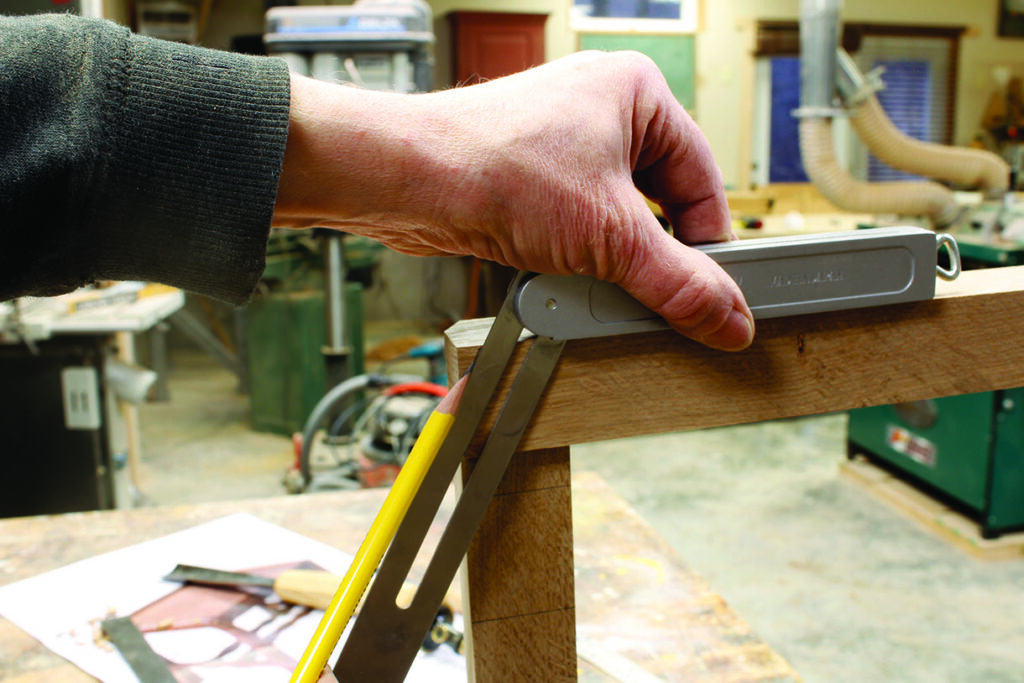
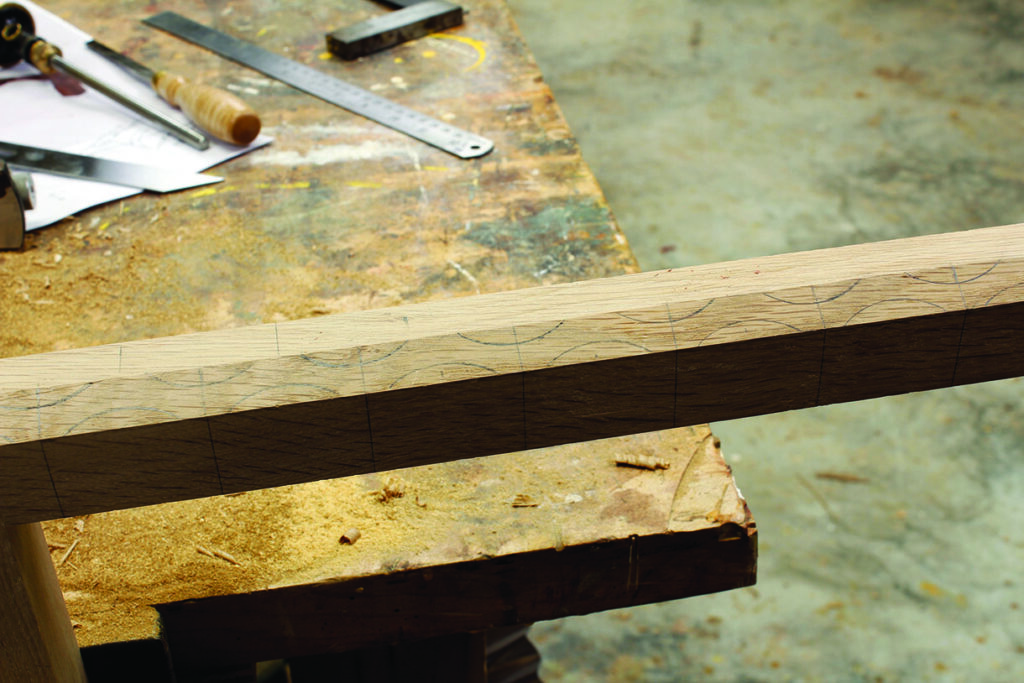
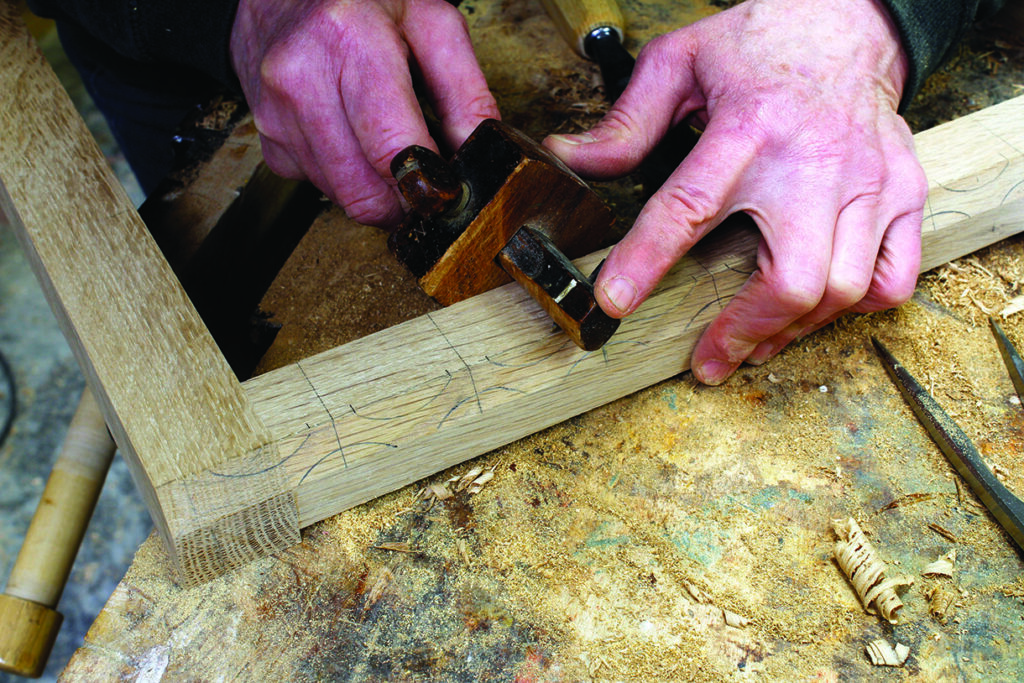
Because this pattern runs unbroken around the edge of a piece, you need to build the basic piece before you lay the pattern out. Clean up the joints, then chamfer the outer top edge. I made my chamfer 5⁄8in wide. The chamfer need not be at 45°; what’s important is that the angle and width be consistent.
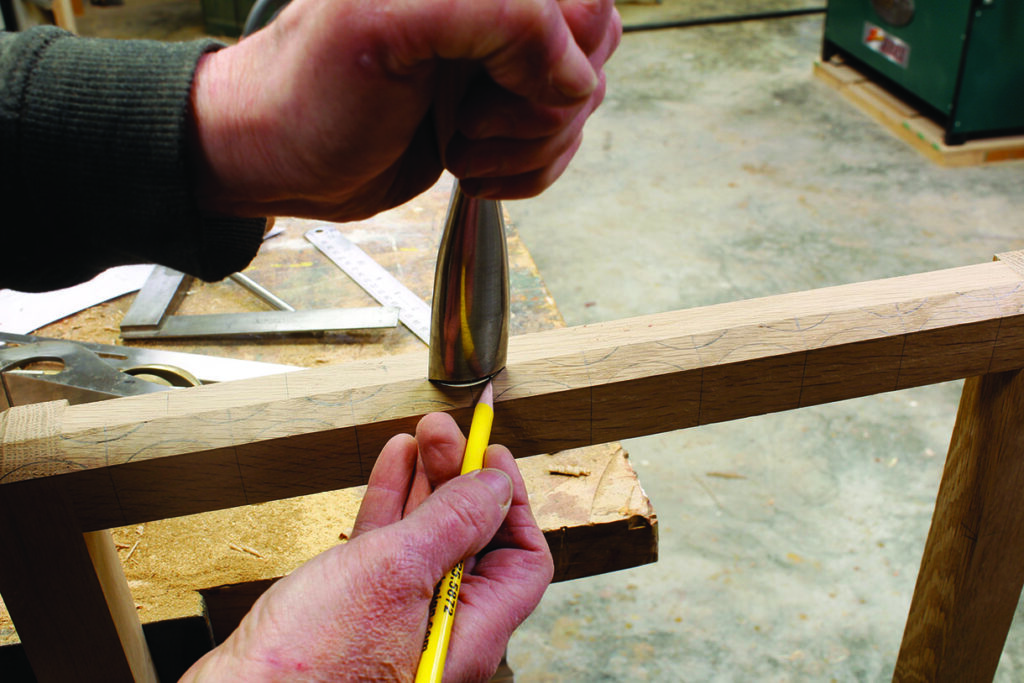
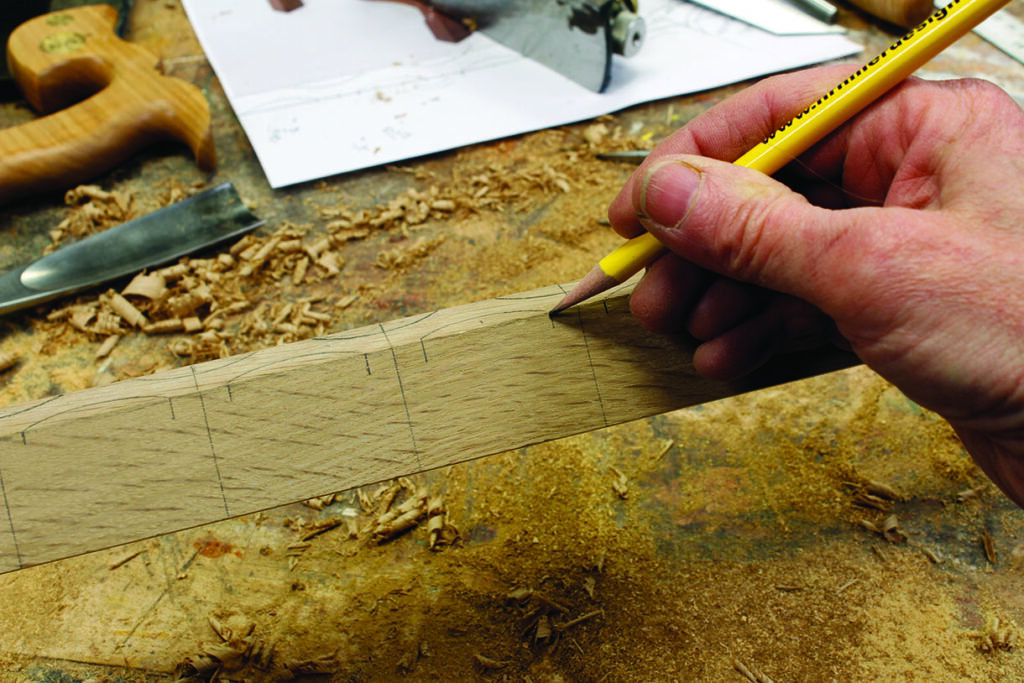
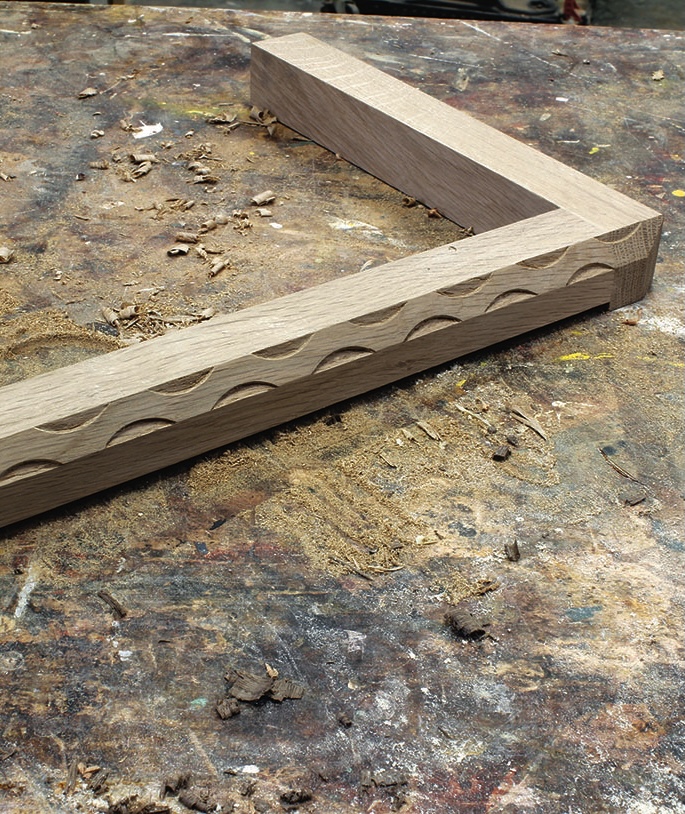
Next lay out the pattern in pencil. The layout will depend on the width of the gouge you plan to use, as well as the width of the chamfer; one of the goals with this pattern is to create a sinuous raised highway, so to speak, that stays about the same width all the way to each corner.
The spacing of the cuts will also depend on the sweep and width of your gouge. The narrower the chamfer and the greater the sweep, the more closely you’ll want to space your cuts to produce the kind of pattern Davies used.
I used a 30mm gouge with a number 7 sweep. An incannel gouge would be ideal for this, but an outcannel can work. Because all of my gouges are outcannel, that’s what I used. Dividers are useful for laying out the pattern.
I marked the centre point of each gouge cut where it would intersect with the outside edge of the chamfer at the top and at the bottom. Once you can see where the gouge cut will intersect with the chamfer, extend those outside points onto the flat of the rail at the top and bottom, then use a marking gauge to cut along the chamfer’s edge. The gauge line will provide a starting point for your chisel.
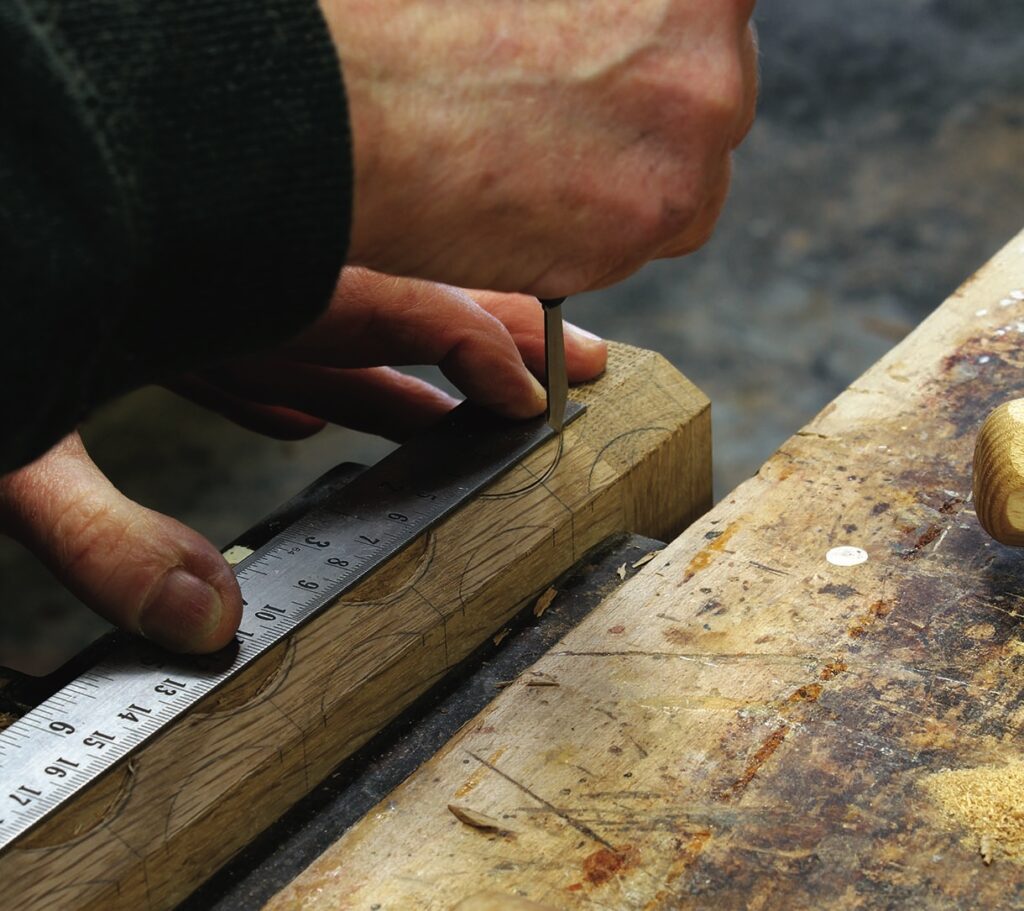
At the ends, where a marking gauge won’t fit, use a steel straight edge lined up with the chamfer and score with a marking knife. Take several light passes to avoid getting caught in the grain.
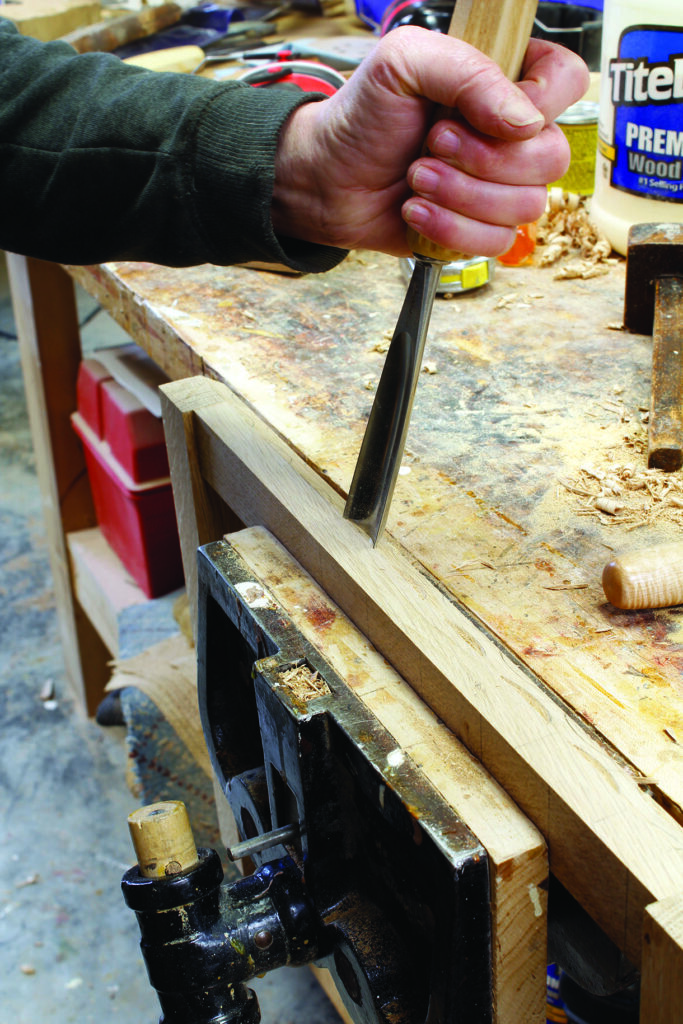
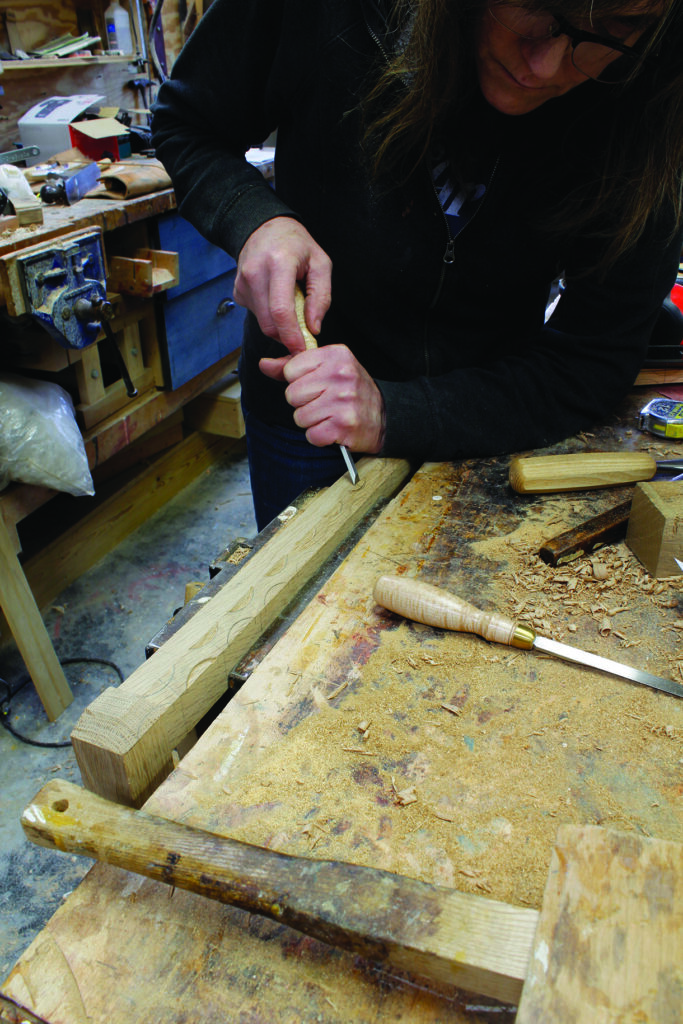
Set the gouge on each mark and tap with a mallet. Avoid too hard a blow or you may break out the grain at the chamfer. The object at this point is to define the gouge line and score the fibres. Repeat until the centre of the gouge has penetrated about 1⁄8in. The gouge line should taper from that depth out to nearly nothing where it meets the chamfer.
Next adjust the workpiece if necessary and use a skew chisel to pare out the waste. Begin by setting the edge of the chisel in your marking gauge (or knife) line and gently start paring. The idea is to remove material in order to create the pattern of shadow and light, but with minimal breaking or tearing of the grain. Work at an angle that will get you from the high point of the chamfer’s edge down to the deepest point at the centre
of the curve.
It’s a good idea to complete all of the carving on the bottom row in one go, then switch to the top (or vice-versa). That will help you keep the angles consistent, especially if your chamfer, like mine, is not at 45°.
Alternating chamfer
The alternating chamfer takes straight structural elements such as the rails of a stretcher, and turns them into a seemingly fluid form. Aside from the moral element of redundance, chamfering, originally a means to reduce the weight of wooden wagon parts, expresses the Gothic virtue Ruskin deemed most important, that of ‘savageness’ (in design) or ‘rudeness’ (in character). Ruskin was in part invoking a certain integrity between maker and artifact, as well as within the processes of making themselves, that had been lost to Victorian culture. This integrity would find new expression in the Arts & Crafts movement – for example, in the exposed joinery of the Cotswold School.
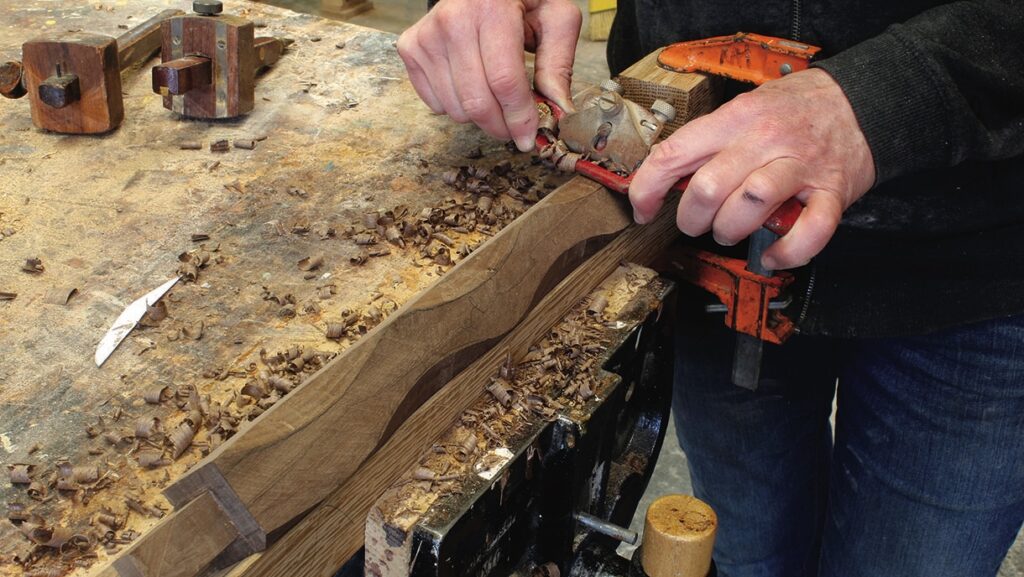
This pattern is extremely simple to produce with a drawknife or with a spokeshave and chisel. As with the alternating thumbnail, the greatest challenge is in the layout.
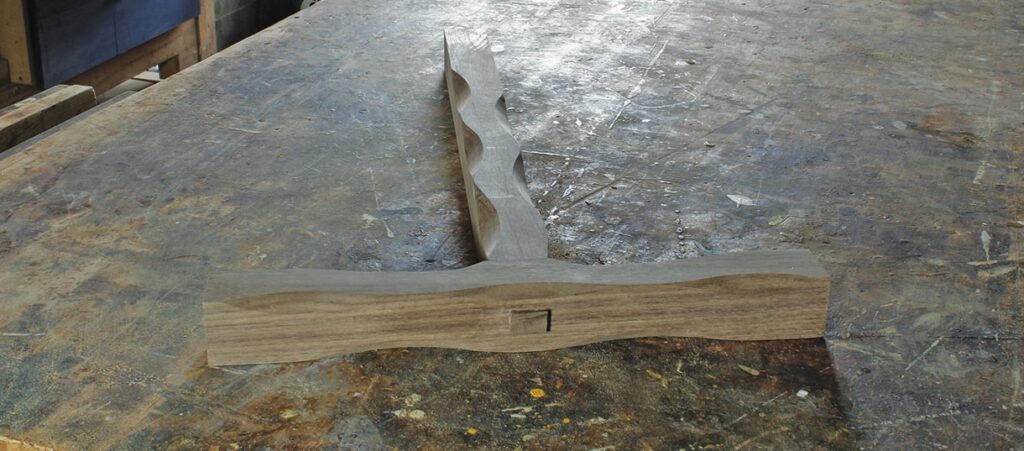
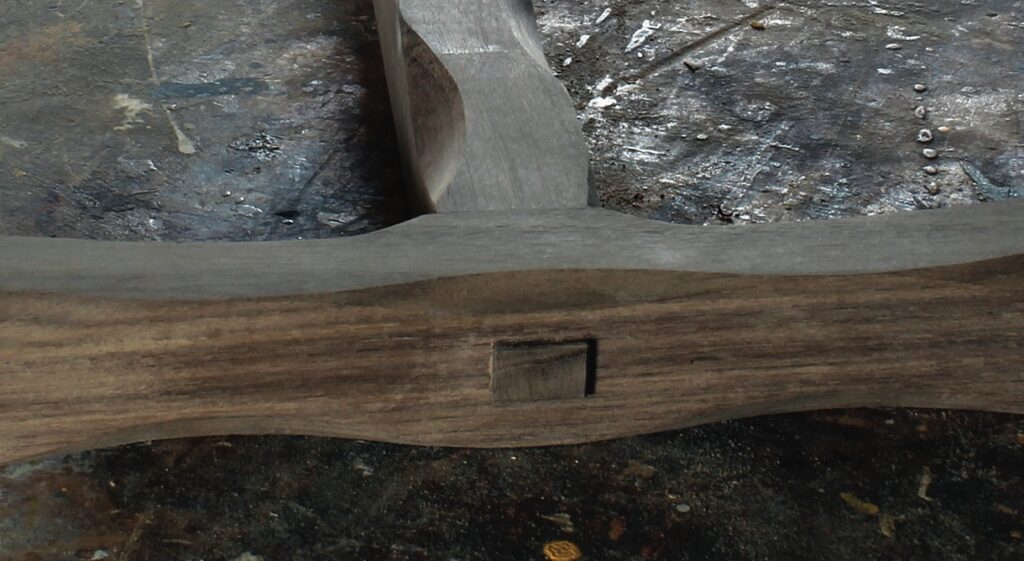
Once again, the pattern creates an undulating raised area that should be consistent in its width. In this case, the pattern is produced by a series of chamfers barely joined at their ends to create a sort of fluid bead. But because the chamfers must alternate as they go around each structural member, it’s very important to work out how they’re going to intersect with each other at joints. One way Davies dealt with this was to have parts mirror each other, in cases where they were paired, such as the table below.
As with the alternating thumbnail, you should have the joints cut and fitted before you begin the shaping, though in this case it’s easier to do the cutting before the parts have been glued together.
Lay the pattern out on all sides of every part before you begin shaving. This way you’ll have a chance to rub or sand out any lines that may be incorrect and redo them. It’s fine to alter the shape and depth of the chamfers to fit different sections of the work. For example, Davies used an asymmetrical shape tapering from a sharper radius at one end to an elongated point on the outside faces of this small table’s rails. Also be careful to mind joints; for this exercise, I made a shorter, shallower chamfer just over the mortise and tenon to avoid cutting too close to the joint.
Make a mitre cradle on the tablesaw to hold your workpiece at 45°. An offcut makes an ideal block for clamping.
These chamfers take very little work to make. Davies specified that all work should be fresh from the tool, with no sanding – a finish consistent with Ruskin’s first moral element of Gothic: savageness (in design) or rudeness (in character). However, I went ahead and sanded mine.