
David Waite tells F&C about his first professional project
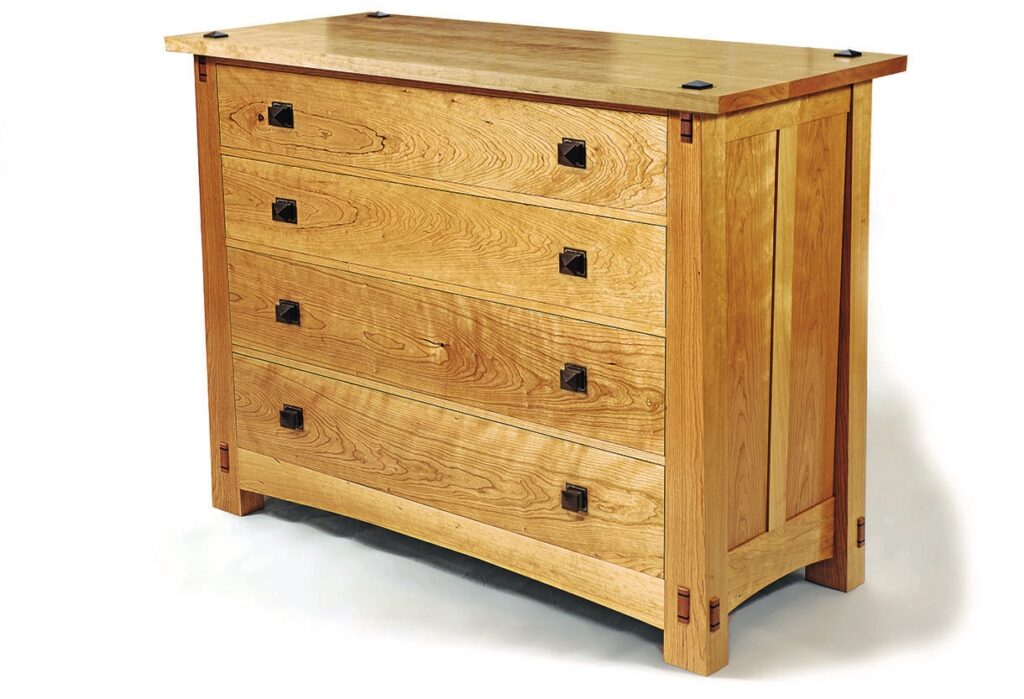
Landing my first commission was an exciting, if somewhat unexpected event. While enjoying my summer family holiday in France, I received an email via my website from a potential client who had seen my business logo on the side of my Land Rover. The email requested a meeting to discuss a potential project, but gave no clues as to what this might be. An initial consultation was arranged promptly on my return to the UK and I was delighted to find my client had a real love for the work of Gustav Stickley of the American Arts & Crafts movement and wanted to commission a large chest of drawers sympathetic to his style.
The client’s input
Our first meeting took place at the client’s home, which gave me valuable insights into his taste in furniture. As we chatted, I was able to develop the brief further. My client articulated his love of American cherry in fine furniture and its use with appropriately contrasting timbers such as maple. He also liked bold chunky designs and show joinery that demonstrated the handmade nature of a piece. He had a couple of specific requirements: firstly, he wanted four fully extendable drawers; secondly, he wanted abalone shell inlays to be incorporated into the piece. With these requirements understood, we agreed to meet in a couple of weeks’ time for me to present my initial design sketches.
I was excited at the possibility of being commissioned to make this fairly substantial piece but keenly aware that nothing had – at this stage – been agreed and no real commitment had been made. Happily, this changed during our follow-up meeting. I presented five different pencil sketch designs and was pleased to find he liked what I had done. One idea in particular met with his approval and he was prepared to pay the design fee I ask for in order to work up a fully costed, fully resolved design in CAD.
Money makes the world go around
Once details of the design were established, I tackled the critical question of pricing. As mentioned in a previous article on setting up my business, I had already calculated my hourly making rate, so I simply needed
to estimate the number of hours it would take me to make the piece and add the cost of all materials needed in order to arrive at the price.
Cost of materials was relatively straightforward to achieve, as I was easily able to generate an accurate cutting list from my CAD drawings and, after adding in a 20% overage for timber wastage, I called several timber suppliers to ascertain their best prices. I added to this cost the price of the drawer runners, the abalone string inlay and a couple of curved templates I would commission from a CNC specialist.
Estimating the number of hours it would take to make the piece was a more challenging calculation. I have read on numerous occasions that this is where many makers are hopelessly optimistic and as a result destroy any chance of making a viable living. I spent time writing a detailed process list for all parts of the construction and then assigned my time estimate to the nearest half hour for each activity. Adding these times together and adding a 10% contingency then gave me an overall making time for the piece which equated to 12 weeks, worth of work. I am fortunate to have the continued support of the Waters and Acland Furniture School to call on since completing my training with them and I took the opportunity of running my time estimate by them for a reality check. Will and Oli both thought it was realistic and were also very helpful in offering me a critique of the design.
With costs and timelines calculated, all that was left to do was prepare finalised drawings, including a nice watercolour sketch, and make the pitch to my client. I must confess to feeling a little nervous as the day of the meeting arrived, but I felt confident that my design was good and the price was fair. As I walked my client though the finalised design and cost proposal, he seemed very pleased and happily agreed to move forward, transferring one third the overall fee to my bank account to allow timber to be bought and making to begin.
Delivering the brief
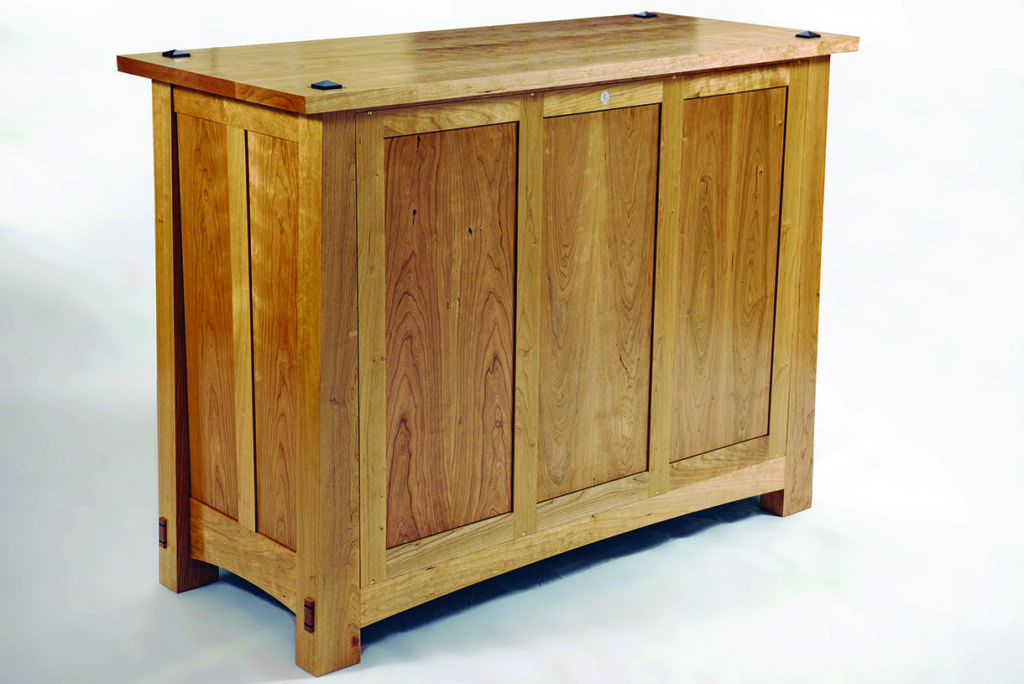
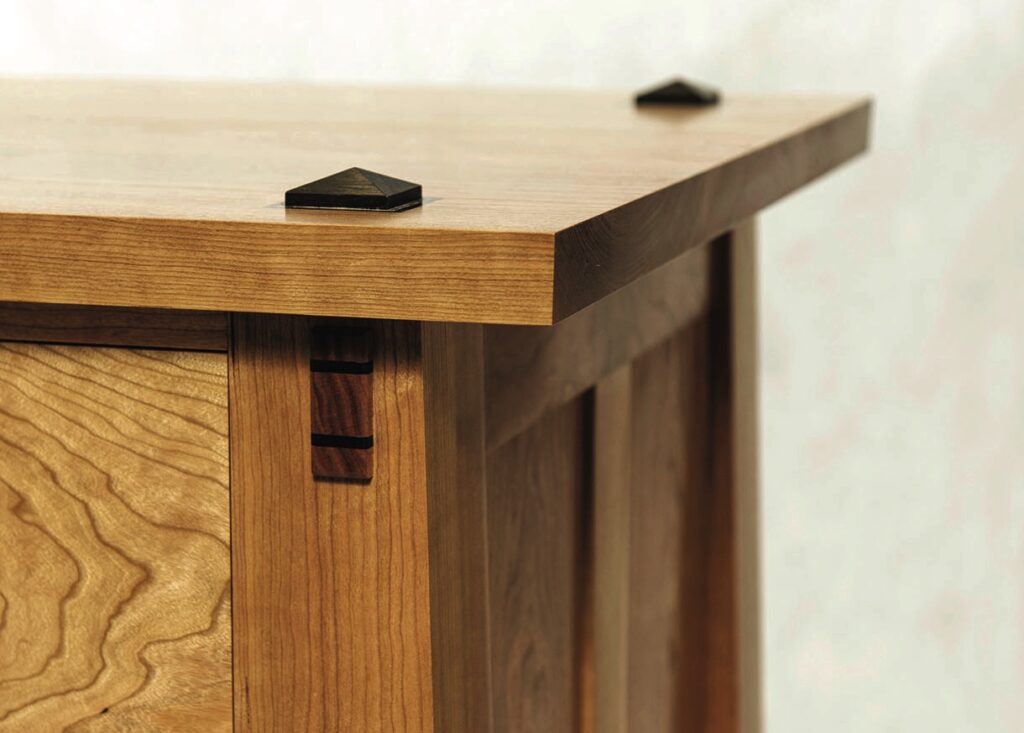
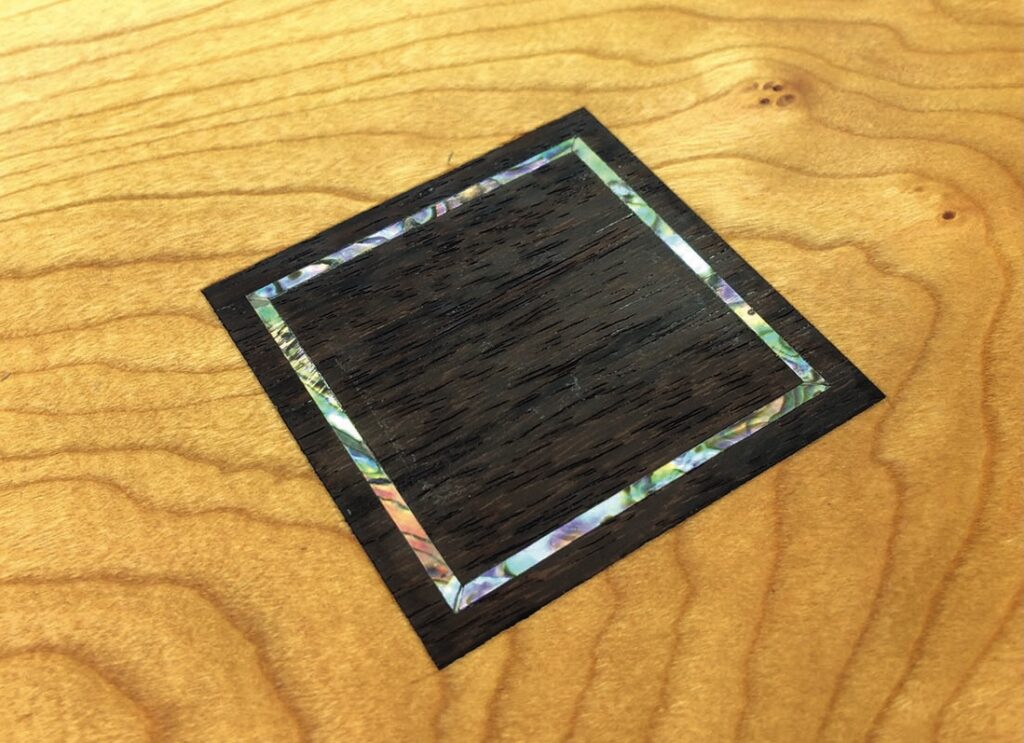
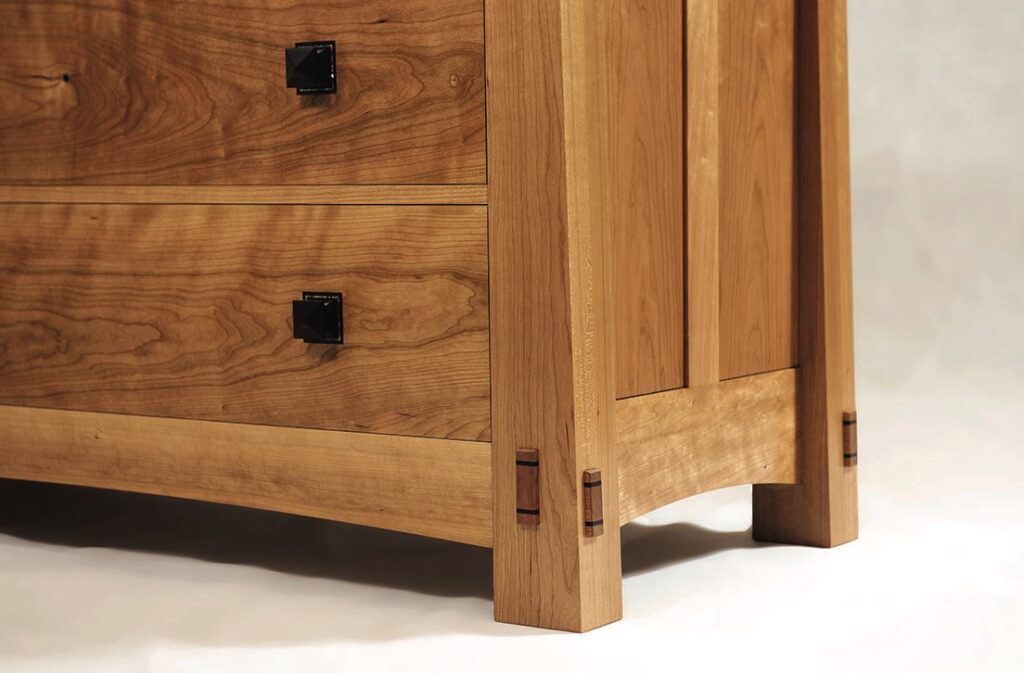
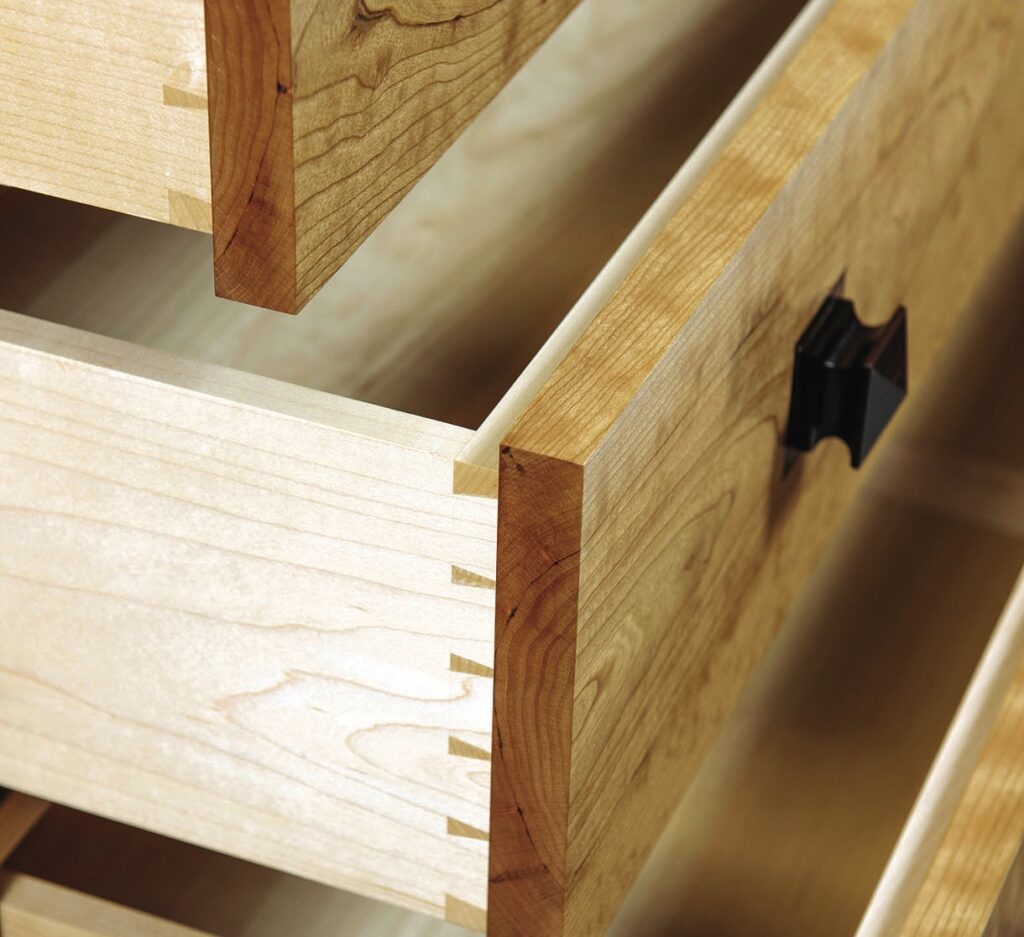
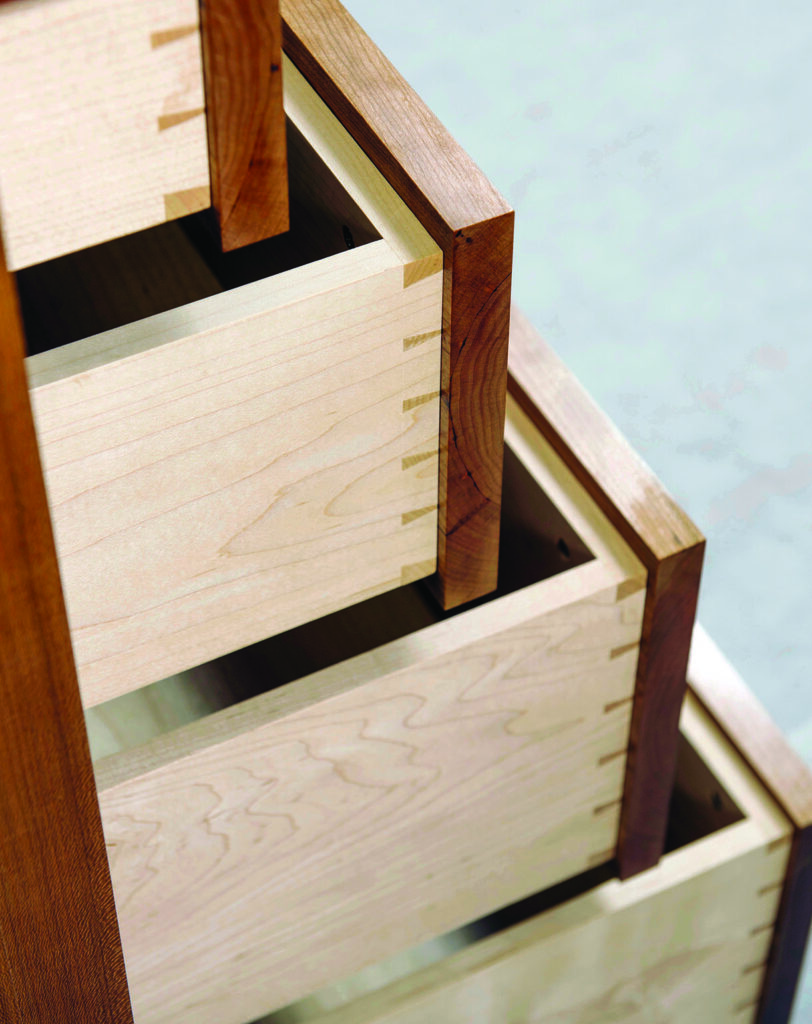
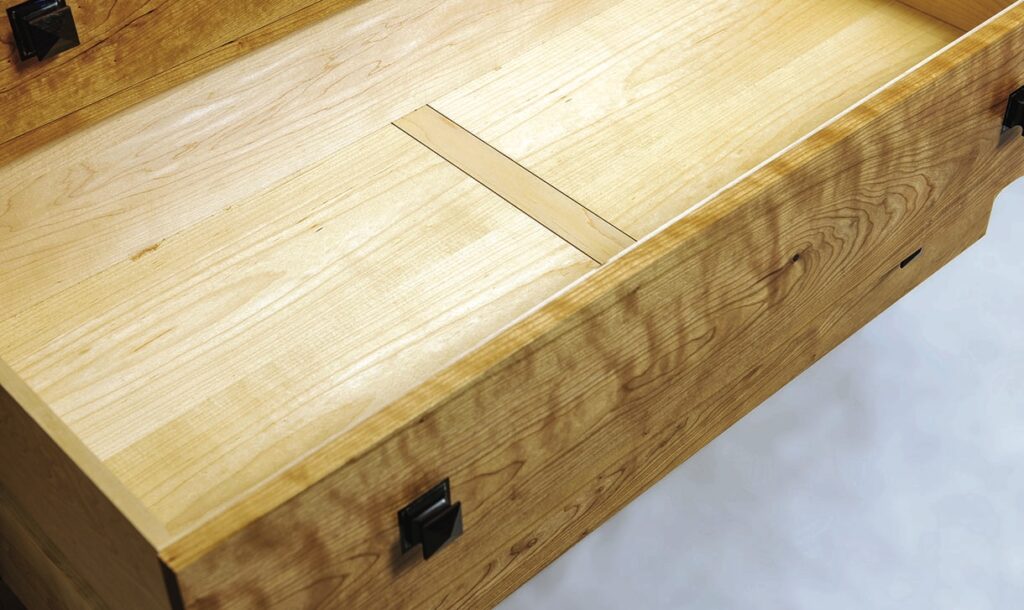
Whitmore’s Timber provided the cherry and maple for the project, which I self-selected along with the rosewood from Timberline in Kent. The final design was quite traditional and in keeping with Stickley’s work. Substantial tapered legs were a key feature that gave weight and solidity to the piece as well as providing visual interest. Book-matched panels were housed in a traditional fashion between the legs and cross rails to form the sides and the back was also of a frame and panel construction. Rosewood wedged through mortise and tenon joinery provided further interest and squares of rosewood were added as an inlay detail on the drawer fronts behind the square pyramidal drawer pulls as well as on the top of the piece. I opted for a string line of abalone shell set into each of the rosewood squares found on the drawer fronts and top, anticipating a beautiful sparkling contrast between the dark rich rosewood and shell. Given the requirement for the drawers to open fully, traditionally constructed drawer boxes in maple were proposed, sitting on soft-close, fully extendable, under-mounted runners with a cherry false front fitted to each.
Gustav Stickley
Gustav Stickley (1858–1942) was an American furniture manufacturer, design leader, publisher and the chief proselytiser for the American Craftsman style, an extension of the British Arts & Crafts movement. Stickley’s furniture reflected his ideals of simplicity, honesty in construction and truth to materials. Unadorned, plain surfaces were enlivened by the careful application of colourants so as not to obscure the grain of the wood, and mortise and tenon joinery was exposed to emphasise the structural qualities of the works. His firm’s work was popularly referred to as being in the Mission style, though Stickley despised the term, considering it to be misleading.
Construction
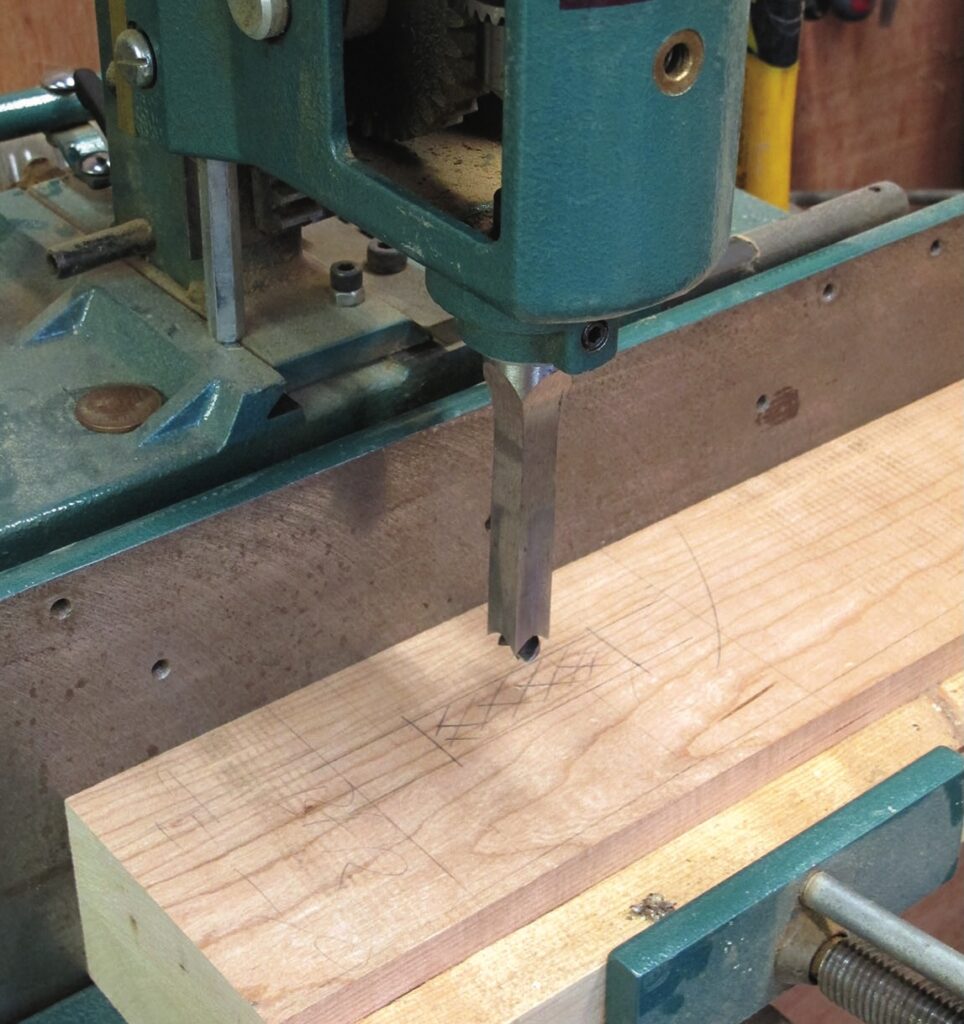
Carcass construction began with preparation of the tapered legs and curved lower rails at the spindle moulder using a bearing and spiral head cutter block and the template jigs I had had prepared. Mortises were then cut in the legs on my mortiser and a 3° taper created from front to back on each of the through mortises using a simple wedge shim. Tenons were then cut on the rails using the bandsaw and at the router table to achieve snug push fit. The lower side and front rail tenons intersect so a notch had to be cut in the lower side rail tenons to enable the front tenons to pass through to allow the joints to come together. Finally, appropriate length slots were cut in each through tenon at the bandsaw for the rosewood wedges.
With the leg and rail joinery complete, grooves were created in the legs, cross rails and central mutins to accept two book-matched side panels. Each panel was carefully dimensioned so that when fitted into the end frames, a 1mm shadow gap was left showing around each panel edge. A rebate was also cut into the bottom back rail to house the frame and panel back of the chest. This was constructed from solid cherry using Dominoes to joint the frame and with the same 1mm shadow gap around each of the three book-matched rear panels.
Next, four internal dust panel frames were made, in solid cherry, jointed using Dominoes and grooved at the router table to accept 6mm cherry veneered MDF panels. The top frame was left without any panels and instead buttons were machined on the router table to fit the 6mm grooves in this frame so that the chest top could be securely attached, yet able to cope with any seasonal movement across its width. The chest’s top was constructed from three 30mm thick cherry boards carefully butt jointed together. The top had a 2° chamfer cut using the tablesaw on each of its edges to match the tapered angle of the legs.
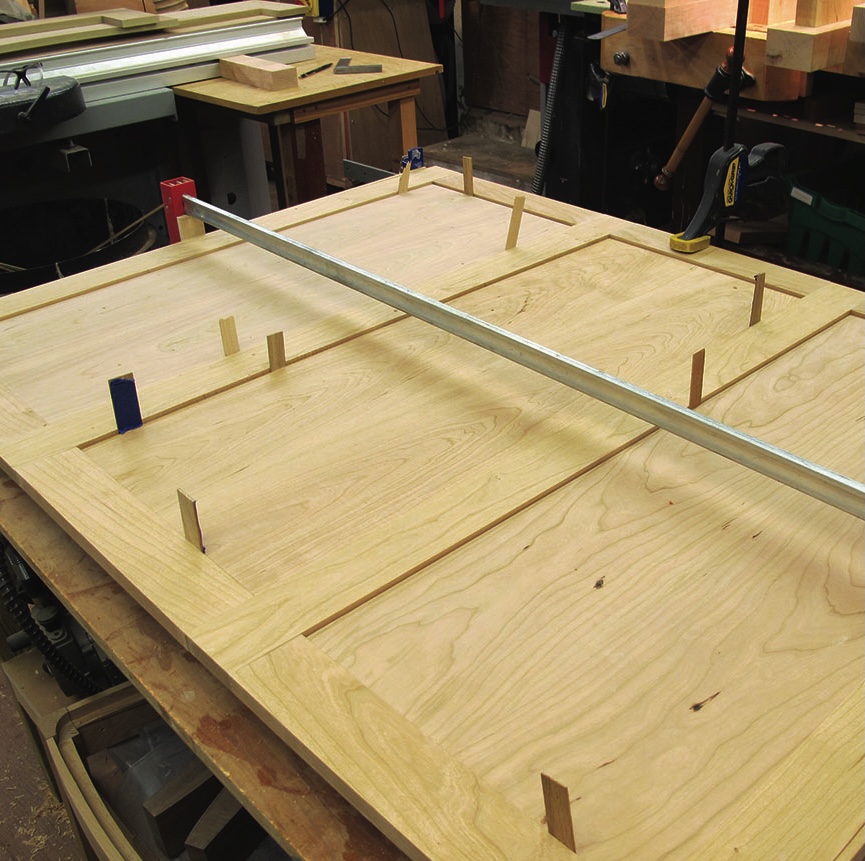
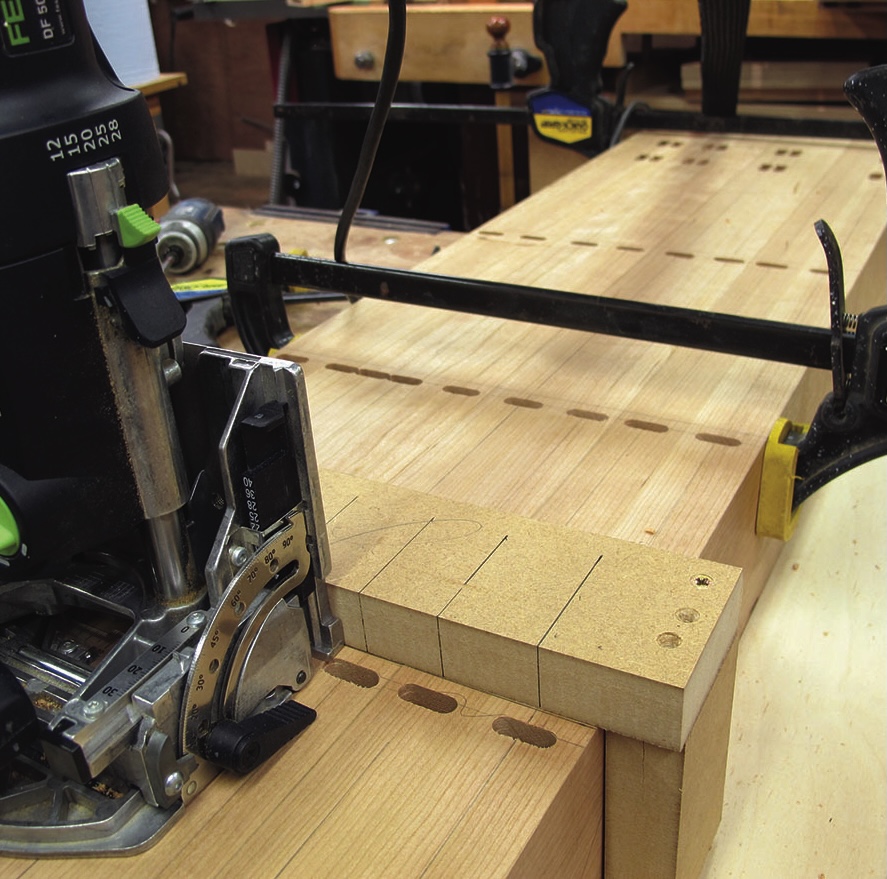
The final stage before carcass glue-up was to machine Domino slots at the appropriate heights in the internal faces of the legs and central mutins. All four legs were carefully clamped together ensuring they were flush in length and a simple straightedge jig laid across them to register the Domino jointer from, thereby ensuring the slots in each leg were at exactly the same height. Corresponding slots were then cut in the ends of each of the dust panels and finally in the central mutin. Adding Domino joints along this central mutin was important to avoid any flexing of the dust panels when the heavy drawers and runners were added at a later stage.
Inlays and handles
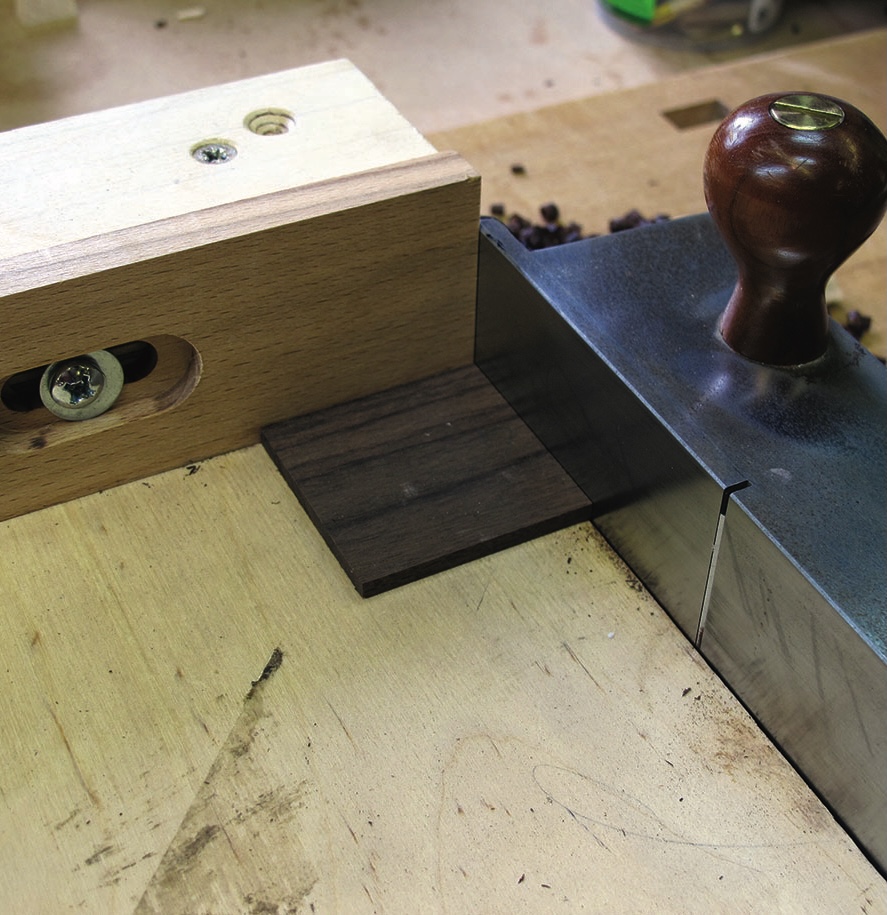
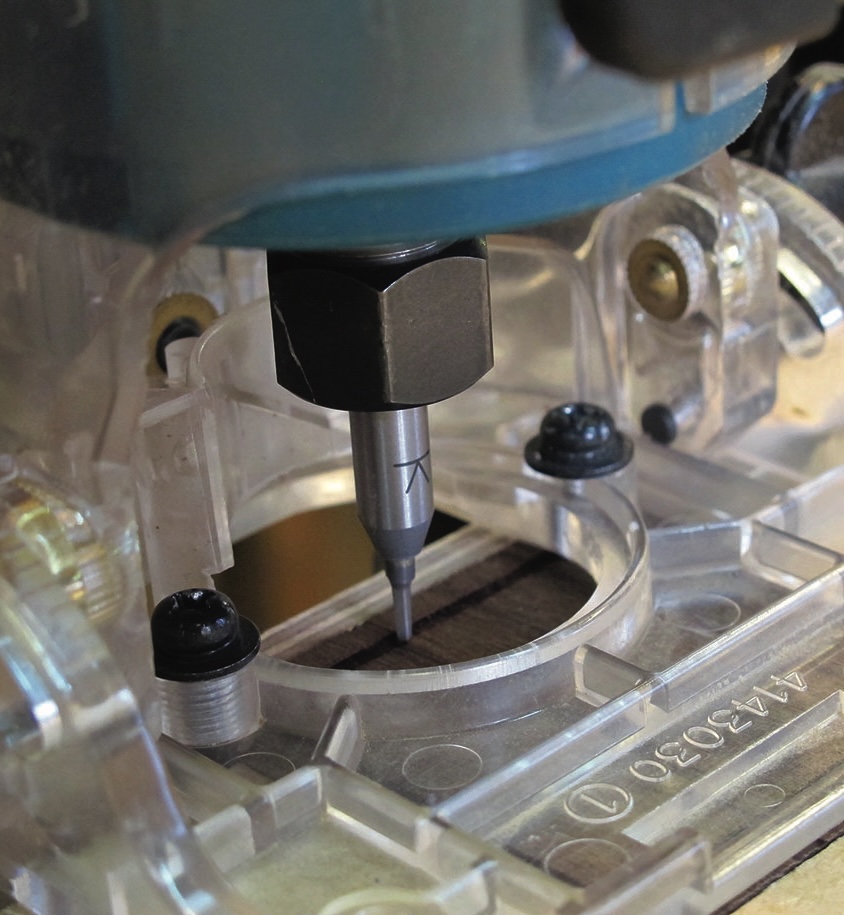
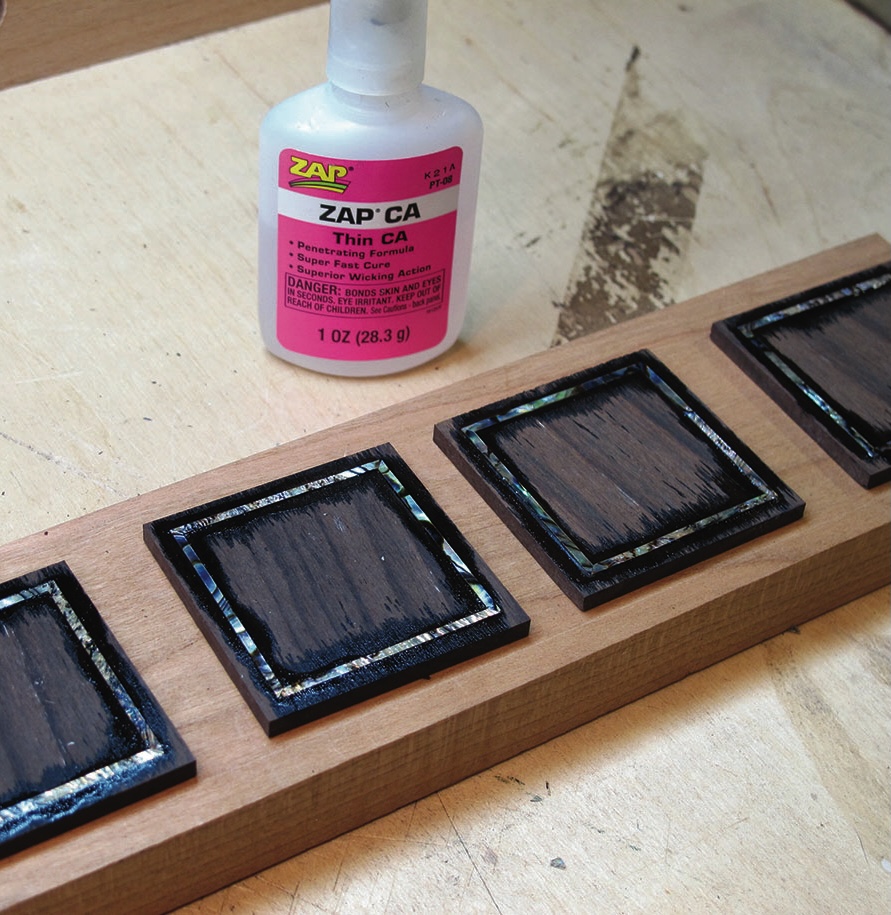
An important detail of the piece was the Arts & Crafts-style pryramidal drawer pulls set onto square rosewood inlays which had the abalone shell string line inset. The 4mm inlays were first cut oversize on the bandsaw and then accurately dimensioned square on a shooting board. Once prepared, each rosewood blank had the 1.5mm-wide string line routed into it, 3mm from its edge and to a depth that ensured the shell string line would lie just a fraction above the rosewood. Corners of the groove were then made square using a scapel and fine chisel. The shell stringing, bought from a luthier supplier, was carefully mitred with a sharp chisel and fitted into the grooves. Once all four pieces were cut and dry fitted, a thin cyanoacrylate glue was flooded over the surface of the string lines. Once dried the excess glue and shell were sanded away leaving the string line perfectly flush with the rosewood. The position of the rosewood squares were then marked onto the drawer fronts with a sharp scalpel and then let into the drawer fonts using a router to remove most of the waste and a sharp chisel to square each corner. The squares were glued into the drawer fronts and sanded flush before an 8mm dowel hole was drilled at the centre of each.
The pulls were created from 50mm-square rosewood blanks using the drill press to form the dowel holes and shape the handles’ curves, followed by the tablesaw to bevel each top. A detailed description of this method can be found in an article by Michael Perchov in Fine Woodworking Magazine. The finished pulls were then attached to the drawer fronts using glue and a short length of walnut dowel.
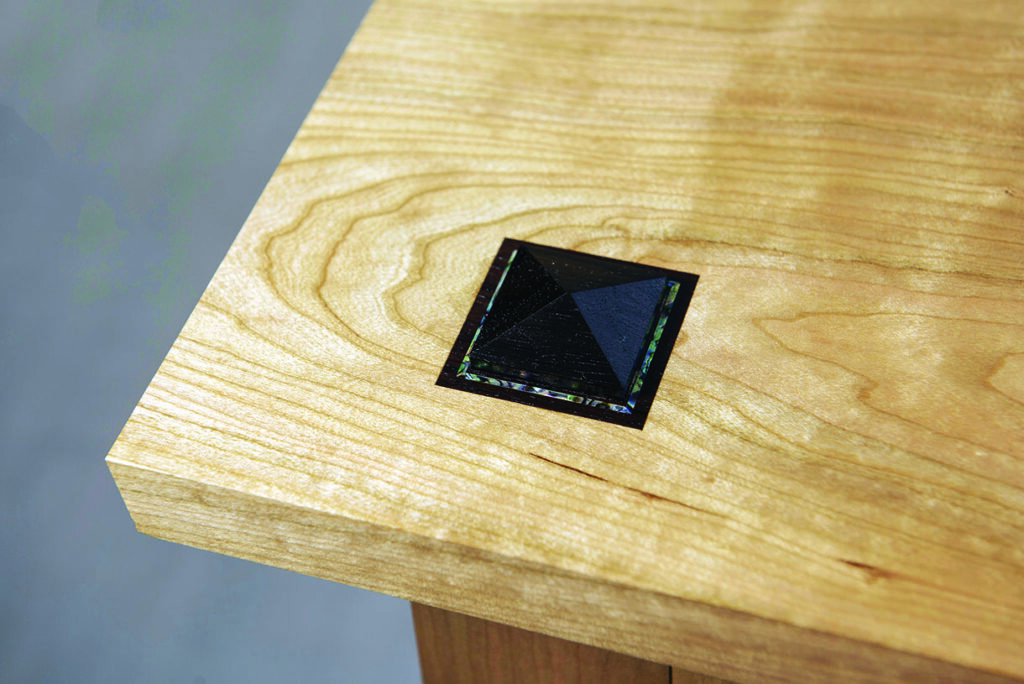
The drawer pull detailing was echoed on the chest top with four of the same square inlays set into the chest top and a raised pyramidal cap detail added to match the drawer pulls.
Getting across the goal line
I delivered the piece to my client 13 weeks after the making process began (one week more than estimated) and I am pleased to say he was delighted with it. The commission allowed me to test many elements of my new business model and I took a lot of confidence from being able to manage the whole process to the satisfaction of my customer. I learned several valuable lessons during this commission (see below) that will hopefully ensure my new business continues to flourish.
Key lessons from my first commission
• Keep a real-time log during the making process. I have been able to pinpoint exactly where I had underestimated my time on this project. In this case, it was in the fitting of drawers to get perfect closure, and in prototyping the process for making the drawer pulls. These are valuable insights and I will add 5% more contingency to my time/cost estimate for future jobs of this type.
• Ask the client upfront where the piece will be finally located. Failing to do this was a rookie error, which I was fortunate to get away with, as the client directed us to his downstairs living room on delivery. There is no way the piece would have been able to get up the tight narrow staircase to a bedroom!
• It’s worth scheduling a photoshoot to coincide with the delivery of the finished piece. Co-ordinating the help needed to move the furniture with the availability of a photographer, hire of a studio and delivery to the client turned out to be surprisingly tricky to synchronise, but meant I only had to move the furniture once and yielded fabulous images for future publicity.
• Always ensure you have general spare parts for critical machinery. When the £20 capacitor on the starter motor of my dust extraction equipment shorted, the machines in my workshop were taken out of action for four days while I sourced a replacement. Fortunately, this occurred just as the project completed, and had minimal impact on achieving the ‘due date’.