Richard Findley looks at the difficulties surrounding faceplate work.

So, what is faceplate work?
Essentially faceplate work covers any type of turning where the grain of the timber is running across the bed of the lathe – as opposed to along the bed of the lathe as in spindle work. Technically bowl turning is faceplate work, but as this has been covered a number of times by myself and other turners, I thought I’d look beyond bowl turning – at some of the other things that can be made in this fashion, and the problems associated with it.
My feeling is that faceplate work is seen as a poor relation to bowl work, and even spindle turning, and is perhaps somewhat overlooked. There is, believe it or not, much more to woodturning than making bowls. Some of the things that fall under the heading of ‘faceplate work’ include:
• Bases for lamps and candlesticks
• Plinths
• Table tops
• Stool seats
• Coasters
• Chopping boards
• Rosettes
The main problems with this kind of work are mostly associated with understanding the grain direction and how to work with it to achieve the desired results. Without this understanding the results are usually torn grain, catches, poor shapes and poor finish.
Understanding grain direction
No matter whether you are turning a large tabletop, laminated from narrower boards to form the large surface, or a tiny rosette or drinks coaster, the grain will be running across the lathe.
This means that as it rotates, you will be turning side grain, followed by end grain, followed by side grain and then again by end grain. And so it goes on.
This combination of easy-to-cut side grain combined with end grain – as well as the difficult transition between the two – is what makes this type of work so challenging. There is nothing you can do about this. It is a fact that twice in each rotation, you will be cutting the wood in completely the wrong direction, which goes against every principle of woodworking, but is simply a part of our lives as woodturners. Fortunately, there are a few things that we can do to lessen the harsh effects of this cutting against the grain action.
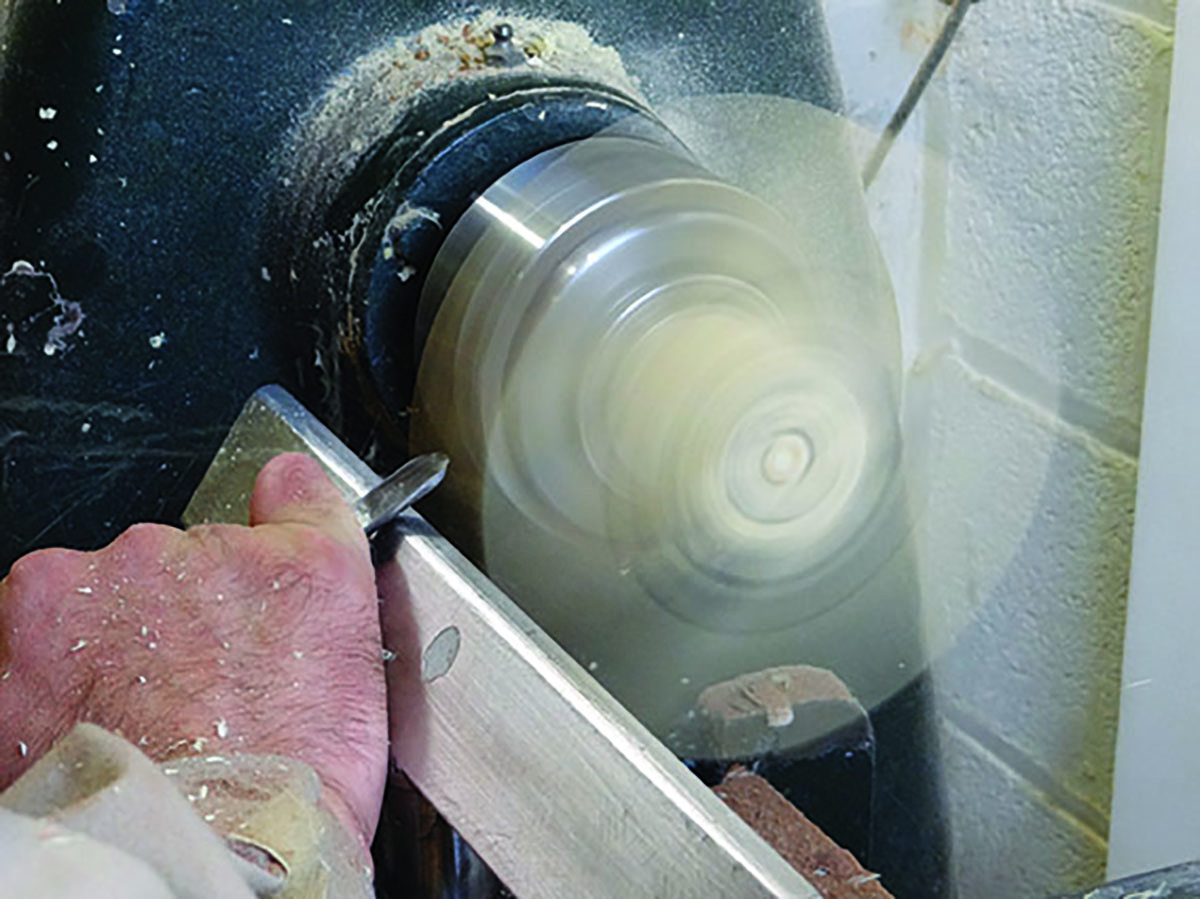
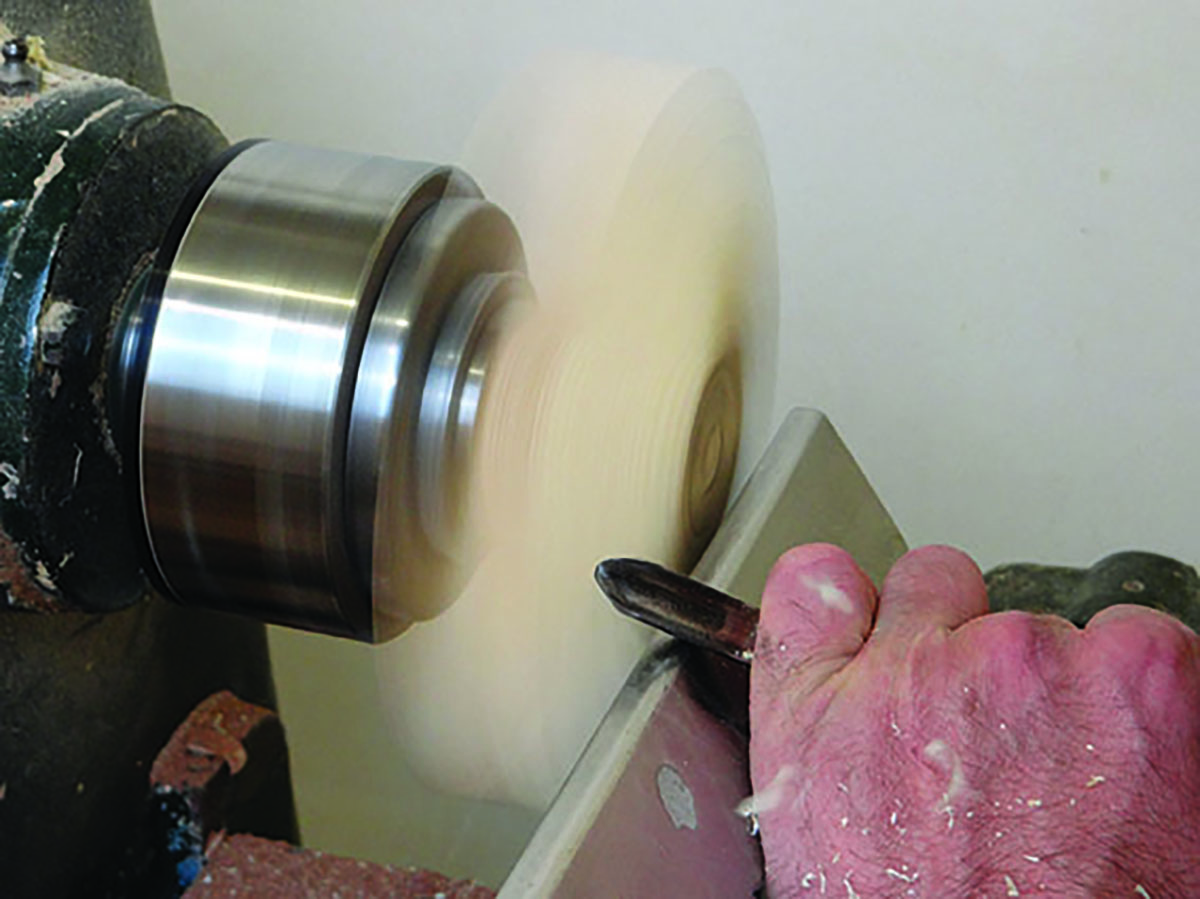
As you can see from the photographs, cutting square to the end grain is the least good option. This is why bowls made with a smooth flowing curve cut and finish easier than a square-sided bowl – often made by beginners. By working across the end grain in a curve, it reduces the harshness of the cut, as can be seen in the pictures. Sometimes a square edge can’t be avoided, especially if a design calls for it. However, if you can, it will be easier to achieve a clean cut on a curved surface.


Direction of cut
It is important to understand the direction you should be cutting in. With spindle turning you will cut from the top of each shape, downhill, to the bottom. This is also correct for faceplate work, but because the grain is running across the lathe, rather than with the lathe bed, the top of the ‘hill’ is not in the same place as it is for spindle work. The top of the hill is on the face of the wood, rather than the edge.
If you are ever in doubt as to which way to cut, imagine you are going to carve the work with a carving gouge and mallet. If you start at the edge and cut in from there, you will splinter the wood, cutting against the grain. To cut with the grain you will need to work away from the edge.


Making shapes
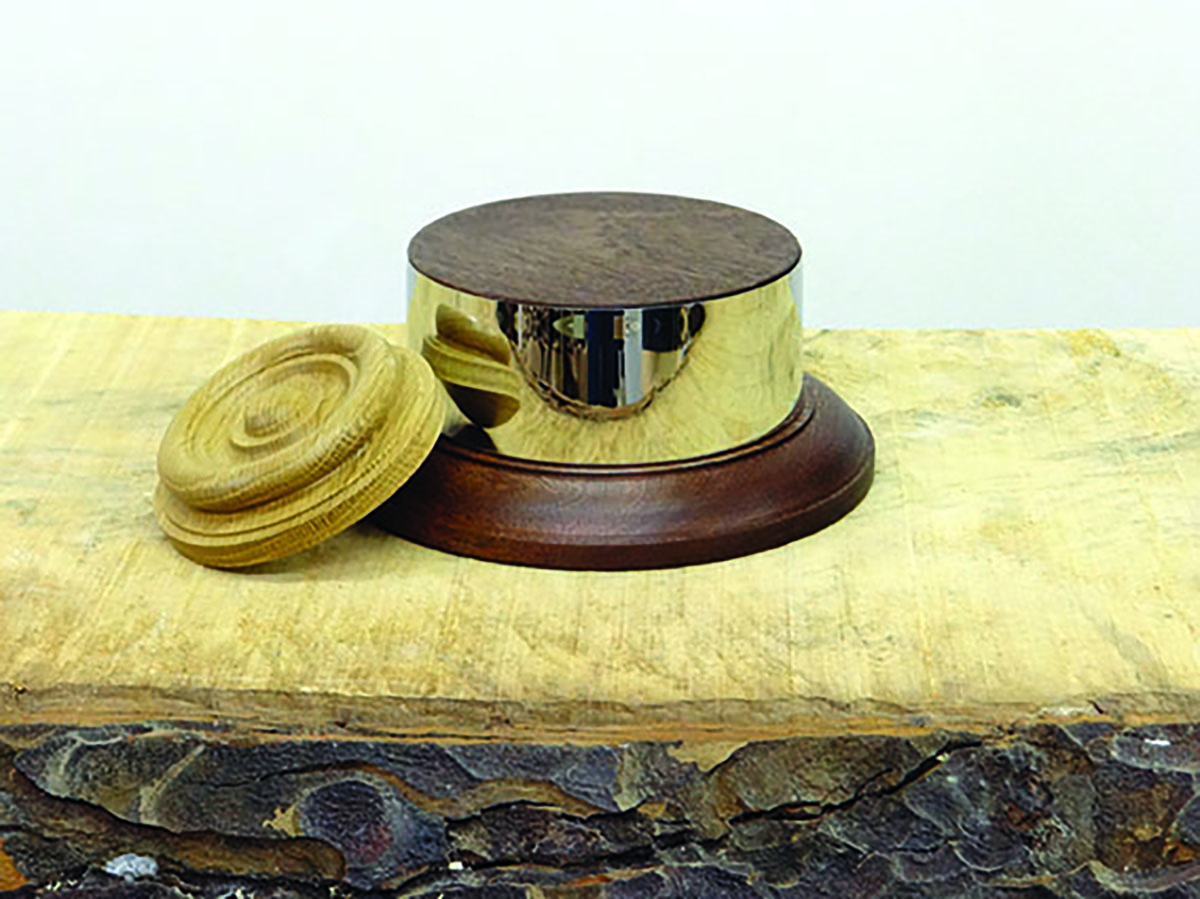
Designs used in faceplate work vary from a simple edge mould to very detailed shapes cut into the face of the wood. For this article, I have made a trophy base and a rosette to show some of the range of cuts required for this type of work. The trophy base involves straight sides and a gentle edge mould which is cut with the wing of the tool, whereas the rosette has much deeper beads and coves cut into the face which need careful presentation to keep control of the tool.
Work holding
The term ‘faceplate turning’ is perhaps a misnomer, or maybe a slightly outdated term. A faceplate can be used, as can a faceplate ring or screw chuck, or indeed any method that you might use to hold a bowl. The thing to consider when choosing your holding method is the end use of the product. In woodturning circles, any unworked surface, or holding marks left in work, are frowned upon and the use of baize was pretty much outlawed in the mid-1990s!
That said, in the trophy trade, baize bases are not only encouraged but are a necessity. The trophy bases I make have their bases flattened on the planer and are held on a screw chuck before the baize is applied. Similarly, rosettes are applied to larger pieces of furniture, newel posts or decorative frames and so the backs need no more work than flattening before turning and are, again, held on a screw chuck.
However, bases that can be examined closely, especially by woodturners, do need reworking. So techniques employed in bowl turning can be used to remove holding spigots. A recent stool I made as a Christening gift for a friend’s son was held with a recess, which was filled with a disc in contrasting timber, engraved with an inscription.


Trophy base
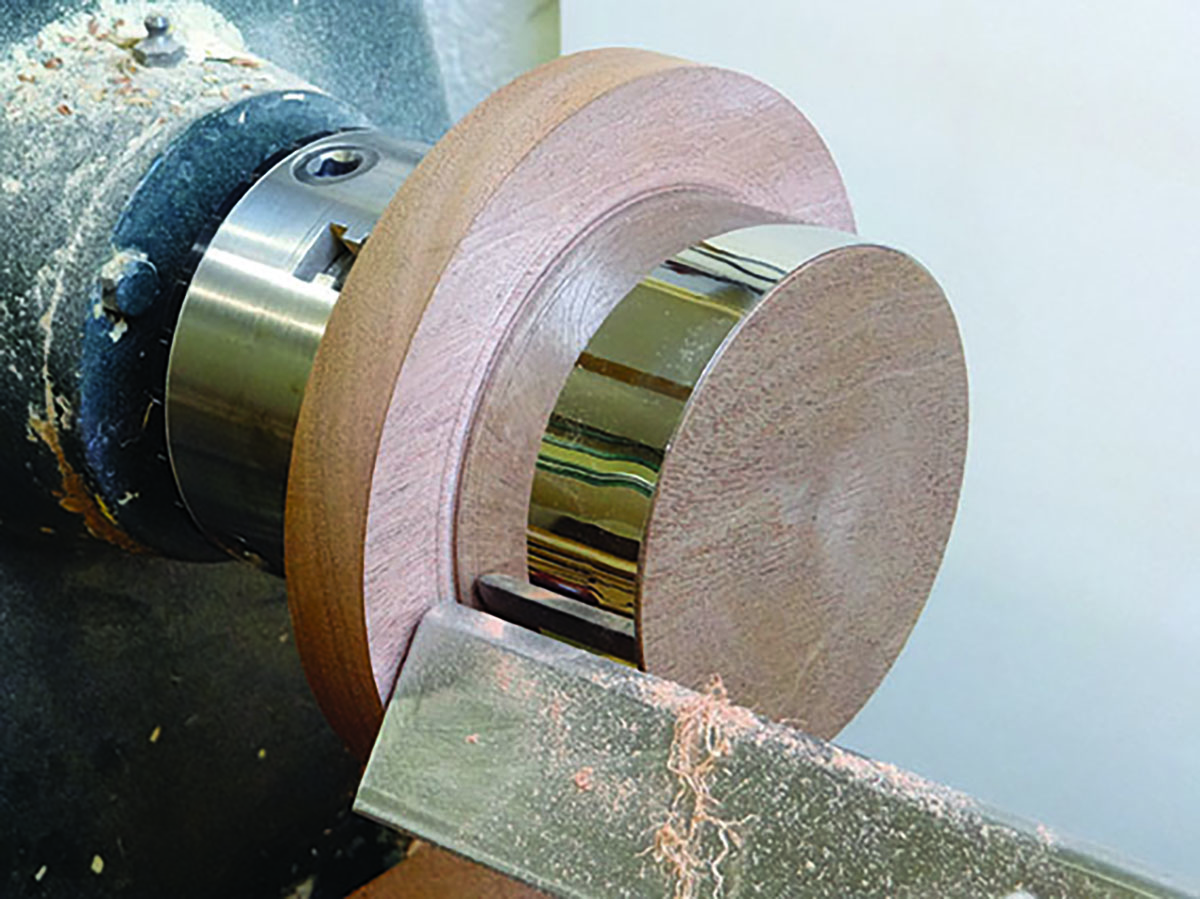
I make a lot of different trophy bases for a local engraving company. In this case I was asked to make a copy of an original trophy base in sapele (Entandrophragma cylindricum). The shape is quite simple, which is ideal for an introduction into faceplate turning. The important areas are the straight section for the silver band, which needs cutting cleanly, cutting straight and to an accurate dimension, and the lower edge mould.
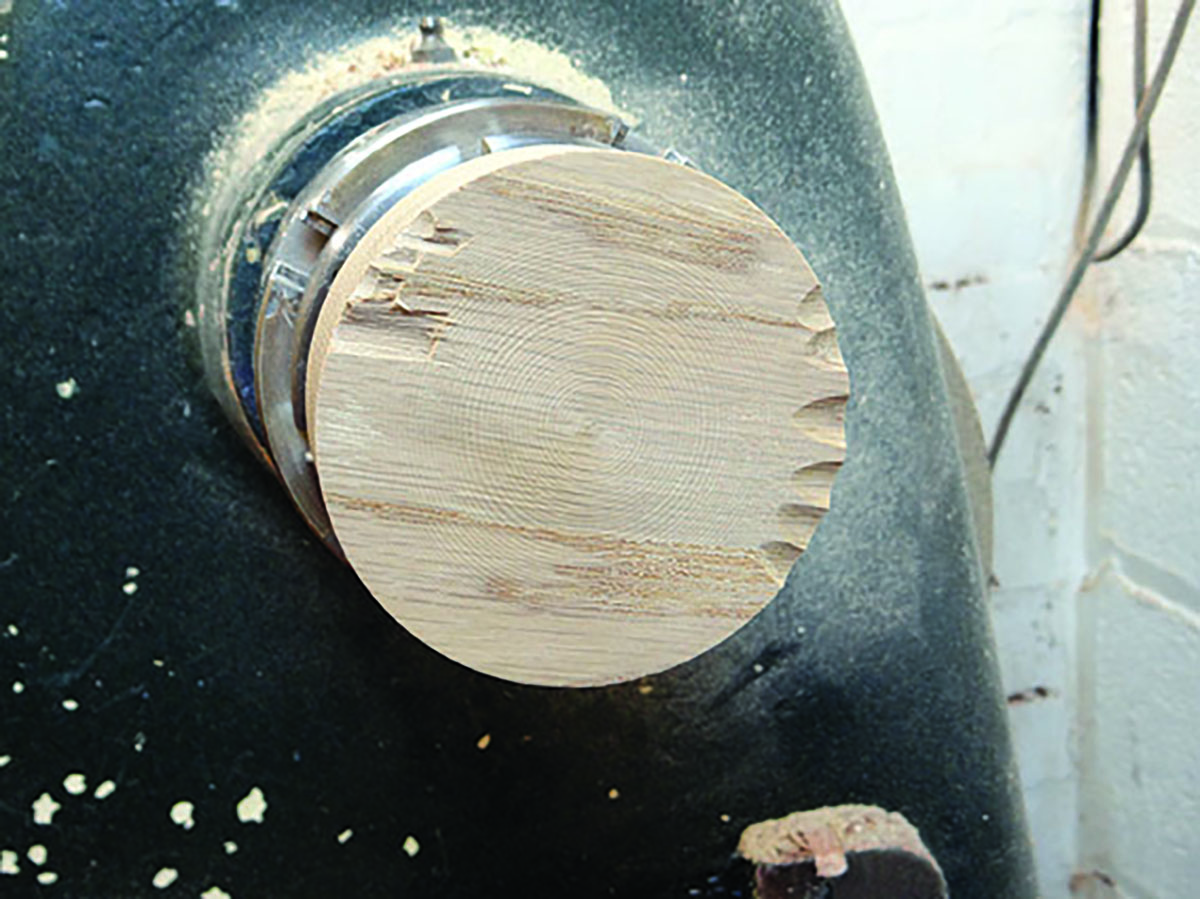
The first stages with any turning are truing up the blank, marking up the positions of the details and removing waste timber by blocking out the final shape of the item. During these roughing and blocking out cuts you have plenty of opportunity to practise your cuts using different presentations and comparing the results before you get to the final shaping and finishing cuts.
At this early stage you will be able to tell if the wood is going to behave itself or fight you at every turn. I was fortunate on both of the items I made for the article that the sapele and the American white oak (Quercus alba) turned beautifully with no need for extra treatment – which I shall come to later.
Presentation
The way that you present the tool will have an effect of the outcome of the cut. The more shear the angle of the cut, the cleaner it will be. By shear, what I mean is the angle of presentation. A tool held square to the wood will cut, but will not produce the cleanest surface. By angling the tool to closer to 45° you will find a vast improvement in the cut surface.
You will be using some type of gouge to make these cuts and the exact presentation can make a huge difference to the outcome. Often a less experienced turner will try to cut right on the tip of the tool, but actually, by rotating the tool slightly and cutting just to one side of the tip, it makes the cut more shear and produces a much cleaner surface than when cutting right on the tip. This can be seen in the pictures throughout this article.
You may choose a push cut, slicing the timber with the bevel rubbing, or a shear cut with a razor-sharp edge and no bevel contact. Sometimes to find which is best you need to ask the wood by trying each cut to see the results. You will find that shear cuts are great for open shapes and long flowing curves, but for some details cut into the face of the work, you will need to use a bevel rubbing cut. Having the ability to use both types of cut will give you more options and more tools in your turning armoury, to tackle problems that may arise.

Use of scrapers
I have never been a great fan of scrapers – especially for bowl work, but I recognise they have a place, especially in end grain box making and for faceplate work, where working on the face of an item the end grain doesn’t come in to play, they work very well indeed. My preference for this is for a round skew which is ground straight across – I never really got on with the round skew for its original purpose.
Ground like this it becomes a negative rake scraper which can easily be rolled to around 45° when it becomes a shear scraper. It is now ideal for facing off the top of the trophy base and cutting little fillet details on the rosette, among other things.

Shaping the trophy base
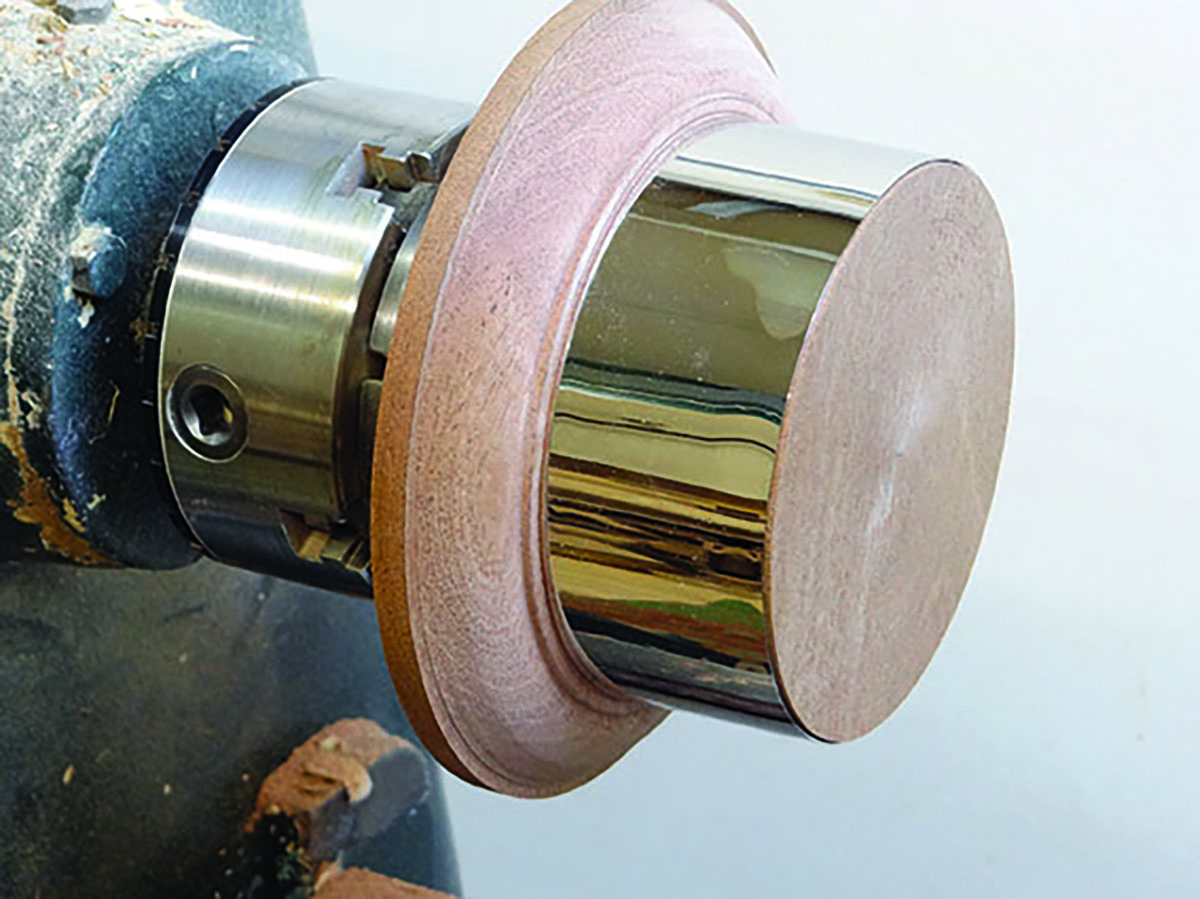
With the silver band fitted I just have to shape the lower detail, which is a simple curve with a small fillet or flat at each side to add definition. Here I used two variations of a draw cut and a shear cut to perfect the shape and the finish.
I began by cutting just to the left of the tip to put in the initial shape, rolling it more onto its side to produce a more shear cut as the shape progressed and finishing with a shear cut. The flute almost faces the wood and there is no bevel contact; just a razor sharp edge, presented at around 45°, to skim off the last few shavings. The fillets were then crisped up with the round scraper. The base was then sanded 180 to 320 grit and ready for staining and oiling.


Rosette
I don’t make these very often, so I have dug out an old job that I did a few years ago because I felt the intricate shapes would offer a suitable challenge and be a good way of showing how to make the cuts cleanly.
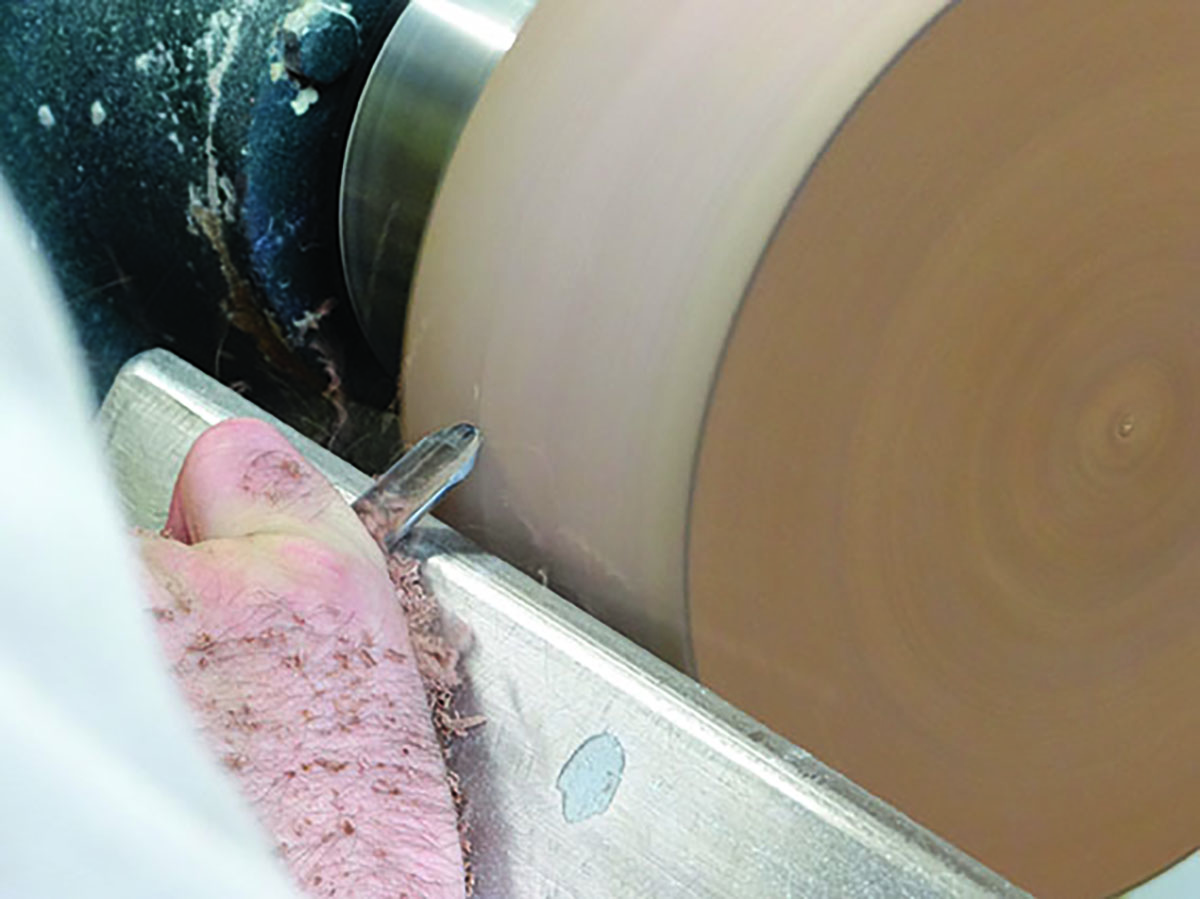
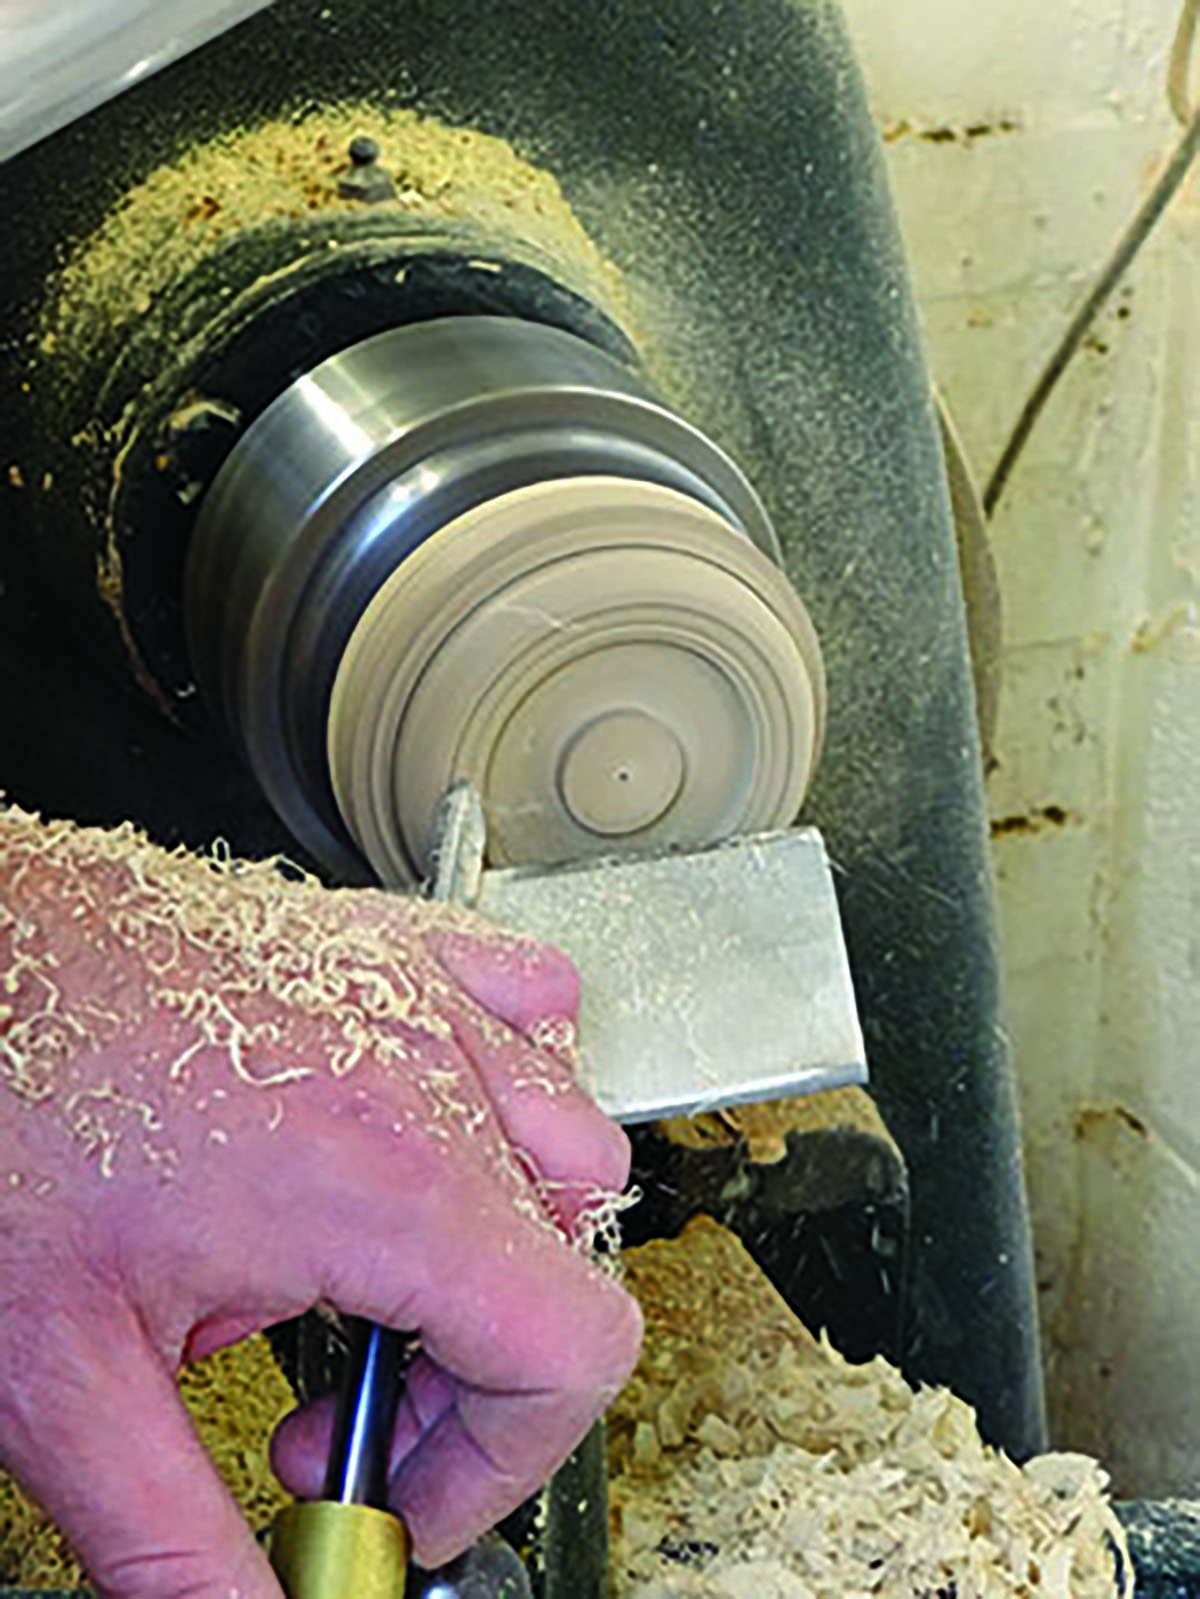
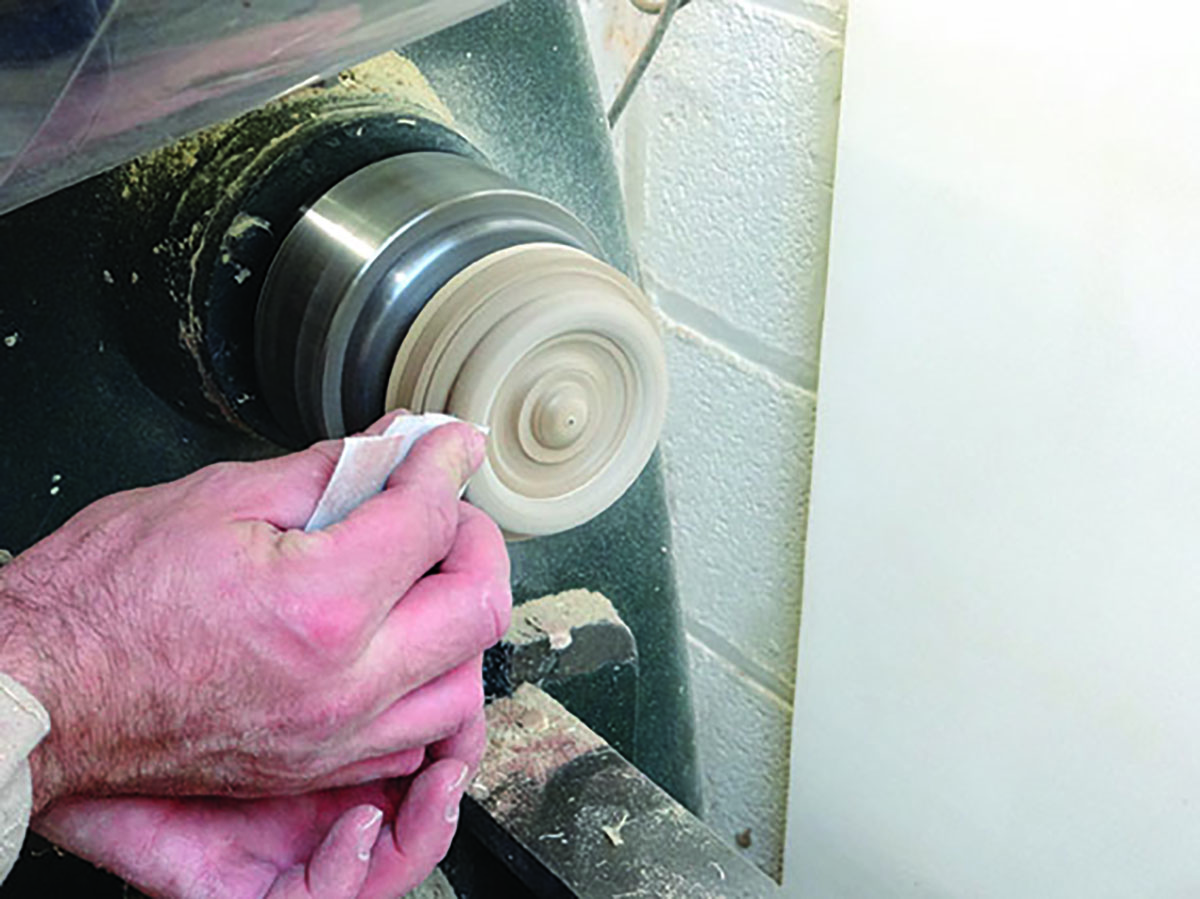
As before, the design is marked out on the disc and the shape is blocked out with my spindle gouge and round scraper to cut the fillets on the face. The first shape that I turned was the ring which is visible from the side and face of the rosette. You will notice the pencil line on the face of the rosette, which marks the high point of the ring, the top of the hill if we were to continue the analogy from earlier, which means I need to cut downhill from each side of this line.
Keeping the handle low and cutting just to one side of the tip, I gradually form the ring. The main thing to be aware of as you make this cut is that the shaving should always be coming from this point – just to the side of the tip – throughout the cut. This will maintain control of the tool and avoid a catch.
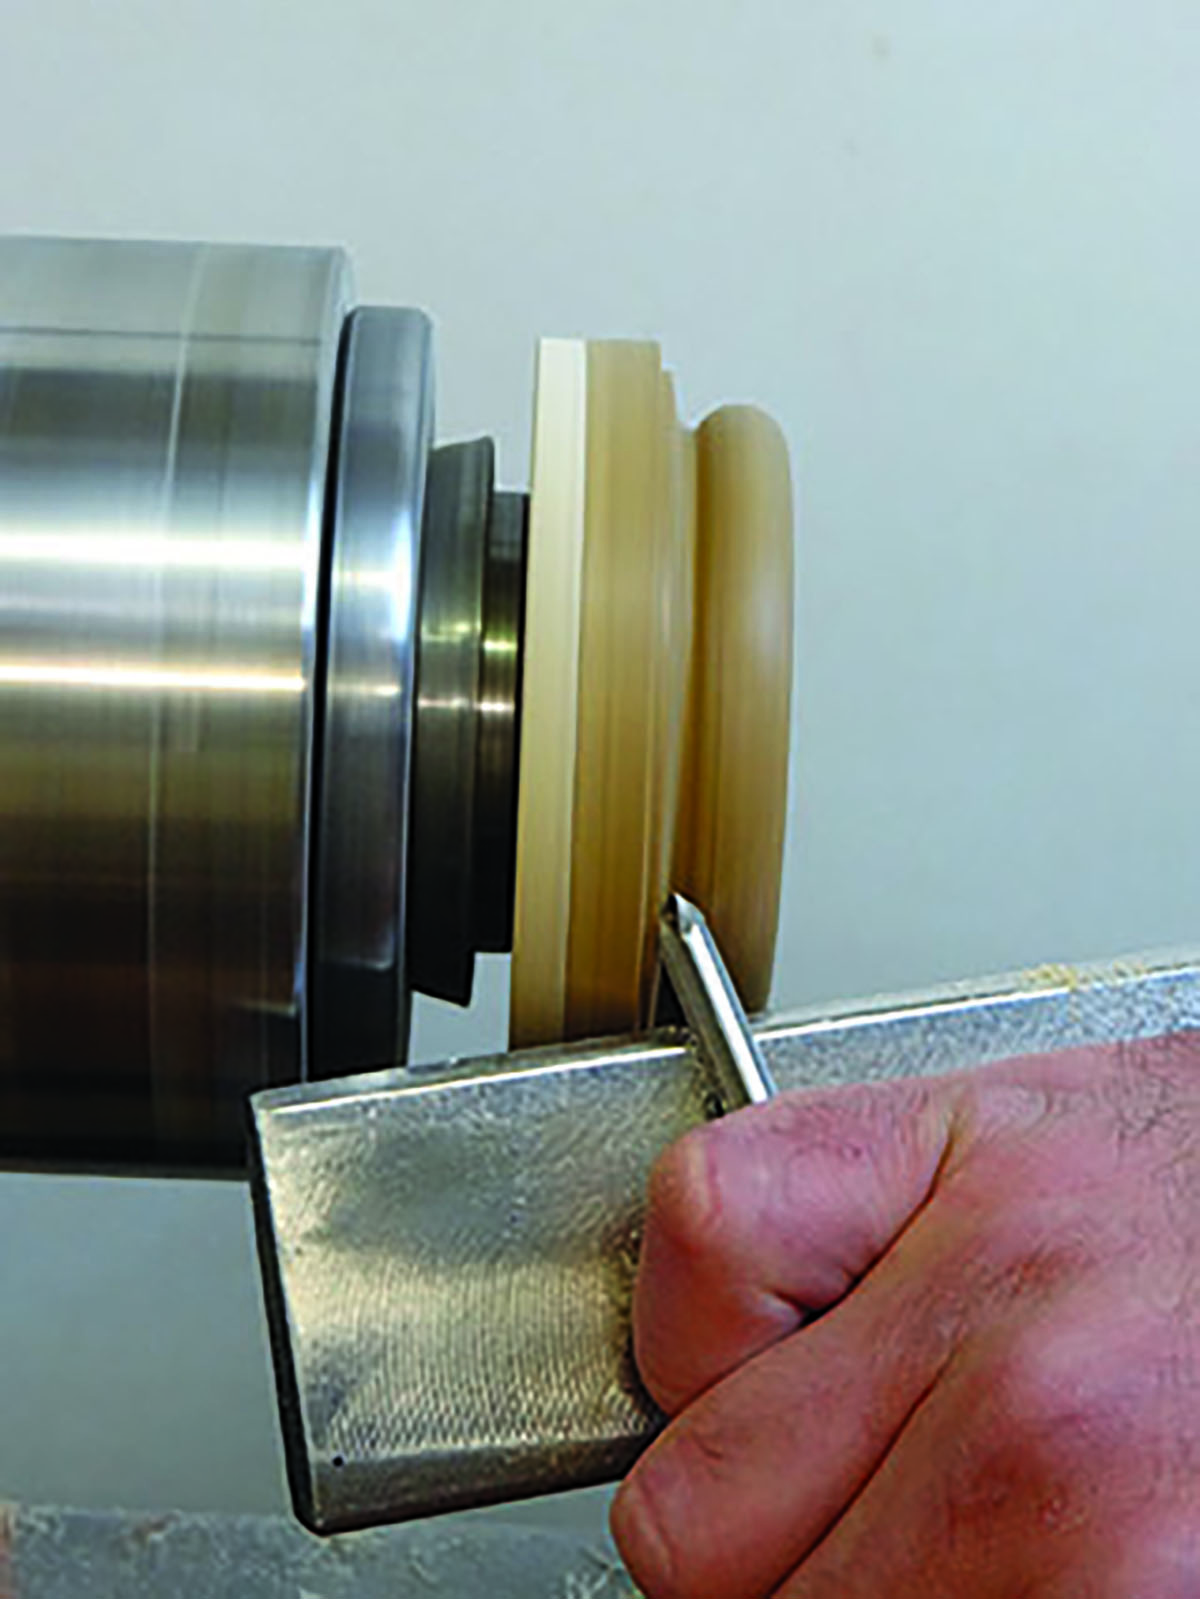
Having cut down both sides of the ‘hill’ from the face, I roll the tool over, so the flute almost faces the work, and use a light shear cut to perfect the shape. Looking at the edge of the rosette, the ring continues around, and there is a small half cove flowing up to the edge. These need to be drawn out using the wing of the tool. Ensure the wing is trailing to avoid a catch. I then use a shear cut to finish off the shape. The central dome is cut in much the same way as the ring on the face of the rosette. Keeping the handle low, I cut just to the left of the tip, with the bevel rubbing, and form the shape.
The cove on the face can be tricky because if the presentation is not just right, the tool can try to skid across the face of the rosette. The handle is once again low, and I slice into the cove, again using the part of the edge just to the side of the tip. As with a cove on spindle work, this cove is cut down from the rim to the base of the curve. I find keeping the handle of the tool low a real help at the beginning of the cut, raising it up and swinging it to form the cove.
Having a lathe with a good centre height is a real bonus as it allows this unrestricted movement without the bed bars getting in the way. It is possible to make the cut on a smaller lathe, but you will need to feel for the best presentation of the tool while maintaining control and producing a good shape. The rosette is then sanded, like the plinth, 180 to 320 grits and finished with oil to bring out the figure of the oak.
I’ve done all this, but the grain is still rough!
Some timbers are naturally more difficult to achieve a good finish with. Sharp tools and good presentation will get you most of the way, but sometimes the wood still doesn’t want to do as it’s told. I would recommend applying a coat of your chosen finish to the work. If you intend to oil the work then apply oil, likewise with lacquer, sanding sealer or wax. If in doubt then sanding sealer is a good option as this is the most compatible finish, being unlikely to interfere with your chosen final finish.
By applying a generous layer of finish, it will penetrate into those difficult areas and help to support and stiffen the offending wood fibres, allowing a freshly sharpened tool to cut them much more cleanly. In extreme circumstances, you can reapply the finish before sanding to give that final bit of added support to the grain.


Further reading
PHOTOGRAPHS BY RICHARD FINDLEY