Dave Western explores carving commemorative spoons

When I first began carving lovespoons professionally, among my first orders were a couple for Christening spoons. Although not a lovespoon in the classic sense of the word, a spoon celebrating a new life can be every bit as passionate and emotional as a spoon given to initiate a romance or commemorate a wedding. Parents and grandparents are justifiably proud and honouring a newborn with a lovely spoon is certainly a marvellous tradition. Although the trend has been to present silver spoons because of their association with prosperity and good fortune, I believe that wooden birth spoons can easily rival metals and, when done right, surpass them entirely.
I merely copied normal spoons, but on a slightly smaller scale. My initial designs were fairly straightforward and unadorned. Sometimes I would dress them up with the addition of an occasional Celtic knot or carver’s trick. Most followed the classic order of a straight handle and bowl with no unusual shaping.
As I warmed to the subject, I began introducing more diverse elements and started to tell more of a story as I do with my larger lovespoons. I began to jazz up the handles a bit and broke away from the straight handles I had been previously making.


Chance discovery
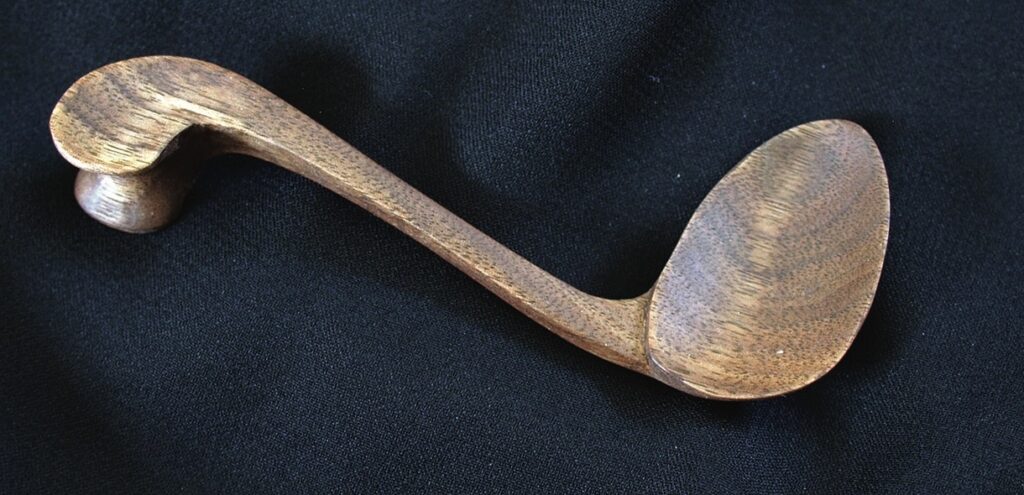
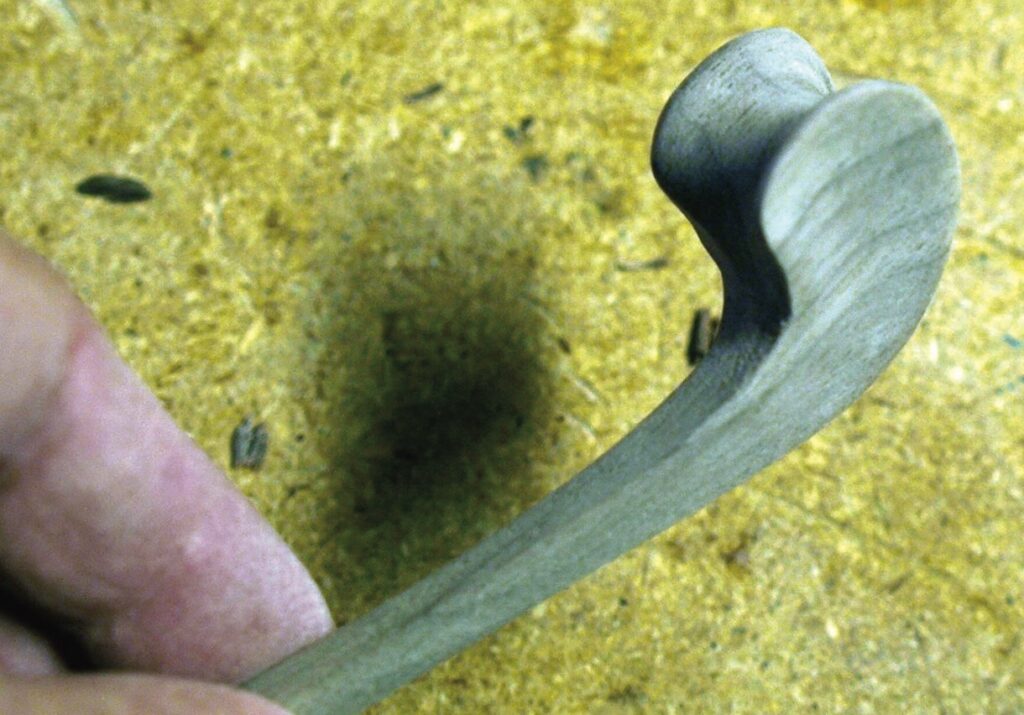
However, it was the chance discovery of a remarkably unique little bent spoon that entirely changed my way of approaching birth spoon design. I kept noticing a quirky style of spoon in museums and auction brochures which stood out both for its simple elegance and its unusual design. With a bowl sitting at almost 90° to the handle and a curious bone-like crown detail, it certainly caught my eye. Like many things to do with traditional lovespoon carving, knowledge of its original purpose seems to have been lost to the sands of time, but it is suggested spoons like these were used to feed the baby.
The mother could sit with baby on her lap or could stand with it wrapped in her shawl and be able to find baby’s mouth without having to reach around. The curious crown detail was, in fact, a finger grip that would allow the mother to hold the spoon by the tip without fear of dropping. It certainly seems a sensible and plausible notion. A slightly less romantic and believable scenario is that the spoons were made to feed invalids – plausible, but less likely as the need to reach around would not be very common. Personally, and as unscientific as it is, I’m siding with the baby-feeding theory since it suits my needs.
It also set me on the path to developing my own versions of the birth-style spoon and to modernising and completely altering much of the design around it. I’m hoping that after you’ve carved a couple of these little beauties, you’ll also be inspired to try your hand at variations on the theme.
Fun
As it turns out, this style of spoon is loads of fun to carve, presents several entertaining (but not insurmountable) challenges and makes for a wonderful conversation starter. You can approach it with bare minimum tools and carve it with only a straight and a bent knife, or you can take the more modern route and shape it up with a scrollsaw, leaving the knife work for the detailing.
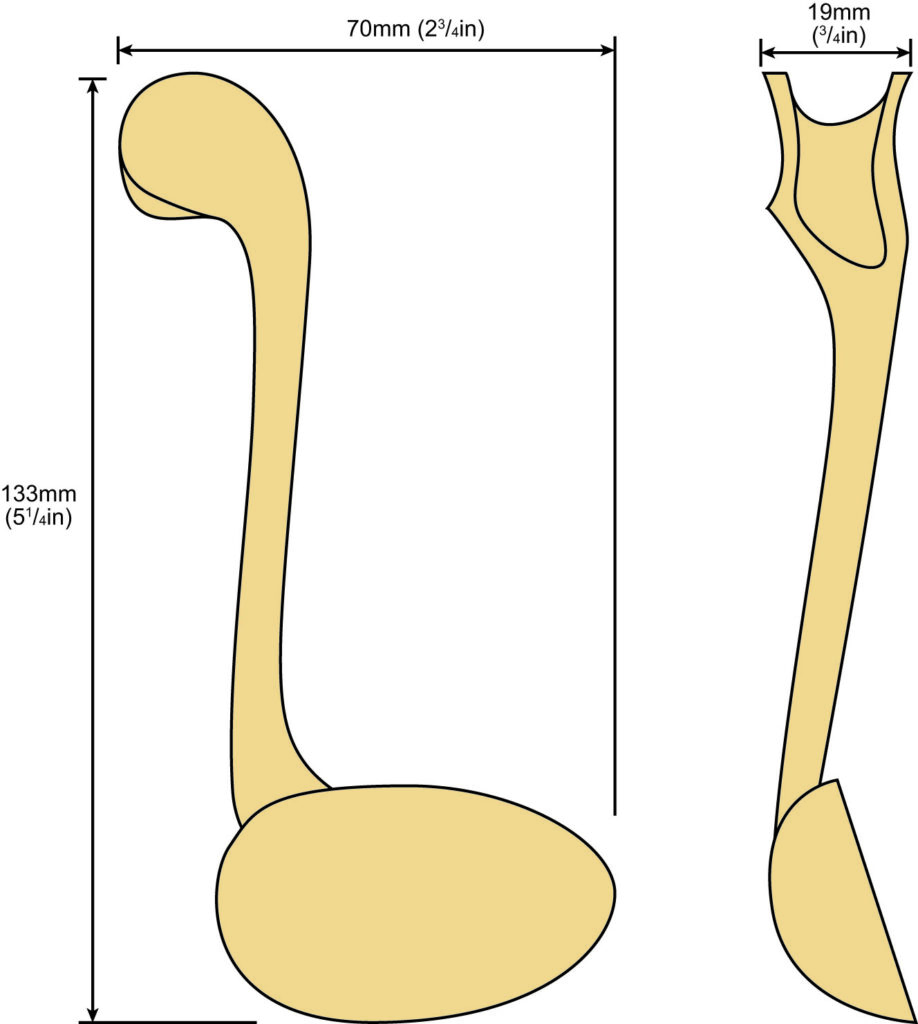
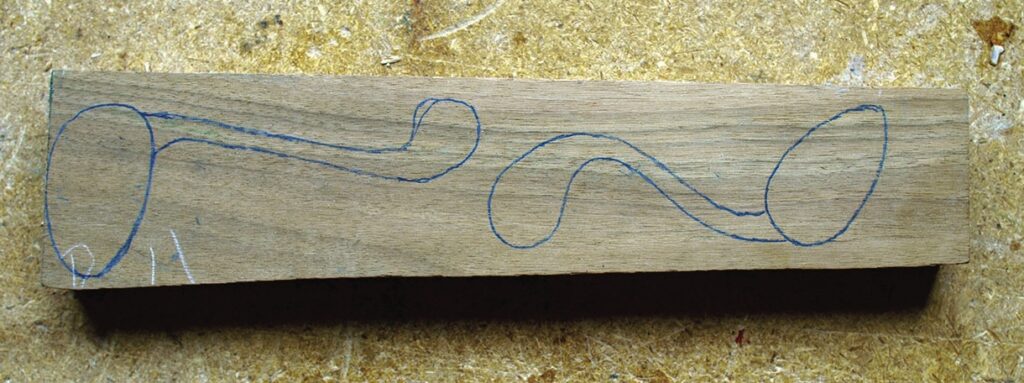
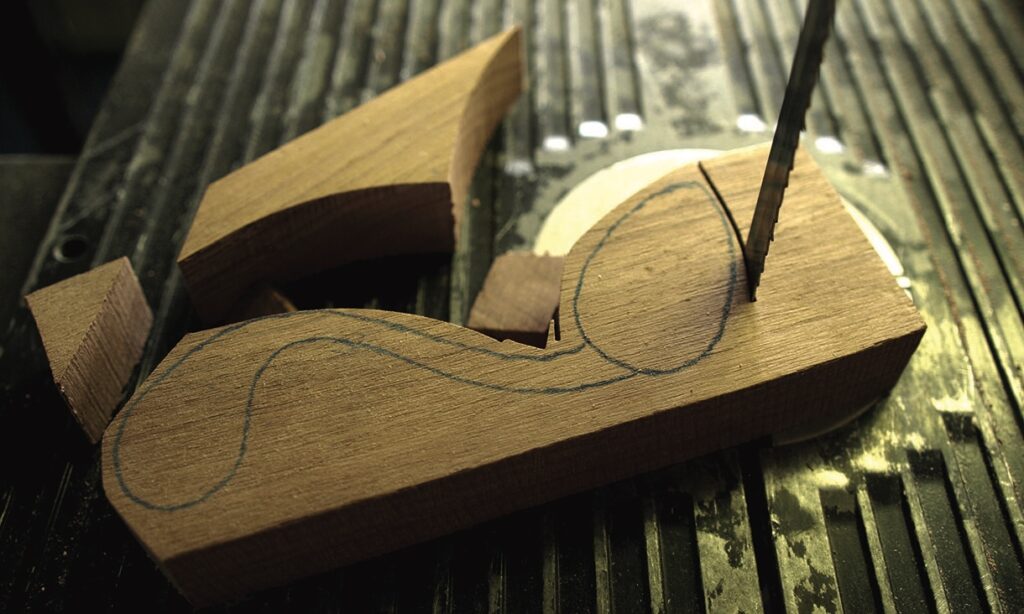
For this one, I started with a 20mm-thick piece of walnut and freehand sketched out the spoon outline on top of carbon paper. You can photocopy and glue the sketch at the end of the article if you are uncomfortable with freehand drawing. The spoon I made is approximately 135mm long by about 70mm wide. The bowl measures about 55mm long by 32mm wide.
I also orient the grain to be running straight from the handle through the bowl. Although it adds a bit of extra work shaping the bowl, I have found it is the strongest orientation for the grain at the stem/bowl junction and results in the fewest breakages.
Dimensions of spoon with offset bowl
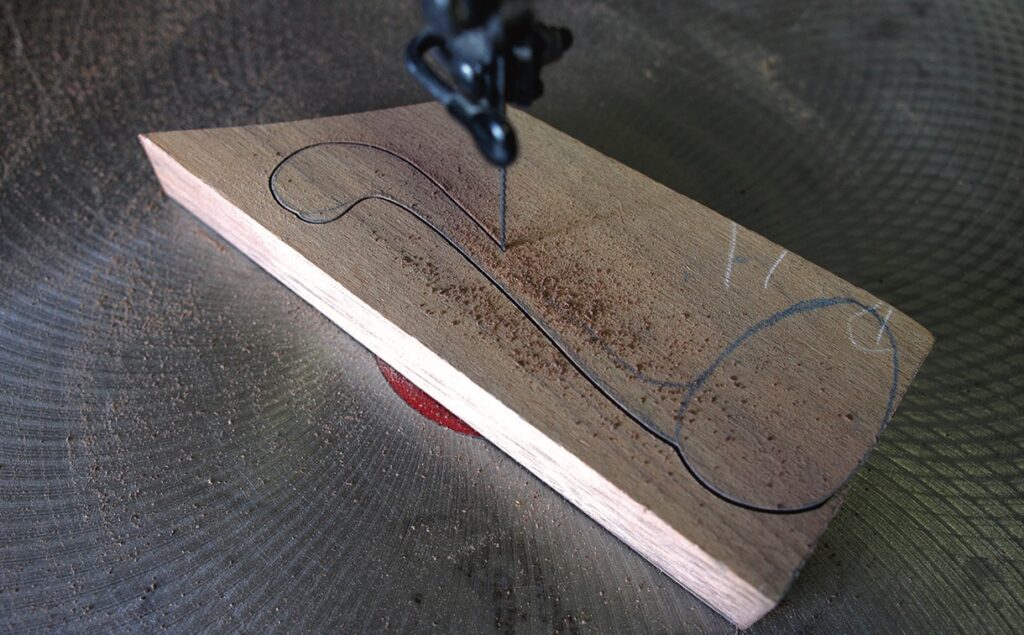
Cutting out the blanks
If you have a bandsaw, use it to cut to as near the line as the blade will allow. My blade is thick so doesn’t turn well, meaning I leave some space to be safe. If I use the scrollsaw, the blade is very accurate, so I can cut right to the line for a huge saving in time. If you are using a knife and/or axe to shape the spoon, remember to be very cautious in the area above the spoon bowl and just below the crown. It’s easy to get carried away and split these sections right off.
Carving the spoon
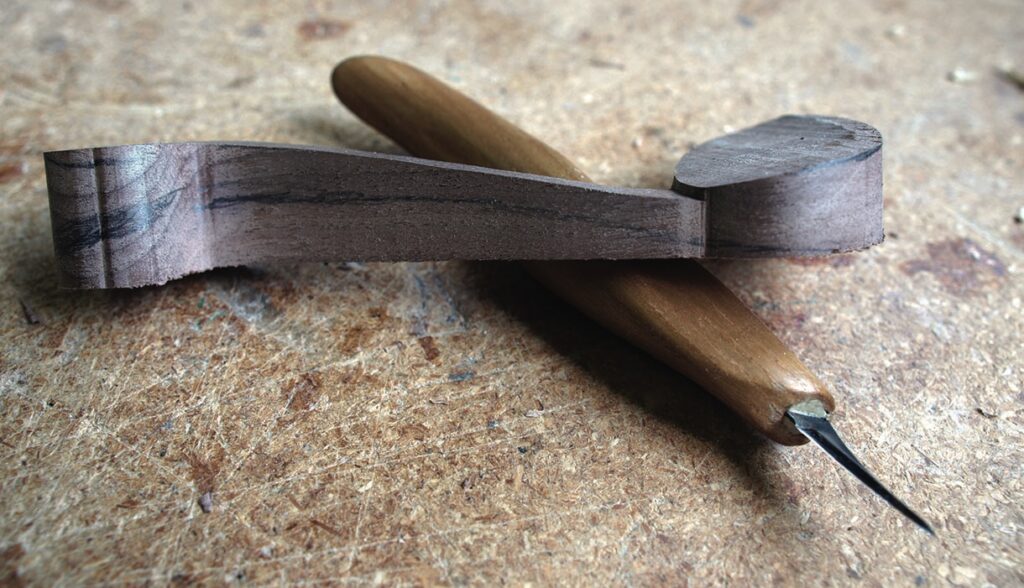
With rough-shaping complete, I take the opportunity to cut out the top curve along the handle and a bit of a tilt into the top of the bowl. This gives the spoon a bit more of a dynamic feel and makes it much less static than a straight, flat carving. Only cut away the front faces at this point – it will make it easier to clamp the spoon if need be and will give you extra strength and support while carving.
I like to smooth the front face of the stem and slightly raise the bowl at the stem joint. Once that is achieved to a depth of about 1.5mm, I begin shaping the bowl with a bent knife or gouge. The grain is short through this area, so take your time and use shallow cuts. Be very conscious of the edges where you can have chipping or full splits occur if your cutting becomes too enthusiastic!
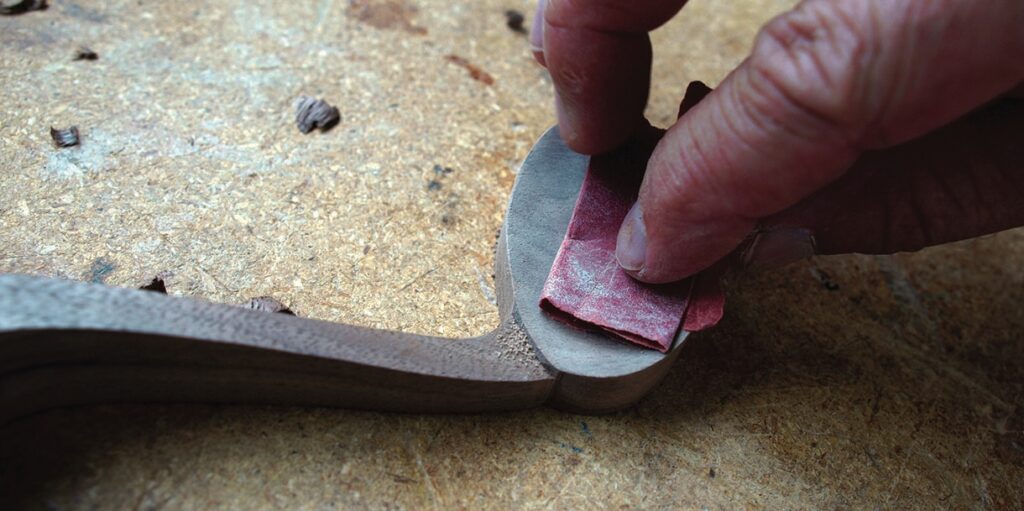
I generally completely finish the bowl before I move on to other carving. Doing it this way means I can clamp the spoon if I need to and don’t have to worry about putting stress on and snapping the stem. I sand right through the range of papers to 320 for a super-glassy finish. I rarely leave these ‘from the knife’ as I want that silky finish, but there is certainly no reason why a good knife finish wouldn’t look good too.
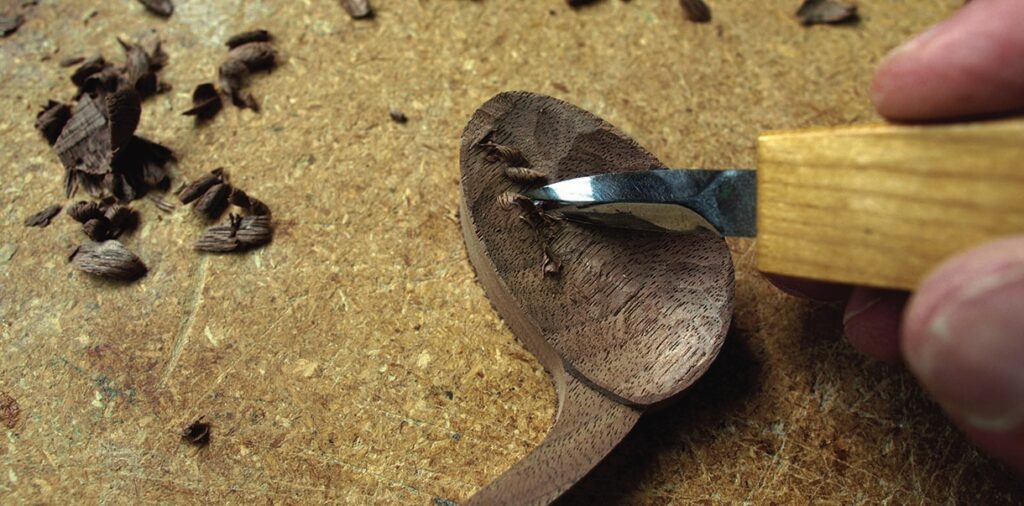
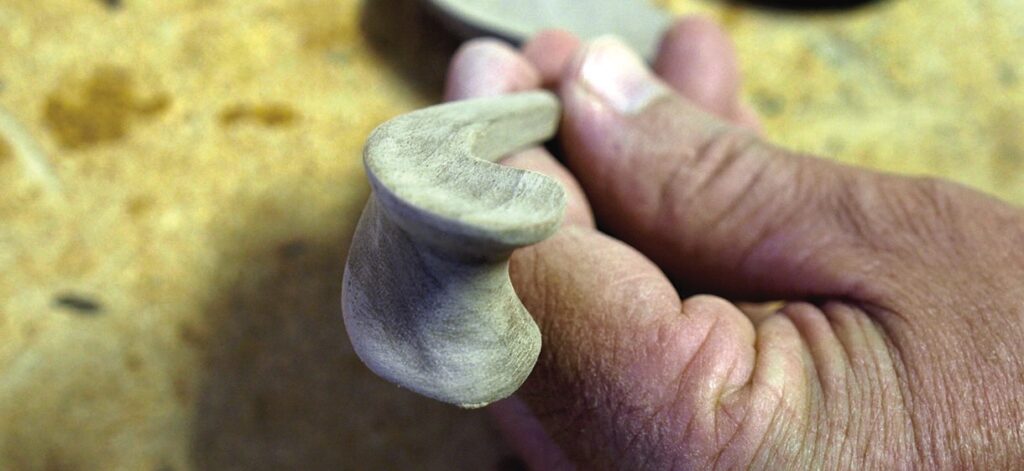
With the bowl finished, I shape a finger-grip hollow into the crown end of the spoon.
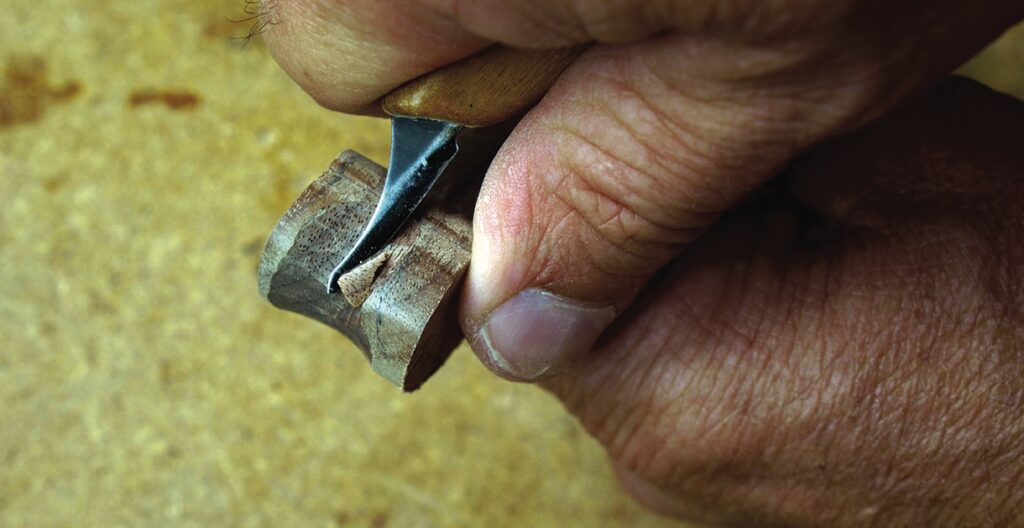
I use a bent knife or gouge and finish once again with abrasive paper for a smooth finish. With the front face finished, I repeat the same hollow on the back and then get to work shaping a groove around the outer edge of the crown. The forefinger will rest in that groove as you hold the spoon, so you might have to work the groove until you get it comfortable for your hand. Try to leave about 1.5mm un-carved at the edge to give you some wiggle room if things go a little bit askew.
Refinement
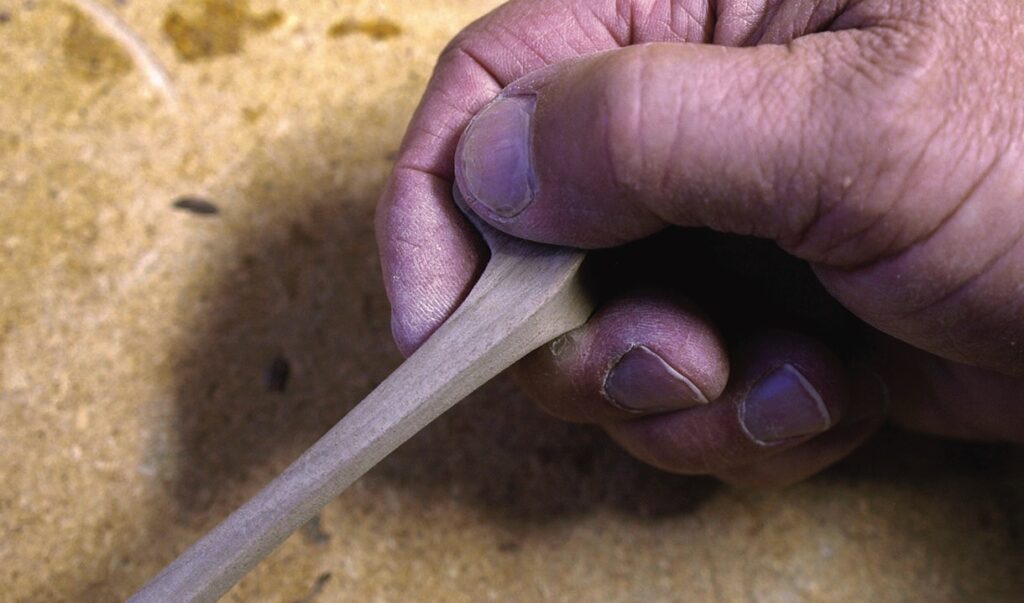
Once the crown is shaped, I remove the back stock from both the stem and the bowl. You can use a saw to remove it in bulk, or simply take it down with a knife. It’s subjective how thin you take things. I leave the handle about 6mm thick and then use my fingers as callipers to judge how thin I am getting the bowl. I try to get the bowl as elegant as I can without risking a break or cutting through anywhere. Take your time and be careful not to exert undue pressure on the stem as the spoon is much more fragile now.
When the bowl, stem and crown have all been carved to your satisfaction, spend a moment testing the hand-feel. If the spoon is comfortable in your grip, you are done, but if you feel bumps or awkward spots, spend some time shaving, filing and sanding to achieve a flowing, comfortable feel. It is time well spent.
Finishing
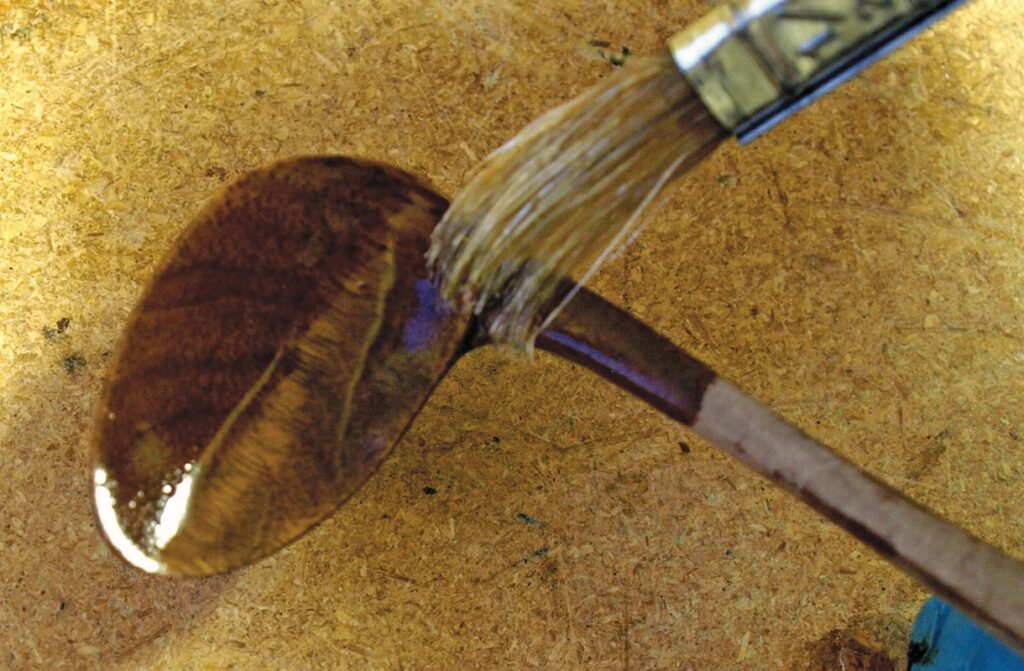
Give the spoon a final once-over with your finest abrasive and then apply finish. If you will be using the spoon for feeding, I would highly recommend a non-toxic, food-safe oil or a straight beeswax finish. If it is for show, you can use an oil finish with driers. On mine, I used a couple of coats of pure tung oil followed a week or two later with two coats of wax polish.
Experimentation
As I mentioned earlier, while fun in its own right as a project, this spoon was a wonderful jumping-off spot for me as I developed my own ideas of what a birth-type spoon could do.
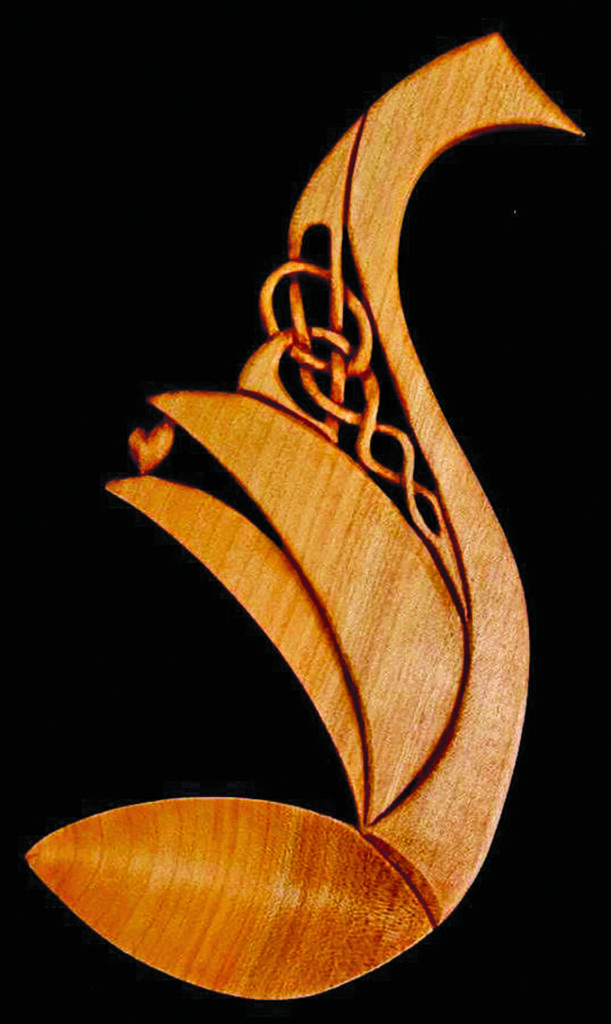
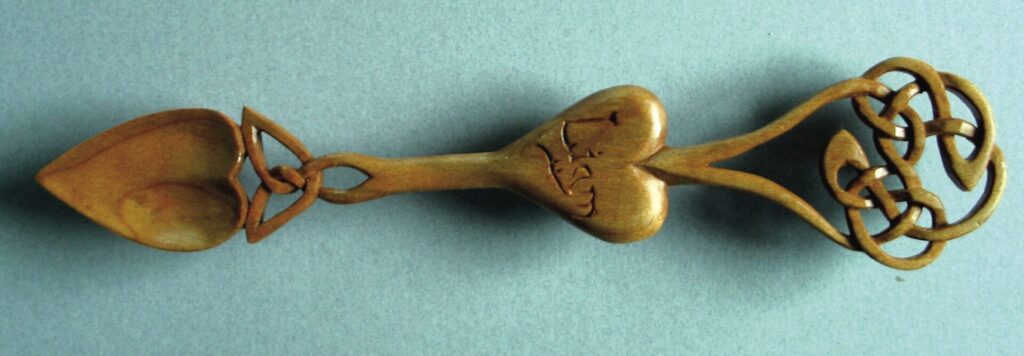
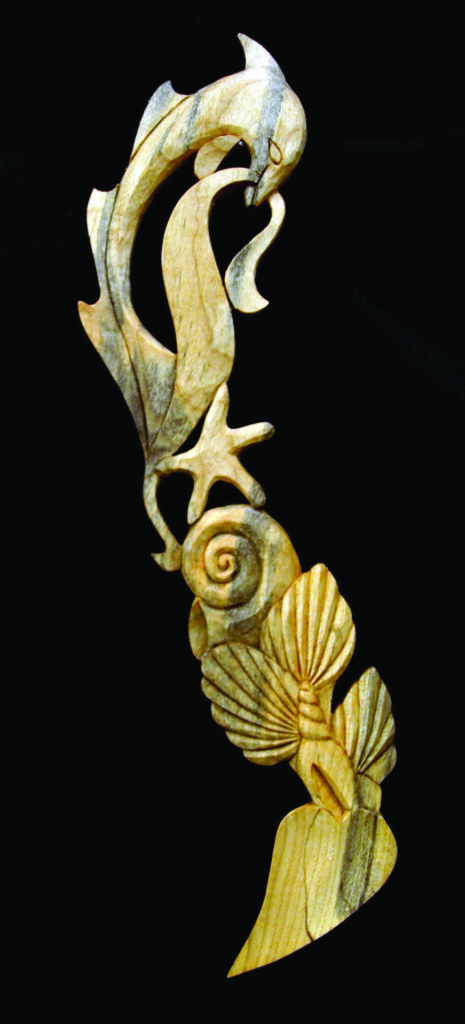
At first I experimented with some sinuous Celtic designs, which allowed me to keep the bend, but also have a more decorative handle. I then got a bit more adventurous and began involving animal shapes or flowing outlines which were a bit more abstract, eventually playing with ultra-minimalist designs.
With that out of my system, I began working on ways to tell stories with the spoons. As you can imagine, a baby doesn’t necessarily have a lot of history to work with, but the family always does. Their hopes and aspirations, the things they love and the places they’ve been are all grist for the design mill. But no matter how complex the designs became, I always kept that vaguely S-shape and the wonderful bent bowl to honour tradition.
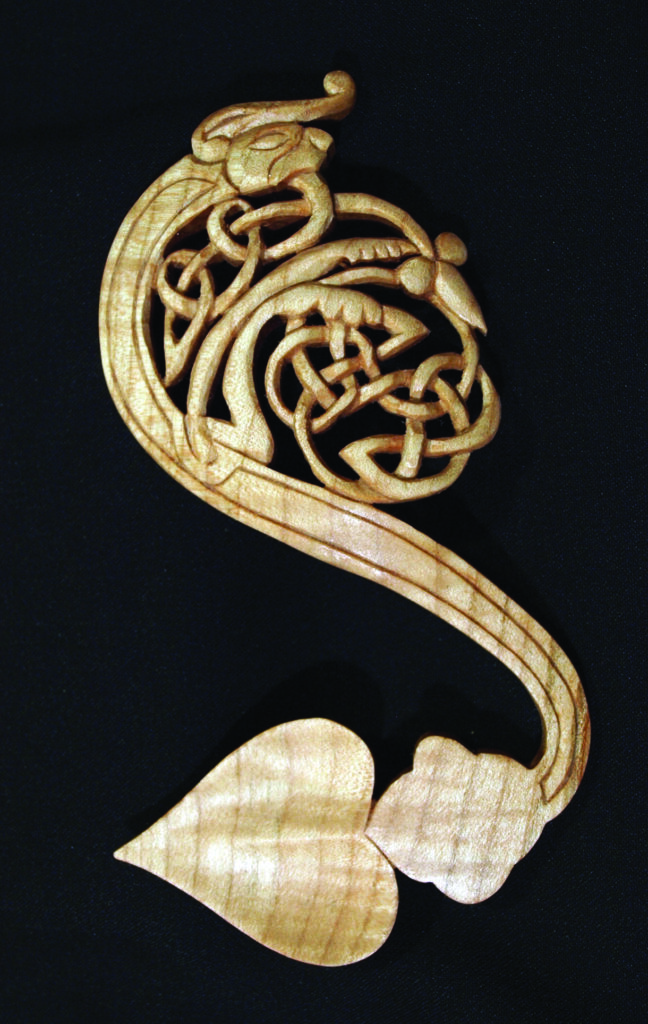
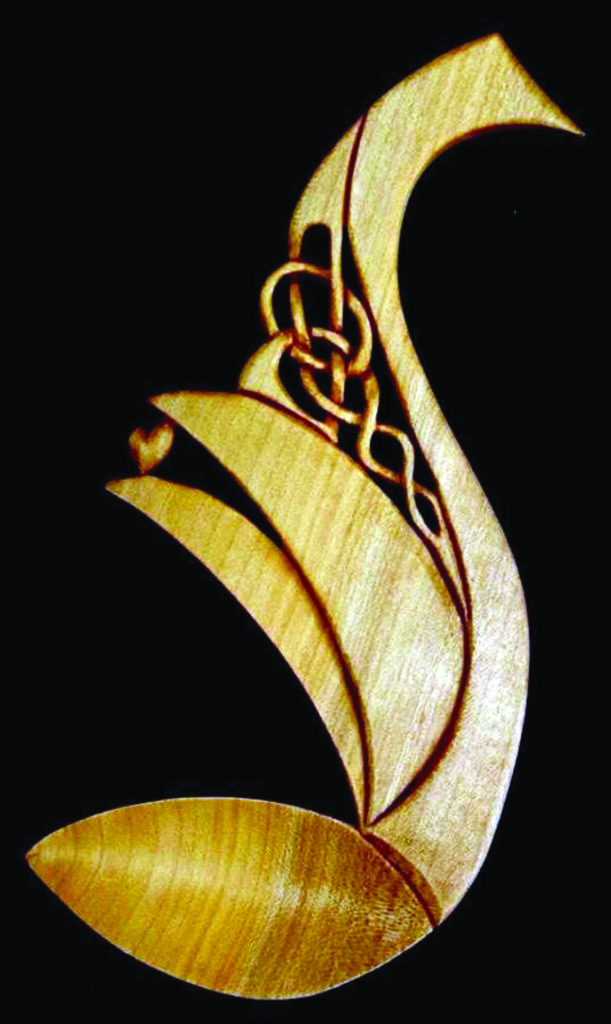
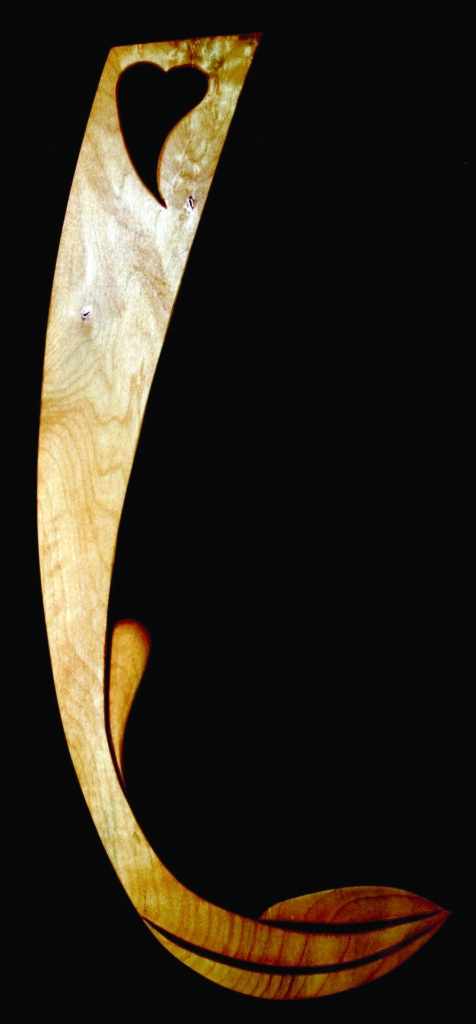
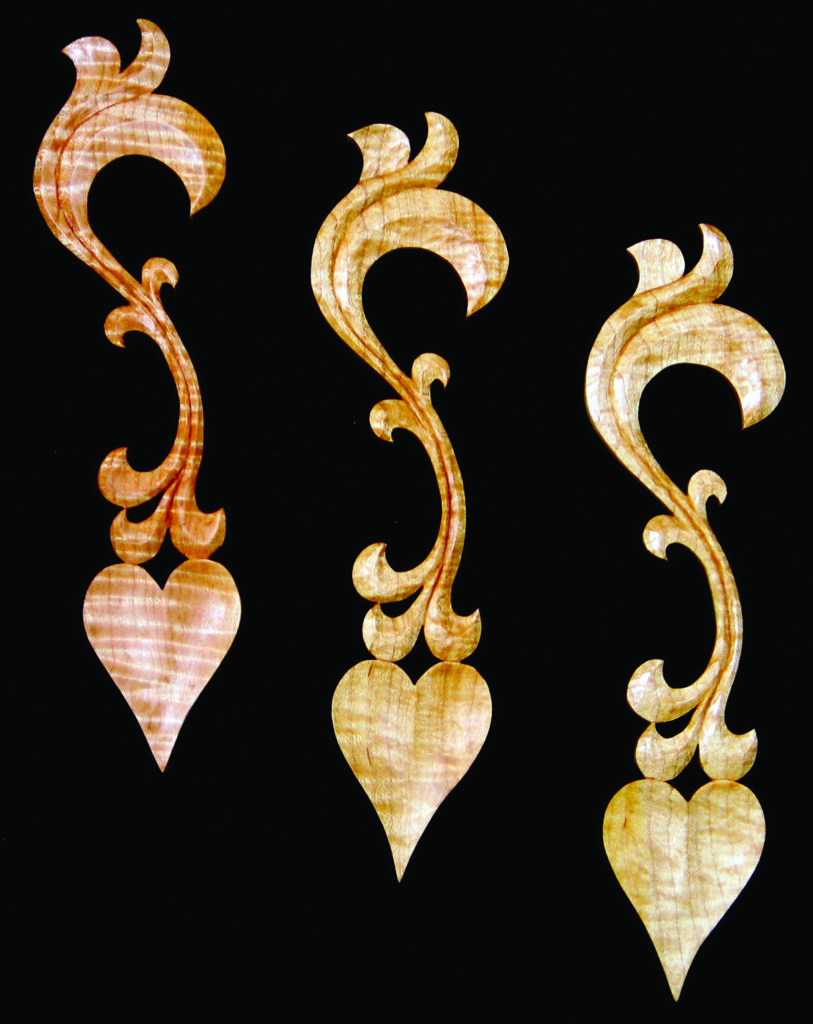
Over the years, I have found myself making two main styles of birth spoons. The first has a modern and very sleek heart-shaped bowl, followed by a slightly shallow S-bend in the handle. The designs can vary widely and there is much scope for experimentation, but the overall shape is less flamboyant than the second type I make.
Alternative shapes
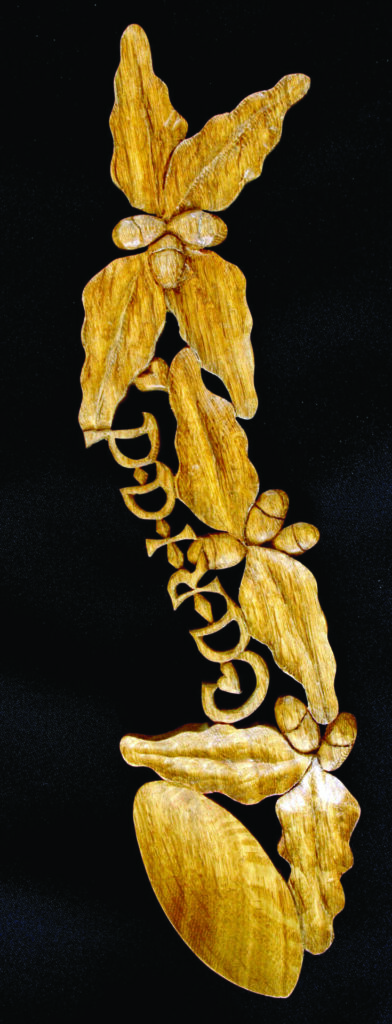
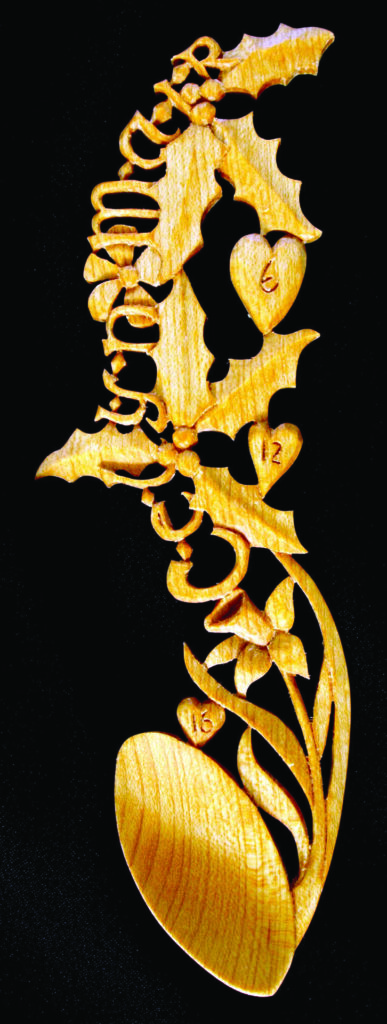
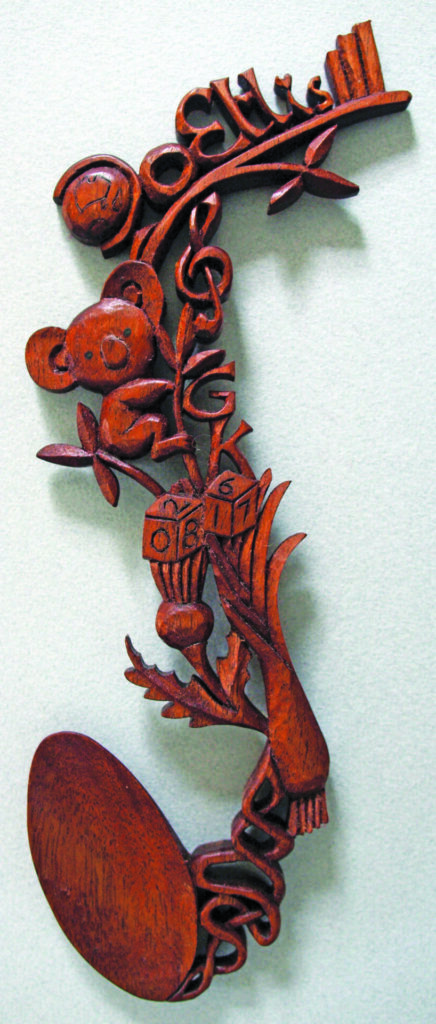
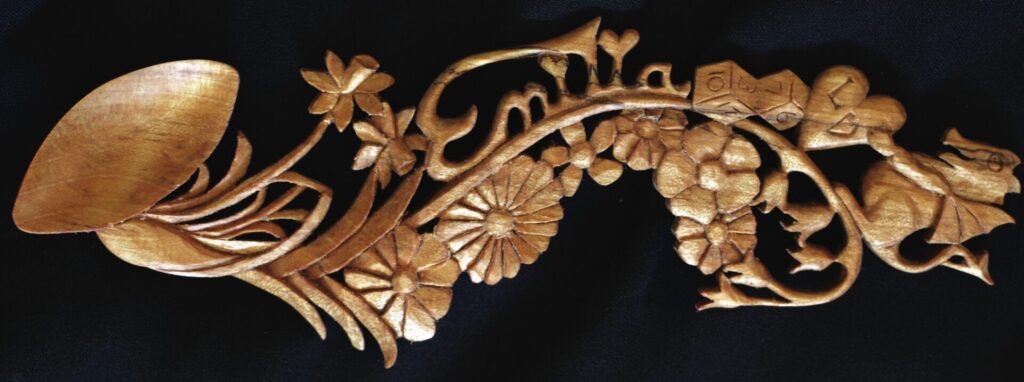
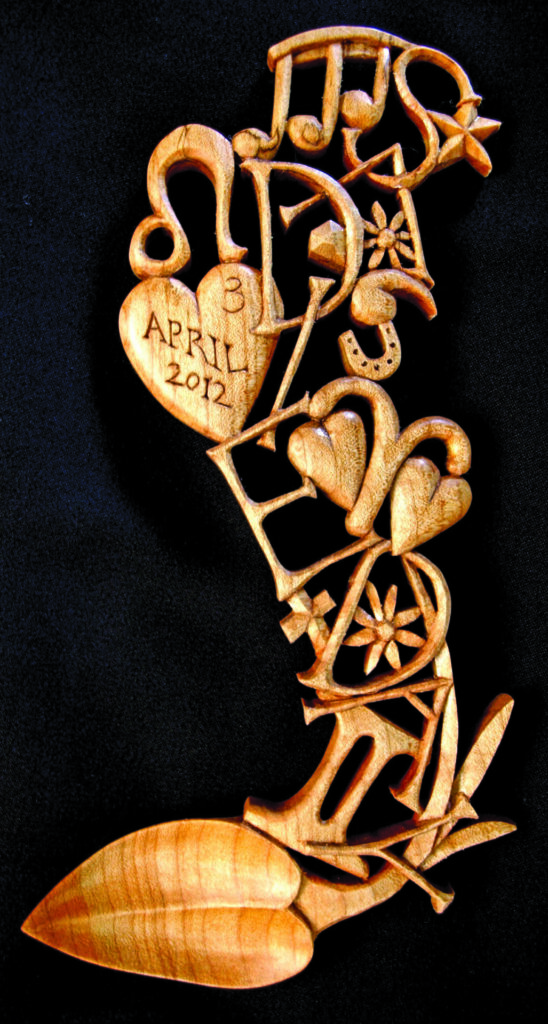
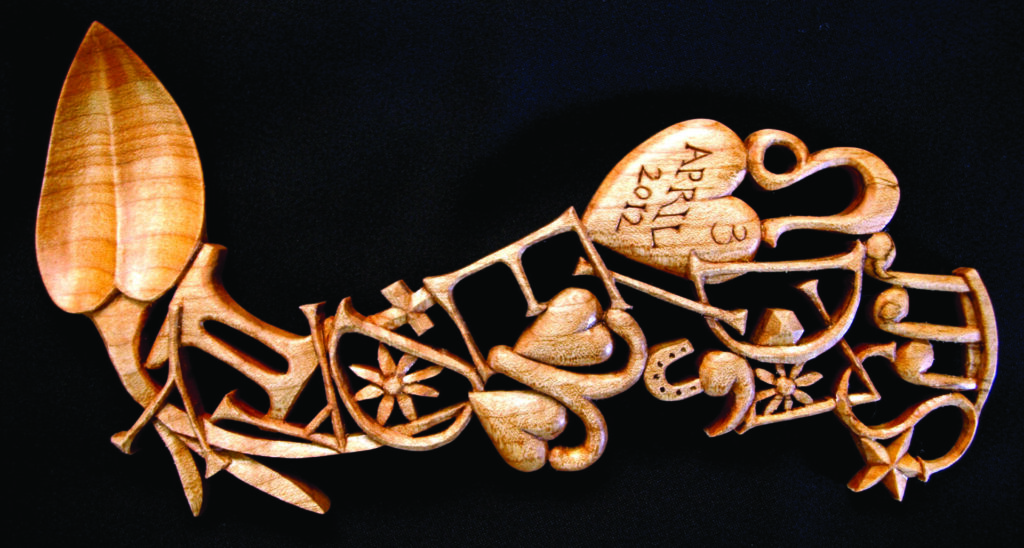
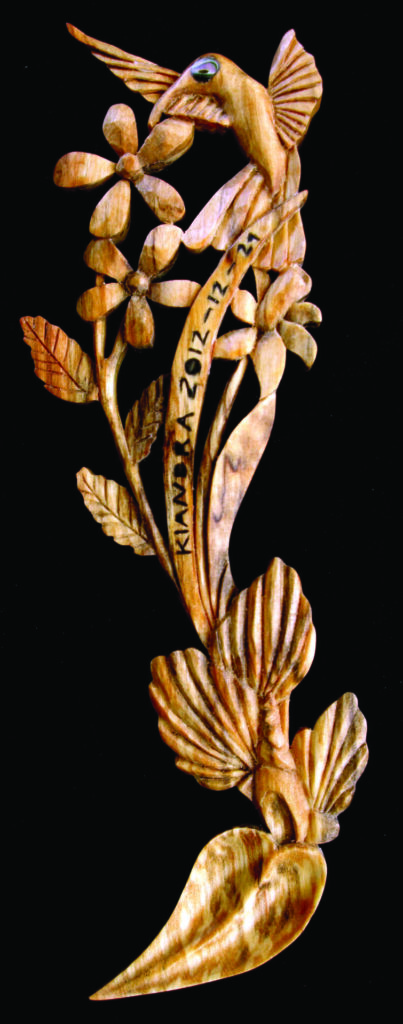
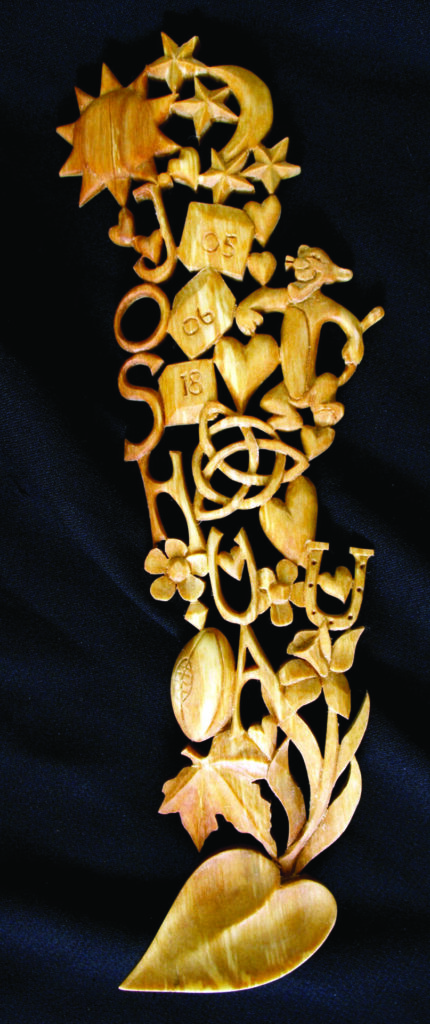
The second type has a more oval bowl shape, which is subdued and acts as a foil to the more extravagant handle designs. On these ones, I keep the S-curve fairly pronounced and will often have the design ‘climbing’ the handle. Often, the design will have a theme which might revolve around things the family like to do or which have been significant in their lives. I will often spell out the baby’s name as part of the design and use other elements to commemorate dates or places.
As with a traditional romantic lovespoon, there is no end to the design possibilities and to the personal statements which can be made through the spoon. As a gift which both commemorates a new life and will give that life a link to its past, it simply cannot be surpassed. I sincerely hope that seeing my experiments will inspire you to carve one as well.