The Woodworkers Institute

We bring you the very best of woodworking!

“Make it with us”

Andrew Potocnik shows the stages involved in making a modern hallway table 
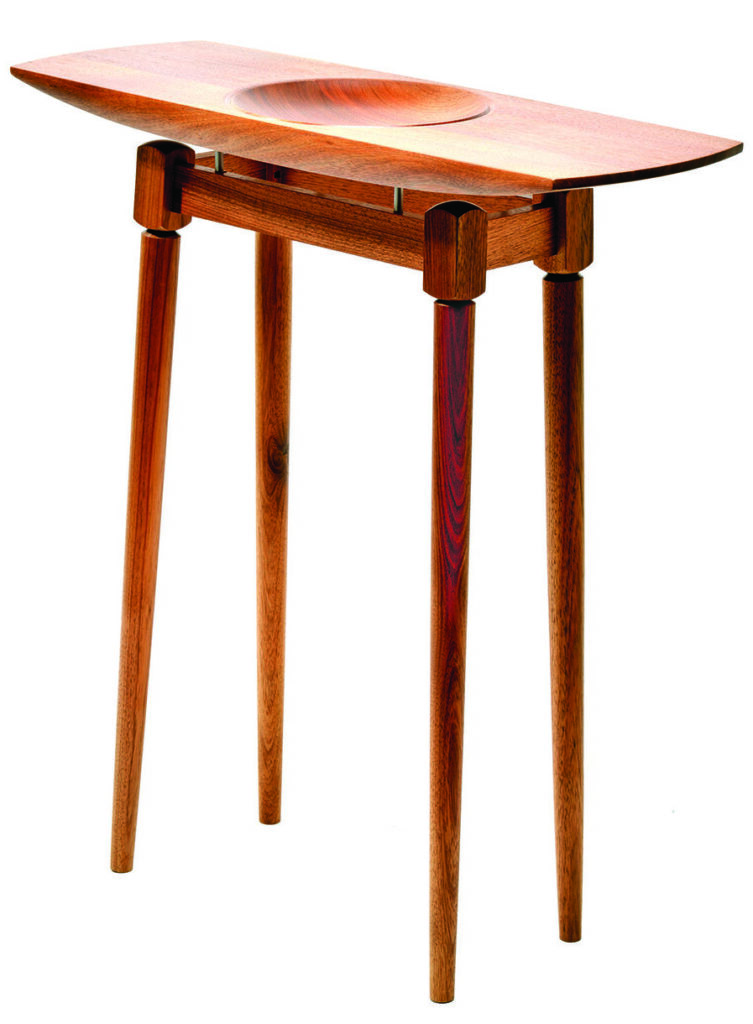
Wooden side table with carved circular bowl
Wooden side table with circular recessed tray

When asked by my in-laws to make a hall table that would suit the entry of their recently downsized home, I was a little apprehensive. There were several qualms: it’s a modern build, my in-laws are in their 80s, and I don’t make mainstream furniture. So I had to tread a fine line to keep all of us happy, especially as I’d only recently become an ‘in-law’, hoping not to become an ‘out-law’ too soon…

Assessing the space and requirements of the table it quickly became apparent that a receptacle for keys and other bits that need to be deposited as one enters the home could be fulfilled with a dish form at the centre of the table-top. There needed to be a flat area for a light to stand on, so my mind went to work. It seemed that the simplest solution, from my turning background, was to turn a dish-like form into the centre of a rectangular table-top.

Easy enough for me to propose this initial solution, but would it suit the in-laws, and could I actually turn a piece of wood this size? Fortunately for me, both answers were yes. The top was accepted, and I could fit a disc of 750mm diameter to my Stubby lathe. Phew! 

But with something this big it is not just about lathe capacity. It is also about working safely and, because the top is long and thin, holding the wood effectively, turning it at low speeds and never standing directly in with the edge of the work.

Many people do not have this size of lathe to work with, so if you like the idea of turning the table-top smaller than shown here, the techniques for turning the top still work and it makes a great bowl in its own right without the leg and sub-frame.

Tools and materials

• PPE & RPE
• 13mm bowl gouge
• 20mm spindle roughing gouge
• 20-25mm skew
• Round-nose scraper
• Faceplate and screws
• Revolving ring centre
• Woodworking tools for the table legs and frame
• Belt and random orbital sanders
• Metal table supports 
• Drill with drill bit to suit the metal support spacers
• Dowel drilling guide
• Clamps
• Abrasives
• Bandsaw
• Adhesive
• Finish of your choice
• Timber to suit the drawings 
• Sacrificial timber/boards for the top and back support 

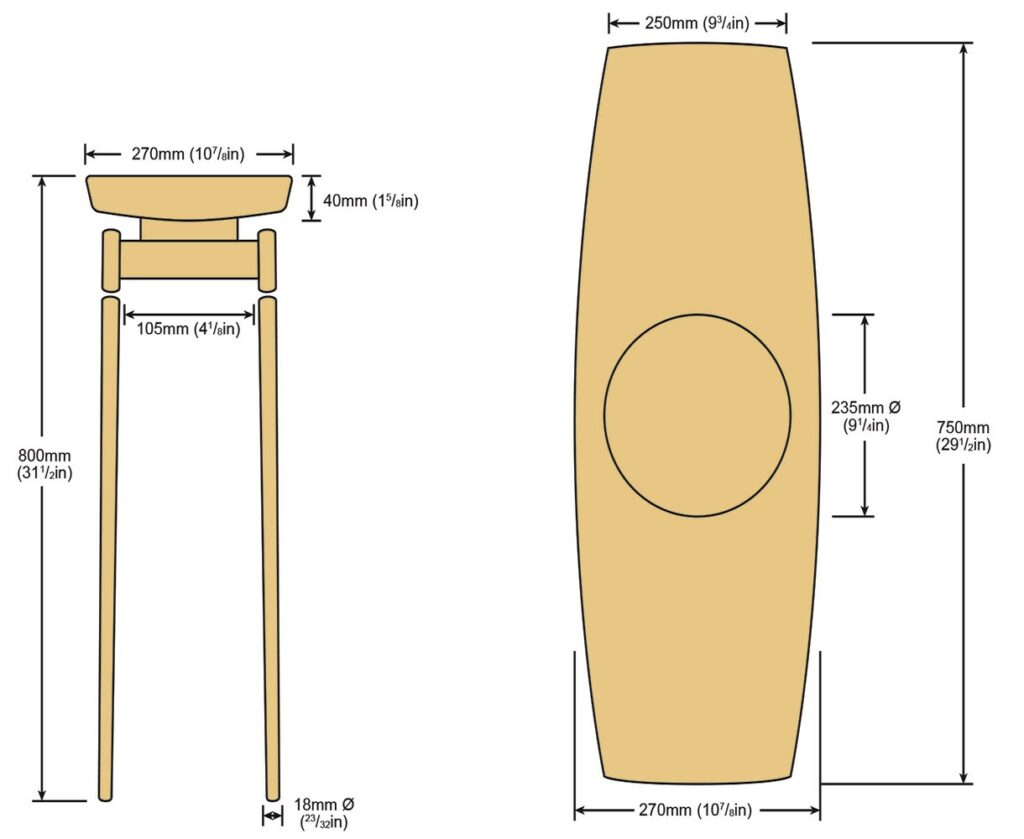
Drawings
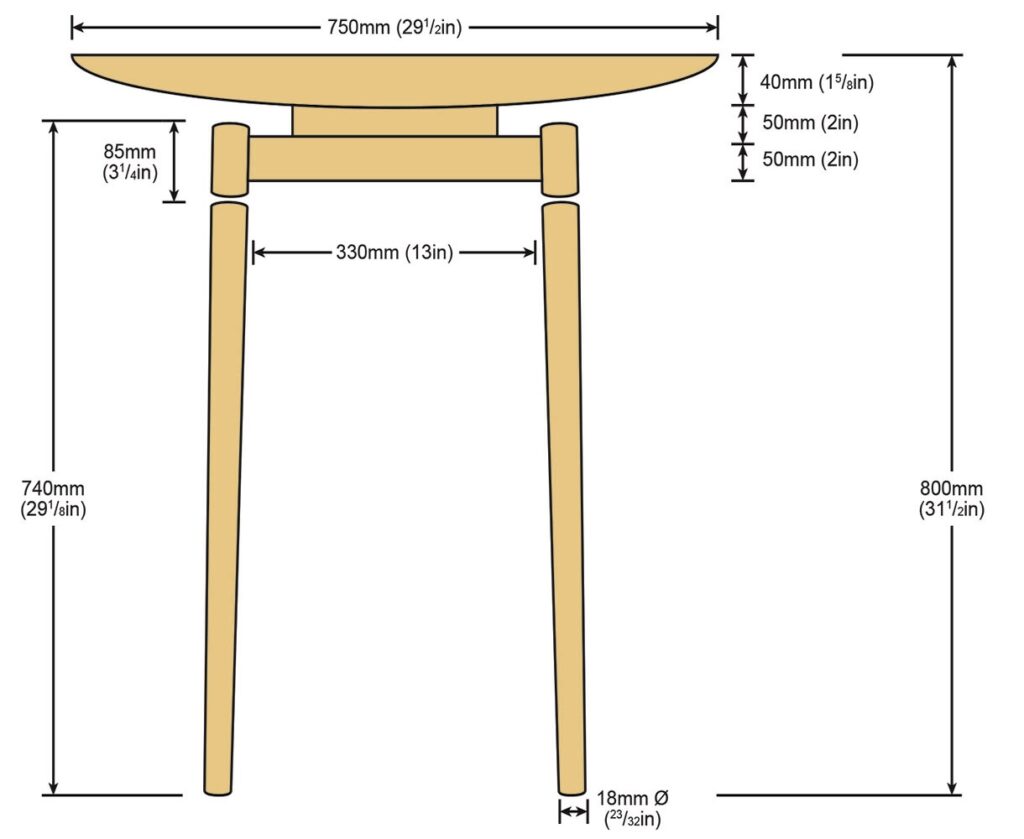
Dimensioned drawing of wooden stool with rounded seat
Dimensioned diagram of wooden stool with oval seat opening

The make

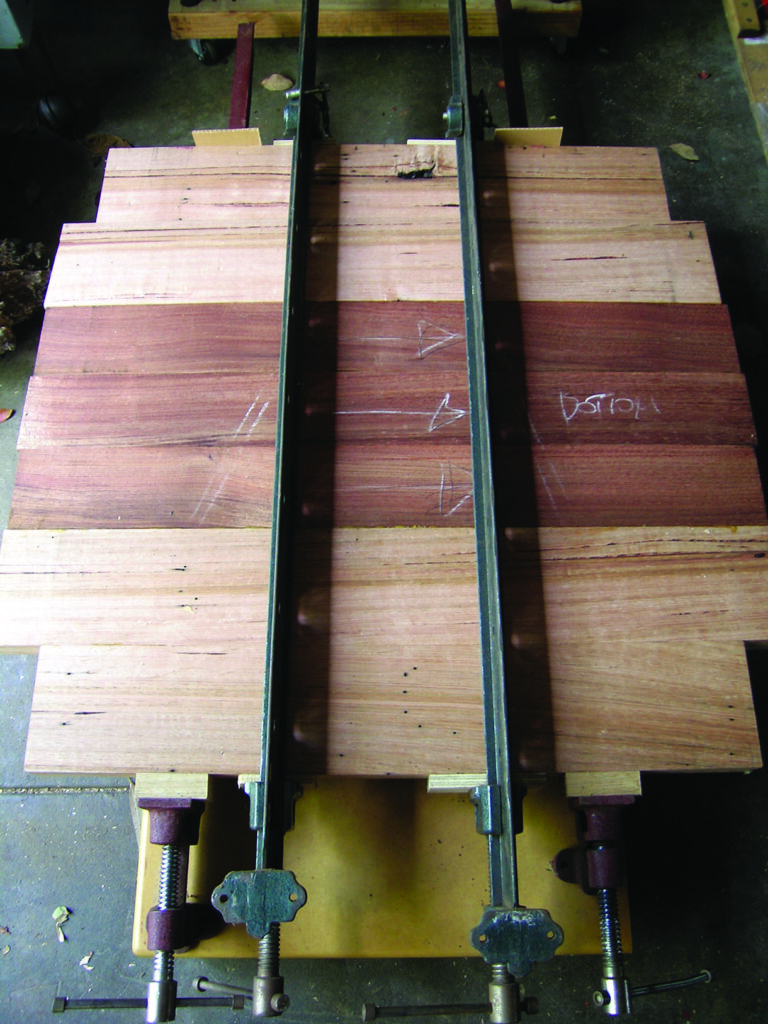
Wooden boards clamped on a workshop bench
1. Start by laminating three pieces of wood, machined flat and edged – I used Australian blackwood (Acacia melanoxylon) – and glue the boards together edge to edge with gap-filling PVA on the planed edges. Then use sash clamps to ensure all surfaces are bonded thoroughly before adding extra material that would enable a full circle of wood to be turned on the lathe. The alternative would be having a propeller of wood spinning around, which is dangerous with large work using this method, so it’s better to spend time and add sacrificial material to complete a full disc of 750mm diameter making the process safer. I hate to waste wood, so I used feature-grade Australian mountain ash (Eucalyptus regnans) for this part, knowing I’d already worked out a way of creating another table-top out of the waste, but that is another project. Once all is glued together and allowed to dry, mark a circle and cut on a bandsaw
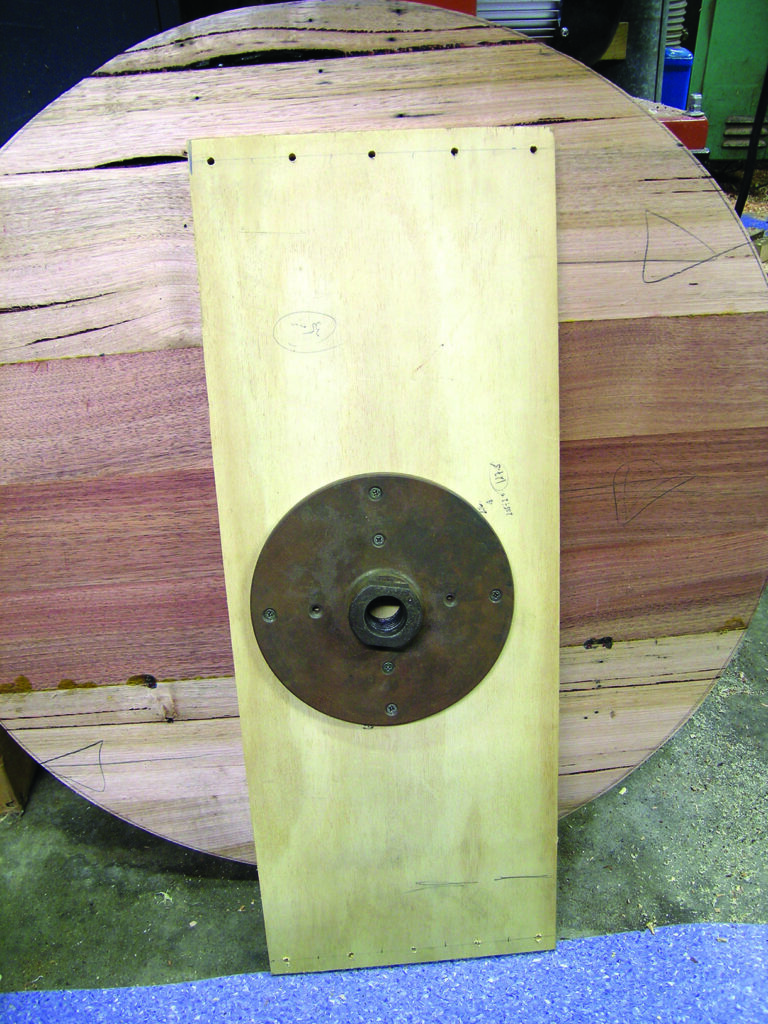
Wooden panel with circular metal mounting plate
2. Attach a wide strip of 18mm plywood to a large faceplate… 
Wooden workpiece mounted on lathe with drilling jig inset
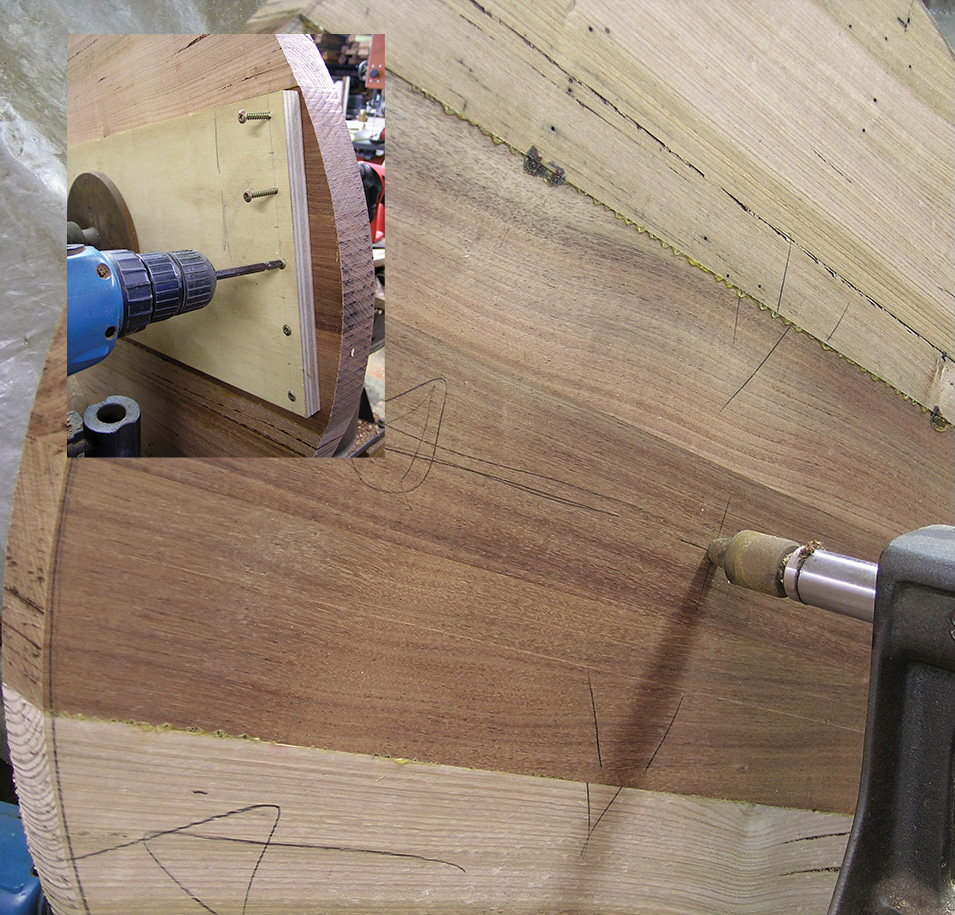
3 …then, mount the faceplate and ply on the lathe. Mark the centre of the table-top and centre the table blank to the faceplate/ply carrier using a revolving tailstock ring centre. This ensures the blank will be perfectly centred. Screws can now be driven through the carrier into the blank, into the outermost ends of the table-top. Any screw holes will be turned away later
Woodturning lathe hollowing a circular bowl from timber
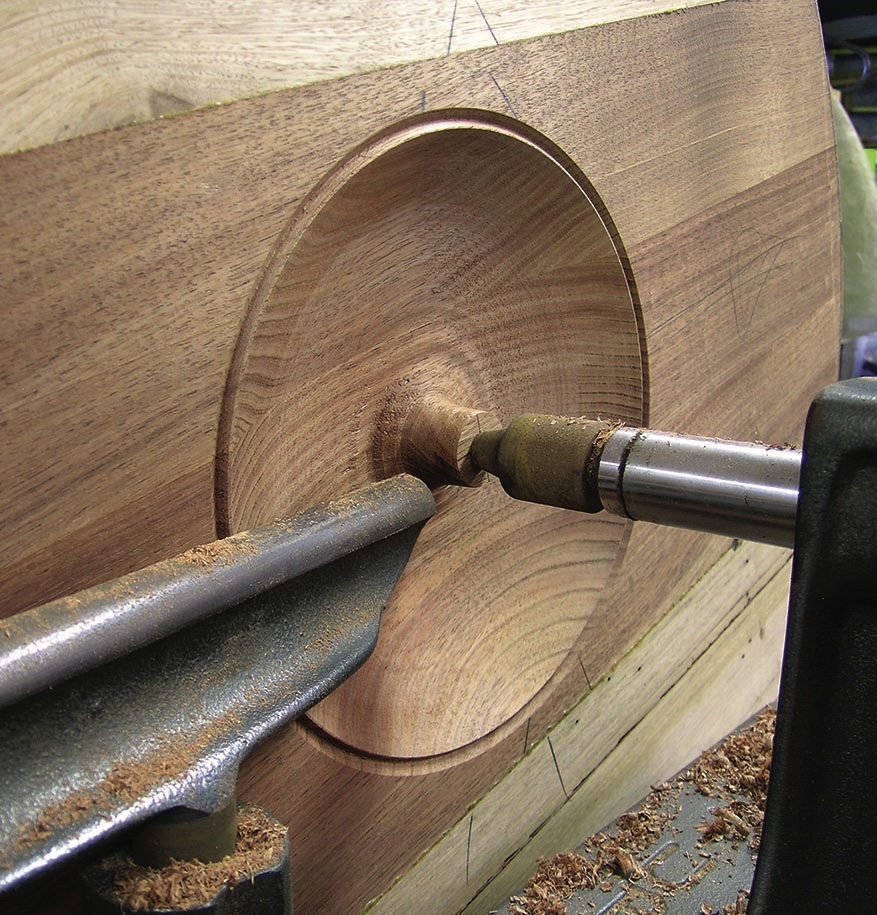
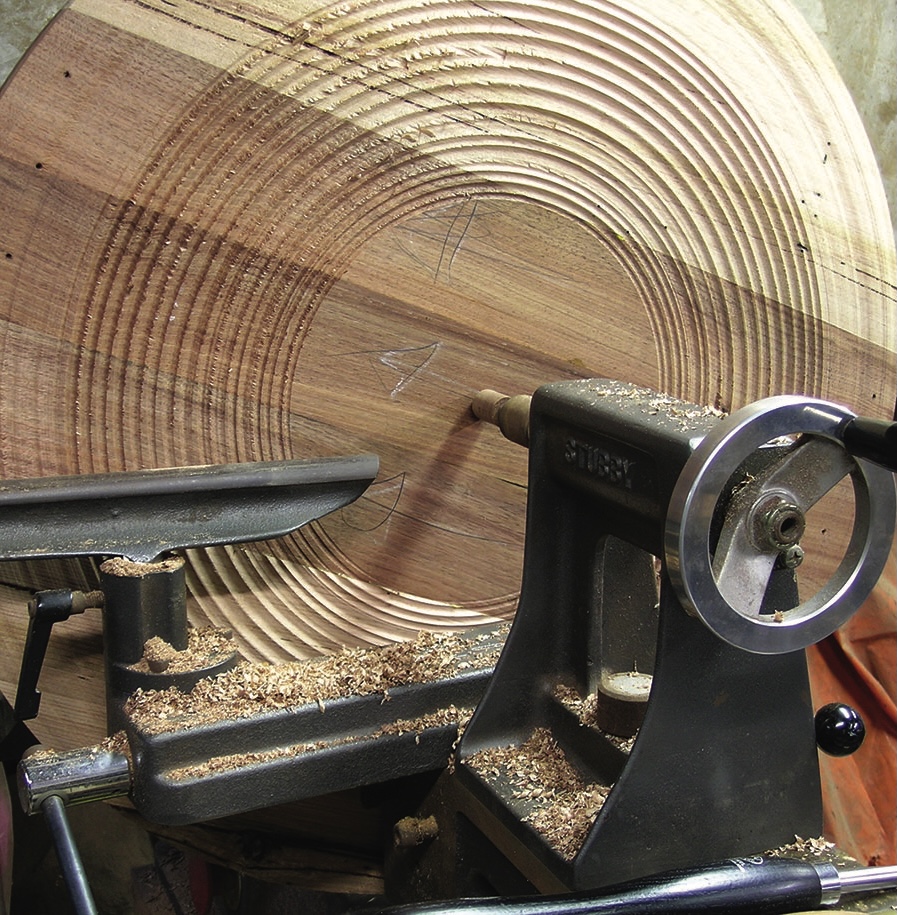
4. Using the lowest speed you have on the lathe – for something this size about 125-150rpm will work,  but do check speed charts and go slower if needed – turn the bowl section but avoid any work to the flat sections, as they had been machined flat and clean prior to attaching sacrificial material. Now cut a V-groove around the perimeter of the bowl area for a nice visual effect and also to enable accurate location when reversing the blank
Circular hole cut into a wooden board
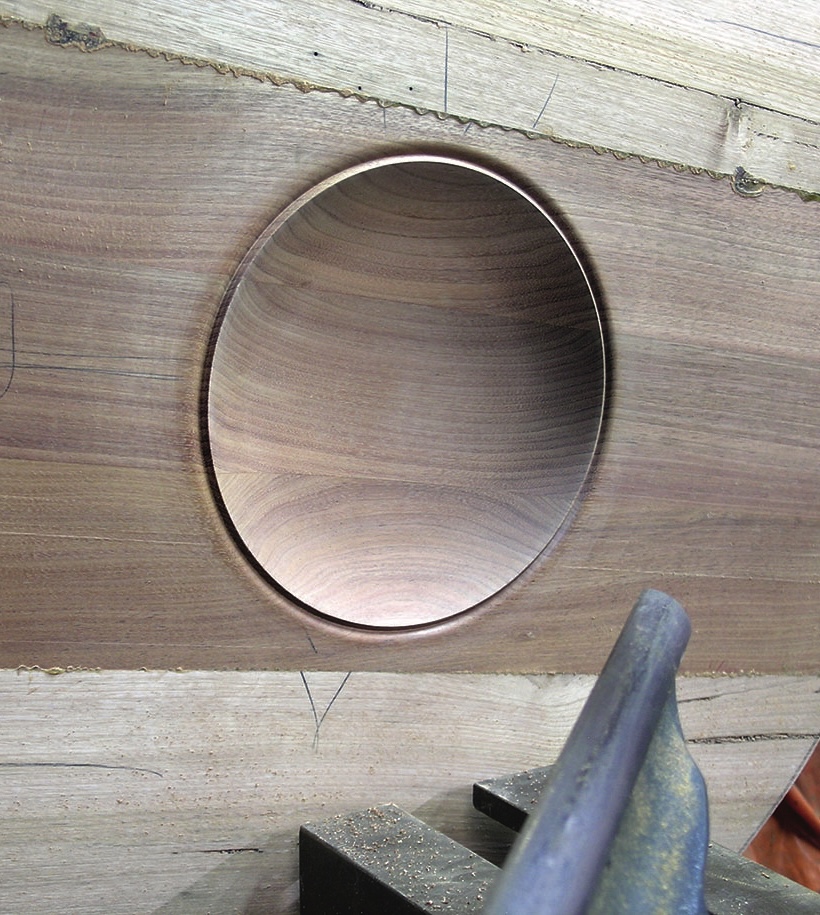
5. With heavy cutting and shaping completed, remove the tailstock and trim away the supporting stub. If needed, refine the bowl with a scraper, then sand the surface through to 320 grit
Close-up of a carved unfinished wooden circular component
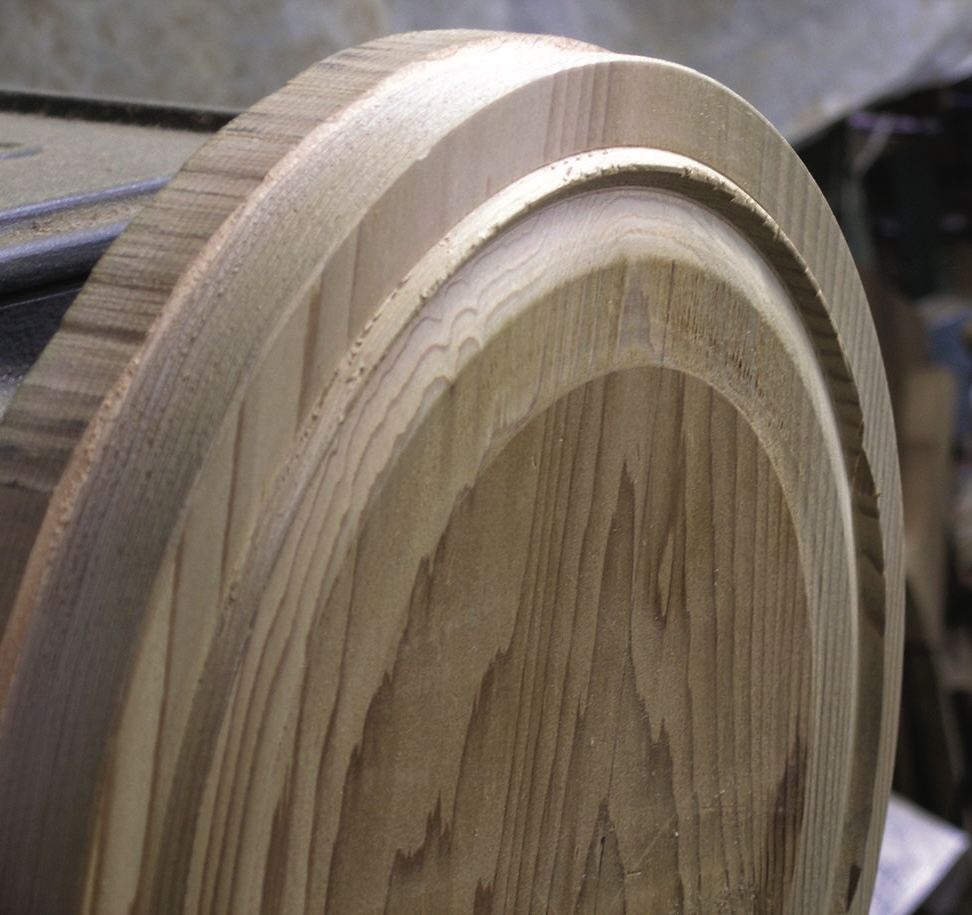
6. To reverse the item make a carrier/friction drive with a protruding V-shaped ring that matches the groove on the table-top so the two surfaces can meet snugly to prevent any possible lateral movement when the top is reversed and pressed against this carrier. Some electrical tape or paper towel needs to be applied to the carrier to prevent marking the sanded surfaces of the top
Woodturning lathe shaping a large circular timber blank
7. Now, locate the hollow bowl section up against the carrier and bring the tailstock into place. Insert a small wide spacer block into the live centre and between the table to act as a pressure drive to avoid an unwanted hole
Wooden disc being turned on a lathe
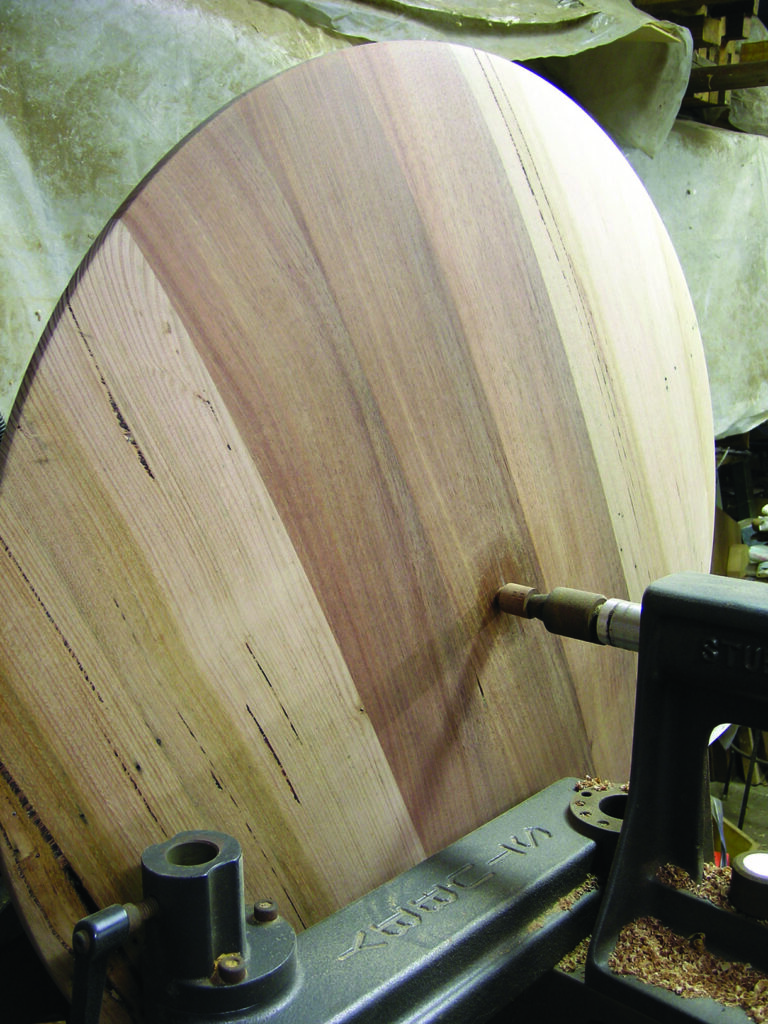
8. Turn the underside of the table to a gentle upsweeping curve using very light cuts with the lathe running at a very low speed – 125rpm or lower. Then sand it to 320 grit
Orbital sander smoothing a round wooden tabletop
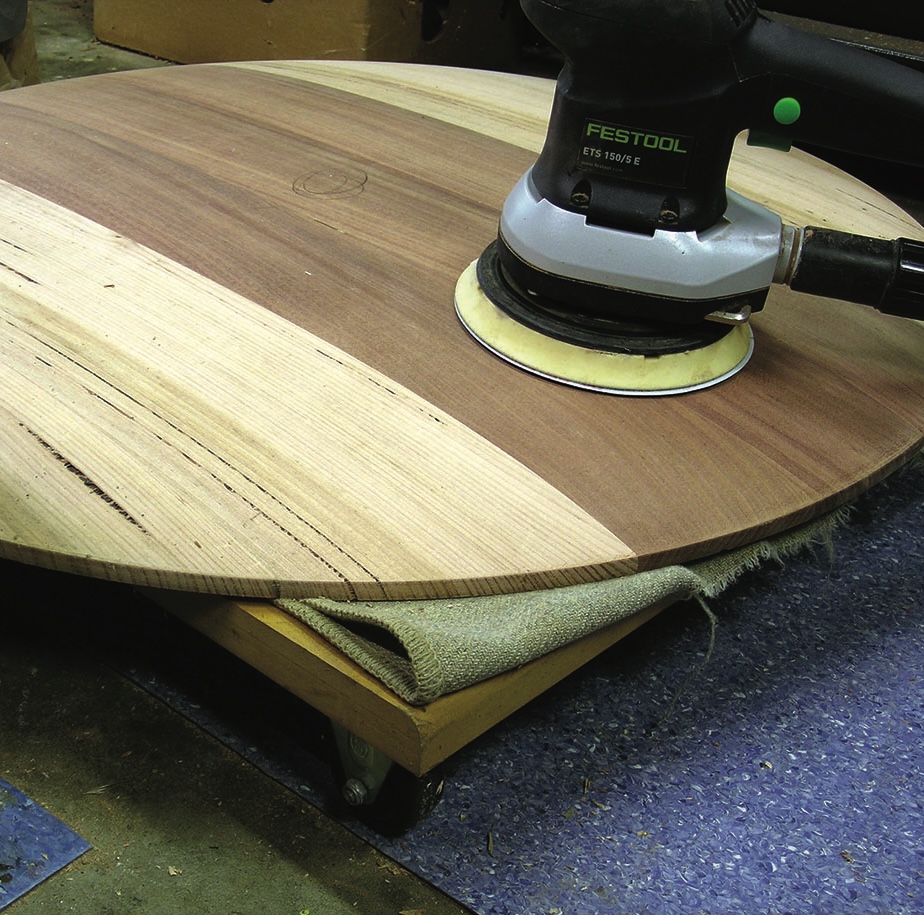
9. Remove the disc from the lathe and lay it flat on either a trolley which has a blanket as a shield to prevent the marking of the table-top or on padding on the floor. Finish sanding all over with a random orbital sander
Paper templates taped onto a live-edge wooden slab
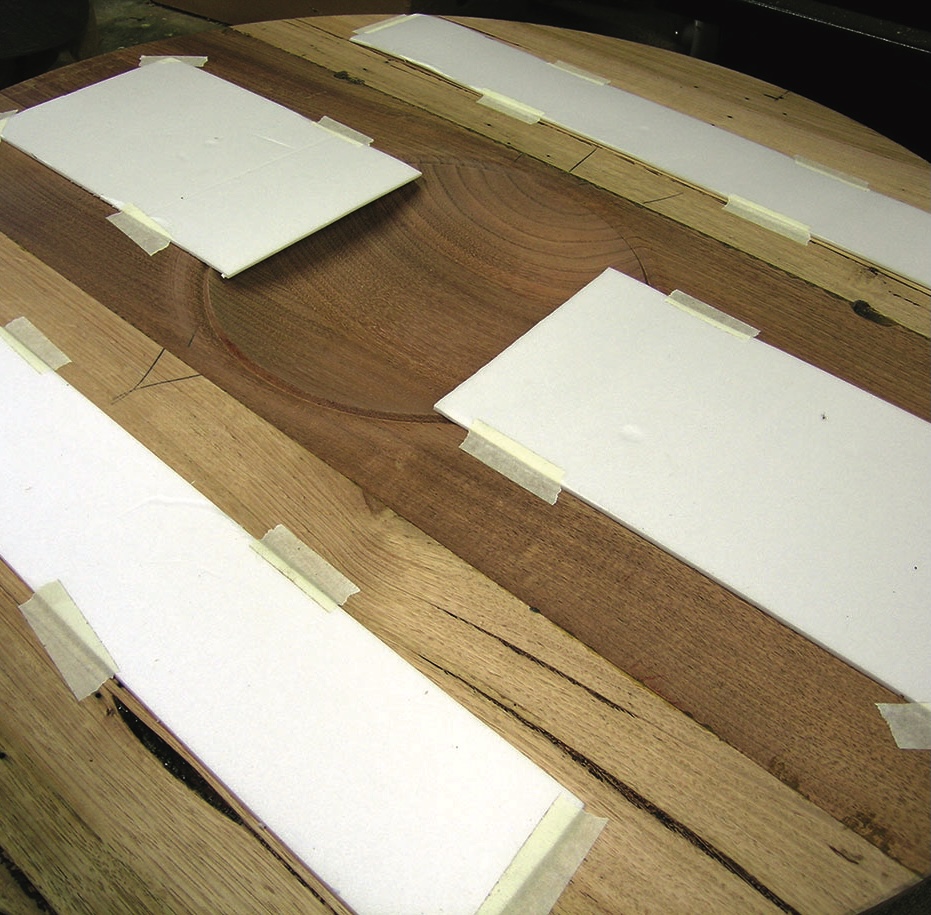
10. The next stage is to remove the sacrificial timber. To protect the top of the table, place high-density foam on to the flat surfaces
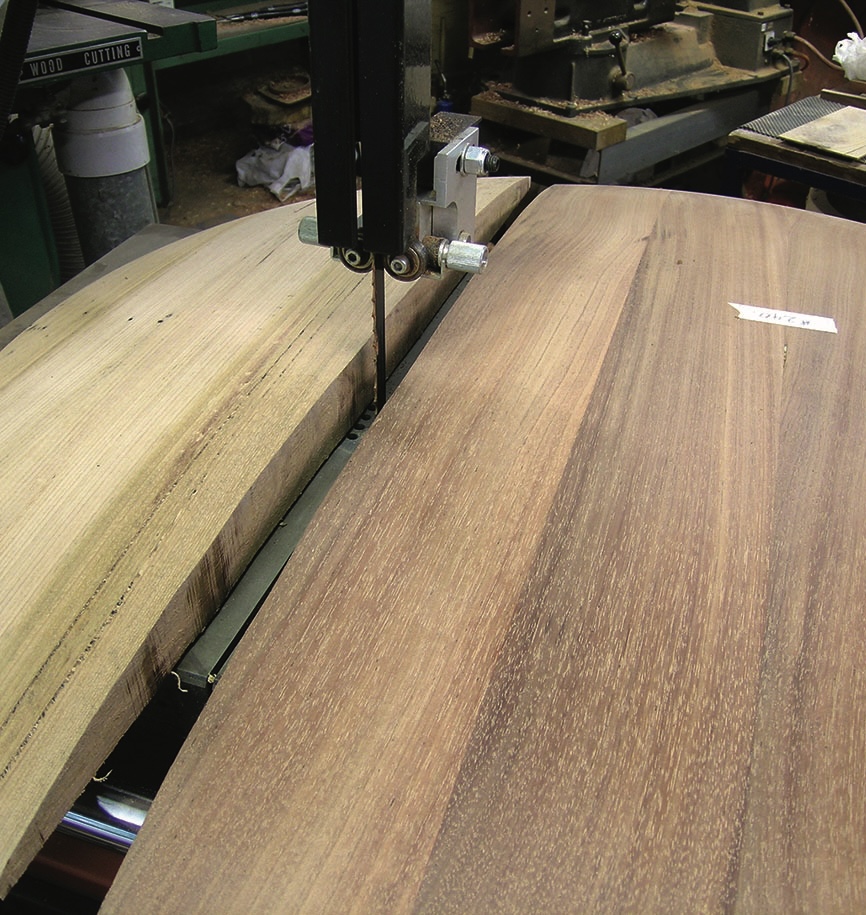
Bandsaw cutting two timber boards in a workshop
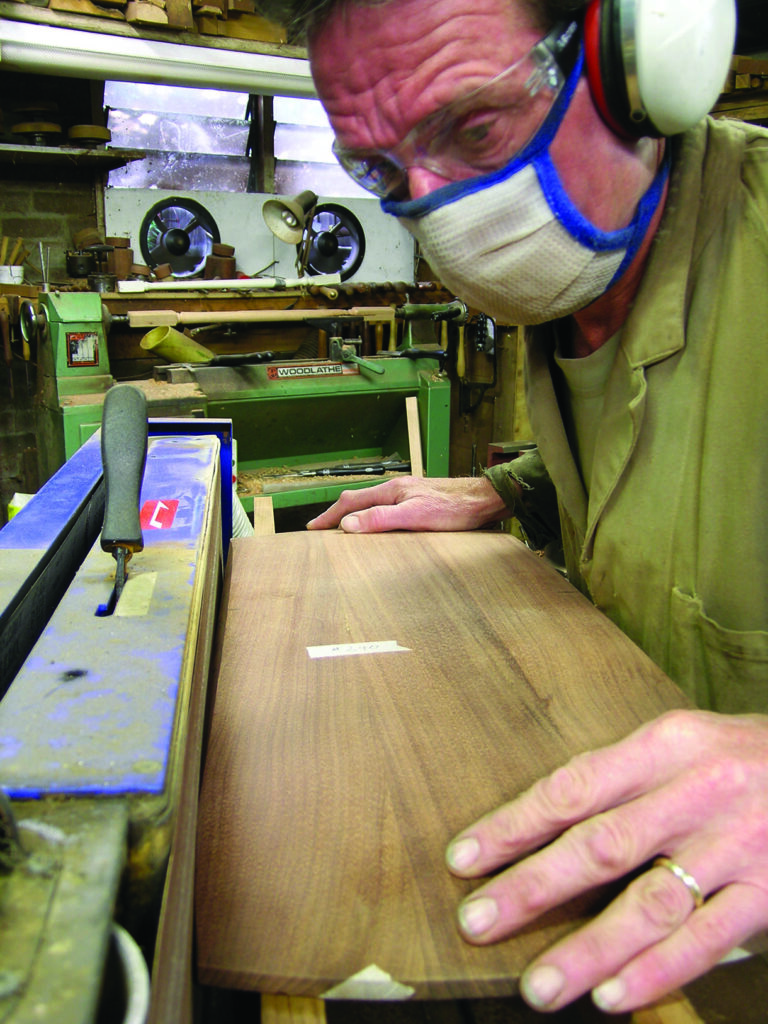
11. With padded surfaces resting on the table, cut the waste material as close to the joint as possible without actually cutting the table-top section. For the next bit I chose to machine the edges flat – although you can use a long hand plane – so angled cuts could be executed on a tablesaw. Again, you can create the angled sections with a hand plane if you choose. I wanted the top to look as ‘light’ as possible and angling the sides would reduce visual bulk. It is up to you to decide the shape you want and, of course, you can use hand tools or machines to help you to do this
Woodworker inspecting walnut veneer in a busy workshop
12. To further lighten the appearance you can curve the edges slightly on a belt sander/finisher. About 15mm was removed at each end for this top so the rectangular shape was ‘softened’. Again, your table, your choice as to how you wish it to look
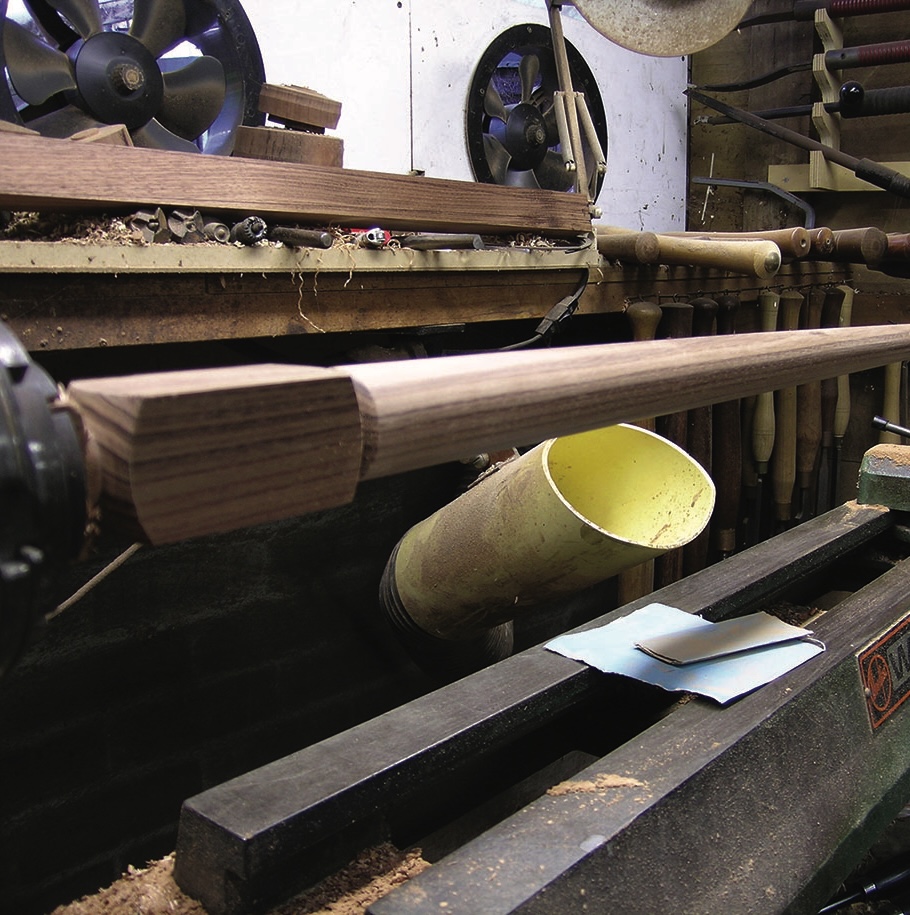
Wooden spindle being turned on a dusty workshop lathe
13. The timber for the legs needs to be machined to about 40mm square and turned leaving a pommel at the top while the leg is tapered to about 18mm at its end. Mount the wood between centres and use a combination of a spindle roughing gouge and skew to make the elegant, simple, tapered shape. I chose to hold the headstock end of the spindle in a chuck and the tailstock end with the revolving ring centre
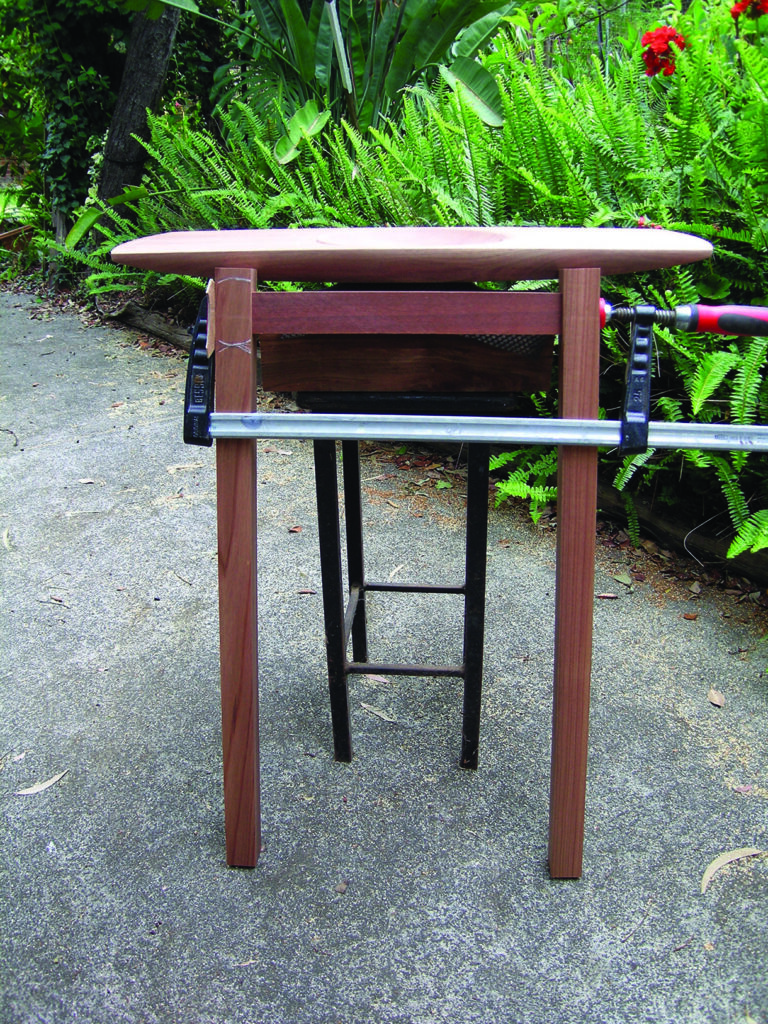
Wooden surfboard clamped to outdoor work stand
14. Now is the time to get the proportions right and check a few things out. Create some temporary skirts and clamp them to the legs. To support the top – the design of this has the top sitting clear of the subframe – use a stool with a block of wood on it. This is the ‘trial and terror’ part where what worked in the mind’s eye as two-dimensional drawings is put to the test as a three-dimensional object. Adjust what you need to so that you are happy with how the frame looks and also how the top sits in relation to the subframe. I ended up tweaking the lengths of skirts and distance between top and subframe
Handcrafted wooden frame components with mortise-and-tenon joints
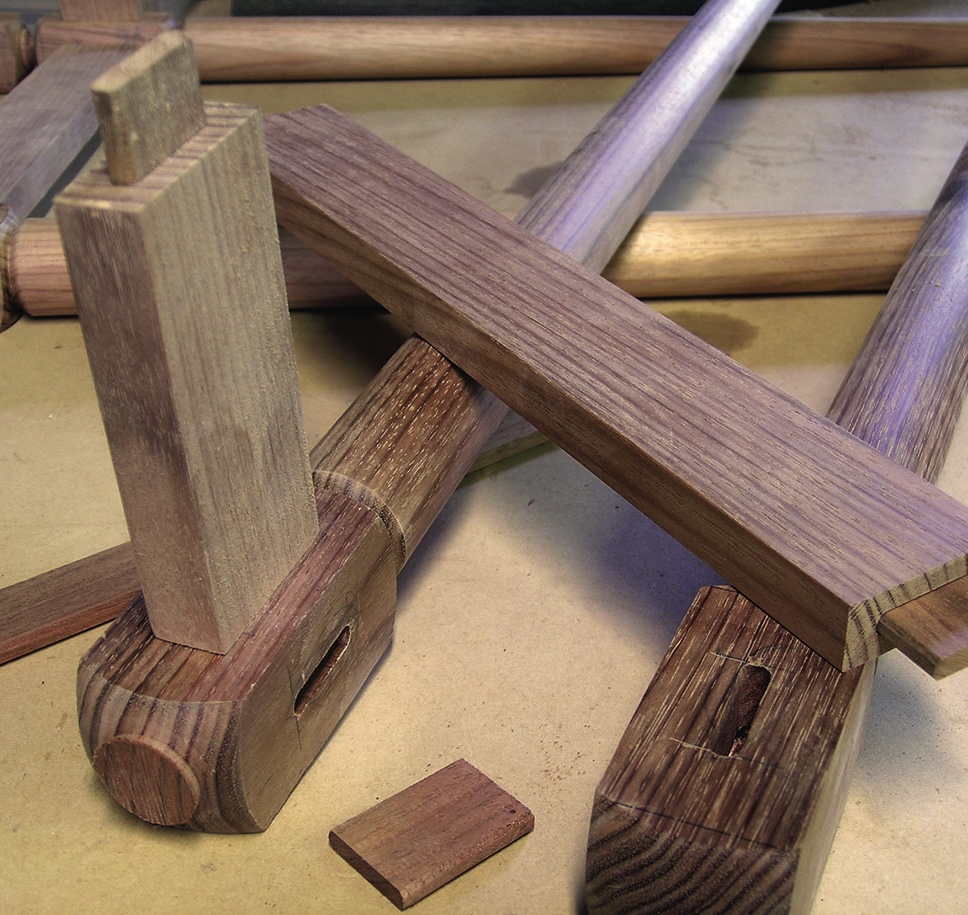
15. Now you have to make a decision as to how to join the legs to the skirts. Traditionally it would be via a mortise and tenon and I chose this method but opted for floating tenons. For speed, I used a mortising machine to cut the mortises
Wooden chair frame clamped during workshop assembly
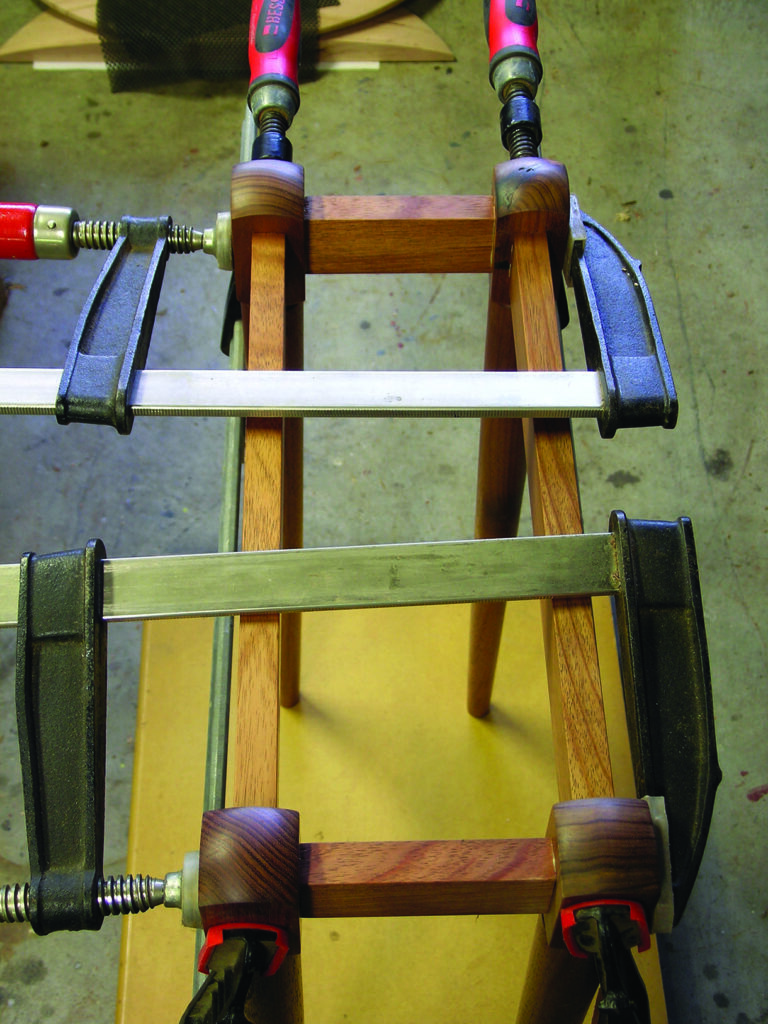
16. Dry-assemble all the pieces and check everything is okay. Make any adjustments now. Prior to gluing and clamping up, pre-finish the subframe. This can be with a shellac, sanding sealer, oil or similar. Once dry lightly denib/knock back then glue and clamp everything together ensuring any squeeze-out was wiped off with a damp rag
Freshly stained wooden worktop with polishing cloths and varnish tin
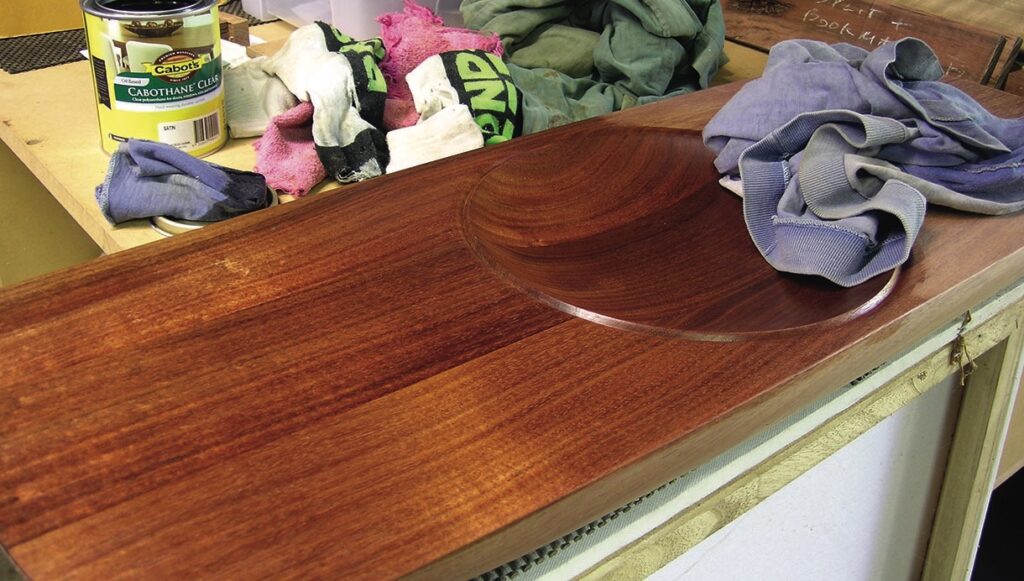
17. While that subframe is drying apply a finish to your table-top. I chose polyurethane using my favourite wipe-on, wipe-off method which does not leave a thick layer of finish on the surface. There is, however, a fair bit of elbow grease needed to wipe back a surface as large as this, but I opt to do it in stages, making sure the finish doesn’t become too tacky prior to being wiped off. If it does, simply apply more finish, which will dissolve the sticky surface and allow you to wipe it back. The finish you select needs to be durable and the right lustre for you
Steel ruler beside clamp on wooden furniture frame
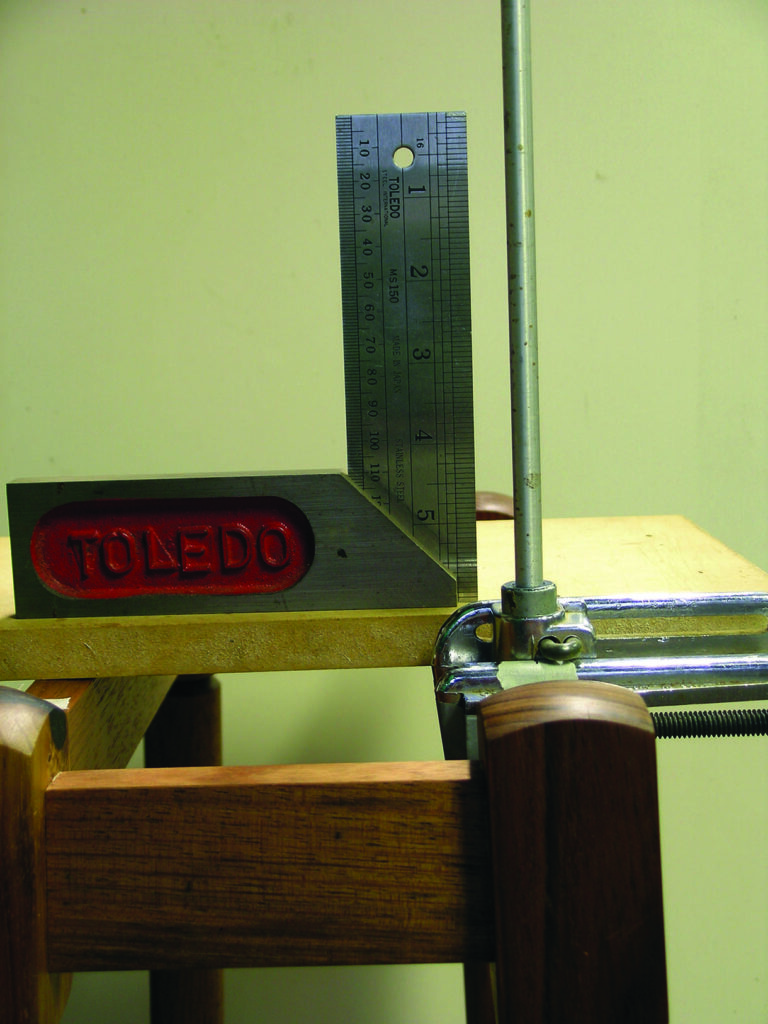
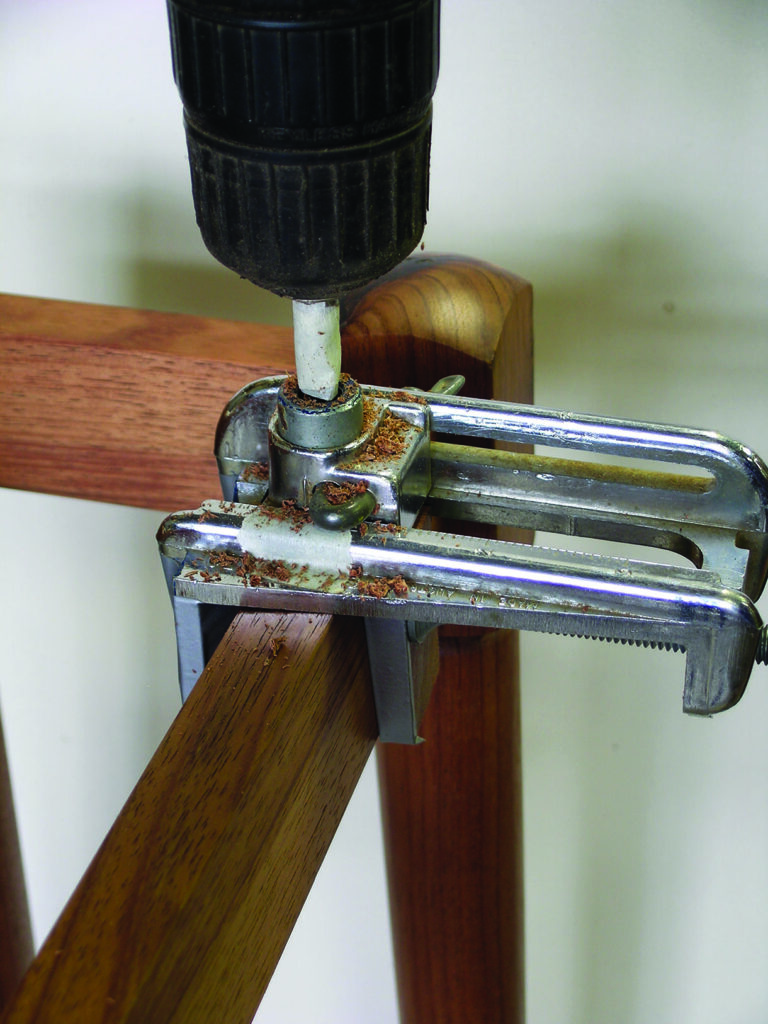
18. Now you need to drill holes for the aluminium spacers, which required another bout of lateral thinking on my part. The reach of my pedestal drill was insufficient to handle this frame, so I reverted to a dowelling jig clamped to the rails. But as it’s designed to drill holes parallel to its sides, I needed to cut some 2° angled spacers to tilt the jig back to perpendicular. A piece of aluminium tube inserted into the guide sleeve lined up with a tri-square ensured holes would be at 90° to the floor, not the rails
Drill boring hole through clamped wooden furniture rail
19. Now drill holes with a cordless drill using a bradpoint bit and some masking tape to determine consistent depth of holes. Once drilled, apply your final finish on the subframe and let it dry before moving on to the next stage
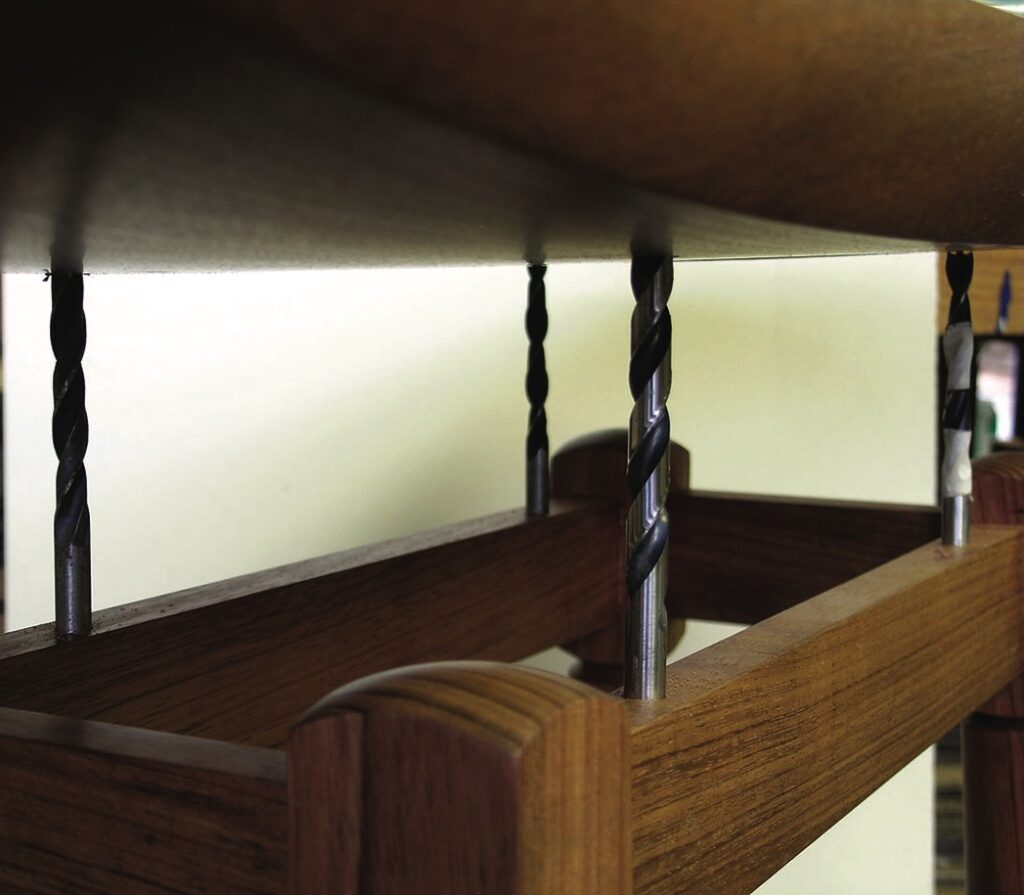
Drill bits inserted through wooden furniture frame
20. To mark where holes are required on the table’s underside, insert bradpoint drill bits into holes already drilled in the frame. Prior to locating the top, measure and mark as closely you can the position of the rods on the underside of the top to avoid marking the underside with the sharp bradpoint bits as much as you can. When you have done so place the top in its final position and press down so centre points create marks ready for the next stage of drilling
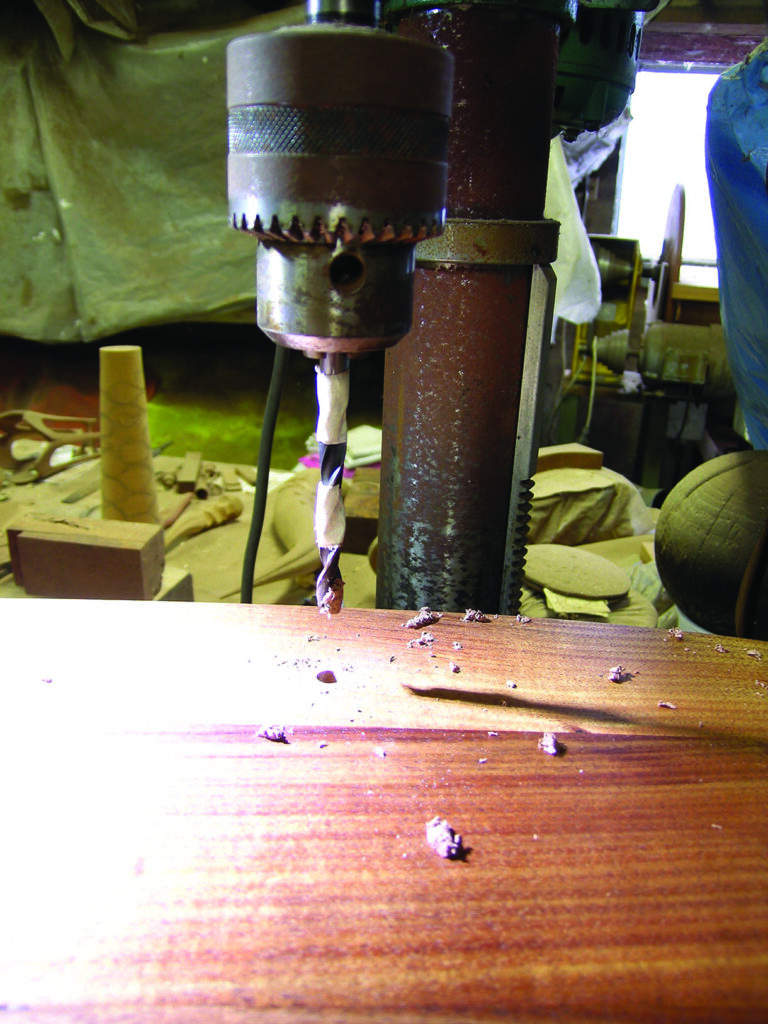
Drill press poised above a wooden workpiece
21. Once marked with the little indent, bore holes to a consistent depth using a pillar drill, or very accurately with a hand drill, ready for final assembly. Fingers crossed, all will fit together correctly. Add a few drops of adhesive to bond the wood and spacers. Thankfully, much to my relief, mine did, just in time to keep the in-laws happy. Conclusion: Making one-off pieces is a time-consuming process where there are many problems that need to be solved along the way. Experience gives you a ‘vocabulary’ of techniques and solutions to fall back on, but pricing? In this case it was a love job, completed late… but the in-laws were happy, so I’m not an ‘out-law’ at this point
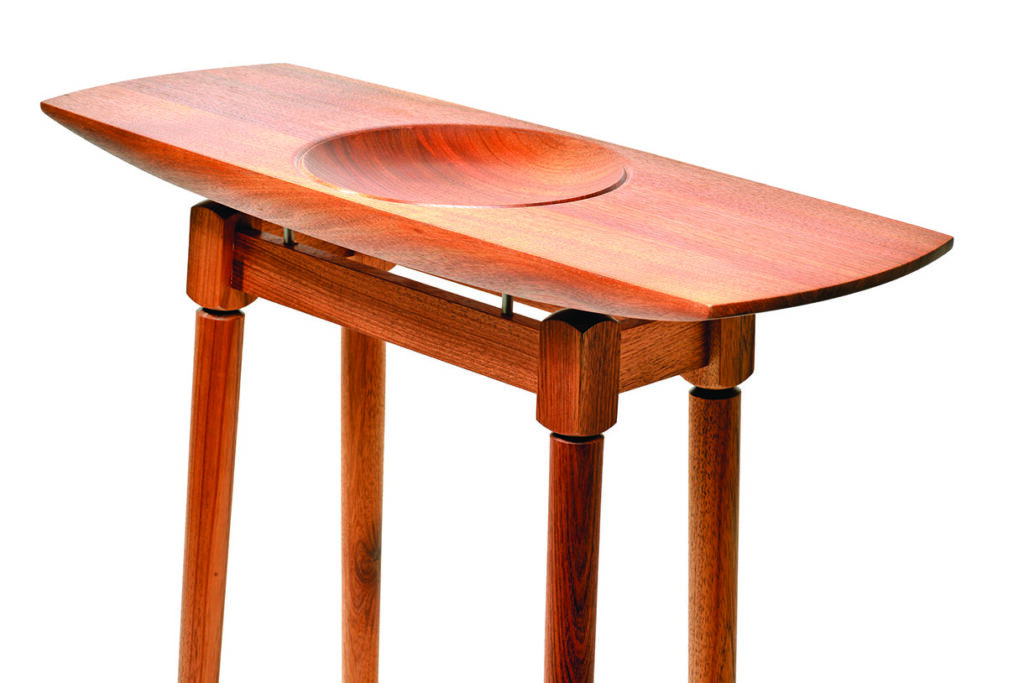
Wooden side table with circular recessed tray
22. The finished table

Leave a Reply

Your email address will not be published. Required fields are marked *