Bench mallets are a staple of any woodworking workshop, including that of the woodturner. Most of us acquire our first mallet from a tool shop and because it is ‘just a hammer’, often the only consideration is cost; cheap is good, expensive is bad. Time and experience show this approach to tool acquisition is deeply flawed. Things tend to be cheap for a reason. Fortunately, for the turner and woodworker, the progression of our skills takes us to a place where we can remedy this situation.
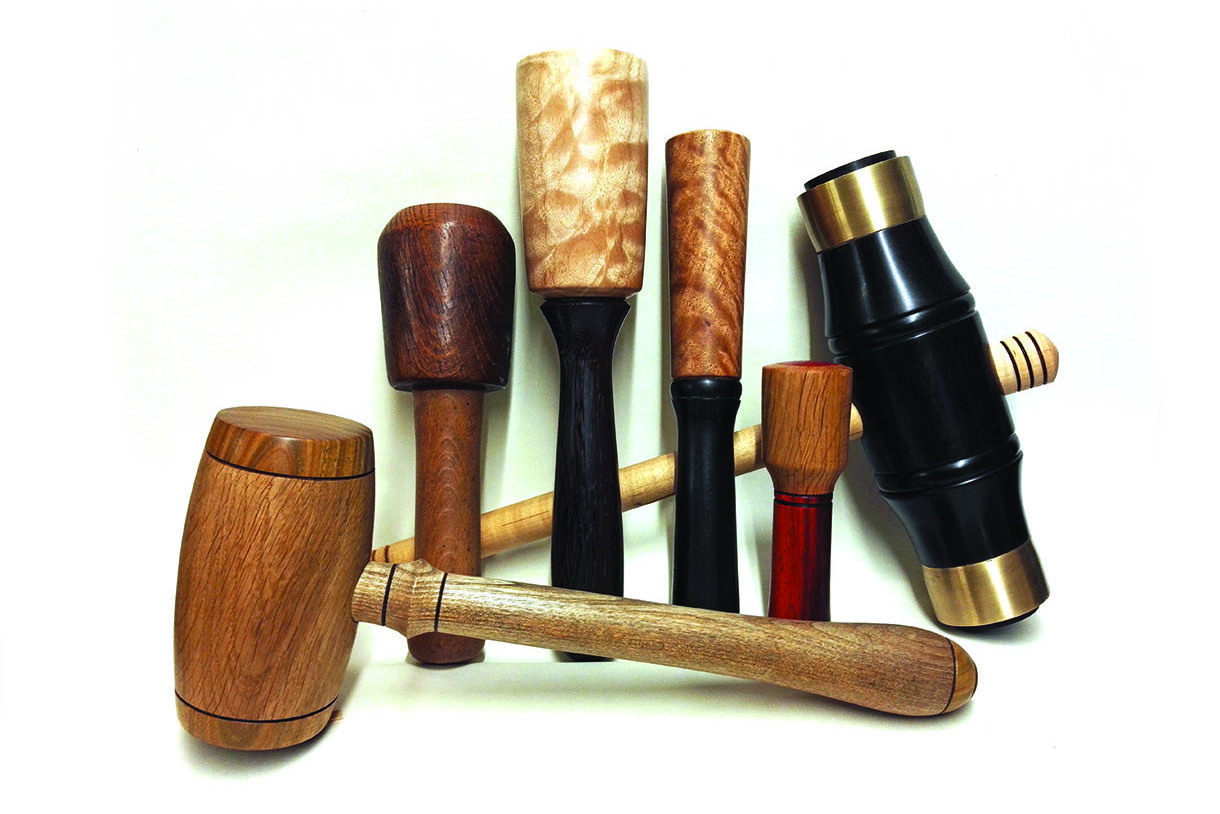
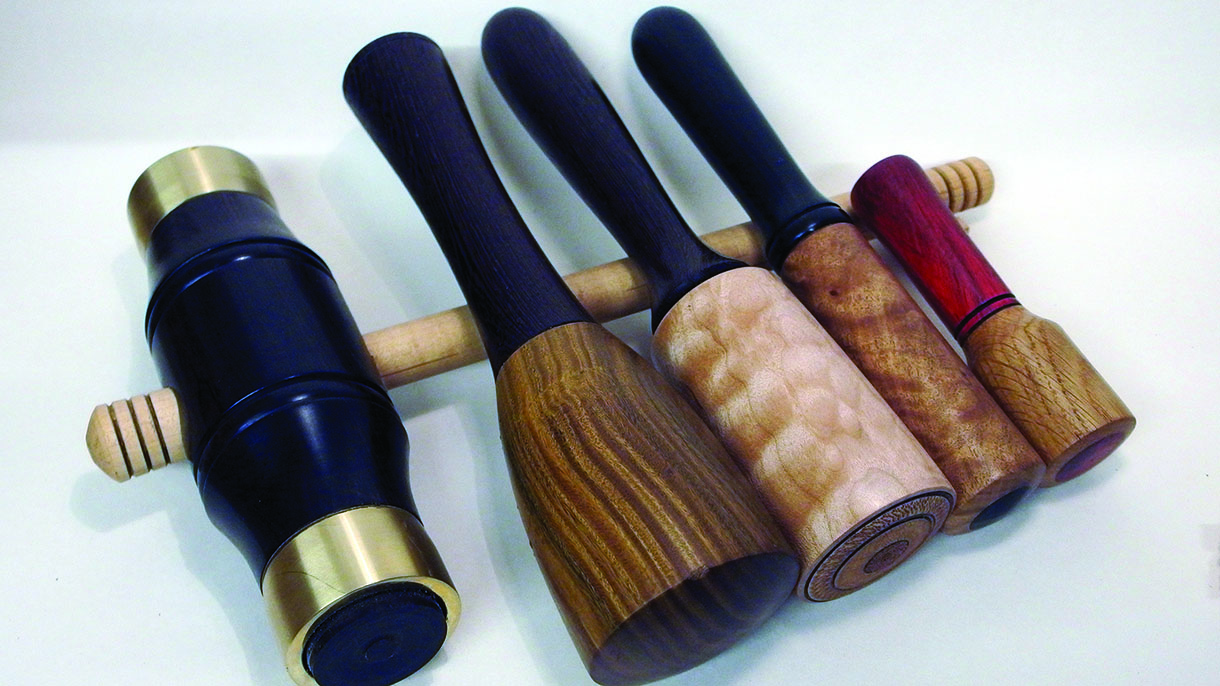
Woodworkers and woodturners might very well end up with a different tool via different methodology, but the results are usually equally pleasing, both functionally and aesthetically. Mallet designs vary enormously, as do the materials used to create the head of the mallet. Typical things to consider are: mallet heads can be made from a number of wood species such as beech (Fagus sylvatica), elm (Ulmus procera), hornbeam (Carpinus betulus), greenheart (Chlordcardium rodiei), lignum vitae (Guaiacum sanctum), walnut (Juglans regia), maple (Acer compestre) and various exotics.
Whichever species you choose, it should be hard, dense and stable. If a species is difficult to split using a froe it is likely to be suitable for mallet heads. Basic considerations aside, the world is your oyster, and your mallet can be as plain or ornate as you wish. Here I have taken a very basic design and modified it slightly to produce a more durable and attractive object. Having once had a customer say that the mallet I made for him was just ‘too nice to use’, I will tell you what I told him: there is no reason our tools should not be beautiful, but plenty of reasons they ought to be.
Types of mallet
Mallets can be made in a vast range of styles and sizes. Small detail mallets for fine carving can have lead, ball bearing or sand captivated in the head to provide a dead-blow effect in use. Specialist mallets, such as caulking mallets, have a metal ring attached to prevent the head splitting under heavy use. The rings are best fitted using a heat shrink methodology to provide a solid immovable fit. Some mallets are traditionally made with removable handles, such as a basic joiner’s mallet, to make portable storage easier. Masons’ and bodgers’ mallets (beetle) are usually made in one piece from a single section of log and are essentially a disposable tool, which can be readily replaced as required.
Plans and equipment
Tools
Spindle roughing gouge
10mm spindle gouge
10mm parting and beading tool
2mm parting tool
Skew chisel
Jacobs chuck and Forstner bits
Materials
Ash block 50 x 50 x 330mm
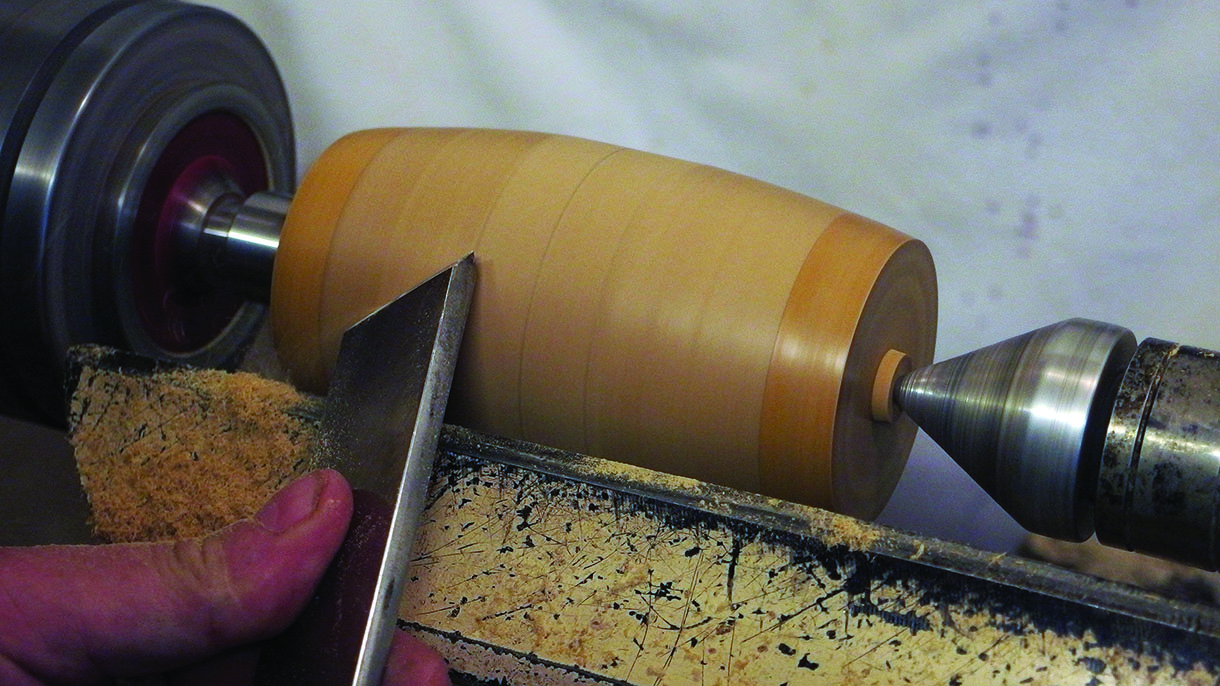
Lignum vitae block 75 x 75 x 125mm
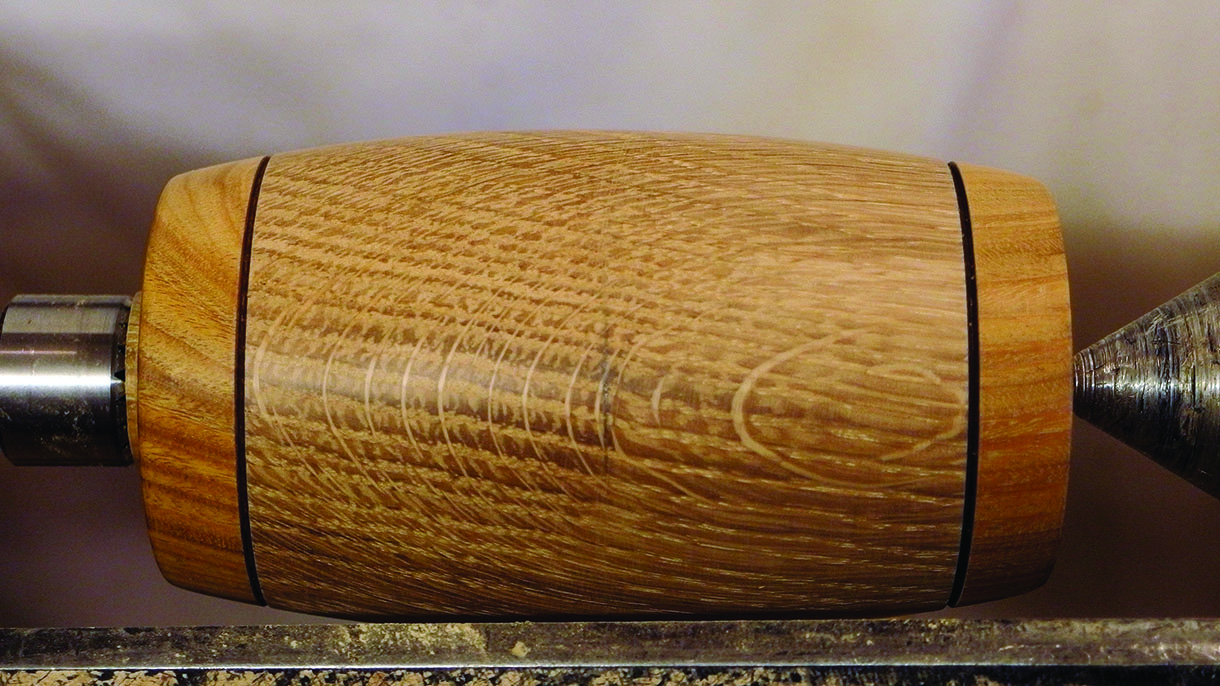
Oak block 85 x 85 x 150mm strip of formica
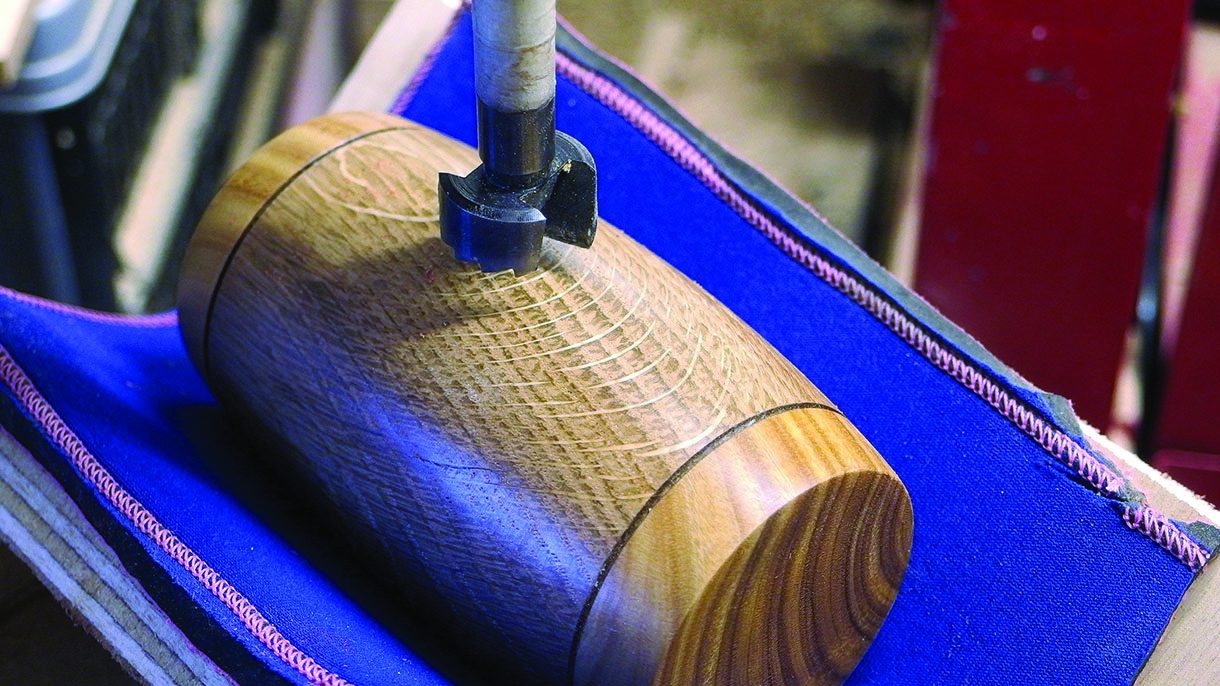
Abrasives 180–400 grits
Cellulose sealer
Wood glue
Boiled linseed oil
PPE: facemask, gloves, dust mask/respirator
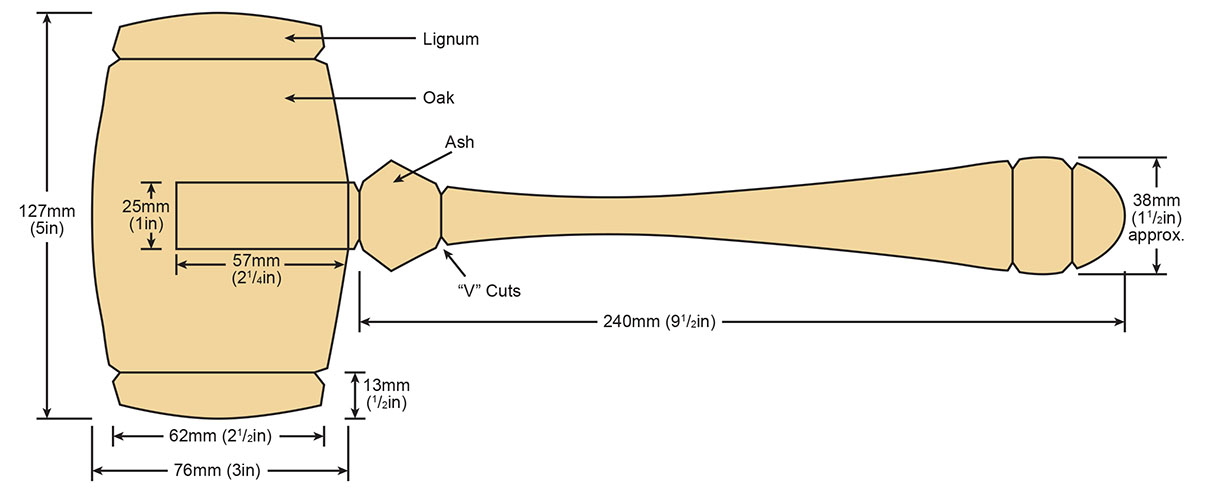
Mallet anatomy and dimensions
Drawings and how to resize them
To enlarge or reduce the size of drawings right click on the image to download it and then go HERE to watch a video on how to use paper with a grid to do exactly that.
Mallet construction
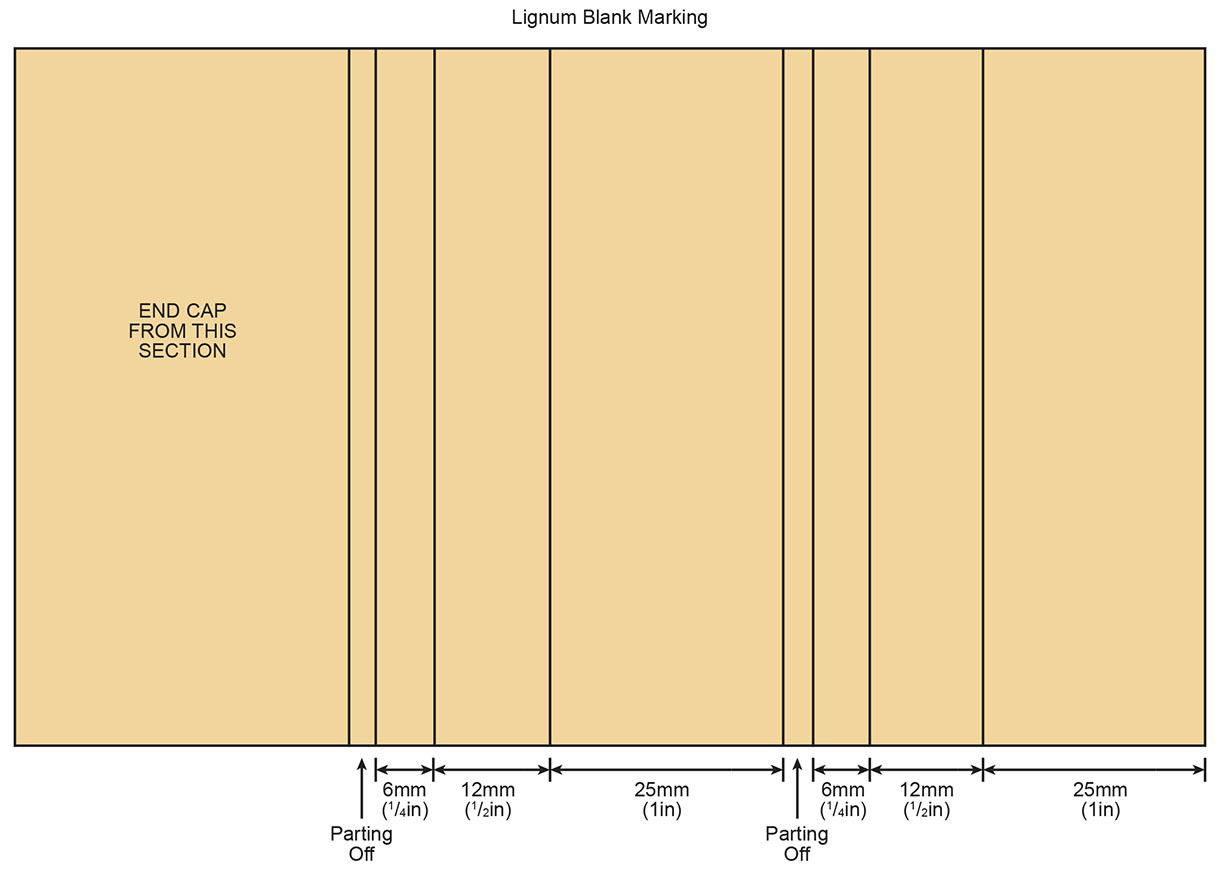
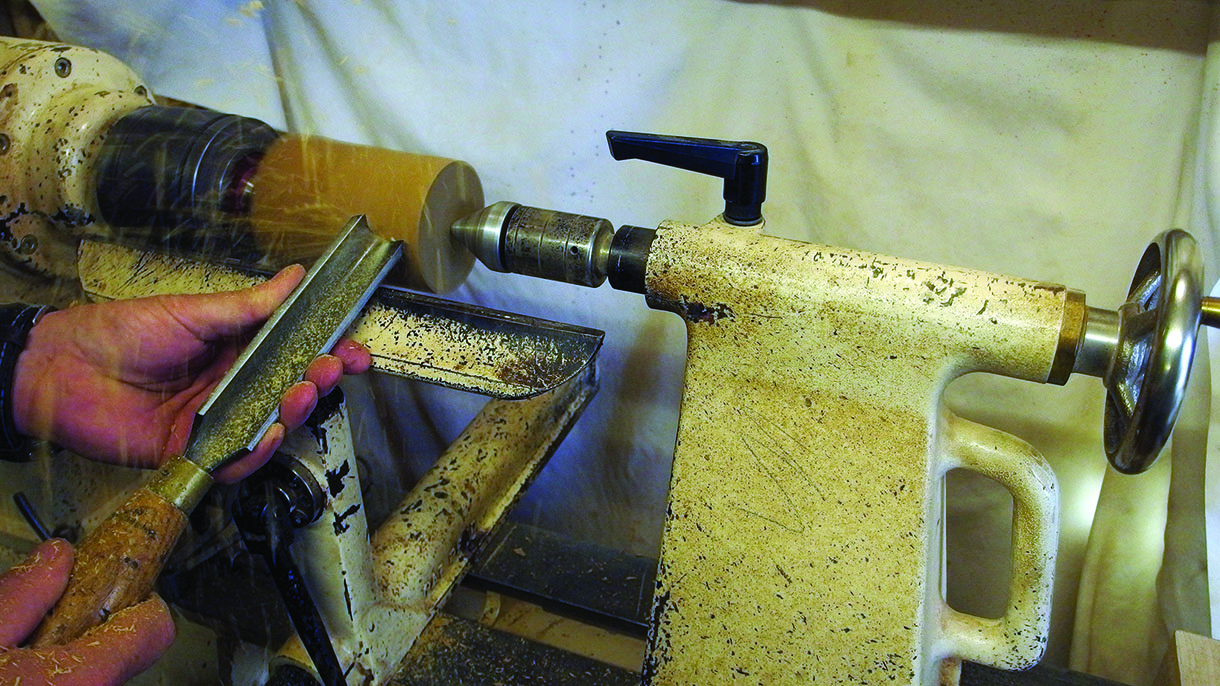
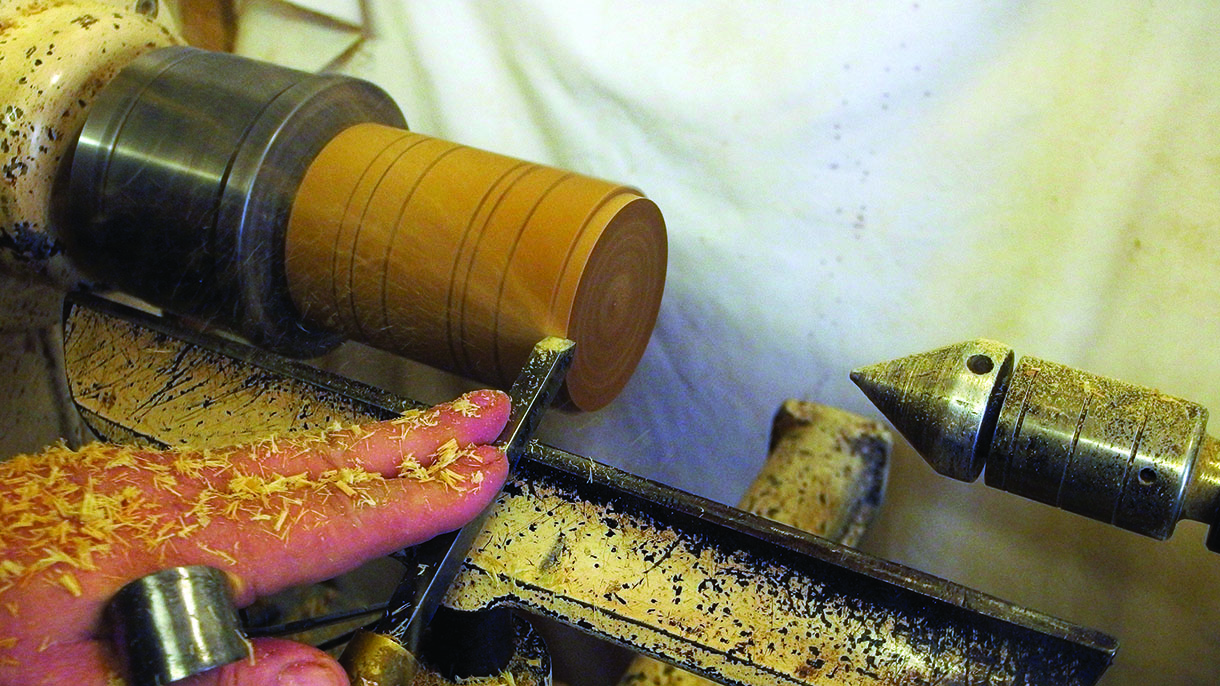
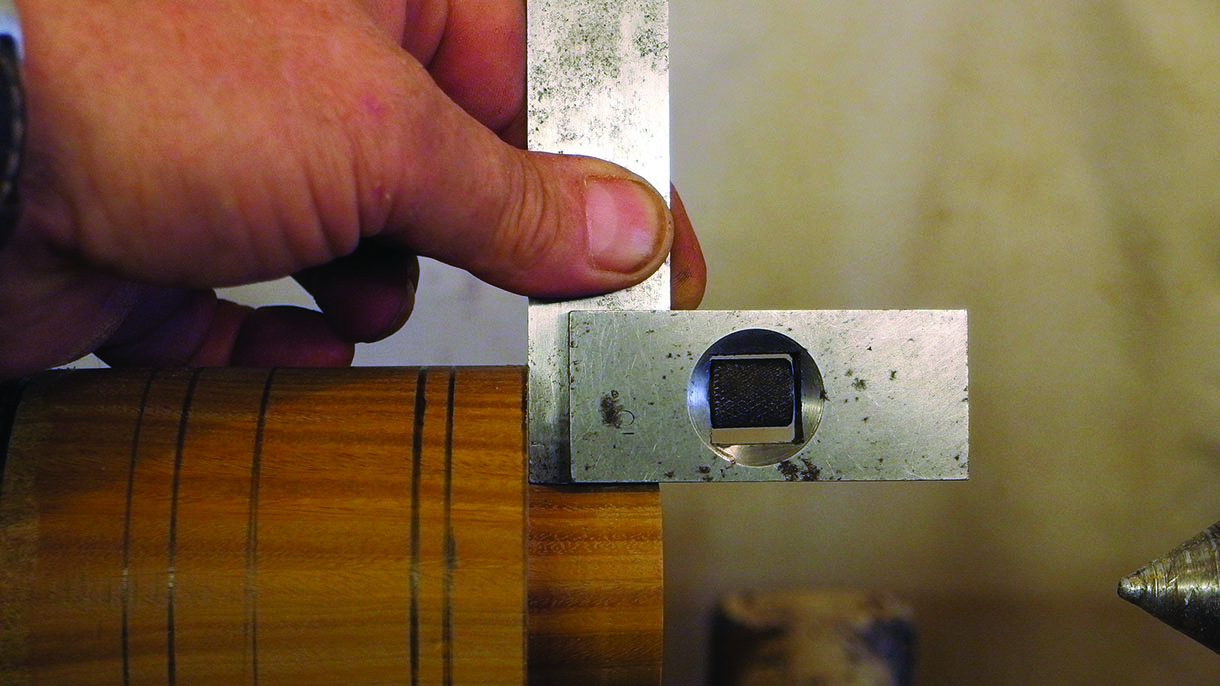
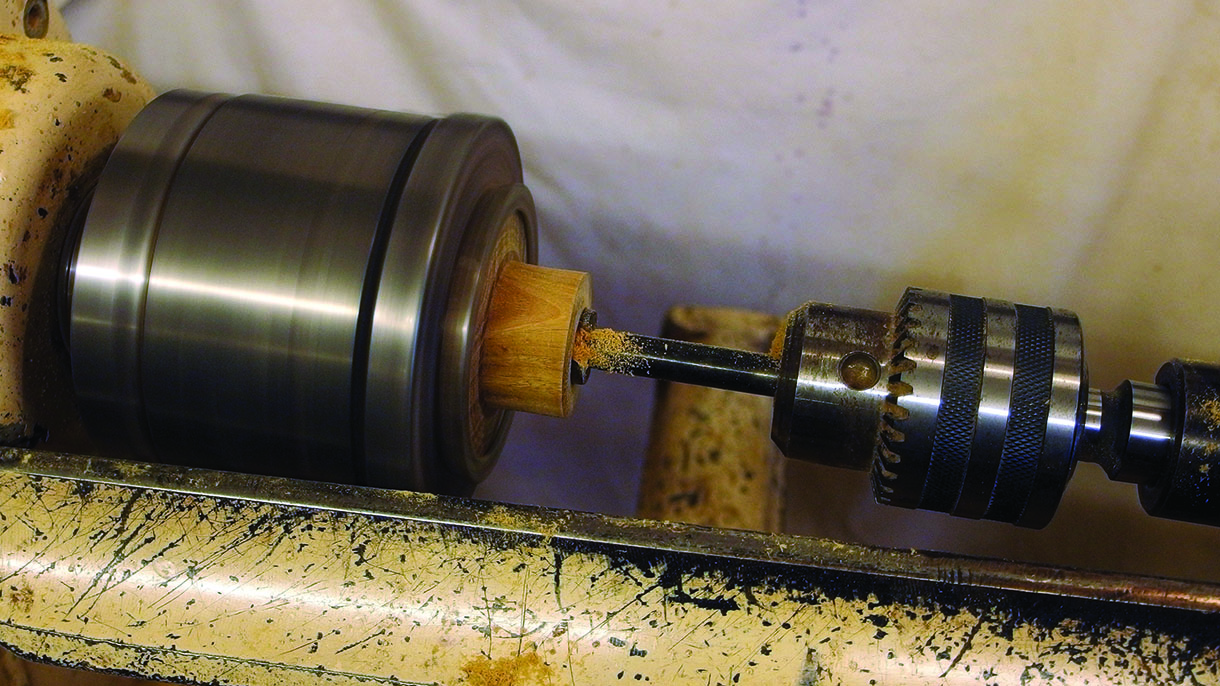
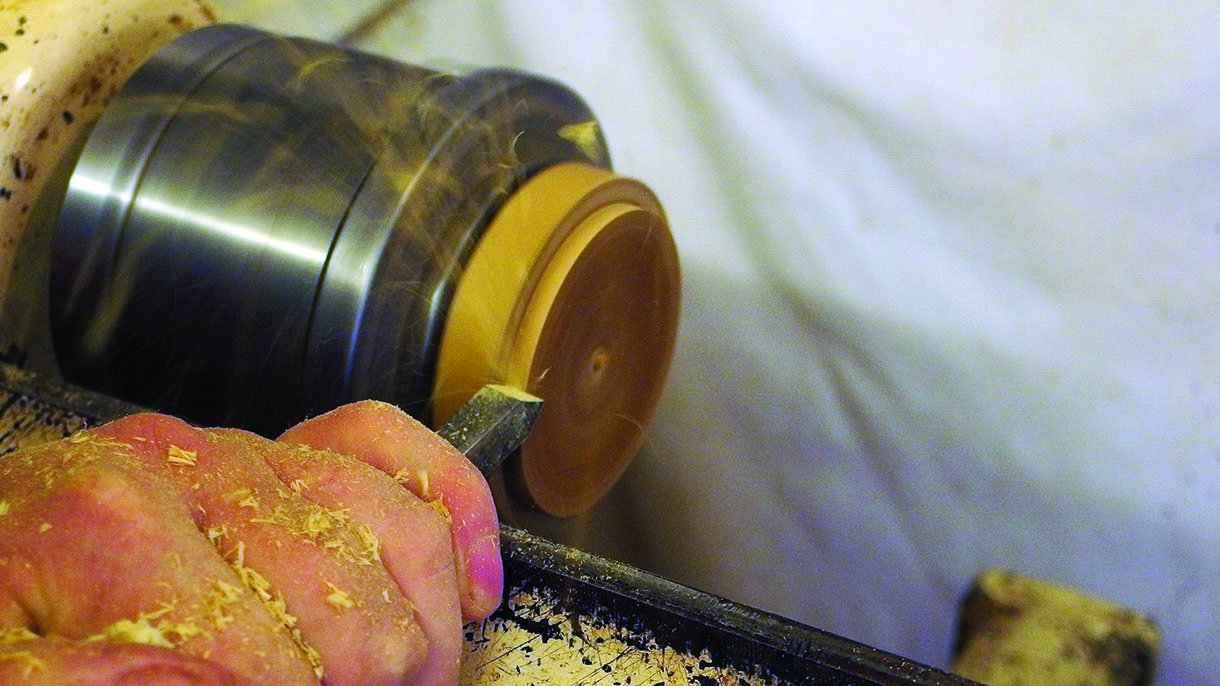
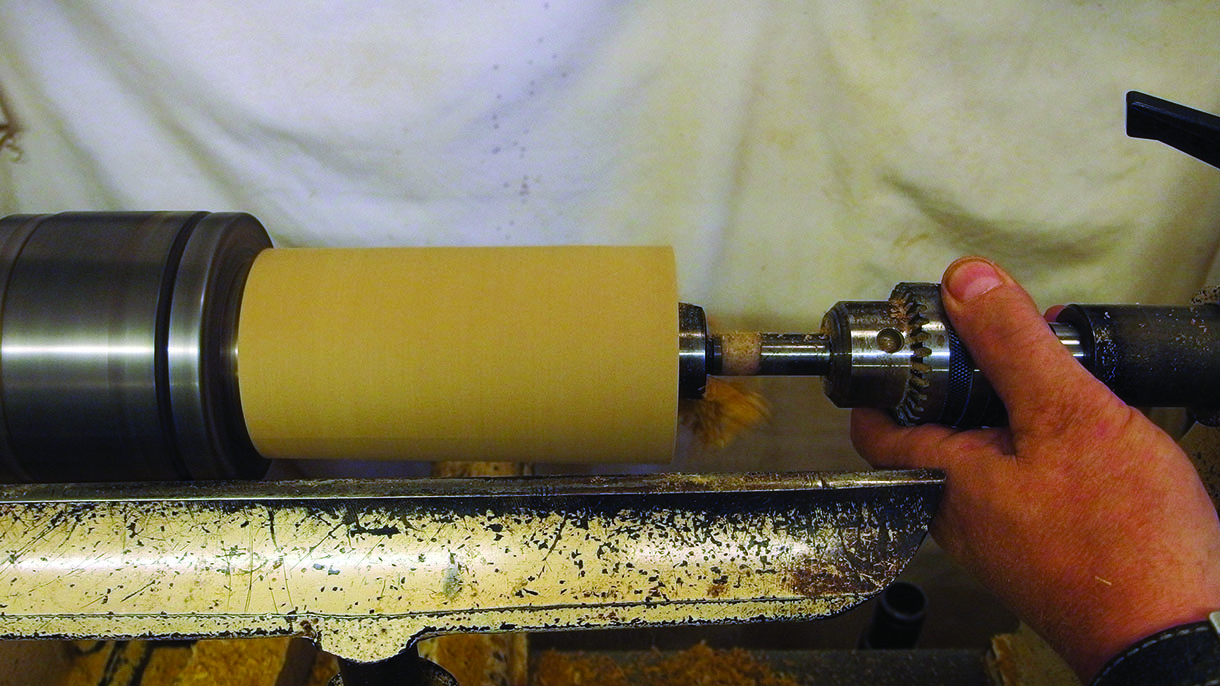
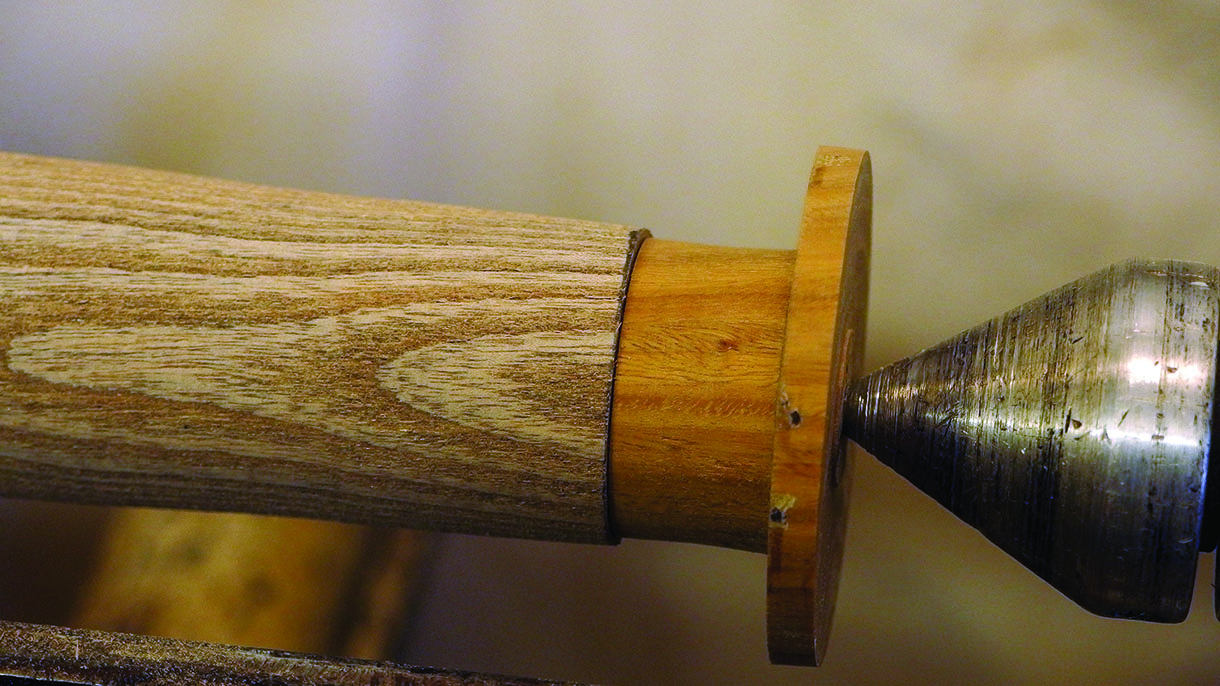
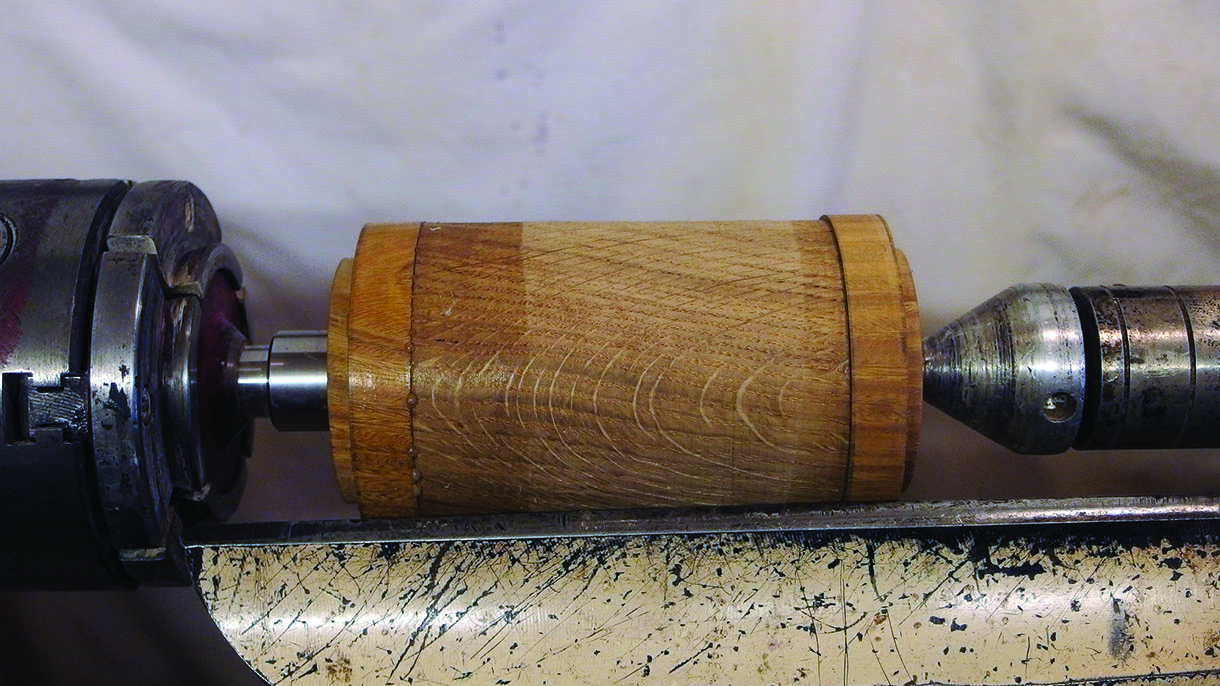
1. Mount the oak block between centres and using a spindle rouging gouge, take down to a 75mm cylinder. True the end face using a 10mm parting and beading tool and turn a spigot to suit your scroll chuck. Set the blank to one side2. Next, mount the lignum blank between centres and take it down to the maximum cylinder. Turn a tenon on this blank to suit your scroll chuck. Remount the lignum block on the tenon. Ensure blank is true. Clean up the end face with the 10mm parting and beading tool3. Mark the lignum blank; the blank will produce three separate pieces which will become part of the oak head. It is vital that all cut surfaces are flat and even, and that each is the same size as the other to ensure that finished weight it even and balanced. Take care marking out and turning the pieces. Using a freshly sharpened 10mm parting and beading tool turn the first section, at the tailstock end, down to a 38mm parallel tenon 25mm long. If using callipers make sure the tips are rounded rather than flat with a tapered point as often supplied. Take care to ensure accurate dimensions4. The face adjacent to the tenon needs to be flat to ensure a perfect fit later. Use a square to check progress. The blank includes 6mm of excess material on the face, so if you need to adjust the cut to make it perfect, you have a little excess to play with. Using a freshly sharpened 2mm parting tool, part off the first section from the lignum blank. Ensure the cut is straight in to the blank and, if comfortable doing so, part directly off the remaining blank. If you are uncomfortable doing this, part down to a narrow stub and complete with a fine saw with the lathe switched off. Repeat the process to create an identical copy from the remaining lignum5. You will be left with a stub of lignum approximately 32mm long. Turn this down to produce a 38mm parallel cylinder 25mm long. If the blank allows you can make this a little longer. Using a 19mm Forstner bit in a Jacobs chuck bore a hole 13mm deep. Ensure the face edge is parallel and clean6. Mount one of the two lignum components on the 38mm tenon. Turn a tenon to suit your chuck on the last marked section (this will be removed later). Remove from the lathe and repeat for the second lignum component7. Remount the oak blank on the tenon. Ensure the blank is true. Using a Jacobs chuck and a 38mm Forstner bit, bore a hole 25mm deep into the end of the oak blank. Do not force the bit in to the wood, and withdraw to remove shavings during the process8. Next you need to glue one of the lignum end caps into the oak blank. You can use an epoxy glue or a good quality wood glue here. A further option is to use hide glue. This gives the advantage of making the end cap removable later on should it become damaged in use. Remove the blank and clamp the joint until cured; 24 hours is usually the ideal cure time, but some modern wood glues have faster cure times and enable a faster return to work9. Now mount the 330mm ash blank between centres and take the blank down to a cylinder. Check there are no splits or faults in the wood that would weaken the handle. Turn a 19mm tenon 13mm deep at the tailstock end. Ensure the tenon is accurate and the face edge parallel and is clean
Mallet handles
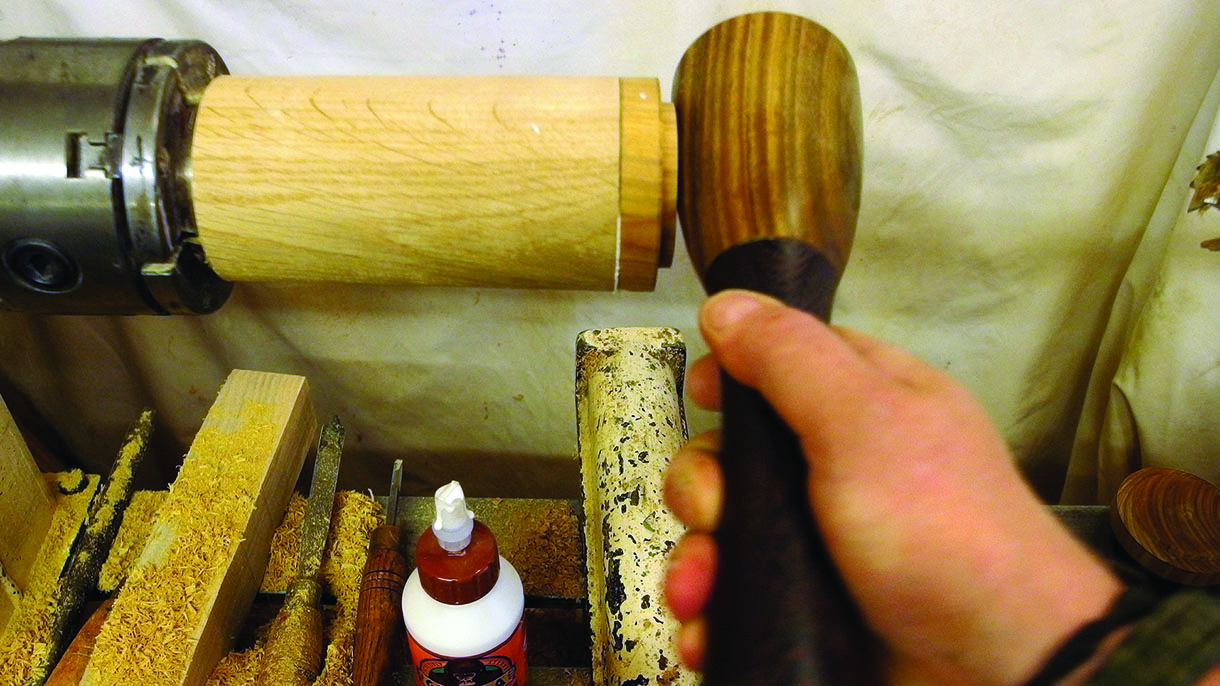
Mallet handles should be made from species known for strength and flexibility. Using a wood of contrasting colour and grain to the head adds a pleasing aesthetic to the finished tool. Handles can be fitted in a glued stopped hole, or with a wedged through hole; the choice is often based upon perceived strength of the connection between head and handle, but may also be an aesthetic consideration.
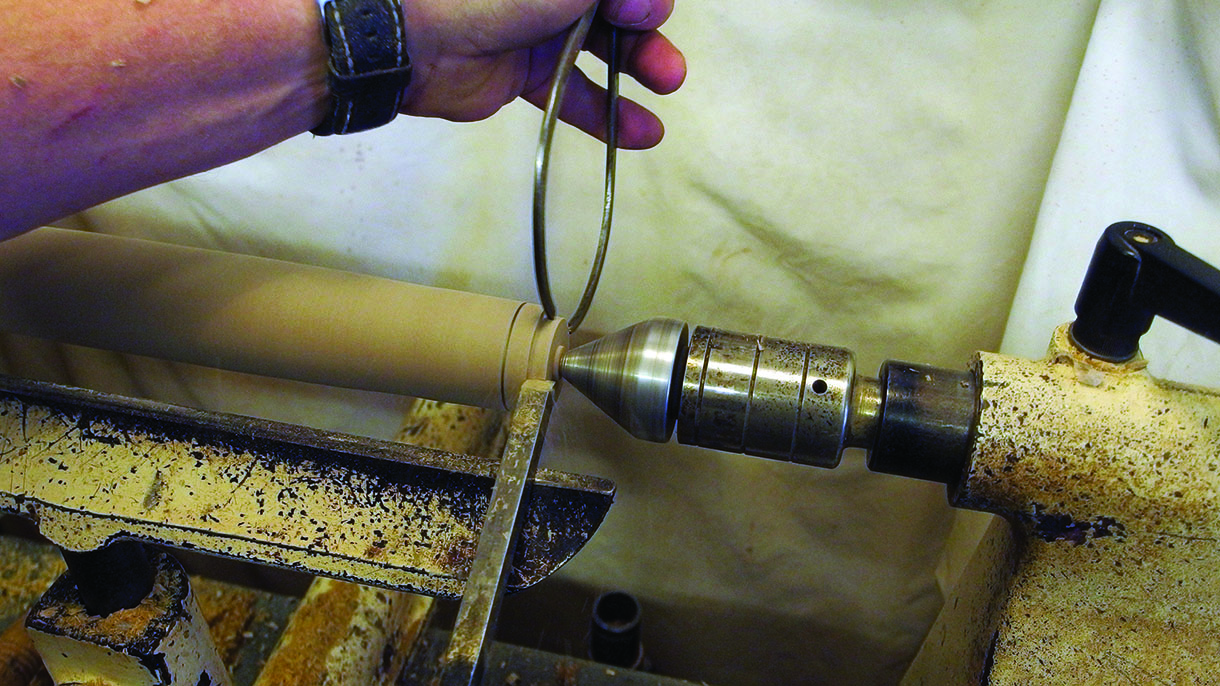
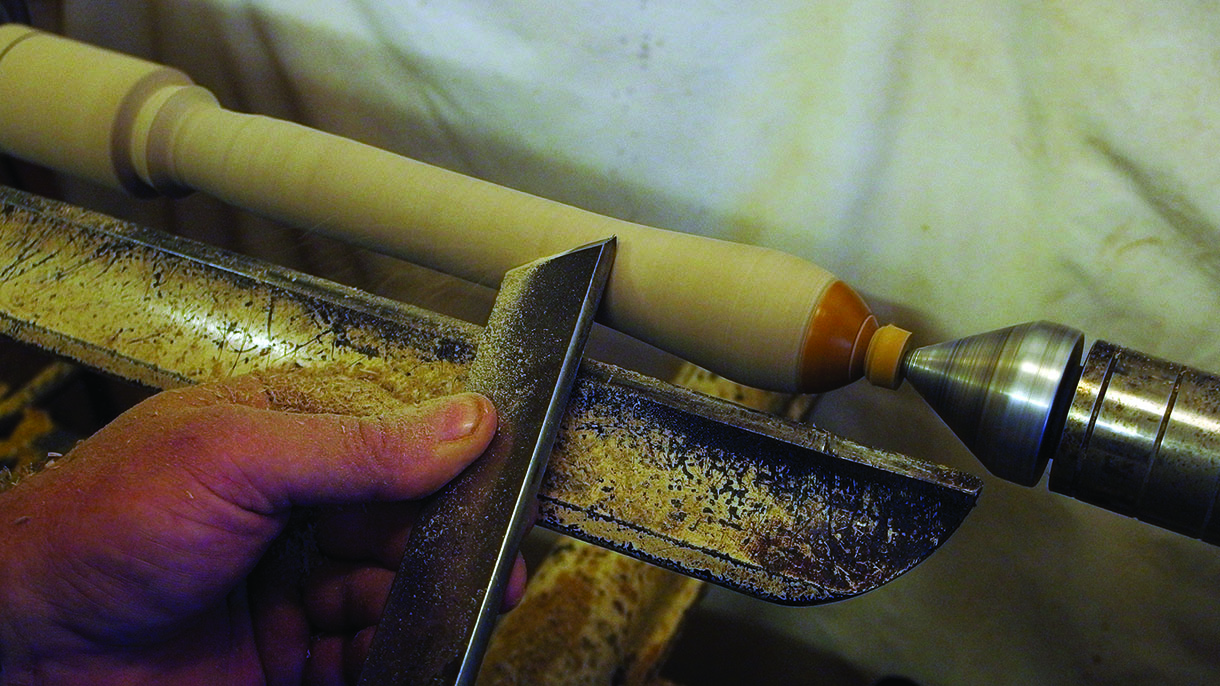
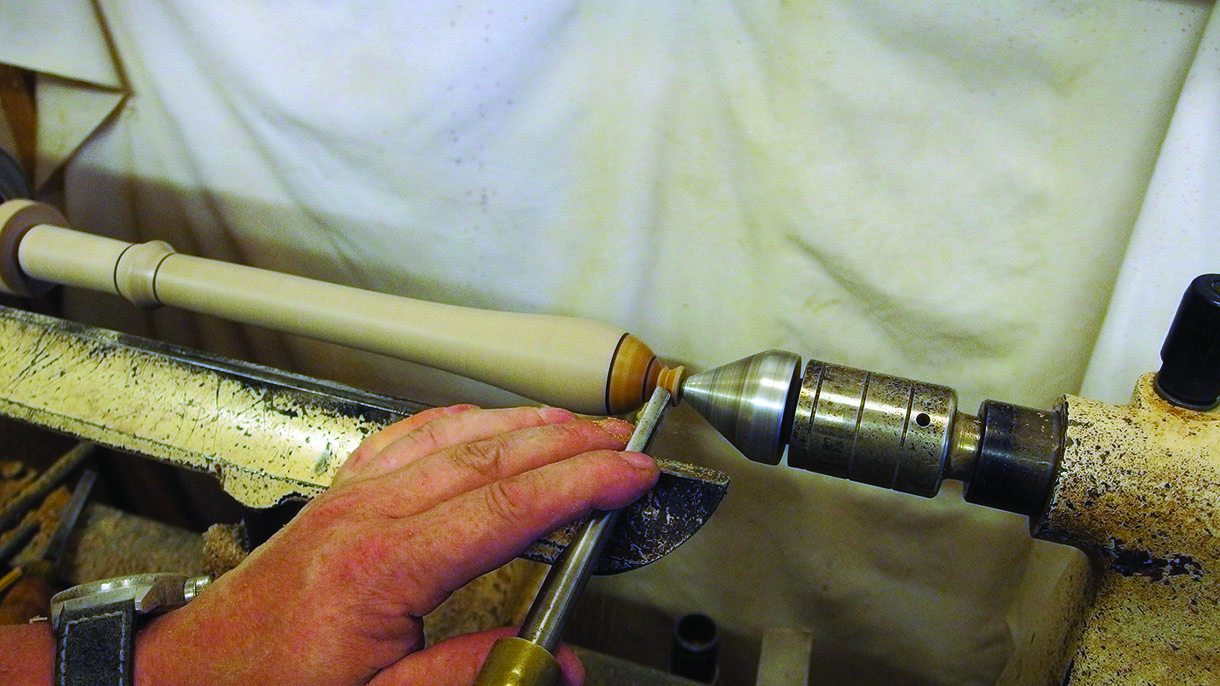
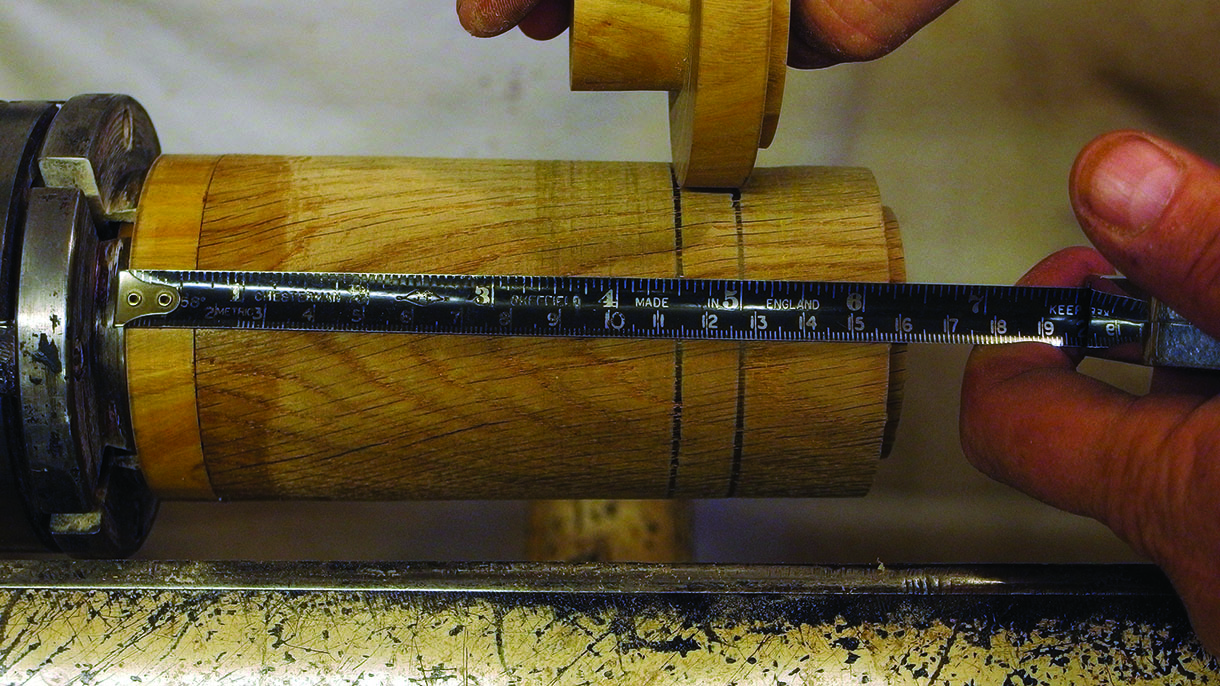
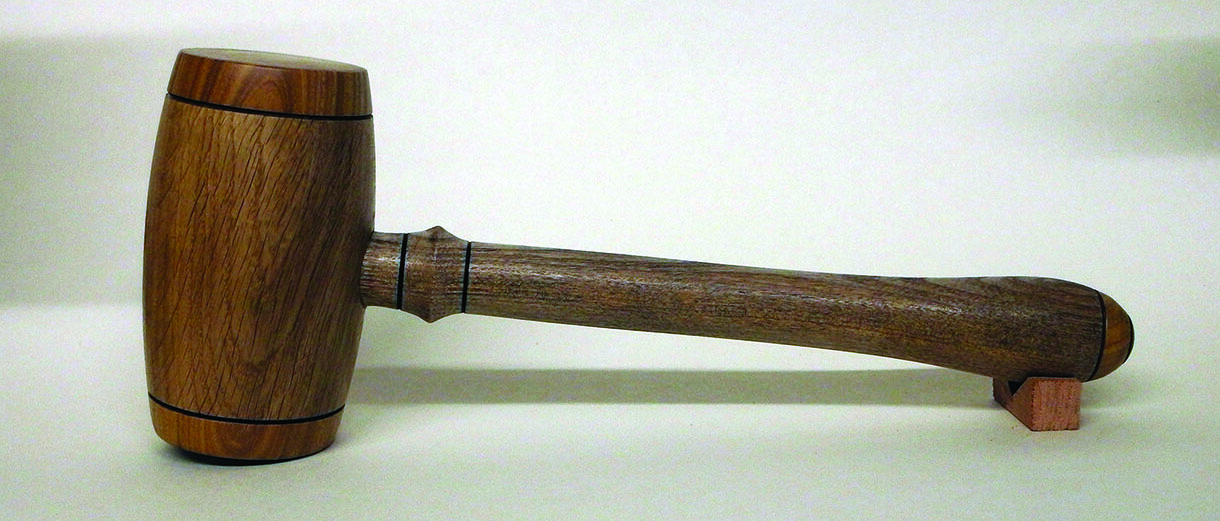
10. Loose the handle blank in the chuck and take the third lignum component. Glue the piece to the tenon on the end of the handle and mount between centres to cure. Use a spindle gouge to shape the end of the handle at the ash/lignum join. Be conscious of the ash tenon inside the lignum. Shape the end, leaving a 10mm stub to remove later. Take light cuts11. Continue shaping the handle. Turn a tenon, 63mm long and 25mm diameter at the headstock end of the blank. This tenon needs to be accurate and true. Refine the overall shape. Stop the lathe frequently and check the feel of the handle. Make sure it fits you12. Make a series of decorative ‘V’-cuts and scorch definition lines into the handle. Abrade the handle to a finish and seal all but the tenon. At the tailstock end complete the shaping as close to the drive centre as possible. Any remaining stub can be carved off and cleaned up later on. If comfortable doing so, part off the handle at the headstock end13. Remount the oak using the lignum end cap tenon to hold the blank. Mark up to create a mallet head with a length of 125mm finished. Remember to include the 13mm of lignum in the measurement. Part of the excess14. Using the Jacobs chuck and a 38mm Forstner bit, bore a hole 25mm deep in the end of the oak blank. Ensure the face edge is parallel and clean. Apply glue to the hole and insert the second lignum end cap. Clamp and allow glue to cure15. Mark the middle of the blank and 14mm either side. Mark a 63mm diameter on either end. Shape from the outer markers at the middle of the blank to the finished diameter on either end. Aim for a barrel shape16. Using a spindle gouge turn the end faces. I prefer to make one flat and one slightly convex. Make ‘V’-cuts at the glue joints and scorch definition lines. Next abrade the mallet head, blending in the flat area at the middle of the blank. Seal the blank and mark the middle once again17. Using a support carriage, drill a 25mm hole 55mm deep on the centre mark. Take it slowly, and ensure the hole is true and does not waver. Glue the handle into the head and clamp. A bicycle inner tube can be used as a strap for this job if you do not have a suitable clamp. Once the glue is cured you can oil the mallet with boiled linseedAnd here we are, a beautifully sturdy finished mallet
And here we are, a beautifully sturdy finished mallet.
To provide the best experiences, we use technologies like cookies to store and/or access device information. Consenting to these technologies will allow us to process data such as browsing behaviour or unique IDs on this site. Not consenting or withdrawing consent, may adversely affect certain features and functions.
Functional
Always active
The technical storage or access is strictly necessary for the legitimate purpose of enabling the use of a specific service explicitly requested by the subscriber or user, or for the sole purpose of carrying out the transmission of a communication over an electronic communications network.
Preferences
The technical storage or access is necessary for the legitimate purpose of storing preferences that are not requested by the subscriber or user.
Statistics
The technical storage or access that is used exclusively for statistical purposes.The technical storage or access that is used exclusively for anonymous statistical purposes. Without a subpoena, voluntary compliance on the part of your Internet Service Provider, or additional records from a third party, information stored or retrieved for this purpose alone cannot usually be used to identify you.
Marketing
The technical storage or access is required to create user profiles to send advertising, or to track the user on a website or across several websites for similar marketing purposes.