Cherry Greenman

0

Cherry Greenman
Duane Cartwright carves a fun cherry greenman

Duane Cartwright carves a fun cherry greenman

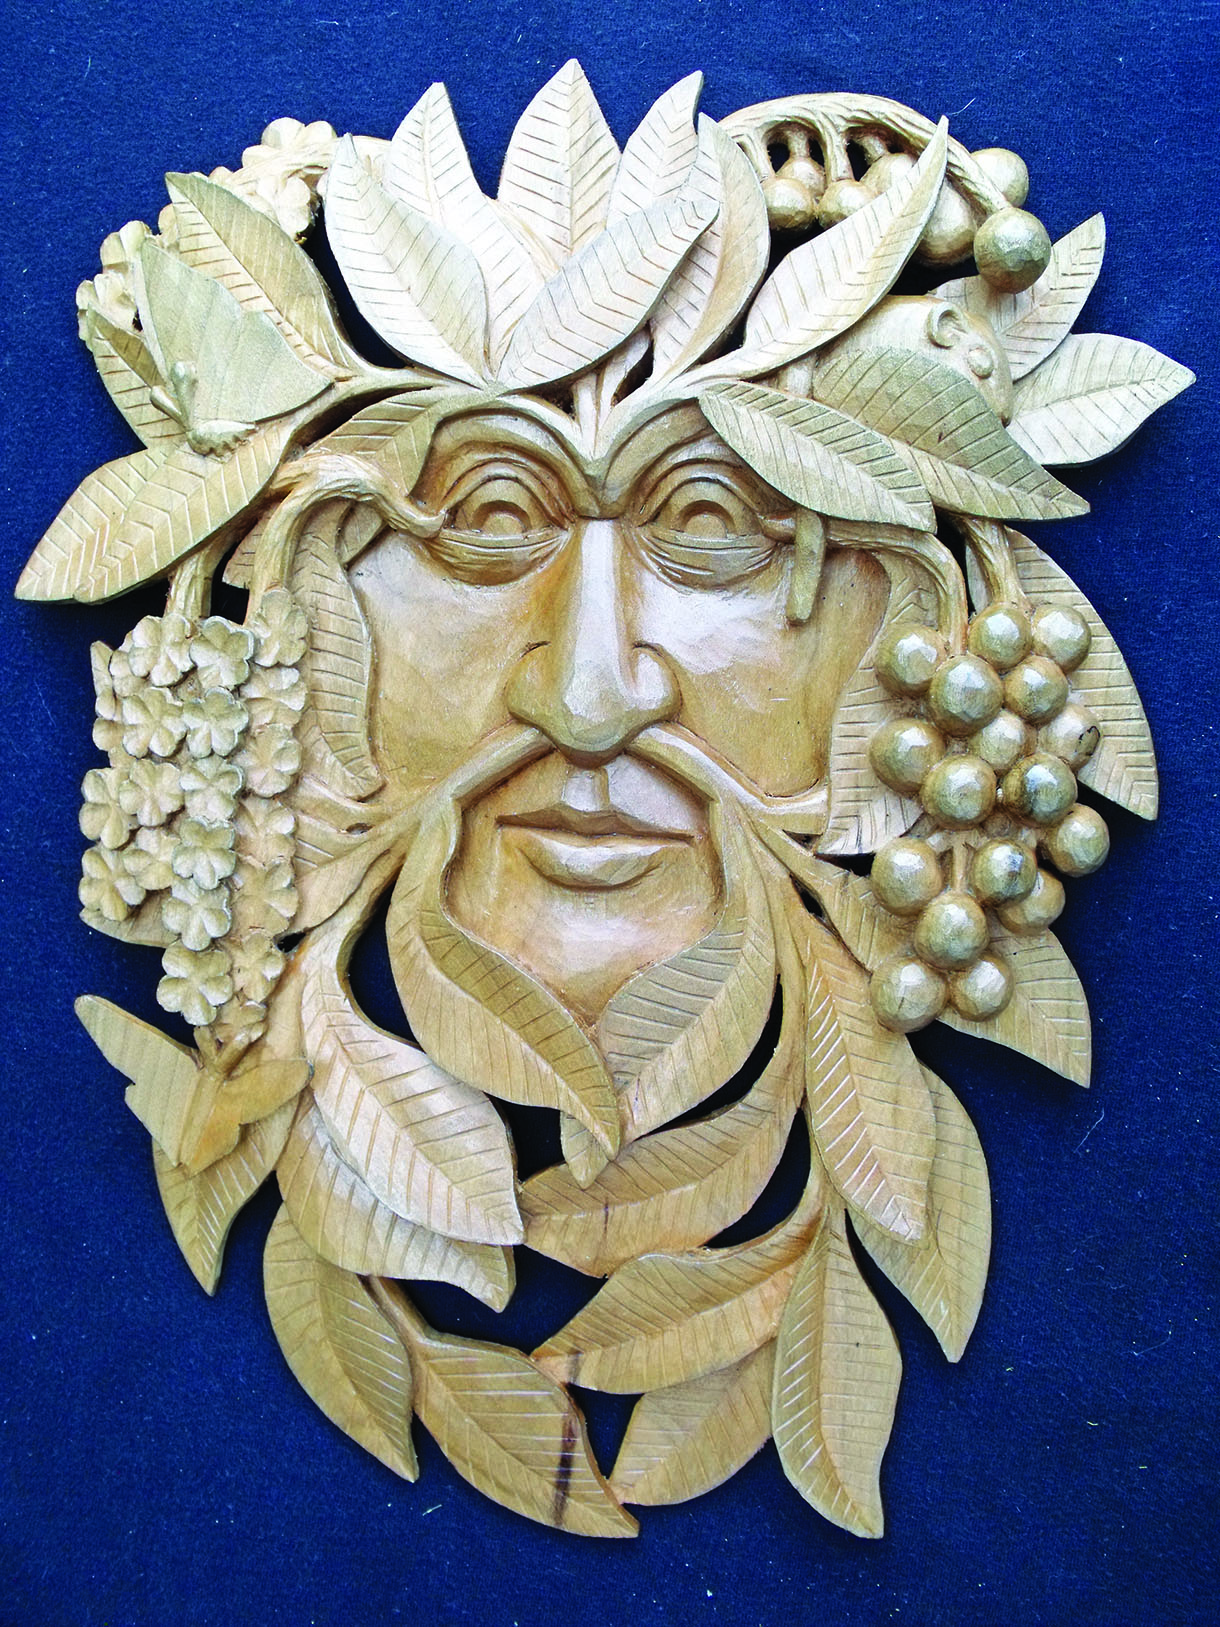
The greenman as a carving subject is more popular now than ever and in his many guises it’s easy to see why. The greenman also has different meanings to different people and cultures around the world, but for me it’s how we put a face to nature; the fusion of man and nature, how we hold nature and its future in our hands, but also how we are entwined with it. For us woodcarvers we are even more entwined as our chosen medium is wood/timber and in carving a greenman we’re returning life to the wood. 
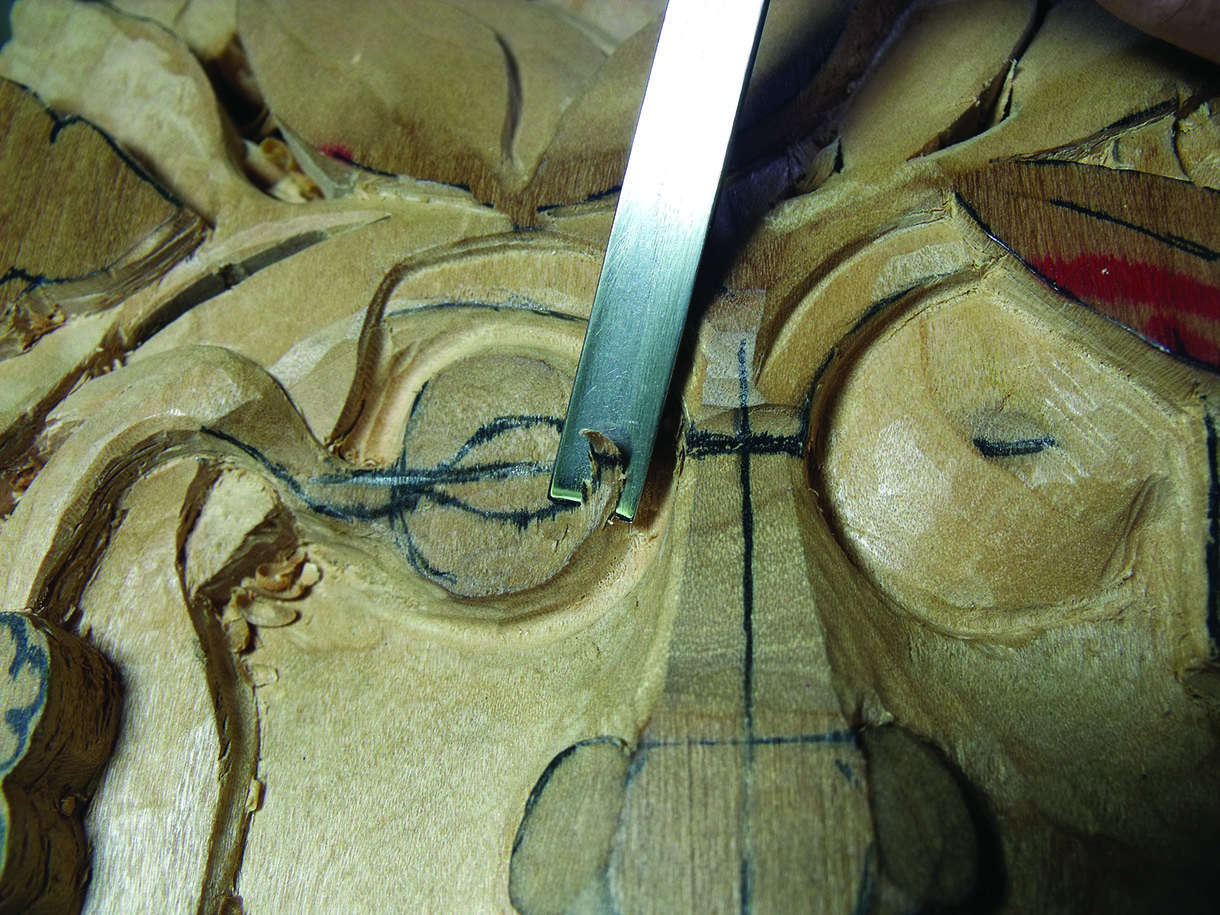
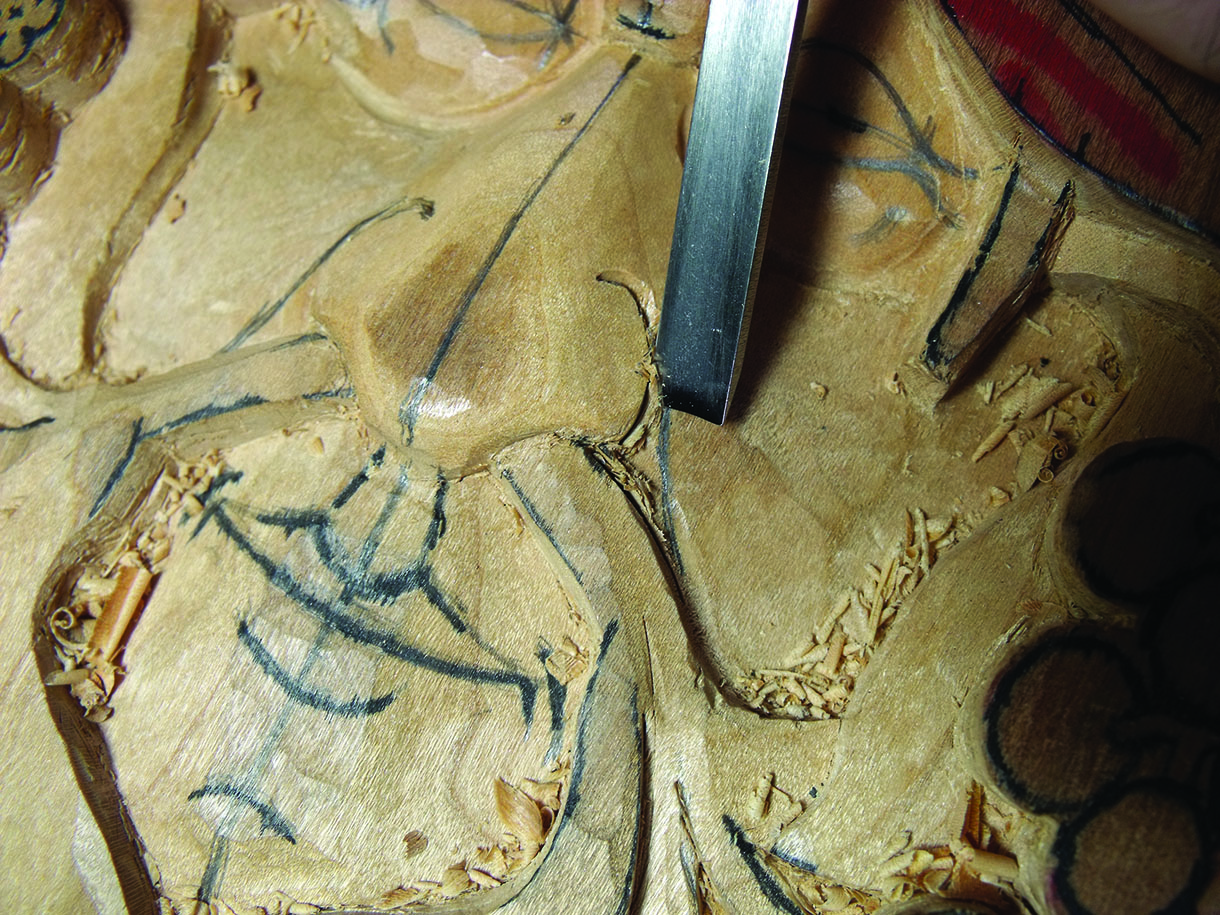
The other good thing about carving a greenman is it’s great practice for carving facial features, like the eyes and mouth which can be challenging and take practice, even poorly carved facial features can sometimes work and even add character to the greenman carving.
For this greenman and some others I’m carving at the moment, I’m trying to follow a theme of carving each greenman so the foliage matches the species of wood. This greenman is carved in American black cherry wood (Prunus serotina), so the leaves, flowers and cherries are from the black cherry tree, the butterflies and mouse are species that live or feed from the tree. This theme in theory could be used with most species of wood, it comes down to researching the tree’s leaf shapes and the creatures that live in and around the particular tree. 

Things you will need
This list of tools is what I used and is a guide only. Try using the tools you own before buying any new tools as this carving can be carved with any basic selection of tools.
Tools
• Bandsaw or jigsaw
• Pillar drill or hand drill
• Scroll saw or coping saw
• No.9, 14mm
• No.9, 5mm
• No.11, 3mm
• No.7, 6mm
• No.7, 9mm
• No.6, 4mm
• No.6, 14mm
• No.3, 8mm
• No.2, 20mm
• No.4, 9mm fishtail gouge
• ‘V’-tool, 2mm
• Hooked skew
• Depth gauge
• Dividing callipers
• Laser level
Wood
• American black cherry – 310 x 240 x 25mm

Design
When designing your greenman start with an oval egg shape and draw a cross in the centre. Then draw some eyes on the horizontal line and the nose on the vertical line, then using a list of the leaves, flowers and creatures you want to add, start to draw the placements of the leaves, rearranging and redrawing them until you’re happy with how it looks.
If you find drawing difficult, then make some cardboard templates of the leaf shapes you want to include.
Then draw around the templates, and keep rearranging and redrawing them until you’re happy with how it looks. Of course, you can use the design provided or even make some changes to it, making it more personal and to your liking.
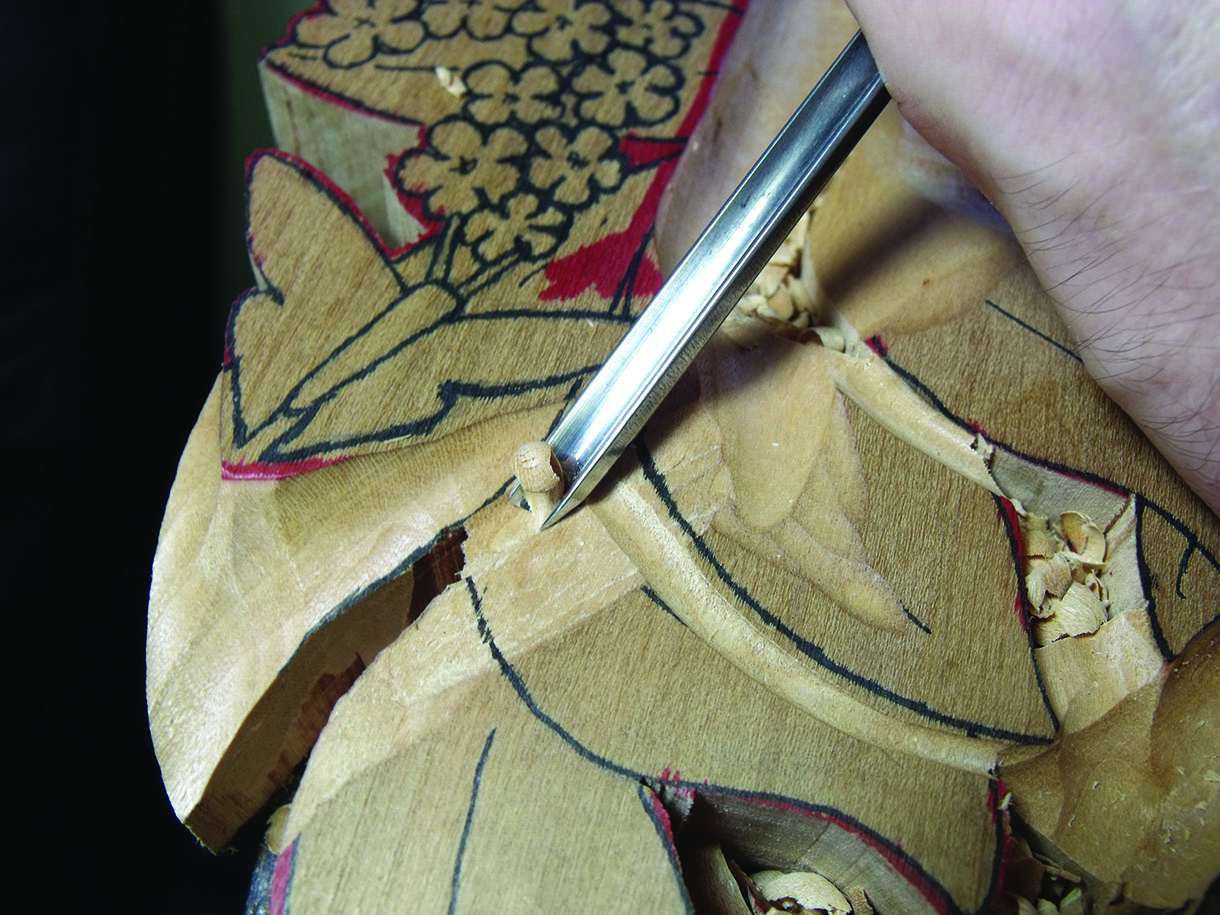

Whether you use the design provided or you make your own, start by printing the design at the required size for your piece of timber, then either glue the printout onto the wood or trace it on by rubbing a carbon stick over the back of the print and trace over it. Now if you want a pierced relief as I have done, you will need to drill and cut away the waste with a bandsaw/jigsaw or by hand with a coping-saw, or you could carve it as a relief panel and carve the background down to a thickness of about 5mm from the back.

1. First, drill some pilot holes in the inner waste areas. You need the hole to be big enough to get a jigsaw  or coping saw blade through it, to be able to cut out the waste wood. If you’re carving a relief panel, then drilling out the waste areas to just above the required depth of about 6–7mm from the back  can help speed up the lowering of the background

2. Now using a bandsaw/jigsaw, or a coping saw cut out the inner waste areas first, then cut out and remove the outer waste areas. If carving a panel, use the best fitting gouges to cut in around the outline and lower down the background

3. With the carving secured to a bench or carving vice, and with a large deep gouge, carve down the sides of the nose and out across the cheeks, hollowing out the eye and cheek areas up to the flowers and cherries on each side and down past the mouth area

4. Using a 5mm or similar deep gouge, sketch out around the leaves and areas that over and under lap each other separating the various features. By sketching out with a gouge rather than cutting in and creating stop cuts, this will allow for change later if a bit breaks off, and it doesn’t leave any stab marks that will need to be removed or they will show up after the carving is polished

5. Use a large deep gouge to carve down some of the lower leaves. When bolstering in the leaves look how they overlap each other and think of how strong each leaf will be after it’s carved. Angling the leaves in different directions will add to the overall effect of the carving

6. Use some dividing callipers, plus the pattern, to redraw the rough placement of the eyes and the stems coming out from the nose. Then, with a deep gouge sketch them in and carve down the cheeks and surrounding waste

7. Keep checking the depth as you carve down around the eyes and cheeks. Make a simple depth gauge from a piece of scrap wood by drilling a hole in the middle, the same size as a dowel or pencil, have the piece of wood resting on top of the carving and push the dowel through until it’s flush with the back. Then make a mark on the dowel. This way when you place the depth gauge over the carving the gap from the top of the gauge to the mark you made will show how much wood is left for you to carve

8. Once the bulk of the bolstering in on the face is done, start cutting in around the flowers, cherries and leaves on both sides of the face

9. Now slope the nose back to the bridge and redraw the centreline. Then, with a deep No.11 gouge or similar carve around the eyeballs, keep using the depth gauge to check both eyes are of equal depth

10. Now use a shallow gouge to round over the eyeballs – keep some wood where the stems will come out of the outer corners of each eye. Using a laser level or a profile gauge or even some card can help in drawing a straight horizontal line across the eyes

11. Set some dividing callipers to the width of the eye and measure the distance between the callipers, and from the vertical centreline measure equally half the callipers width on both sides of the centreline, marking the inside of each eye. Then, from the inside eye mark use the callipers to measure to the outside corner of the eyes

12. With the callipers set for the eyes you can use them to mark out the width of the mouth. Measure out from the centreline to each corner of the mouth. This will give you the rough width of the mouth. Draw on how you want the mouth and whether you want a smile or frown. Also, how you carve the mouth will affect the eyes and cheeks so make sure you’re happy with your drawn-on features before committing by carving them in

13. Before carving in the eyes and mouth, continue shaping the nose. Round over the tip of the nose and slope back the nostrils, cut in around the edge of the nostrils with the best fitting gouges, then with a shallow gouge carve down the sides of the nostril’s blending into the surrounding cheek

14. Carve in the septum up to the nose and the stems coming out of the nose. Now either use a ‘V’-tool to carve a groove between the lips, or create a stop cut with a tap from a mallet, then use a very shallow gouge to carve in the top lip. Then with a deep gouge carve under the bottom lip around to the corners of the mouth, now using a shallow gouge reversed round over the bottom lip

15. Now back to the eyes. Once you’re happy with the shape of the eyes you’ve drawn, use the best fitting gouges to cut in, creating a stop cut on the top eye lids. Then, carve up to the stop cuts. Remember to carve in the stems coming out of the corner of the eyes and the mouse’s tail

16. Now, again with the best fitting gouges, cut in the bottom of the eyes, then using a hooked skew or similar carve from the top of the eye down to the stop cut you just created, rounding the eyeball, carving deep in the corners of the eyes

17. Draw the iris in place so half of it is hidden under the bottom eye lid. Use a No.9 gouge to cut in a stop cut, step back  millimetres and carve up to the stop cut

18. Continue carving foliage. Use the best fitting gouge to create a circle that fits the circumference of the cherries, then cut in. Lower the rest, redraw and cut in. Use a reversed gouge to round over the cherries

19. Use the same gouge to cut in the flowers into circles, cutting in the highest ones first. Redraw and cut in. The flowers need to be angled. Once the blossom circles are carved, draw the shape of the petals. Once drawn, cut in, then using a deep gouge with a rolling cut carve from the outer edge of the petals to the centre

20. Use a deep gouge to carve down the centre of the butterfly, then a shallow gouge to slope the wings in. Draw the body of the butterfly in place and use a Veiner to carve down both sides. Round over and finish sloping the wings

21. Draw the centre veins onto the leaves and use a Veiner No.11 gouge to carve them in. Slope the leaves into the centre

22. Start undercutting some of the leaves. Bolster in the mouse’s body shape, draw in and use the best fitting gouges to cut in and carve the features

23. If carving a relief panel, continue undercutting. If carving a pierced relief then, before you finish undercutting, turn over the piece and draw on the leaves under/overlaps. Now back cut and check the back blends with the front

24. Finish undercutting, then carve in the other leaf’s veins

25. Finish and check the carving. Sanding is a personal choice but I left the carving with a tooled finish. Once happy give it a coat of sanding sealer and once dry, cut it back to remove any raised grain. Then apply your chosen finish, add a picture hook to the back and you’re done

Share.

Leave A Reply

This site uses Akismet to reduce spam. Learn how your comment data is processed.