In this two-part series, expert turner Kurt Hertzog shows you how to turn a segmented piece.

You are probably familiar with what a segmented turning bowl looks like. One could almost describe it as a chess board that has been bent into a bowl. Fortunately there is an easier way to make one. The goal of this article is to awaken a desire among the ‘never-have-segmented’ crowd. I’ll provide a simple, low-tech method to get started with. No need for software analysis and design tools – just a piece of graph paper and perhaps a calculator. Multicolour, multi-species feature rings can wait until the basics have been mastered. We’ll start with a segmented turning blank from a single species board using common tools, wood adhesive and some rubber bands or tape. If you have or have access to a tablesaw, mitre saw or bandsaw, along with the regular shop supplies like abrasives and glue, you are ready to begin.
What is segmented turning?
Segmented turning is a form of woodturning where often different varieties and colours of wood are glued together and turned into an object. This can create some interesting textures and patterns. As you can probably imagine, segmented woodturning is far more involved than simply turning from a single piece of wood. It requires many more processes, types of machinery, design stages and glues, and this can bring some advantages when it comes to turning. If done well, the results can be nothing short of wonderous.
Safety
The usual turning safety guidelines always apply when you are woodturning or doing other work in the shop. Wear safety glasses, no loose clothing and dust protection as needed. In addition to the standard precautions, make sure you are familiar with and follow all safe operating procedures for using a tablesaw, bandsaw or mitre saw. We will be cutting many small pieces on one of these. It is easy to become complacent. Pay attention to what you are doing and at any sign of fatigue, stop. Use the appropriate clamps, stop blocks and push tools to keep your hands always in a safe place. If you are not familiar with the use of any of this equipment, get assistance from someone who is.
Why segmented turning?
If we aren’t going to turn designs or fancy shapes, why do segmented turning? There are many advantages to segmented turning that have nothing to do with the art of it. Even if you only work with one species of wood, you have two huge advantages that can’t be matched with the standard wood blank.
Face grain
First and foremost, with proper design and construction, all turning can be on a face grain – not a bit of end grain to be dealt with. Face grain is ideal as it sands uniformly and finishes very nicely. That alone can be worth doing segmented turning.
Availability
The other big advantage to segmented turning is obtaining blanks that couldn’t otherwise be found or afforded. If you want to turn a vessel that is two metres, you’d be hard pressed to find a single blank that would be affordable and easily handled.
Minimal wastage
Furthermore, by avoiding large amounts of waste from boring out a single blank, your segmented blank puts sufficient wood where it needs to be, with little waste. That said, savings in shavings does come with a time penalty – creating the segmented blank takes considerable time and effort, though you can create sizes and shapes that cannot be found otherwise.
Access
You’ll appreciate the advantages of building your blank as you go. The process can be very dynamic and forgiving. For example, you can add or remove rings as you go. This gives you easy access to deep areas, and the ability to create subcomponents that can be assembled and finished, is another great advantage of segmented woodturning.

Planning your blank
While there is a variety of very useful software available for the planning of segmenting, the old-fashioned way of graph paper and pencil works well. Many of the world’s finest segmented turners still use a pad and pencil. For the sake of simplicity, I suggest you begin with eight segments per layer. It is an easily handled number both in planning and handling for glue ups. The example shown is only going to be a few layers to illustrate the planning process. Feel free to build higher and wider if you wish, but remember, we’re only covering basics. As such, we’ll plan the diameter and height of the final blank along with the number of layers based on the thickness of our stock. Some consideration for the wall thickness and shape gives is all that’s required for the design.
Type of wood and dimensions
Sometimes it is easier to start with the raw material dimensions and see what can be made from it. For example – what I could make from a plank in the shop. This wouldn’t have an ideal grain orientation, but it would be workable. Furthermore, as it was already milled and thickness planed, the thickness would be consistent throughout. Your stock will need to be a consistent thickness, or you’ll need to process it later to make your glue-up ring completely flat. I had 100mm wide pieces after removing the waning. By using a cut off of 100mm, I now had a consistent base of 100 x 100mm. Allowing for 10mm wall thickness, I’d need a width of 32mm to cut my segments. That worked nicely by ripping my 100mm wide plank into three pieces. Those three pieces of 815mm length provided 2438mm of segment stock. The running total of my circumferences is 2082mm, plus 32 kerfs – not enough to do another bigger ring and not enough to do a double smallest ring. A miss cut or two will risk losses, so plan for some extra.
Joint angles
The maths is pretty straight forward. A circle of 360° divide by eight segments yields 45°. That 45° split equally on each side of each segment gives you a cut angle of 22.5°. My arbitrary selection of outer diameters was for a simple shape. Each diameter multiplied by pi calculated the circumference. That circumference divided by the number of segments yielded the cut length of the long edge of each segment. That number will be used to set the stop block for each of the different rings when they are being cut.


Checking your saw accuracy
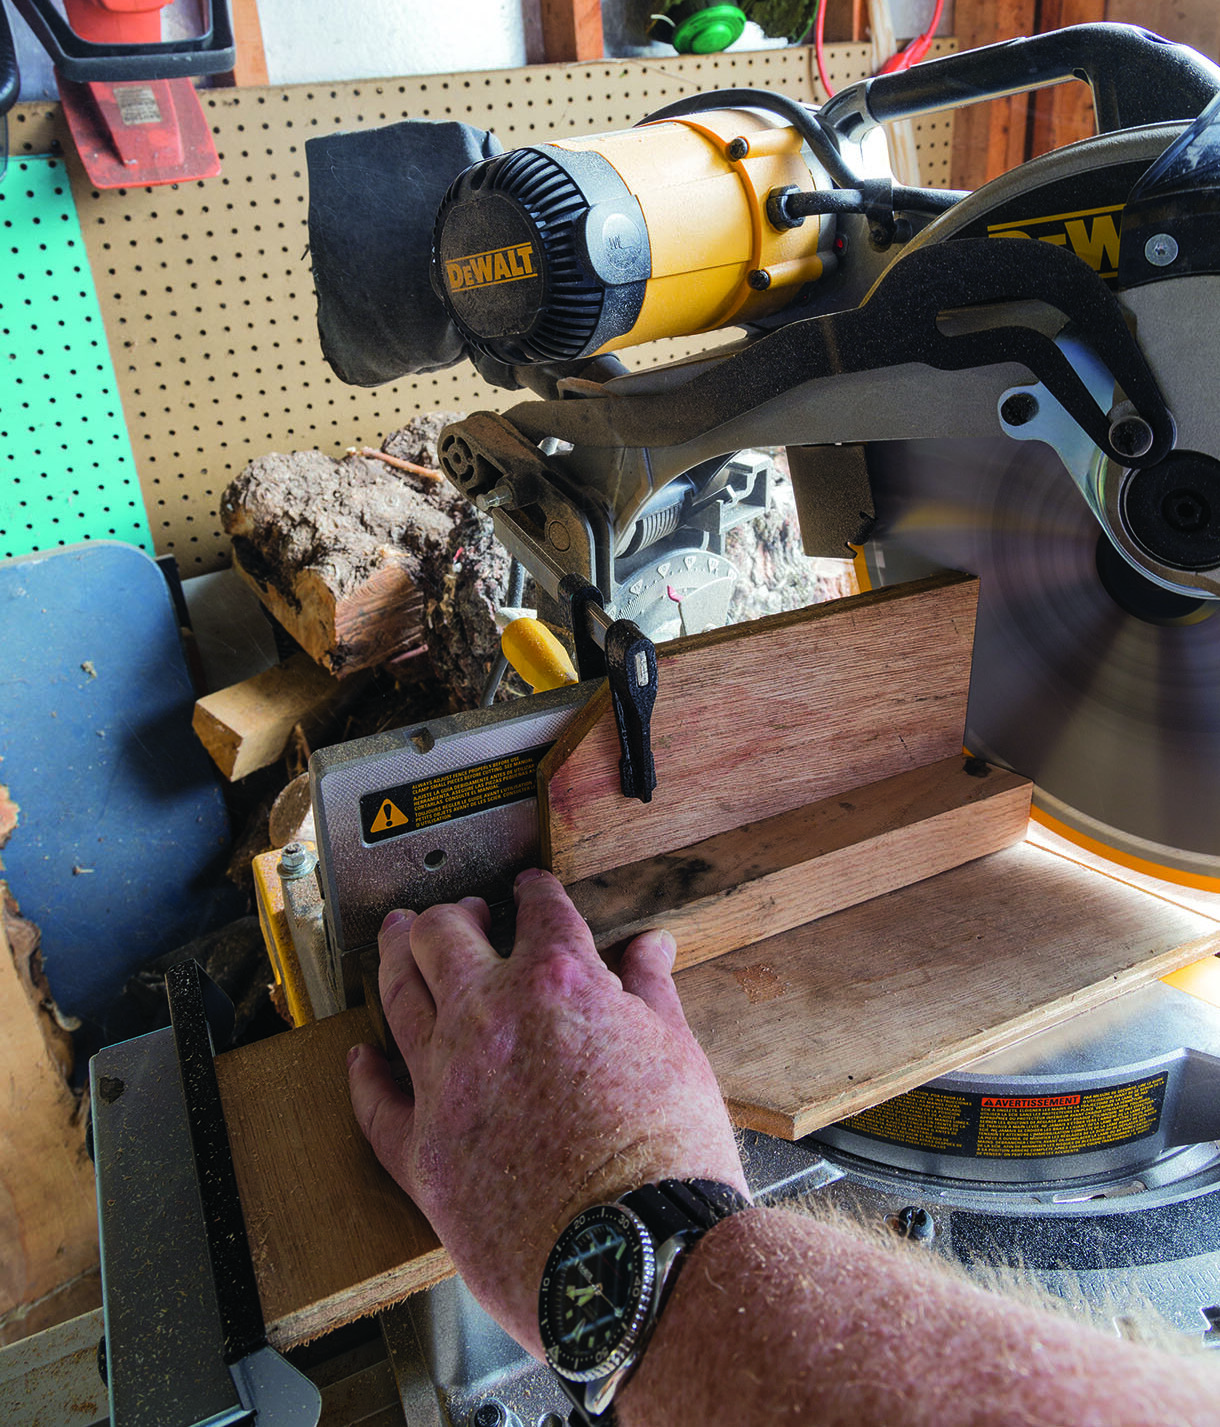
It sounds more difficult than it really is. The time spent checking and properly adjusting your equipment is fundamental to achieving good work. Nearly every saw needs some attention to accurately cut segments. Whether eight segments or 48, all cuts need to be at 90°. With our eight segments per ring, the cut on the side needs to be 22.5°. It should never be assumed that all equipment is set up properly – especially any piece of equipment with adjustable blades or tables. Regardless of whether a tablesaw, bandsaw or mitre saw, you need to check and be certain your blade is cutting at 90°. Once you have your cut at precisely 90°, you can begin to think about your angled cut accuracy. Regardless of price, nearly all equipment indicators are not accurate enough.
Set your mitre gauge on your bandsaw, table saw, or mitre saw for the desired angle. In our example, 22.5°. Set your segment length stop block at a reasonable distance. You can use similar sized scrap stock if you wish. Make your first cut. Flip the stock 180°, position the stock against the stop block, and make your segment completion cut. Cut enough segments to create a half circle. Check for any gaps, or a semi-circle more or less than 180° when the blocks are aligned. Adjust your angle and repeat this process until your segments fit together properly and are a true half circle. You can glue them up if you wish. Alternatively, you can measure each angle with an angle measuring too


Good practices
All adjustable angle equipment has a throat plate to accommodate the full range of blade angles. This big gap doesn’t help the quality of the cut. Supporting the stock as close to both sides of the blade as possible can improve the cut quality. When working with small pieces, a zero-clearance throat plate prevents loss of small cut pieces. I find that a reasonable quality sharp blade suits my needs when used properly. Depending on the saw type you use, proper speeds and feeds are key to getting precise, repeatable cuts of good quality. A blade that is not sharp or running true can be as troublesome – forcing things through, rather than letting them be cut, can lead to distortions and erroneous angles. Blade thickness will have an impact on your total kerf loss, though this is usually not worth worrying about. If you have a choice, a fine woodworking blade from a reputable manufacturer is likely to be superior to, say, a contractor’s blade.
For those using a bandsaw, you’ll need to temper your blade choice based on the material and thickness. A three TPI skip tooth blade may not produce good cuts in 3mm snakewood – much like a 32 TPI blade cutting 20mm cherry may burn. Before any cut, use some scrap of the same stock to test the setup and quality of the cut. When cutting segments, you’ll almost always cut across the grain. Without dwelling too much on blades, be aware there are designs available for ripping, crosscut and combination cutting.


Summary
Now you have carried out all the groundwork to ensure that your segmented rings will come together as required. You’ve designed your piece, prepared your materials, and set up your tools. The next steps are to cut the pieces and bring them together in preparation for turning. In the next article I will show you how to cut pieces, glue up them together, how to avoid common pitfalls, and amend any unwanted discrepancies in your work.
One Response
Dear and honorable teacher, hello
Don’t be tired
I am sending you a message from Iran.
I would like to sincerely thank you for preparing and presenting these very valuable trainings.
Your trainings are excellent and unique.
I hope that God Almighty will reward you abundantly for your efforts.
If there is a mistake in my message, please forgive me – because I do not know English well.
With many thanks
Mohammad Ali Ashrafi – Iran – Kashan.