
Nic Westermann looks at the methods available to sharpen these tools effectively
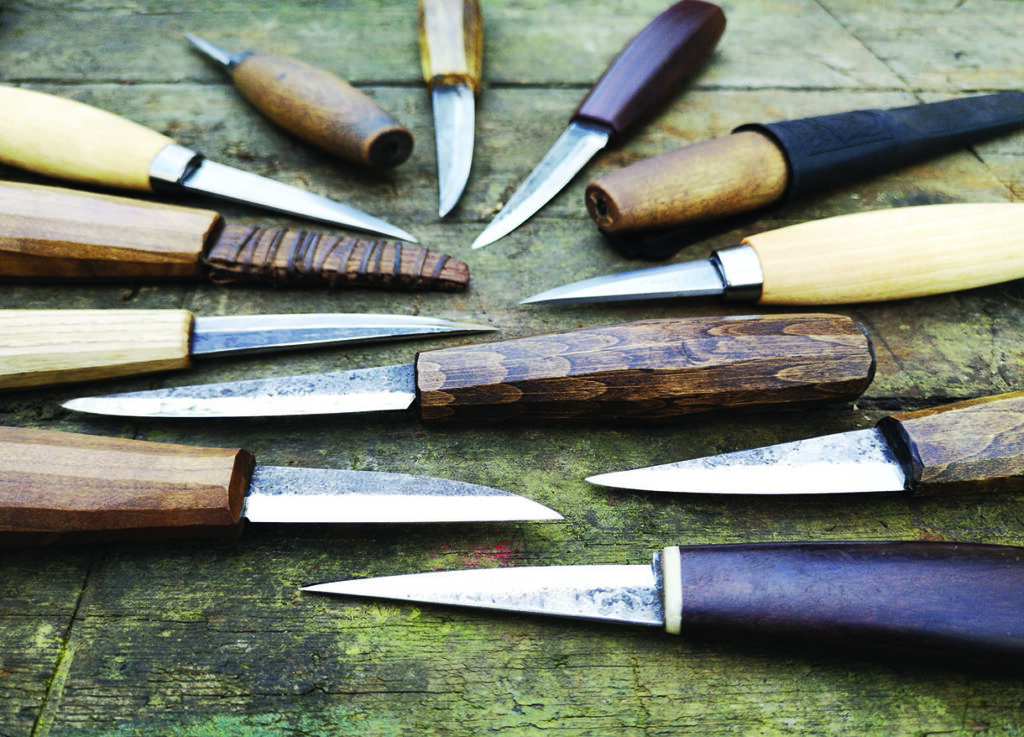
I should start by explaining what a sloyd knife is, as many will not be familiar with the term. It is taken from the Swedish ‘slöjd’, meaning craft, however it has morphed into a catch-all term for larger, slimmer carving blades, especially those used in green woodwork. Another feature of these blades is that they have the so-called Scandi (Scandinavian ) grind-flat bevels.
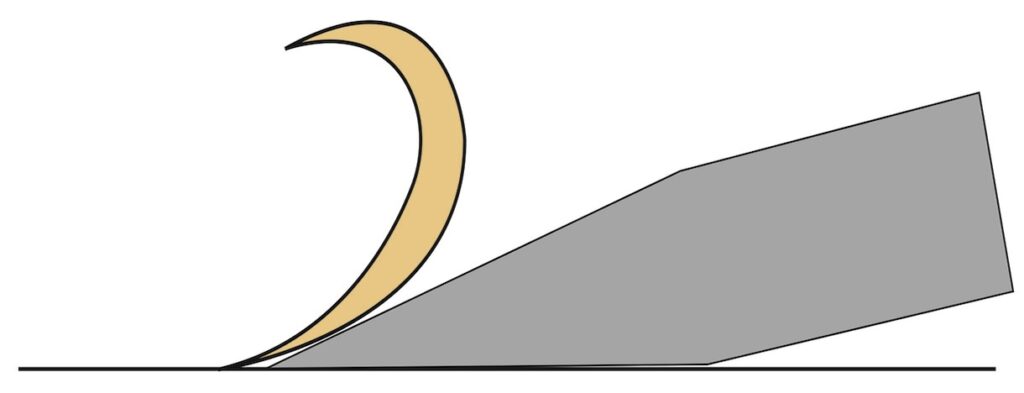
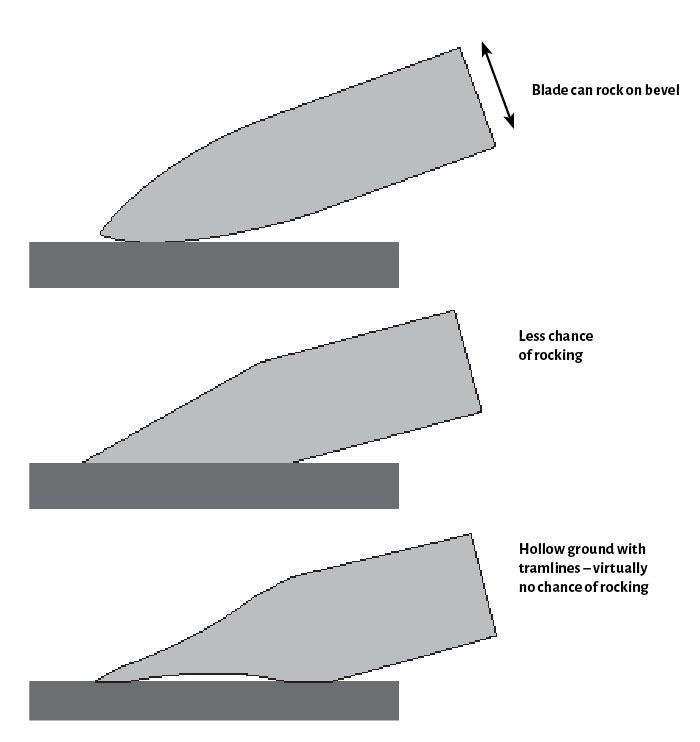
As the diagram shows, flat bevels excel at planing cuts as the long bevel guides the cut. This grind will stand up to a lot of abuse and is used on bushcraft knives. However, this edge profile does not excel at all cutting tasks – it will take a shaving very well, but as the bevel is long there is a pronounced wedging action if this bevel form is plunged. Try to cut a raw potato in half with one of these blades and you will quickly find yourself looking for a better implement.
Optimum profile
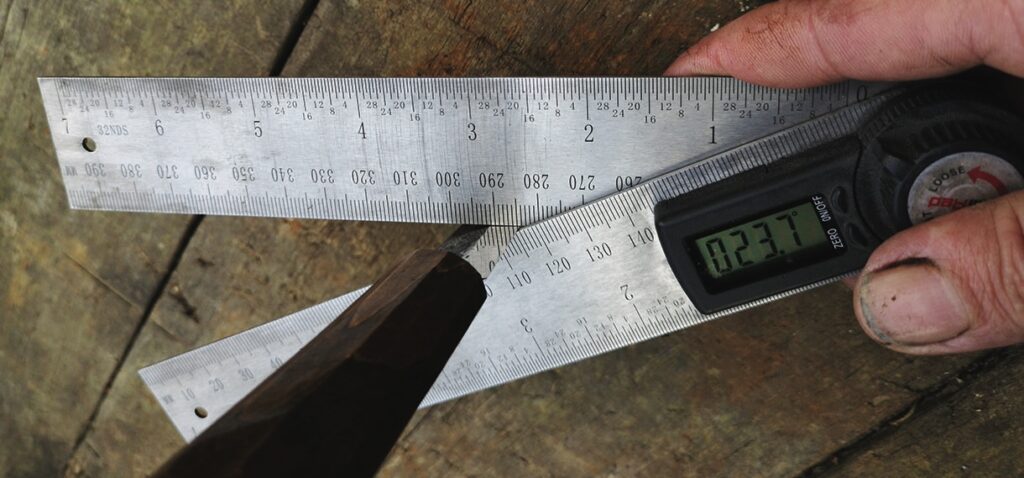
So, following our two-step approach to sharpening, let’s first look at establishing the optimum bevel profile. Flat bevels provide the support we need – the included angle should be around 25°. This can be measured for reference, but I find an empirical approach more practical. If your edge isn’t holding or is frequently damaged then I would steepen the bevel angle. Conversely, if you are finding the blade is not cutting as easily as you like and takes a very long time to dull appreciably, then a finer angle is worth considering. Generally, though, unless you have strong reason to alter bevel angles, I would assume the manufacturer has it right. The length of the bevel is just simple geometry at this point, a function of the grind angle and the thickness of the blade. A longer bevel will provide more support but will be more difficult to turn in concave cut. Again, unless you have strong reasons to alter this, don’t.
Hollow grind
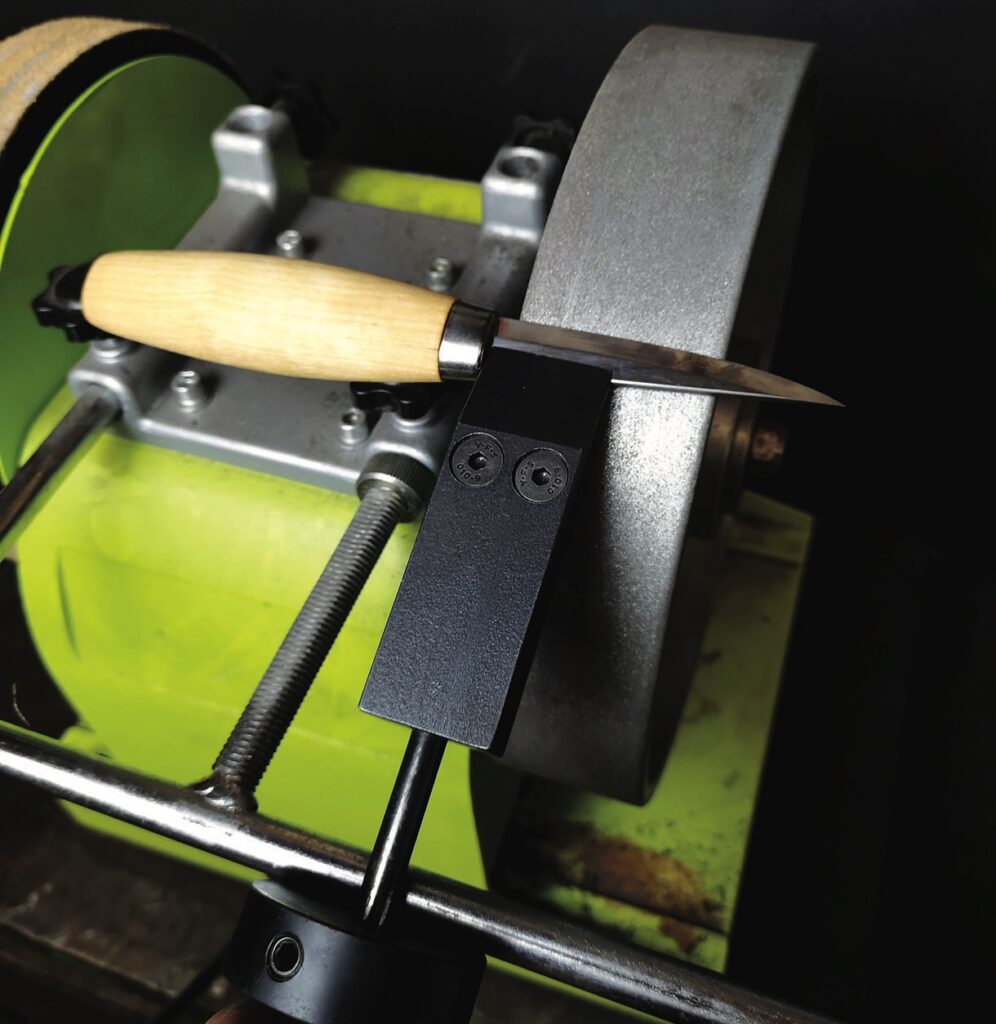
There is another option to flat bevels though, and this is to hollow grind first and then establish a flat across the hollow. This makes sharpening much easier, but the actual geometry at the edge is identical to a flat bevel. Hollow grinding really deserves an article in itself but there are various jigs available to make it easier, or it is possible to do this freehand.
Sharpening these blades is something that some people struggle with and some don’t and that is partly because there are two stable states when honing. A truly flat bevel will sit flat on a stone and is relatively easy to keep flat. Conversely, once a bevel has become rounded it will rock on the stone and unless you hold the blade very accurately and consistently it will continue rocking and the rounding may well get worse.
Rounded bevels
A rounded bevel is not desirable for various reasons. First, the bevel will not provide support during the cut, second it will make it very hard to measure the edge angle and it is likely to be much more obtuse than the bevel length suggests. Finally though, when you sharpen a flat bevel on a flat surface every stroke you make will hit the whole width of the bevel, including the edge. When you sharpen a rounded bevel it is a lottery which section of bevel you are hitting and could be having no effect on the edge at all. This can make sharpening a long, drawn out process, especially as you progress down through the grits.
This rocking effect is caused by the hump in the middle of the bevel – hollow grinding removes this and will make the sharpening process so much easier.
Flattening a bevel
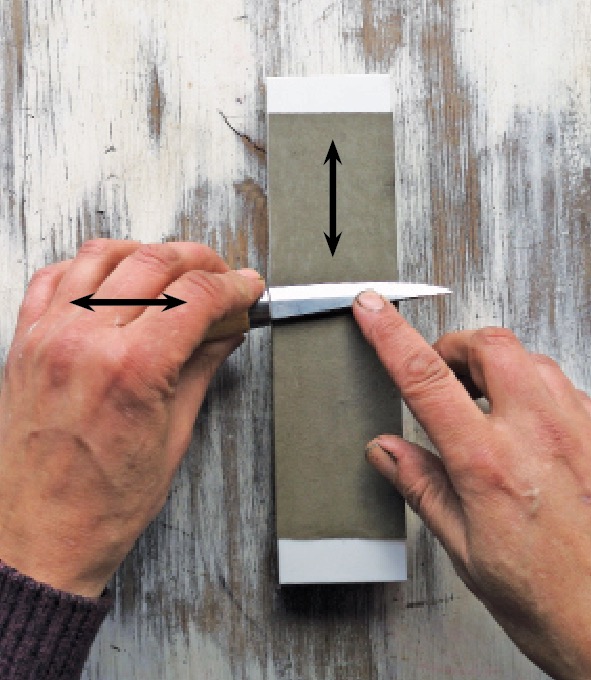
If you are trying to flatten a bevel then a really coarse stone that cuts quickly is excellent for this, Diamond is my favourite in this scenario, but water stones, oil stones and abrasive paper on a backing pad will all work. If you are going to use a water or oil stone make sure it is flat. If it has become heavily dished then the concave surface of the stone will form a convex bevel – it will be impossible to get a truly flat bevel. Around 300 grit is a good starting point for flattening a rounded bevel, or removing edge damage. Carry on until you can feel a burr appearing – this shows that you have hit the edge with the stone. If you turn the blade over and work on the other bevel this burr should then flip to the other side on the first couple of strokes.
However, if you have hollow grind then you want to maintain the hollow for as long as possible. All you need to do is to get through the marks left by the wheel to establish two tramlines. I would start this at 2-3000 grit. Even edge damage will be removed pretty quickly as the area of steel in contact with the stone is so small with a hollow ground blade.
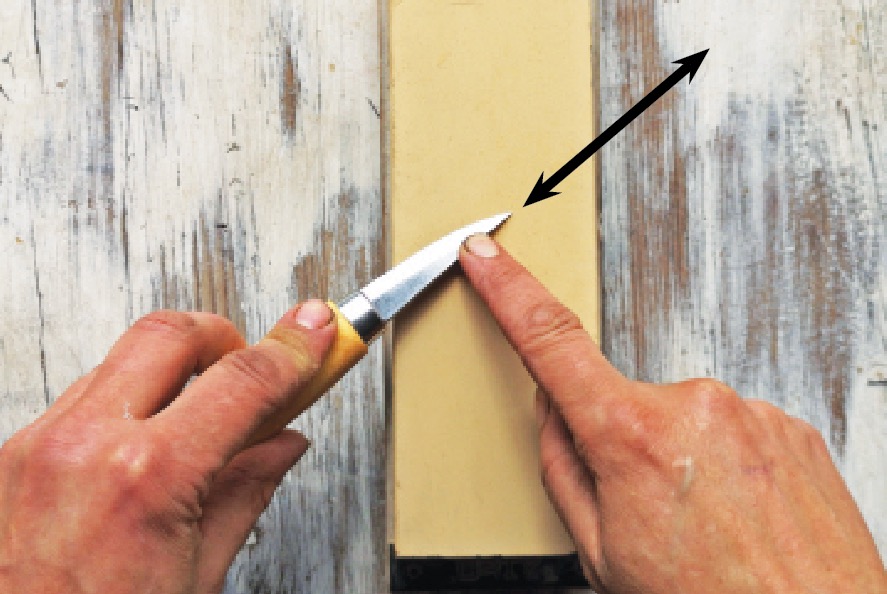
The actual way you do this is really down to personal preference. Some people will keep holding the knife in the same hand and have the edge pointing towards them for one bevel and away from them for the other. Others will prefer to swap hands, working on either side of the stone, but always having the edge pointing the same way regardless of which bevel you are working.
You will often find that one bevel is easy to keep flat and the other tends to rock – this is intensely frustrating but entirely normal. The best advice I can give is if it is going wrong and you are getting annoyed, then take a break. You need a firm but relaxed grip so you can feel the bevel cutting on the stone. If you are stressed you will be tense and this vital feedback is lost.
Stab sharpening
A blade with a straight cutting edge is much easier to sharpen – you can hold the knife at the same angle all the time to hit the entire surface of the bevel. A blade with a pronounced curve or belly at the tip is more difficult, you have to lift the handle to get the tip to engage, and you can lose the support of the bevel to keep your angles consistent. Stab sharpening can help with this loss of support but can lead to gouging of the stone. Abrasive paper systems can be even more prone to this, but on the other hand it is much easier to swap out for a new sheet than spend ages flattening a damaged stone.
However, the finer tip on a blade is often used for working in slightly concave surfaces, also known as turning in a cut, so if you do end up with some convexing in this area it is not necessarily a bad thing;
While not strictly speaking edge geometry or sharpening, you will find smoothing crisp corners on the spine of the blade will make thumb push cuts much more comfortable. No real need to work through the grits after smoothing but it looks better if you do.
Refining the edge
The second part of the sharpening process is refining the edge and if the bevels have been set well then this should be easy. If you have a flat bevel the surface area is much greater and you will have to make smaller jumps in grit sizes to be sure you don’t leave scratch marks from the coarser grits. With a hollow ground blade it is acceptable to jump straight to a finishing grit, something around 5-8,000 with no intermediate stages.
Stropping – cheating or a necessary evil?
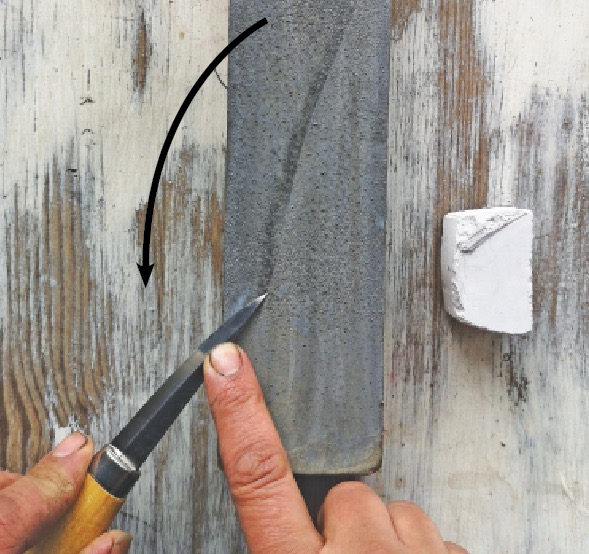
Stropping using a fine polishing compound on leather or suede is pretty simple. You need to concentrate on keeping the bevel flat, as ever, and also you must work away from the edge or you will cut into the leather. It is a subject though that causes a lot of debate. It can be used in a variety of ways, as a final finish after using stones or abrasives, or as a means to touch up a dull blade – it is this second option that is worth looking at more closely. A fine compound will actually cut steel, but the amount removed is negligible. If a flat ground blade has blunted the edge will have worn back. To properly sharpen it the entire surface of the flat bevel must be removed to get back to a clean edge – this won’t be possible with stropping. All that is realistically happening is that a micro-bevel is being introduced. This is because the softer leather has some give and deforms, meaning most of the polishing action is concentrated on the edge.
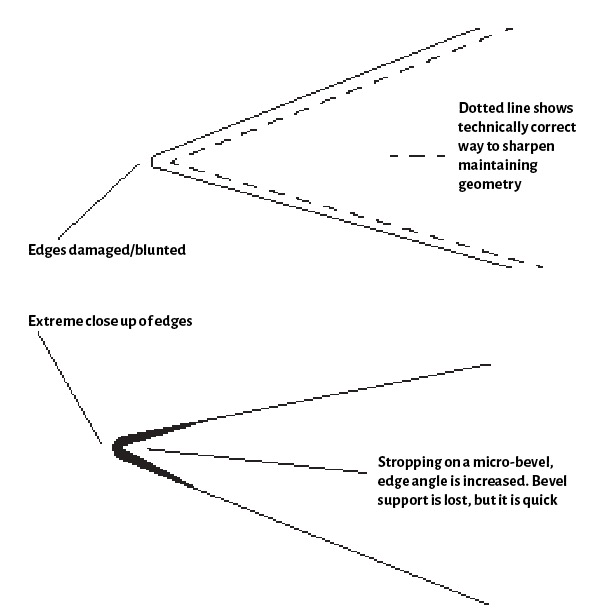
This isn’t a bad thing as it is the quickest way to get back to carving. It reinforces the edge by increasing the effective bevel angle. There is a destabilising effect as the bevel support is lost, but this effect is negligible at first as the amounts of steel removed are so small, and this, I think, is the problem – a blade repeatedly stropped will suffer a death by a thousand cuts. After a while you will notice that, although it can be stropped back to sharpness, it will not keep this edge for long. It will also like bite. I think of the edge feeling buttery on the wood – it will feel like it is sliding. At this point it is time to go back to the stones. Work with a coarse stone until you feel a burr to be sure you have obliterated the micro-bevel and re-established flat bevels. How little you strop between sharpening is often a measure of how much of a purist you are. Personally, I take the easy route and strop often.
Hewn & Hone
This article is brought to you by the team at Hewn & Hone. The team comprises: Nic Westermann,
a blacksmith and creator of carving tools and sharpening accessories; Don Nalezyty, an IT specialist and respected Kolroser and carver; Alex Yerks, an internationally renowned green woodworking teacher and kuksa carver; and Adrian Lloyd, a UK-based full-time craftsman, teacher and toolmaker.
To learn more visit: www.hewnandhone.co.uk