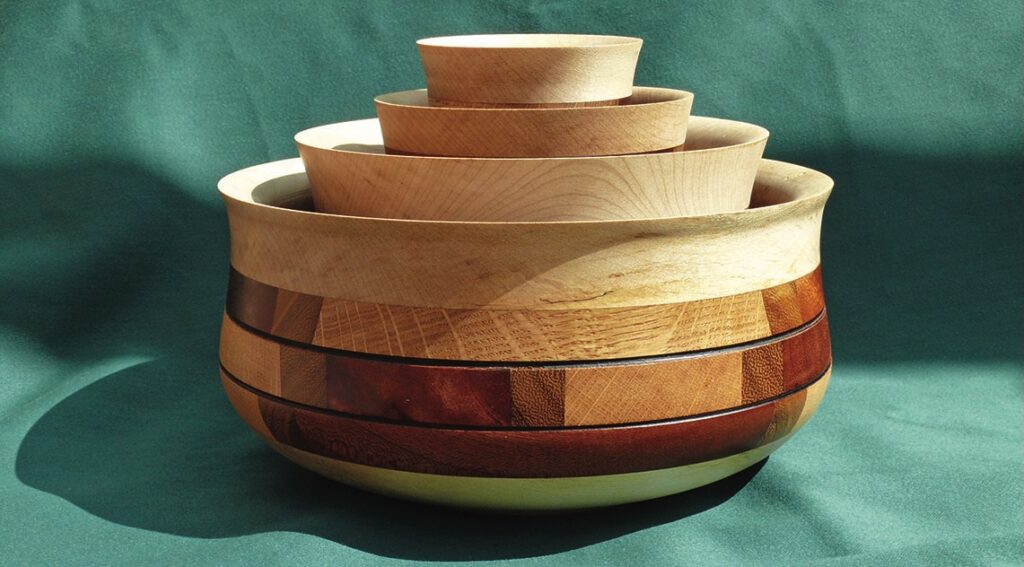
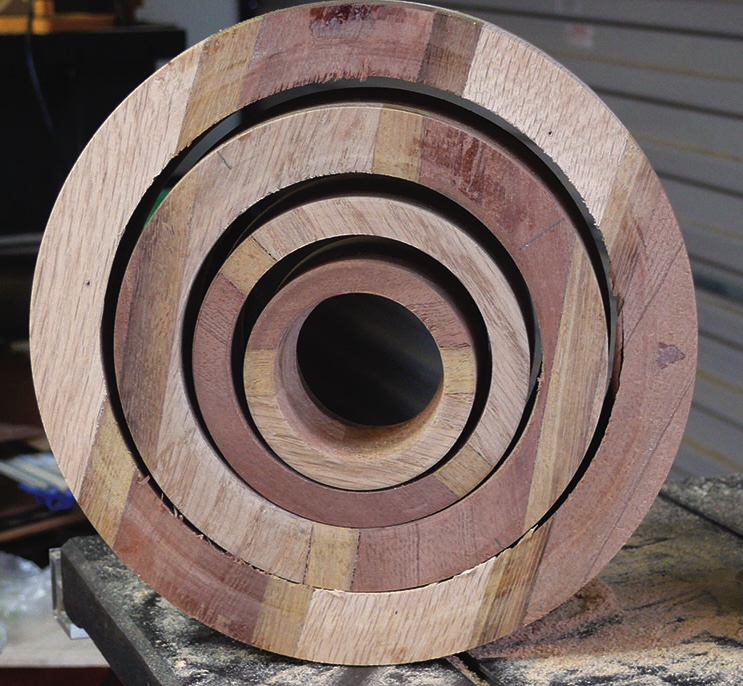
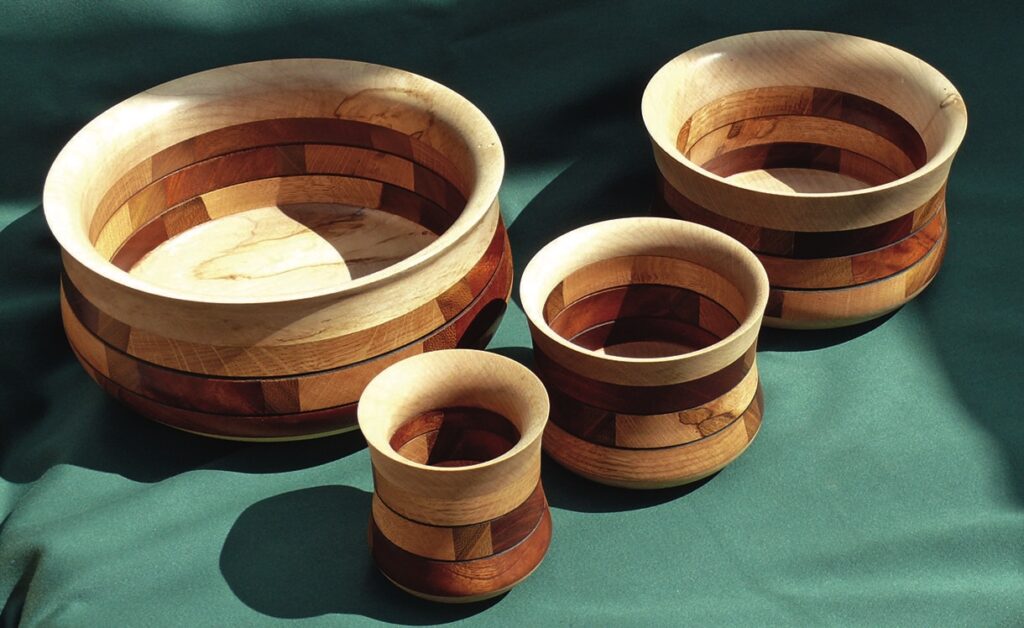
David Ritchie shows how to create a nest of segmented bowls – but without segments as we know them
During the war we, as children, had to make do with the basics – just a treacle tin to play with, times were hard. Aah, is that a violin I hear? One of my clearest memories is the picture on the Tate & Lyle syrup tin of a lion and a swarm of bees, the quotation reading ‘out of the strong came forth sweetness’. These words, while borrowed from the Book of Judges, were first used by Abram Lyle in 1904 and are still going strong today.
What has this got to do with segmented bowls? Absolutely nothing, other than the words were from an original thought and I think ‘original thoughts’ that we all have from time to time are important and should not be discarded lightly. As far as I am aware the way in which these segmented bowls are constructed is original – at least the thought was to me. No doubt someone out there will know differently.
I wanted to make a bowl with a number of different woods but without all the normal angles to be cut and accurately reproduced time and again.
My bandsaw, like me, is ageing and not up to it. Neither do I like wasting wood, which we all do when removing the centre of a conventional bowl. I always feel that there must be another way to skin the same cat. In order to prove my theory and allay a few worries a trial piece was made, which I thoroughly recommend when trying a new system, as it can – and did – prevent disaster.
Table of contents
Equipment and materials
Tools • 6 & 13mm bowl gouge • 5mm wide heavy-duty parting tool with extra-strong tang or dedicated straight coring blade • Heavy-duty French curve scraper • Point tool or corner of a skew chisel • Wire for branding (of the appropriate gauge) • 180-600 grits • Oil and wax mix and finishing oil
Plans and equipment
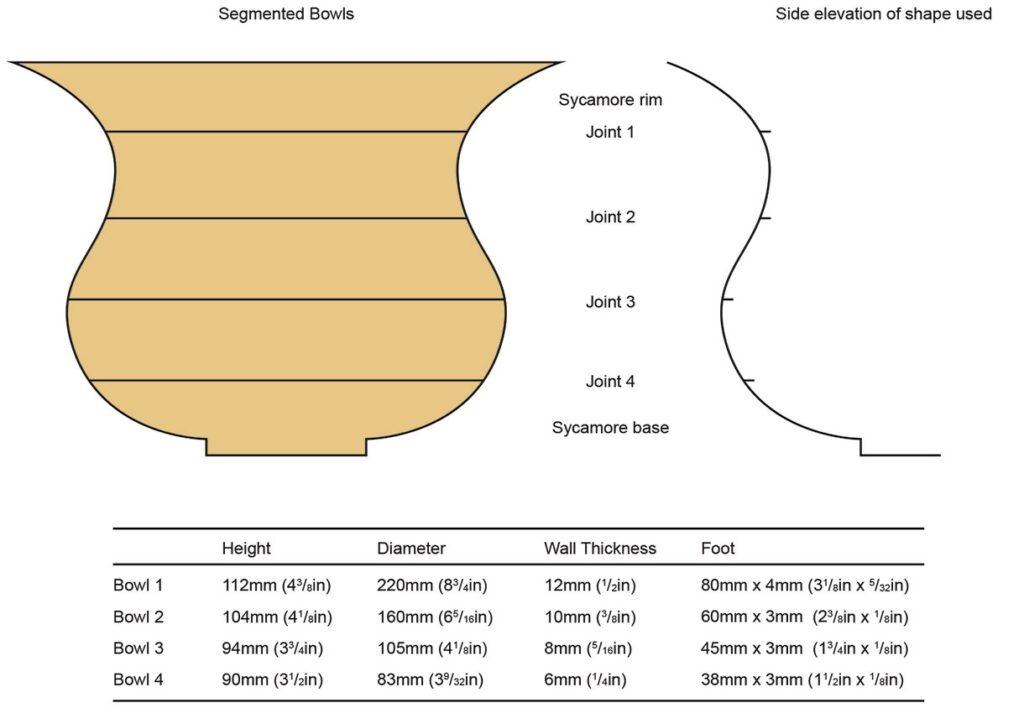
This sketch is not to scale but indicates the approximate shape and the divisions between each layer of segmented pieces. The sizes are entirely your choice but remember when removing waste from the original block to allow sufficient space to form the curves and outer shape clearance. Wall thickness must be sufficient to support the glued joints. Those shown in the drawings worked well for the height and width of the piece the bowls were turned from.
Construction
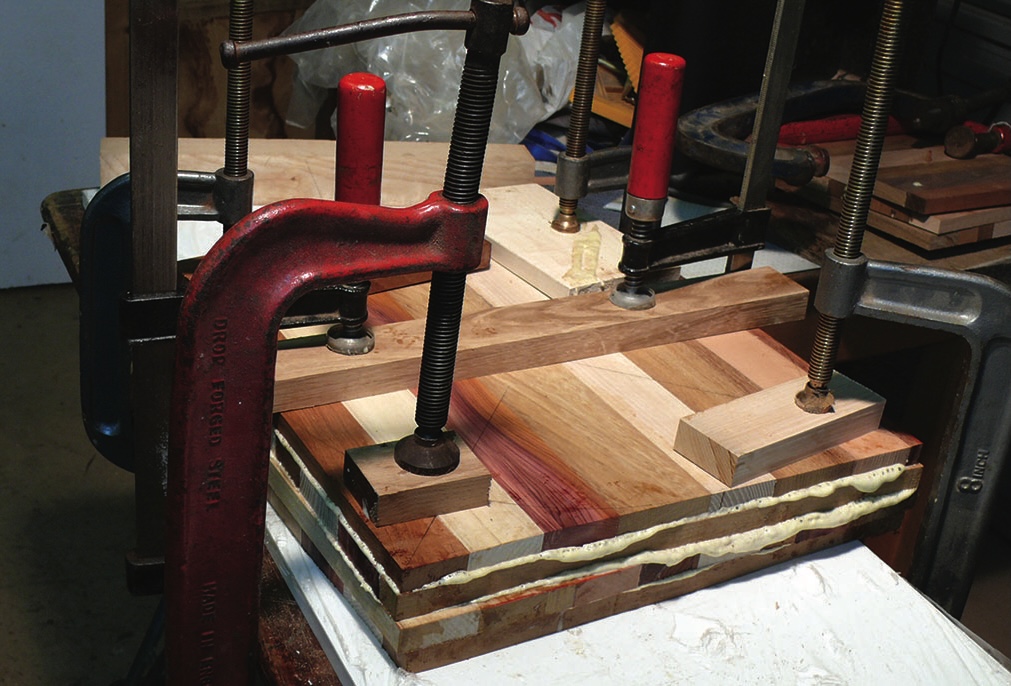
As my planer will only take 255mm wide timber I decided to make up squares of just under 255mm to fit. Using iroko (Milicia excelsa), oak (Quercus robur), and mopane (Colophospermum mopane) the choice of patterns is entirely yours, but ensure each segment is planed and of the same thickness, with clean contacts on all edges. My assembly was as follows and the following shows the width of the boards: oak 65mm, iroko 25mm, mopane 70mm, Iroko 25mm and oak 65mm equals 250mm wide and all were cut to 250mm long. Three of these squares were assembled, glued edge to edge then clamped and allowed to dry.
I assembled three squares and glued up into a block, with the middle ones grain running in the opposite direction. NB: The segments in the photo are from subsequent bowls using different woods but the system was identical.
Regarding adhesives, irrespective of what it says on the tin I suggest you leave your adhesive to set for at least 24 hours. You can have whatever thickness you like but remember the rings are to be removed using something like a parting tool or, better still, a dedicated straight coring tool. The four bowls turned for this article were from planed 20mm stock which gave just over 50mm to cut through.
Once you have your laminated block, cut it round on a bandsaw or leave the block and turn it true later.
Cut and glued-up blocks
Turning the rings
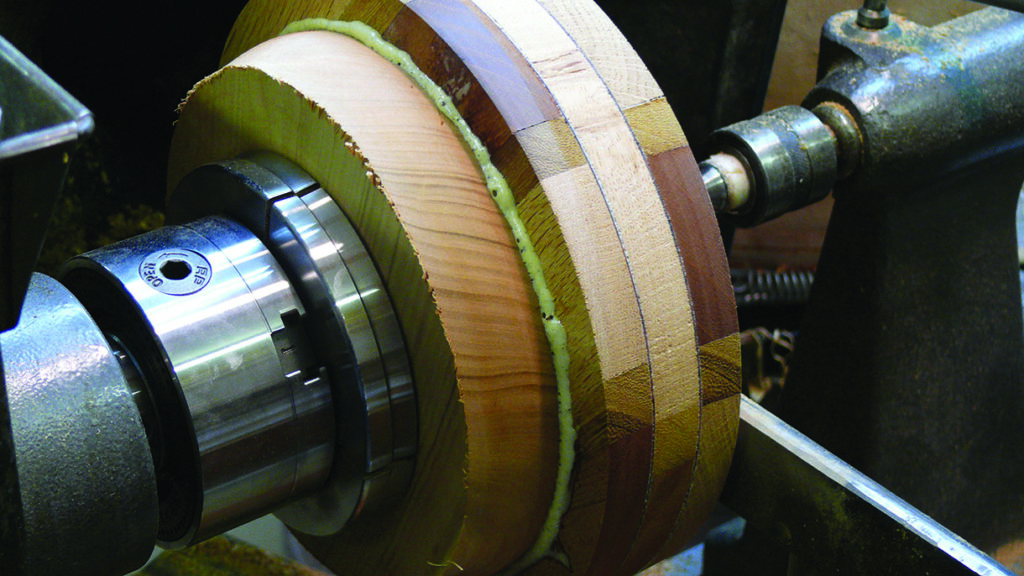
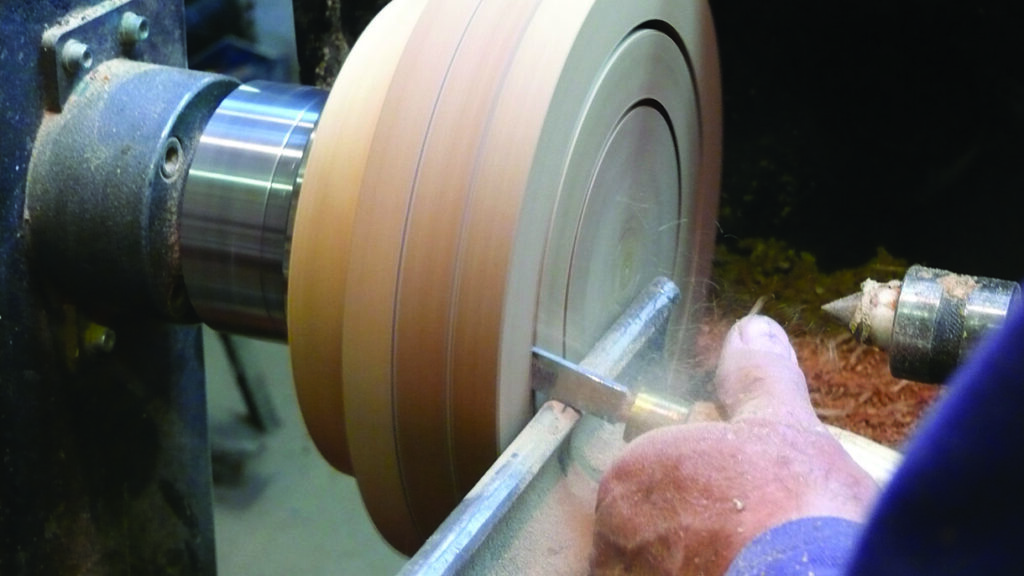
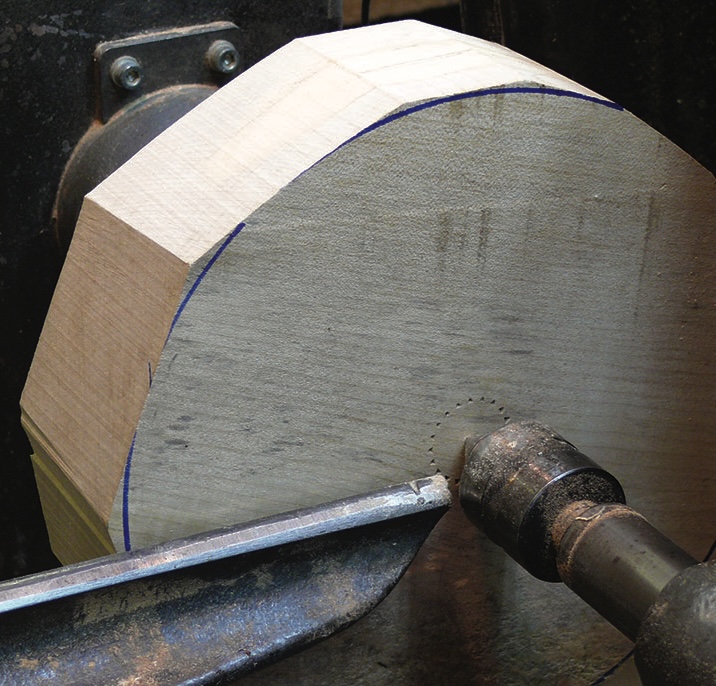
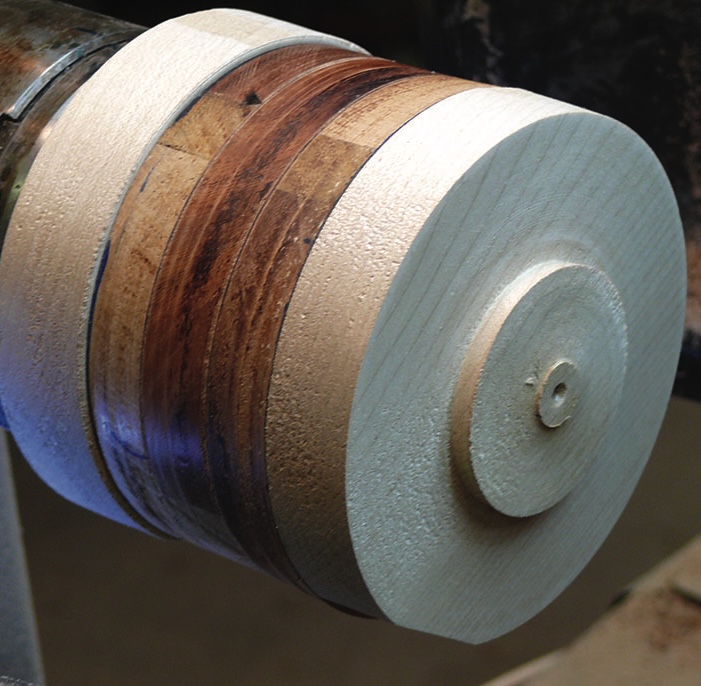
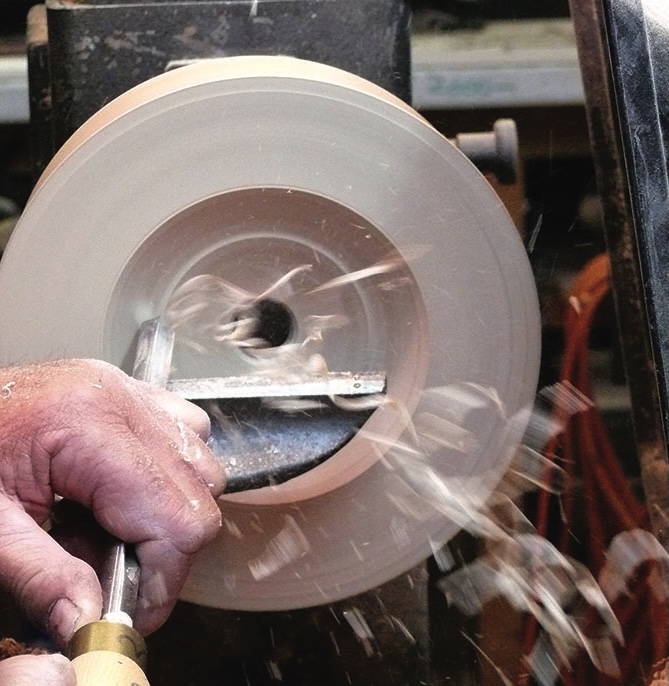
1. I wanted just a gentle curved form for the bowls. I used sycamore (Acer pseudoplatanus) for the top and bottom to complement the middle section and add some height and width to each bowl. The shape must be considered when deciding the width of each ring – the wider the ring the more shape options are available, but this means fewer rings to work with. The best option for turning the rings is to create a glue chuck to hold the laminated block. To make a glue chuck, mount a faceplate-oriented block of wood that is slightly larger in diameter than the inside diameter of the large ring needed on your large bowl. You could also use screwchuck or mount between centres. Now turn a spigot on the tailstock end to fit in your chuck. True up the side of the blank then remove the piece and fit the spigot in your chuck. Once secure in the chuck create a perfectly flat or slightly concave surface on the front, which is the face to which the laminated block will be glued to. Once turned, glue on your laminated block, let it set and turn it true using the tailstock for support while doing so2. Warning: This next element is where you need to consider how to make the rings. I chose to do this from a solid block, but it requires the use of a heavy-duty parting tool with a beefed-up tang that is secured well in a long handle to resist the possible twist and leverage forces of plunge cutting. Alternatively, use a dedicated small, straight coring blade – available in some coring systems. Do not be tempted to use thin parting tools in small handles for this job. Catches and binding might ensue with nasty results. Using a relatively low speed about, 500-600rpm, clean up the surface and mark out the intended number and size of the rings. My shape allowed four from a 255mm blank. Now, using the parting tool start parting almost to the bottom depth of the rings, stopping every 10mm or so to ensure the debris is clear so you don’t get a ‘grab’ on the parting tool due to debris in the slot. Also, when you make the next entry cut, widen the slot cut by about 1-1.5mm, just to create a bit of clearance so the tool doesn’t bind on the sidewall
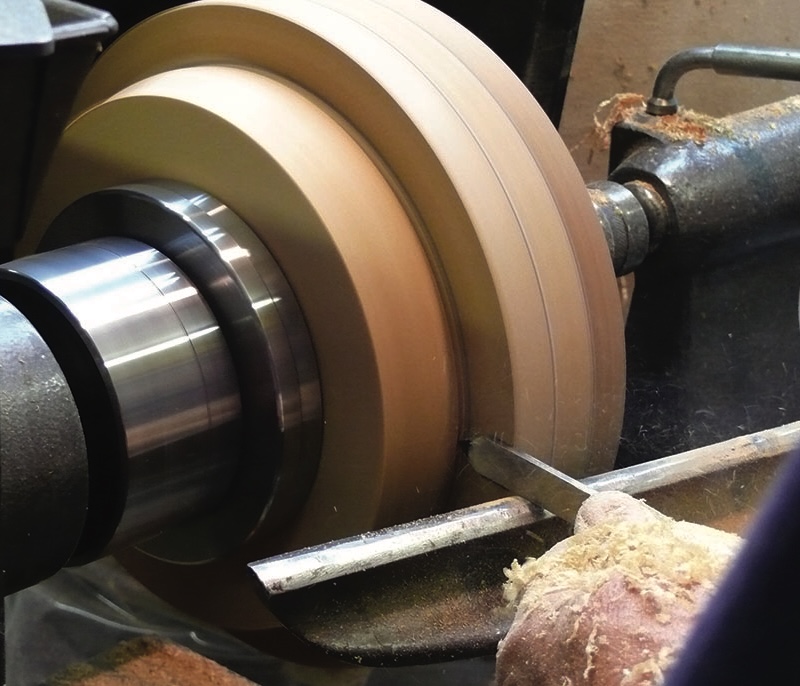
3. Now you need to make a parting cut at the base section to the depth of the inner section of the outer ring, then make the final parting cut from the front to release the ring
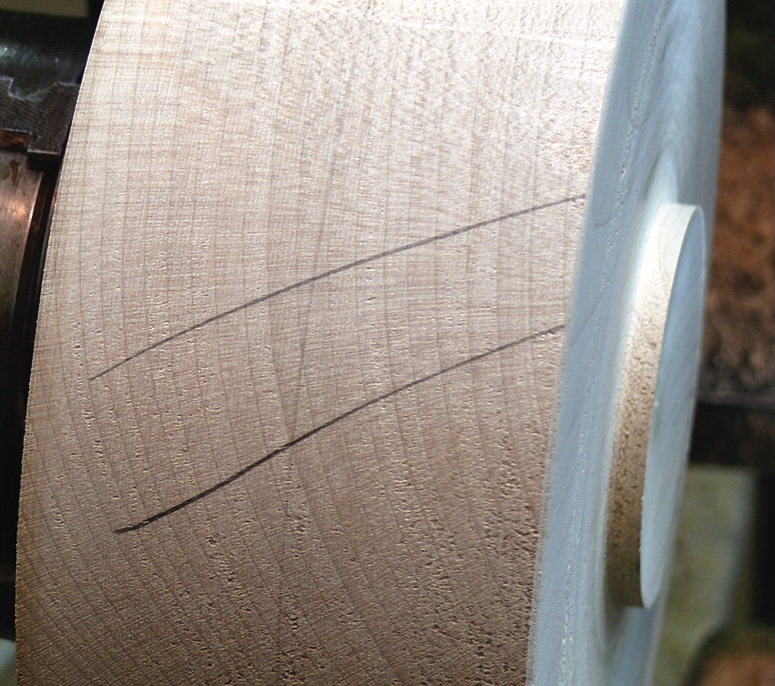
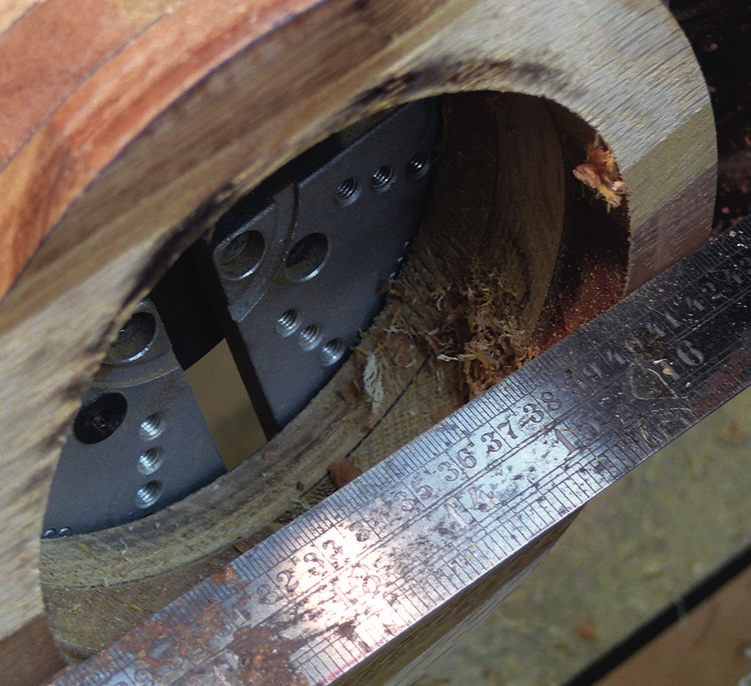
4. Measure frequently the depth of cut and clear the back glue joint before cutting through. It’s far better to know before you go through the back than after
5. Bring up the tailstock before making your final cut from the base which will enable the ring to spin freely and be caught by the tailstock quill
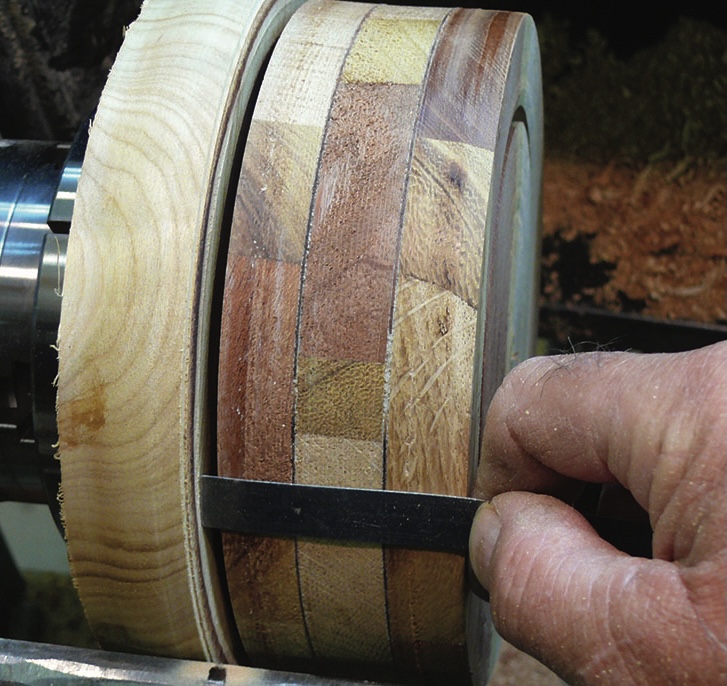
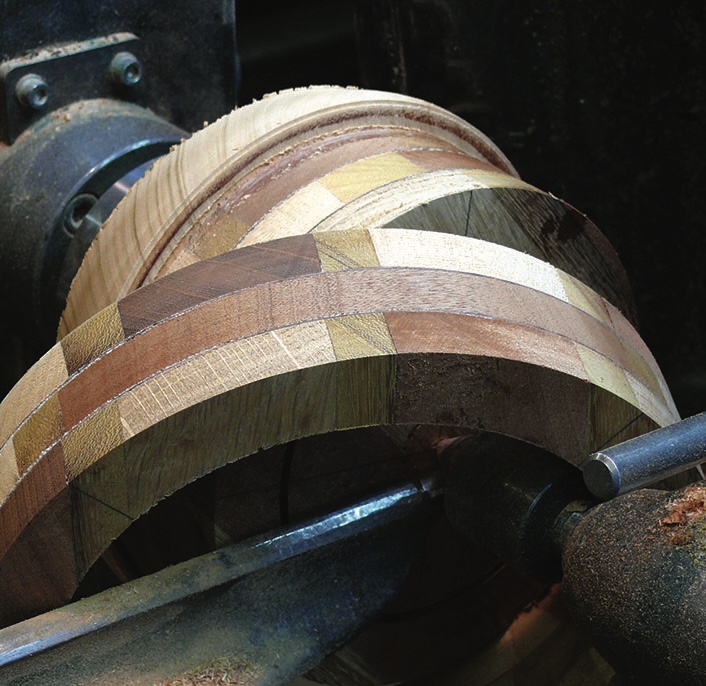
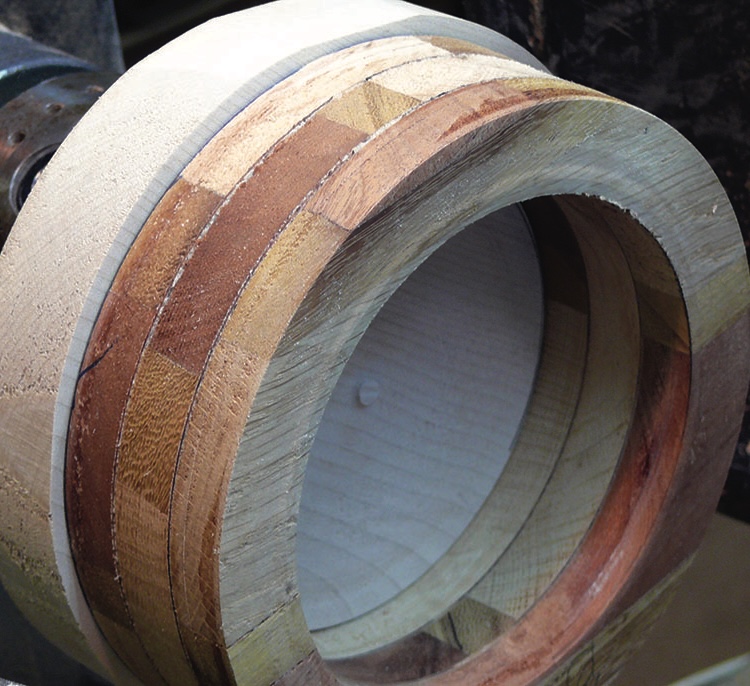
6. This shows the rings as they came off. Note the space between each ring, ensuring the parting tool does not jam and cause a disaster
Top and bottom
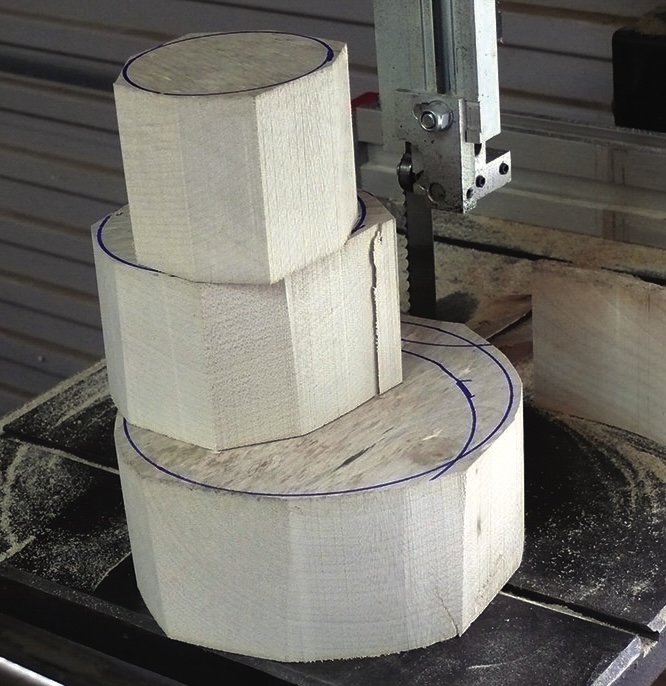
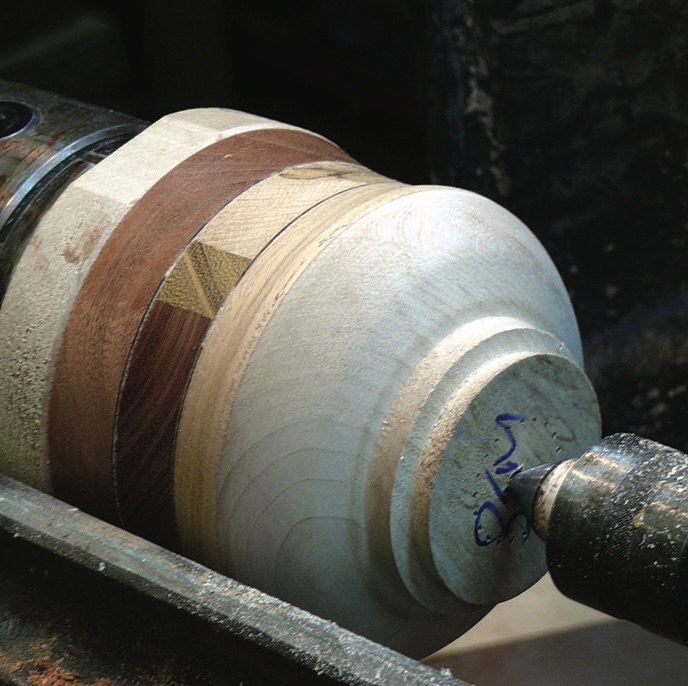
7. The bottom and top are created from solid sycamore bowl blanks. The largest blank – this piece – from a 280mm sycamore blank, 90mm thick. Mount the piece between centres, cut a spigot to suit your chuck jaws and then mount the blank on your chuck using the spigot just cut
8. The blank was then reversed, mounted in the chuck and another spigot cut. This will later become the foot. The grain now needs to be marked for future reference to preserve continuity where possible. Now, with the lathe set a low speed, take your parting tool and plunge cut into the wood on the centre line and square to the blanks. Remember to remove the blade regularly to remove debris as you cut deeper and also make a clearance cut until you get to about 30-40mm of the centre. Then, with the lathe stationary, use a saw to cut through the last section to remove the top piece from the bottom
9. Now you need three more blanks cut from the same sycamore stock so each is as close as possible in appearance to its siblings. Repeat the process used on the previous blank to create these next ones
10. Now, using either Cole jaws or a jam-chuck system, true up both faces of the largest ring to ensure a flat surface to give maximum surface contact to be glued on to the top and bottom sycamore sections. At the same time clean up the inner edges of the ring and measure the internal diameter with callipers
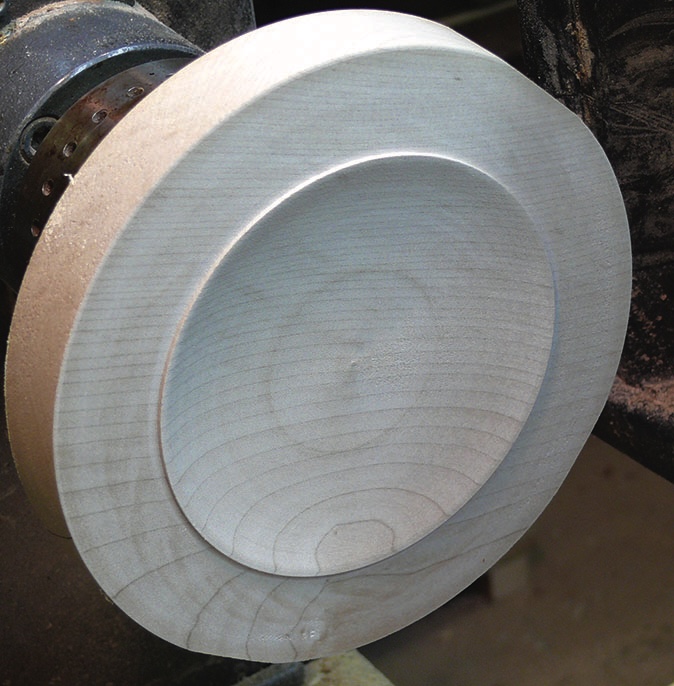
11. The base section of the blank is now mounted in the chuck and the measurement from the callipers transferred. The outer edge is made flat, leaving approximately a 3mm lip which should be a push fit for the ring. It is also a good idea to shape what will become the bottom of the bowl as access is far easier at this stage
12. The top follows exactly the same procedure as the bottom. A lip of 3mm helps not only in turning but in presentation when finishing the inside of the bowl
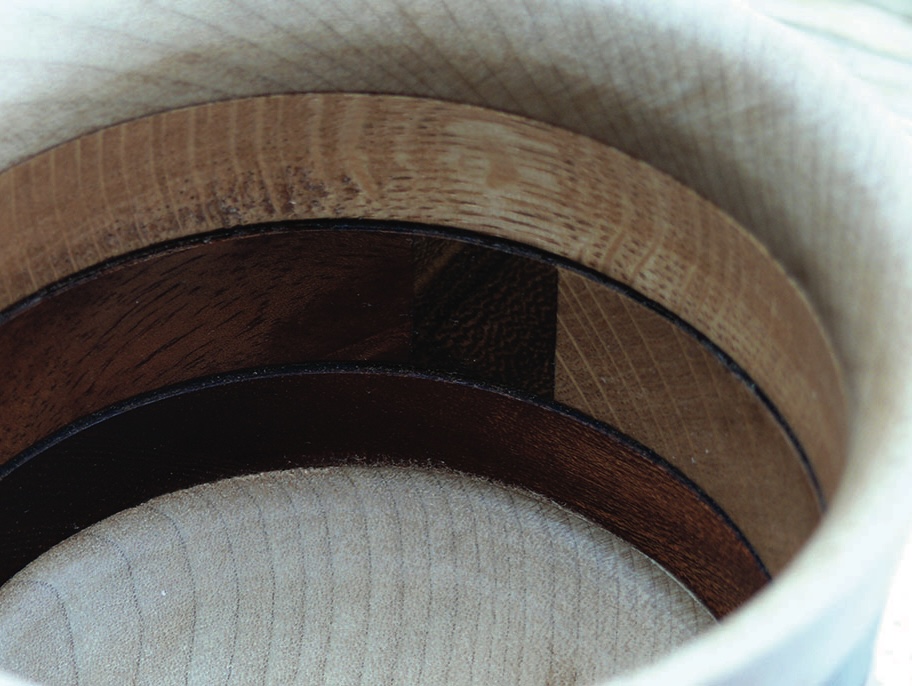
13. A thin layer of glue was spread on the inner edge of the top and bottom and the ends of the rings moistened. There are four stages of assembly. The spigot you have cut push fits on the top…
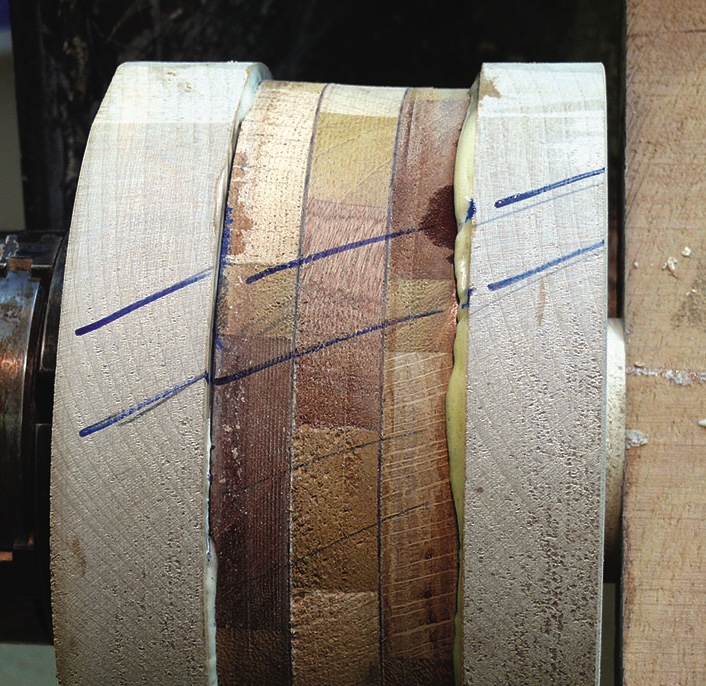
14. … and bottom, helping to hold things in place, then the whole assembly can be turned until the lines showing the grain direction can be married up. Before bringing up the tailstock insert a block to spread the pressure, clamp and leave for at least 24 hours
15. The glued-up blank is now ready to turn to shape. As you know, the thickness of the side wall (segmented section) determines to an extent what shapes are available to you. In this particular project I wanted all four bowls to follow the same ‘cottage style’. Dramatic changes in shape can be achieved simply by increasing/decreasing the diameter of the top and bottom
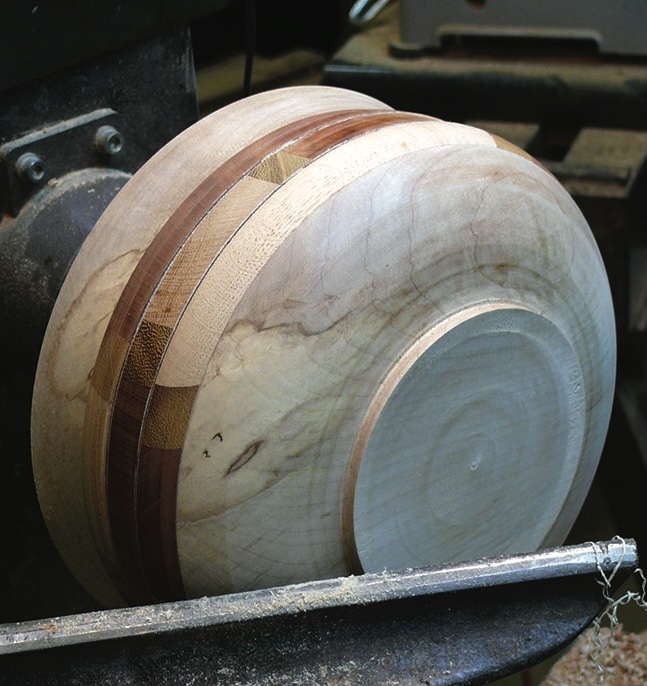
16. Starting at the base, define your shape using a bowl gouge and turn the foot. The style I have chosen is a cauldron/calabash style
17. Having finished the outer shape, do the same for all the other bowls you have constructed. Remember to keep the shape and proportions the same for each one, but of course with the sizes scaled accordingly to the size of blank being turned
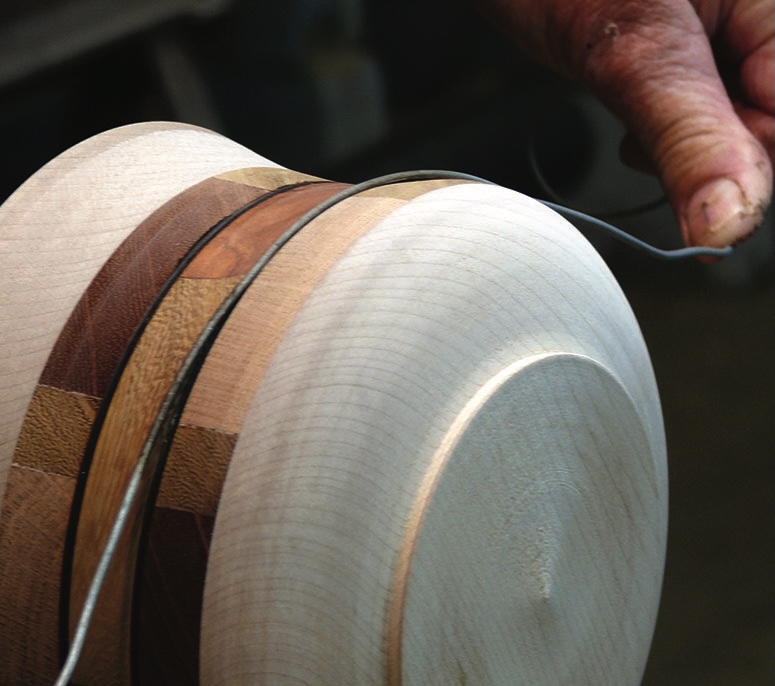
18. Working from 180 grit in this case go through each grit until the desired finish is achieved. I wanted to emphasise the centre two joints so decided to burn with a wire until black. This was then sanded again with 400 grit
Shaping the inside
19. Remember that you are dealing with a variety of woods and end grain means your tools must be sharp. Don’t try to force the issue and use a slow turning speed – 600-800rpm. Use 12mm and 6mm bowl gouges to ease away the centre part of the sycamore ‘top’. I would not recommend drilling this out – it may be quicker to do so but develops torque and could damage the joints. Continue until you have the shape you require
20. The size and profile of the rim is a personal choice. Having achieved the inner shape with a gouge, refine it with the scraper and then go through the abrasive grits to 400. Now you need to burn/scorch the inside glue joints to match the outside. It cannot be done with a wire but by can be done using an odd piece of worktop laminate. This material is hard enough to do the job, but take care. A trick is to glue the worktop laminate to a piece of scrap wood so it is at right angles. This is by far safer than holding the laminate in one’s fingers. Once turned, reverse mount the bowls and adjust the spigot at the bottom by removing it or creating a foot as required. Now sand the lower section
21. Now apply the finish of your choice to all of the bowls. To aid the finish on the end grain I gave each piece a coating of wax/oil mix, left it for 40 minutes and sanded again with 400 and finally with 600 grit. The bowls were buffed, left for a week to thoroughly dry before giving a final coat of finishing oil. This has been an interesting and worthwhile journey. The objective was to produce four bowls from one segmented glue-up without having to cut angles, reduce waste to a minimum, produce something that is decorative and worthwhile, and, above all, to enjoy your turning. Remember not to discard your original thoughts – they may really be original
To provide the best experiences, we use technologies like cookies to store and/or access device information. Consenting to these technologies will allow us to process data such as browsing behaviour or unique IDs on this site. Not consenting or withdrawing consent, may adversely affect certain features and functions.
Functional
Always active
The technical storage or access is strictly necessary for the legitimate purpose of enabling the use of a specific service explicitly requested by the subscriber or user, or for the sole purpose of carrying out the transmission of a communication over an electronic communications network.
Preferences
The technical storage or access is necessary for the legitimate purpose of storing preferences that are not requested by the subscriber or user.
Statistics
The technical storage or access that is used exclusively for statistical purposes.The technical storage or access that is used exclusively for anonymous statistical purposes. Without a subpoena, voluntary compliance on the part of your Internet Service Provider, or additional records from a third party, information stored or retrieved for this purpose alone cannot usually be used to identify you.
Marketing
The technical storage or access is required to create user profiles to send advertising, or to track the user on a website or across several websites for similar marketing purposes.