Murray Taylor looks at some different ways of carving letters and introduces a new font
Previously, we have looked at the origins and carving of the Roman alphabet, the spacing and layout required to give a balanced and pleasing overall effect and some project ideas.
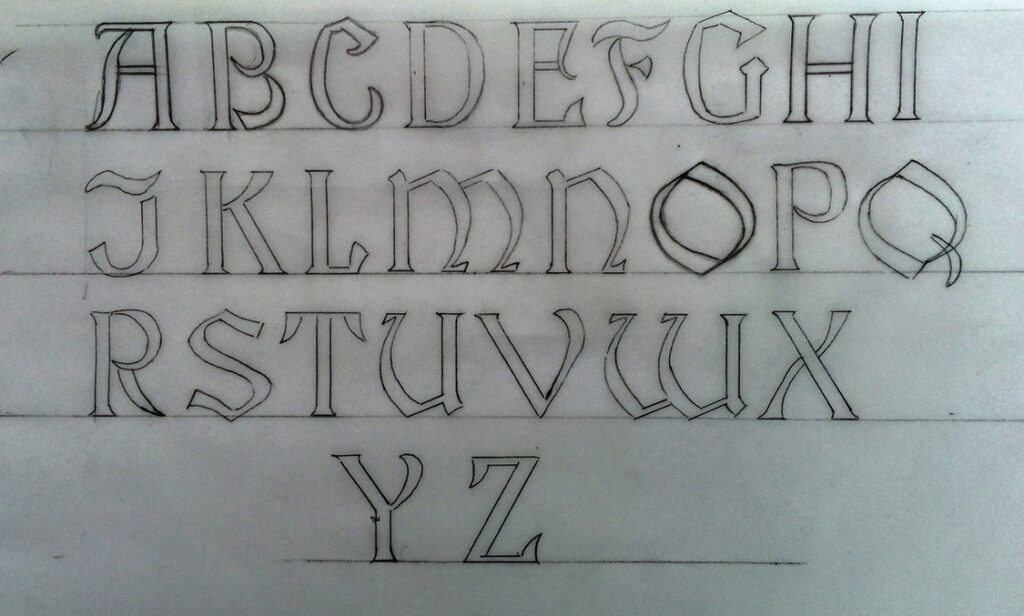
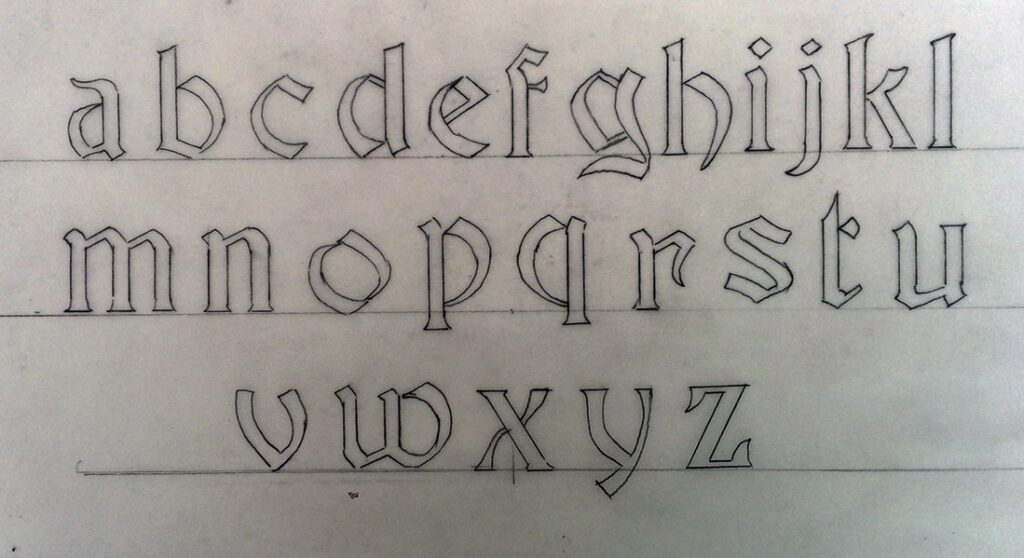
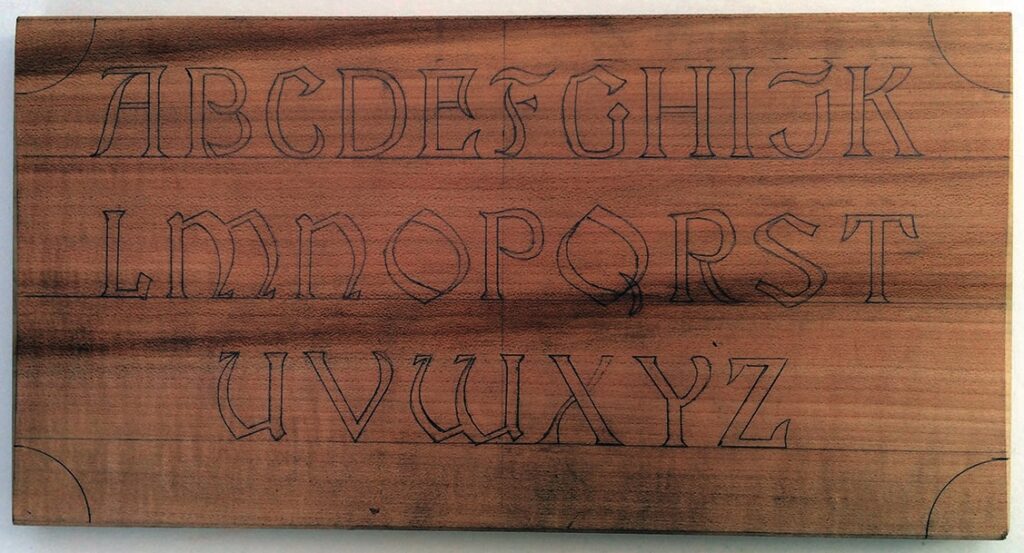
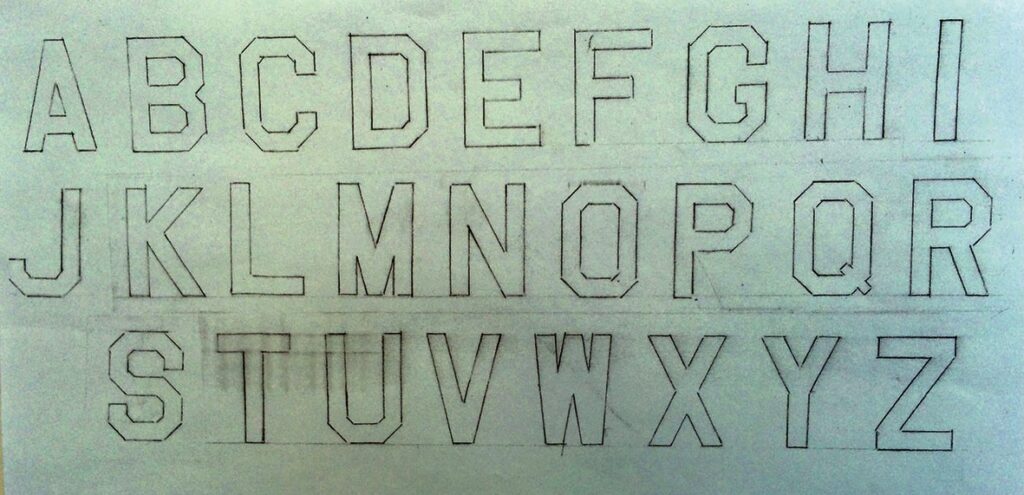
In this article, I will look at the Becker font. It is widely used, but I am going to use a variation of the font adapted by the modern-day master of chip carving in America. I am, of course, referring to Wayne Barton, and I recommend all his books on the subject. It was the finding of one of his books in a secondhand bookshop in Canada that got me started, so my thanks to him for setting me on my way.
Order of cutting
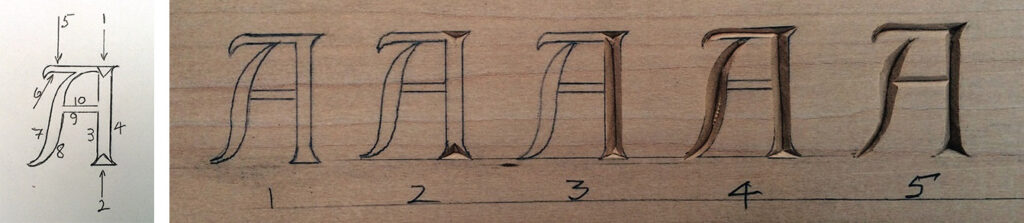
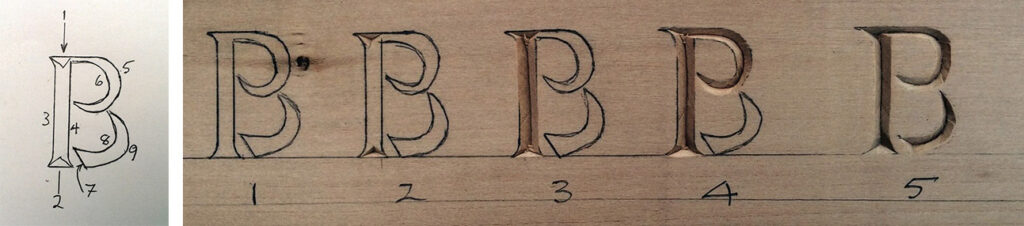
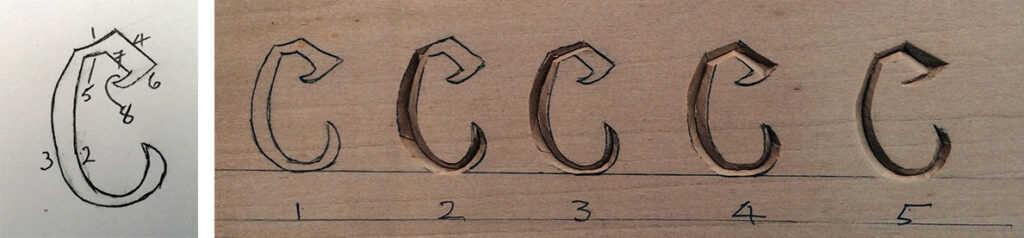
The grouping of letters for carving the modified Becker font are as follows. I have shown the first letter
of each group as a diagram showing the order of cutting and the progressive carving of the five first letters.
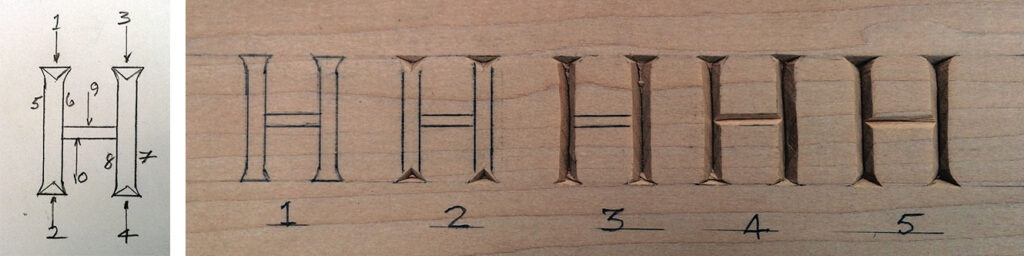
Group 1
This group comprises straight line letters H, I, L, T, Z
Group 2
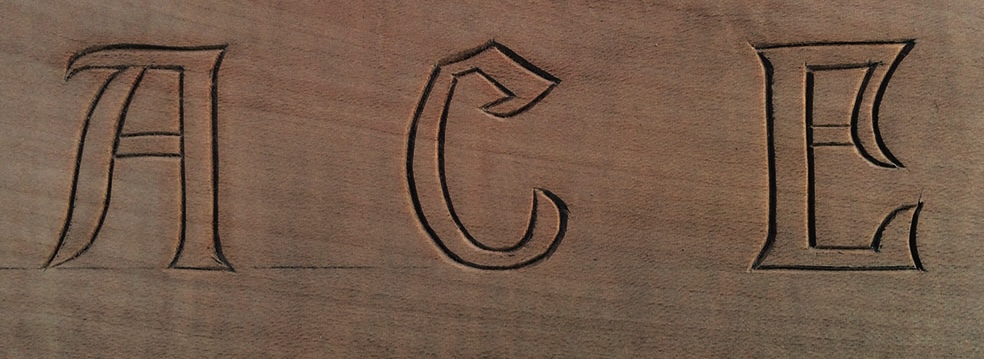
This group includes letters with straight lines and open curves A, E, J, K, M, N, U, V, W, X, Y
Group 3
Letters with straight lines and closed curves B, D, P,
Group 4
Letters with open curves C, F, G, S
Group 5
The enclosed letters O and Q
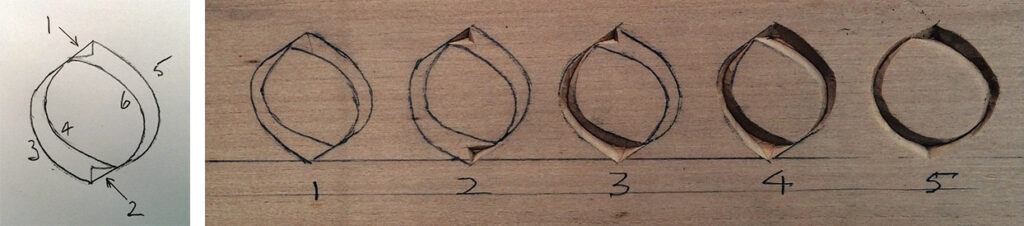
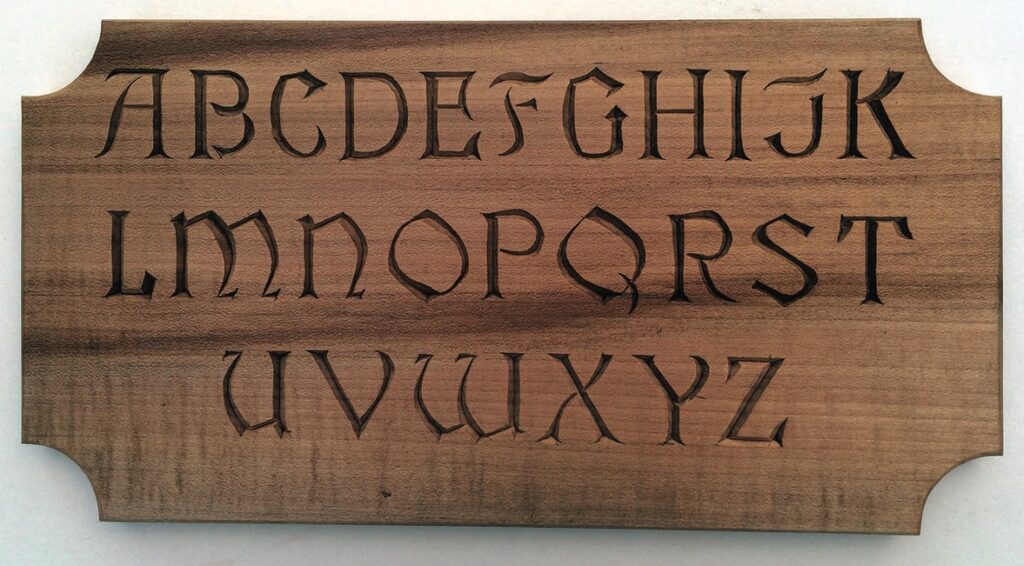
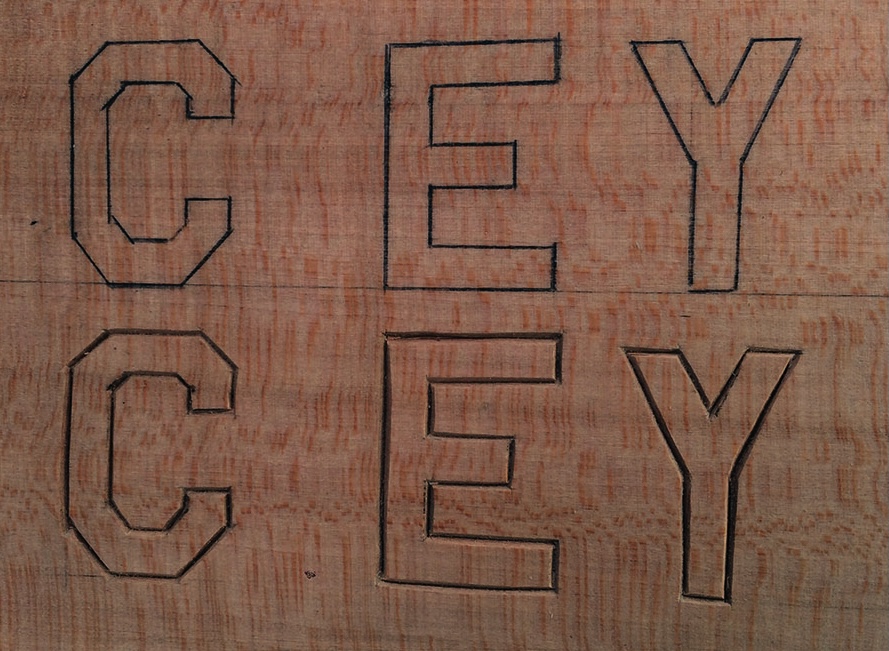
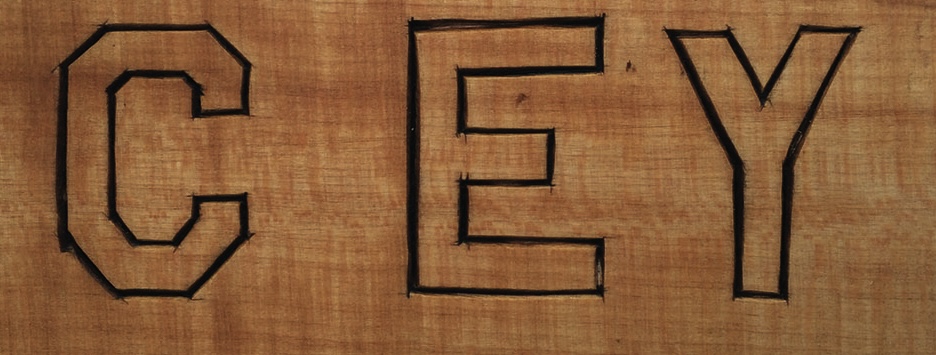
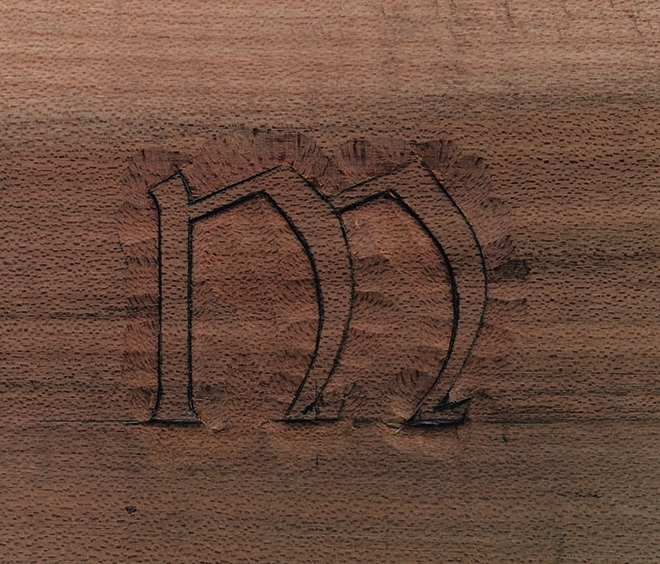
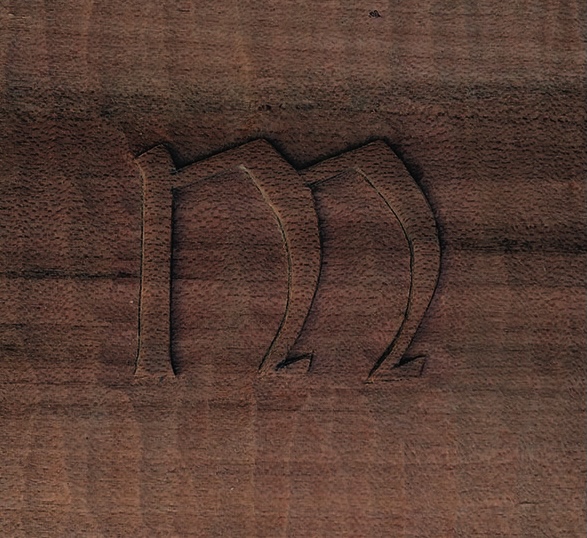
If you have started to practise carving the Becker font you will find it much easier than its Roman counterpart. First you do not have the problem of the acute angles on the A, M, N, V, W etc. and letters are made up of small sections. Do not expect the letters to appear perfect on the first cut. As you can see from the five boards I have prepared of the progressive carving of the letters H, A, B, C and O, the letters take shape and develop right up to the final cuts. I want to emphasise at this time that it takes a lot of practice to achieve really neat lettering, so don’t get despondent if at first you don’t succeed. I have carved the complete Becker font as
a sample board. You could, of course, do something like this as a project or just keep going with bits from the scrap box.
Project idea
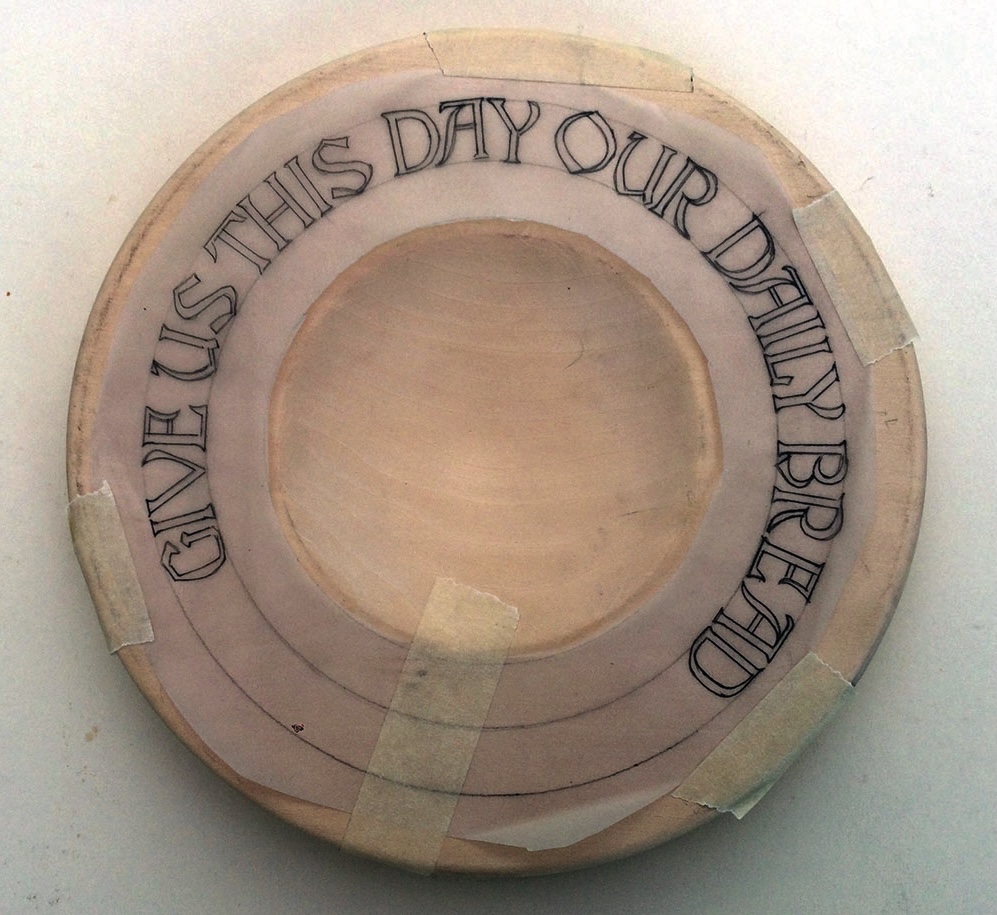
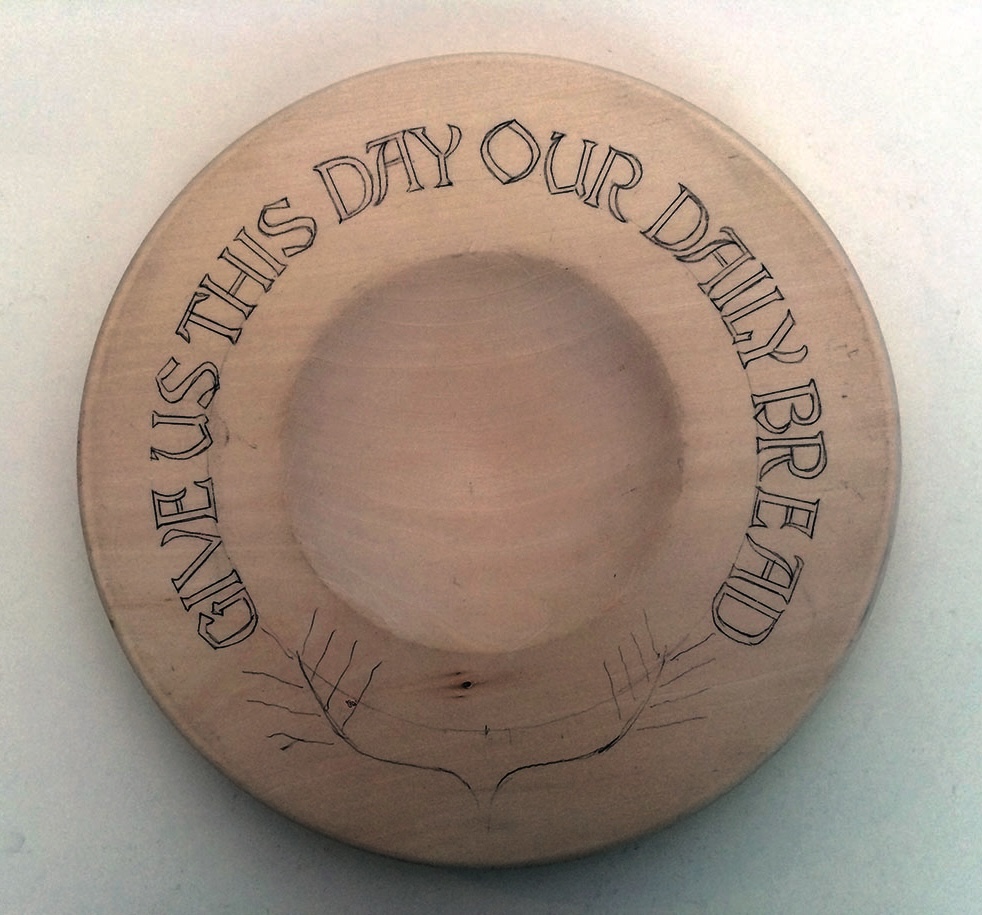
If you have successfully mastered the Becker font you might like to try a project idea. As with all my projects they are given in the form of general ideas rather than a list of specific instructions.
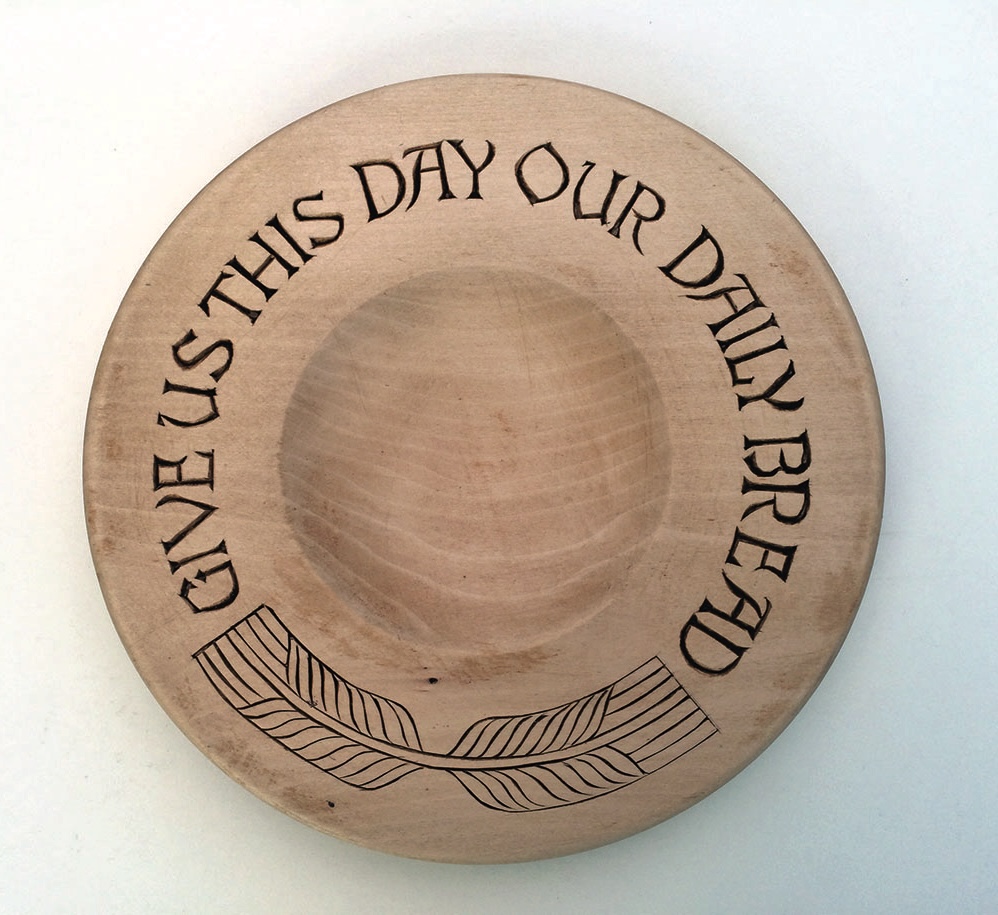
In this project I have carved a turned lime plate with the words: ‘Give us this day our daily bread.’ If you are not able to turn a plate you might be able to persuade a friendly turner to do it for you or you could, of course, use a flat piece of timber and make a breadboard.

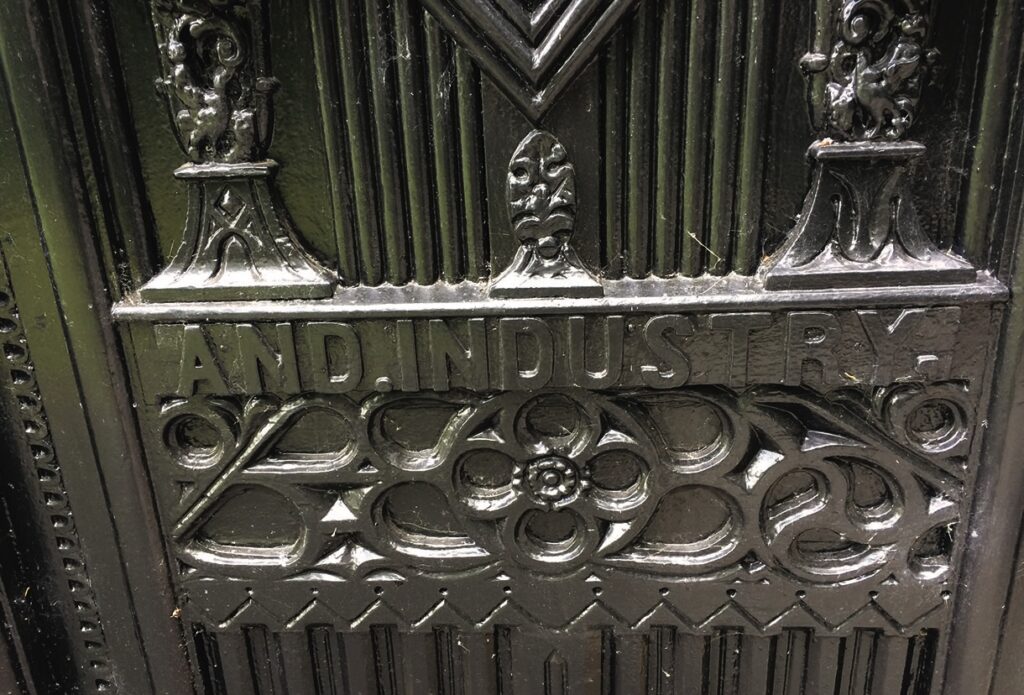
Different ways of carving letters
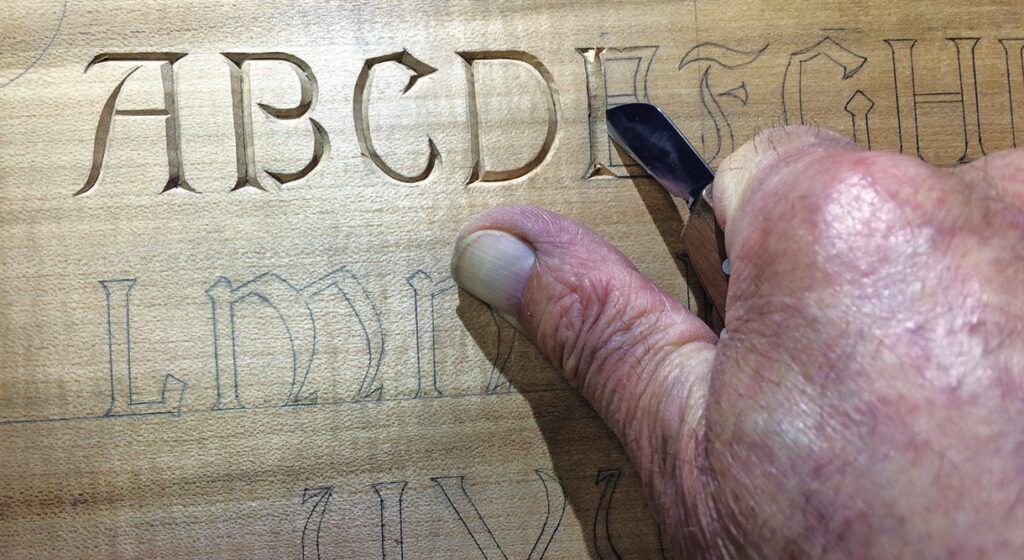
One of the easiest ways to produce neat lettering is to trace the letters on to your wood and simply chip carve the outline – it is both simple and effective. You will get a very pleasing result if you fill the chip-carved lines with a dark liquid wax.
Raised lettering
The traditional way of starting any relief carving – for that is what raised lettering actually is – was to do the setting in using a selection of chisels and gouges.
CARVER’S NOTE: ‘Setting in’ is the term applied to the vertical cuts which outline the subject to be carved
This requires a selection of tools when, in fact, for shallow raised lettering a single chip-carving knife will suffice. The outline of the letter is traced on to the wood and then a vertical cut is made around each part of the outline with your knife. Now, with a shallow gouge, say a No.3, you cut up to the vertical cut from about 3 or 4mms out. When this is completed around the letter you have a simple form of raised lettering, or you can go on to remove the rest of the background to produce the traditional form of raised lettering. The background can be taken down to a fine finish or left with quite prominent gouge marks. You might even try a hammer and punch finish.

CARVER’S NOTE: If you want the letter to stand out more, just go around again with the knife and remove the background

Ideas
With your newly found skills in letter carving firmly established, it should be a simple task to think of project ideas. These are a few to stimulate the thought process.
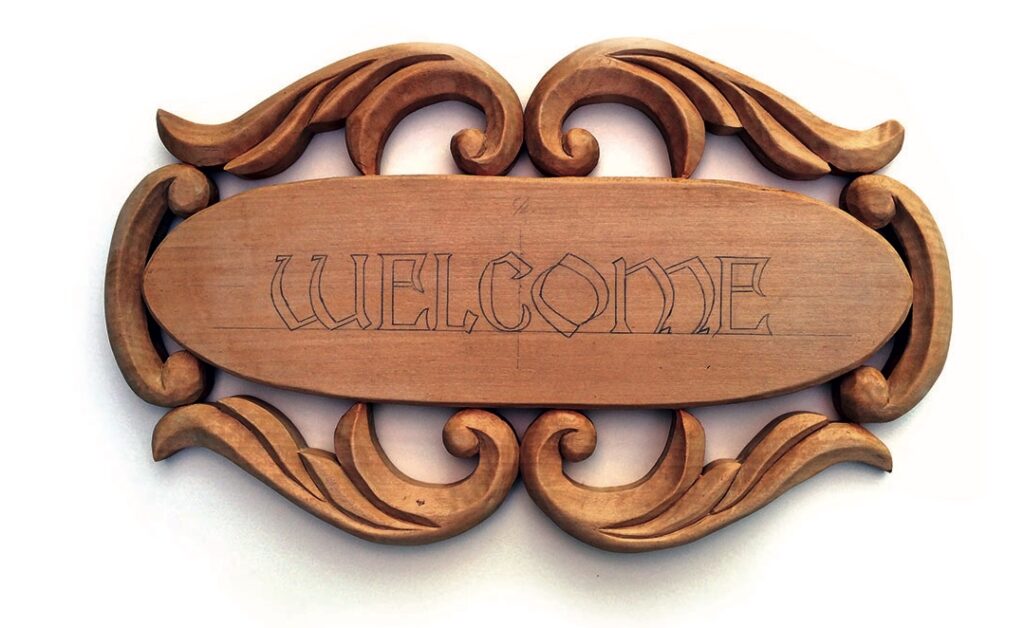
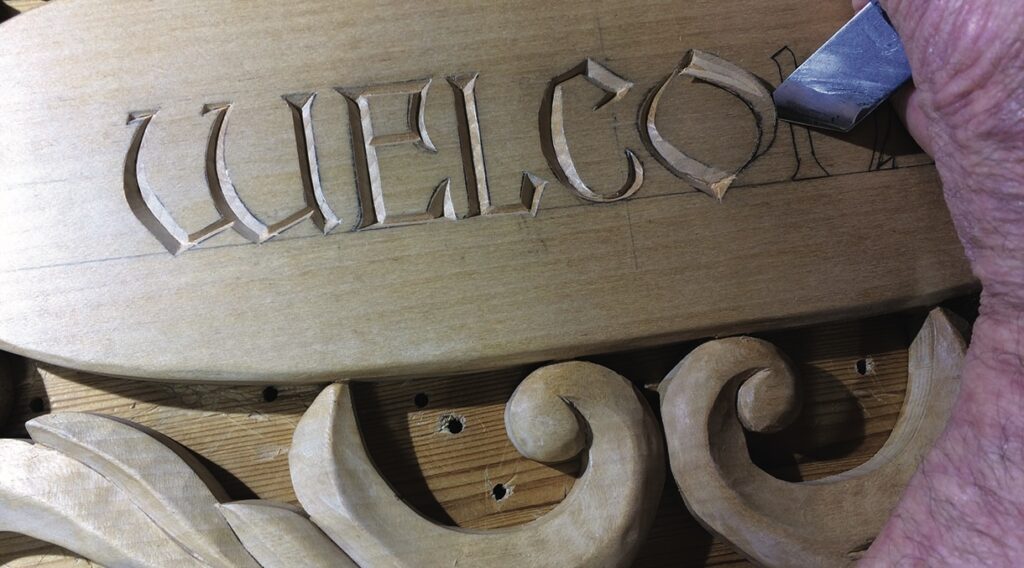
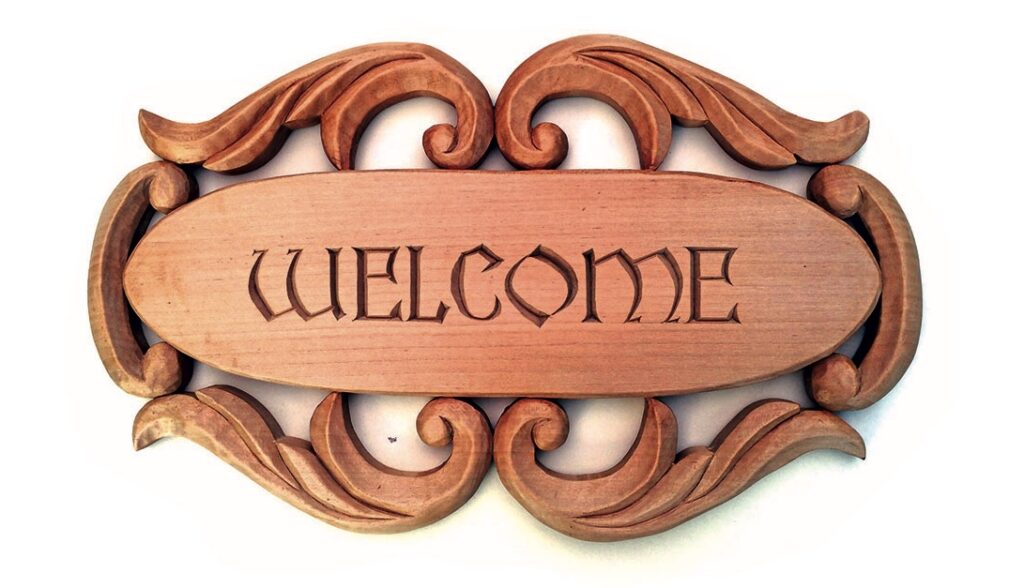
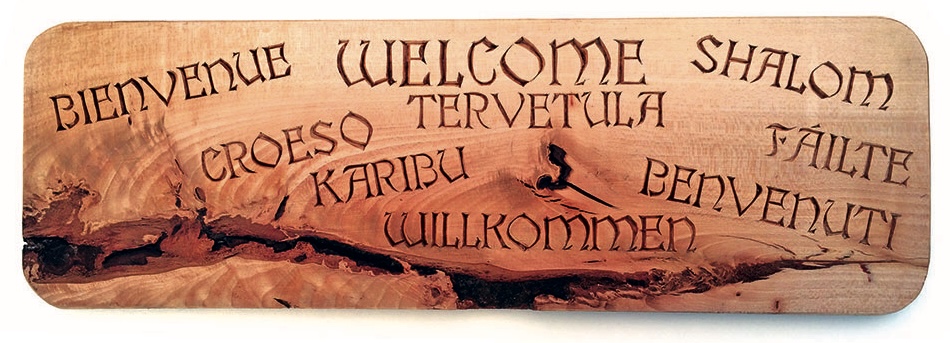
The first is a ‘Welcome’ sign. In this case I have carved some acanthus scrolls to decorate the piece, but you could of course use a chip carved, pierced or other decorative motif.
Keep your tools sharp, don’t carve when you’re tired and work in a comfortable position. Above all remember to practise, practise, practise.
I hope this article has given you food for thought and a basis for some experimental techniques of your own and some project ideas. Keep your eyes open and your camera handy. There are hundreds of things you can make with your letter-carving skills – children’s bedroom door plaques, initialled fobs for key rings, notice boards, house names and monogrammed coasters to mention but a few.