Edward Wild shares his technique for creating deceptively simple but perfectly stunning sunburst panels from plain veneers.
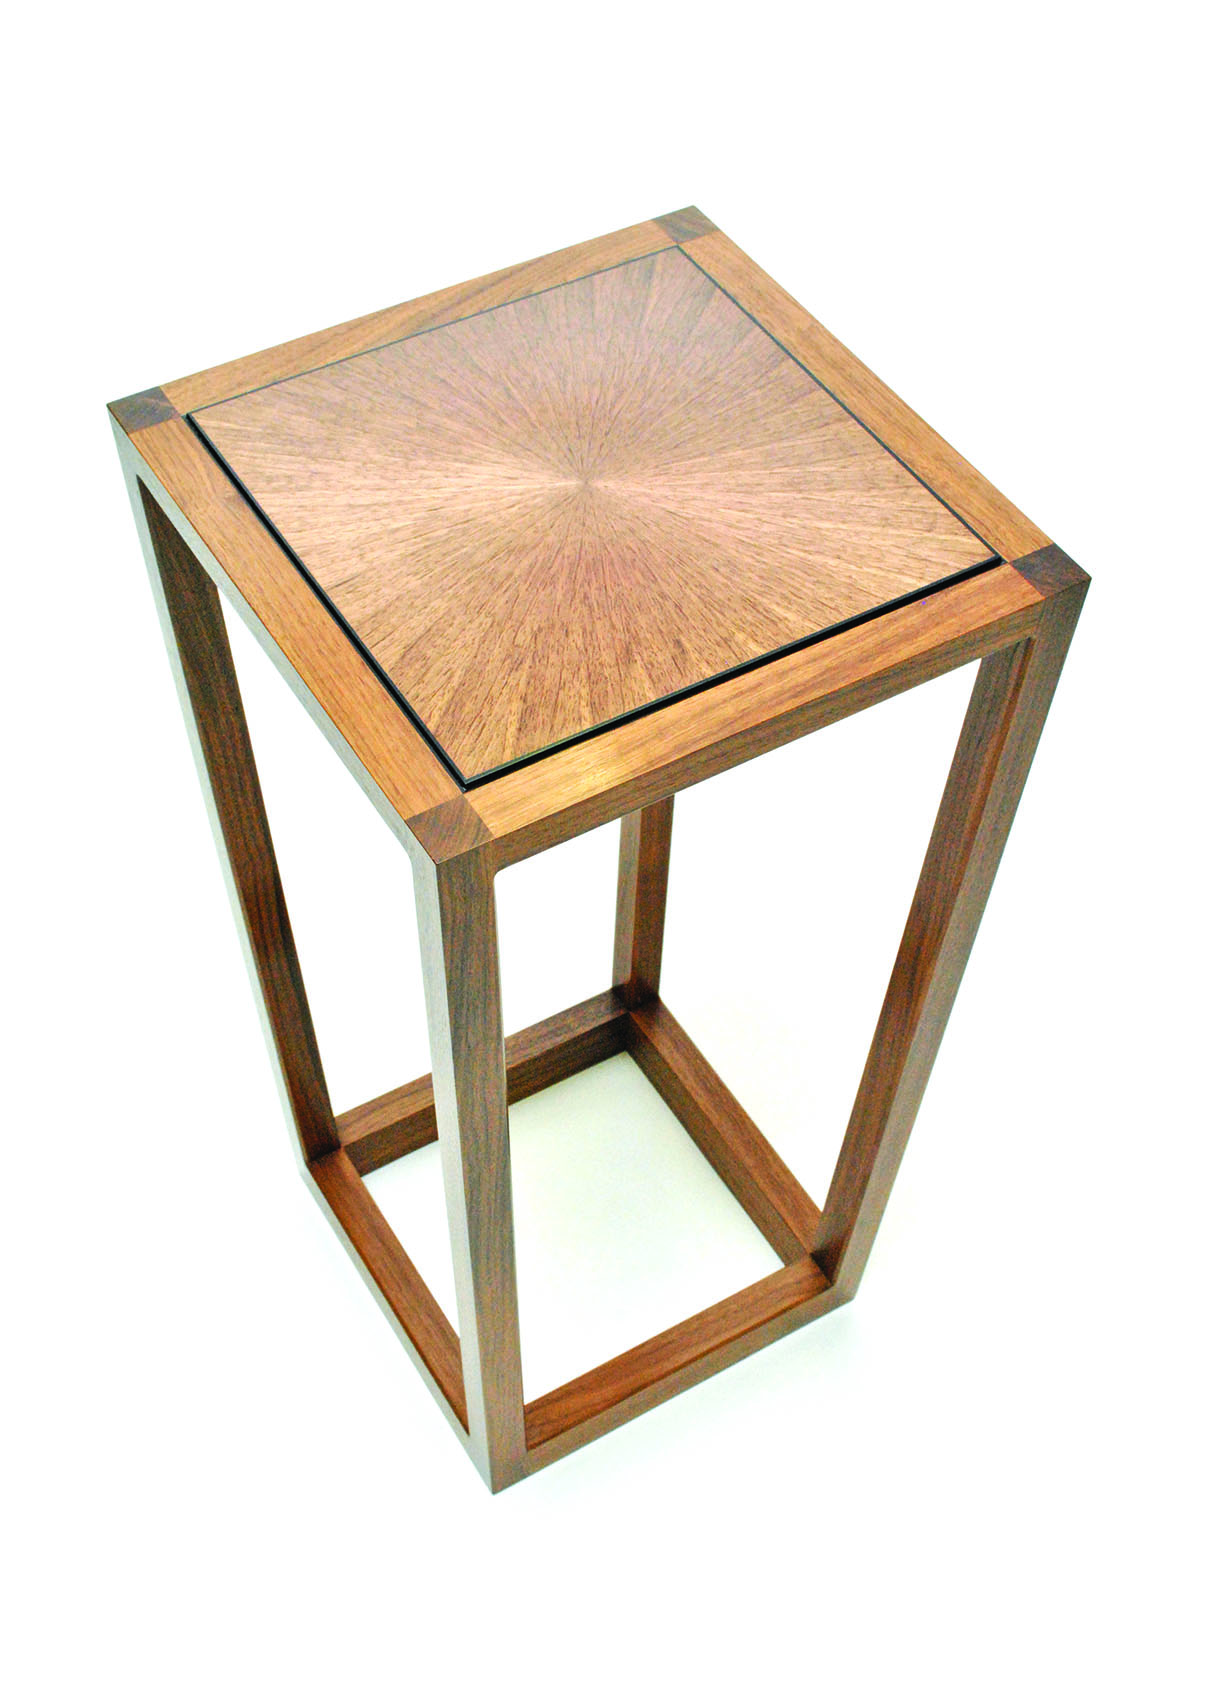
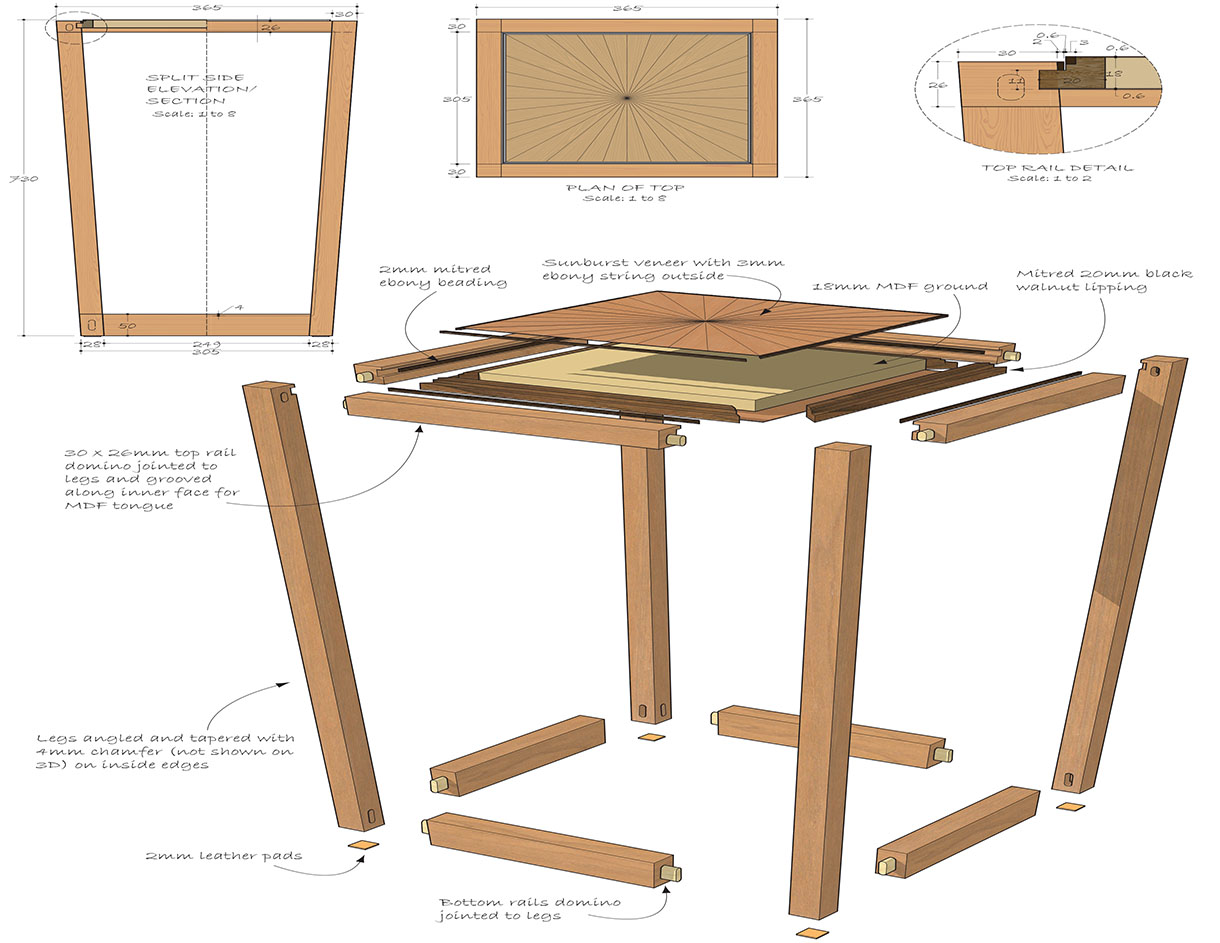
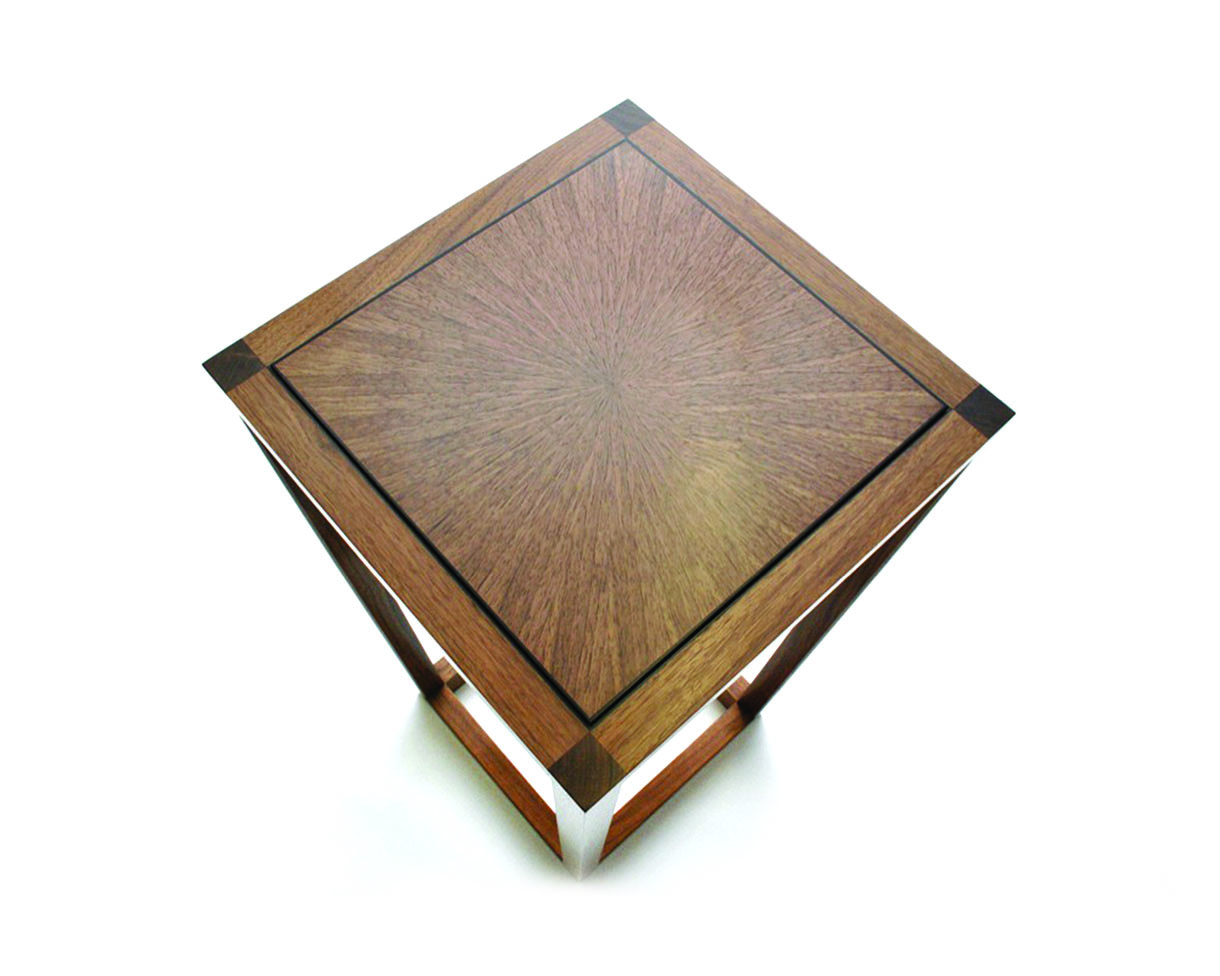
The Burnett Table originated from a client’s request, “I would like a side table similar to your Hall Table, but a little different”. This set the gears in motion. I attempted to create a table that looked clean and sleek; it has slightly tapered black walnut (Juglans nigra) legs, which angle inward from the top to the base. These form a framework into which the top sits, in a similar way to a frame and panel construction. The table top is elevated from the frame by 3mm, giving definition with a shadow line – this is accentuated with ebony (Diospyros crassiflora) string lines and beading.
The table is square when looked at from above, with the side view being repeated on each side. The overall table height is 730mm, the width at the top is 365mm and 305mm at the base. The legs taper from 30mm square at the top of the table to 28mm at the base, with the taper being on the two outer edges of the legs. The legs and rails are joined together with Dominos. The top is an 18mm MDF core, lipped with 20mm American black walnut with a 11mm tongue cut into the walnut, which fits a groove on the inside of the rails. The MDF is veneered with 0.6mm black walnut veneer. There is a 3mm string line around the table top and a 2mm beading round the rails.Table exploded view
Choosing the veneer
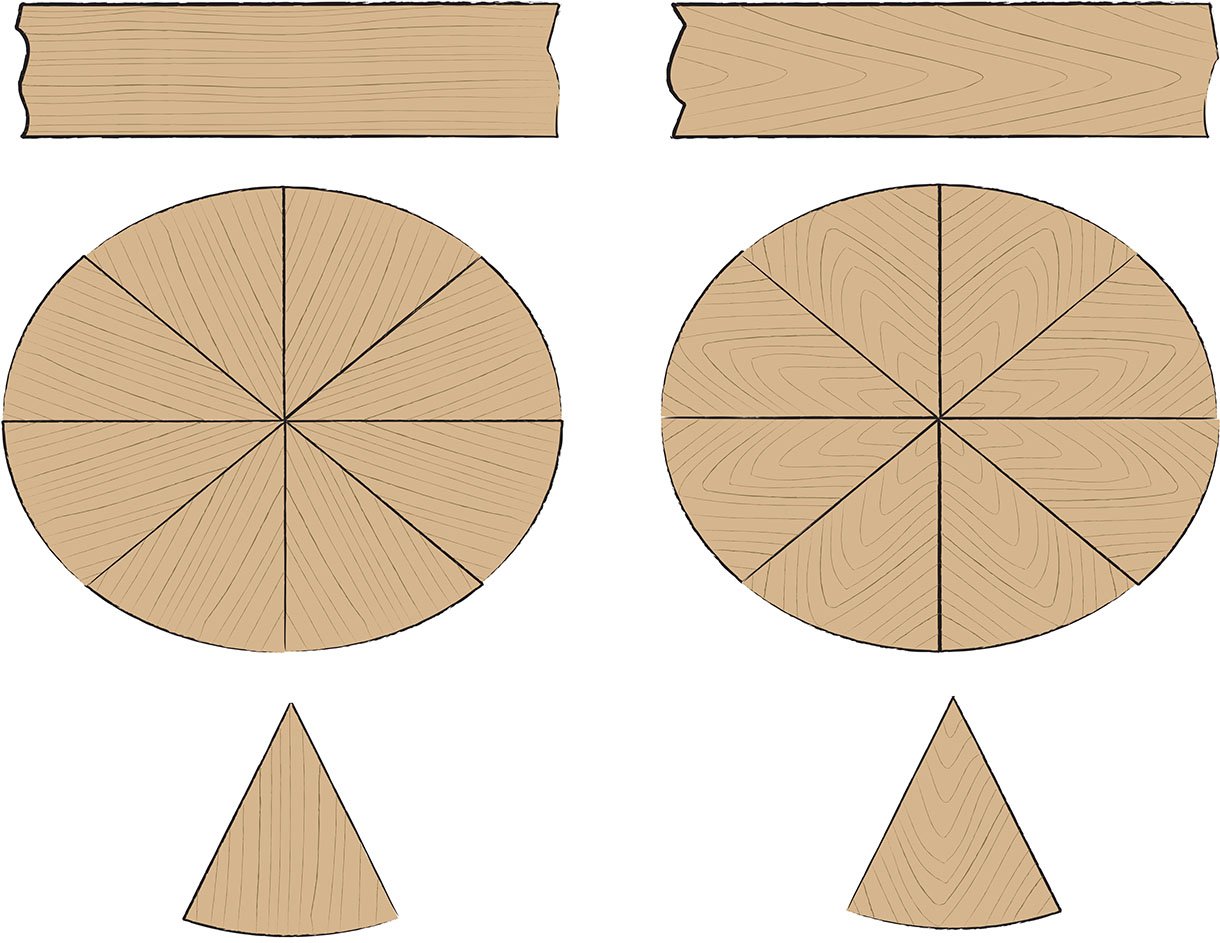
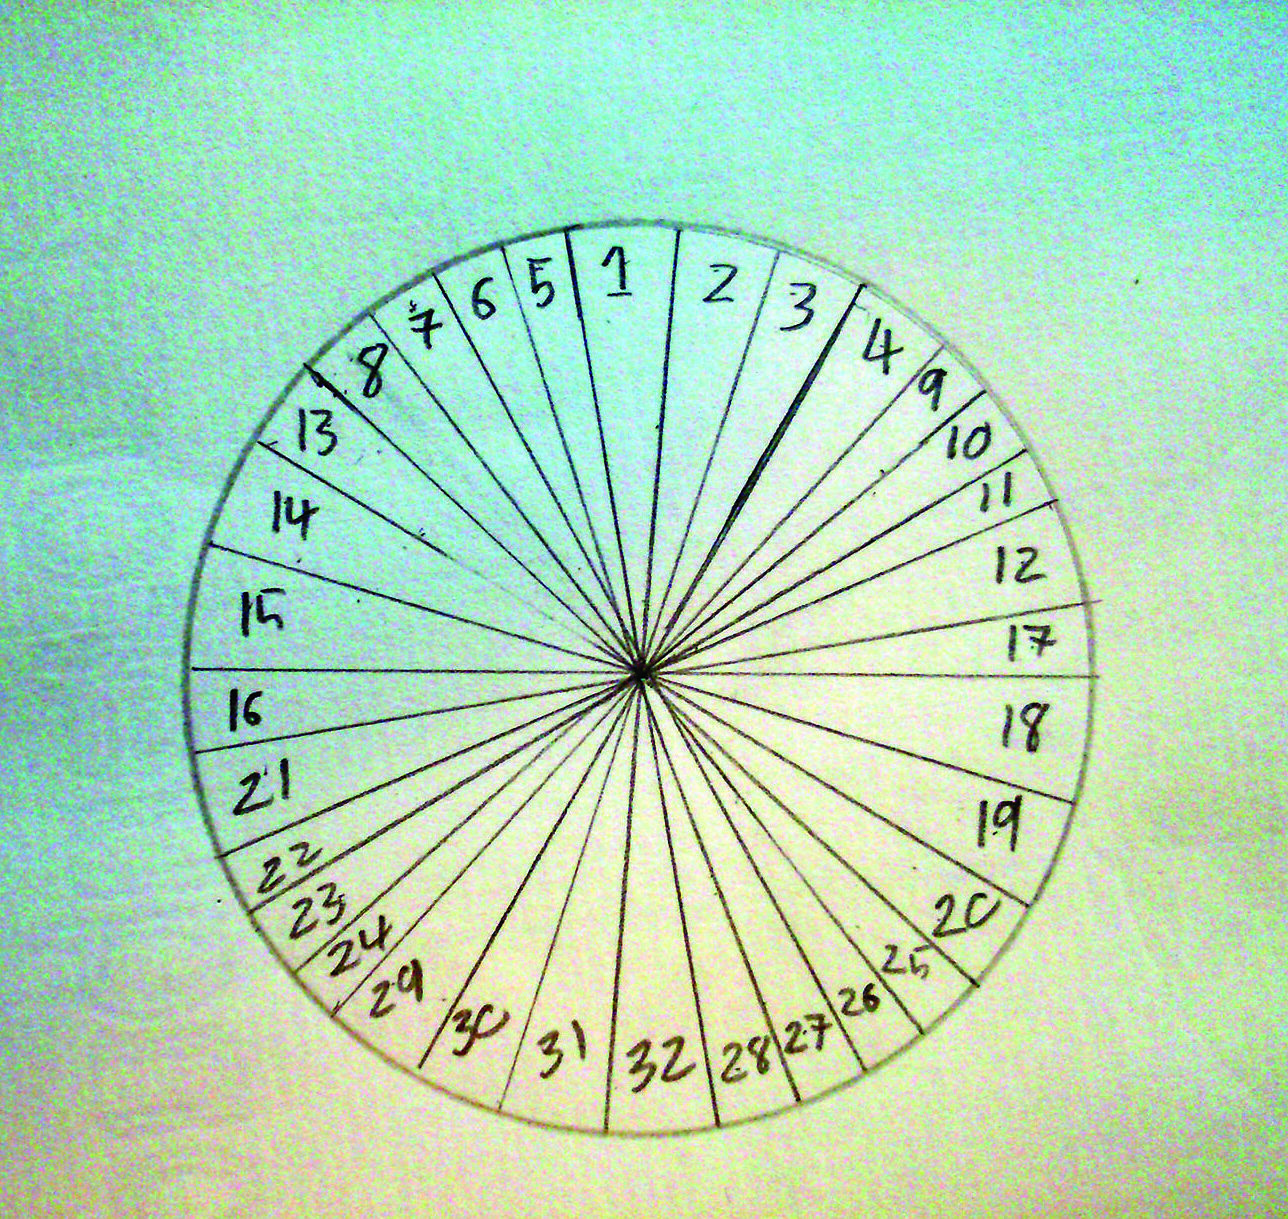
The table top is a sunburst made using 32 separate triangles radiating out from a central point, the making of which I shall deconstruct in this article. The sunburst is made from black walnut veneer; if attempted in solid wood it would be pulled to pieces by the daily movement of the wood, with the wider end of the triangle expanding and contracting with changes in humidity more than the tip, resulting in the joint failing. I had to consider how I wanted the sunburst to look; this could be dramatically altered, depending upon the grain of the veneer and how I laid it up. Crown cut or tangential cut timber gives a dramatic flame figure in a sunburst – a very different look to linear quartersawn timber. For the Burnett table I was specifically after the regular linear pattern given by quartersawn wood.
Flattening the veneer before use
Veneer can become crinkled and misshapen over time; this is particularly true of burr veneers that have complex and irregular grain. To flatten the veneer ready for work, each leaf is sprayed lightly with water to introduce some flexibility, and then layered between sheets of blotting paper. The whole bundle is then clamped between two boards of 18mm MDF. The moisture is drawn into the blotting paper while the pressure keeps the veneer flat.
If you’re working with light timbers, such as sycamore (Acer pseudoplatanus), it can be helpful to put a few drops of bleach in the water to prevent discolouring. Each hour the paper is changed, and a width measurement is taken from one of the leaves. The veneer will expand with the addition of moisture, and then shrink as it dries. Once three equal measurements are taken, the veneer is dry, flat and stable. It can take 8–12 hours to flatten a bundle, but produces perfectly flat veneer.
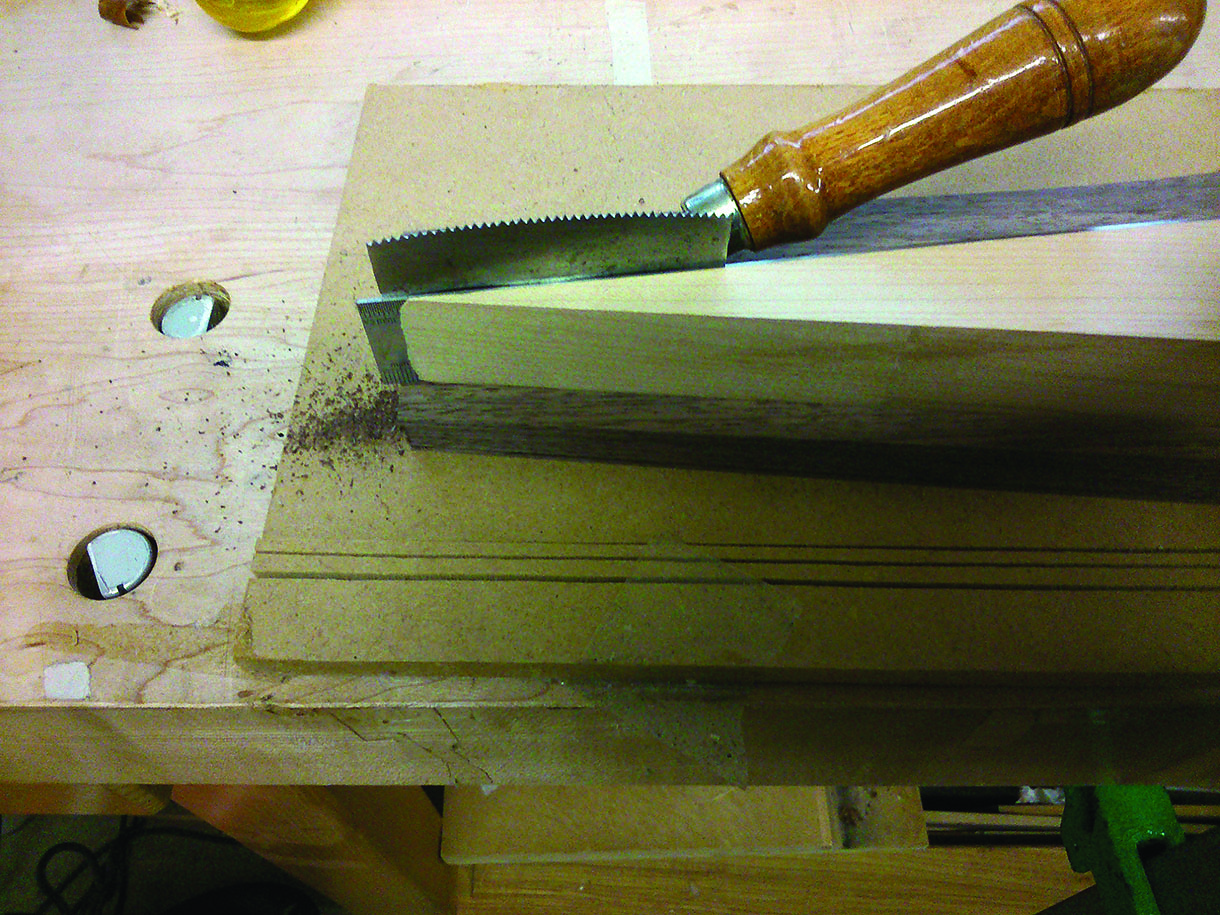
Preparing the groundwork
Before I could start work on the veneer, I needed to prepare the groundwork to form the core of the table top onto which the veneer would be glued – this must be both stable and solid. Traditionally hardwoods such as mahogany (Swietenia macrophylla) were used for their stability. However, over time these can move resulting in the veneer cracking. I used 18mm MDF as the groundwork for its stability and flatness, and lipped it with 20mm wide solid American walnut. I cut a tongue into the walnut to fit into a groove in the table frame and keyed the surface of the groundwork with 100 grit sandpaper, making it rough in preparation for gluing.
Preparing and flattening the veneer
I checked the 32-leaf bundle of quartersawn American walnut veneer for cracks, damage or misplaced leaves, before numbering each leaf from 1–32. If a leaf is turned up the wrong way, it will show vividly once the sunburst is polished, as each side of the veneer will reflect light in an opposite direction. This corresponds to the direction it is sliced across during production. I used a window template to select each piece of veneer and a pair of hinged mirrors to visualise how they would look.
Cutting the sunburst
Once the veneer had been selected for the sunburst, I needed to make a hardwood template for cutting the 32 triangles. This had an 11.25° angle and was 38mm high and 460mm long. The template was the most important part of the sunburst; if this was not accurate the triangles would not fit together, and the sunburst would not work.
The template was made out of three pieces of 38mm thick quartersawn maple (Acer campestre), for stability and hardness. The template was marked using a marking knife, cut on the bandsaw, and then planed by hand to final dimension. If it is 0.1mm undersize, the final sunburst will be over 3mm undersize – if it is 0.1mm oversize, the final piece will be 3mm oversize so the final leaf can be trimmed to fit. The sides of the template must also be flat and square to the face of the triangle. I checked the template was accurate by marking around it 32 times using a knife on a board of MDF to form a circle.
With the template completed I moved onto cutting the veneer. I started by roughing out all 32 triangles at once. The template was clamped to the veneer bundle, and I held a metal ruler against the template, adding 1mm to the template width on each side. I used a veneer saw to cut through all 32 leaves simultaneously. I started with a back cut (a small cut at the exit end of the veneer in the opposite direction to the main cut), to stop the veneer splitting as each saw cut is completed. Each leaf was then cut to its exact size using the template and a very sharp Japanese marking knife. The back of the knife is flat and runs against the template. The cutting end of the knife is curved, so I can rotate it through the cut. Again I do a back cut to stop breakout, and try to cut with the grain if possible.
Laying up the veneer
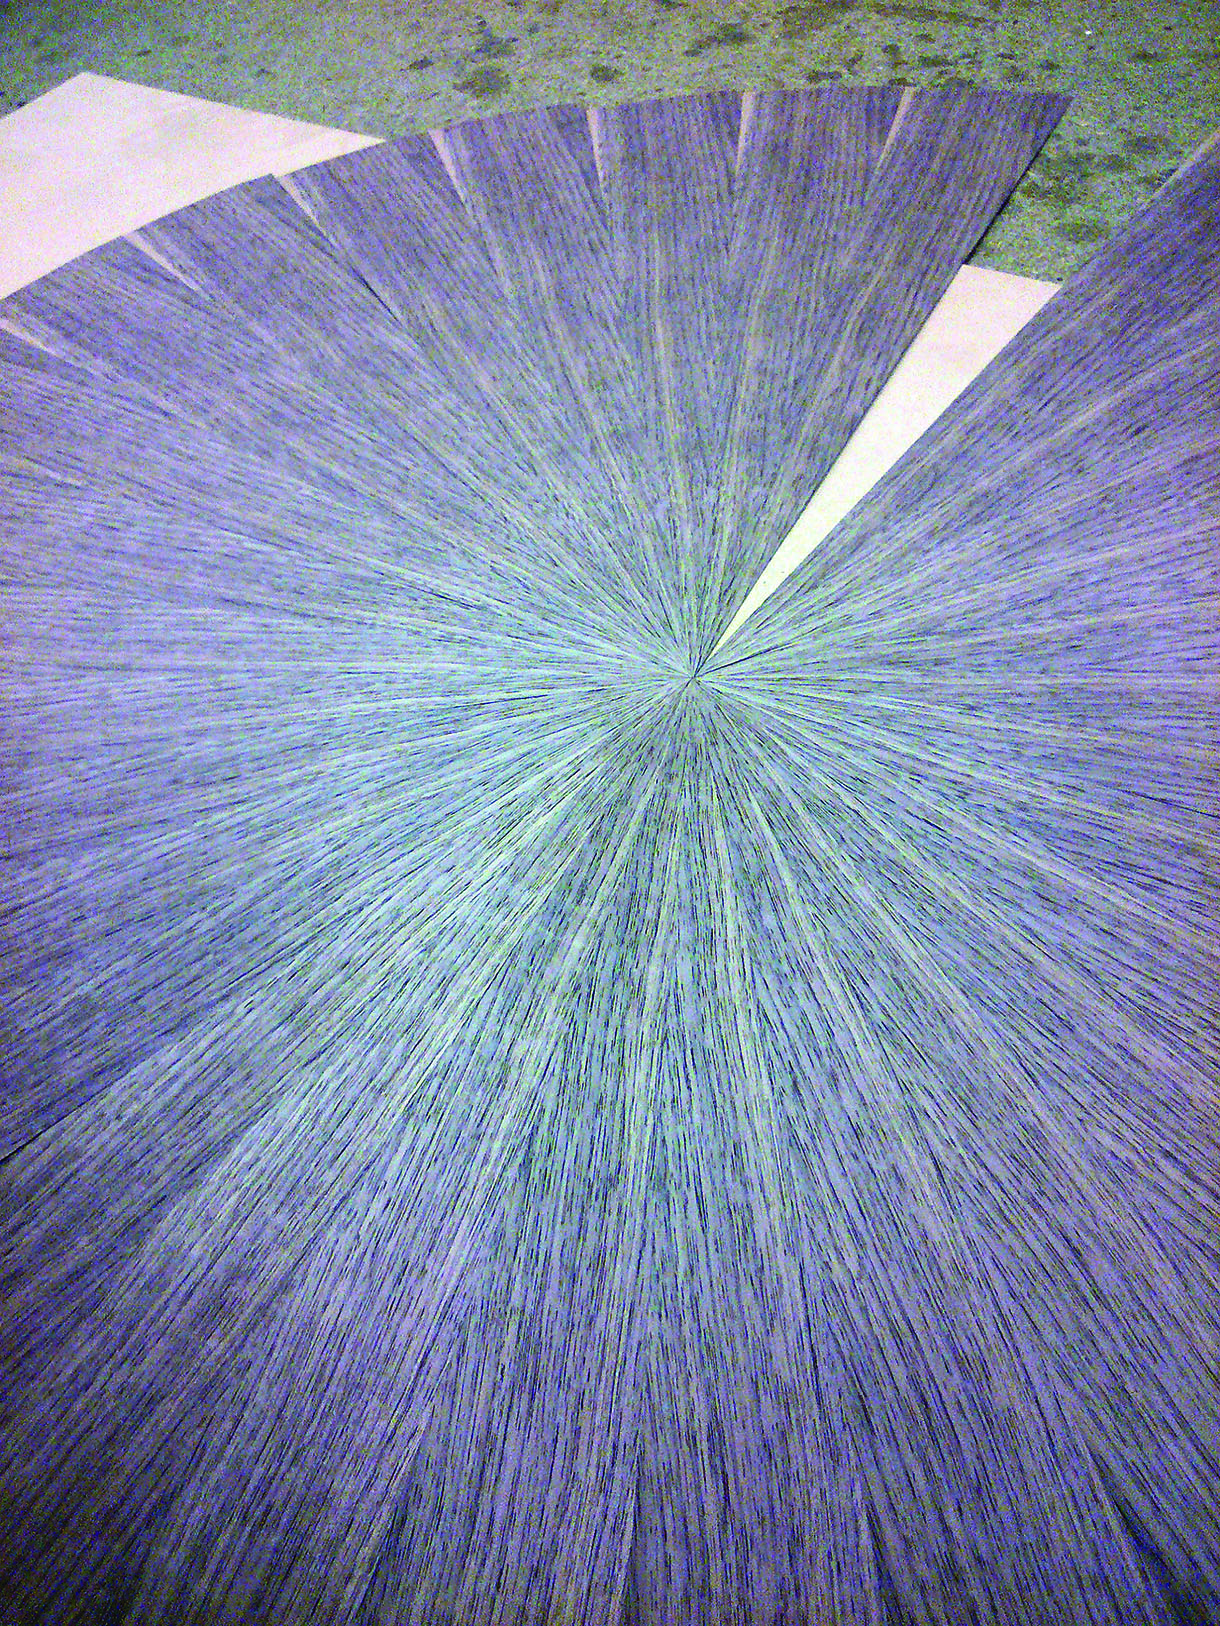
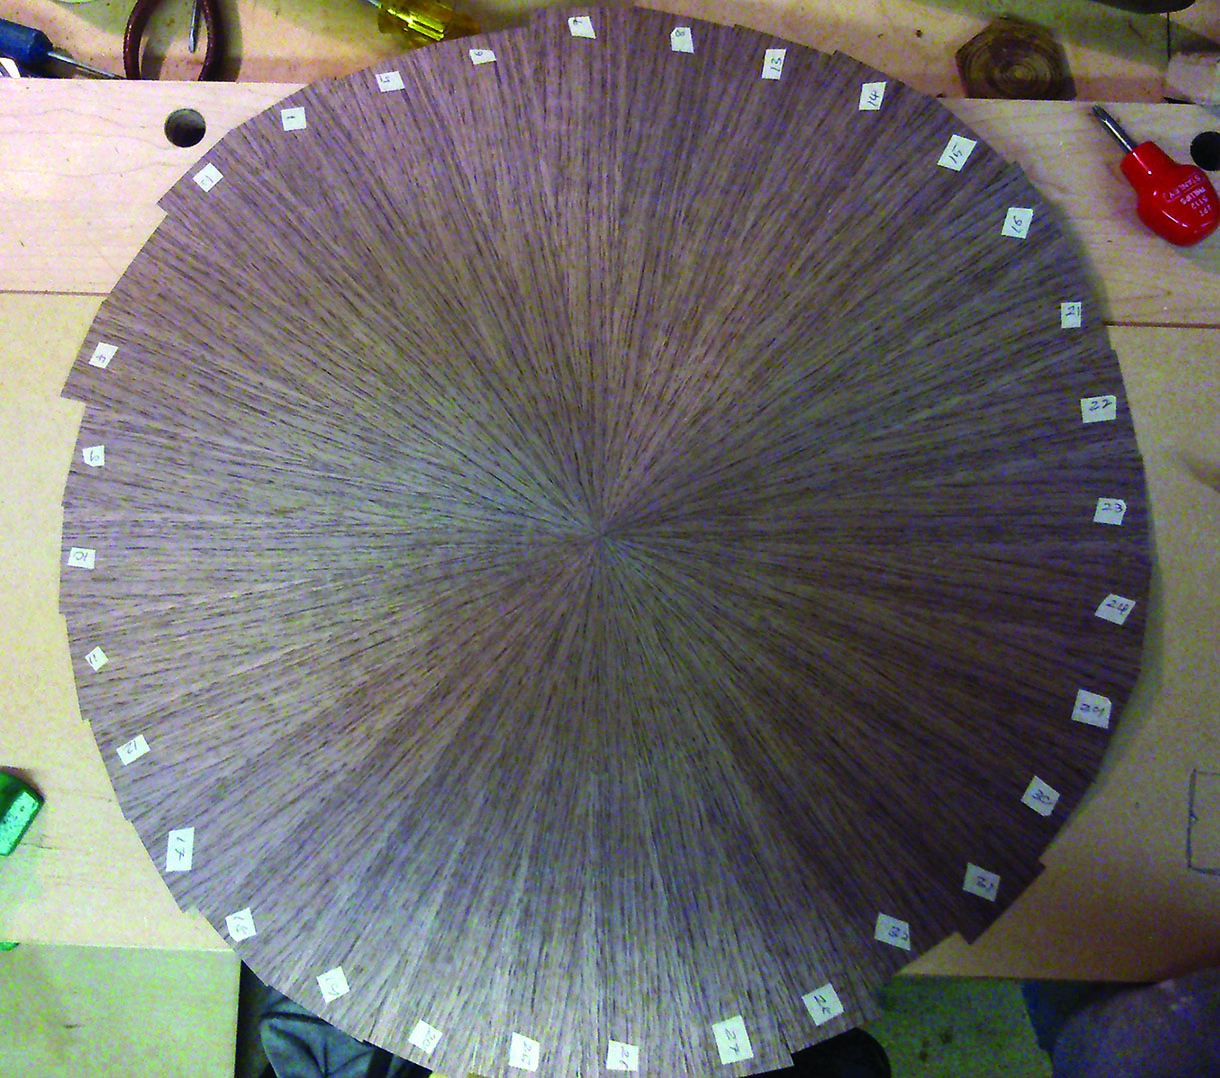
The pieces are not laid from 1–32 in consecutive order around the circle, but in a four-break match; this means no leaf is more than four away from a similar leaf. If I was to lay the leaves from 1–32, from the top to bottom of the veneer bundle, the grain would noticeably differ between number 1 and 32, giving an uneven look. When laying up the sunburst, the tip of each triangle was both important and vulnerable. The aim was to fit each point perfectly at the centre without damaging the very tip. Each leaf was placed in position by eye, and then taped to the leaf next to it using sticky tape. The sticky tape has just enough elasticity to stretch and pull the joint between each leaf tight, without causing damage.
This forms a perfect seamless joint between each leaf. If a knick is found in a leaf at this stage, it will need re-knifing. Sometimes I will leave one leaf out and insert it after gluing up the sunburst- the gap will allow for expansion from moisture in the glue, without gaps forming in the sunburst. In this case the sunburst was to be cut into a square, reducing the risk of expansion, so all leaves were glued at once.
Once each leaf was in place, the sunburst was turned over and re-taped on the underside; this would be the top surface on the finished piece. It was important to make sure the tape was holding each joint tightly while being no more than one piece of tape thick at any location. If several layers of tape build up, these will cause dents in the work when the veneer is pressed. It took several attempts to get all the pieces fitting correctly at the centre of the sunburst. A sunburst can take from 20 minutes to four or more hours to lay up depending on how each tip fits together.
Gluing the veneer
Once the sunburst had been taped up, I marked and cut a square from the centre for the table top. This was cut with a sharp scalpel 5mm over size on each edge using the groundwork as a template. The veneer for the underside was cut in the same way and both sides were glued simultaneously to ensure stability. The groundwork was rolled with an even coating of urea formaldehyde glue and the veneer was stuck and taped in place to hold it in position. I rolled each joint with a veneer roller ensuring they were smooth and flat and there were no air pockets. To help give an even pressure during glue-up and to prevent the press and veneer sticking a piece of 3mm waxed MDF was placed on top of the veneer. The veneer was pressed using a vacuum bag which gives a pressure of approximately ¾ tonne per square foot.
Preparing the string-lines and polishing the table
Following the glue-up the tape was de-stuck using a warm iron, which releases the tape glue. The surface was then cleaned with cellulose thinners to remove any remaining glue residue left from the sticky tape. I routed a groove in the table top for a 3mm ebony string-line and the string lines were mitred and glued in place.
Once the top was completed, I then sanded the surface. It was important to work with dust extraction to ensure no ebony dust would get rubbed into the grain of the black walnut. I sanded the table top using 180, 240 and 320 grit in that order. It is important here to methodically work over the table, giving each area the same amount of sanding so you do not sand through the veneer by overworking one location. The 180 grit removes any marks in the timber, the 240 grit removes any lines left by the 180 grit, and the 320 grit removes any marks made by the 240 grit.
I would normally always sand with the grain and not across it, however this is difficult with a sunburst. The top was polished by hand using French polish, finishing with a coat of beeswax. The table top was polished before the table frame was glued-up. The layer of beeswax ensured no glue could adhere to the top or damage it. Once the table was glued, final sanding of the table itself was completed, and the table legs and frame were French polished. French polishing can take time; however, it gives a depth and clarity to the timber which is quite unique, lasts for a considerable time, has flexibility allowing it to move with the wood and can be relatively easily repaired if damaged, it is one of my favourite finishes.
Conclusion
It is the combination of the minimalist design and dramatic top that I feel allows the wood to speak for itself, and gives the table an understated elegance. I have not been able to cover every aspect of the table design and construction; however, I hope here to have demonstrated many techniques and processes that will help you to tackle some complex veneering with resounding success.
Why we use veneer rather than solid wood
Veneer has been used for the very finest furniture for over 4,000 years, utilising timbers that are rare, costly, highly figured, weak or inherently difficult to work. It allows complex intricate work to be achieved that cannot be made with solid wood, due to stability and movement, enabling the creation of sunbursts, cross-banding, quarter matches or elaborate marquetry or parquetry techniques.
It also means that a particularly beautiful or rare piece of timber, such as a burr, can be used over a larger area such as a table top, rather than in the small sections it’s naturally found, while also removing the risks associated with daily timber movement. As some timbers become increasingly rare or endangered the use of veneer allows a small amount of timber to be used economically without exhausting diminishing supplies.
Further reading
PHOTOGRAPHS BY DARREN HULL