The Woodworkers Institute

We bring you the very best of woodworking!

“Make it with us”

Through & half-blind dovetails

Michael T Collins shows how to make one of the oldest woodworking joints that cabinetmakers are still keen to master
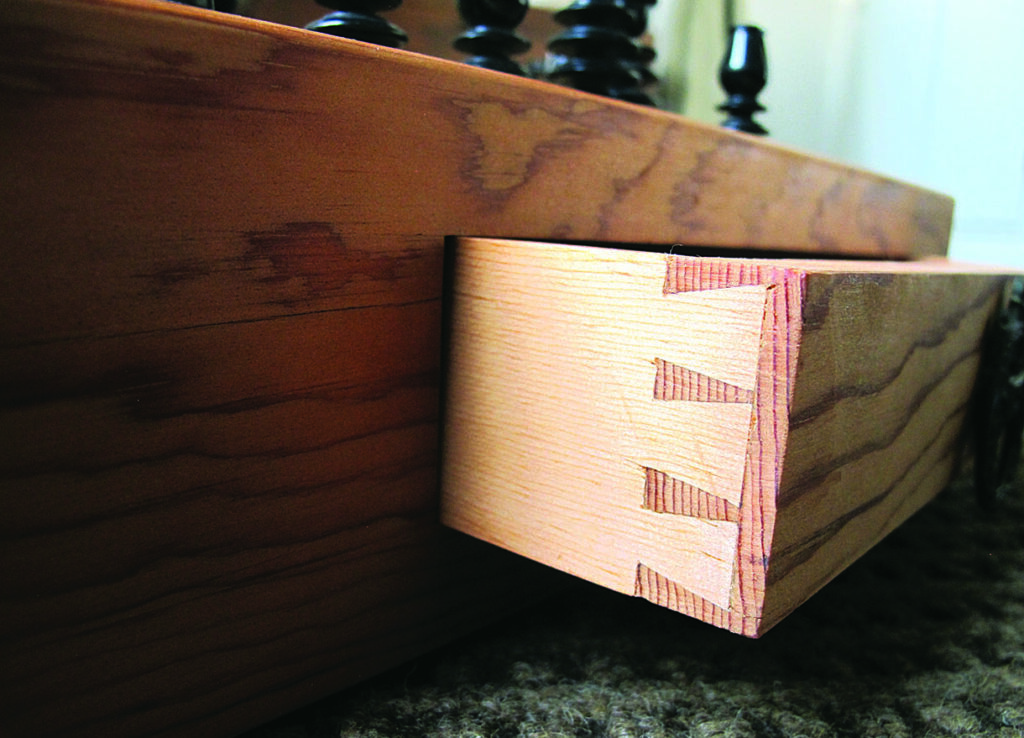
Close-up of handcrafted wooden drawer dovetail joints

The use of dovetails can be traced back millennia to the Egyptians and the ancient Chinese, who used them in their furniture. It is one of the strongest methods of joining two boards together at right angles. 

If the appearance of dovetails in a piece is not important, then the through dovetail can be employed, which is the simplest method to master. The half-blind or lapped dovetail is used when one side (such as the face of a drawer), must be uninterrupted. In this article I will take you through the steps of creating beautiful and accurate through and half-blind/lapped dovetails, the two types common in drawer making.  We will use traditional hand-tool methods.

Tools needed
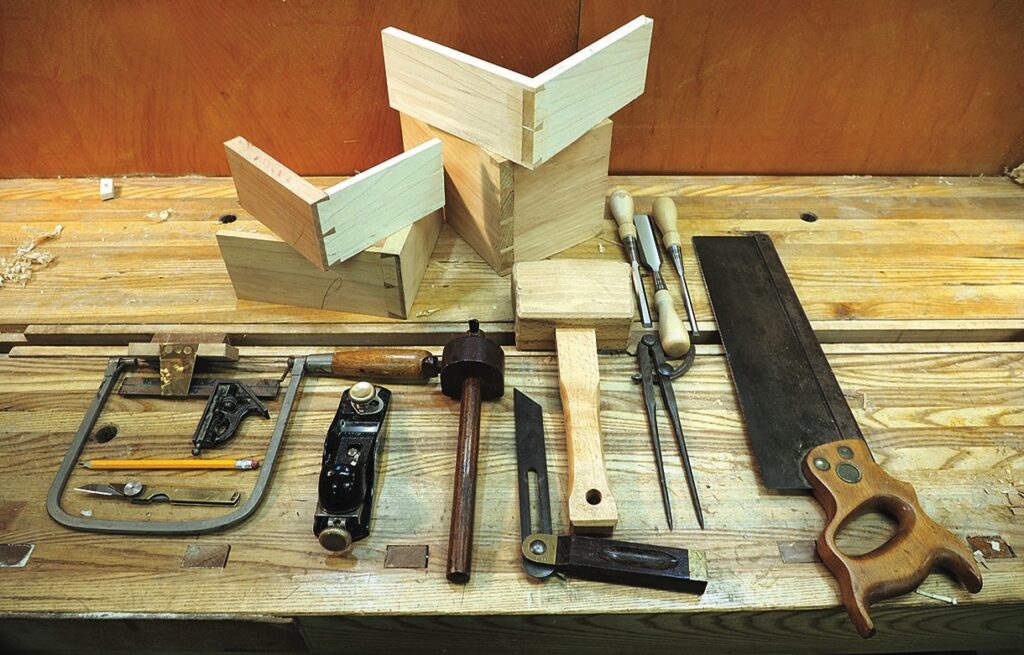
Woodworking tools and dovetail-jointed boxes on workbench

• Bevel edged chisel 6mm and 19mm
• Mallet
• Dividers
• Cutting gauge
• Marking knife
• Bevel gauge or shop-made dovetail gauge
• Dovetail saw (rip set teeth)
• Coping saw
• Block plane

Pins or tails first?

There are two schools of thought regarding the cutting of dovetails: do you cut the pins or the tails first? In certain circumstances (such as secret-mitred dovetails), there is no option but to cut the pins first.  But for the vast majority of dovetails I make, I cut tails first. I like to gang drawer sides together and cut tails simultaneously, which would be impossible to do if pins were cut first. For me, cutting tails first is a much more cost-effective and efficient method. 

Method for cutting half-blind or lapped dovetails

Prepare the boards to final dimensions, pay particular attention to making the ends square. Mark the face side and edge. I typically make drawers with 19mm thick boards for the drawer face (the pin board) and 9.5mm for the drawer sides and back.
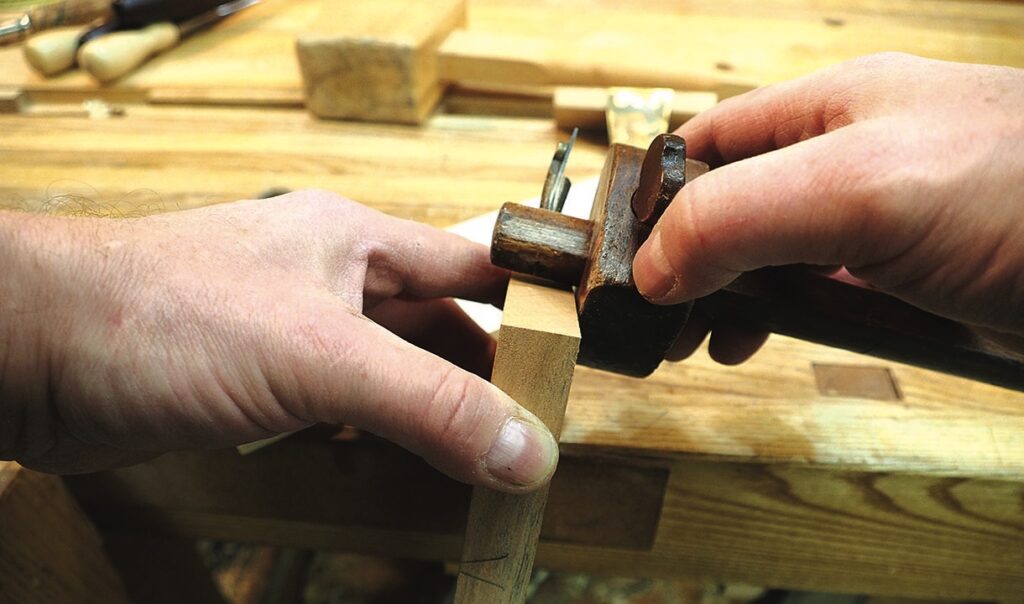
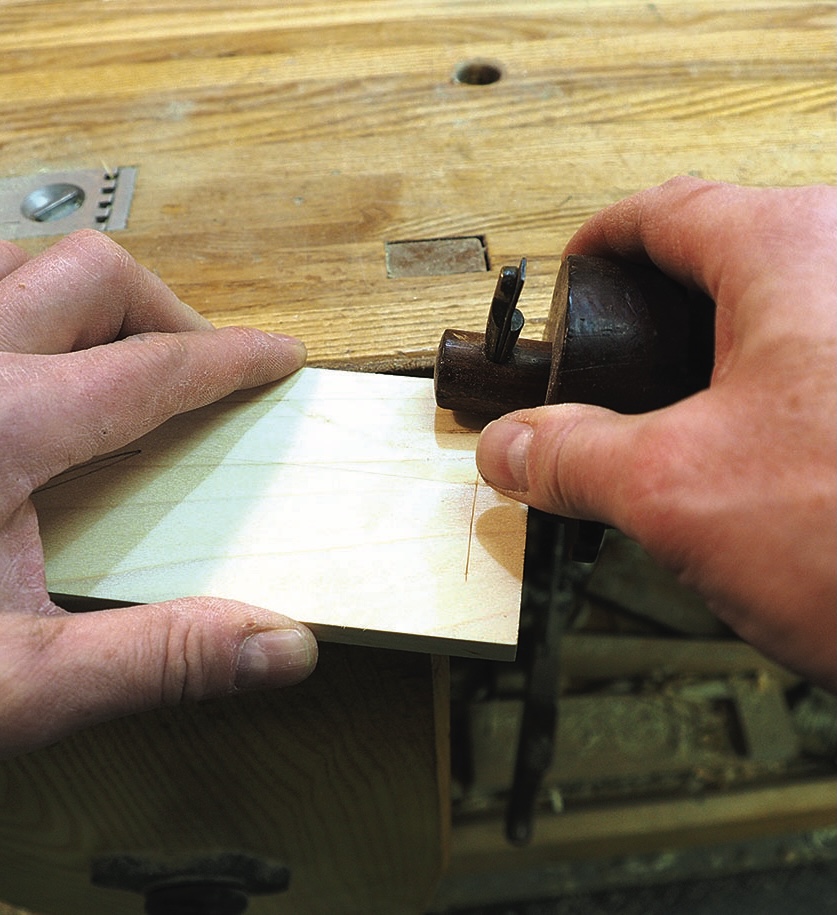
Woodworker shaving timber with a hand plane
1. First decide on the length of the tails. As a general rule I make the tail’s length three quarters of the pin board’s thickness, so if the pin board is 19mm thick the tails would be about  15mm; this will ensure the joint has adequate strength and will give a pleasing look when viewed from the side. With this setting, mark the location across the end grain of the drawer from the inside face
Woodworker marking a board edge with a cutting gauge
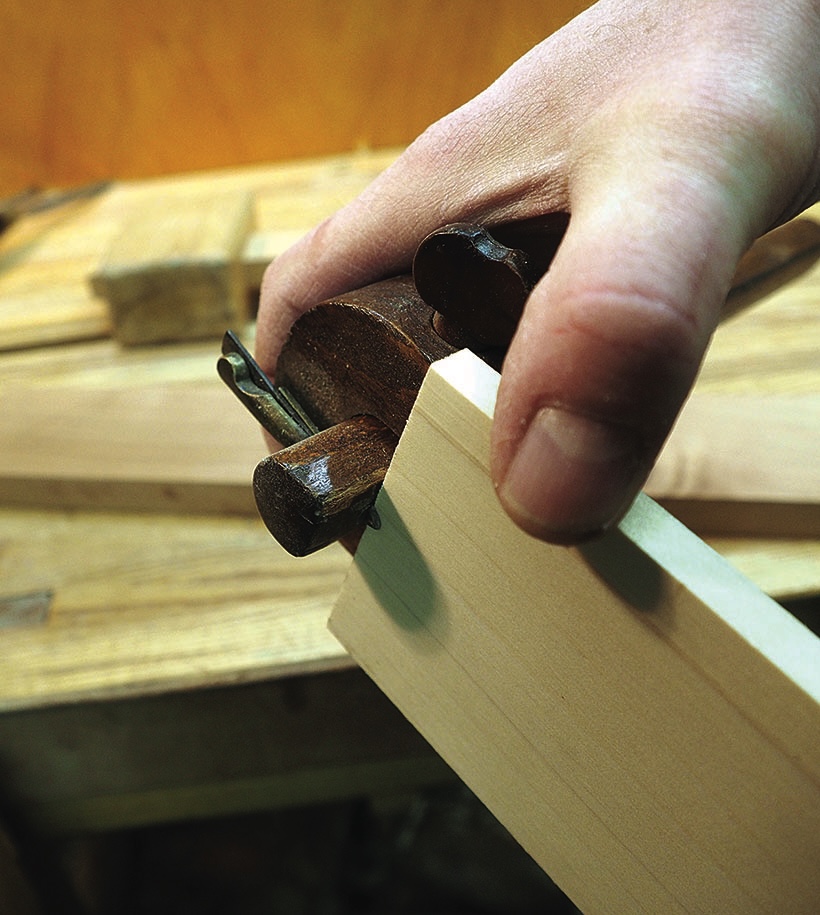
2. With 15mm set on the cutting gauge, mark the tail board across all faces on the ends that will form the blind dovetail
Hand using a hand plane to shape timber
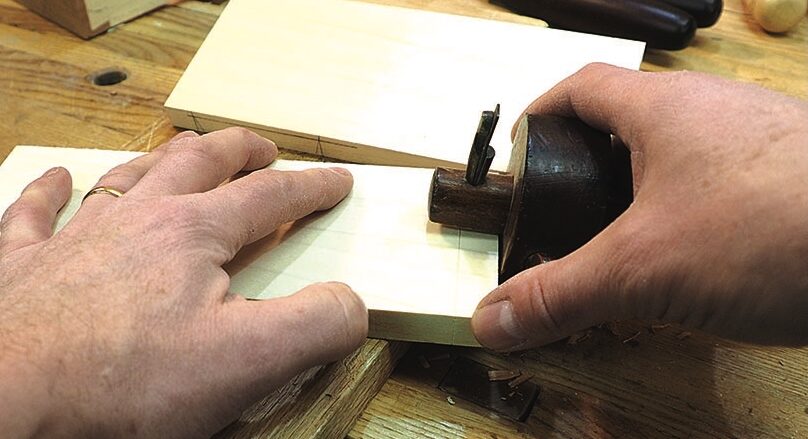
3. Now take the cutting gauge and set it to the thickness of the draw side 9.5mm (I actually add about 1mm to this measurement). This is achieved by hanging the cutter fully over the edge of the board and then take this setting and mark the distance on the inside of the draw front from the end grain

Now to lay out the tails

Compass marking dovetail lines on a wooden block
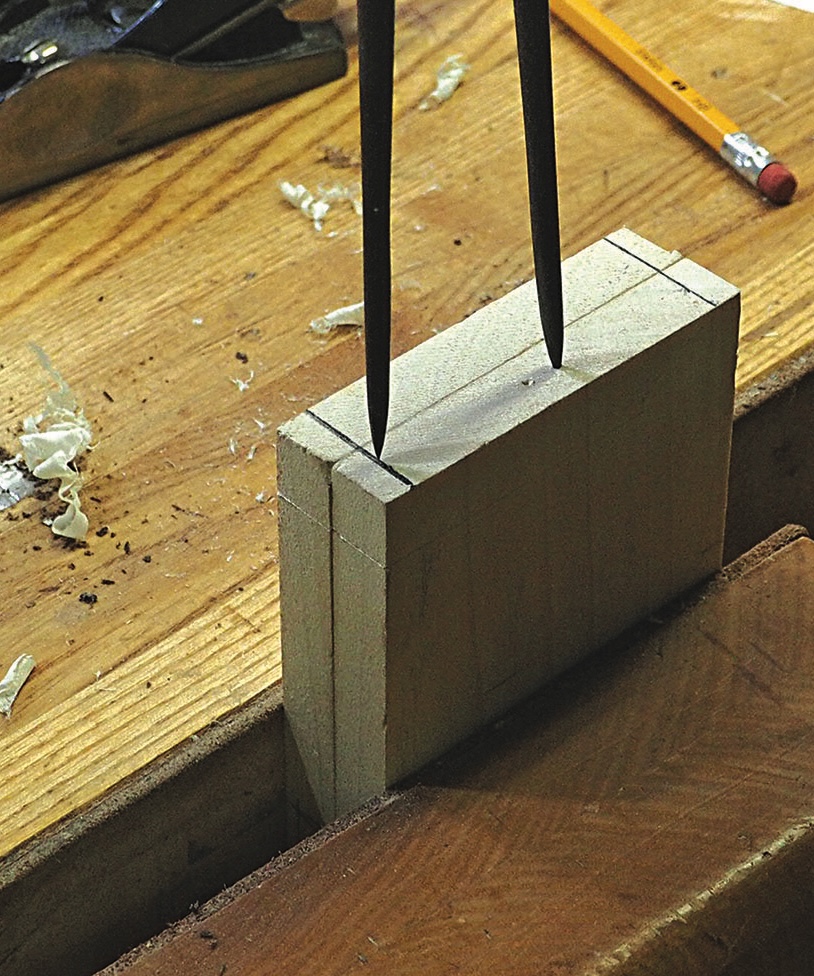
4. First determine the half-pin width: this is a matter of personal choice and aesthetics. I learned to eyeball the size, and so for a 75mm high drawer, a 6.5mm half-pin is about right. Mark the half-pin on both ends of the tail board. Now decide the number of tails you want. For illustration this drawer will have two evenly spaced tails.  Gang the sides together in the correct orientation. To mark the tails, set a pair of dividers to half the distance between the two half pins plus a ‘bit’ (this can be 1.5mm or 3mm). If you are planning on cutting three or four tails, set the dividers to a third and a quarter the distance plus a ‘bit’. Starting at the first half pin mark, walk the dividers across the end grain of the drawer. Place the divider in the other half pin mark and walk the dividers back – this involves a little trial and error
Hand adjusting steel square and bevel gauge on workbench
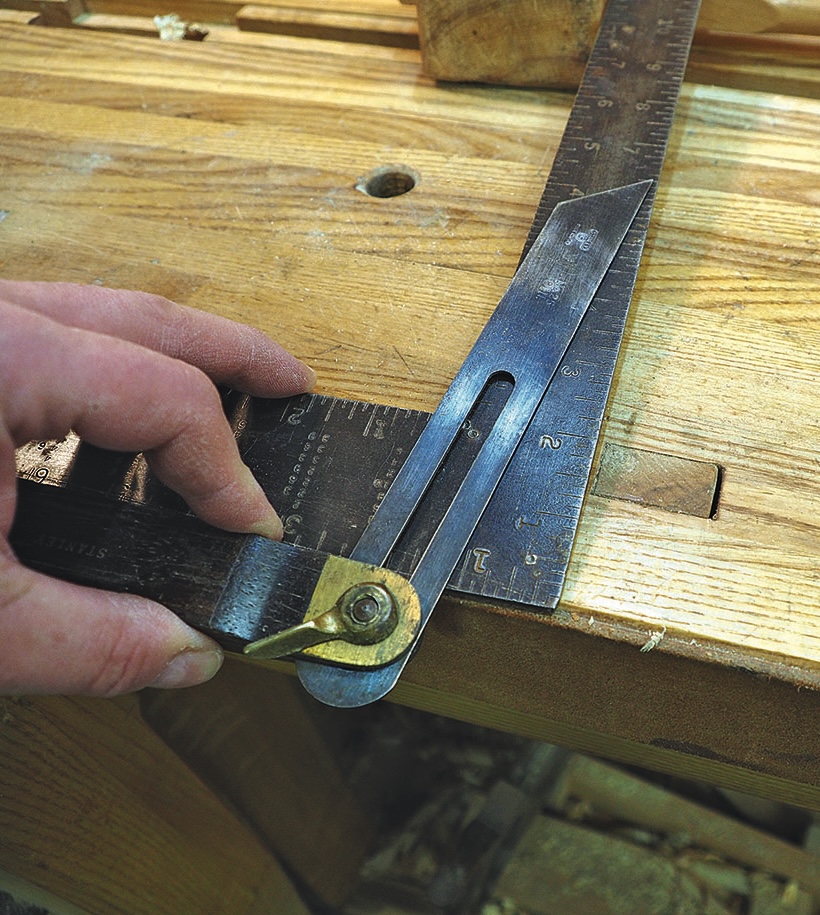
5. The marks will represent the edges of the dovetails. If you don’t like the layout, simply change the divider length. I rather like having very narrow pins, which is considered the ‘English’ style. Tails are angled at approximately 1:6. To set this angle, use a bevel gauge and carpenter’s square or a shop-made dovetail gauge
Woodworker marking timber with a try square and pencil
6. Pencil in the tails using a chisel tip pencil for a clear accurate line
Tenon saw cutting marked timber held in a workbench vice
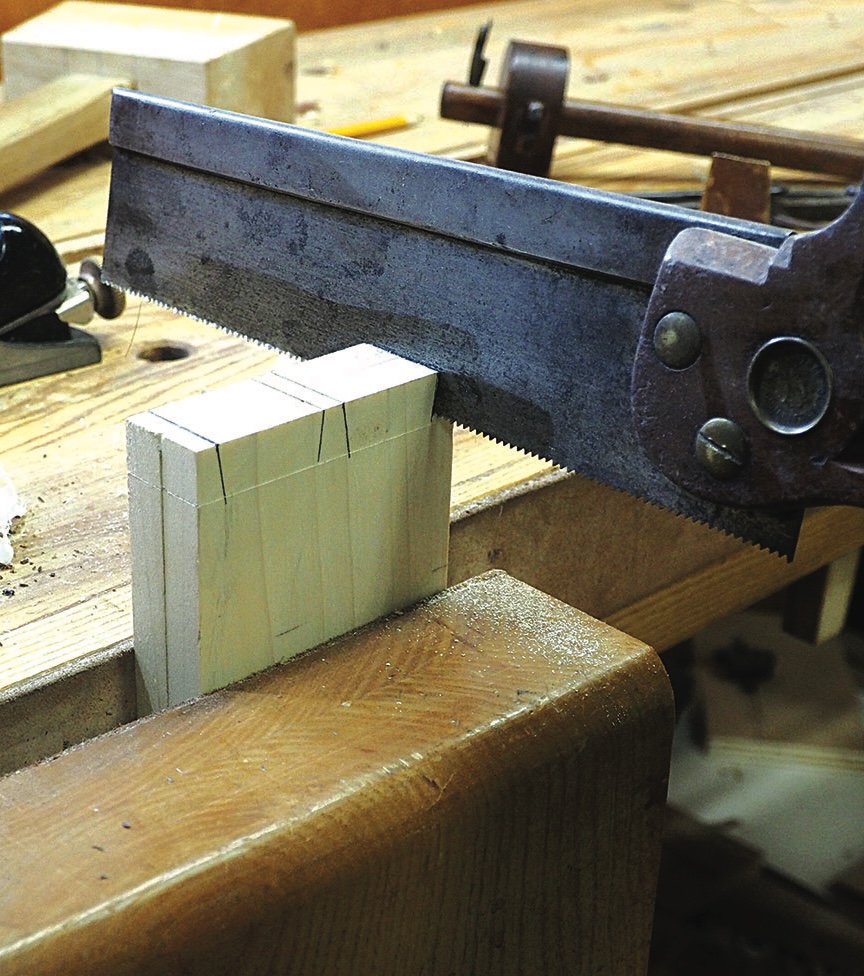
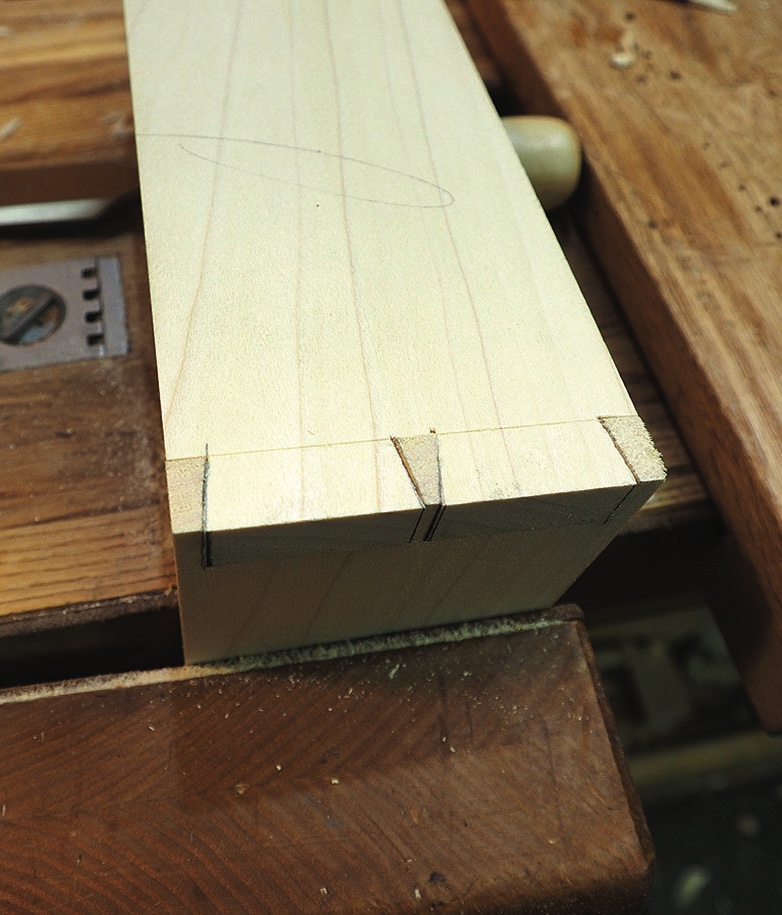
7. Mark the waste and cut the tails on the waste side. Here you’ll need to ensure you are sawing perpendicular to the face
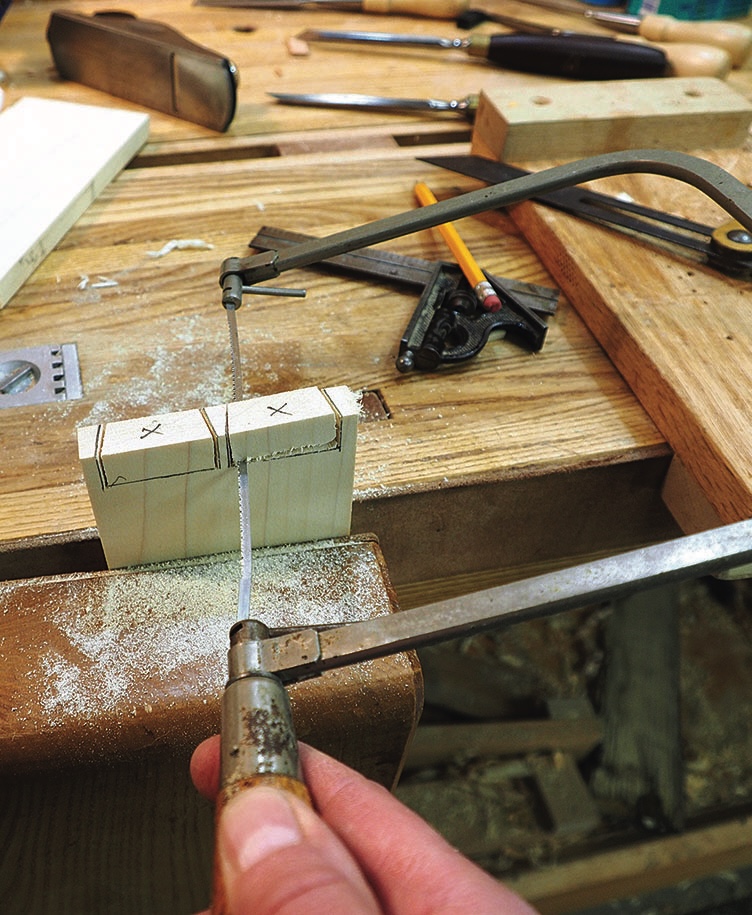
Craftsperson sawing a wooden joint with a coping saw
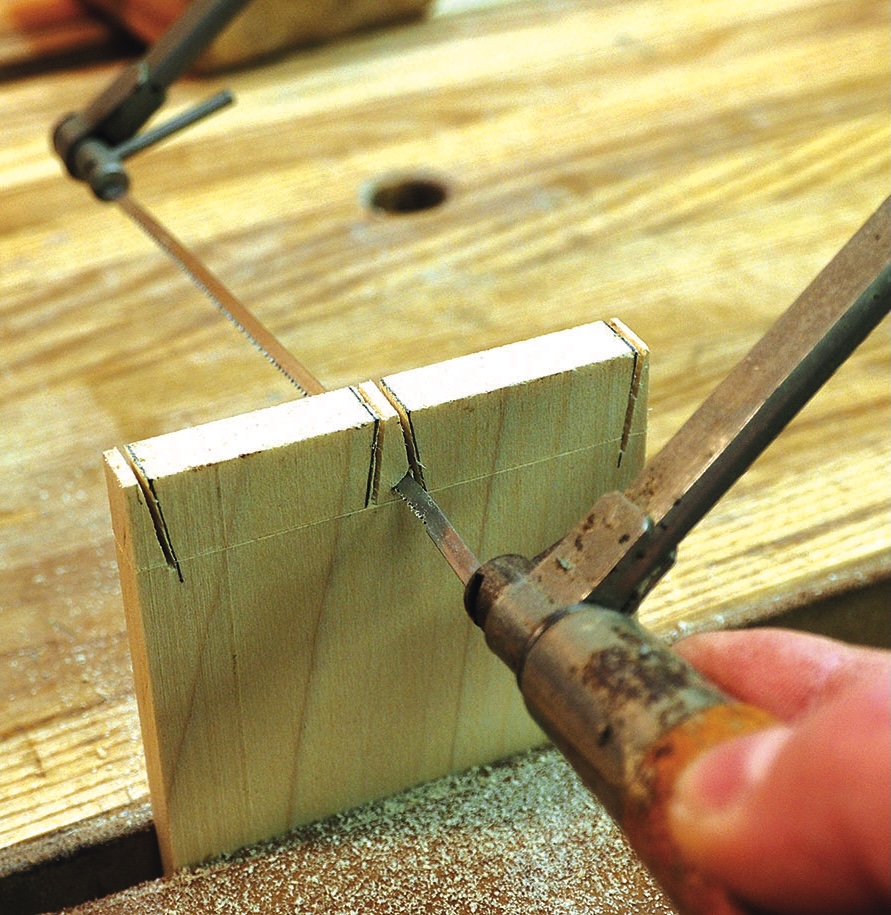
8. Then, with a coping saw, remove the waste. I like to do this with each board, rather than try and cope the ganged pieces
Craftsperson chiselling a notch in a wooden joint
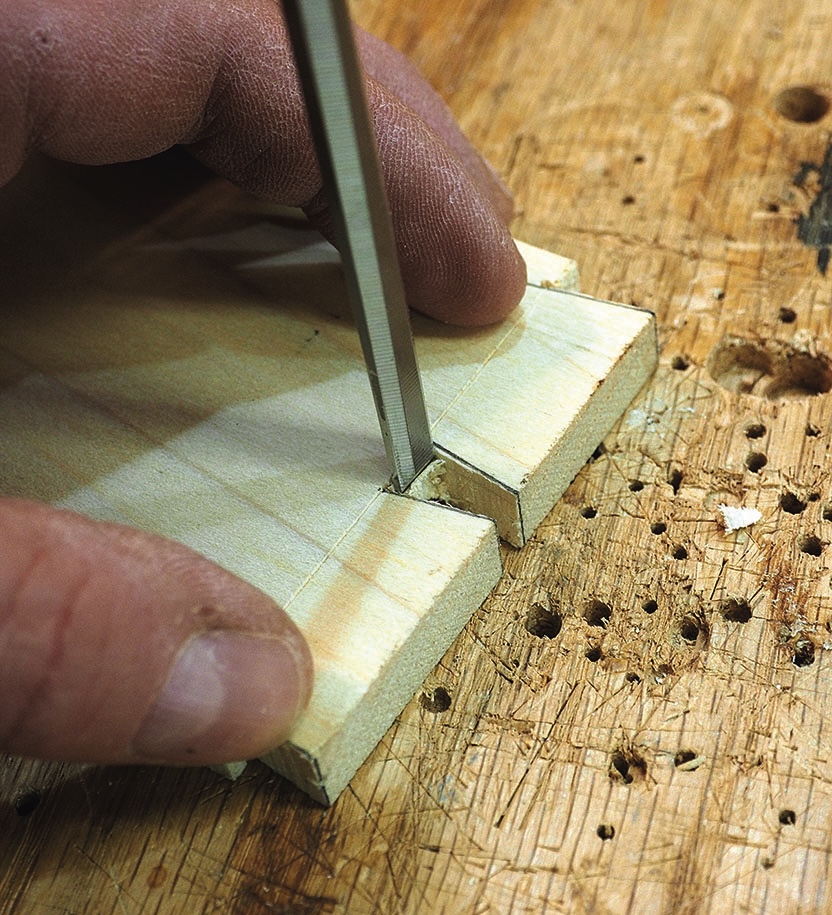
9. Clean up the tails by chopping down in the knife line from both sides
Woodworker marks dovetail joints using a sliding bevel
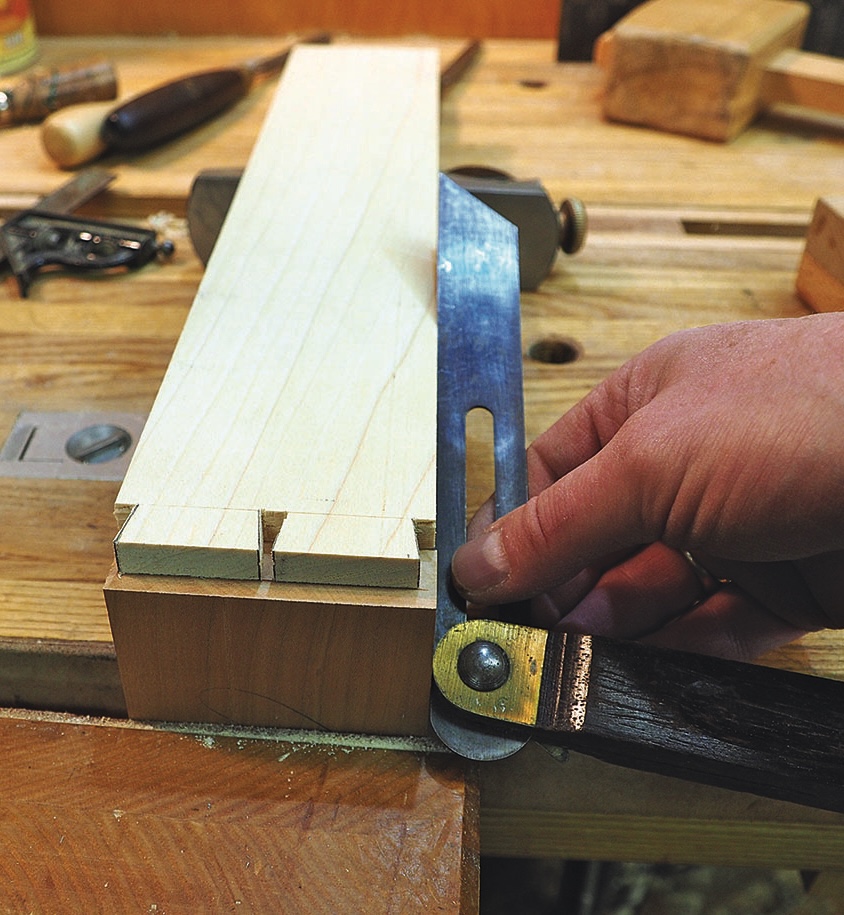
10. Take one tail board and drawer front (pin board) and position them face out so that the base of the tails is lined up with the inside edge of the drawer. The pin board is held in the vice with the tail board resting on the end grain and supported at the back with a plane
Woodworker cutting dovetail joint with marking knife
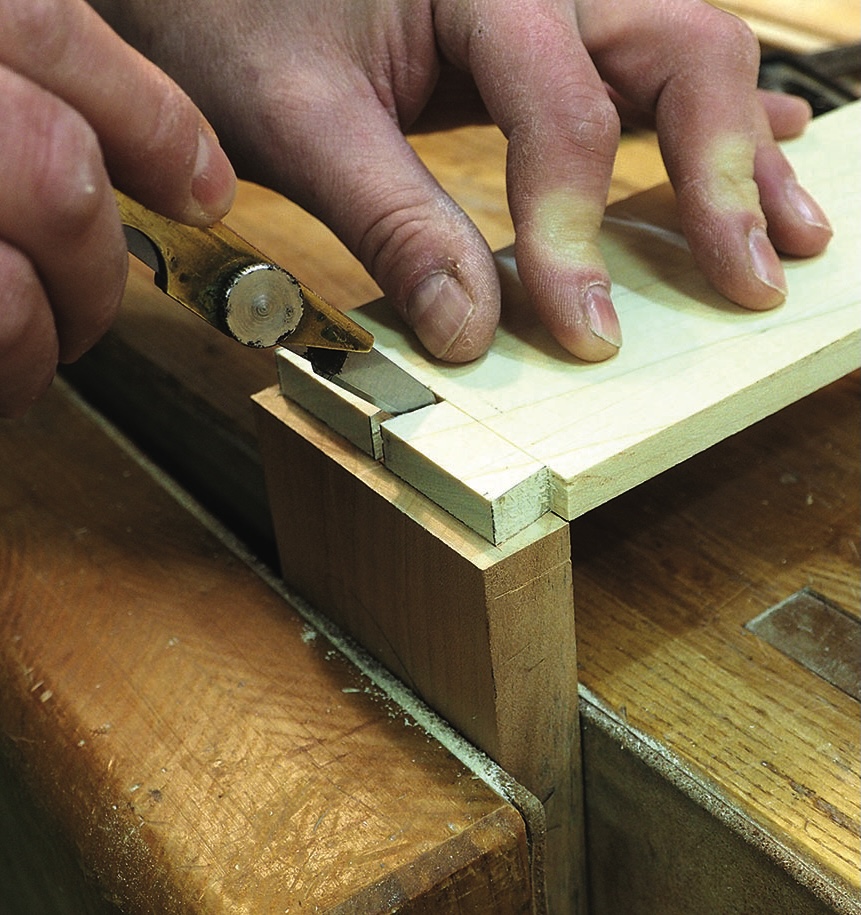
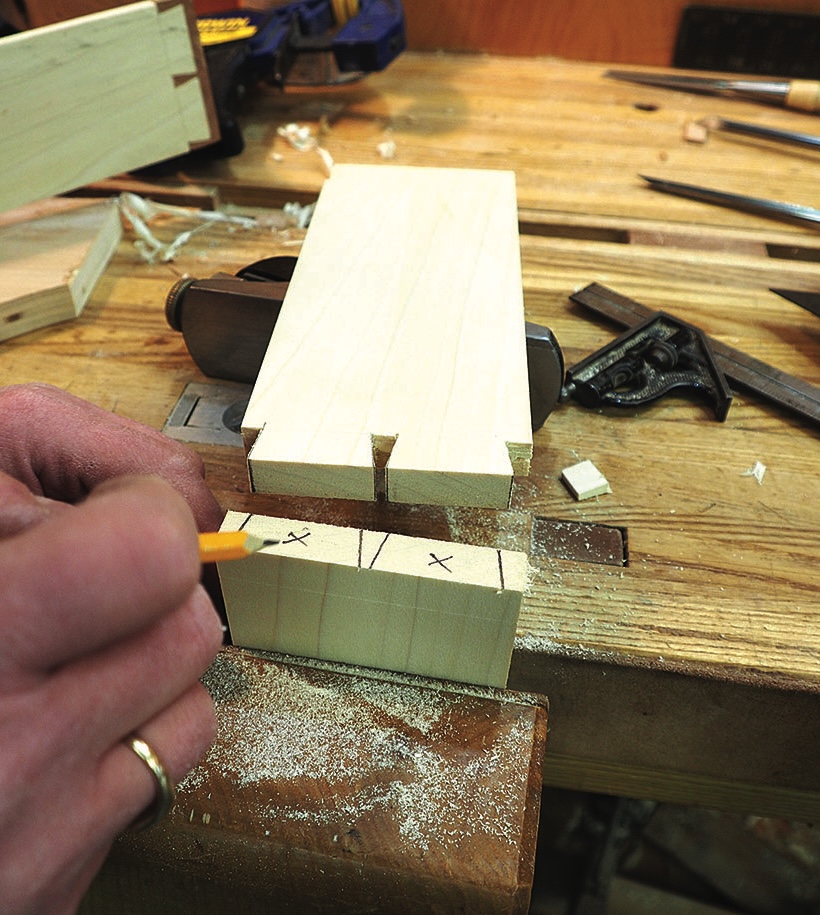
11. Keeping them square, use a marking knife to mark the pin location on the end grain of the pin board. Be careful not to move the pieces during this operation
Woodworker marking a timber joint with combination square
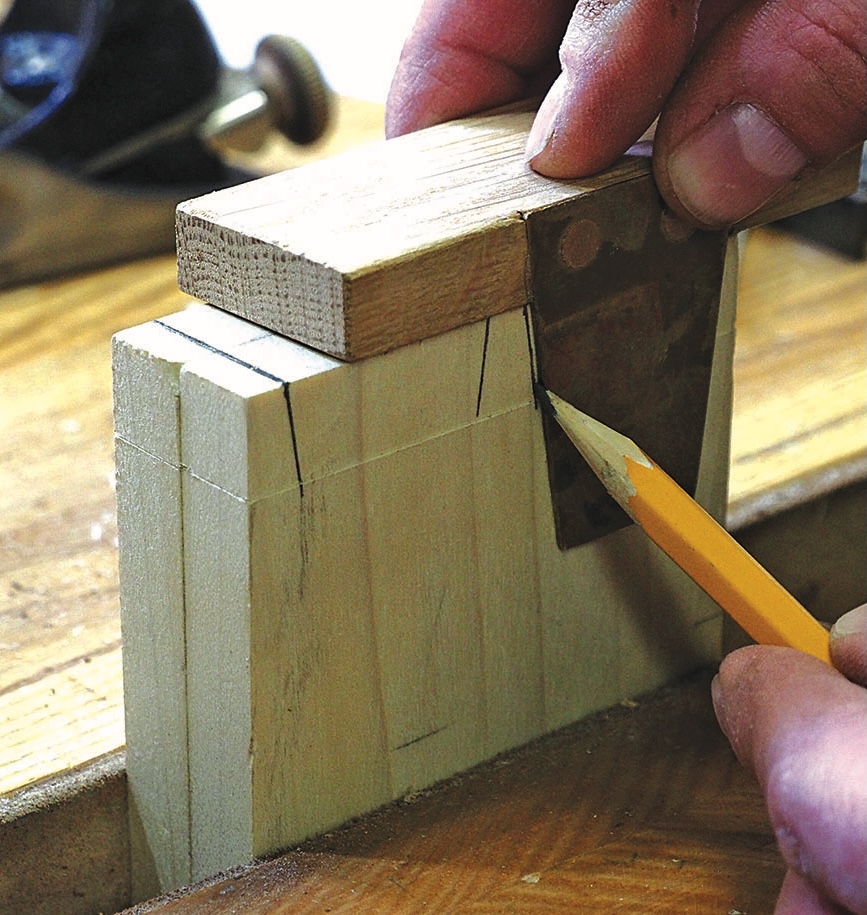
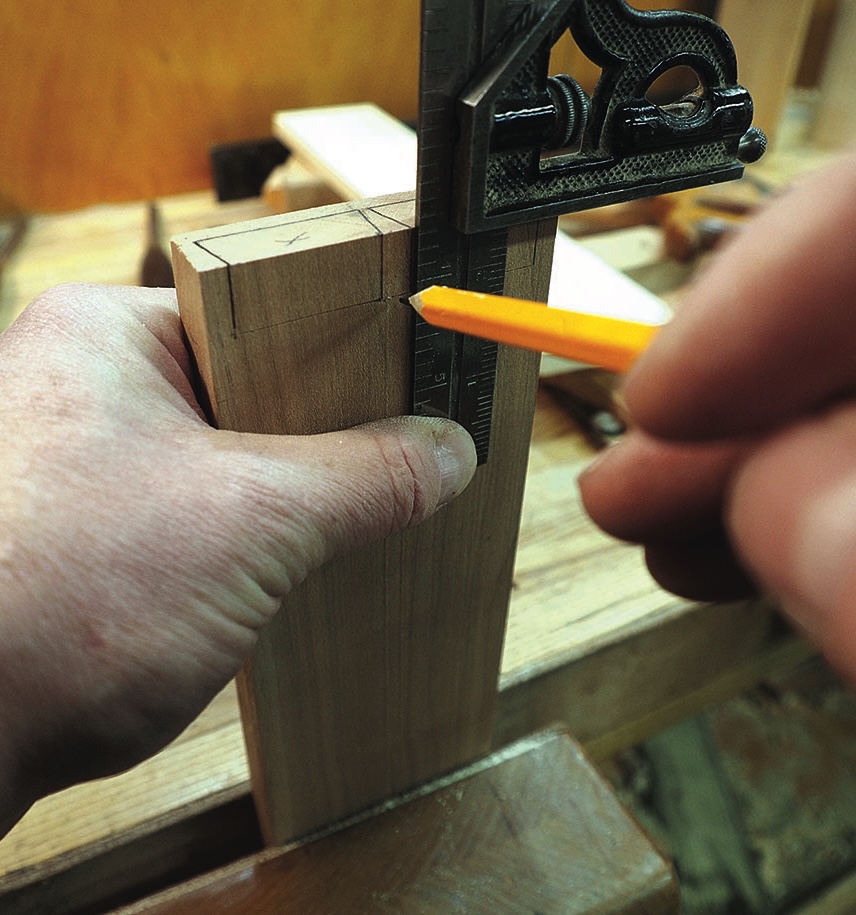
12. Using a square, bring the lines down the inside face
Handsaw cutting marked hardwood joint on workbench
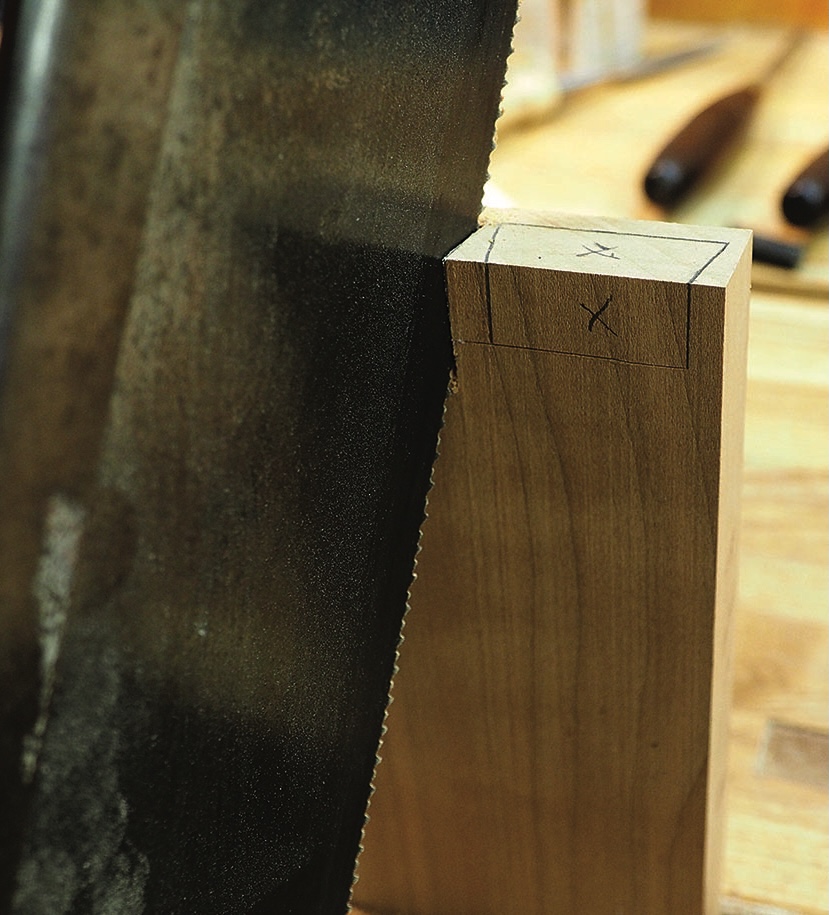
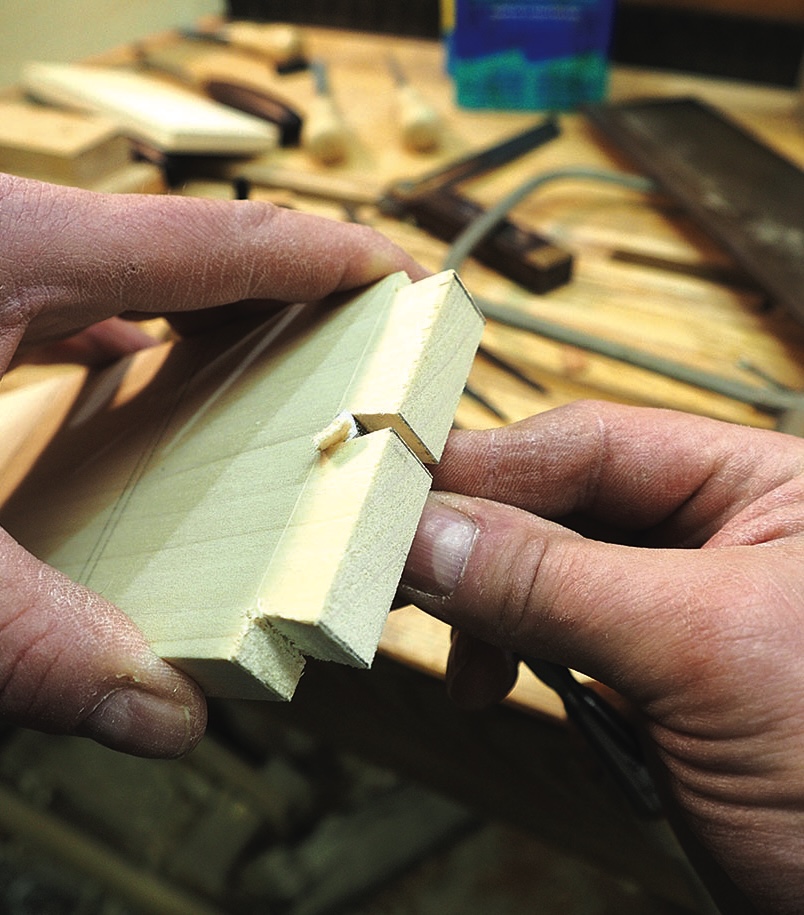
13. Mark the waste and saw at an angle to create the boundariesof the pins. As you’re sawing, make sure you don’t go beyond the end grain knife line. Sawing into the face is OK, however, and historically accurate (it also shows they were hand cut)

Mark the matching parts

Handsaw cutting marked timber joint on workbench
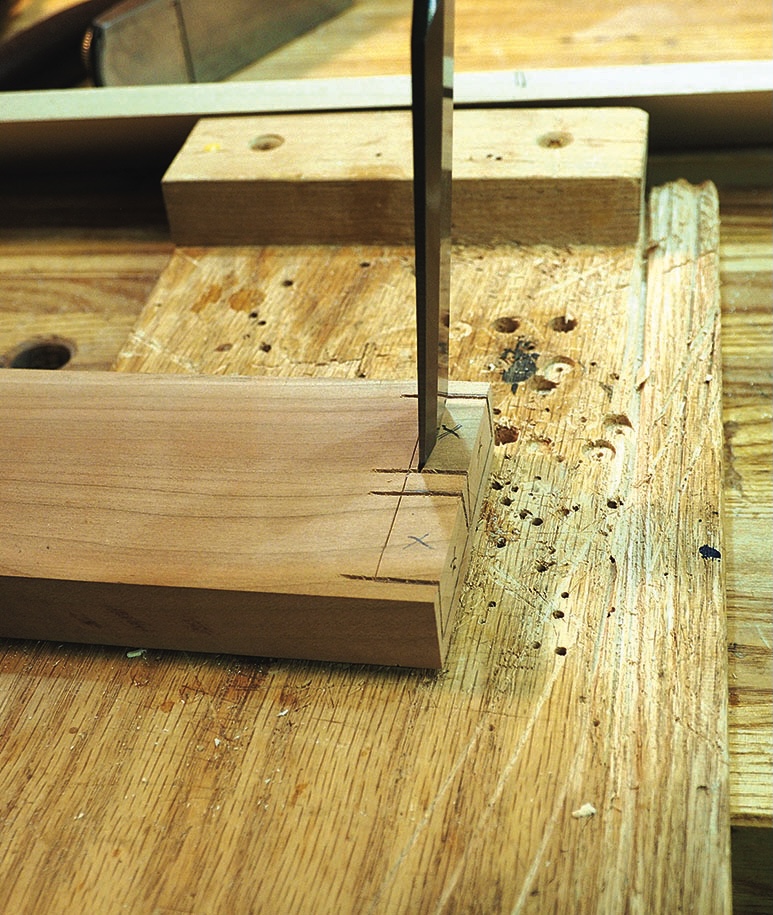
14. Cutting the pins: start by placing the largest chisel that will fit within the waste area, bevel out, about 1.5mm from the line and chop into the waste
Hand chiselling a marked wood joint on workbench
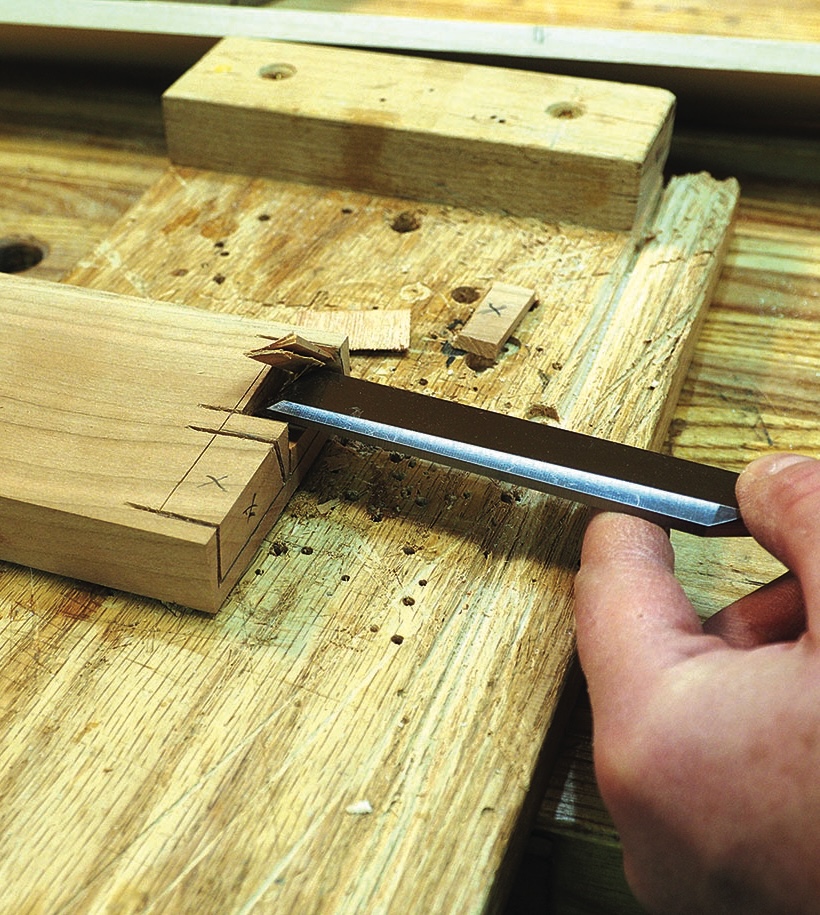
15. Then, from the end grain, remove the waste. Repeat this process until you have excavated the majority of waste. You will need to chisel down along the side of the tails where the saw could not reach. Cherry is a brittle wood, and chopping too hard on the half pins can cause splitting, so go easy.  To reach into the corners, use a smaller chisel or a skew chisel. Lastly, place the chisel in the knife line and chop down, adding a slight undercut. This will allow the tail to snap into place without binding. Clean up the tail sockets. It’s a good idea to add a small chamfer to the inside edge of each tail. This makes for a cleaner joint and a place for excess glue to go

Laying out through dovetails

The back of the drawer is also 9.5mm and has two through dovetails – the first part of the layout is very similar to half-blind dovetails.  
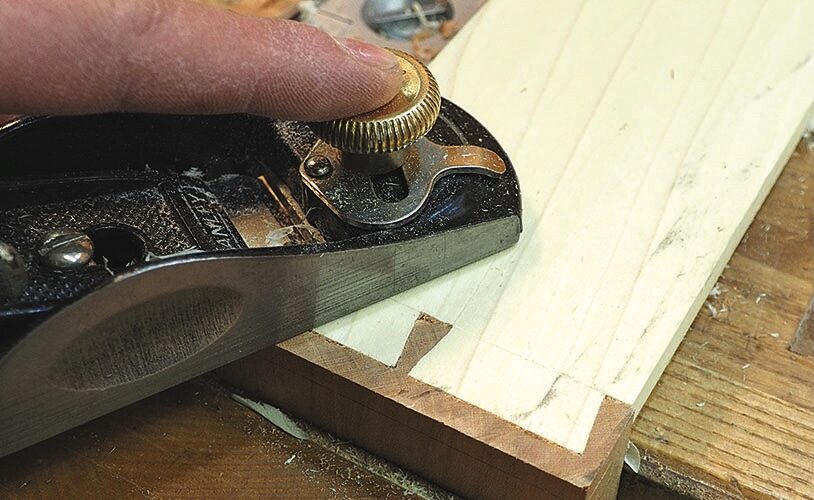
Hand planing a wooden board on a workbench
16. Test fit the joints. With dovetails it is important to not over-test as this makes for a sloppy fit. If you do need to tweak the fit, go easy. As these are custom-fit dovetails it’s a good idea to mark the mating boards. The extra 1mm that was added in the beginning can now be planed off
Woodworker hand-planing a small timber board at a bench
17. First take the width of the board plus 1mm and mark this all round the ends of the sides and back board. The back board will be the pin board.  If the sides had the pins the back would have little strength and could be pulled off
Hands holding a wooden mitre joint sample
18. Using the same technique we employed to mark out the tails for the blind dovetails, lay out, saw, cope and chop the tails on the sides
Woodworker marking dovetail joints on timber at workbench
19. Now lay out the pins on the back of the drawer by superimposing the tails on the pin board
Woodworker cutting marked timber with a coping saw
20. Remove the waste in exactly the same way that the waste was removed from the tails.  However, be careful chopping down, remember the sides are wider on one side
Marked timber joint held in a woodworking vice
21. Clean up the joints. Do not chamfer the tails as this will be seen on the sides. Then test fit. So there you have it – a tried and tested method of creating beautiful hand-cut dovetails. Don’t forget the drawer needs a bottom and here’s a quick reminder
Close-up of wooden door frame and threshold joint
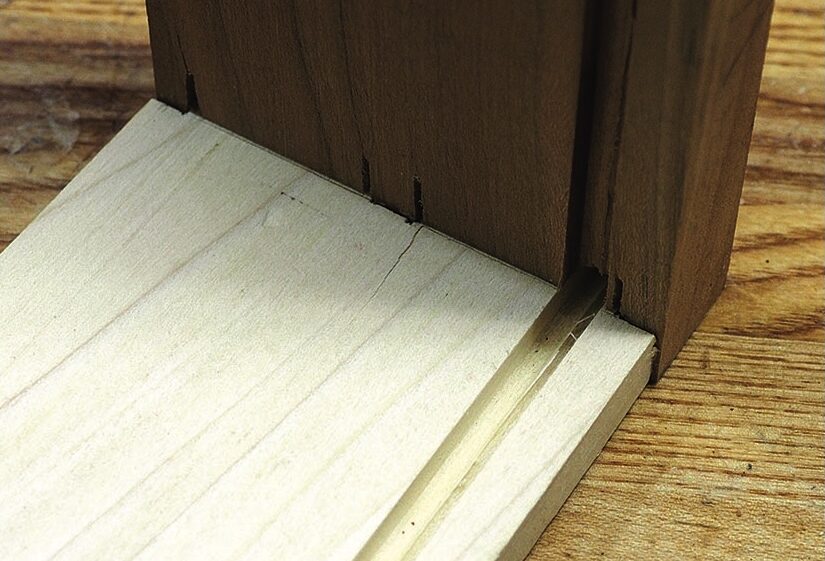
22. Set the combination plane so that it will cut a 6.5mm x 6.5mm deep groove that lies within the bottom tail and pin on all sides of the drawer. The back actually does not need a groove as the board sits on the drawer bottom, but planing the groove will give the exact location.  Saw off the section, on the back, from the groove down. The drawer bottom is a piece of 9.5mm board (grain running parallel to the front) that has a chamfer planed on the underside allowing the bottom to slide into the groove. This board is glued only at the front edge, allowing all seasonal movement towards the back

Why not experiment with uneven pins combining large and small tails? And if that’s not enough to put you in a tailspin – maybe in another article we’ll look at creating the mysterious hidden mitred dovetail joint.

Leave a Reply

Your email address will not be published. Required fields are marked *