Having turned a vase with a natural edge in the previous article, I am now turning my attention to the next challenge – turning a natural edge bowl.
Log choice
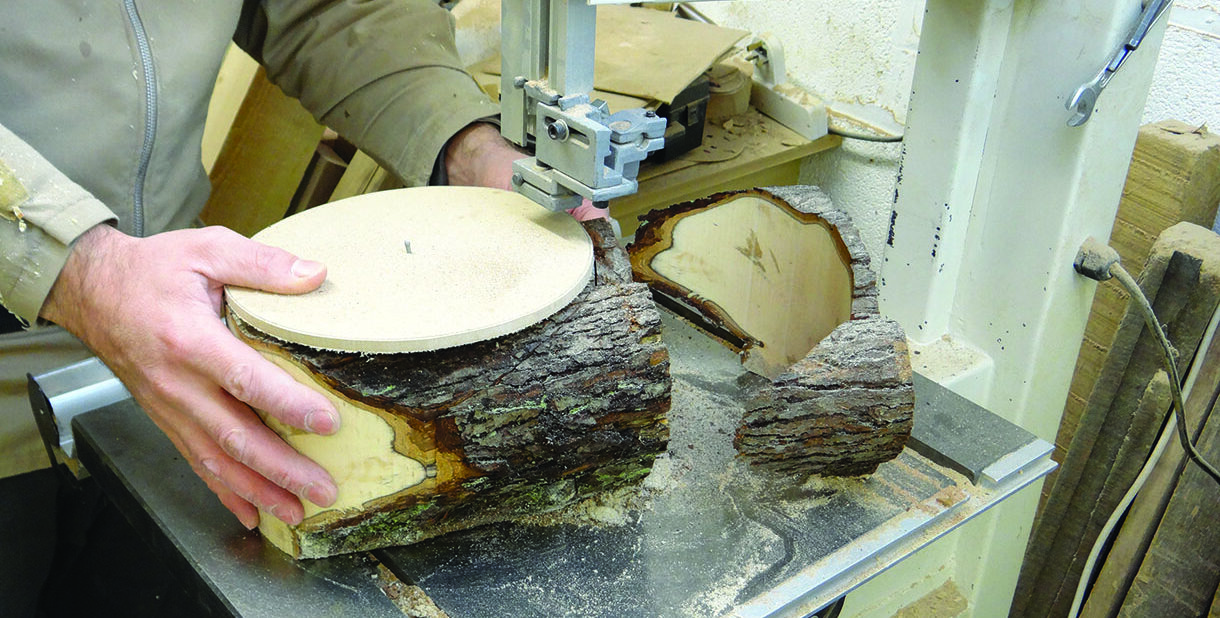
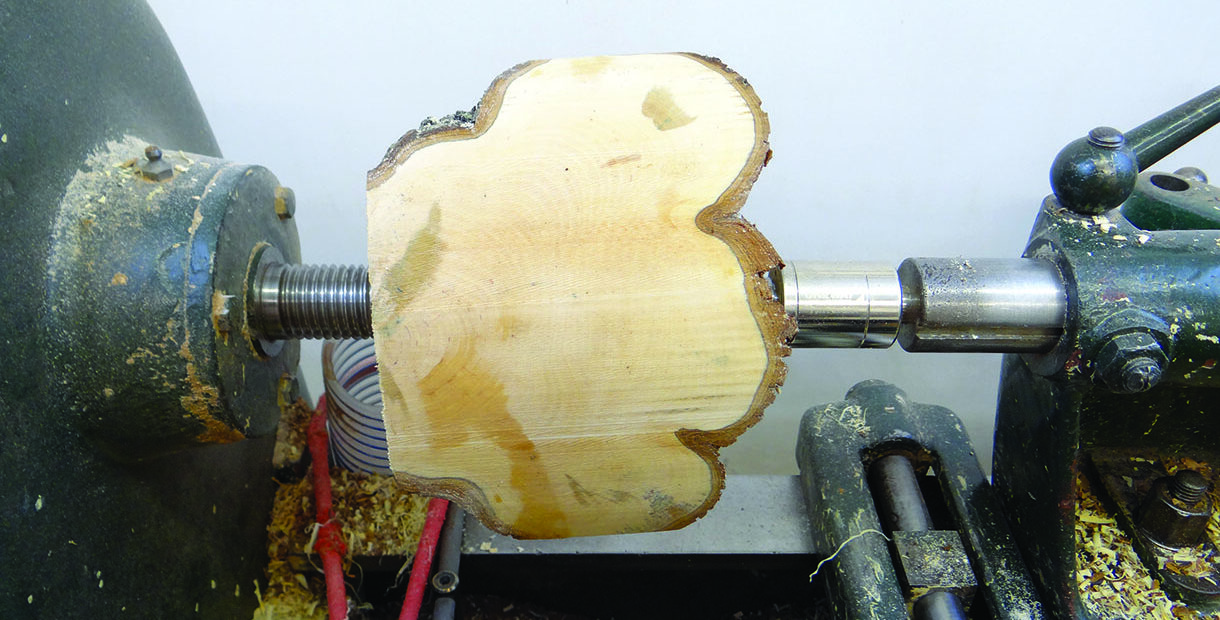
The log that I have selected for the bowl needs cutting round on the bandsaw. Fortunately, George has cut a flat on the base, large enough for it to sit on the table of the saw without rocking as I cut it. To guide my saw I cut out a 200mm disc of 6mm MDF, which I loosely fix to the log with a nail through the centre of the disc. As with many of the techniques I’m using in these articles, this is something I’ve seen done many times in books and magazines but have never tried. So far, I’m impressed at its simplicity and how well it works. As before, I mount this block between centres. It’s hard to see from the picture but I mounted it at quite an angle to give me a more even top profile. Had I used a faceplate, the rim would have been quite skewed and I think, far more challenging to turn. This can be quite stunning to see in a finished bowl, but as it’s my first I decide to err on the side of caution.
Fixing broken-off bark
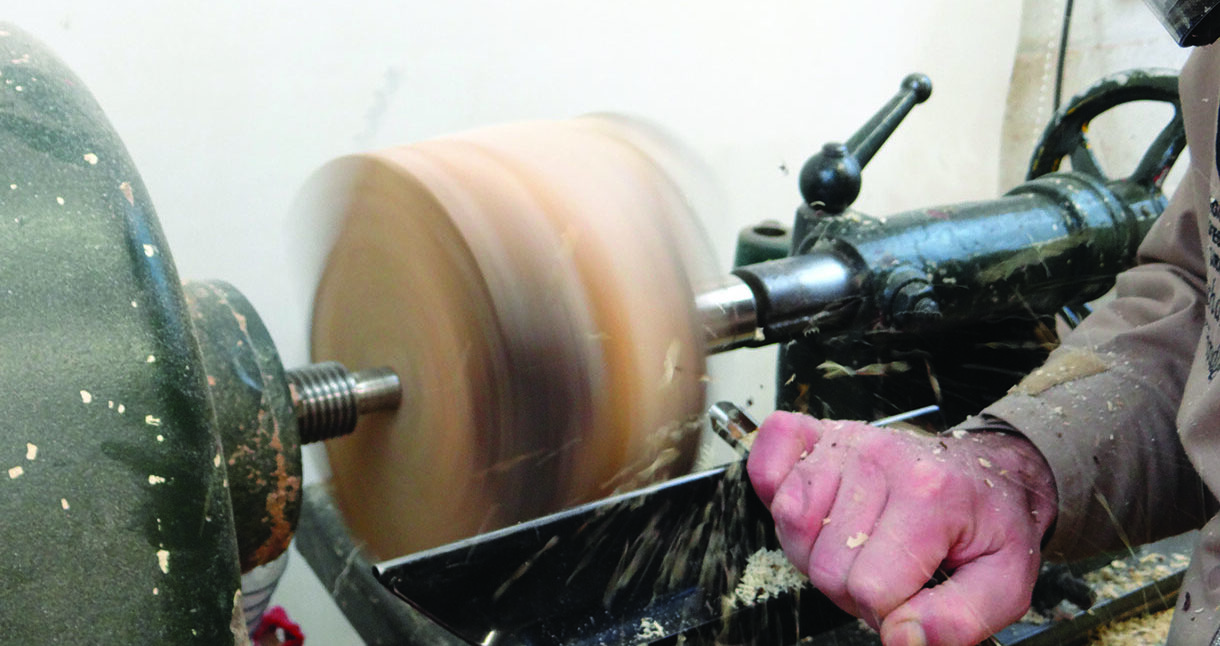
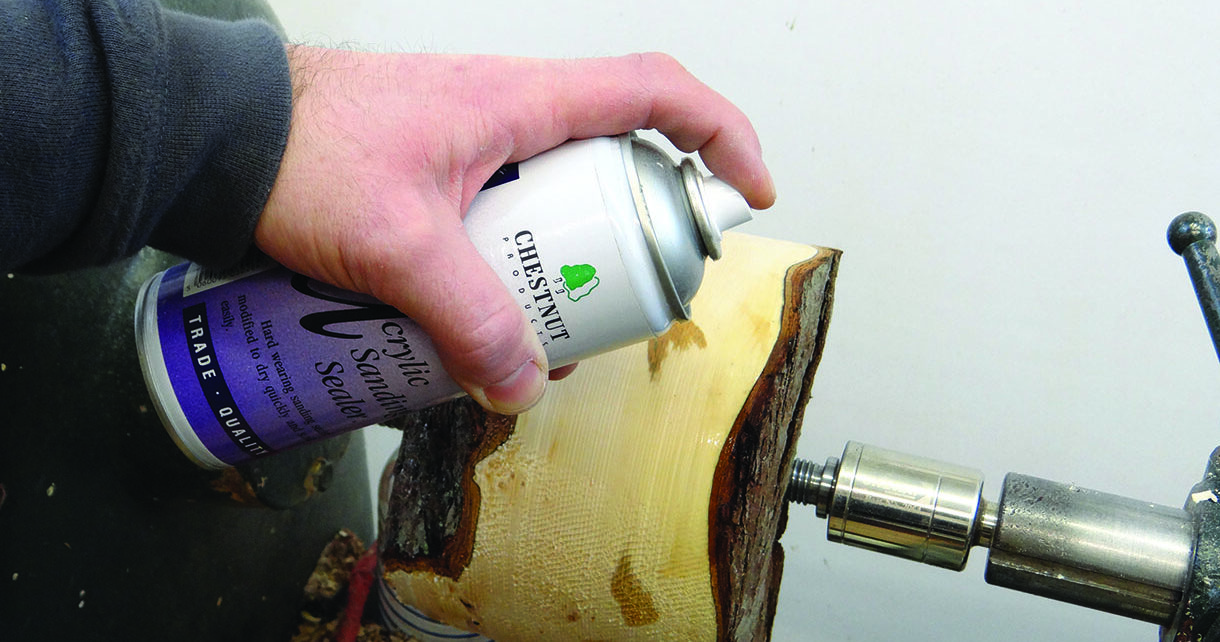
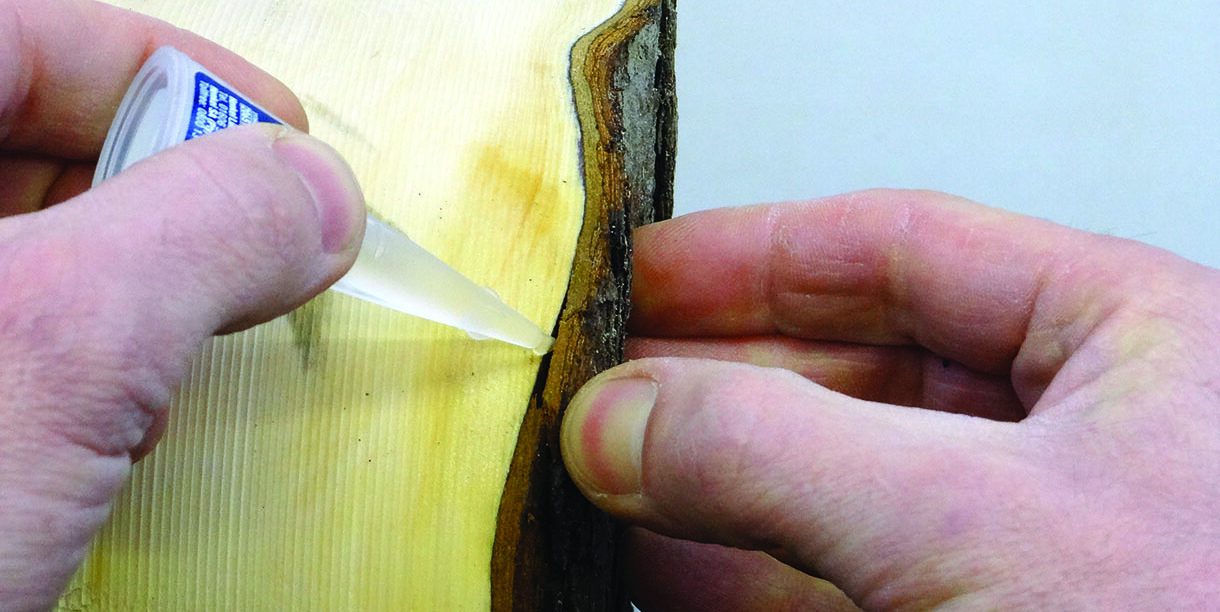
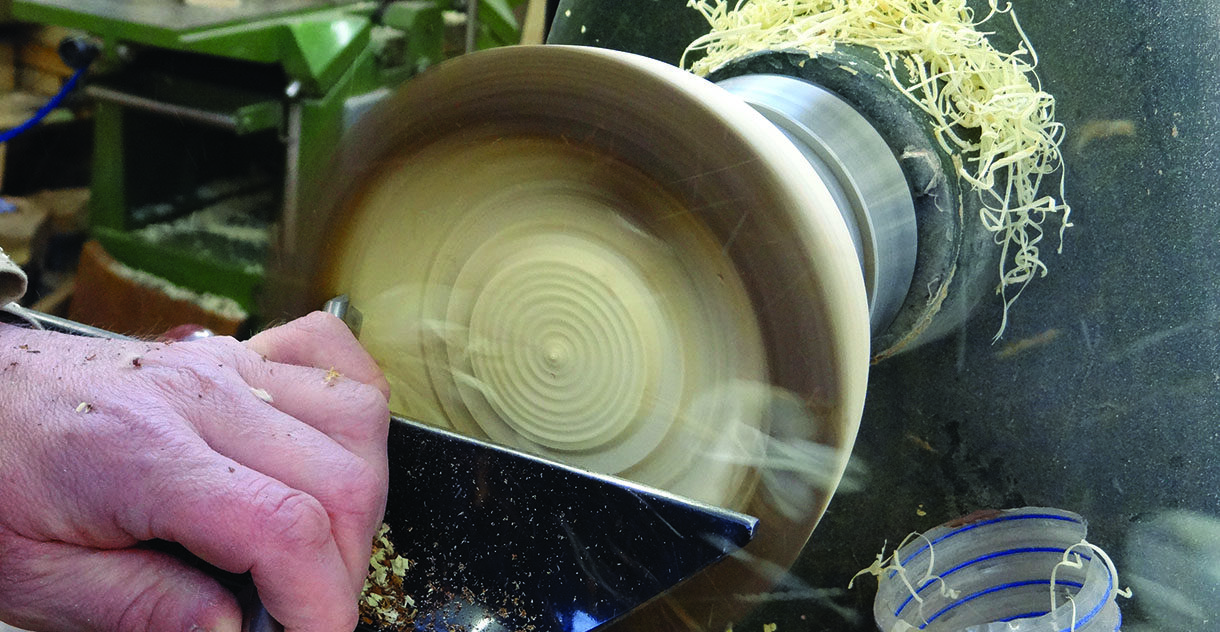
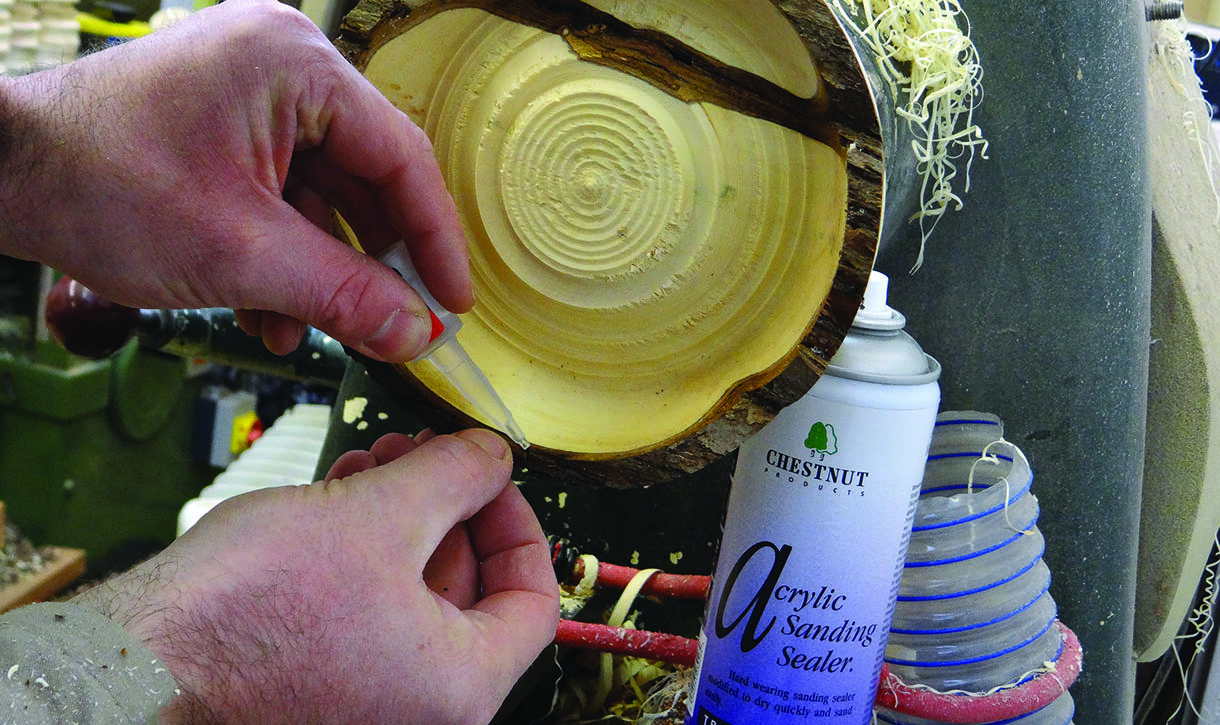
With the block held tightly between centres, I use my 16mm diameter bowl gouge to bring it to round. I take a look at the bark once it is running true and spot a small area where the bark is coming away from the wood. Time for some CA! I’m aware that sometimes adding CA can solve one problem but add another in the form of staining the wood and bark, so I give the area a liberal coat of sanding sealer first. Once dry I run some thin superglue into the offending area and apply a little pressure until it holds. It seems to do the trick and suggests to me that spotting a problem with the bark early is going to be the best way to head off problems. Happy with my work so far, I cut a holding spigot on the base and mount it in the chuck. From here I can begin to shape the bowl.
From outside in
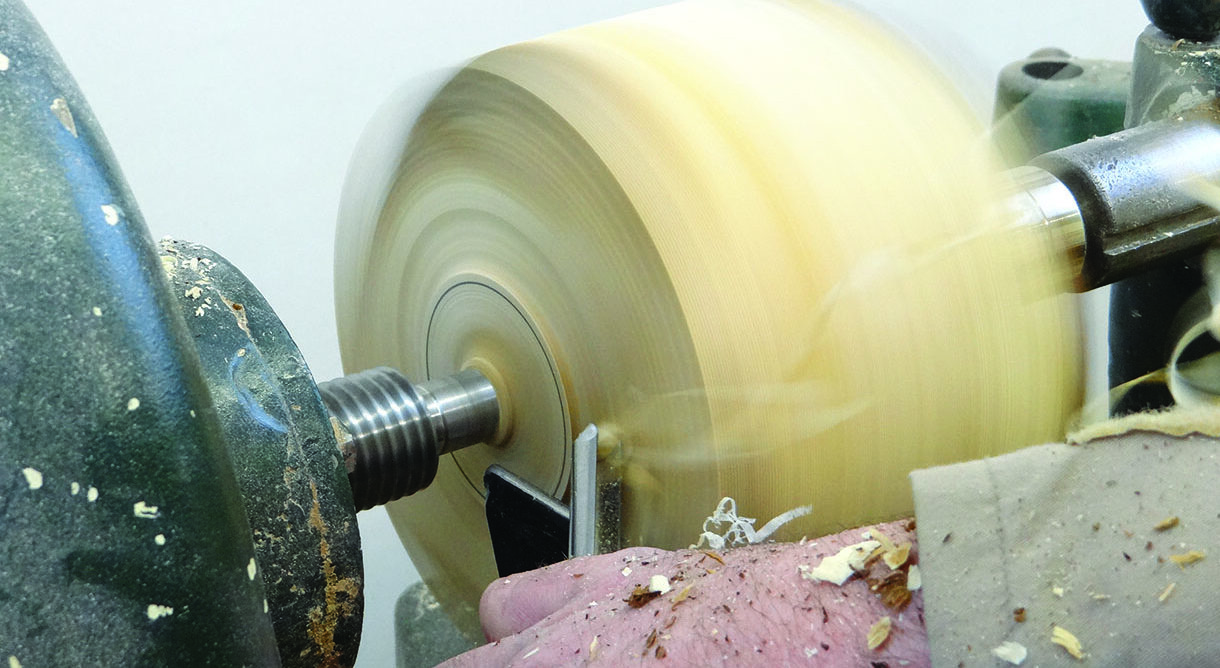
Initially I work with the grain, from base to rim to get the rough shape I want. I remember George’s advice to work from bark into the bowl. So I change direction, and take a light push cut from the bark towards the base with my 12mm diameter bowl gouge. Out of curiosity I stop the lathe and take a look at the finish. In kiln dried timber this would probably be torn and coarse, but in this wet hawthorn the surface is as smooth as silk, especially compared to the aggressive roughing cut I had previously made. I continue shaping the outside of the bowl until I’m happy with the curve. I refine it with a light shear cut using the wing of the bowl gouge.

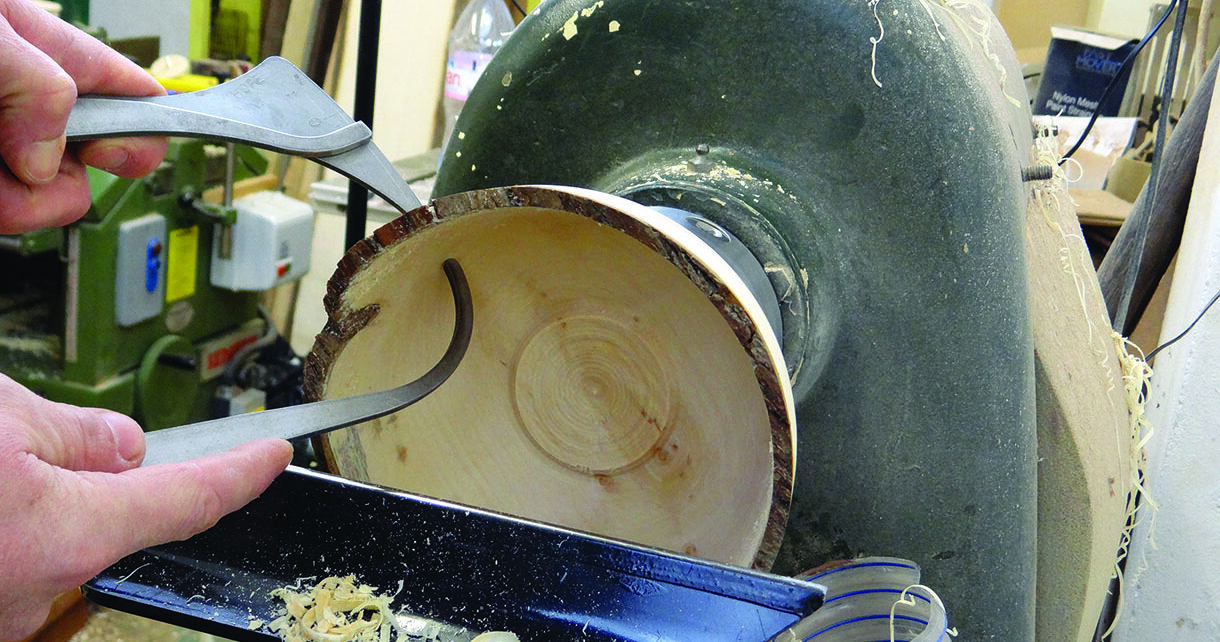
Hallowing the bowl
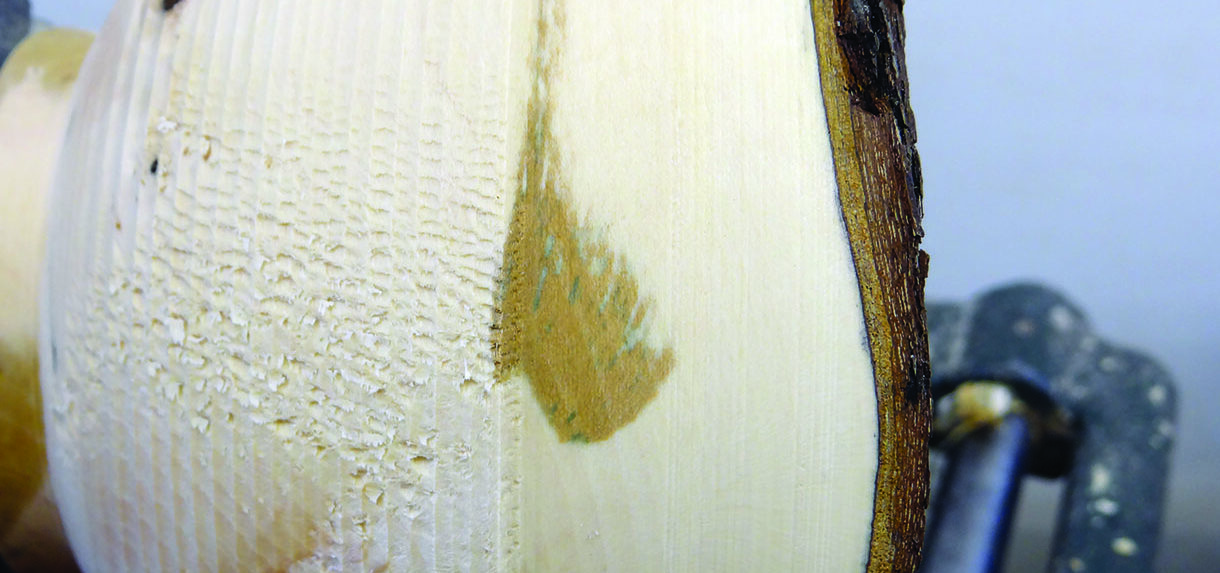
The outside didn’t pose any real problems, but I feel like hollowing into the bowl is going to be the real test. I begin cutting well in from the rim, as I had with the outside of the vessel earlier, and gradually work back towards the edge. I stop and check the bark and the cleanliness of the cut a few times along the way – particularly the area I have already glued but all seems fine. As I continue my confidence grows, but I still stop the lathe and check the quality of the bark a number of times. Sure enough, I spot another area that seems to be lifting a little from the wood, so I repeat the process of liberally spraying with sanding sealer. Once dry, run plenty of thin CA into the offending area and hold it tight to the wood for a short while until the glue does its job.
Once I’m happy it’s dry, I carry on turning, continuing to check the bark and the wall thickness as I go. I settle on a wall thickness of 6mm, which I feel looks right and gives the bark the best chance of staying put. I have read a lot about problems associated with CA glue staining the wood and bark where it has been repaired. Admittedly, I only have this experience to draw upon, but it seems to me that constant monitoring of the bark to head off problems before they happen is the key to avoiding this problem. The use of sanding sealer is often quoted as a solution to the staining issue, which is my main reason for using it. I suspect much of my success with this relates to the fact I then cut the surface again after the glue had dried, removing any staining in the process. I asked George if the bark is likely to come away as they dry, but in his experience, if the bark can stay on during the stresses of turning, it is unlikely to come off later.
Turning the bowl
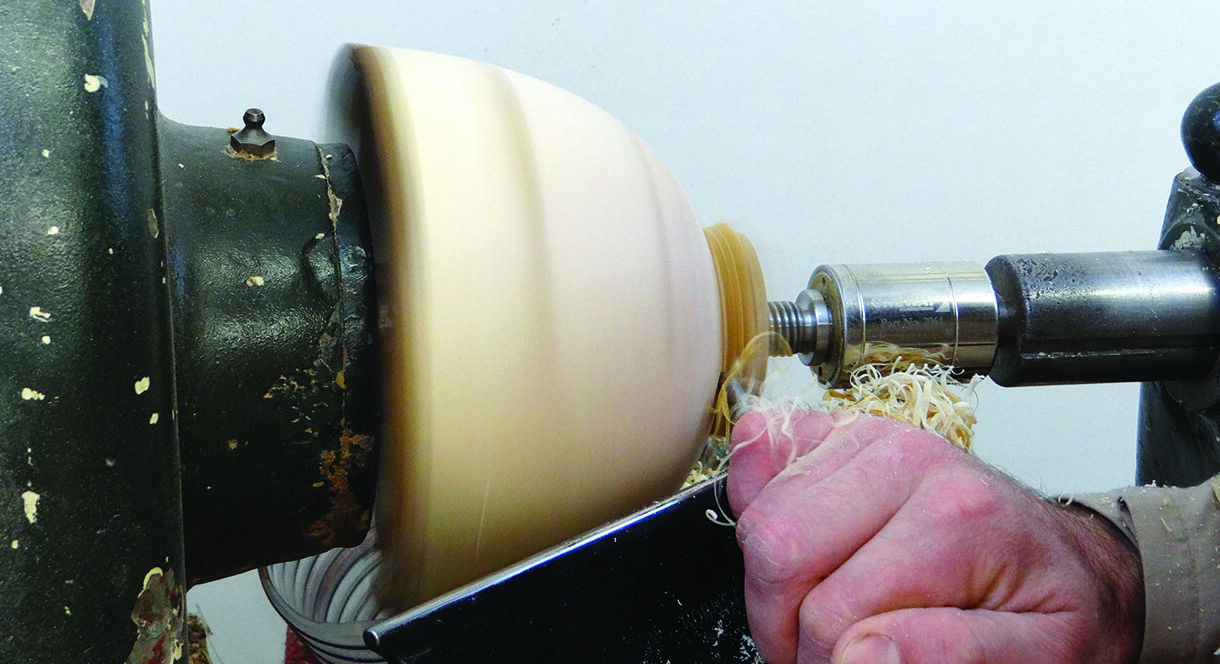
While this is not a bowl turning article per se, there are a couple of points I feel are worth mentioning about turning a bowl of this depth and thickness. You will notice that I don’t hollow the bowl in the traditional manner – by removing the centre and gradually working out to a finishing cut all the way along the inside of the bowl. A green wood bowl will have moved considerably by the time I get to this stage. It would be virtually impossible to finish to an even wall thickness without serious vibration and movement issues. Instead, I choose to work down the outer edge, focusing on a small area at a time, getting it cut cleanly and to thickness, before moving on to the next section. I only remove the central core as I find it gets in my way. I find this method works so much better, offering support to the bowl for longer and giving me a better chance of achieving an even wall thickness throughout.
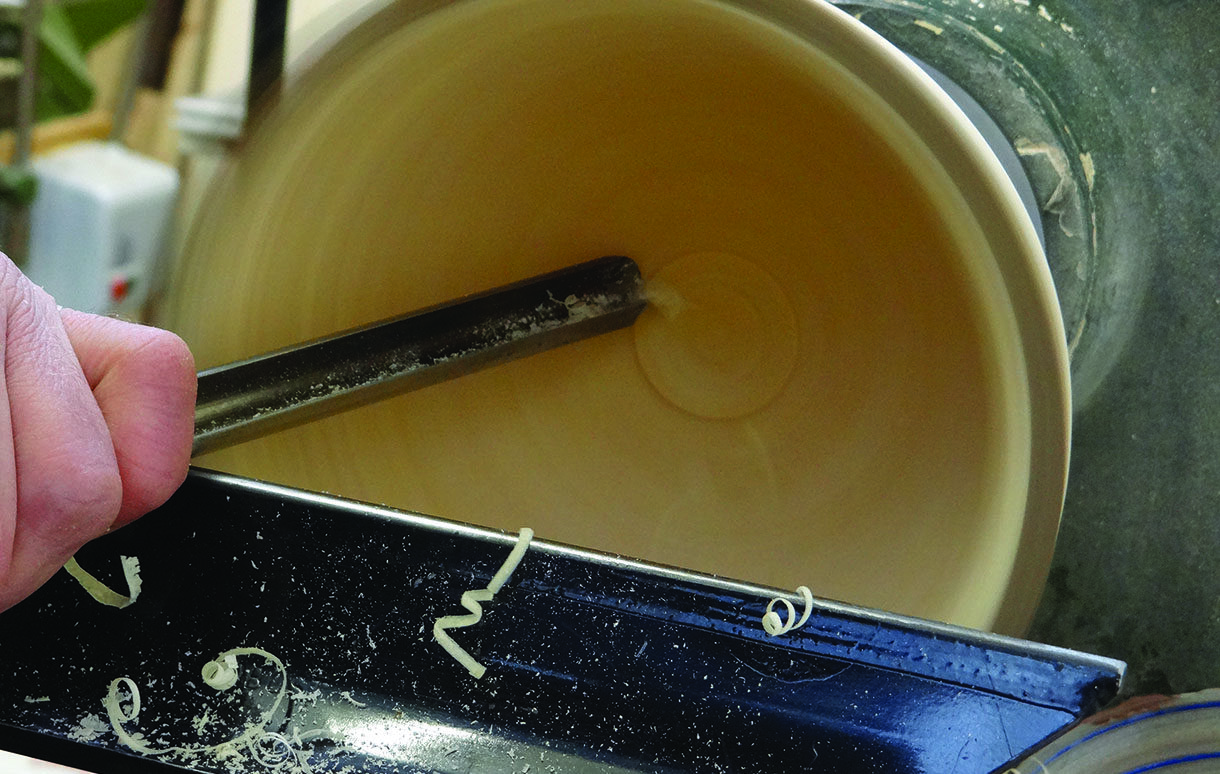
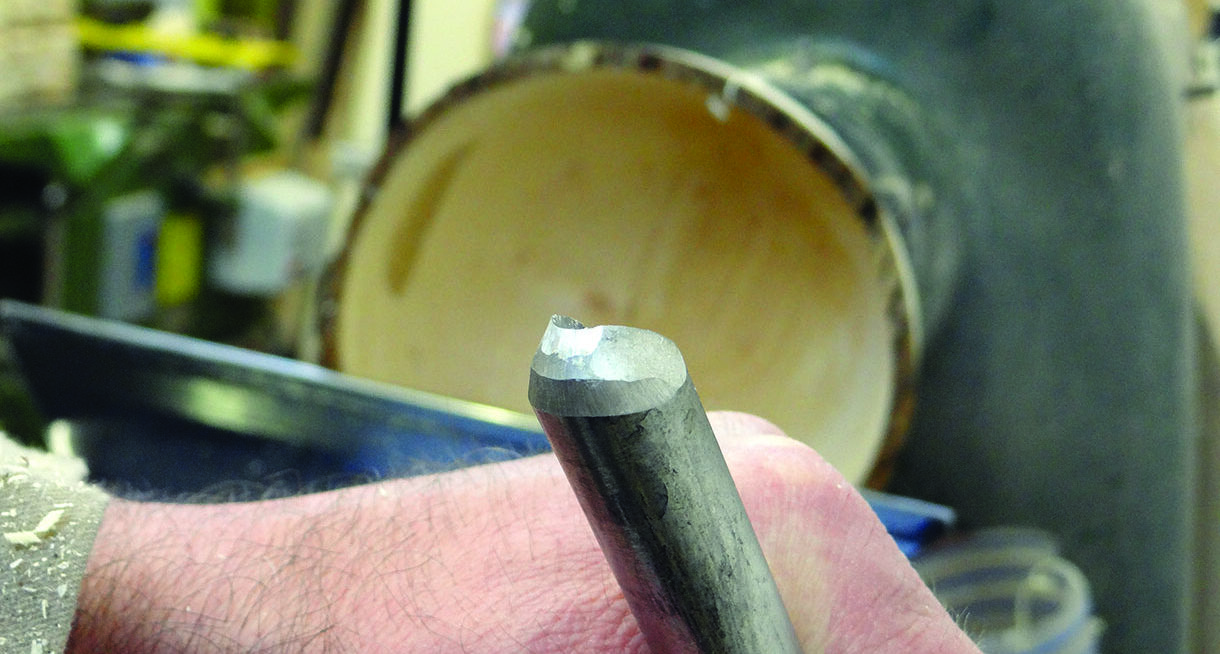
The second point that is worth a mention is turning the very bottom of a relatively deep but narrow bowl. My usual grind angle for a bowl gouge is around 60º, which I find incredibly versatile for bowl turning in most situations. But here I find that I can’t maintain bevel contact along the very bottom of the bowl due to the rim restricting my presentation angle. To get around this I briefly visit the grinder and touch the nose of the gouge to the wheel at a much steeper angle than usual, allowing easy access to the bottom of the bowl.
Finishing the bowl
Happy with the inside of the bowl and the wall thickness, I just need to sand and finish the base of the bowl. Sanding is reasonably straightforward, although I find the wet wood does clog the abrasive, which means I use more than I usually would, but with a combination of power and hand sanding, both with the lathe running and stationary, I get the bowl sanded to my satisfaction, from 120 to 400 grit. When I remove the bowl from the chuck it is clear that, as I expected, there would be plenty more wood to remove to achieve the curve I want. Usually I remount my bowls between a disc of MDF fixed to a faceplate and my live centre. This, however, relies on the flat rim of the bowl sitting against the MDF which I obviously can’t do here. Instead I neatly fold a load of paper towel into a square to pad out the inside of the bowl against the face of the chuck.
Not entirely convinced it will be enough padding, I also cut a piece of bubble wrap which I fold up and place inside the paper towel for even more padding. I then bring up the tailstock and engage the live centre as usual. This allows me good access to the base of the bowl to turn a small foot and perfect the lower curve of the bowl. I find that when I remove the bowl from the chuck, there is are no marks on it, making it a success! As I had done with the end grain vessel, I power sanded the base of the foot to the same standard as the rest of the bowl. Both items were then coated with a liberal coat of thinned down hard wax oil to protect them while they spend a few weeks fully drying out. The oil also immediately darkened the bark, making a stark contrast between the creamy wood and dark outer layer.
Conclusion
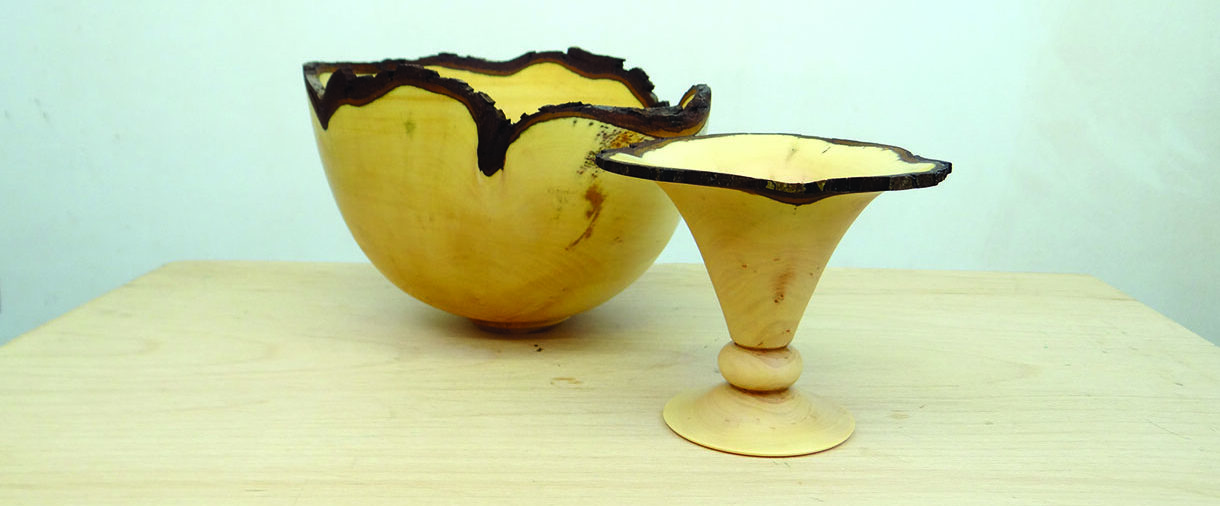
I am very pleased with how these have both turned out. Natural edge work has always been something of a mystery, but it actually isn’t as difficult as it perhaps appears. As with every turning project, timber selection is key, but so are sharp tools (as ever) along with good presentation and good tool control. This has been an interesting and fun challenge which has given me two very nice pieces of work. They will be finished in a few weeks with multiple coats of hard wax oil. The finished vessel is 110mm diameter and 100mm tall, the bowl is 180mm diameter and 120mm tall.
Further reading
PHOTOGRAPHS BY RICHARD FINDLEY