We previously looked at the basics of a bandsaw in part 1. Perhaps the machine with the greatest all-round versatility, but you need to set it up right if it is going to do its job properly
Choosing the right blade
First of all we need to choose the right blade for the job. Once that is fitted we can then make various adjustments to the machine. There are various types of bandsaw blade and we need to be aware of this and keep some spares in stock. Heavy use or abrasive materials and non-ferrous metals will all punish a blade and make it ‘go off’, i.e. blunt, if we don’t use the correct type for the job.
For cutting wood, use wood or wood/metal cutting blades, there’s a choice from hobby quality blades to more professional grade ones. Personally I always steer away from using cheap blades, they don’t last and don’t cut particularly well. Bandsaws are usually supplied with one blade of unknown quality fitted; so go to a reputable supplier and order some extra blades.
Blade types
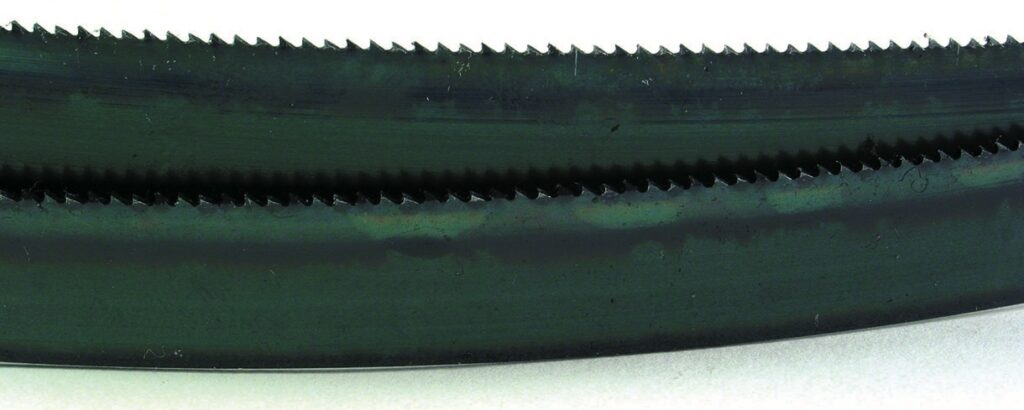
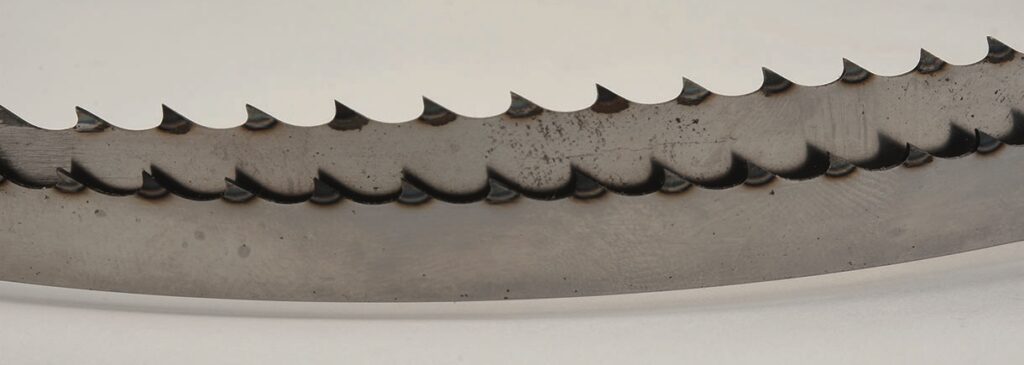
The three usual blade categories are: continuous teeth for thin material; skip-tooth for thicker material; and raker-tooth blades for cutting green, wet wood. Each supplier will have their own range of products to suit these purposes.
The rule is that you must have at least one tooth in the material, which is why a continuous tooth form is needed in thinner material. Blades are by length (of loop) and width in either inches or millimetres and TPI (teeth per inch). For cutting out intricate curved shapes in thin ply a 6mm wide x 10TPI blade is ideal.
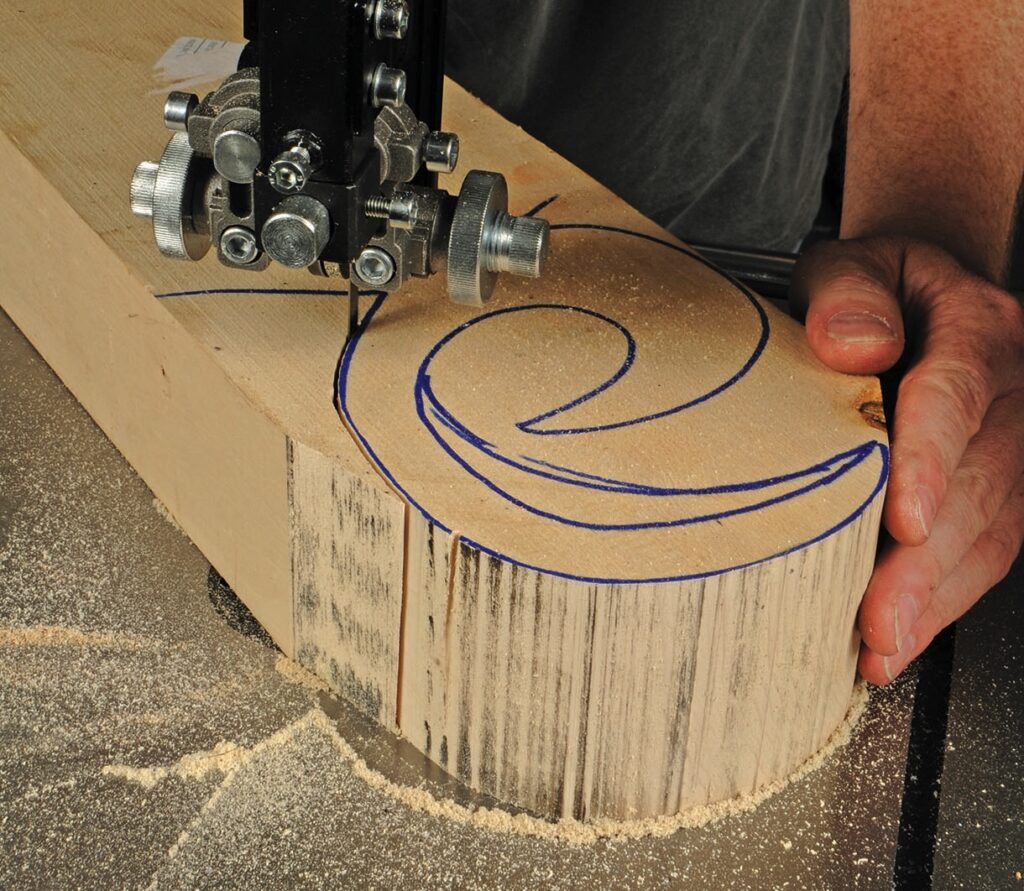
A good standard blade is 9mm wide x 6TPI skip-tooth which is perfect for cutting thicker material such as solid wood as the gaps between teeth can carry away the sawdust; it is capable of cutting moderate curvature or steeper ones if I use ‘relieving cuts’ – but more on this later.
For cutting up ‘green’ logs to season, change to a 12mm x 3TPI blade with extra wide kerf clearance designed to avoid jamming in the wet wood and remove lots of cut wood fibres.
Blade removal
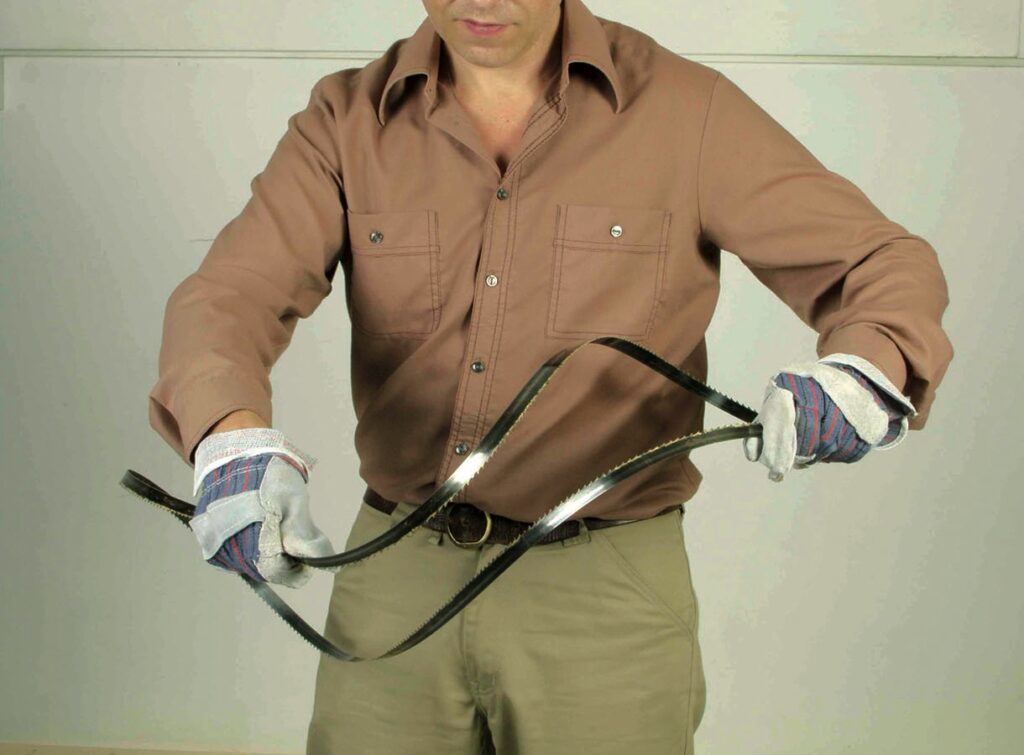
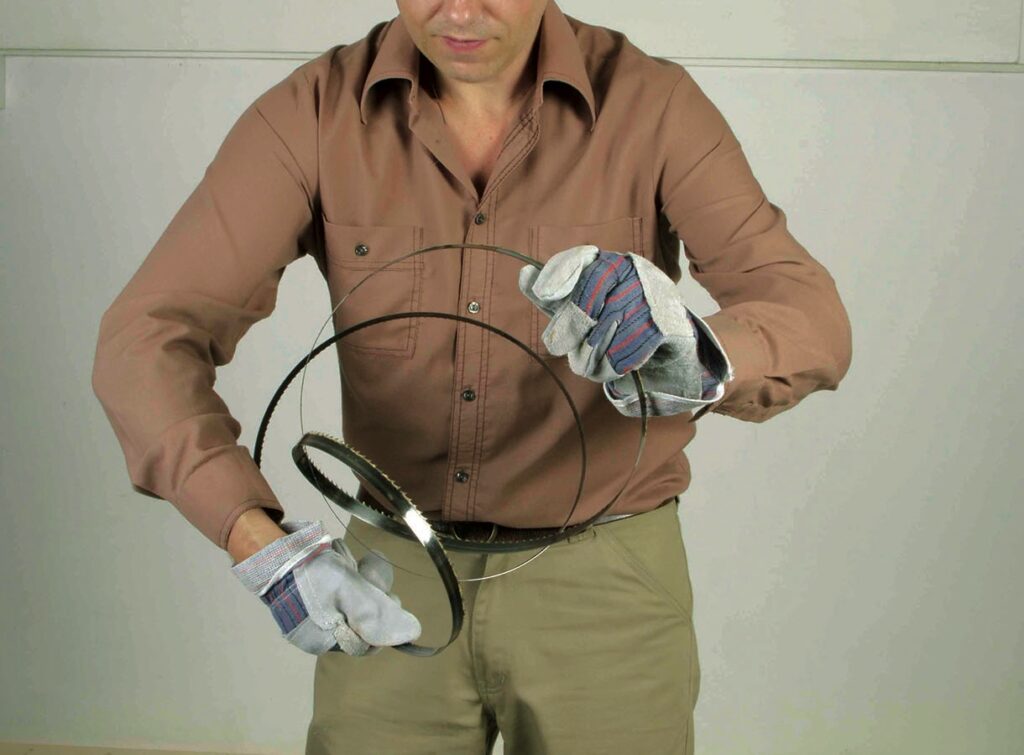
The machine must be disconnected or isolated first. Blade changing can be an off-putting procedure, but once you get the hang of it, it isn’t all that difficult. The first thing is to loosen the steel strap or other device under the front of the table. Loosen and withdraw the blade side and rear guides, then open both bandwheels doors which may be removable to make the job easier. Now de-tension the existing blade using the knob on top of the casing, make sure the upper bandwheel lock is undone first. The blade will now be loose. While wearing armoured leather builder’s gloves safety glasses or goggles, pull the blade forward and off the wheels and out of the casing. Make the old blade safe by grasping the loop of the blade in both hands and twist the loop in opposite directions. This results in the loop closing on itself to create a double thickness circle and the leftover loop can be flipped inwards so you end up with a small triple thickness circle of blade that can be wired or taped together ready for disposal.
Unfurling the blade
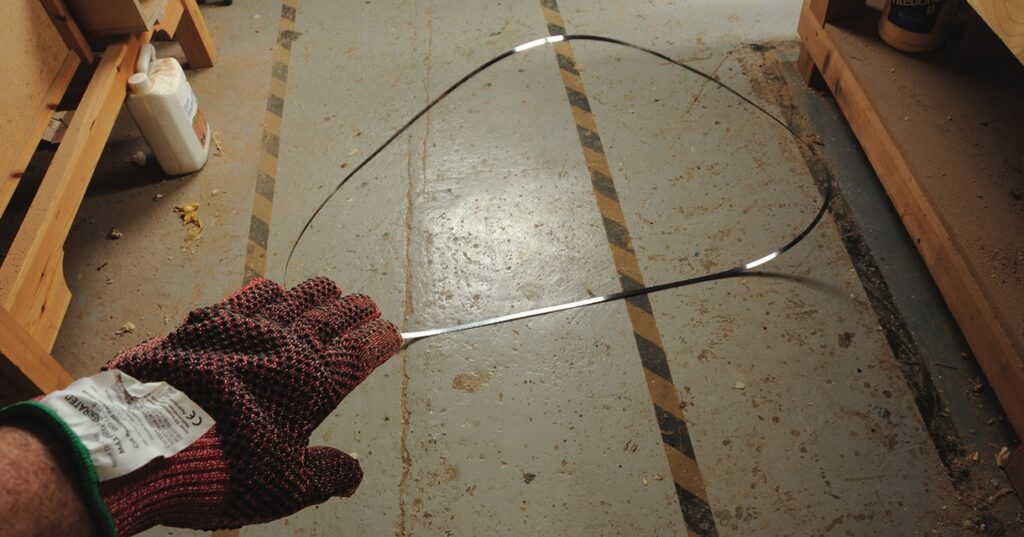
Your new chosen blade will be wired or strapped together in a loop. Still wearing gloves as the blade will be very sharp, cut or undo the ties. Find an open area of floor space without anyone around and throw the blade forward and step back smartly. It will unfurl itself rather dramatically, but it is safer than unfolding it right in front of you. The teeth will be the right way round i.e. as the teeth face towards you they will be aiming downwards at the right hand side as all bandsaws are made to cut to the right of the machine’s column.
Fitting the blade
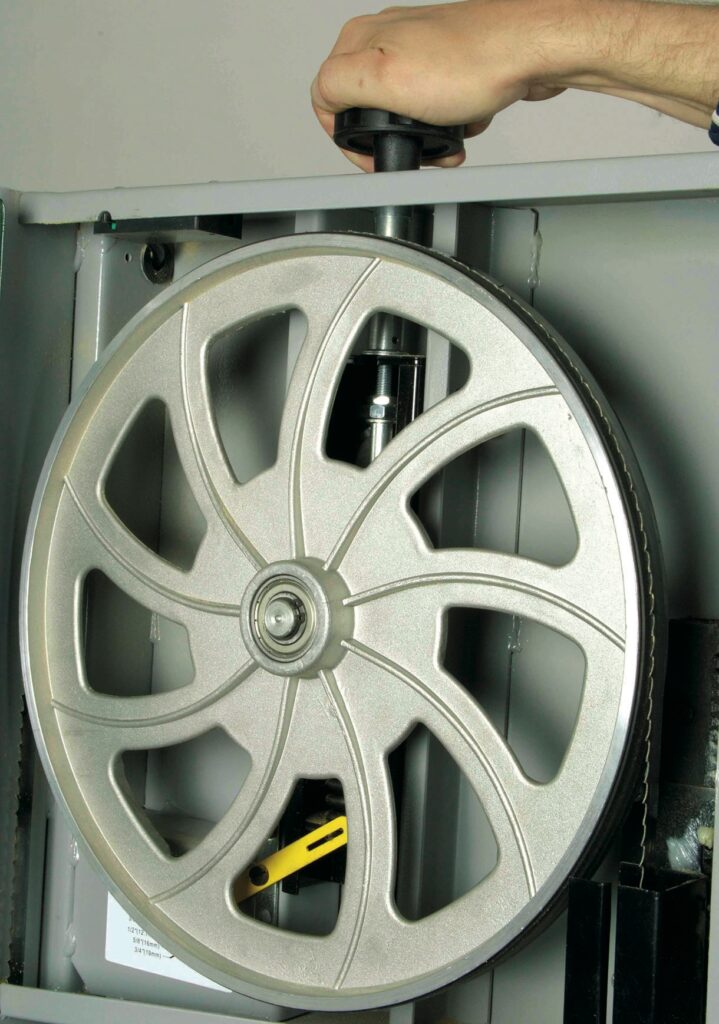
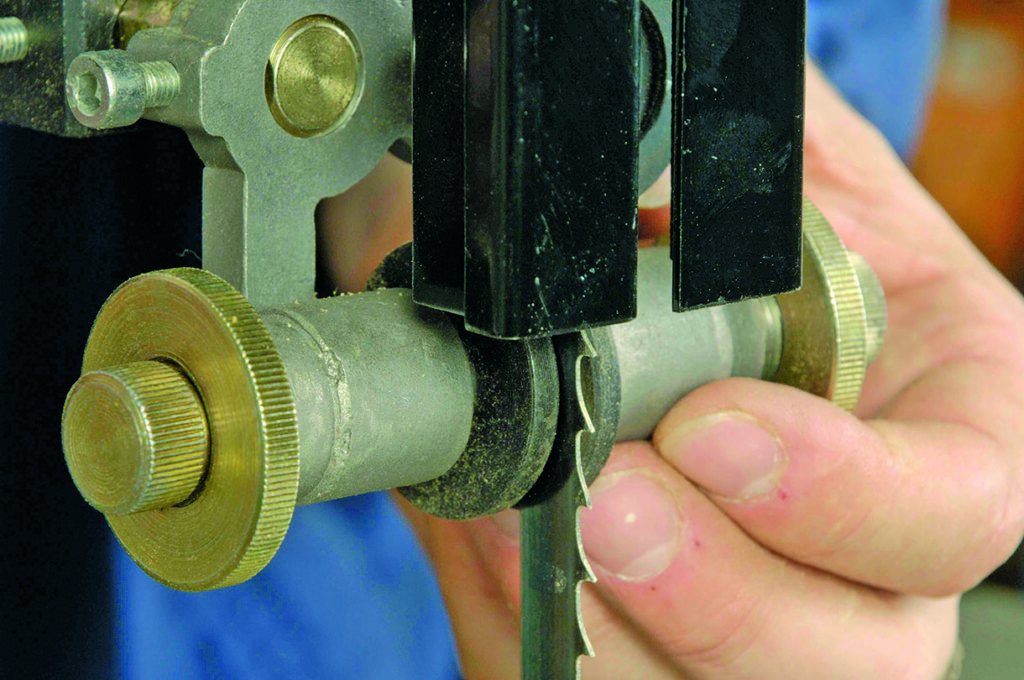
Feed the blade through the slot in the table and slide it on to the bandwheels after passing through the sliding guard and slot in the column. Sit the blade dead centre on both bandwheels checking and rechecking it is in position before retensioning. I don’t trust the tension indicator on most machines, preferring instead to pluck the sideways blade at the rear while turning the tensioning knob and listening for what I would describe as a pleasing ‘musical note’. Now try turning the upper bandwheel by hand without fingers anywhere near the outside of the wheel or the blade as they can get trapped between both. If the blade remains centred on both wheels it’s good. However if the blade wanders toward front or back you need to adjust the wheel tilt. If that doesn’t work de-tension the blade, refit in the correct position and try again at the new tilt position. In theory, if the blade is exactly the same as the old one this problem shouldn’t occur. Be patient and try different adjustments to get the blade to run properly by hand before closing the casing and powering up.
Adjusting the guides
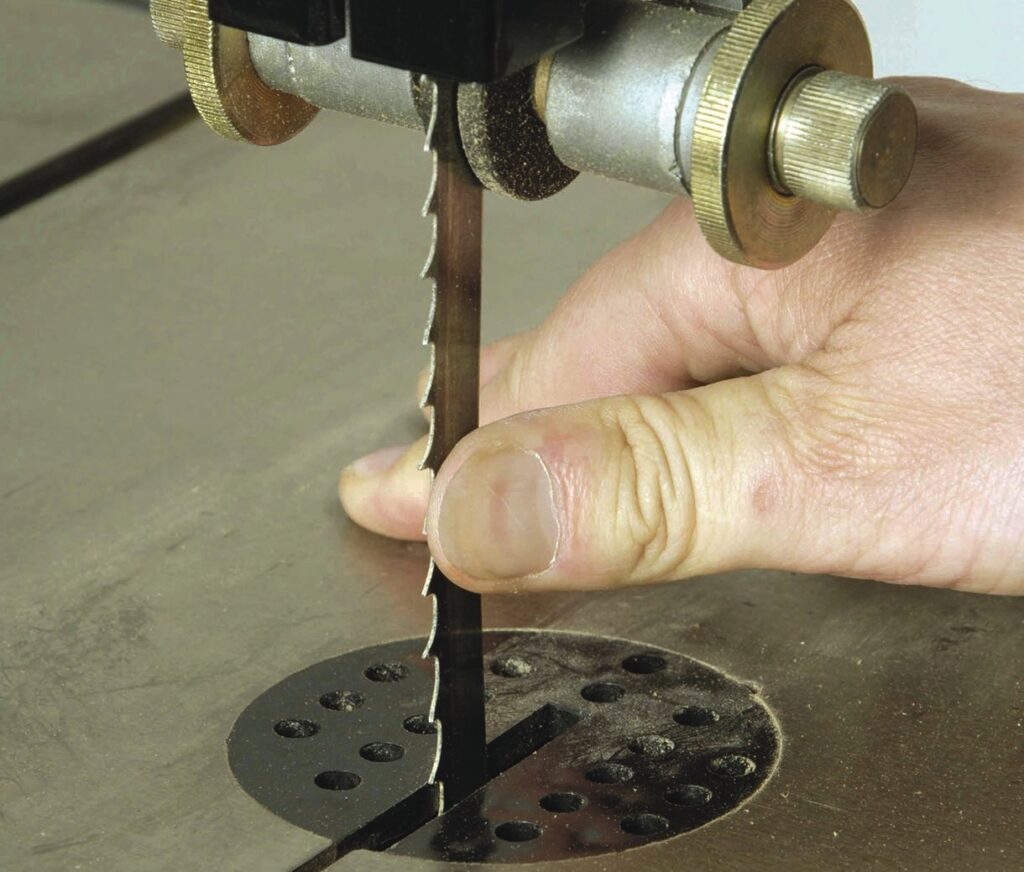
Assuming it is running nicely, switch off and move the top and bottom, rear thrust bearings forward until no more than one millimetre behind the blade. The side guides need to move inwards until almost touching the blade but not pushing it out of alignment. The guides must sit behind the tooth line or the teeth will get damaged. Once you have checked everything is correctly set and secured, your bandsaw is ready to cut. Do a test cut to confirm this.
Checking accuracy
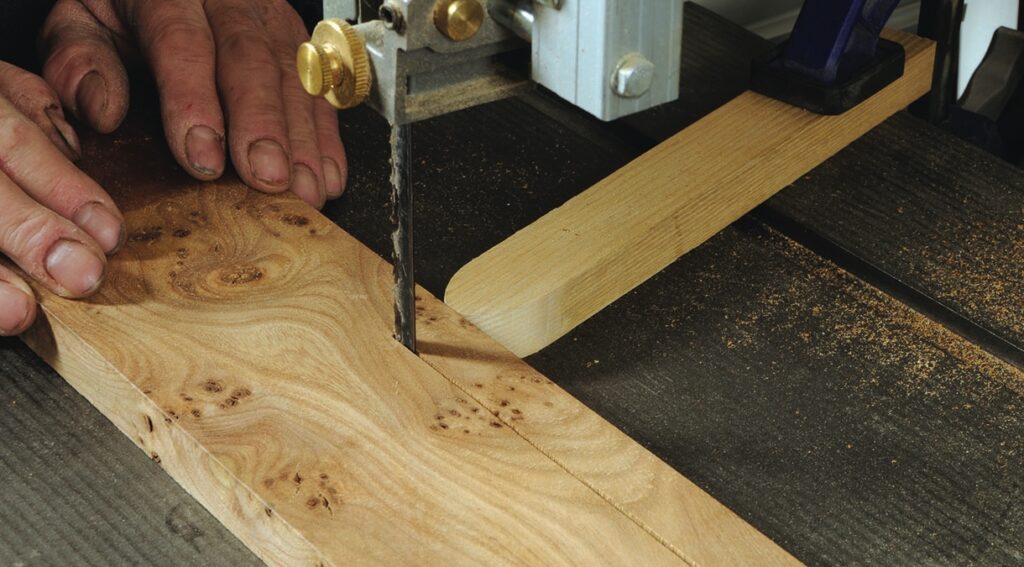
First use a square to ascertain whether the table is level and adjust the height setting bolt under the table as required. It is quite common for a bandsaw to cut with a ‘lead’ i.e. cut at a slight angle, not dead straight ahead.
You should be able to adjust the fence enough to take account of this. Cut a test piece on a chalk on line down the top edge of a board, stop halfway and mark along the side of the board on the table. This should be your fence setting angle. However, please note that cheap blades do tend to cut to one side because of the manufacturing technique good quality blades are much better behaved. A lead and a bowed cut will also happen if the blade is blunt and unwilling to cut.
Point fence
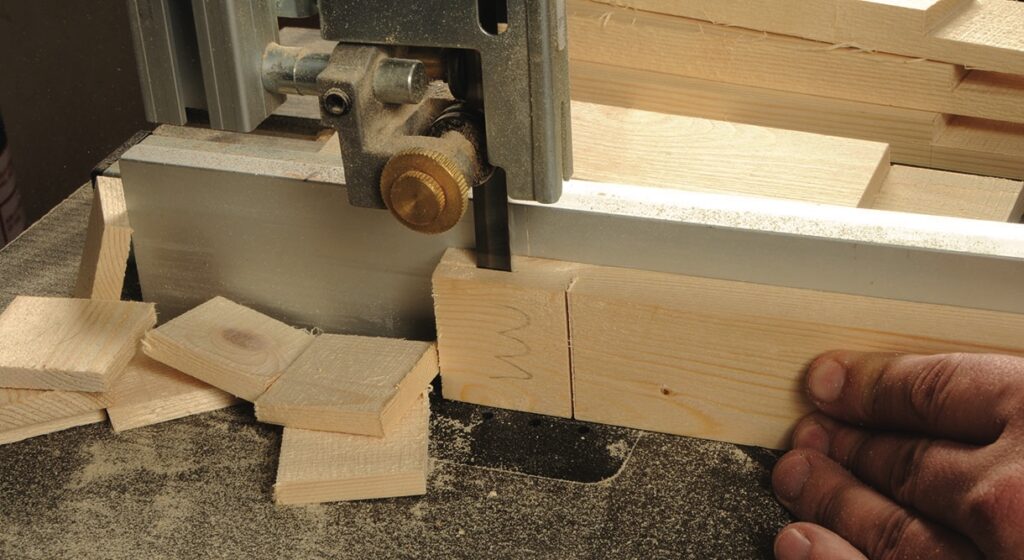
An alternative is to make a wooden point fence, aimed at the blade side. You can then press the workpiece against it and push it through at the angle the blade runs most comfortably at. For short cuts like tenons this is
not an issue, it tends to be lengthy deep cutting where problems occur.