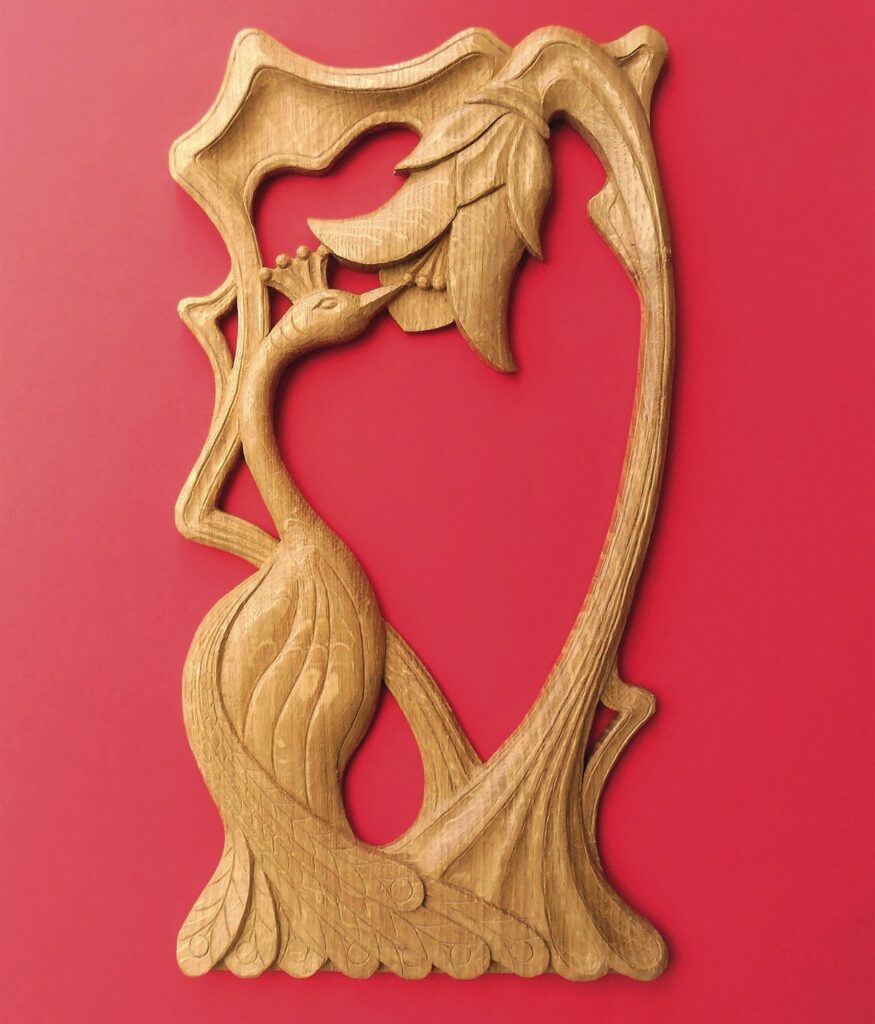
Steve Bisco carves a pierced panel in the popular style
Art Nouveau – literally ‘new art’ – is a distinctive style that was unlike anything seen before in the western world. It developed around 1890 and dominated architecture and the decorative arts until World War I. It was influenced by traditional Japanese art, and is characterised by stylised plant forms and long, flowing lines. In woodcarving, its elegant designs are mostly represented in low-relief.
Art Nouveau (see box) shares many features with its more serious contemporary, the Arts & Crafts style (see Woodcarving issue 162), but whereas the hand-crafted Arts & Crafts style was not always commercially viable, Art Nouveau embraced modern production methods and was very much a commercial success. This was partly due to the support of two of the great entrepreneurs of the time – Sir Arthur Lasenby Liberty (1843-1917), owner of Liberty of London; and Louis Comfort Tiffany (1848-1933), owner of Tiffany & Co., New York. Their respective department stores are still retail icons today.
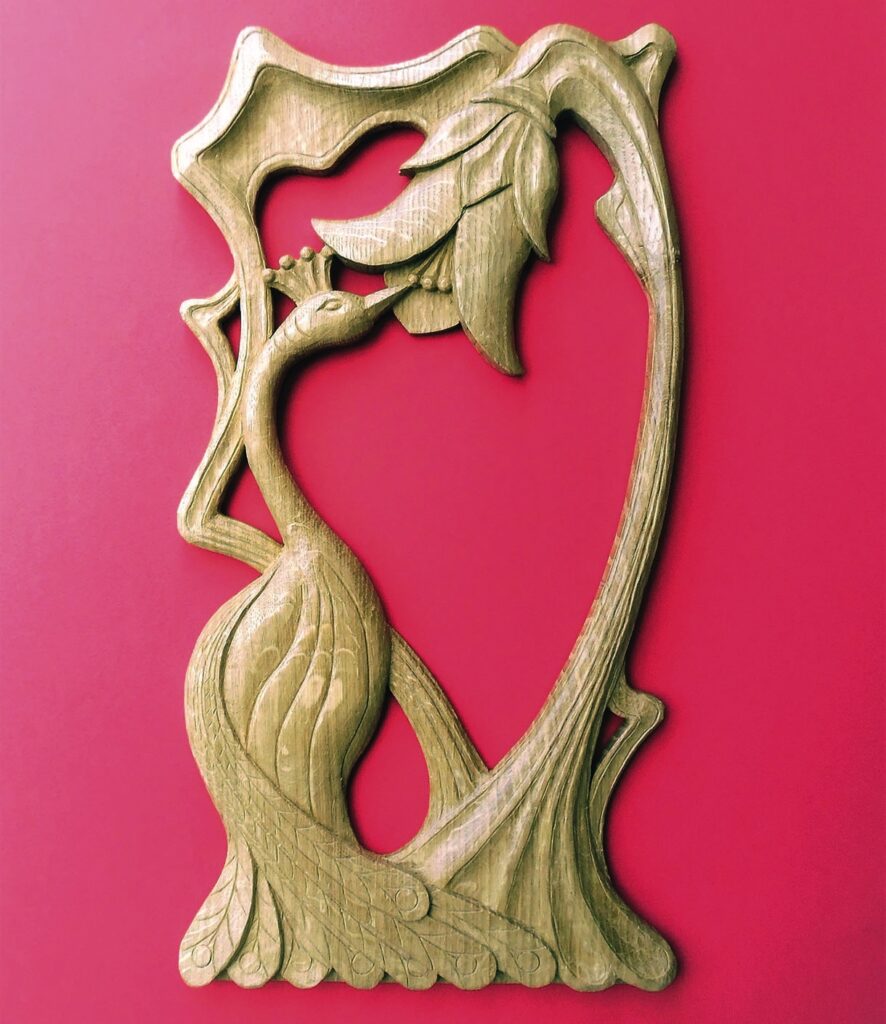
The Art Nouveau style developed at around the same time as electric light, which probably explains why so many table lamps were designed in this style, Tiffany lamps being the most well known. My inspiration for this panel came mainly from several different lamp designs by various makers, particularly the famous Peacock Lamp (1901) by Belgian sculptor Philippe Wolfers (1858-1929). The peacock was a favourite motif in Art Nouveau and, when portrayed in stylised form with long, graceful, flowing lines, it always adds a touch of grace to a design. The other elements – the long, organic stems with their sharp ‘elbow’ bends and ‘fairy’ flowers – are typical Art Nouveau elements that I have combined with the peacock to create a pierced panel carved in oak and finished with wax polish.
Like many Art Nouveau designs, it has a touch of the fairy glen about it, with an open centre framed by a bower of plant stems, among which the peacock is wandering. Piercing, which is quite a simple process, fixes the boundaries of the pattern at the start, and removes the surplus wood without the hard work of grounding out a solid panel.
Materials: • Oak (Quercus robur) 510 x 270 x 25mm • Antiquax Original wax polish
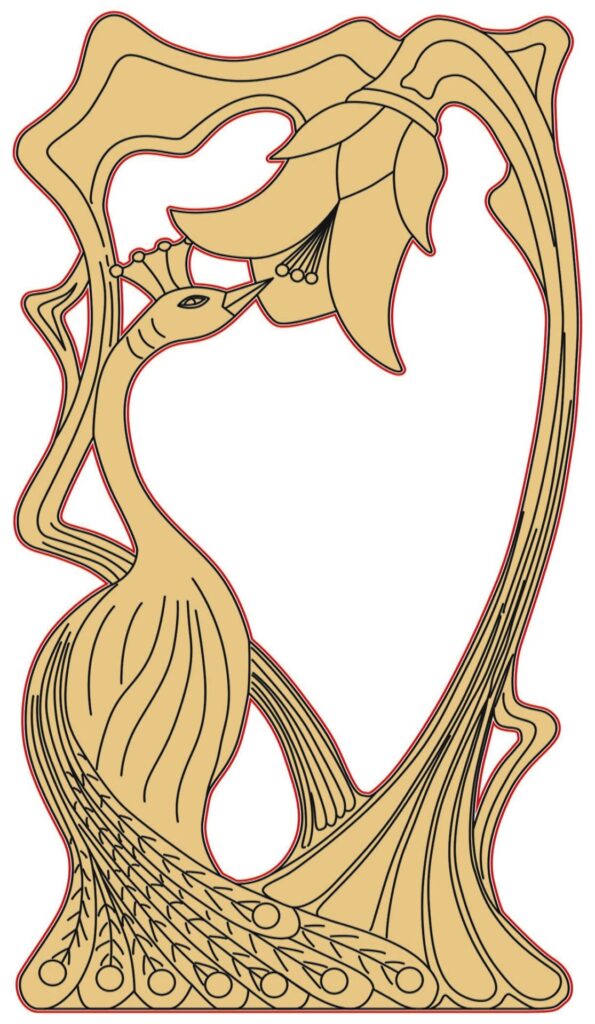
DRAWING
ART NOUVEAU STYLE
The French name Art Nouveau is used because it was the 1900 Paris World Fair that did most to promote this new art that had developed throughout Europe and America. In eastern Europe it also went by the German name Jugendstil (Young Style), and in Italy it was called Stylo Liberty (Liberty Style), after the London department store so closely associated with the style.
In the applied arts, Art Nouveau found physical form in architecture and decorative objects. Cast iron and wood were used to create sinewy and convoluted columns, stair rails, canopies and other elements in buildings, especially by Victor Horta in Brussels and Hector Guimard in Paris. Beautiful glassware was created by a new breed of glass makers, most notably René Lalique in Paris and Émile Gallé in Nancy. Antoni Gaudi began his famous Moorish-influenced Art Nouveau buildings in Barcelona, and in Vienna the Secessionist Movement turned the art establishment on its head by boycotting mainstream exhibitions and setting up their own gallery promoting the new Jugendstil/Art Nouveau style. Art Nouveau itself became mainstream, until it fell out of fashion in World War I.
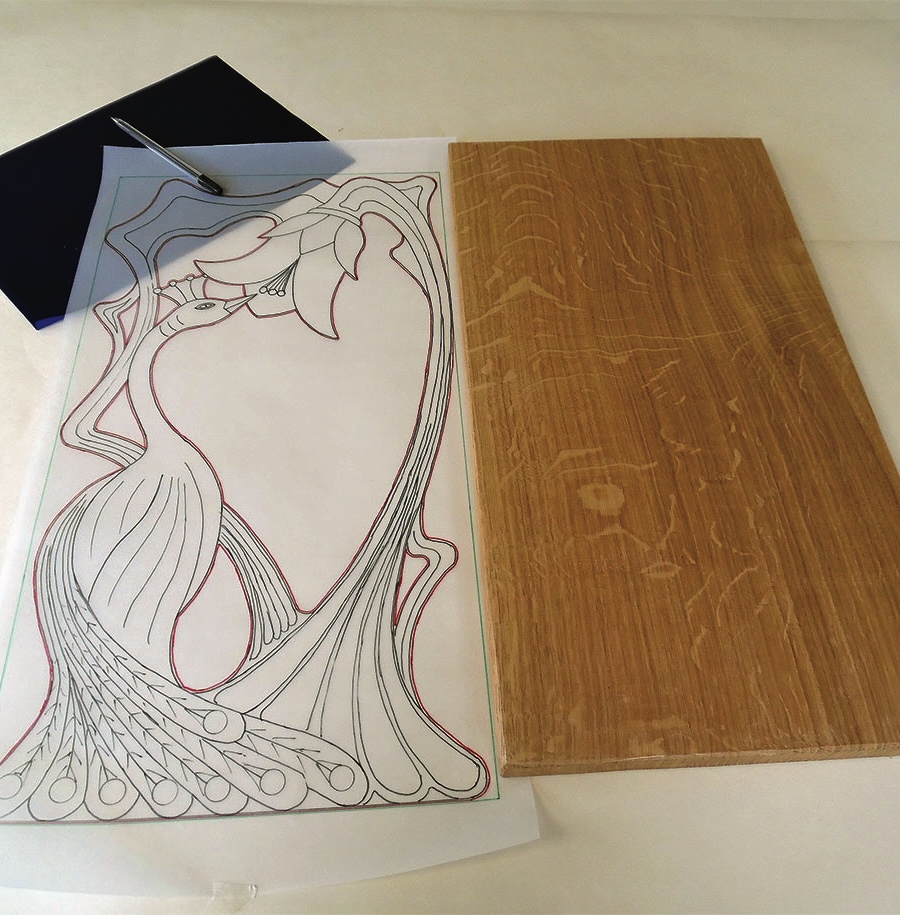
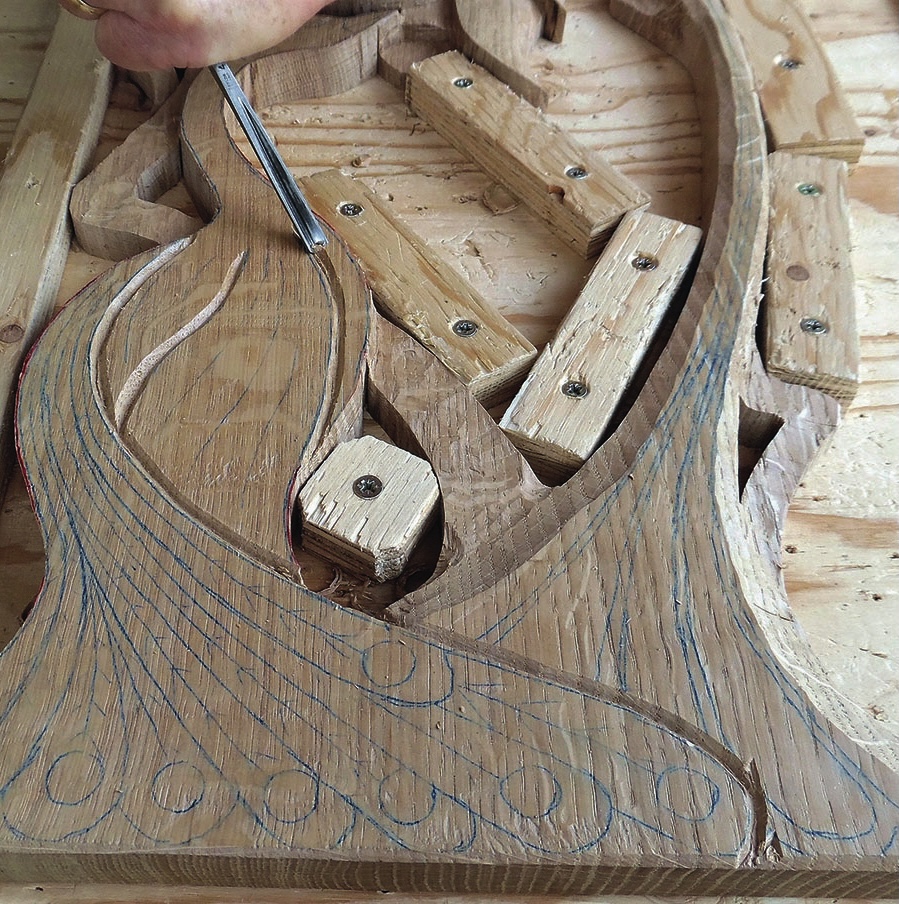
PREPARING THE PANEL
1. Get a piece of oak, 510 x 270 x 25mm. Make sure it is fairly straight grained and free of knots that could distort the pattern. Make a full-size copy of the drawing and get enough sheets of carbon paper to cover the board
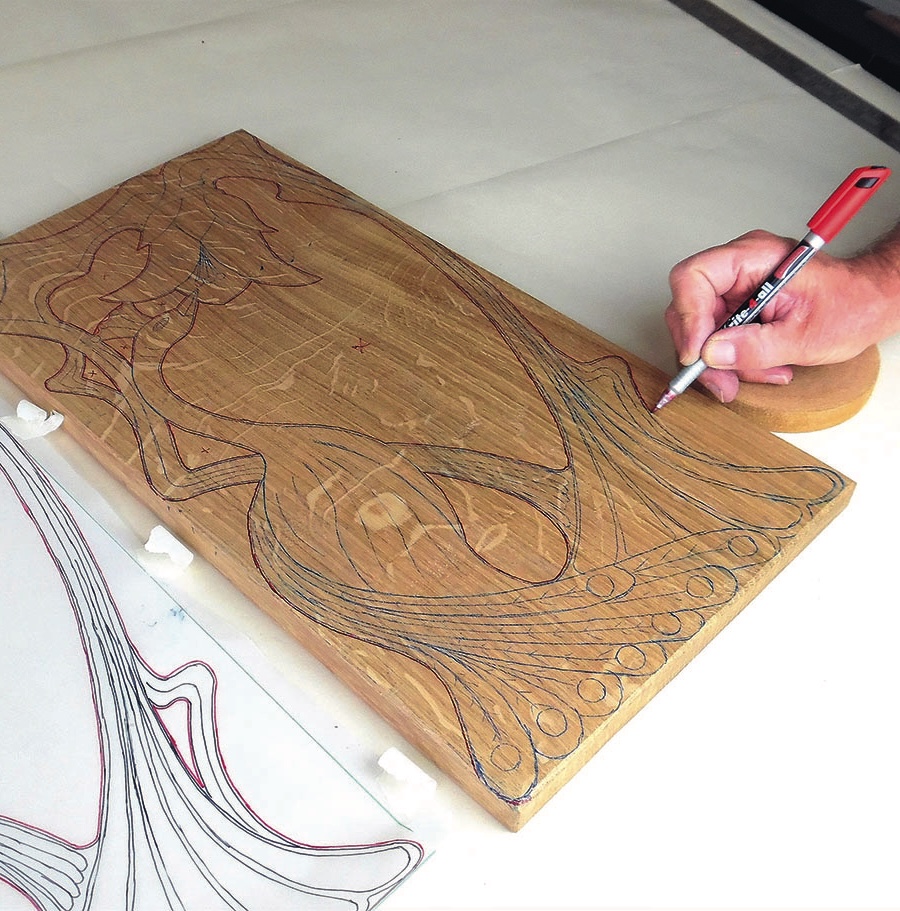
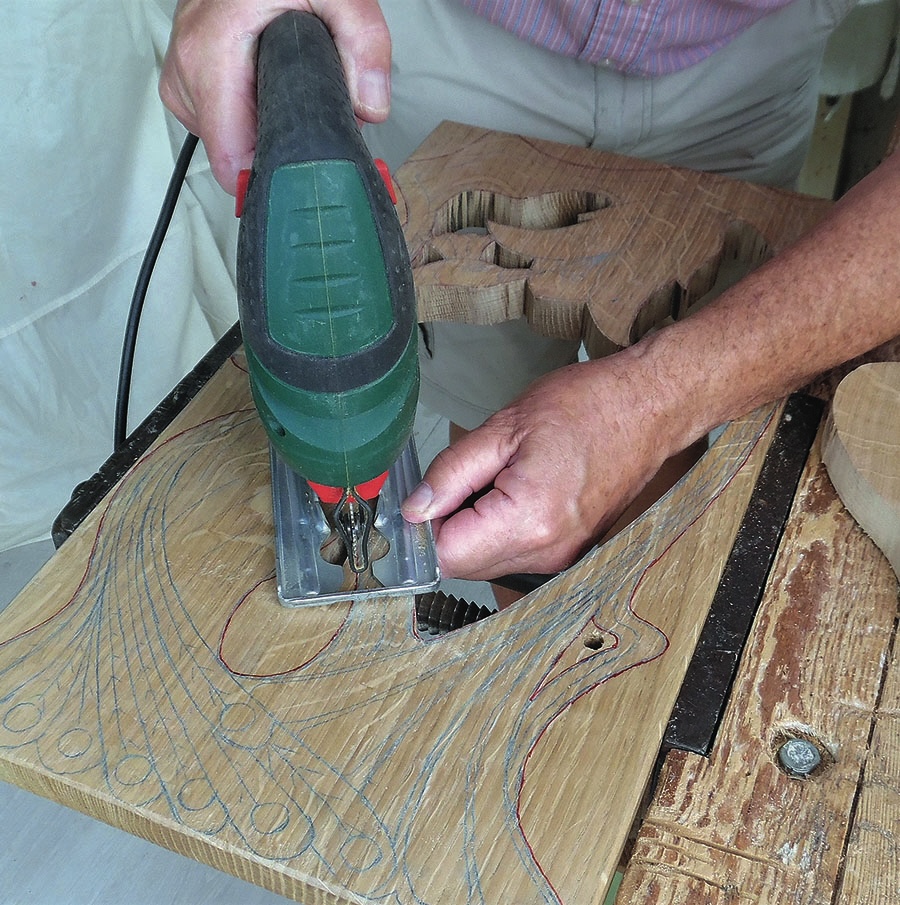
2. Tape the drawing securely to the wood, with the carbon paper under it, and trace the pattern on to the board. The maze of pattern lines can be confusing, and as this is a pierced carving you mustn’t get lost with the jigsaw, so mark round all the cutting lines in red
3. Cut out the internal voids using a jigsaw with a 4mm blade. Don’t cut too close to the pattern lines as the jigsaw blade may flex a little on the tight turns
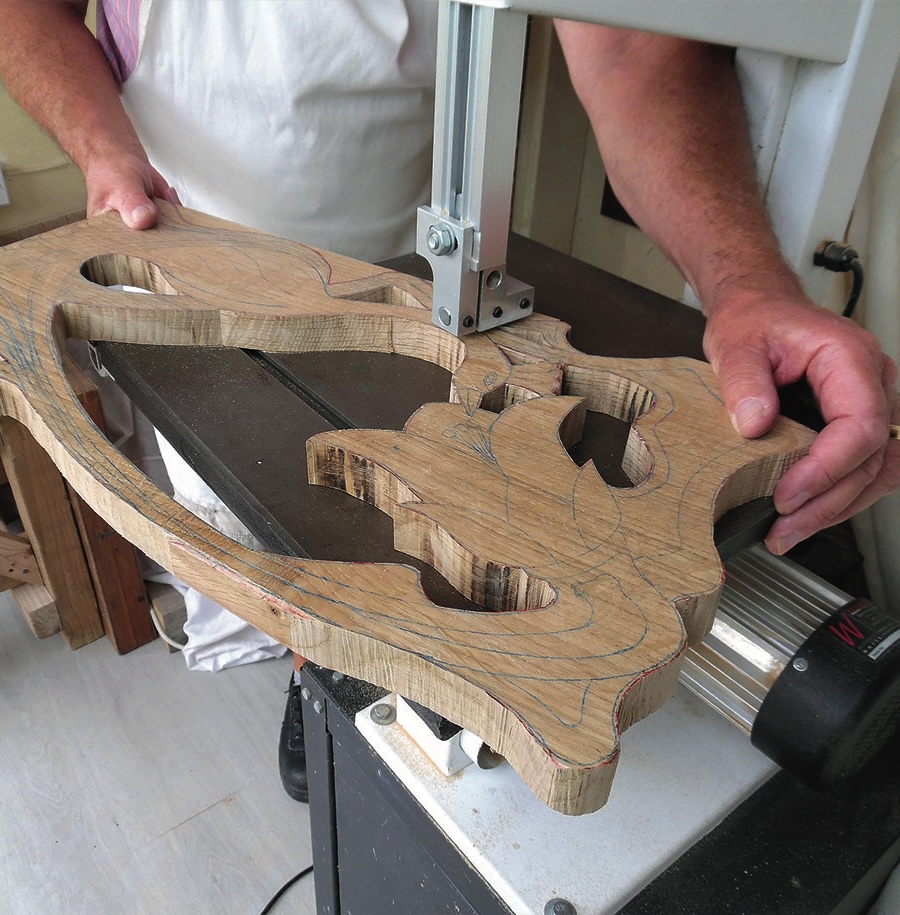
4. Now cut round the outer edges. Use a bandsaw if you have one as this avoids the flexing problem, or continue with the jigsaw if you don’t. One of the benefits of pierced carvings is that, when you have done this, you will have removed nearly all the surplus wood from the carving with very little effort
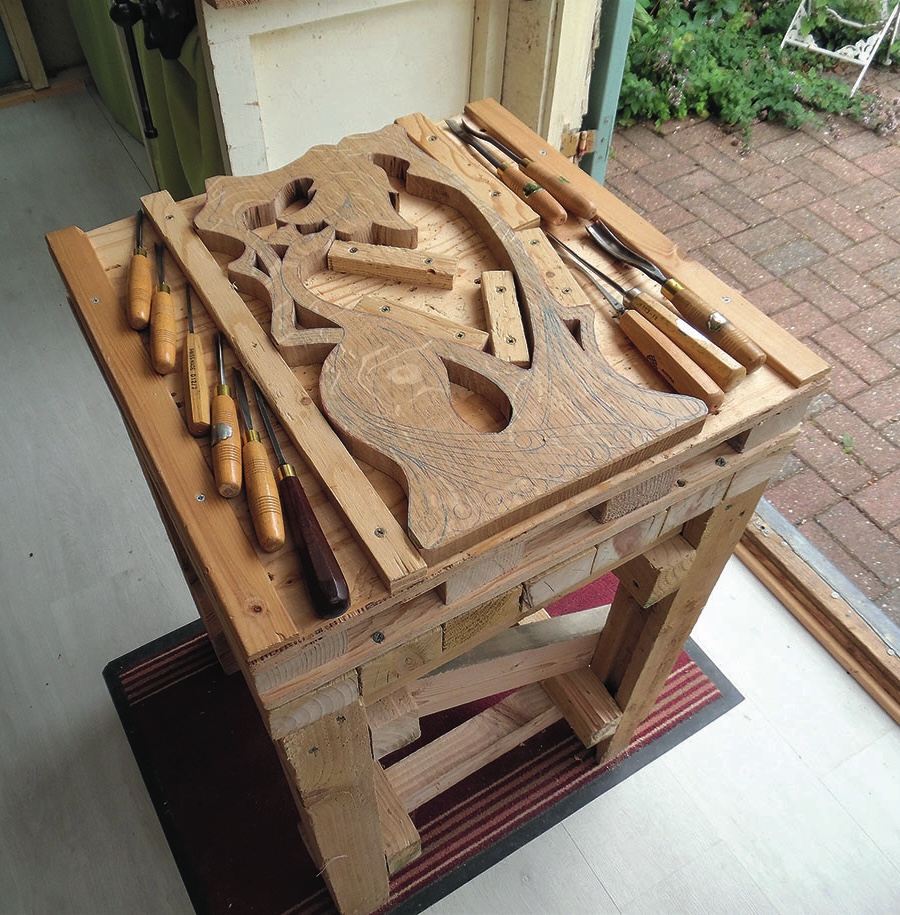
5. Set up the work on the bench, holding it in place with blocks of wood screwed on to the bench so you can move them around as the carving progresses. A free-standing walk-around bench enables you to approach each cut from the best angle, but if you don’t have one you can fix the carving on a backing board so you can clamp it to your bench in different positions
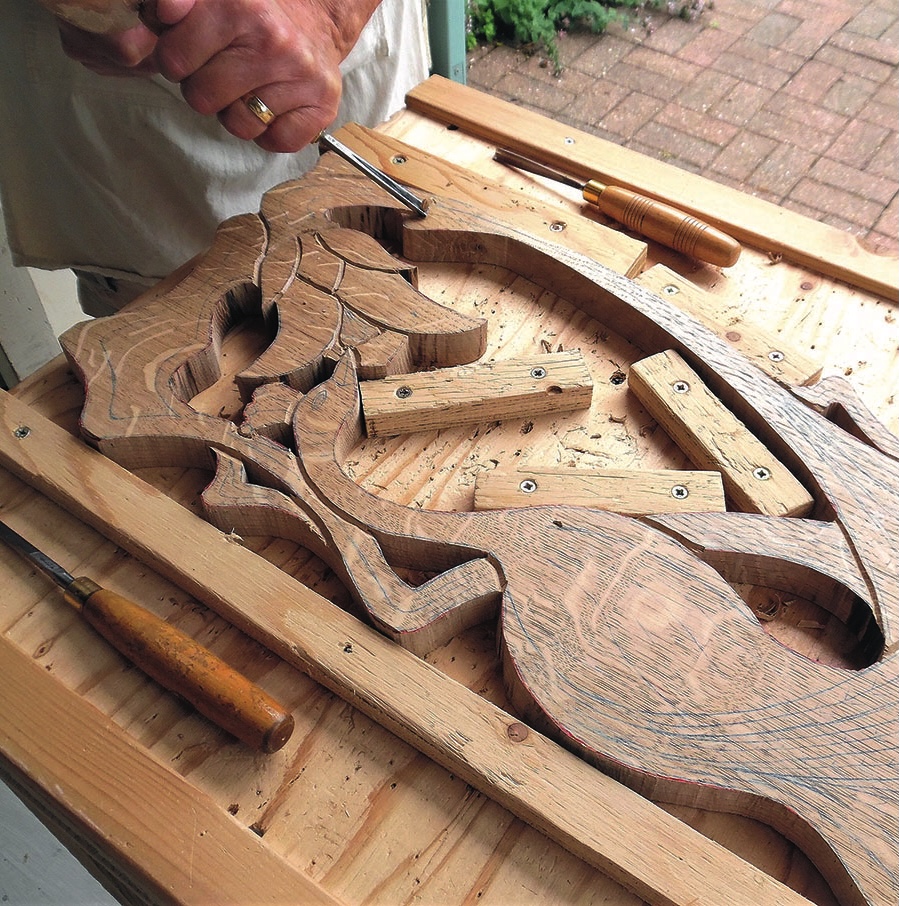
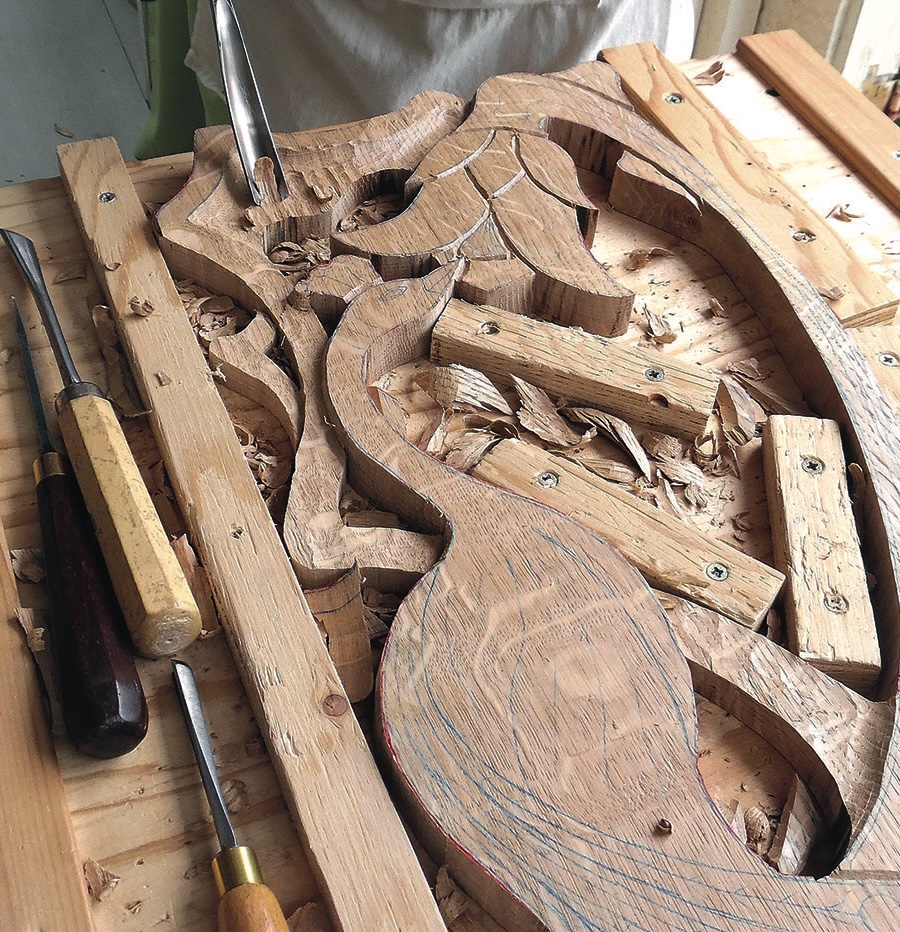
ROUGHING OUT THE STEMS
6. Start the carving by using a V-tool to mark the edges and overlaps of the various elements. For example, the peacock overlaps the left-hand main stem, and the smaller elbow bends that come off the main stems are set at a lower level
7. Rough out the level of the left-hand stem to flow under the peacock’s neck and up to the flower head. Keep the top left-hand corner at the full thickness of the board, but scoop out the flatter section below the upper stem to a depth of about 13mm at the lower edge
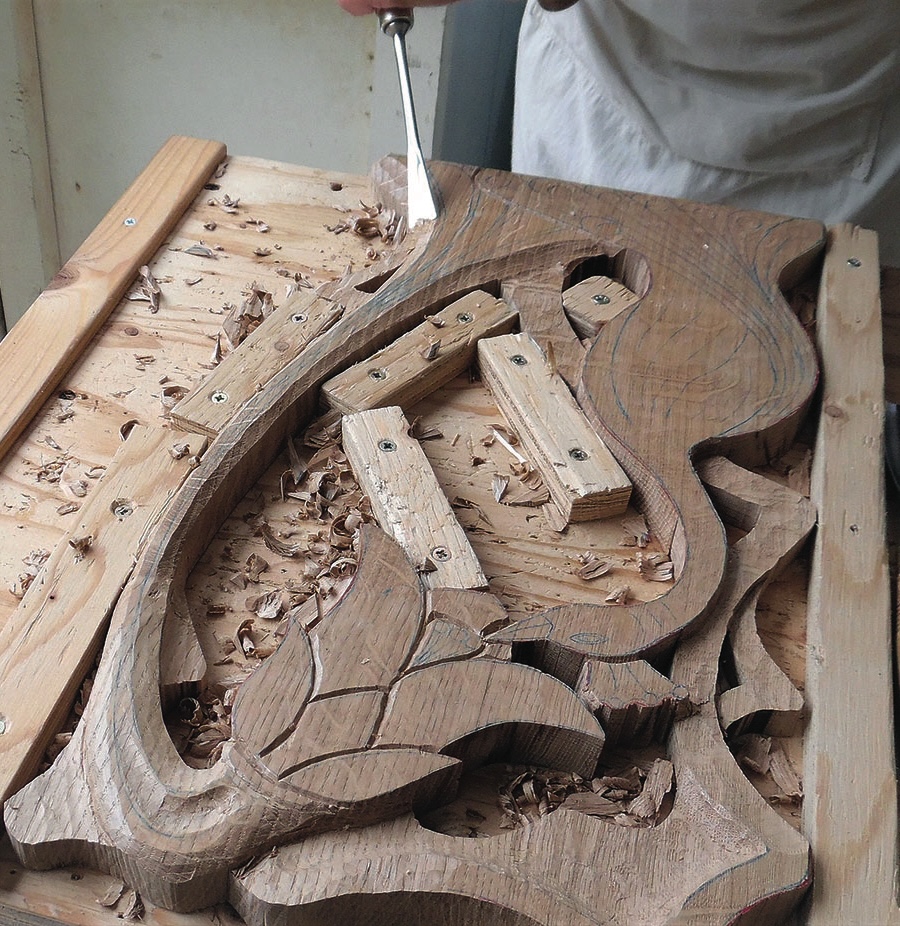
8. Now rough out the right-hand main stem. The three elbow bends that come off the main stem are at a lower level, but the main trunk of the stem remains at the full thickness, apart from a slight hollow in the top bend near the flower head. Take a broad chamfer off both sides of the stem to get a feel for where the sides will be when the detail is added later
9. Finish the roughing out by shaping the flower head. Round off the sides of the petals and sepals to give a foreshortened three-dimensional effect, taking care not to break off the pointed ends. The lowest petal under the peacock’s beak must be reduced to about 9mm thickness at this stage, and the stamens in the middle must be lowered slightly to be carved later
DID YOU KNOW?
Art Nouveau was closely associated with the Paris Metro system that was being built around 1900, and it was often called Le Style Metro. Architect and designer Hector Guimard (1867-1942) designed the entrances to many Metro stations in Art Nouveau style, with green-painted cast ironwork, distinctive orange lamps and an elaborate font style on the green and yellow Métropolitain entrance signs.
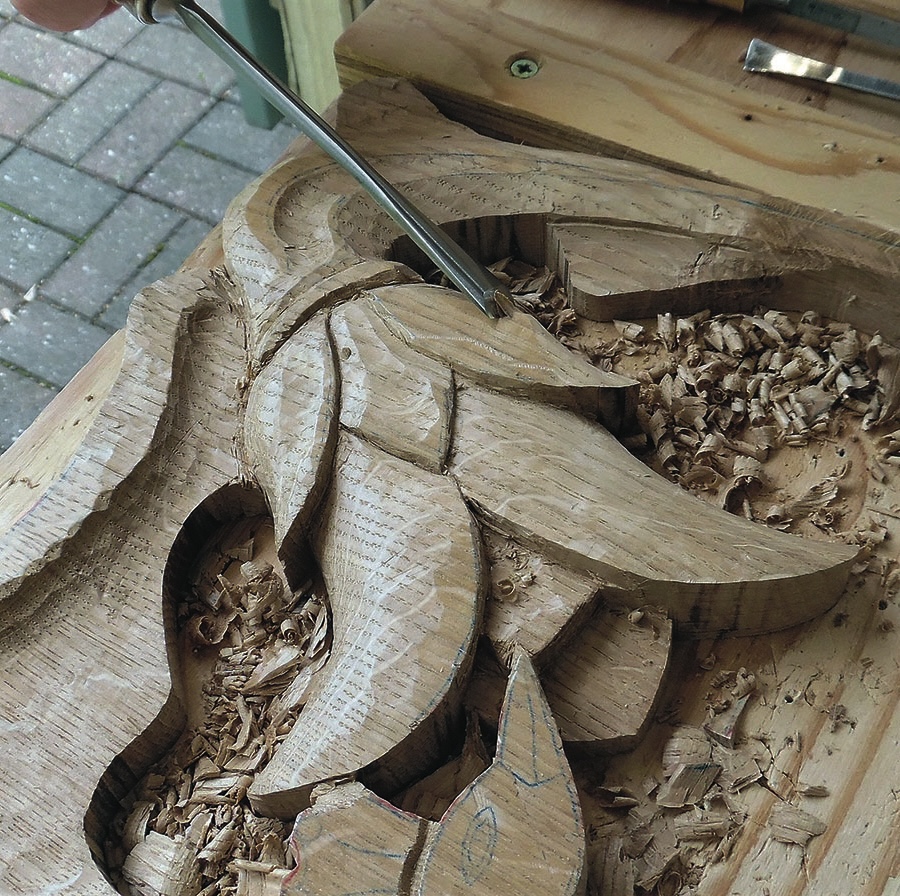
CARVING THE PEACOCK
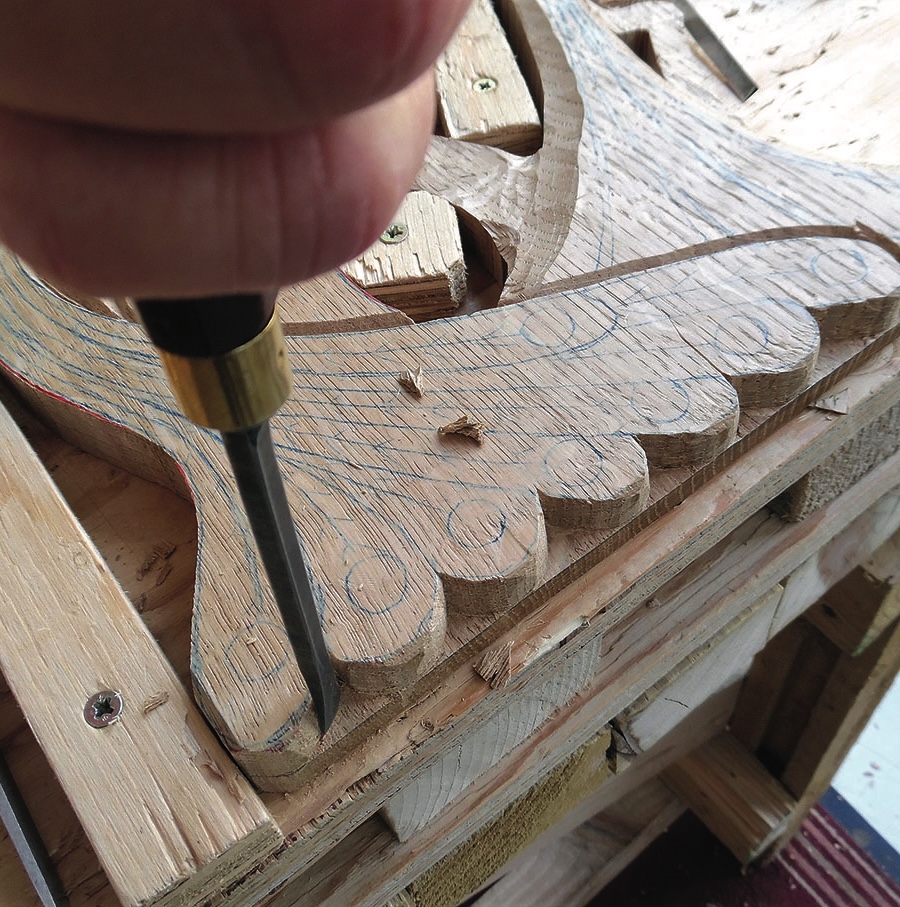
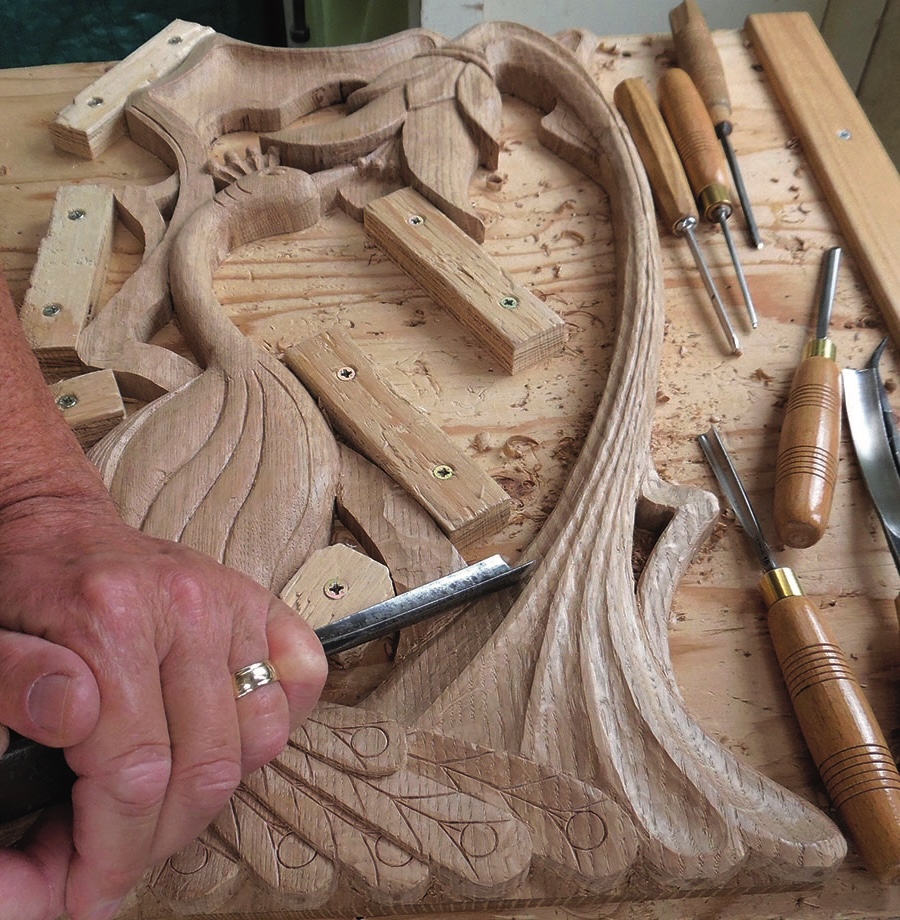
10. Now we move on to the peacock, which is the primary feature of the carving. It is important not to lose the flow of the tail feathers as drawn in the pattern, so we need to combine the shaping with the detail carving. Start by carving a V-groove along the edge of the peacock’s tail and wings
11. At the base of the carving, bost round the ends of each tail feather to remove the triangle of wood between each feather, down to a background thickness of 10mm
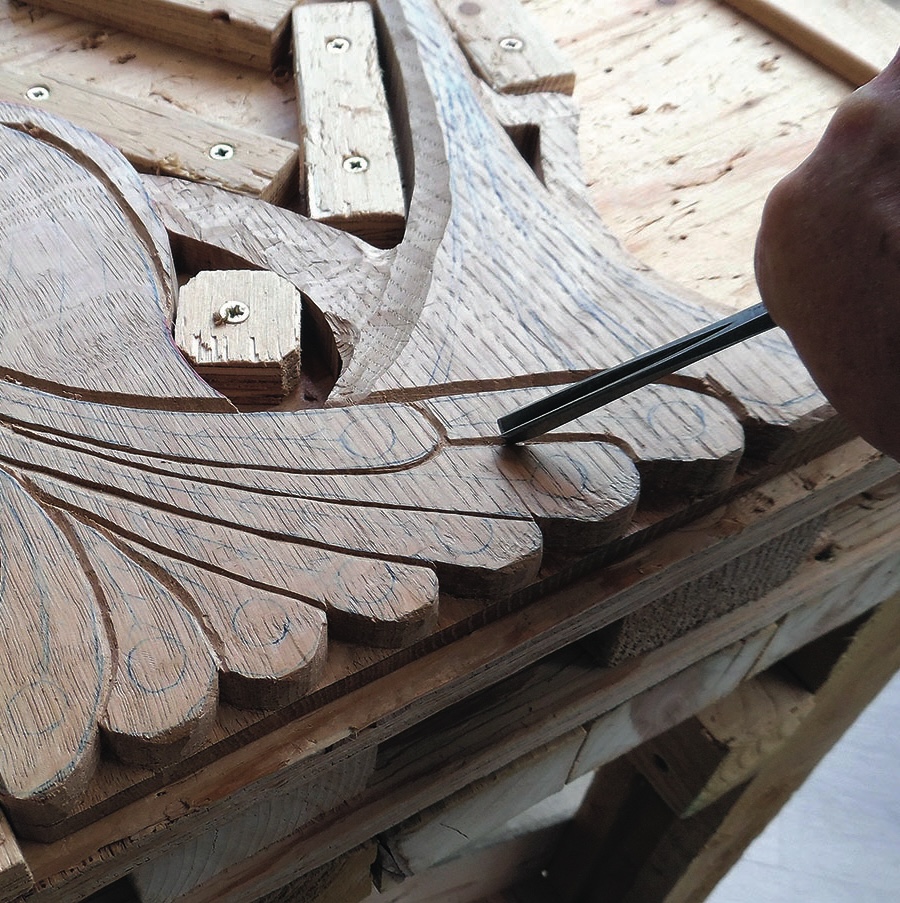
12. Use a V-tool to mark the outer edge of each tail feather where it overlaps its neighbour
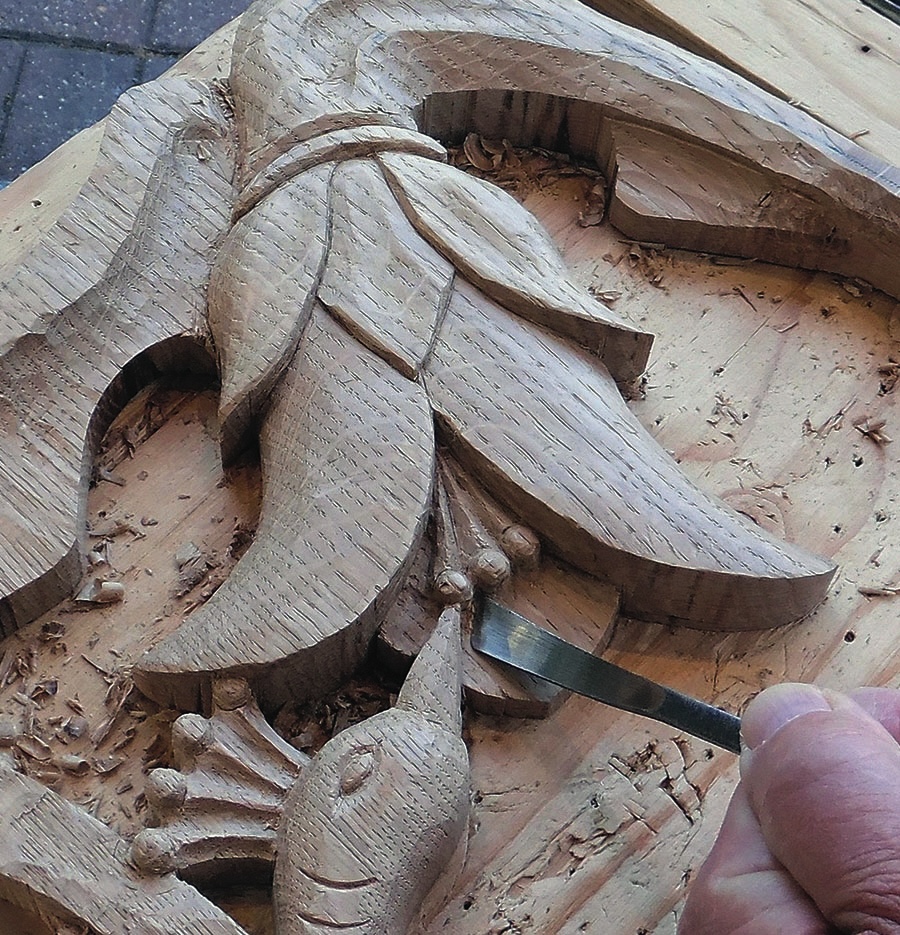
13. Round over the left side of the body and shape the flow of the tail feathers so they appear to curl in towards the unseen legs and then flip out at the bottom. Re-mark the edges of the tail feathers as you go
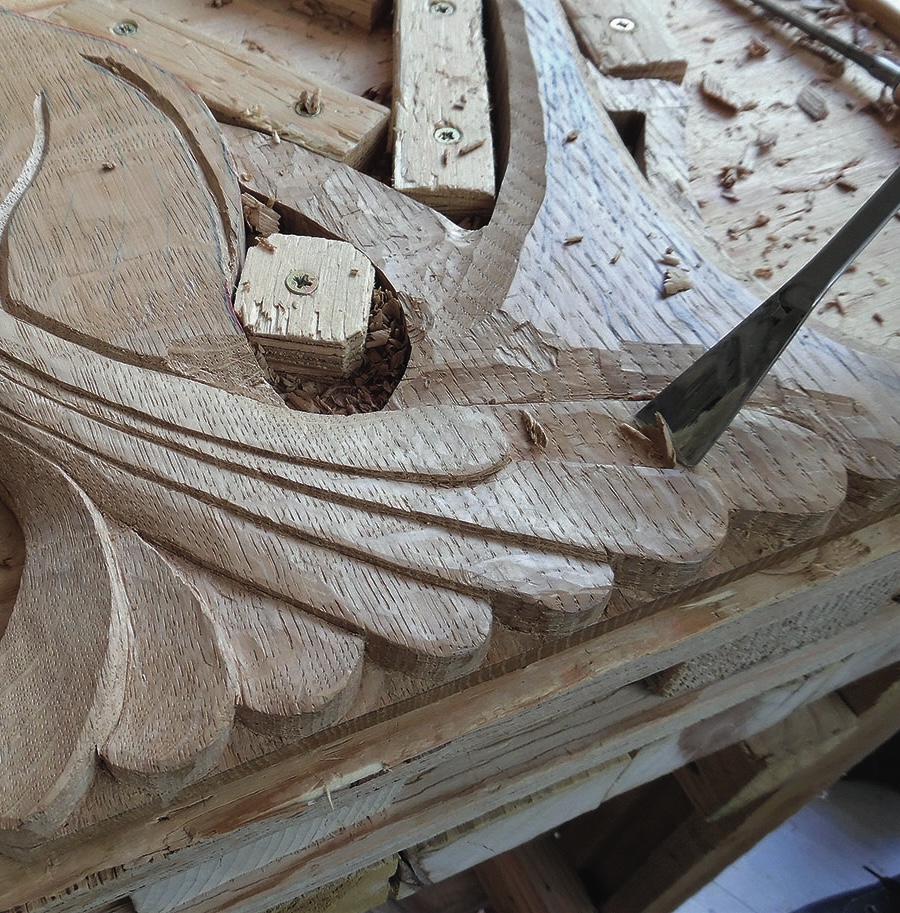
14. Use the foreshortening technique again to shape the breast, which curls under on the right-hand side. The shape of the wings is formed on a virtually flat surface by making three channels with a V-tool and slightly rounding over the surface between each channel
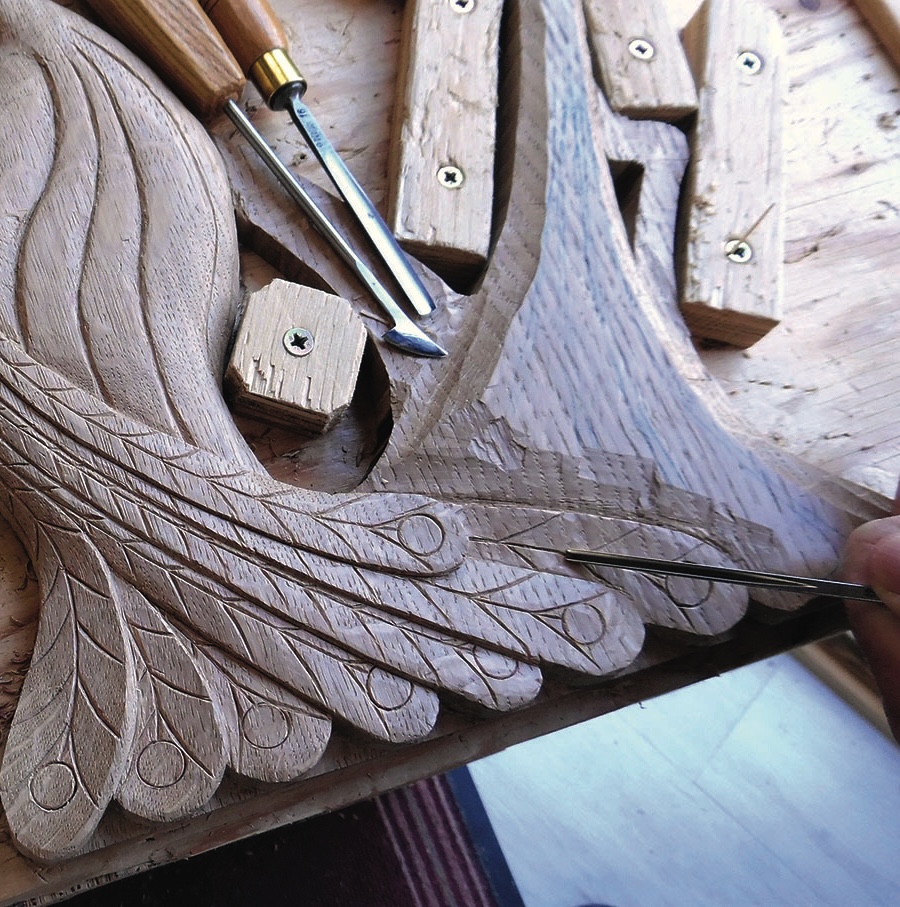
15. Now carve the detail on the tail feathers. Use a No.5, 7mm to prick in the 13mm roundels at the end of each feather, then a 2mm V-tool to carve the centre vein for each feather and the smaller veins which splay off from it. It helps with definition if you finish each vein by scoring the bottom of the V with a 16mm hooked skew chisel (a tool too delicate for any heavier work in oak)
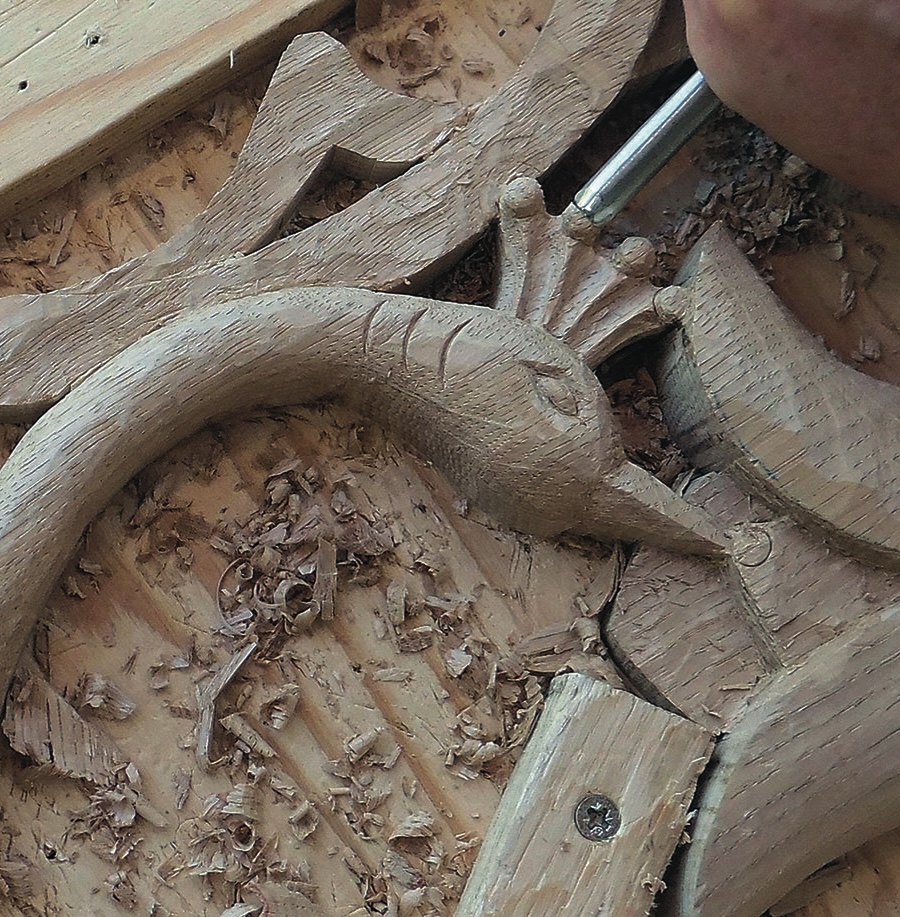
16. Moving to the head and neck, form the elegant curve of the neck. The head is quite small for carving details, so work carefully to carve the eye with a No.5, 7mm, and incise the three curved ‘bars’ behind the head with a No.3, 10mm. Carefully shape the sides of the beak into an inverted V-shape with a very sharp chisel. Finish the head by carving the four balls of the crown feathers with curving flutes between them
STYLISATION
A design is termed ‘stylised’ when a natural form such as a bird, animal or plant is represented in a simplified way which includes the key features that make it recognisable, without depicting all of its natural details.
CARVING THE OTHER DETAILS
17. Carve the three stamens in the flower head by rounding them over with a No.8, 8mm, then carve flutes between them to echo the crown feathers on the peacock’s head. Sharpen up the overlaps and smooth off all the surfaces of the petals. The upper sepals overlapping the petals have slight hollows carved into them – a common Art Nouveau feature
18. Continue on to the upper part of the flower stem. The middle of the stem is concave and both sides are chamfered outwards. The upper elbow bend has a hollow carved into it, and all the key pattern lines are given definition with the 2mm V-tool
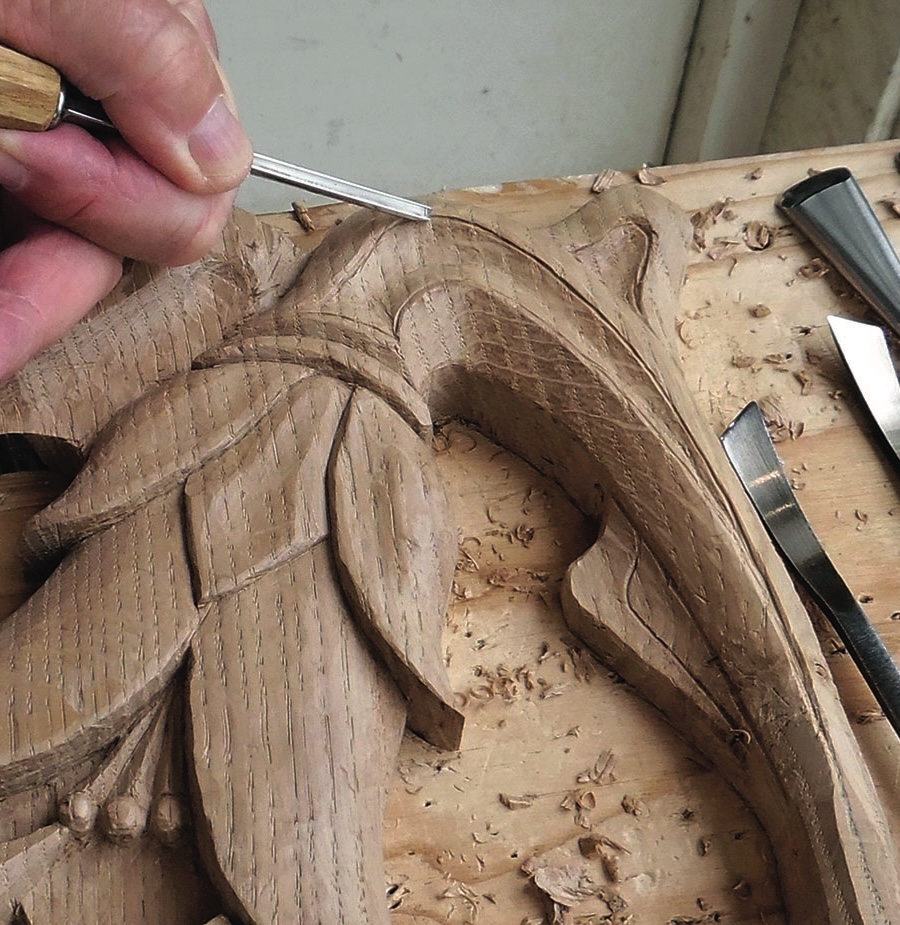
19. Now complete the hollow section in the top right by scooping out the concave area, chamfering the outer edges, and defining the lines with the V-tool as before. This section is a typical Art Nouveau feature that bears no relation to the natural world, so just copy it as you see it
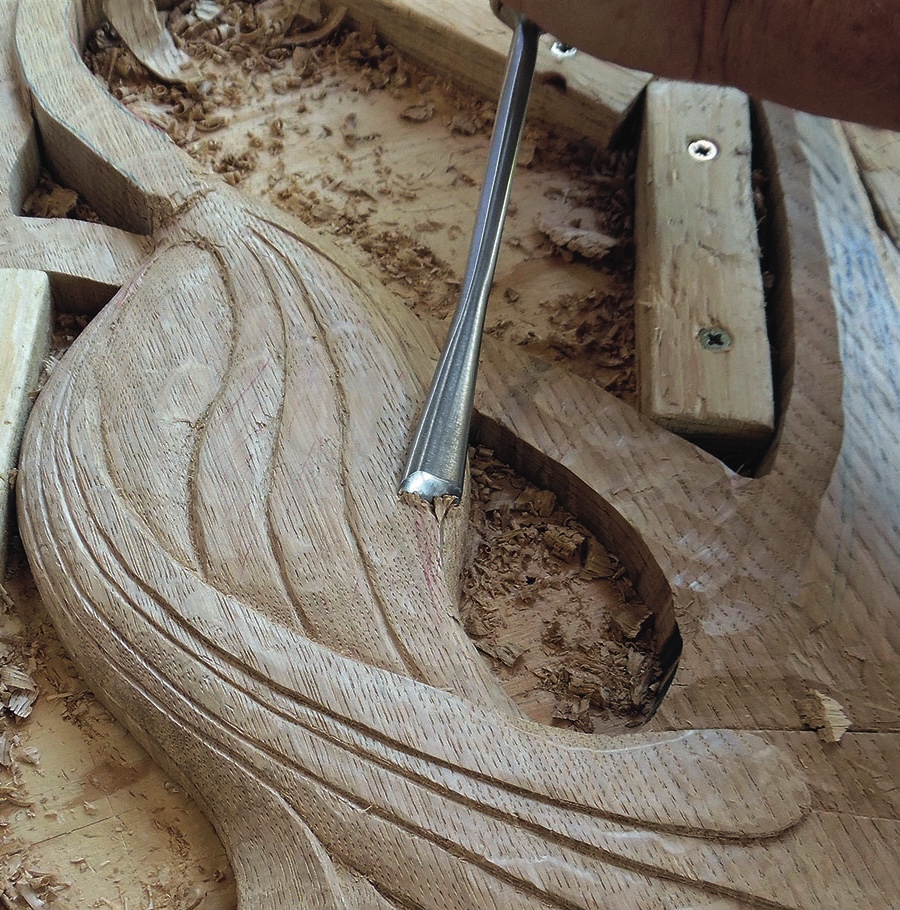
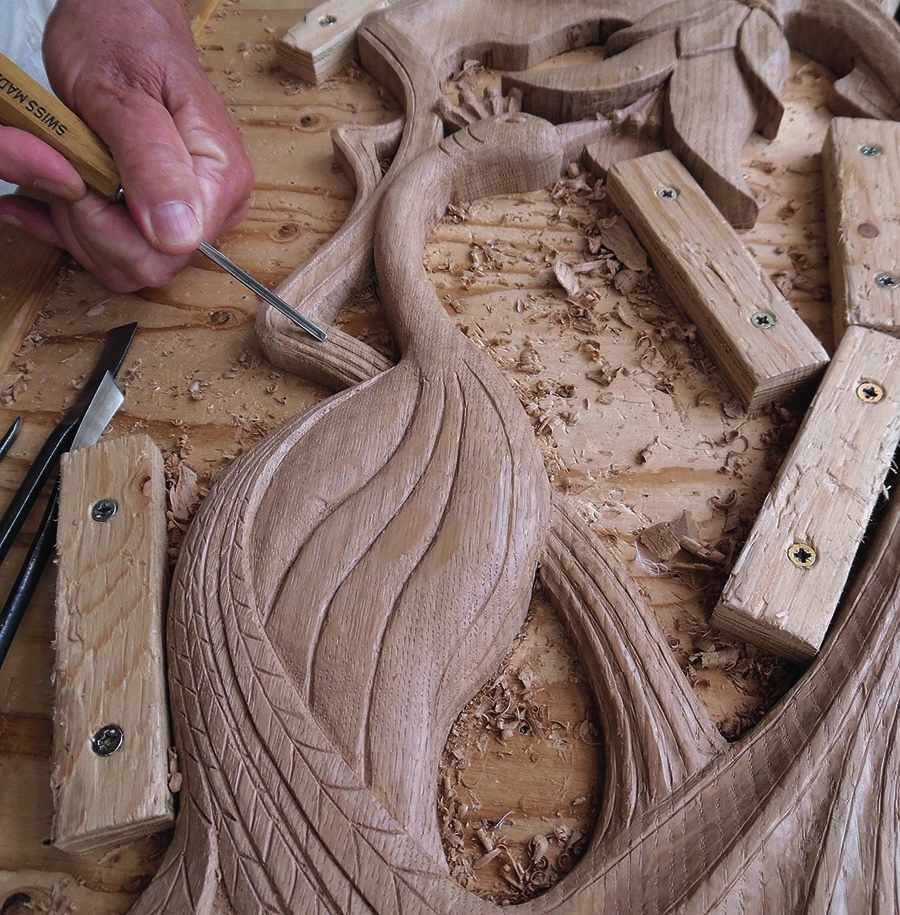
20. Moving to the bottom right, carve the detail on the right-hand stem to link it up to the top. The base has five broad, shallow flutes that curve up into the stem, becoming narrower as they go and merging into narrow veins in the thinnest part of the stem. The elbow bend in the bottom right is slightly concave and slopes outwards
21. Finally, carve the left-hand stem, which starts as a branch off the main stem and is carved with the same five flutes, narrowing as they go upwards and under the peacock’s body, emerging on the other side as narrow veins. As the stem continues upwards, with its elbow offshoot, carve a shallow concave along the middle, chamfer the sides outwards, and carve a border line with the 2mm V-tool
FORESHORTENING
The three-dimensional effect of the peacock, flower, and stems is largely an illusion created in the 25mm-thick board by ‘foreshortening’. By using a shallow curve at the edges of the upper surface, and then increasing it to a steep curve that curls around and under the edges, the eye sees it as a much thicker and more rounded object than it really is.
UNDERCUTTING AND FINISHING
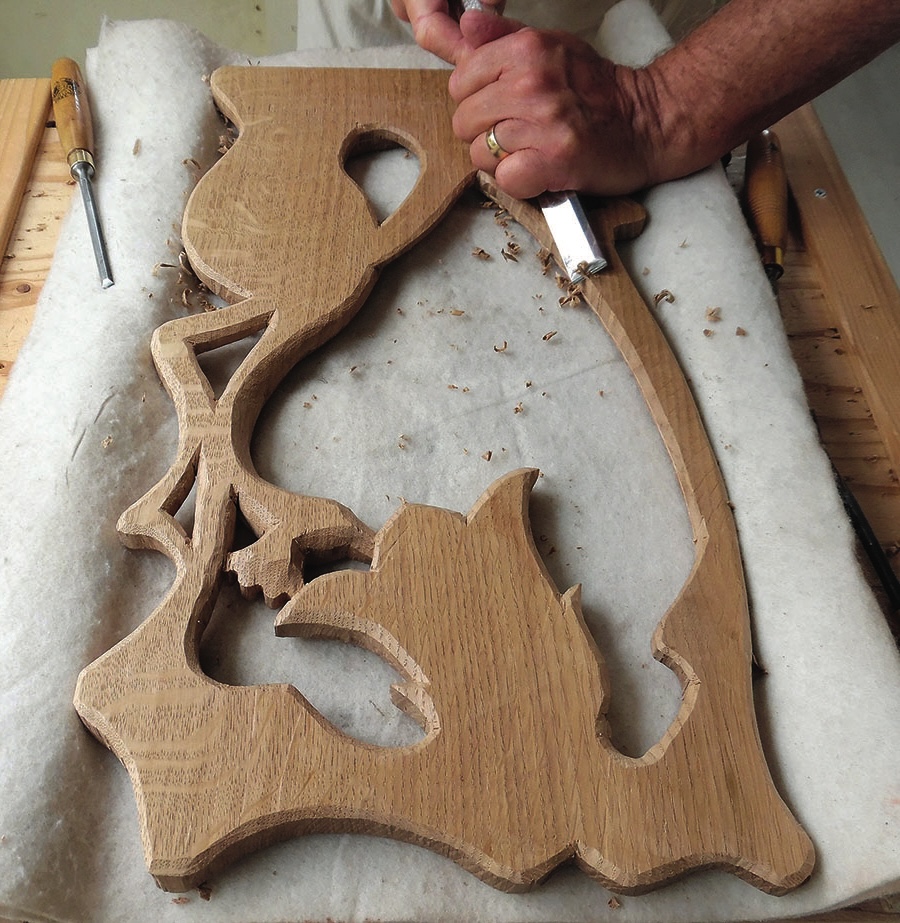
22. With the detail carving finished, it just remains to tidy up the back edges. Place the carving face down on a soft, non-slip surface, and chamfer away the edges of each part of the pierced panel to make them look neater and less thick when seen from the front
23. Give the finished carving a coat or two of a light-brown wax polish (I used Antiquax Original) to bring out the colour of the oak, and buff it up to a soft sheen. Hang it up against a plain surface where the light strikes it sideways to bring out the shadows
To provide the best experiences, we use technologies like cookies to store and/or access device information. Consenting to these technologies will allow us to process data such as browsing behaviour or unique IDs on this site. Not consenting or withdrawing consent, may adversely affect certain features and functions.
Functional
Always active
The technical storage or access is strictly necessary for the legitimate purpose of enabling the use of a specific service explicitly requested by the subscriber or user, or for the sole purpose of carrying out the transmission of a communication over an electronic communications network.
Preferences
The technical storage or access is necessary for the legitimate purpose of storing preferences that are not requested by the subscriber or user.
Statistics
The technical storage or access that is used exclusively for statistical purposes.The technical storage or access that is used exclusively for anonymous statistical purposes. Without a subpoena, voluntary compliance on the part of your Internet Service Provider, or additional records from a third party, information stored or retrieved for this purpose alone cannot usually be used to identify you.
Marketing
The technical storage or access is required to create user profiles to send advertising, or to track the user on a website or across several websites for similar marketing purposes.