Mike Wood shows how to create one of the most exquisitely coloured birds around
There are around 25 species within the bee-eater (Meropidae) family, most of which live in Africa and Asia with a few species found in southern Europe, Australia and New Guinea. In June 2017 there was a rare sighting of bee-eaters in the UK when seven birds were spotted at a quarry near Loughborough. Bee-eaters usually breed in southern Europe and Africa, but the effects of climate change mean that more of these birds are moving north and they may become a more common sight in Britain in the future.
Bee-eaters are very brightly coloured birds, often with brilliant green plumage, although some species have red, yellow, blue or purple feathers. The name Meropidae derives from the ancient Greek word ‘Merops’, which means ‘bee-eater’. Their main source of food is flying insects – bees, wasps and hornets – which they catch in mid-air after observing the prey from their perch. The bee-eater’s beak prevents it from being stung as it kills the insect then removes the stinger by wiping the insect against its perch. Bee-eaters are mentioned in Aristotle’s writings, who advised bee-keepers to kill the birds to protect their hives.
Bee-eaters live in colonies and form monogamous pairs for breeding, with both male and female birds caring for the young. Their nests are burrows which they dig usually into the sides of cliffs, sand banks or on level ground. These burrows can reach up to 3m deep. The nests are vulnerable to attack from rodents and snakes, and the adult birds are preyed on by raptors. Their conservation status is currently categorised as ‘least concern’ by the International Union for Conservation of Nature.
In Hinduism, bee-eaters are associated with archer gods and the Sanskrit name for the birds means ‘Vishnu’s bow’. This association came about because the bee-eater in flight looks like a bow with its beak as the arrow.
Things you will need
Tools:
• Personal and respiratory protective equipment
• Bandsaw, coping saw or fretsaw
• Carving knife
• Rotary power carving unit
• Coarse taper burr
• Medium flame or taper burr
• Bull-nose stone burr
• Round-nose burr
• Fine ruby taper burr
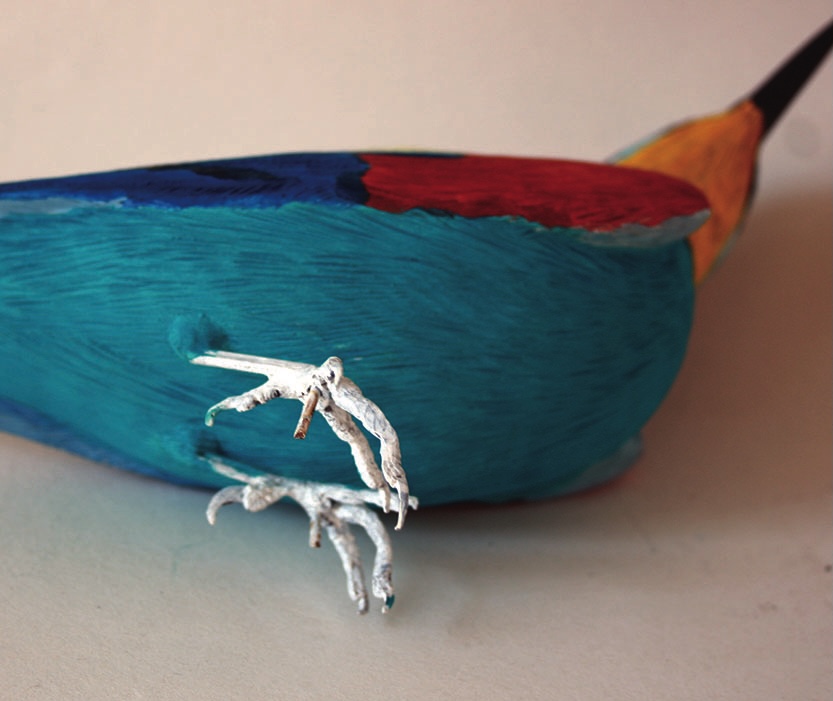
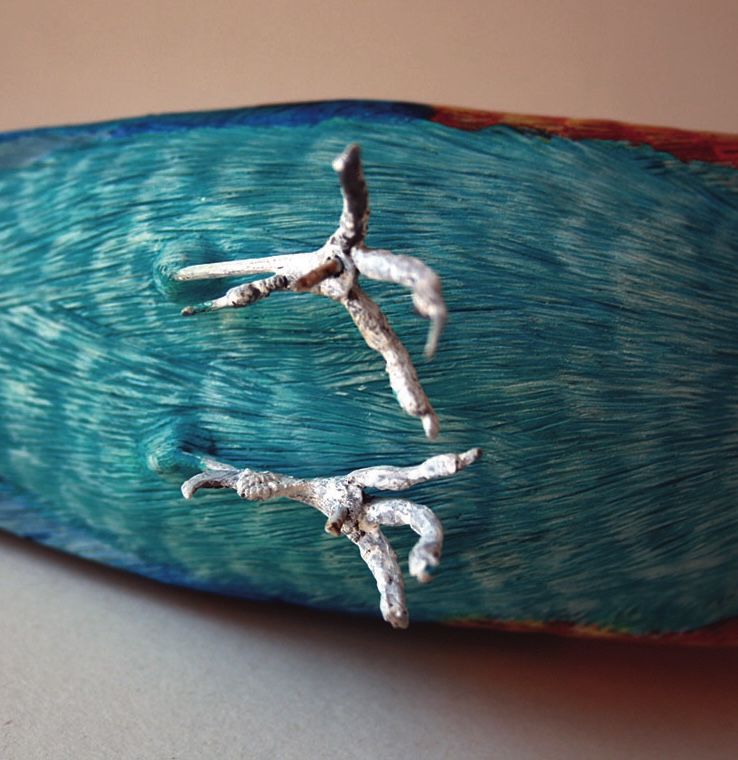
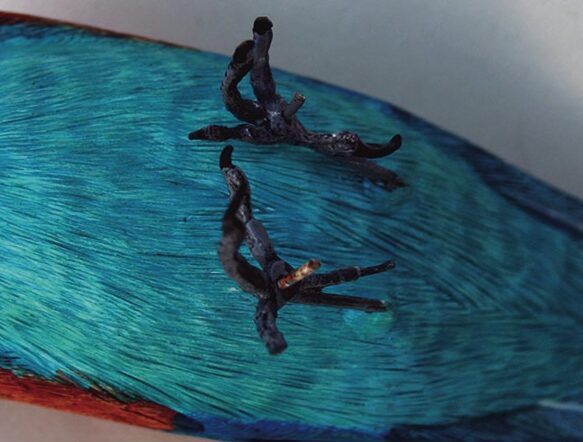
• Drill and drill bit for the feet
• Sanding drum
• Pyrography unit with scalpel nib
• Eyes
• Feet
Materials:
• Jelutong (Dyera costulata)
• Paintbrushes
• Airbrush
• Gesso
• Plastic wood
• PVA glue
• Fine sand
• Abrasives 120-240 grit
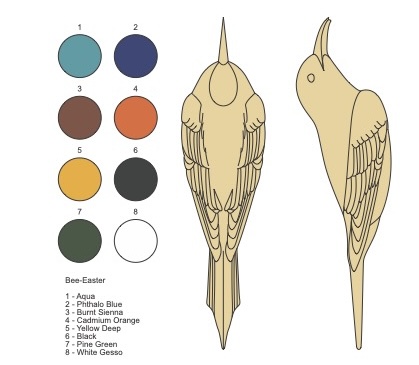
• Acrylic colours as per the colour palette shown right
• In addition to the colours shown in the palette, you will need cadmium yellow and cadmium red
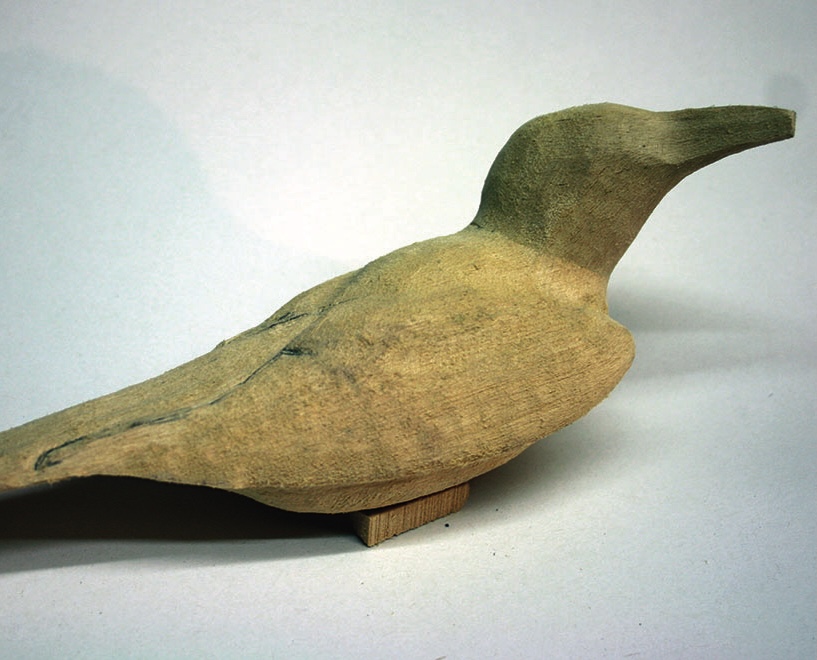
The body
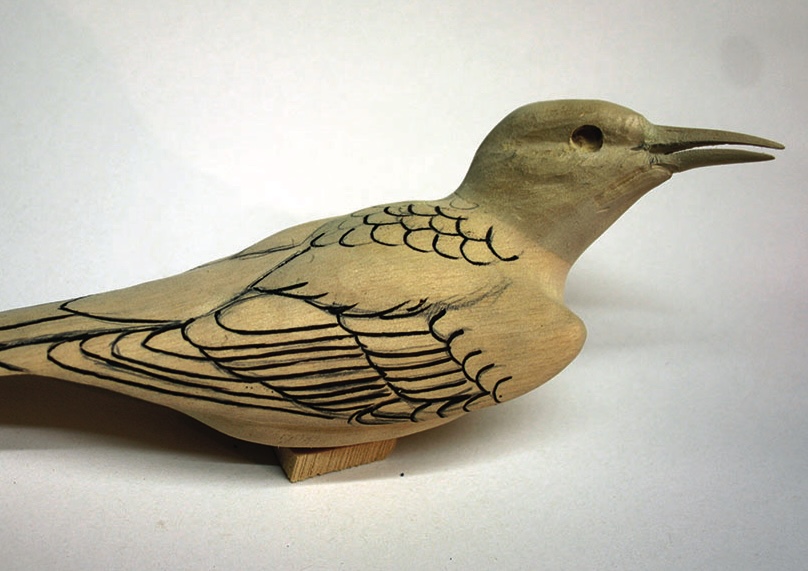
Feather location and detail
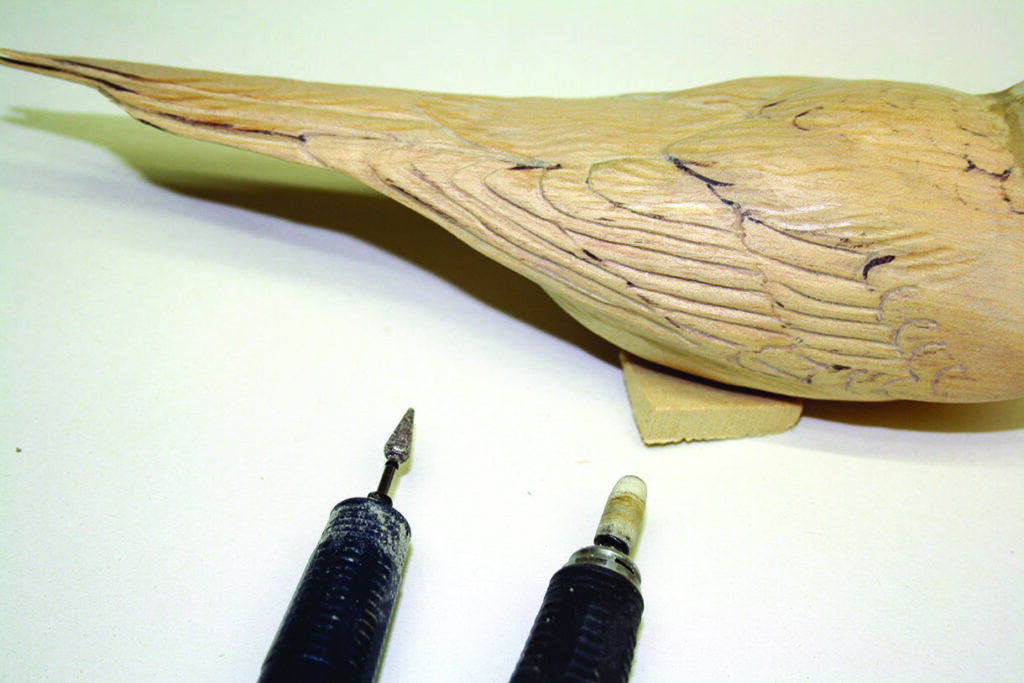
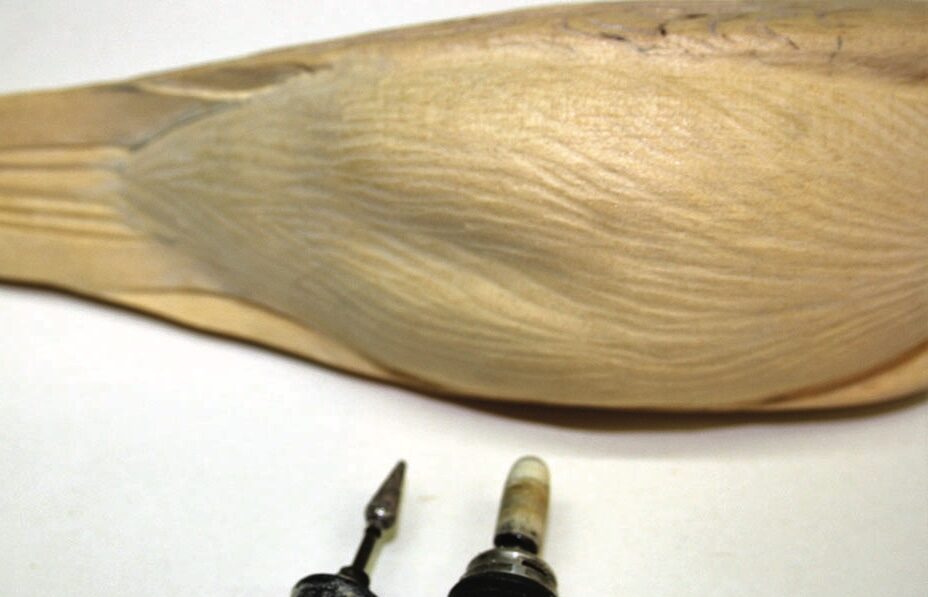
Pyrography
The stand
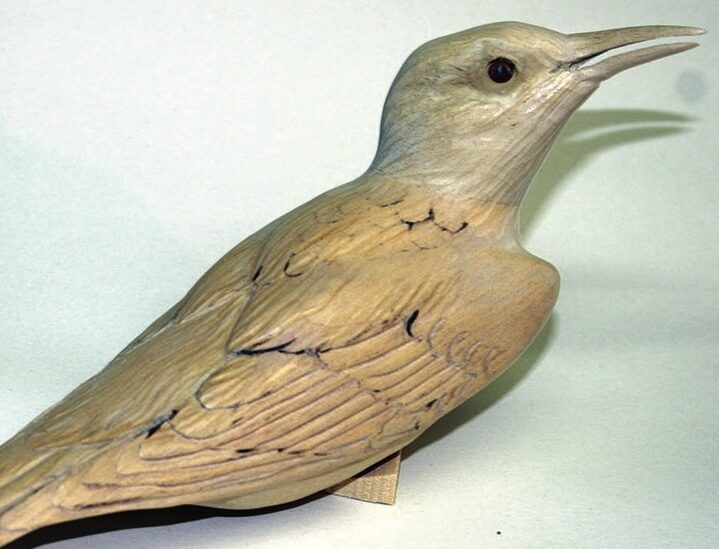
Gesso
Applying colour
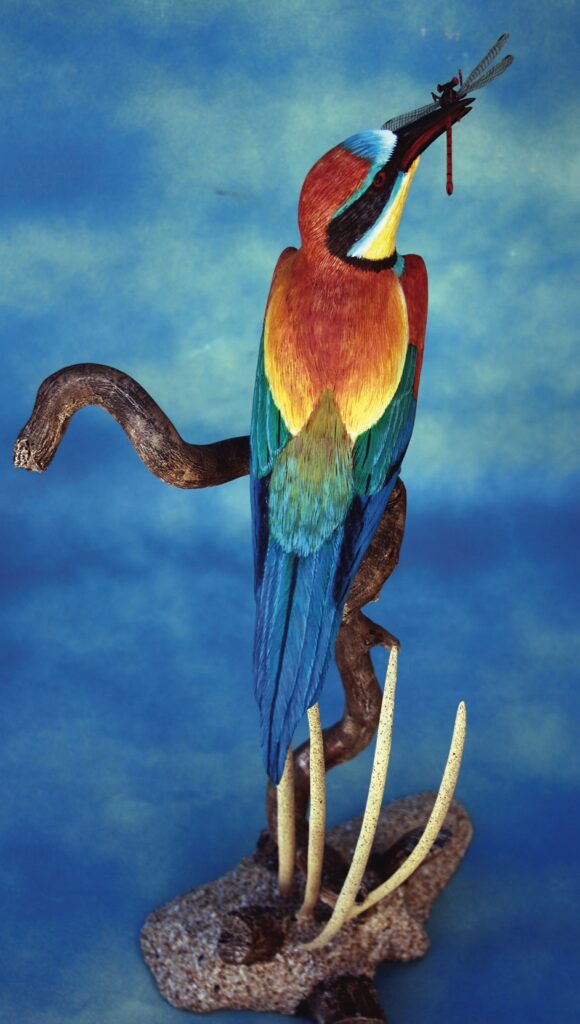
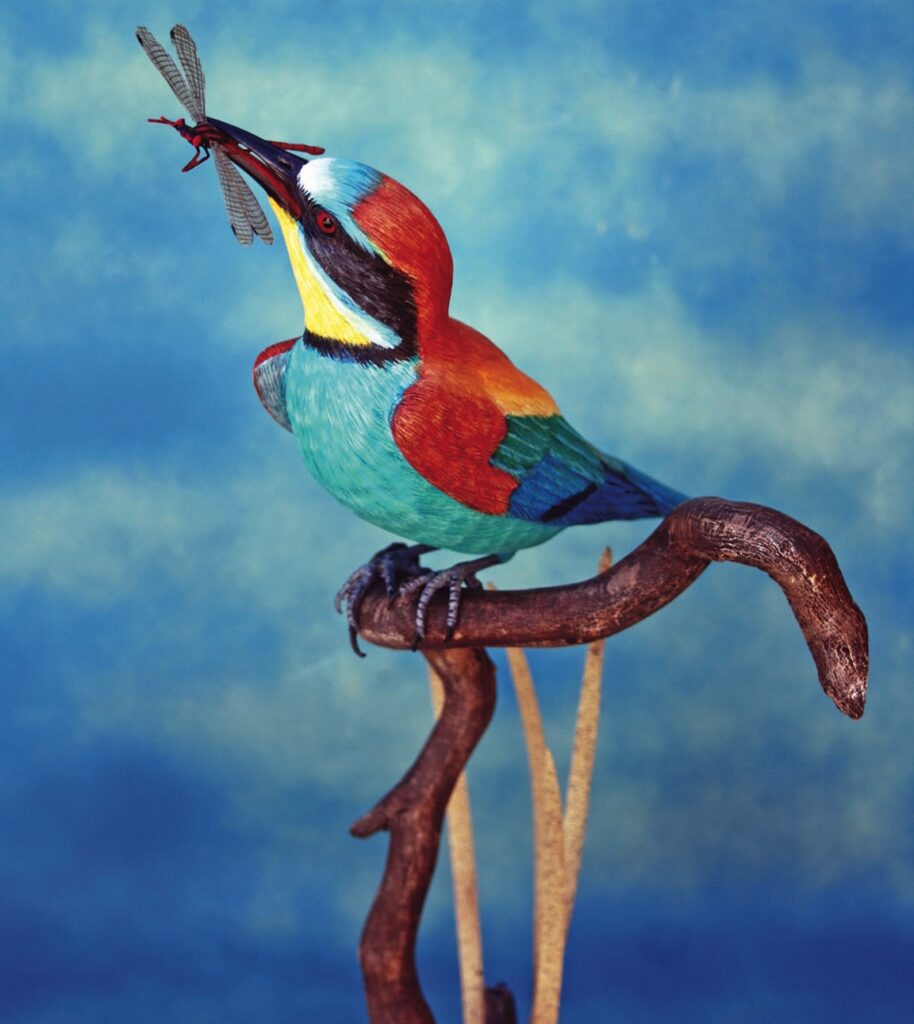
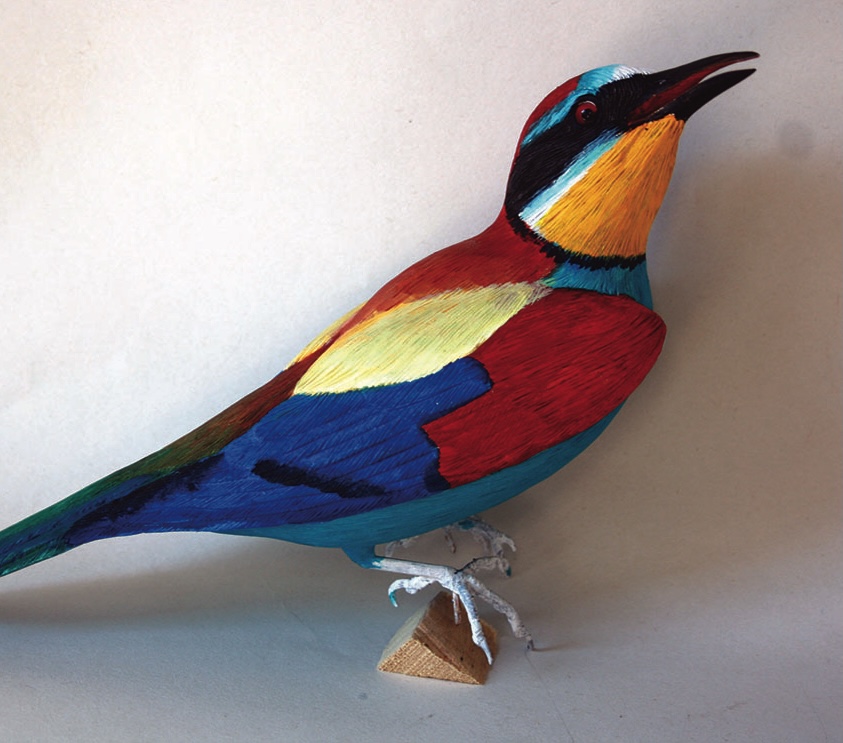
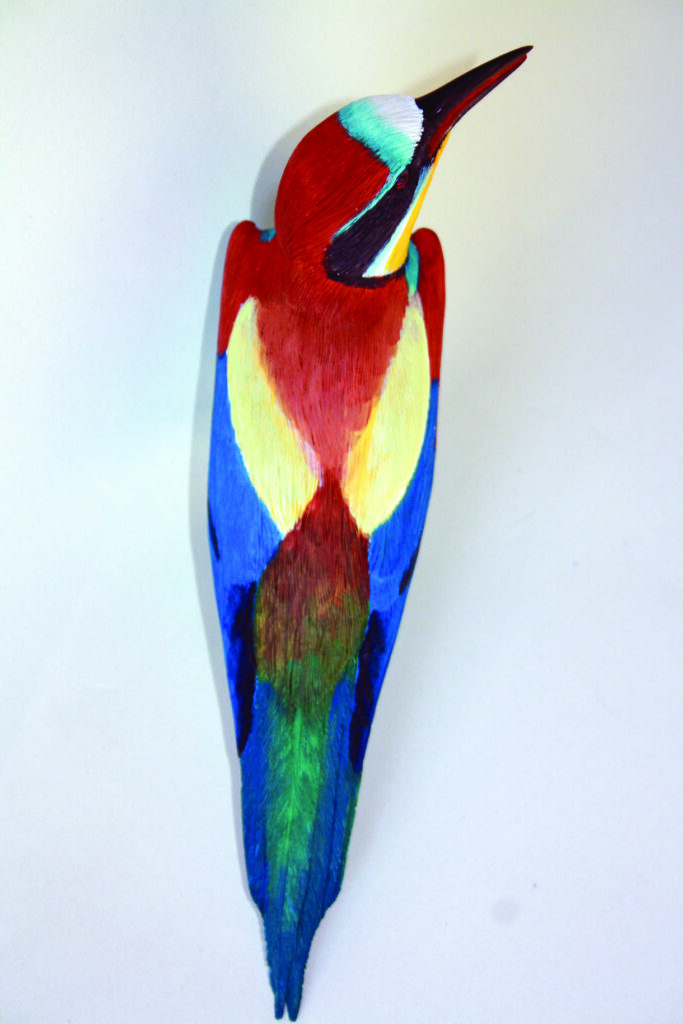
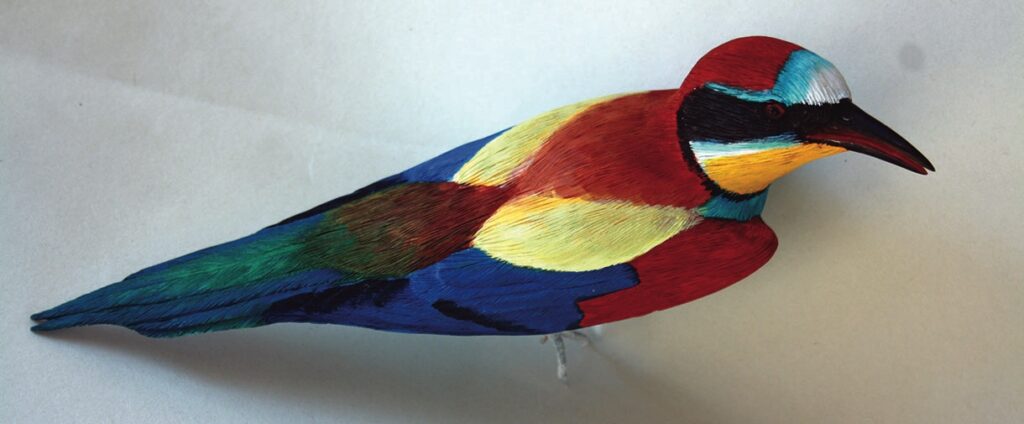
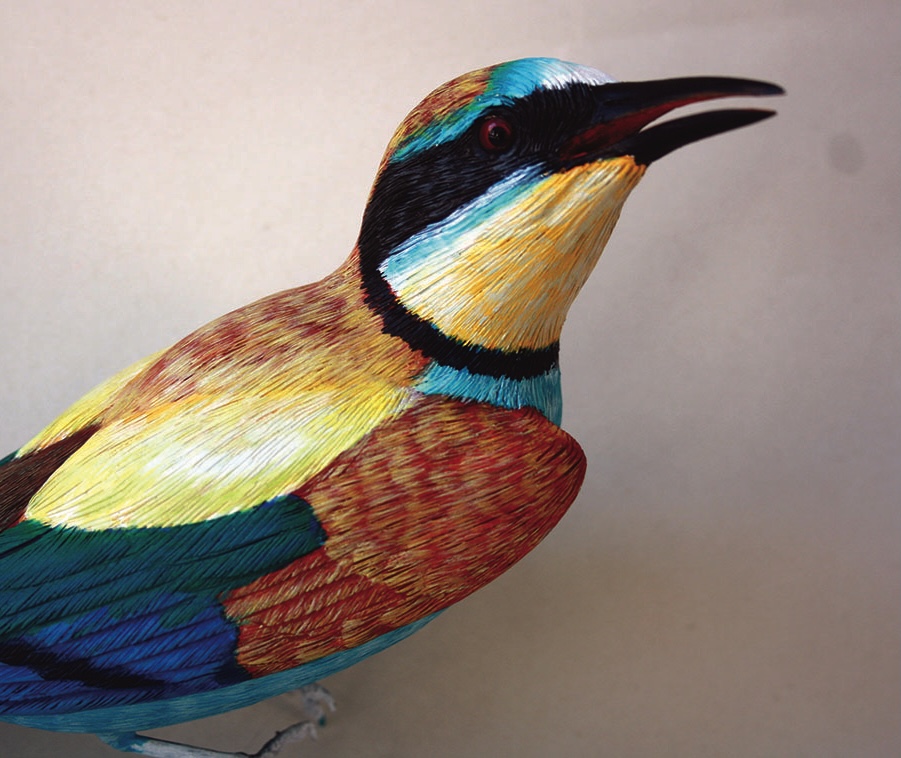
10, 11 & 12. You now need to block in the main colours in the following sequence. The colours are clearly labelled in the palette on page 22. The beauty of this richly coloured bird is that there are clearly defined blocks of colour as a starting point.
The easiest way of explaining them is as a list.
• The outside beak is black and the inside is red, which is a mixture of cadmium red and a tiny bit of black.
• The throat area is cadmium orange.
• There is a collar of black around the throat and part of the head. Note in pictures 12 and 13 you can see that it stops on either side of the brownish top section.
• Then comes a fine band of aqua with a delineating band of white.
• The strip running though the eye is black.
• Above the strip of black is an band of aqua which runs over the head and across the other side. Note in picture 11 you can see that the top front of the head is white.
• The top crown of the head, the front shoulder of the wings and the back V-shaped area are a mix of burnt sienna and cadmium orange.
• The middle and lower wing areas are phthalo blue with dark grey feather tips and edges.
• The two angel-type creamy yellow wing areas on its back, as viewed from the top of the bird, are a mixture of cadmium yellow and white.
• The section in the middle of the back below the two cream sections is burnt sienna with a light wash of aqua.
• The tail feathers are phthalo blue with a wash of aqua over the top middle ones. There is a light edging of dark grey.
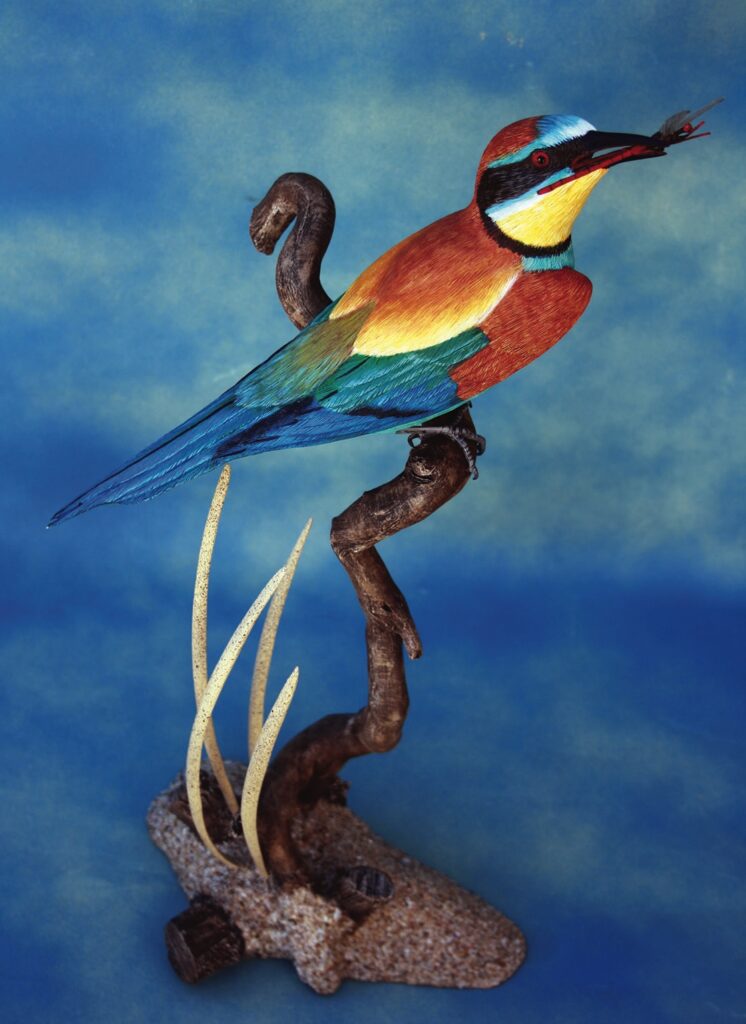
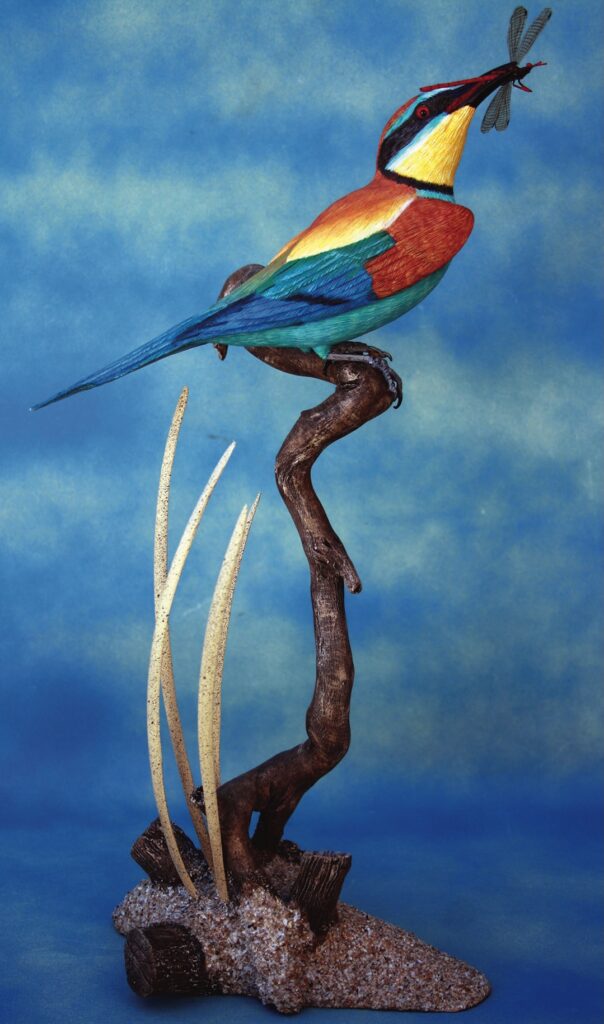
The stand
The branch for the stand was stripped back a bit and light washes of brown were applied to create the mottled brown effect. The base was coated with PVA then fine sand was applied to create the shingle/stone effect. The grass/reeds were sprayed a light fawn colour and then flecked with a darker colour to give the mottled look.
Red-veined darter dragonfly
18-19. I added one other element, an optional extra so to speak, that has not been mentioned yet and that is a red-veined darter dragonfly held in the bee-eater’s mouth. The body was constructed using a combination of copper-coated steel rod and thin copper wire for the head, body and legs. The various sections were cut and then soldered together, then a coat of gesso was applied and, once dry, it was painted. The wings were created using thin acrylic sheeting. These were cut to shape with a very fine saw. The veining was done with a very fine permanent marker. Then and these were glued in place. I think they finish off the piece nicely.