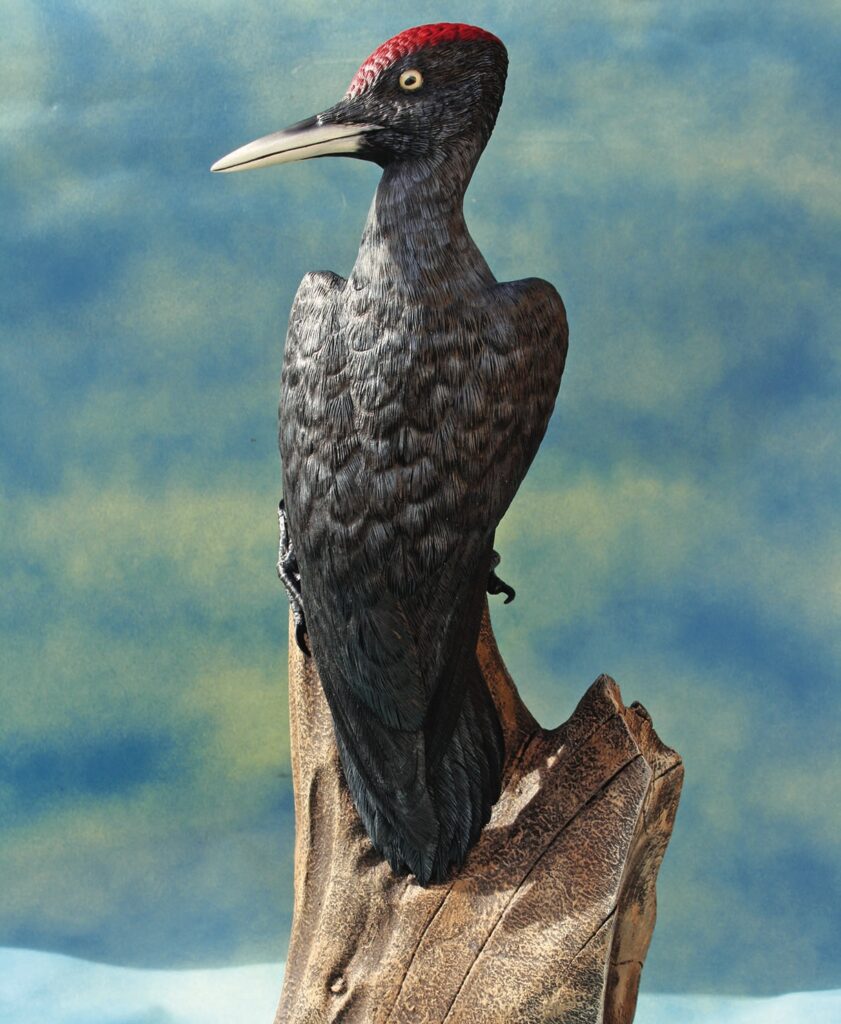
Mike Wood gets to grips with this magnificent bird
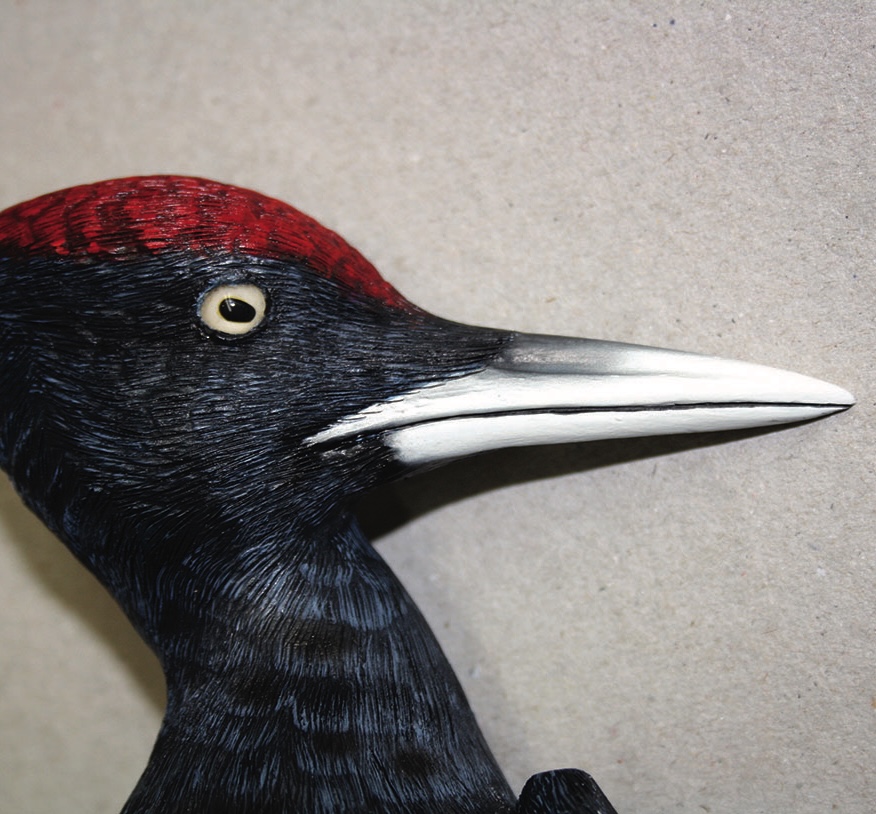
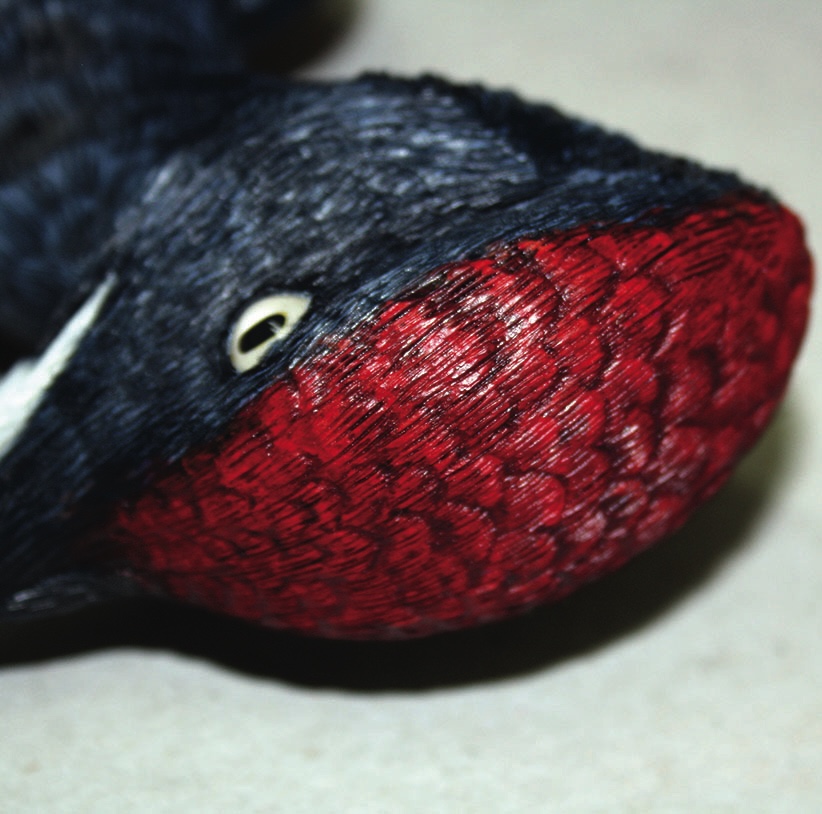
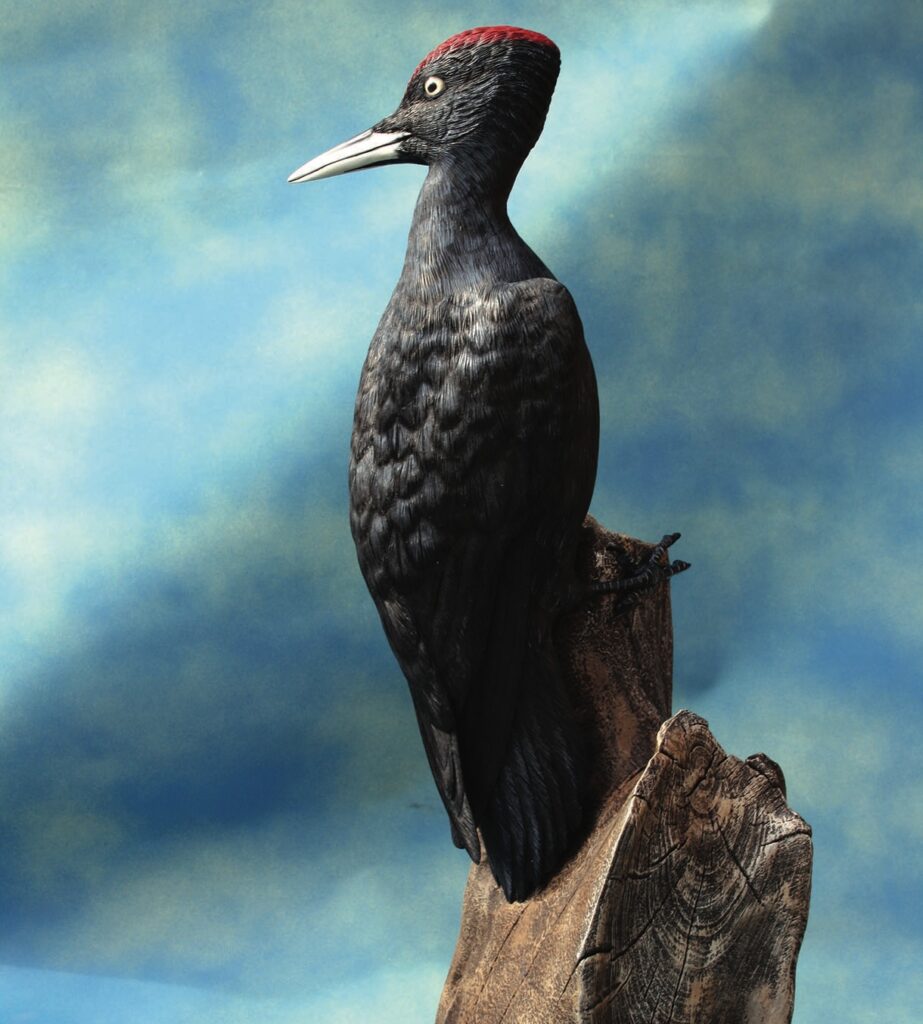
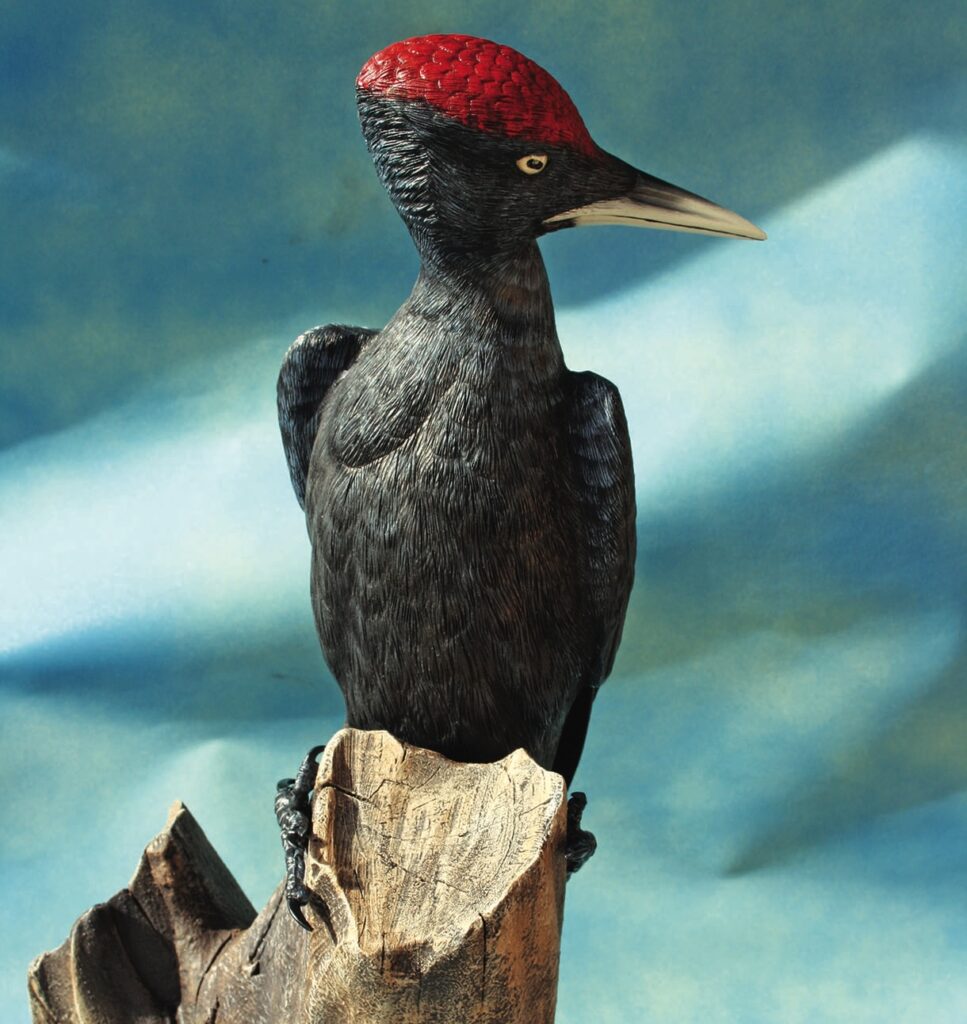
As its name suggests, the black woodpecker (Dryocopus martius) has mainly black plumage with dark-brown primary feathers. On the male birds, the red crown extends from the forehead to the hindcrown, while on the females the red patch is smaller and only covers the hindcrown. These red feathers are raised up during courtship and defensive displays.
The black woodpecker’s range covers a wide area, including Europe (apart from Ireland, the UK and northern Scandinavia), the Middle East, Korea, Japan and China. Its habitat is mature broadleaved or coniferous forests and its population numbers in parts of Europe have increased where ancient forests have been restored. Its conservation status on the IUCN Red List is currently categorised as of Least Concern.
The woodpecker uses its beak and powerful neck muscles to chisel into tree trunks to extract and feed on carpenter ants, beetles, wood-boring grubs and sap. It occasionally also feeds on fruit and berries. In many areas, the black woodpecker is considered a beneficial species because it helps control the numbers of wood-boring insects.
The woodpecker forms its nest by excavating a chamber inside a tree trunk, usually a poplar or pine tree. The average clutch size is four to six eggs and both male and female birds share brooding and feeding duties until the young leave the nest. The empty nests then provide habitats for other bird species and small mammals. Its main natural predator is the pine marten, which feeds on the birds’ eggs.
Due to its piercing yellow eyes and distinctive high-pitched call, the black woodpecker is often seen as a malign character in folklore and fairy tales. In Finnish folklore, the bird was believed to be the bringer of death, bad luck or rain.
Tools: • Personal and respiratory protective equipment (PPE & RPE) • Bandsaw, coping saw or fretsaw • Carving knife • Rotary power carving unit • Coarse taper burr • Medium flame or taper burr • Bullnose stone burr • Round-nose burr • Fine ruby taper burr • Drill and drill bit for the feet • Sanding drum • Pyrography unit with scalpel nib
Materials: • Wood used. Body: jelutong (Dyera costulata); head is lime (Tilia x europea) • Body: 280mm long, 120mm wide, 80mm deep. • Head: 130mm long, 50mm wide, 80mm deep • Eyes & feet • Wire for fixing the bird to the display mount • PVA adhesive • Plastic wood • Paint brushes/airbrush • Abrasives 120-240 grit • Acrylic colours as per the colour palette
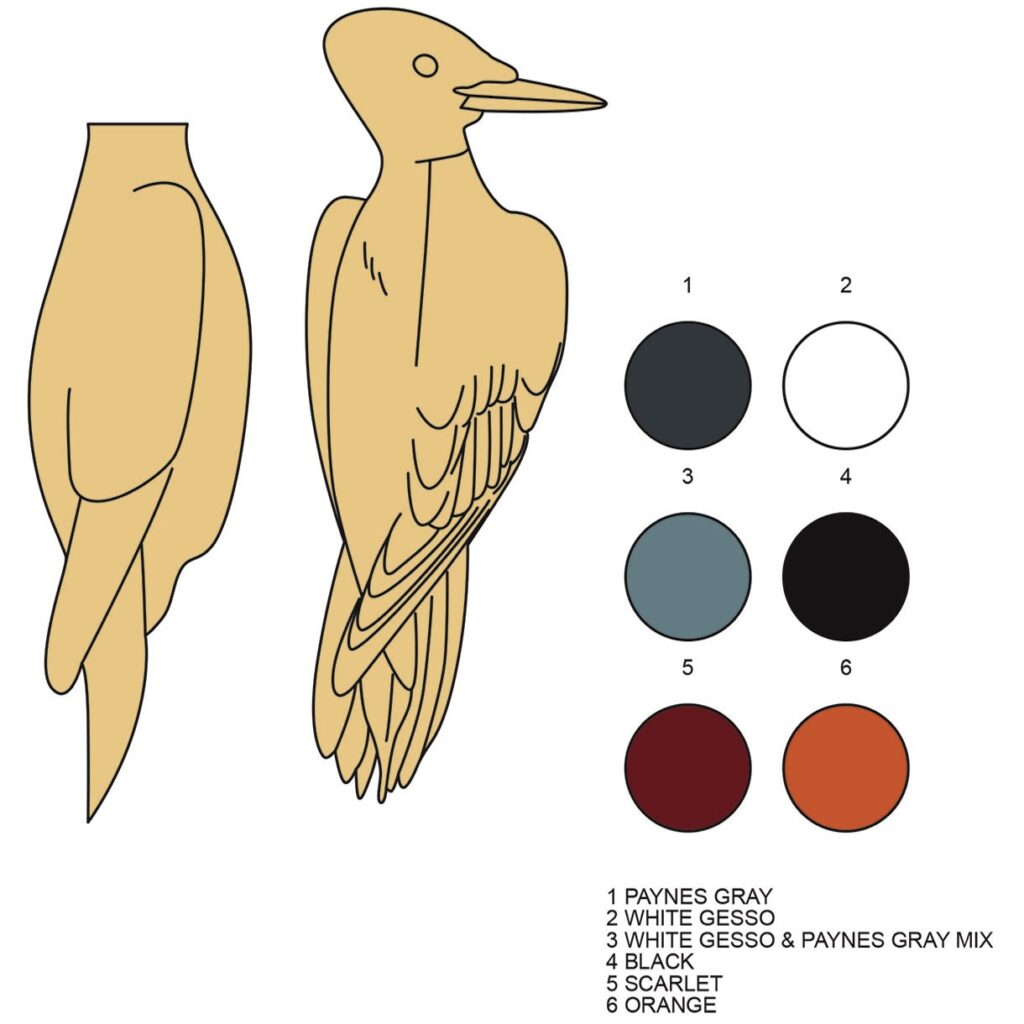
Drawing
Shaping the head
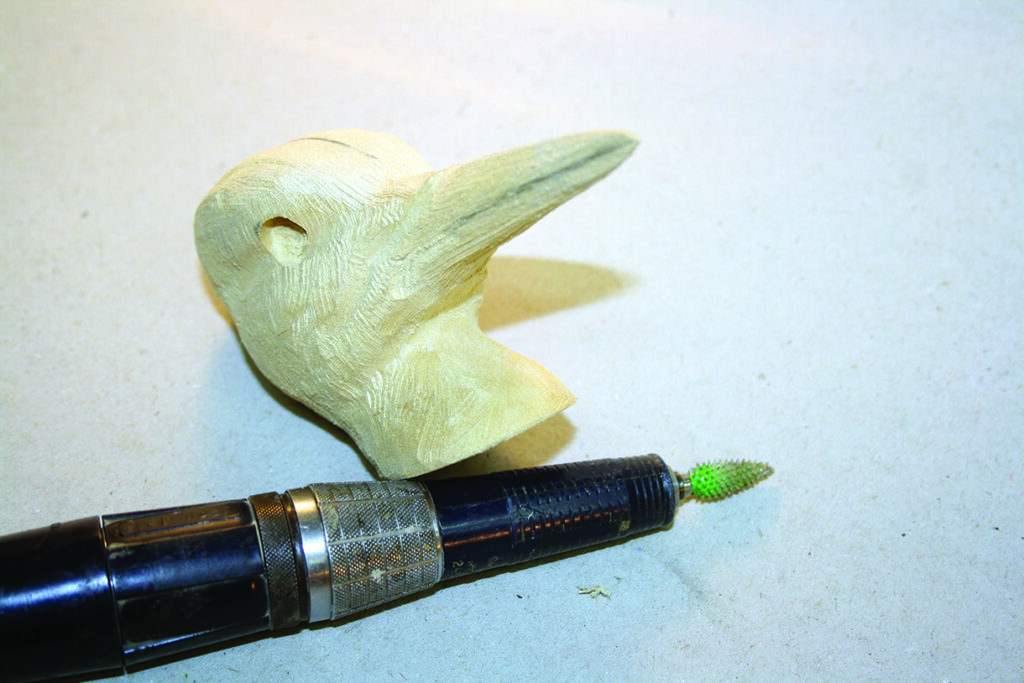
1. I wanted the woodpecker’s head to be looking sideways to the main body, so to avoid wasting timber, the head and body are made from two different pieces of wood. The head is made from lime and the body is made from jelutong. Use the template provided and cut out the head. Then use a high-speed rotary carving unit, or hand-carving tools, to rough-shape the head and beak. A coarse flame burr will work well for this. Mark the position of the eyes and use a ball-end cutter to create a recess to suit the eyes you have bought. As with many projects, you can hand carve these or, if you so choose, knife carve it. Of course the look and feel of it will be different with a knife carved one, but there are some wonderful knife-carved birds out there. It all depends on what look and how lifelike you want the bird to be. I choose to power carve them for speed and time purposes, but it also affords me the control I need. The process is dusty, so do if you power carve, use suitable face and respiratory protective equipment as well as at-source dust extraction
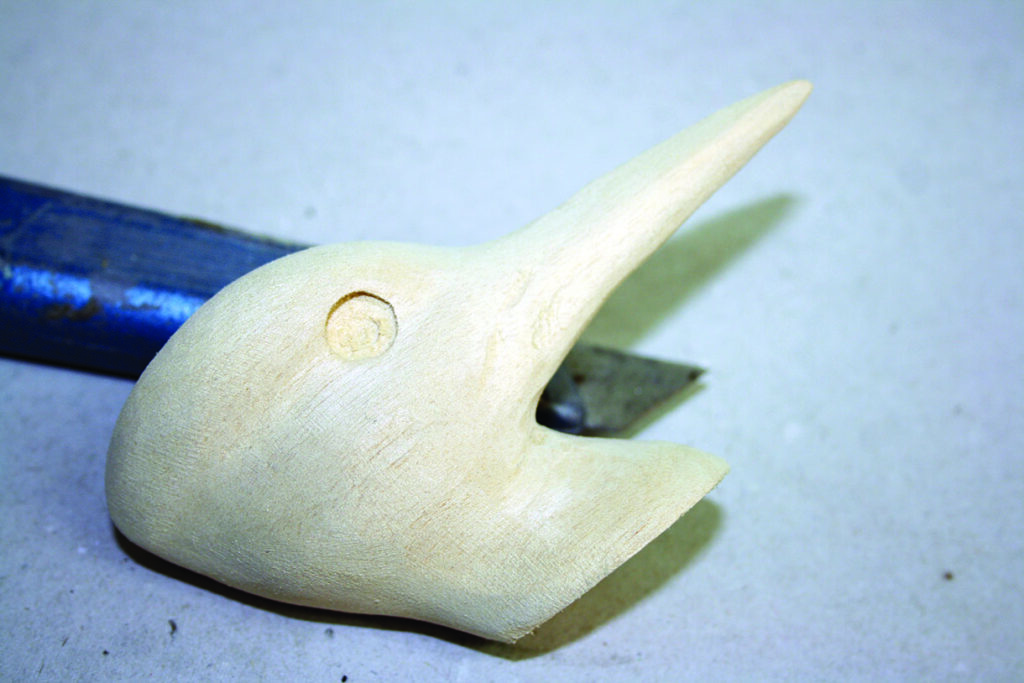
2. Use a medium or fine grit taper burr to refine the shape and follow this by using a sanding drum to smooth out any ridges and scores ready for the next stage
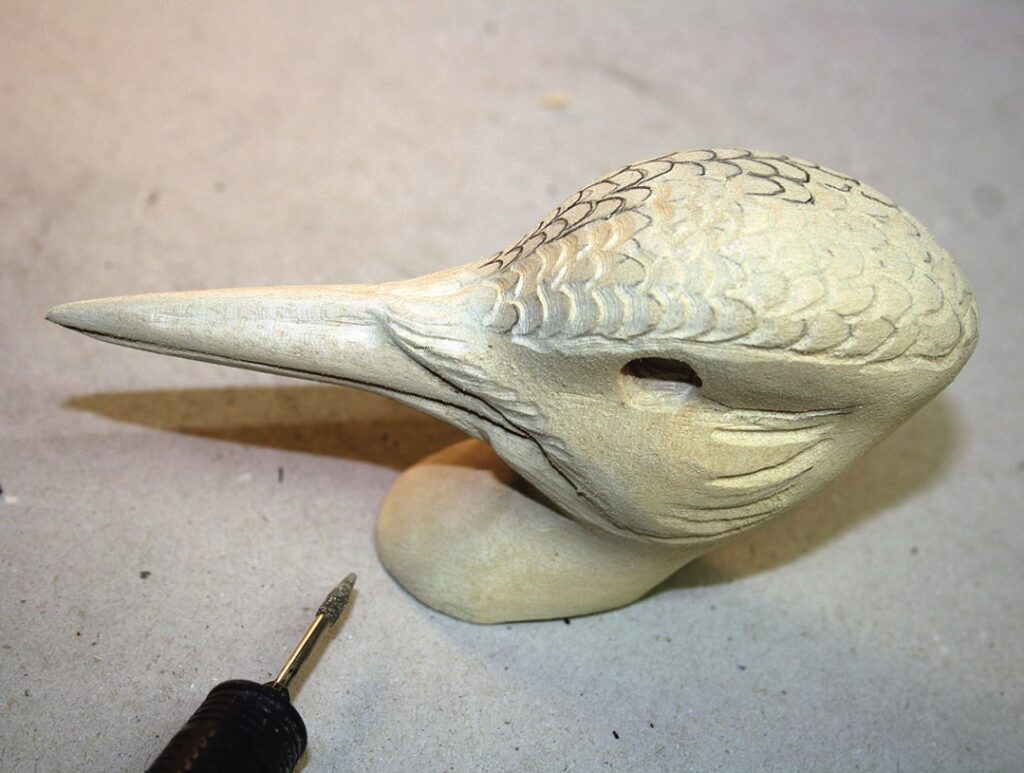
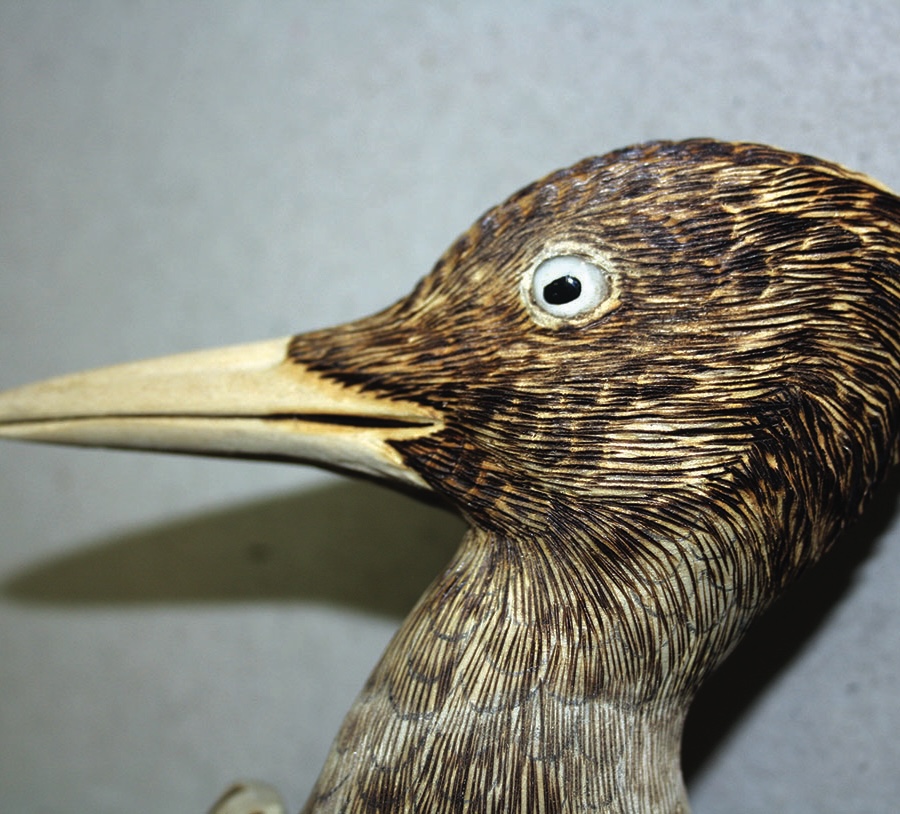
3. You now need to mark in the main feather and beak details and carve these in with hand tools or with a rotary carving burr. If power carving, a medium-grade diamond burr will be ideal. Pay attention to your reference material and go slowly. It is very hard to replace wood once it is cut away
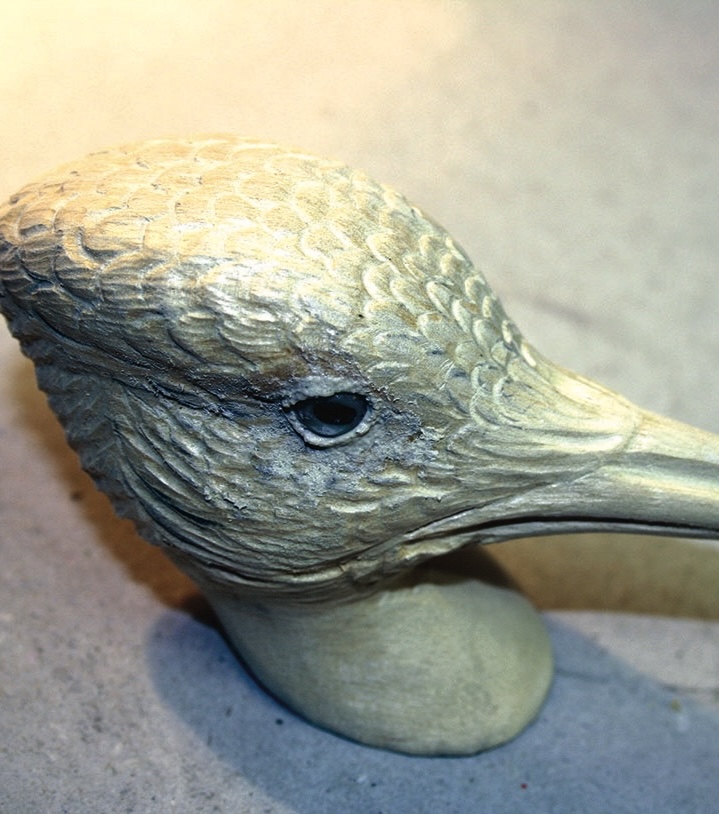
4. Once you have all of the feather details in place, mix up some plastic wood and put some in the eye sockets, affix the eyes and shape any squeeze-out to form the surrounding area for the eye
Body, feathers and feet
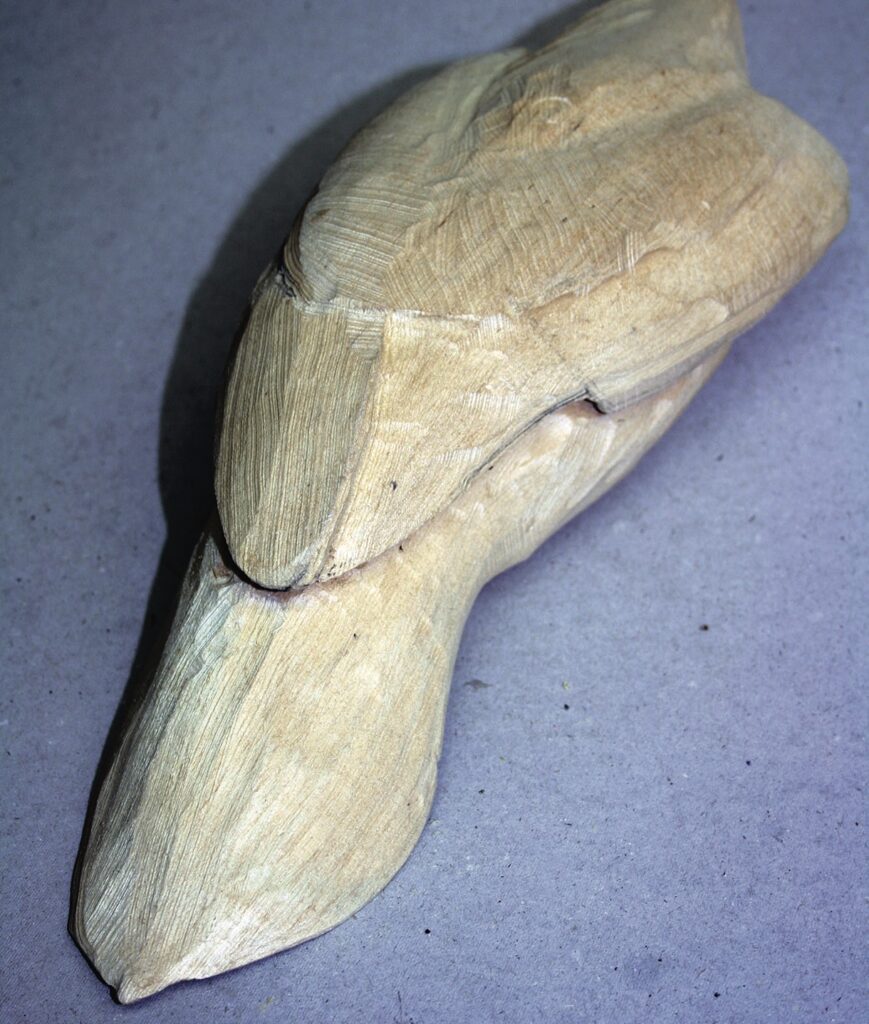
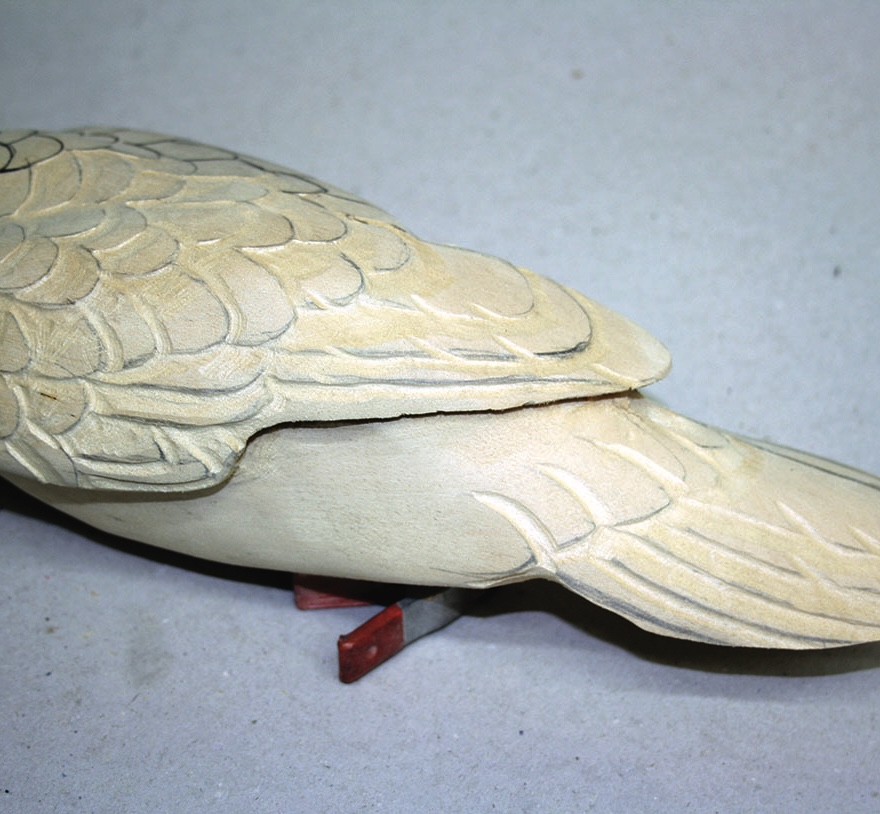
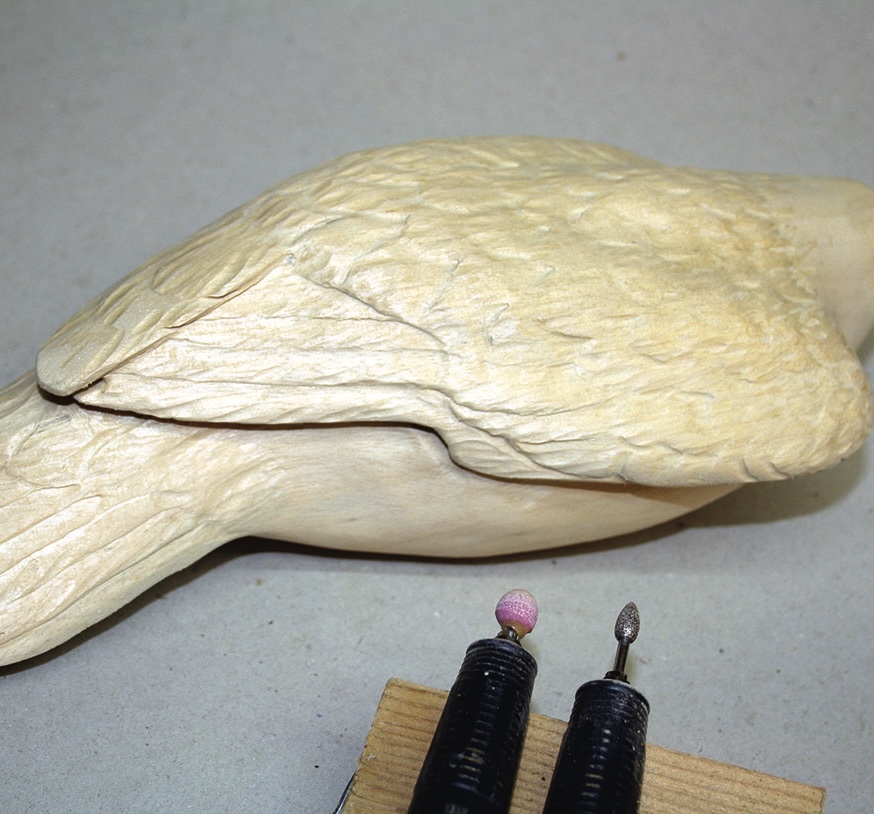
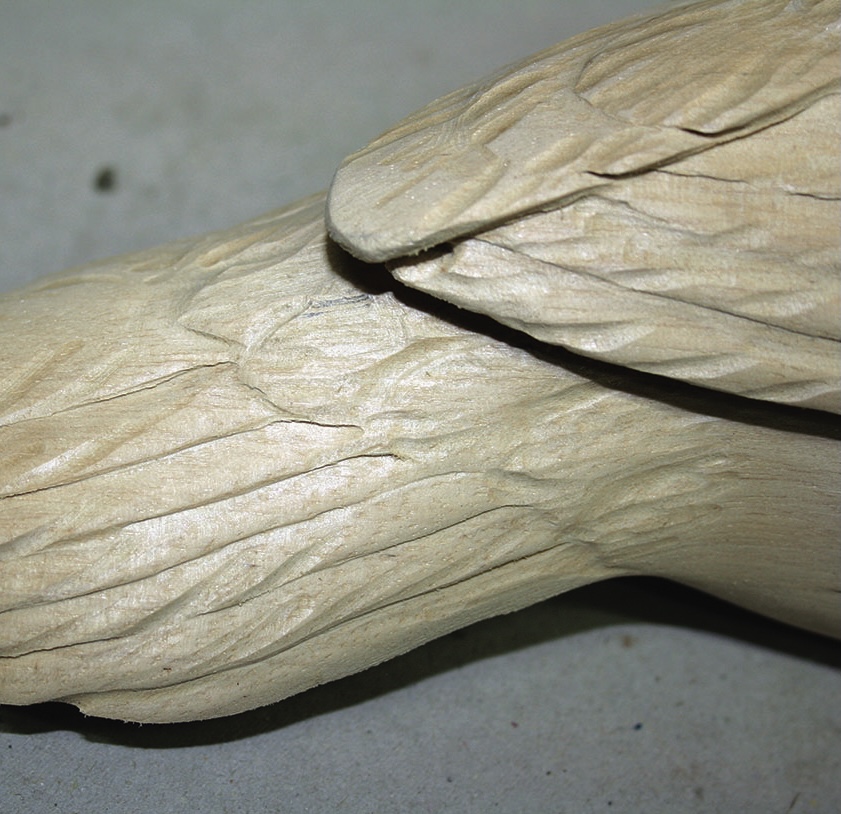
5. Once again, use the template provided and use this to rough-cut out the body. Once cut, use a coarse burr in a rotary carving unit, or hand tools, to roughly shape the main body, wings and tail feather areas. Note the slot cut – this is for attachment of the primary feathers which are created separately later
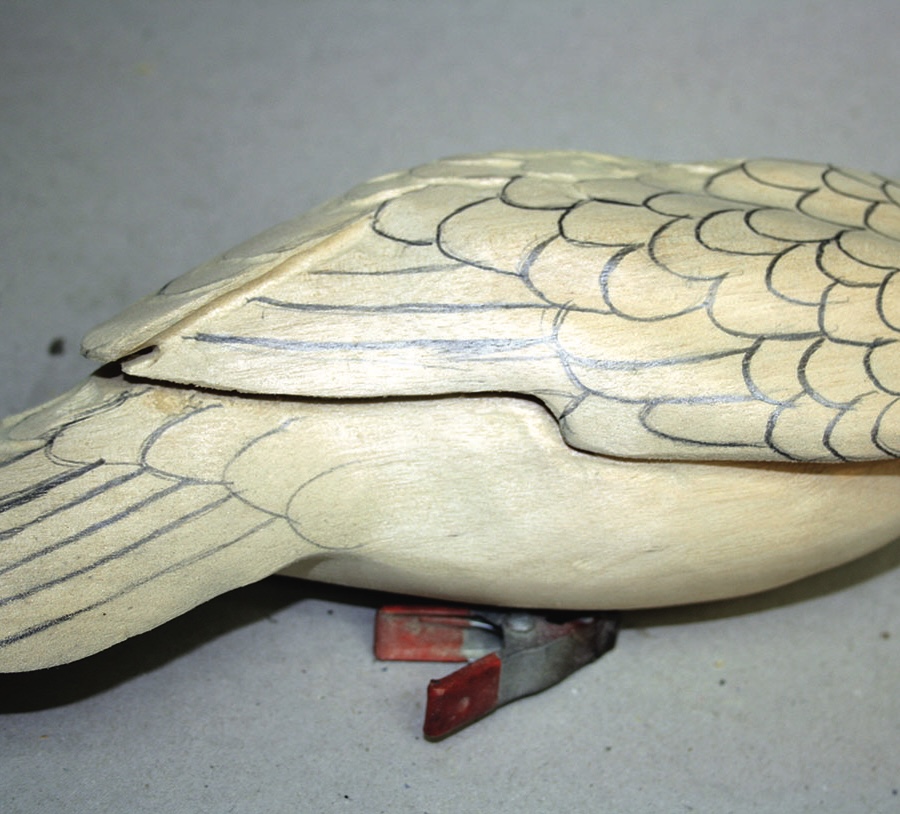
6. Once cut, sand the body smooth and pencil in the large feather positions
7. Use a medium taper burr to cut those feathers in and then…
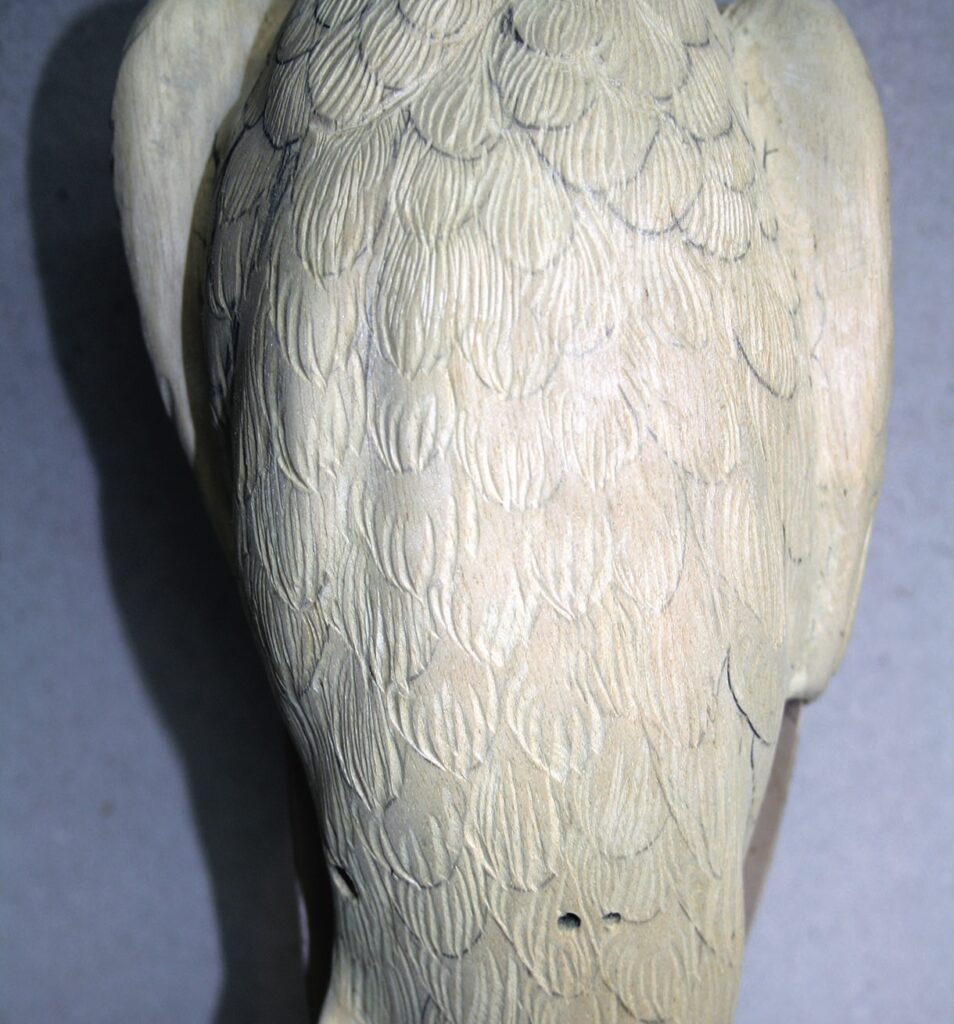
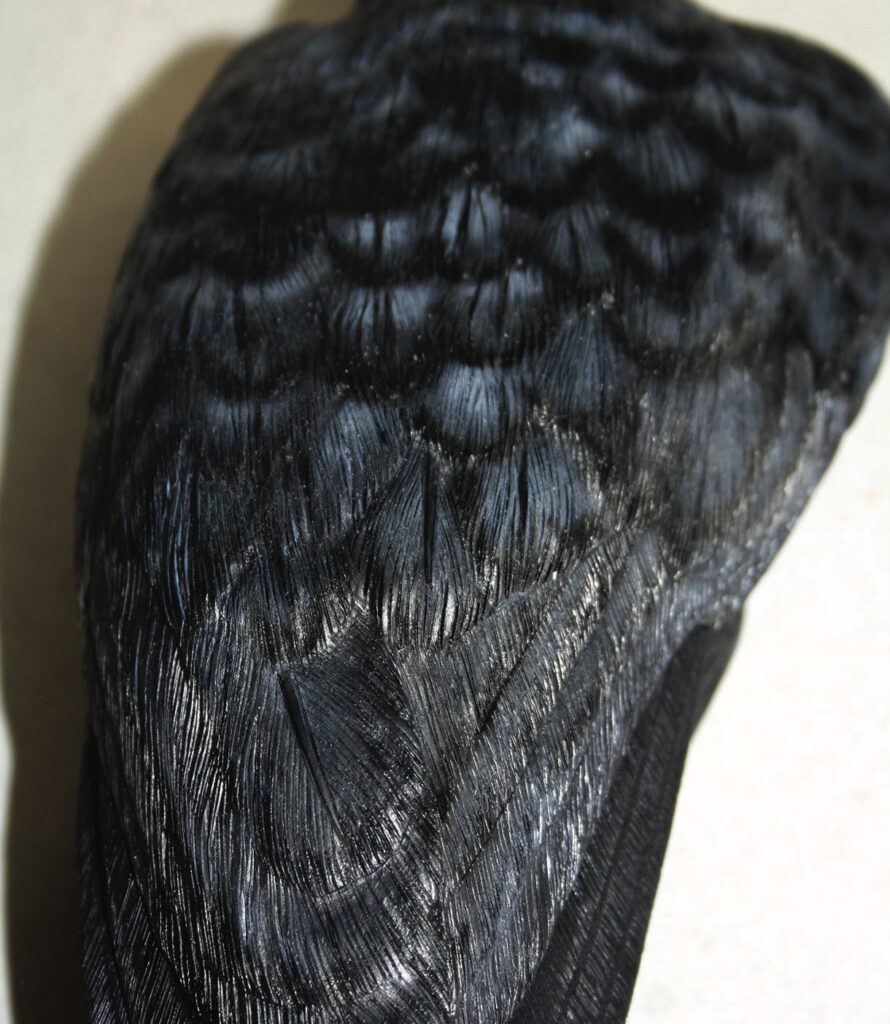
8. …move on to using a small ruby ball-end burr and a diamond flame burr to cut the finer detail. If you, like I do, aim for a realistic texture to the feathers, this can take a little while, so don’t rush. Remember, the detail created now will show through the gesso paint layers later. If you are unfamiliar as to how deep to cut certain detail create a practice board and experiment on that rather than your project.Once done, move on to marking the underside feather detail
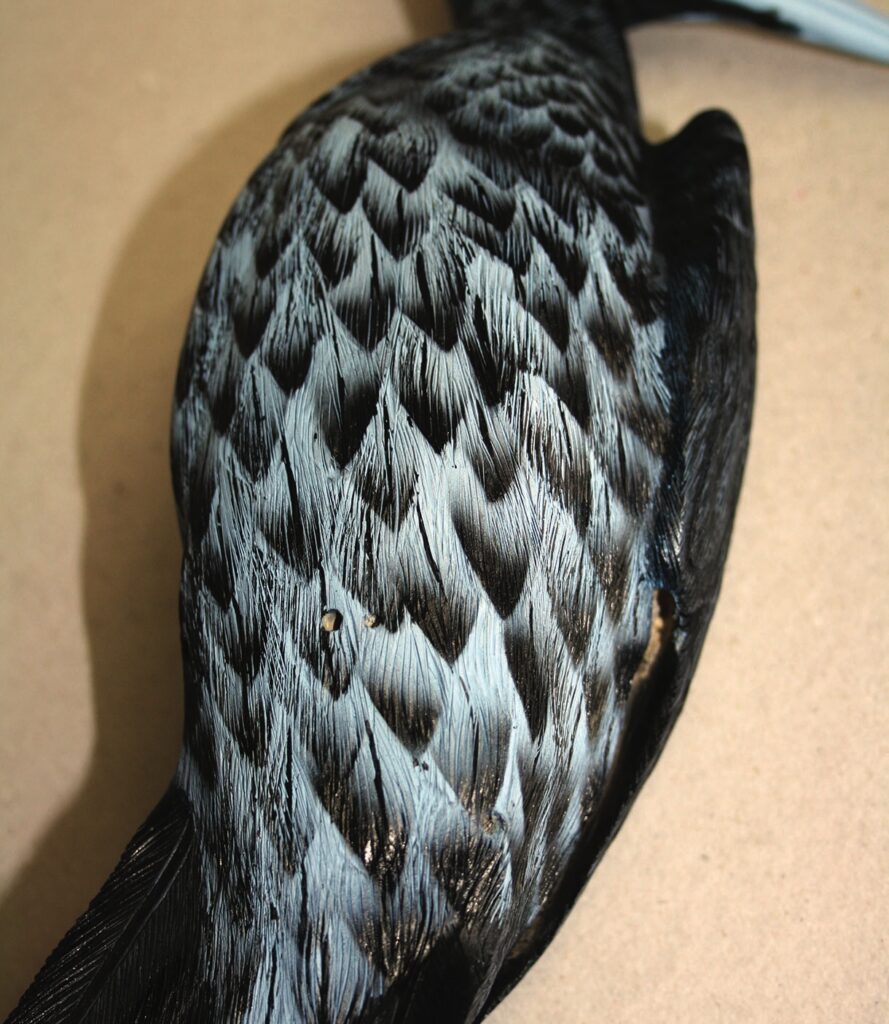
9a. With the underside feather detail marked, use a fine burr to create the required texture. Once done, drill the holes for the bird’s feet and, if required, a hole for a fixing rod. The fixing rod is dependent on how you are going to display your bird. I wanted to have it mounted on the side of a tree trunk, but you may want a different look, so you choose what is right for you
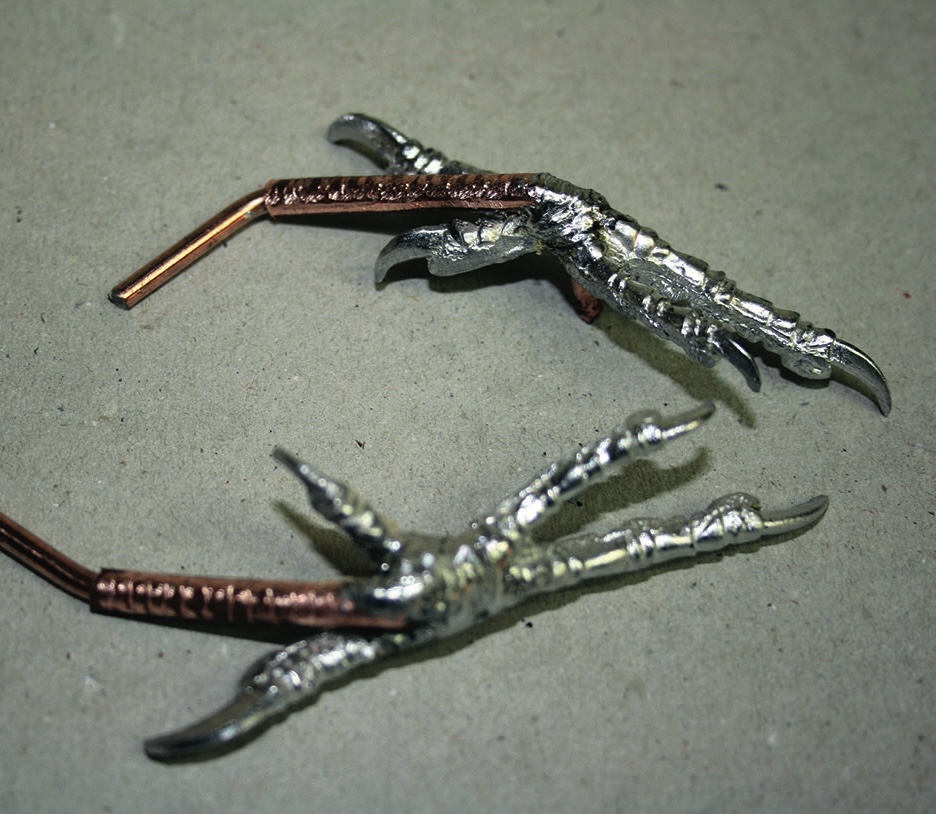
9b. With regards to birds’ feet I make mine from copper wire and solder to suit each project I undertake. But there are retail outlets that sell birds’ feet for many different species, so you can easily buy feet if required
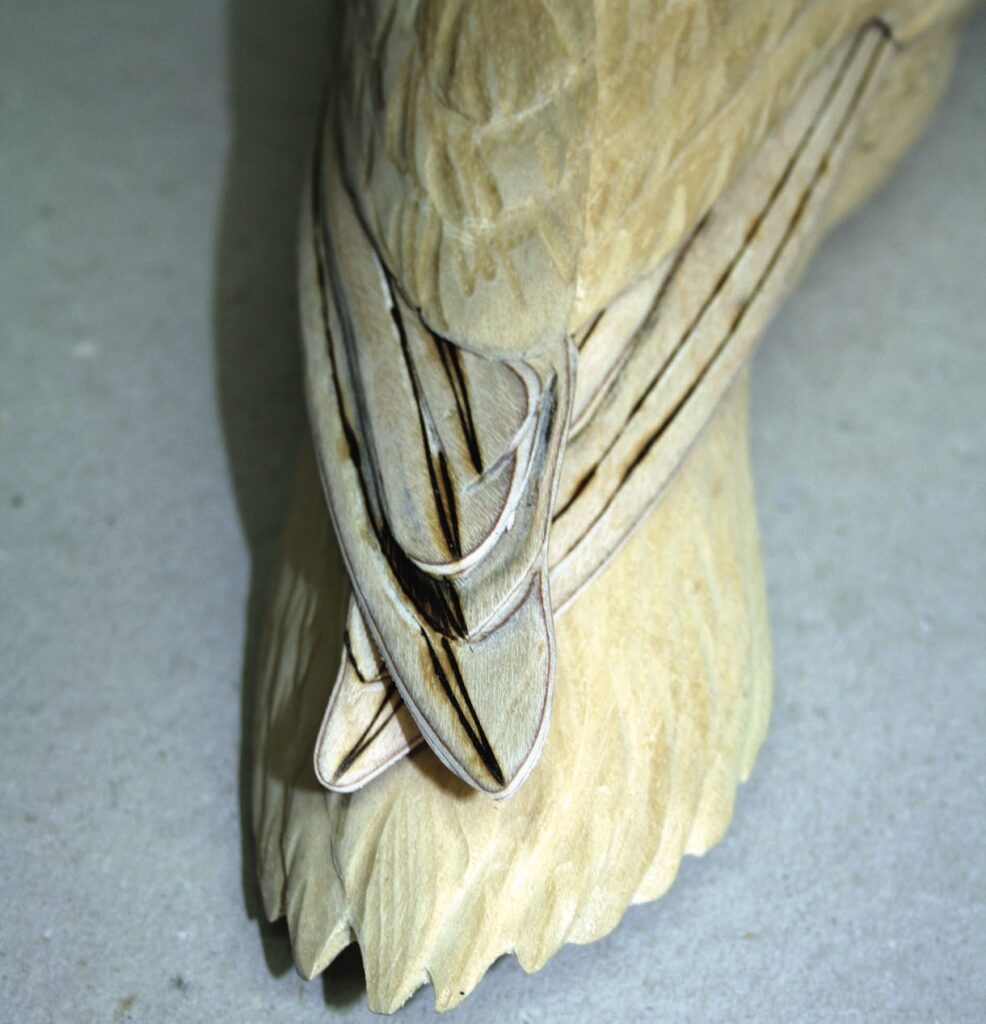
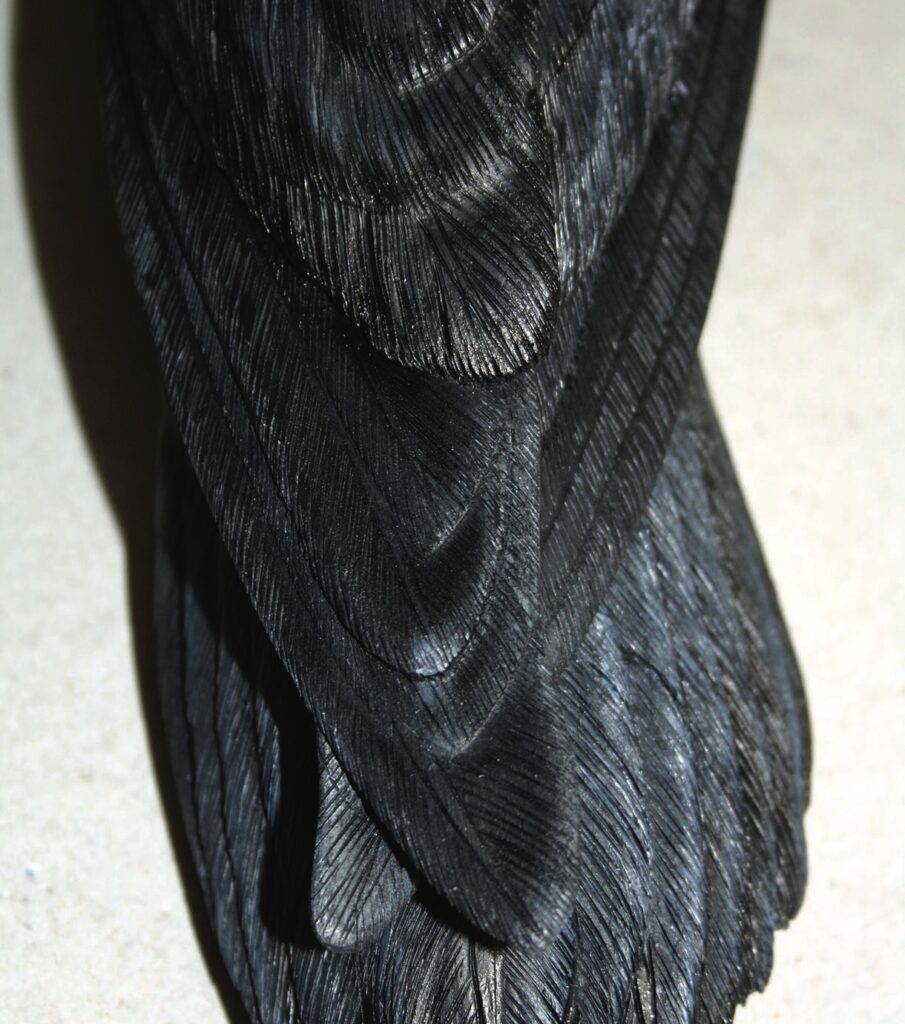
10. Carve the tail feathers. It is best to do these before fitting the primary feather inserts so you have clear access to them
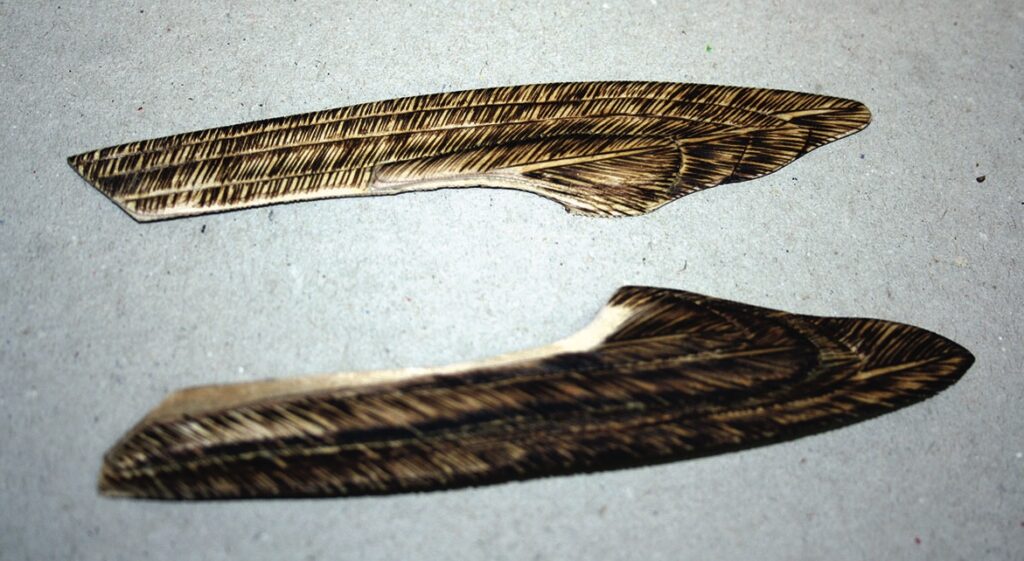
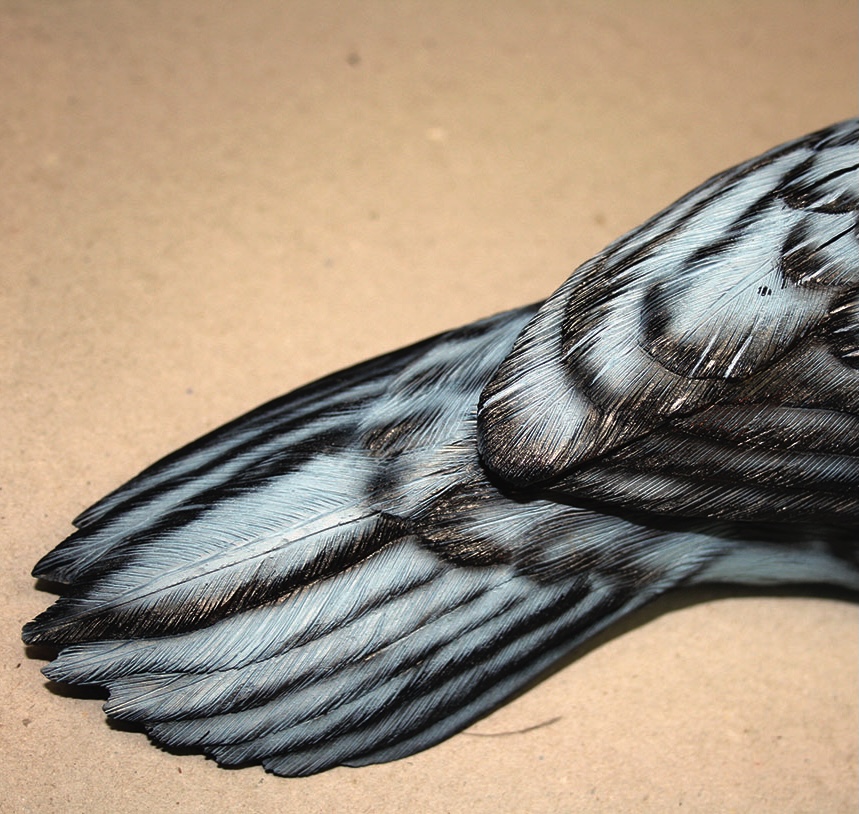
11. Now the primary feather inserts need to be carved and temporarily fitted. Note I have created some pryrographed detail in them at this stage. Remove them and use a small round diamond bit and edge all the feathers on the belly and the chest
Pyrography
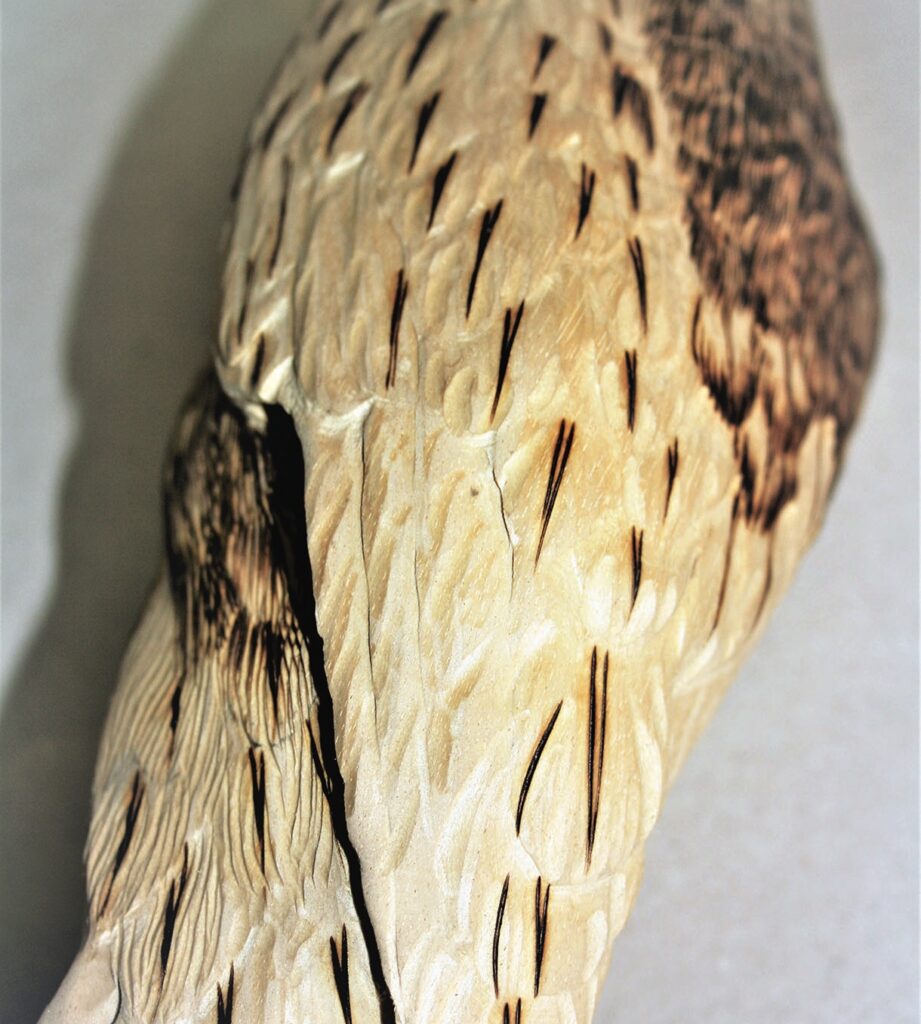
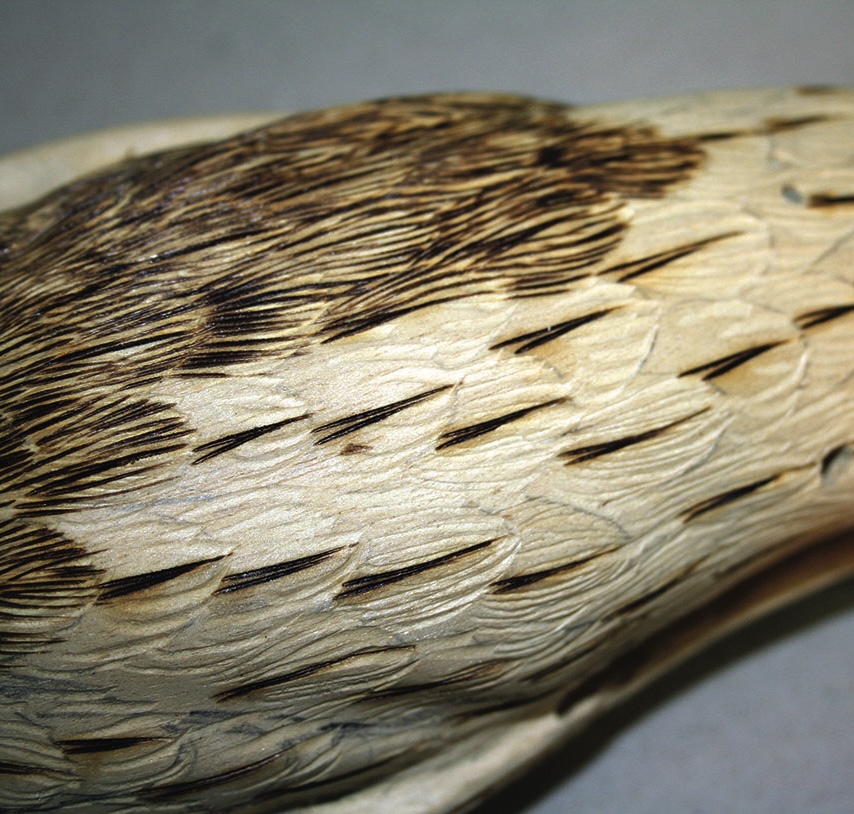
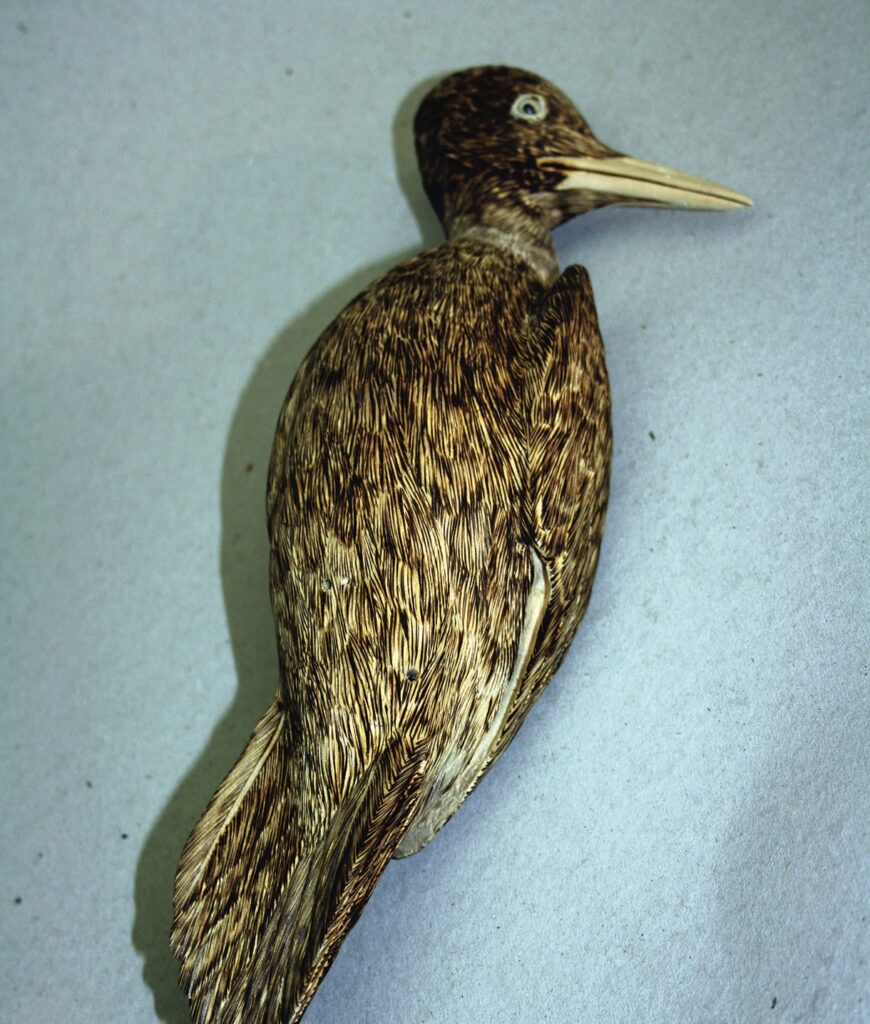
12. Once done, use a pyrography unit fitted with a scalpel tip to mark in the feathers’ rachis…
13. …which is the pointed central elongated section that runs along the length of the feathers, off which the fine feather barbs and barbules form the vane/blade of the feather. Take your time and get them right. This detail shows through the final colour coats so any major errors will show
14. Move on to the head, being aware of the flow and direction of the feather detail required…
15. …and, finally, create the fine pyrographed detail on the pimary feather inserts. Once done, glue them in place
16. Here is the bird ready for colouring
Colour
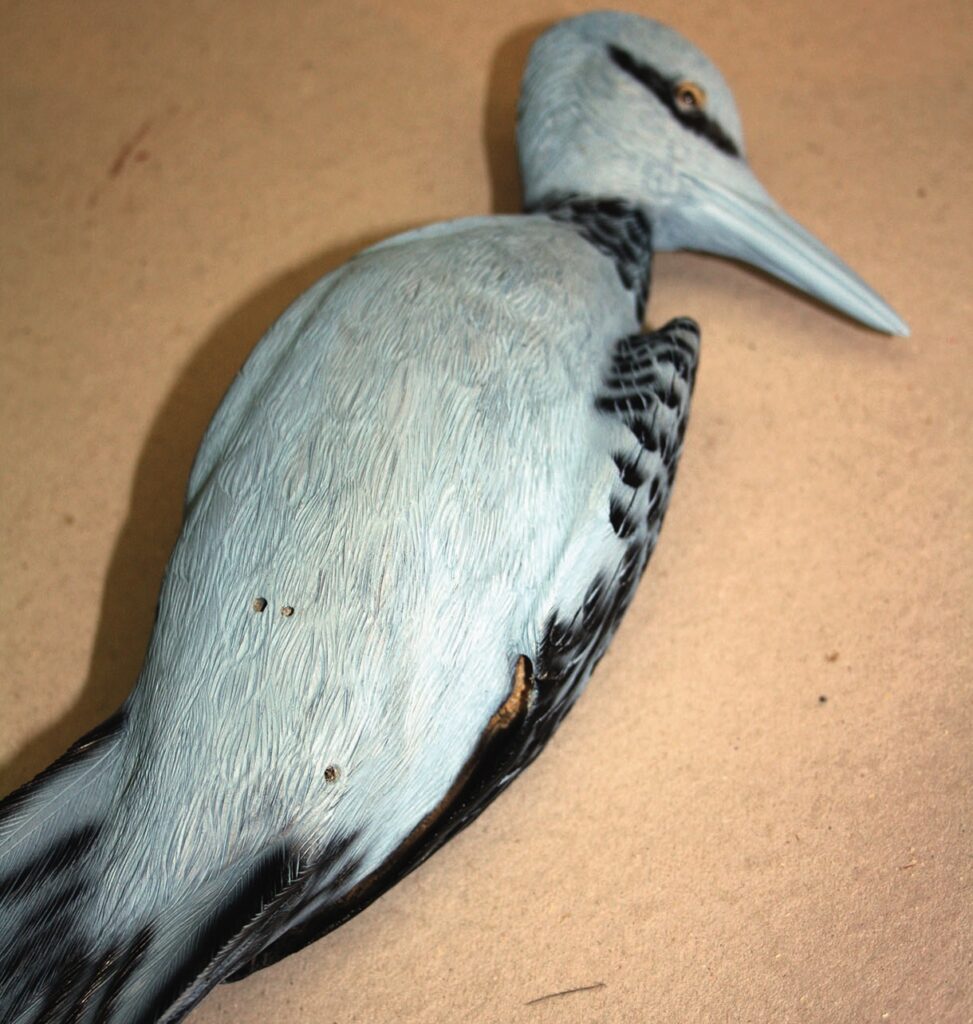
17. Undercoat the bird with gesso, which needs to be tinted with Payne’s grey
18. Paint or airbrush the edges of the feathers with black. Once done use a fine rigger brush to paint in some light-grey splits and repeat for the tail feathers
19. Use a template to paint the feathers on the belly and chest and then use a fine liner to paint in all the shafts of the feathers
20. Go over all the bird with very fine washes of black. Repeat as often as required to achieve the desired look
21. Fit the primaries and the feet, glue in place and touch up any damage or glue marks with paint
22. Highlight the details on the beak using a light-grey mix…
23. …and then paint the head cap red
24. Now move on to making the mounting section. I used an old tree-trunk section for this. I cleaned all loose debris and bark away, gave it a coat of gesso and then applied colours as required to get the right look. I worked out the position for the bird, drilled holes and then glued the bird in place
To provide the best experiences, we use technologies like cookies to store and/or access device information. Consenting to these technologies will allow us to process data such as browsing behaviour or unique IDs on this site. Not consenting or withdrawing consent, may adversely affect certain features and functions.
Functional
Always active
The technical storage or access is strictly necessary for the legitimate purpose of enabling the use of a specific service explicitly requested by the subscriber or user, or for the sole purpose of carrying out the transmission of a communication over an electronic communications network.
Preferences
The technical storage or access is necessary for the legitimate purpose of storing preferences that are not requested by the subscriber or user.
Statistics
The technical storage or access that is used exclusively for statistical purposes.The technical storage or access that is used exclusively for anonymous statistical purposes. Without a subpoena, voluntary compliance on the part of your Internet Service Provider, or additional records from a third party, information stored or retrieved for this purpose alone cannot usually be used to identify you.
Marketing
The technical storage or access is required to create user profiles to send advertising, or to track the user on a website or across several websites for similar marketing purposes.