Steve Bisco is inspired by a medieval dragon in Christchurch Priory.
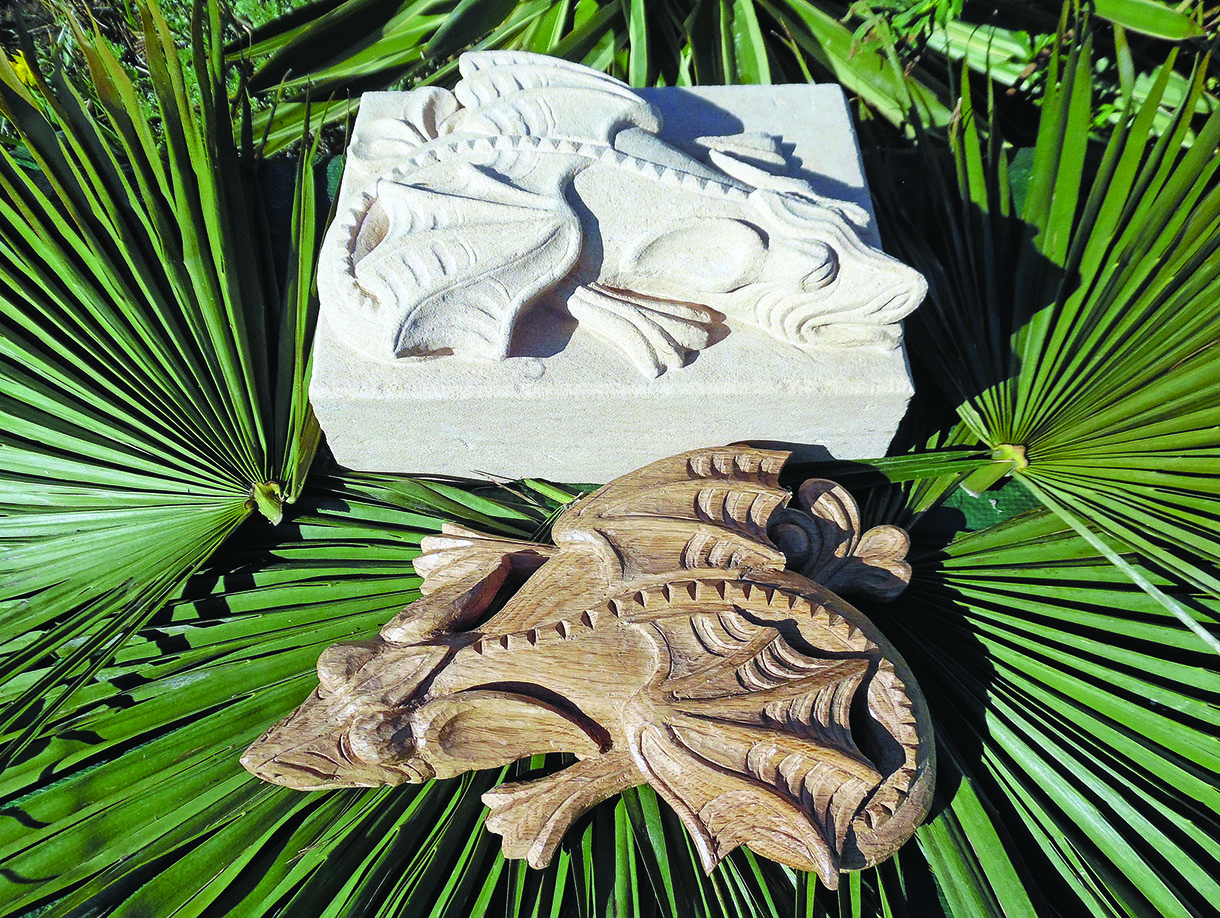
Christchurch Priory in Dorset, is a cathedral in all but name. It’s one of the largest churches in Britain, reflecting the historical status of Christchurch as an important medieval port on the south coast of England. The Norman core of the building, started in 1094 and finished around 1150, was built in the Romanesque style, with the round arches and heavy columns that preceded the later and lighter Gothic style. It is well worth visiting for its carved stonework and woodcarving. While on such a visit I was stopped short by a small dragon nestling at the foot of one of the columns in the nave, apparently asleep but with its mouth partly open as if ready to strike if disturbed. It was carved in medium relief on the upper surface of one of the limestone blocks at the base of the column. It was probably carved later than the Norman building phase in reference to the mid-12th-century legend of the Christchurch Dragon.
A medieval document records that a visiting party of French monks reported seeing the town of Christchurch consumed in sulphurous flames being breathed by a five-headed dragon. There is no record of what the monks had been drinking, but another French report indicates a lightning storm being the cause of the conflagration – you decide which is most plausible. This dragon thankfully has only one head and it provided me with the inspiration for a stone-carving project, with a little adaptation to extract it from its column base and fit it on an oblong block. I have kept to its local provenance by using Portland stone – Christchurch is just a short hop by sea from the Portland limestone quarries – but any suitable limestone will do.
Not wishing to leave woodcarvers out of this project, I have also carved the same design in oak (Quercus robur), and detailed this process in a separate article. By cutting the pattern out of the oak board, the oak dragon is freestanding, or free-laying, and can more easily be displayed in the house. I reversed the tracing on the oak version to make it face the other way, but this is optional.
Sleeping dragon carving
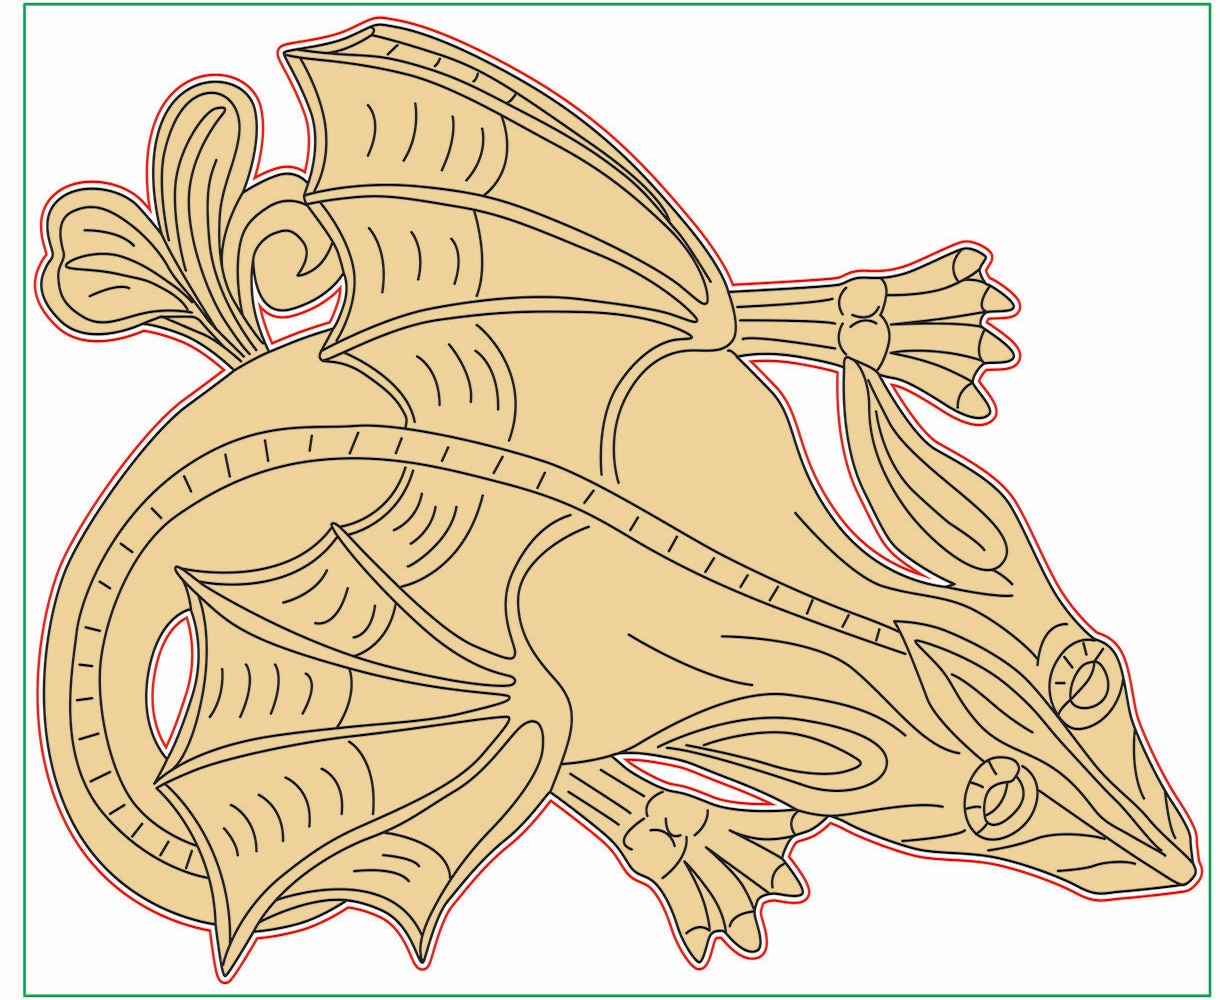
Drawings and how to resize them
To enlarge or reduce the size of drawings right click on the image to download it and then go HERE to watch a video on how to use paper with a grid to do exactly that.
Making the dragon in stone
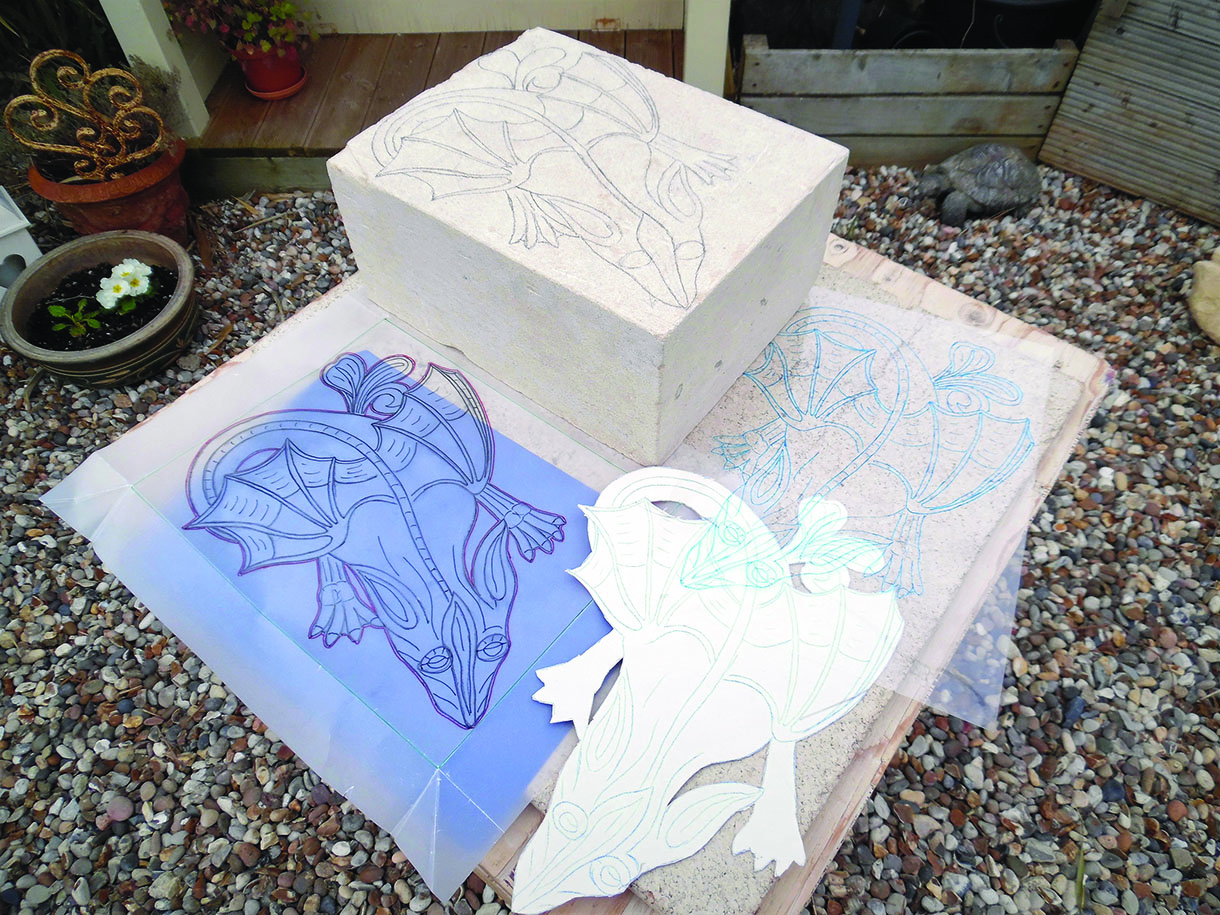
To make the dragon in stone, you will need a block of a suitable limestone (preferably Portland, Caen, or similar). The size is not critical provided you can fit the pattern on to it without it being too small to carve the details. The best place to look for good quality carving stone is at the yard of an architectural stonemason. Getting stone cut to a specific size is expensive, so work with whatever size of offcut you can get cheaply from your stone supplier. If the block has one or more broken faces, cut and square them off using the basic stonemasonry tools and techniques for ‘dressing’ a stone. A stonecarver’s toolkit is very simple because the limestone and sandstone ‘freestones’ used for stonecarving have no grain and you can approach a cut from a wider range of angles. This carving requires just a basic set of four stone chisels and three gouges. A few other tools are useful for preparing and shaping a stone: a claw chisel, a bolster and a club hammer are used in the heavier masonry work.
Things you will need
Tools
- Personal and respiratory equipment
- 4, 6, 13 & 18mm chisels
- 6, 13 & 18mm gouges
- Claw chisel
- Bolster
- Club hammer for roughing out
- Mason’s dummy mallet
Materials
- Stone: Limestone 270 x 210 x 125mm
Carving Stone Safely
- Wear eye protection when carving stone – flying stone chips are sharp.
- Stone is very heavy. A cubic foot, or 300mm metric cube, of stone will weigh around 70 kilos, so take great care of your back and wear protective footwear. Use lifting gear for heavy pieces.
- Stonecarving creates a lot of dust, so work outdoors if possible. Wear a suitably rated dust mask and safety eye wear, and take particular care if working with sandstone as silica dust can accumulate in the lungs.
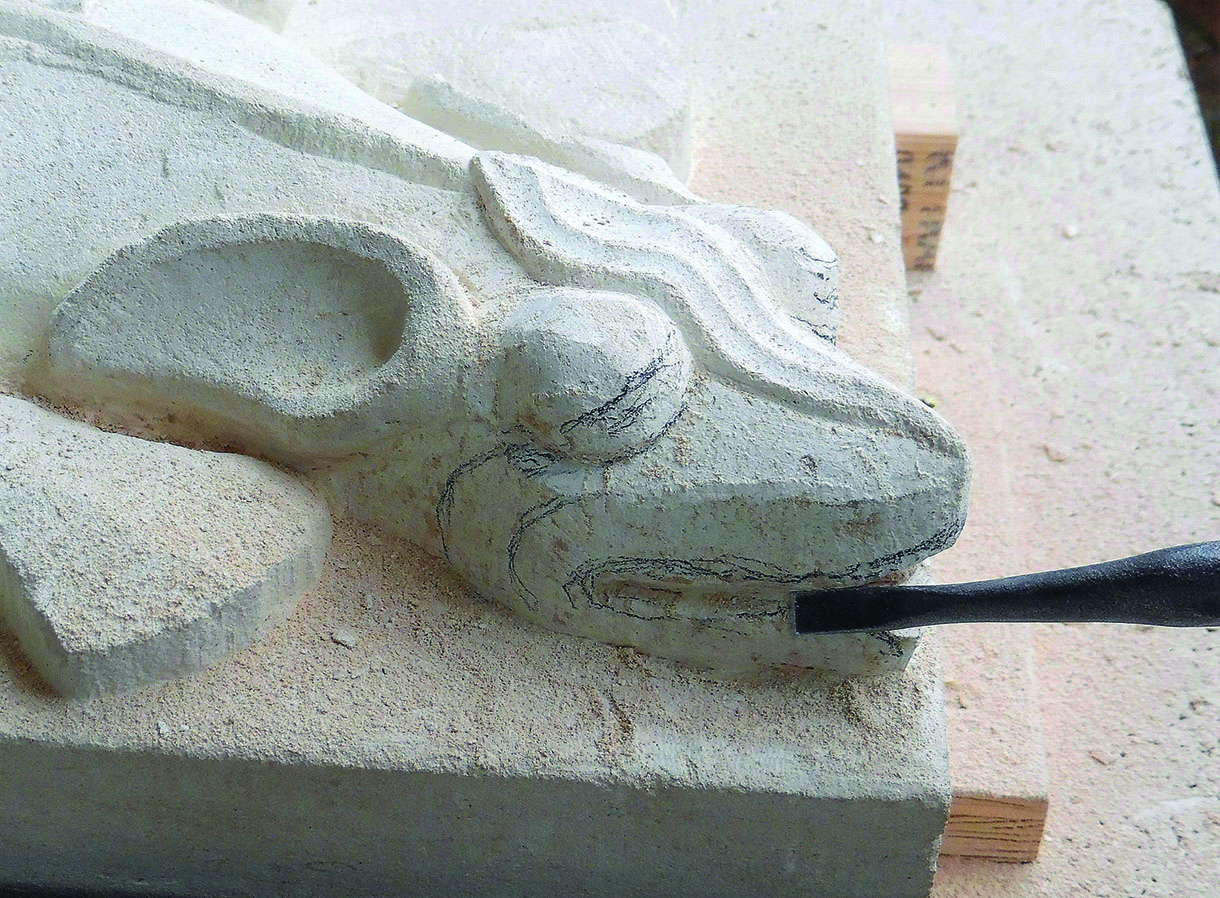
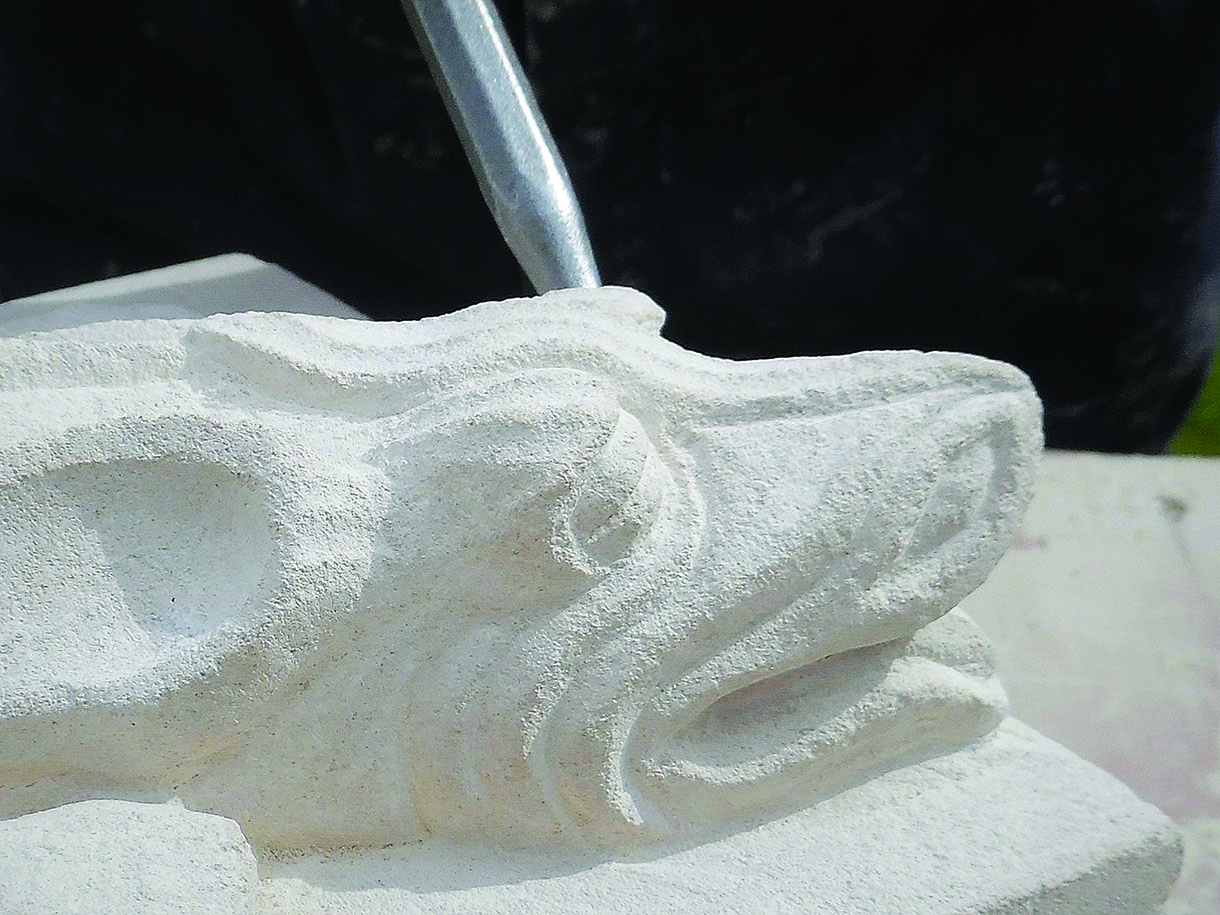
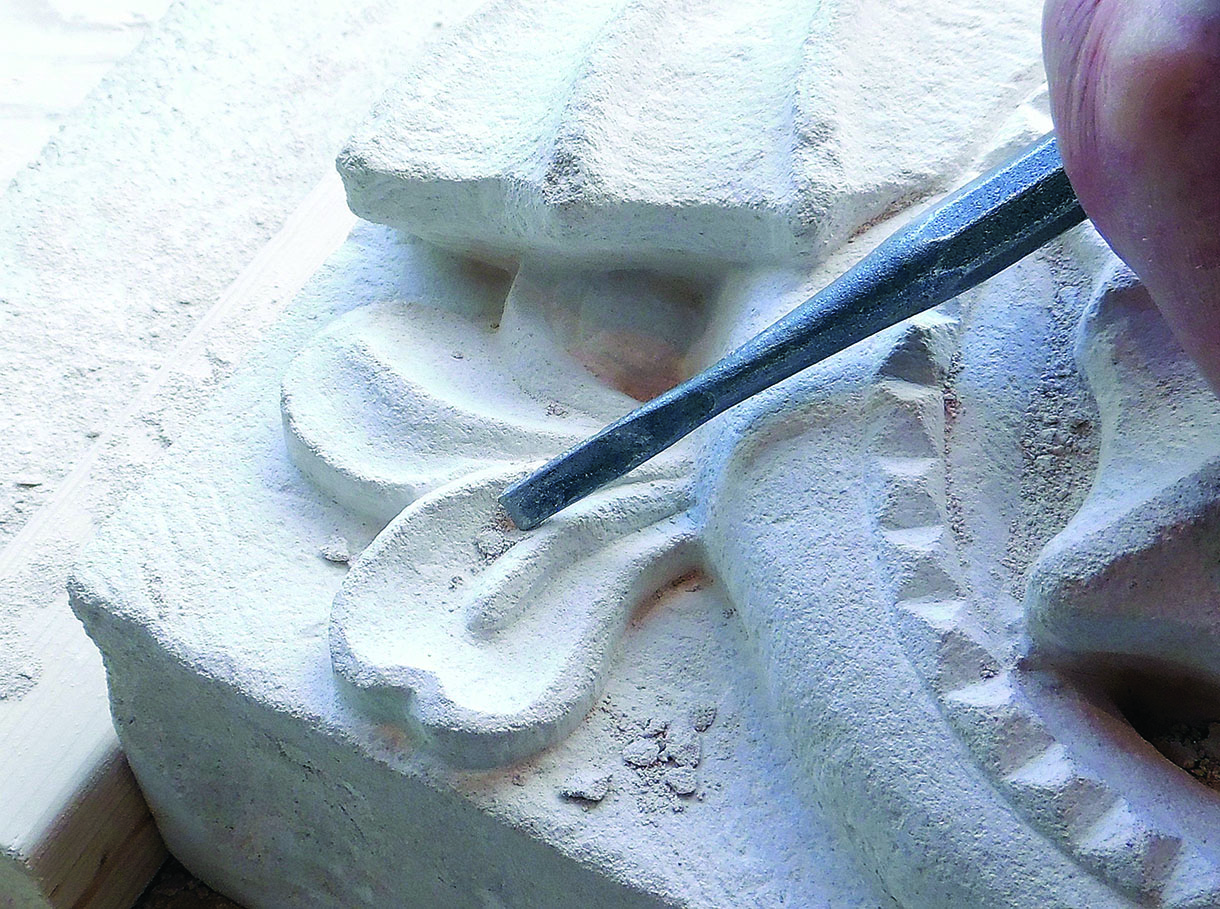
Carving the stone dragon
Roughing out


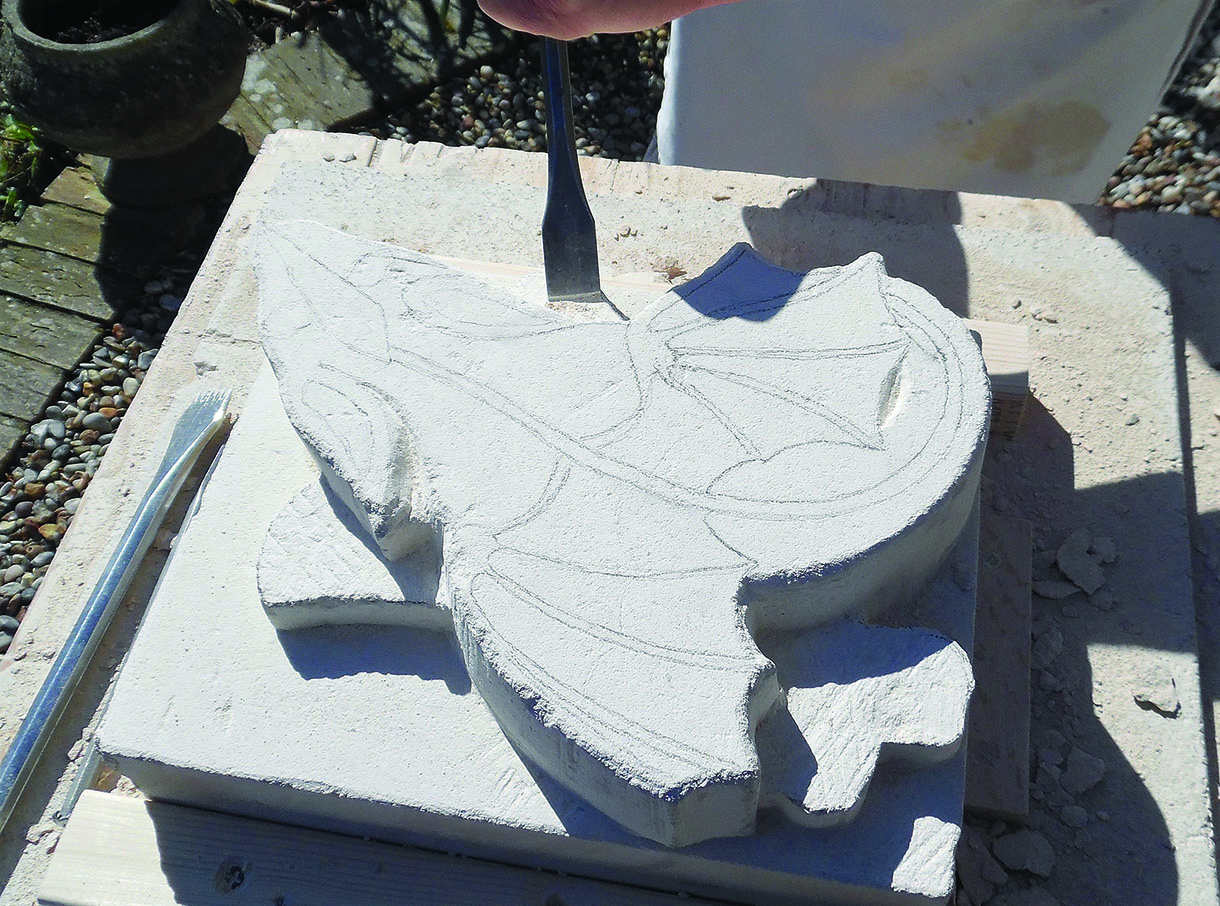
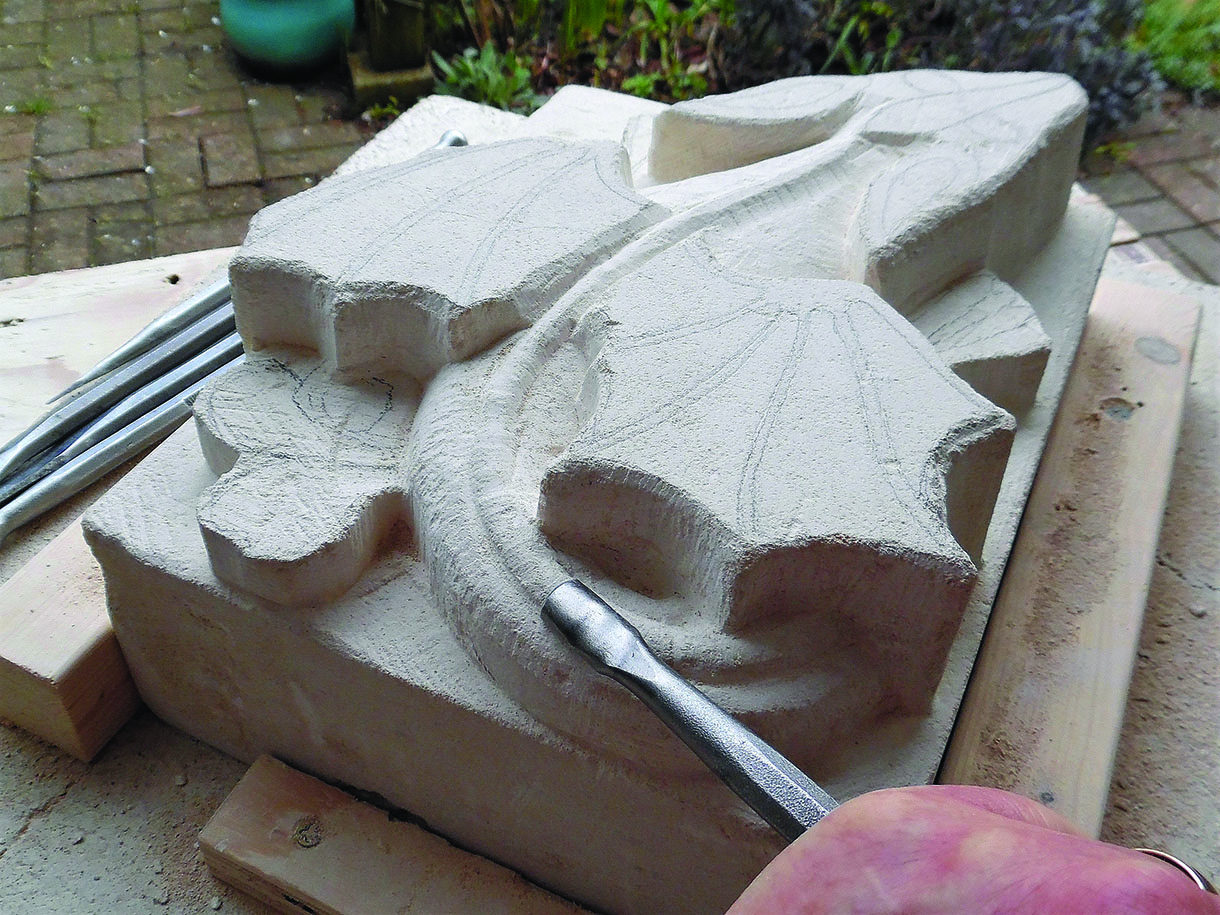

Carving the detail

Did you know
Sightings of dragons were common in medieval times. A report from Bures, Suffolk, in 1405 complains that a huge dragon killed a flock of sheep. A possible explanation for these sightings is a hallucinatory fungus called ergot which could grow on crops of rye, get into the local bread, and cause mass hallucinations.
TOP TIP
One tool that is essential for stonecarving is the pencil. Before you carve any feature, draw it in carefully first with a hard pencil and check that it is in the right position and looks as you want it. You can then carve with more confidence. It is much harder to correct a bad cut in the stone than it is to rub out and redraw a pencil mark.


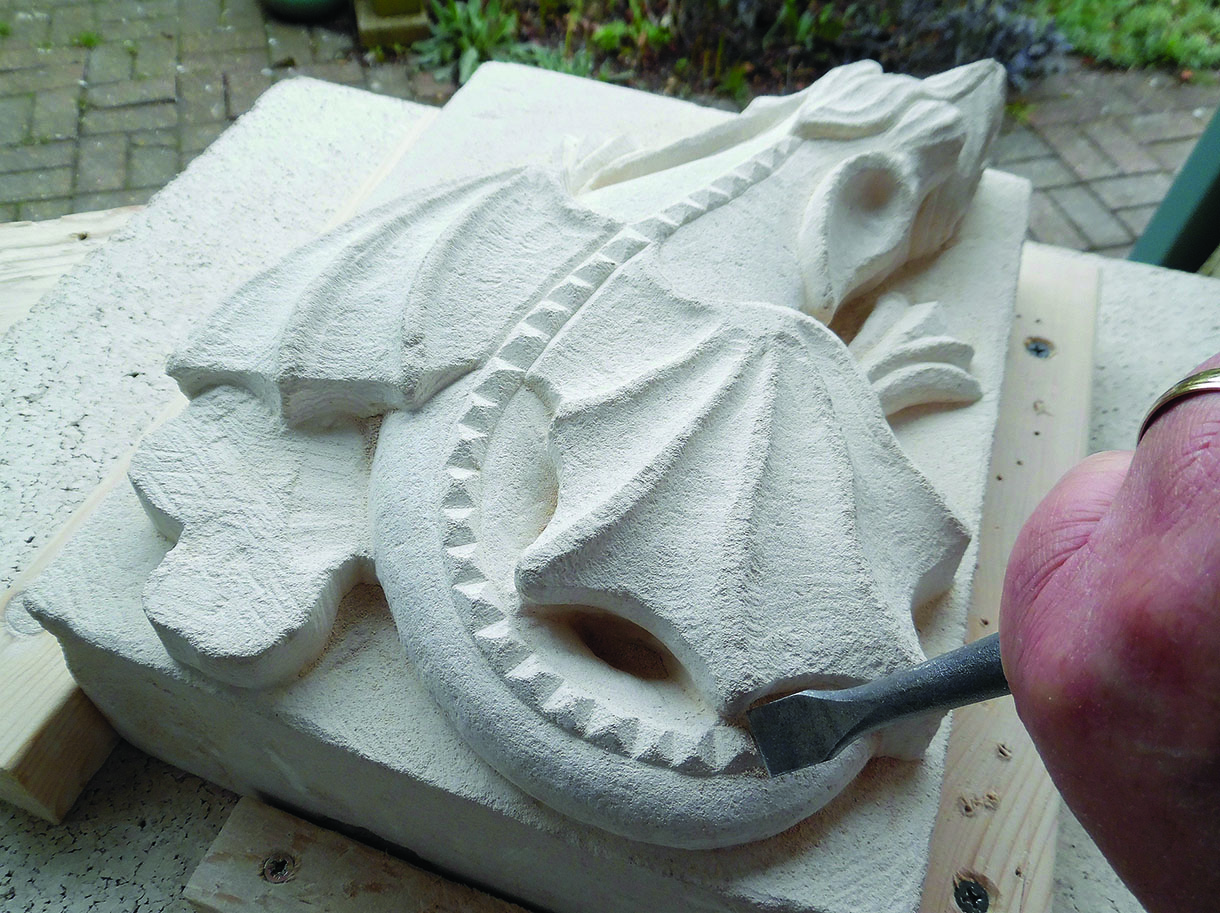


The stone sleeping dragon is now finished. Wash off all the dust with a hose and tidy up any rough bits. The stone dragon will live quite happily outdoors in all weathers for hundreds of years, unlike its wooden counterpart.
Further reading
PHOTOGRAPHS BY STEVE BISCO