The Woodworkers Institute

We bring you the very best of woodworking!

“Make it with us”

Flying owl

Zoë Gertner shows how to create a relief-carved owl
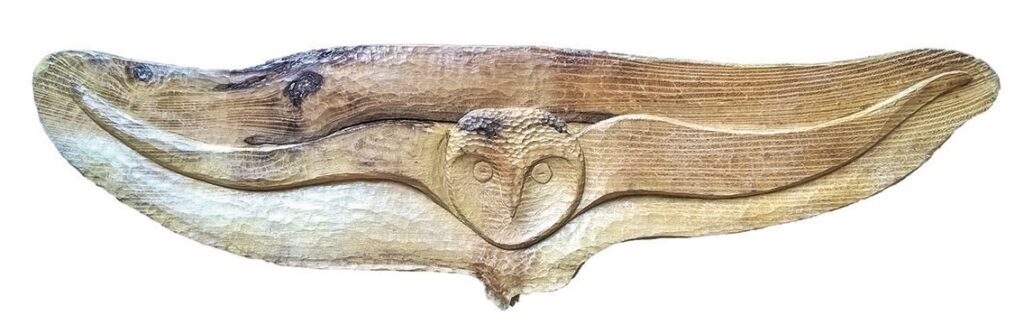
Wooden owl carving with outstretched wings.

Some years ago I was given, for a small donation, several pieces and planks of false acacia (Robinia) which were inconveniencing a Somerset churchyard, mainly weird-shaped planks with bark attached, burrs and some very eccentric grain patterning. The church had offered it to various craftspersons, including turners and a musical instrument maker, all of whom had declined.

Now, as its last resort, I took it away with great glee and anticipation. Rather than being in the mindset of always using squared-off planed wood for your relief carvings, waney-edged timber has many creative possibilities – its grain pattern, burrs, flaws and bark edging can be used to enhance the subject of your relief carving. In addition, you will learn a lot about the species you are using and how to work with ‘difficult’ grain patterns which you may come across in future carvings. This project shows you how to work with an unorthodox-shaped piece of wood to its best advantage.

Things you will need

Tools:
• Personal & respiratory protective equipment (PPE & RPE)
• No.3, 3, 6, 20 & 25mm
• No.5, 10mm 
• No.9, 6mm
• No.11, 3mm 
• 3 & 10mm 60° V-tool

Materials:
• Mallet
• Non-slip router mat on bench to grip carving
• Colourless wax polish, old toothbrush and lint-free duster

Drawing

Stylised owl illustration with extended wings.

Preparation

Chalk drawing on wooden board in grass.
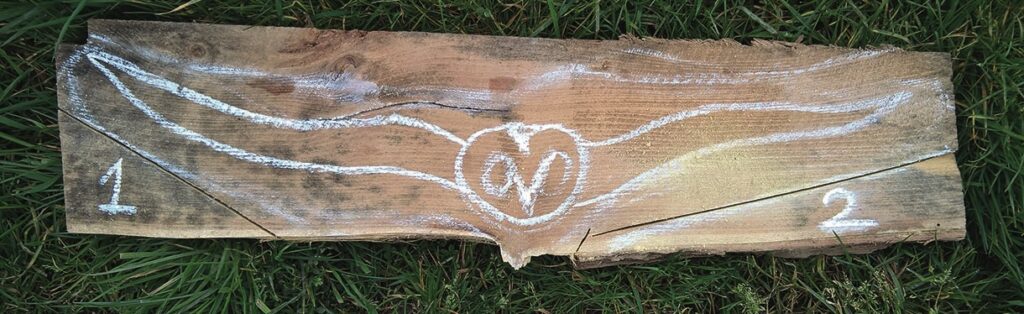
1. My timber was a rough-edged piece of false acacia acacia (Robinia pseudo acacia) about 20mm thick, 405mm long and approximately 125mm wide. All loose fibres and any soft spots were removed and its surface prepared ready to draw on the outline of the flying owl. To position it on the timber you can use chalk and draw the outline directly on to your timber as chalk lines can easily be erased with damp cloth. While carving, it is easiest to grip the board on a non-slip router mat so you can just lift it up and turn it when you need to work in the opposite direction. Having roughly outlined the owl using chalk, my board seems to be too square at its ends and will not enhance the shape of the wings, but the burr beneath the head will give an interesting grain pattern. So the ends will need adjusting to a more pleasing shape
Wooden plank with painted white wings design
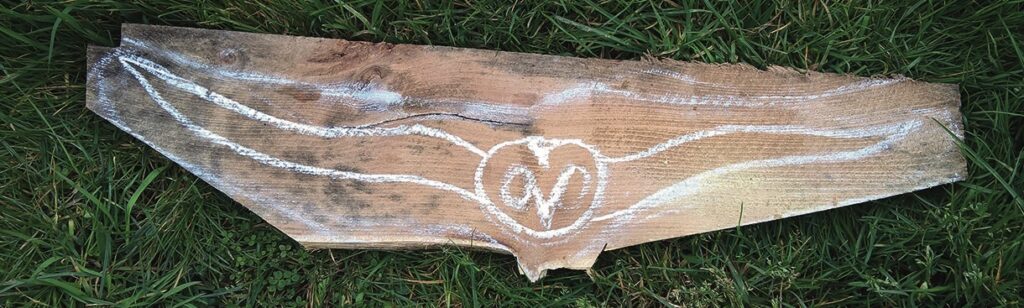
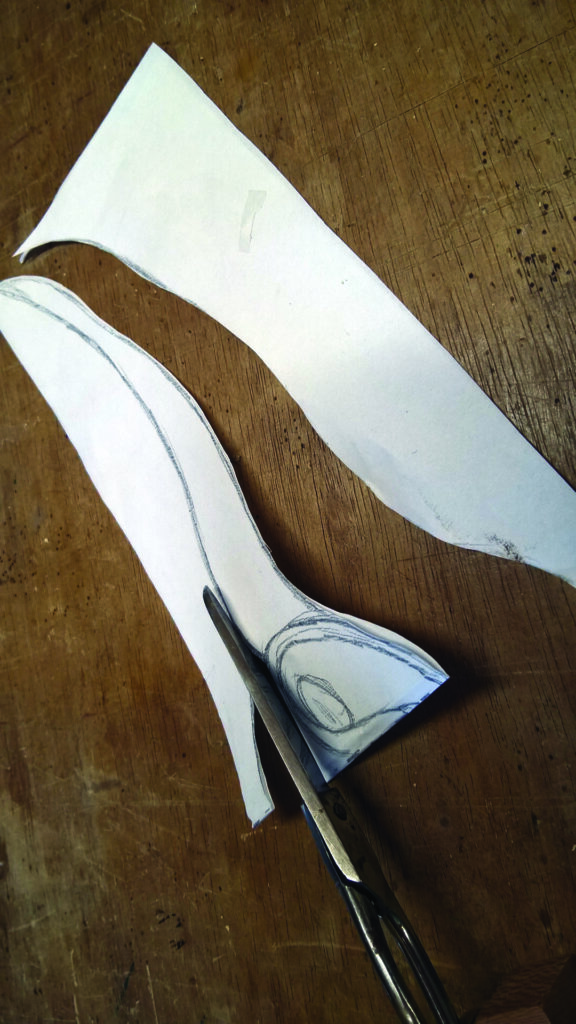
2. The angled sections 1 and 2 were sawn from each end so that the shape of the board will relate better with that of the outspread wings. If you are not confident about drawing the outline directly on to the timber, you can trace my original drawing and transfer it to your wood using carbon paper, or alternatively, trace it on to light card and cut this out to make a template
Scissors cutting paper with traced design on wood.
3. So that the outline of the wings will be symmetrical, fold the card in two vertically down the middle of the head and beak and cut round the halved outline, holding the doubled card as you do cut
Metal owl shape on rustic wooden background.
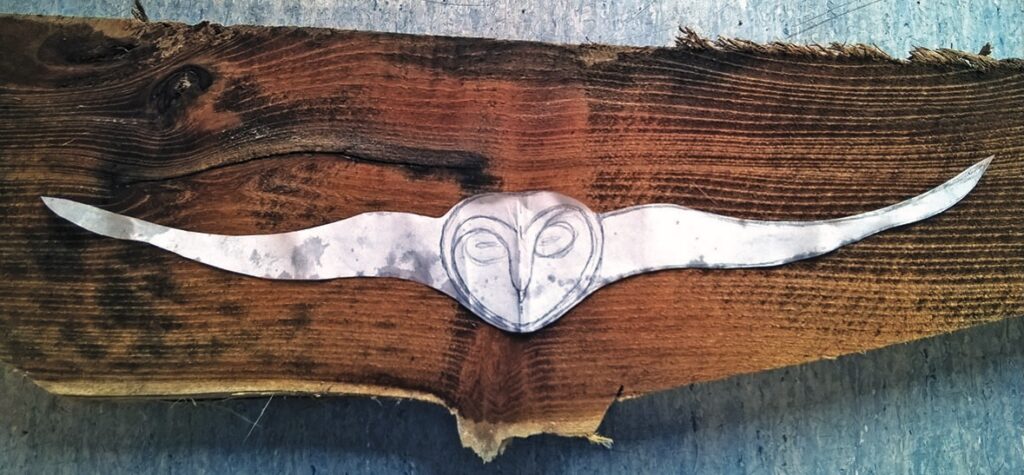
4. Position your cutout card template and draw round it using soft pencil

Starting the carving

Wood carving with chisel on a wooden plank.
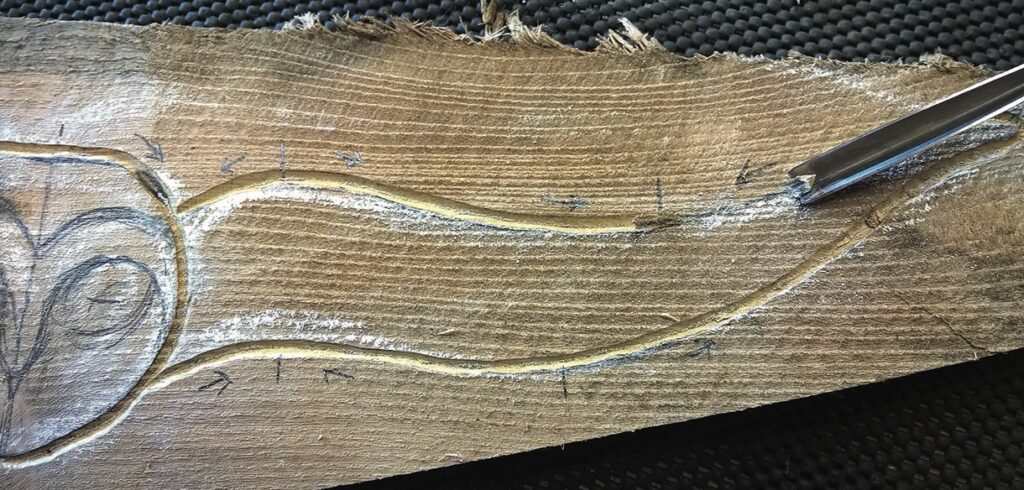
5. Using the V-tool with a mallet cut round the outline, changing the direction of cut where necessary so there is a clean edge against the drawn outline. If the grain of the wood is difficult you may have to turn your work several times so that you always cut in the right direction to minimise grain tear-out
Close-up of wood carving with chisel
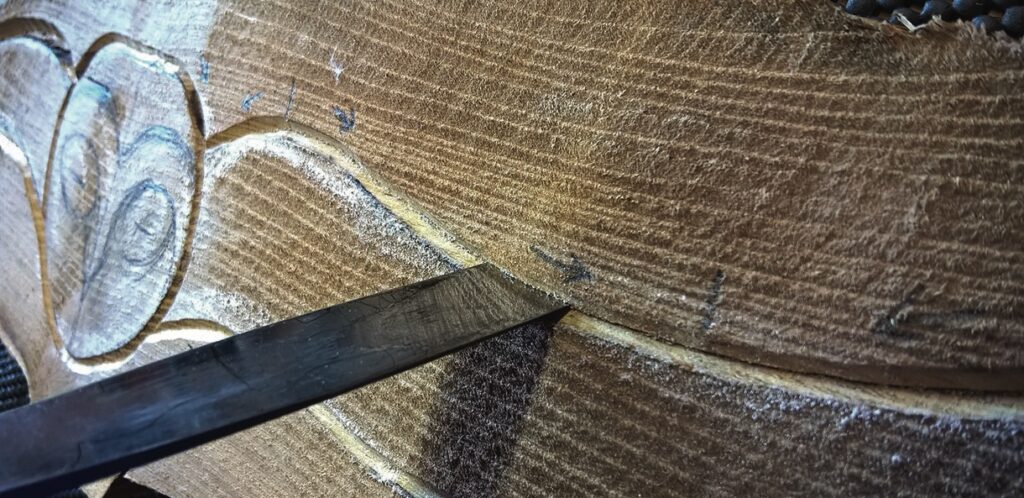
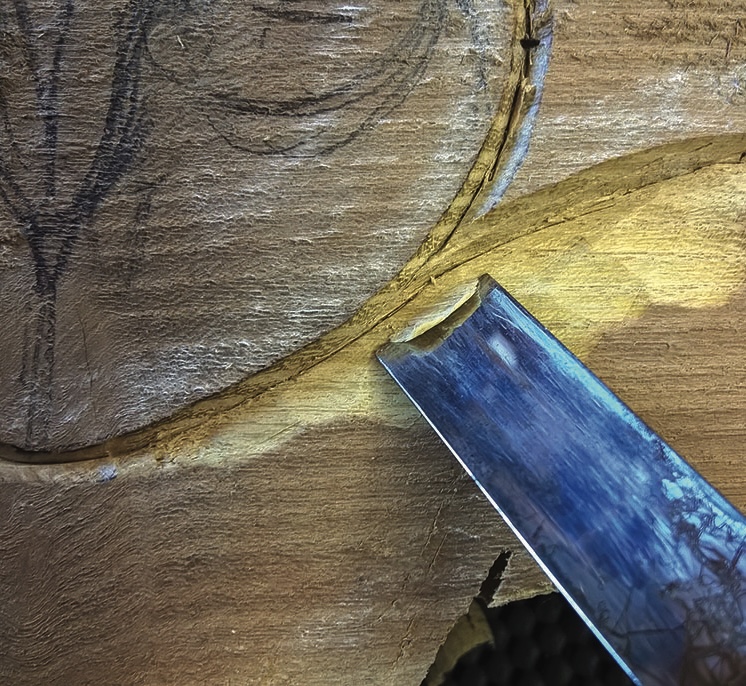
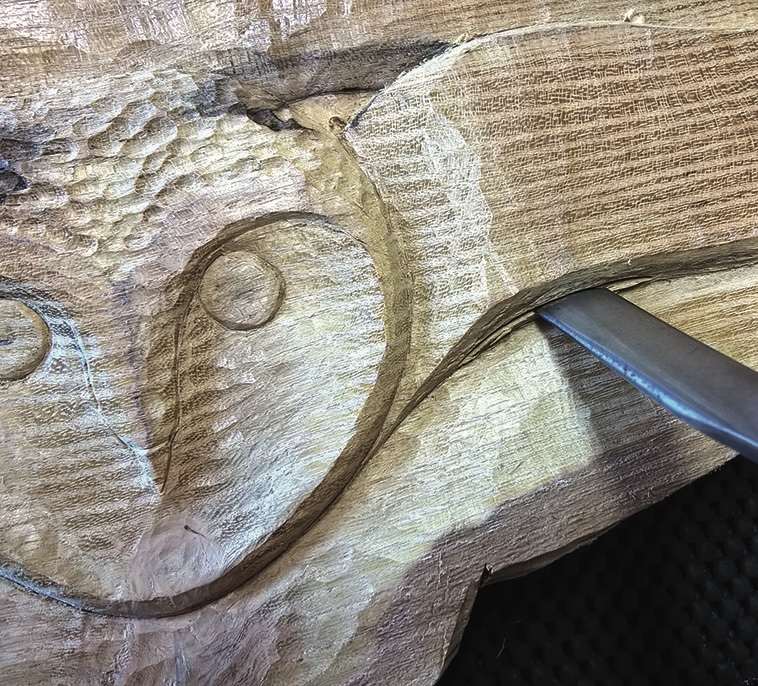
6. Now deepen and widen the V-cut outline using sets of opposing cuts. First cuts: using a No.3 gouge of appropriate width, place its cutting edge at the same angle against the side of the V-channel and cut downwards and away from the owl. Turn the gouge as necessary to so its cutting edge corresponds with the convex and concave curves of the outline. For tighter curves use a narrower No.3 gouge. Do not twist or lever the end of the gouge, but withdraw it at the same angle that it entered. Continue thus around the whole outline. The tool handle should be held over the owl for these cuts, not cutting towards it
Wood carving with chisel in action
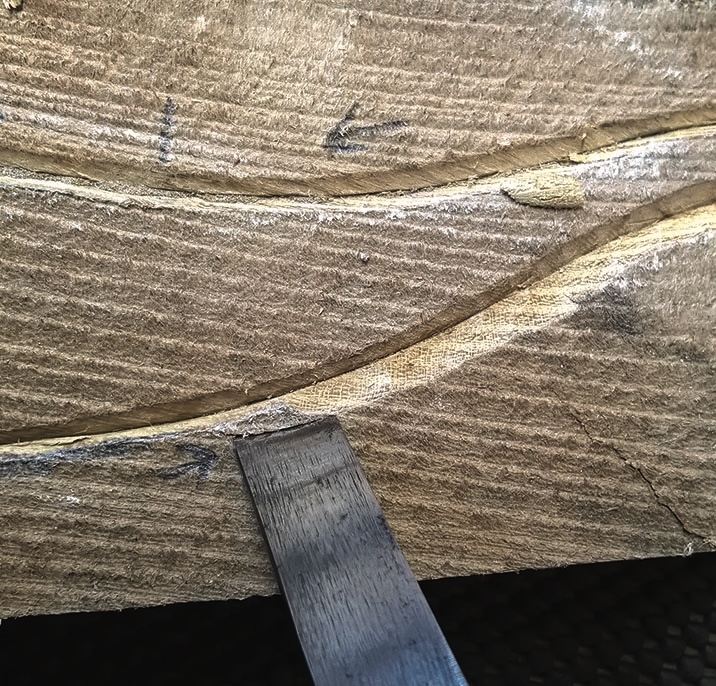
7. Second cuts: these are made towards the first set, always using the gouge with its bevel down, cutting down at an angle towards the first cuts in order to deepen and widen the existing V-channel. Start these angled cuts at about 3mm away from the outline to meet up with the first set cleanly, so deepening and widening the channel from all round. Repeat both sets of cuts, moving out wider and deeper until the channel is approximately 6mm deep and wide, its sides cleanly meeting at the bottom of the V
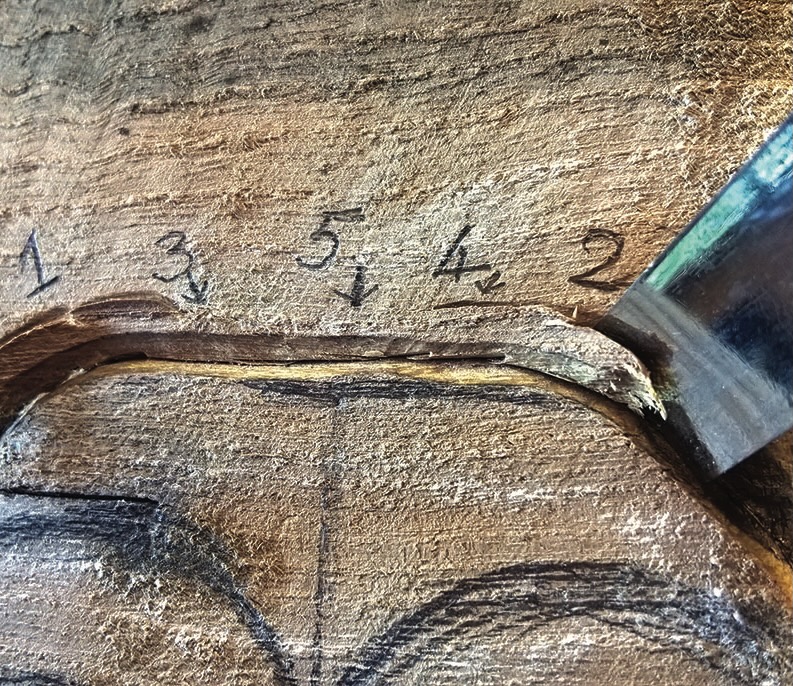
8. To cut a channel cleanly at the at top of the head, where it lies across the grain, make alternate cuts from each side, finishing at the middle of the top of the head. As you cut towards it, swing the cutting edge sideways slightly so that the width of the tool edge meets the first cuts, and a tidy chip should be produced
Wooden carving of an owl in progress
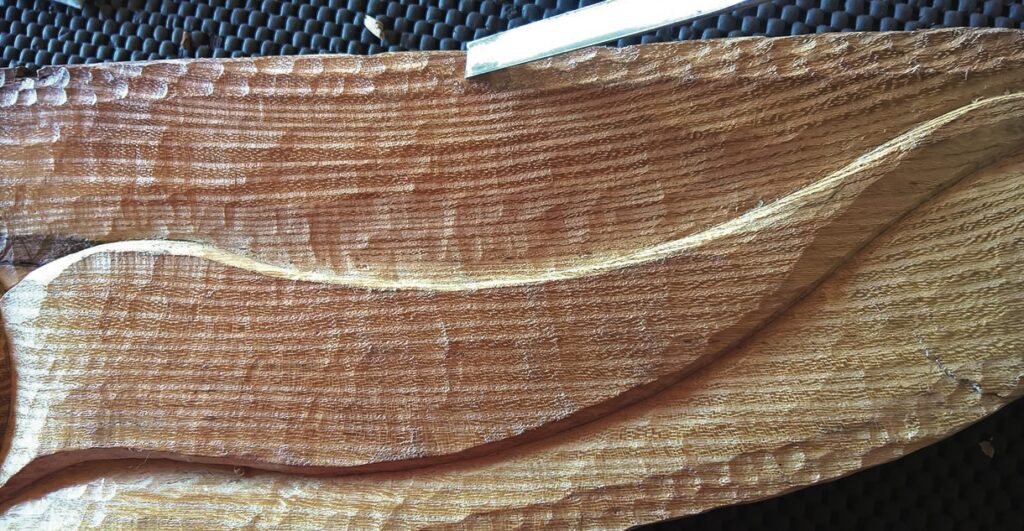
9a. When the outline channel has been deepened and widened, the background can be removed. Using the No.5 gouge with its bevel down, start your cuts along the edge and into the enlarged channel then, always working towards the channel, extend overlapping cuts outwards up towards the edge of the timber
Chisel carving intricate wood design detail.
9b. Continue thus making a gentle slope from the outer edge of timber to the outline of the owl, leaving a border if you wish. The edge of the outline adjacent to the background should be cleanly cut
Wood carving with a chisel creating a groove.
10. Shaping: using the No.3 gouge, round over and chamfer the edges of the wings
Chisel carving into wooden surface close-up.
11. Reduce both wing tips using the No.3 gouge

The head

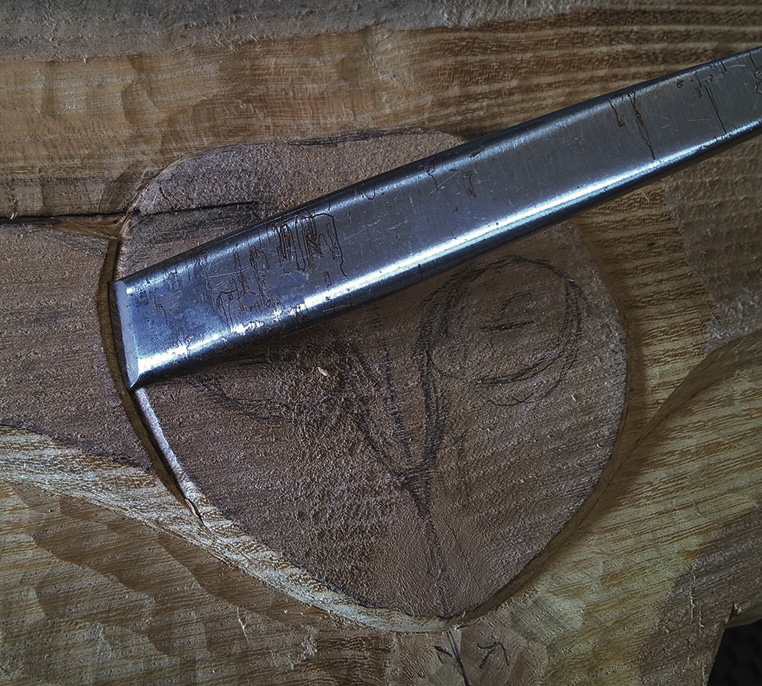
Chisel carving wood with floral design sketch.
12. With the No.3 gouge inverted to match its curve, each side cut round the outside of the head down towards the wing
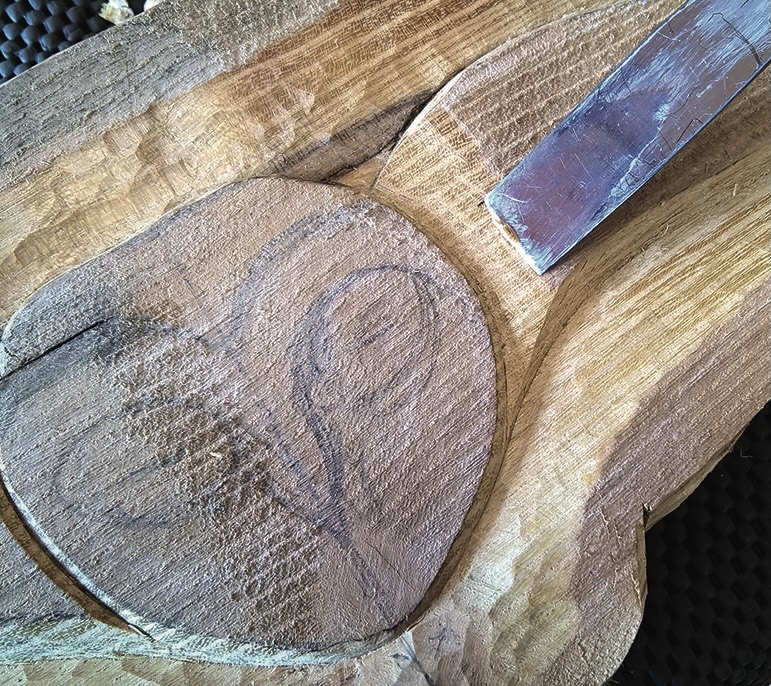
Wooden sculpture carving with chisel tool.
13. Now deepen the upper surface of each wing up to the side of the head so that the head projects forwards from the wings
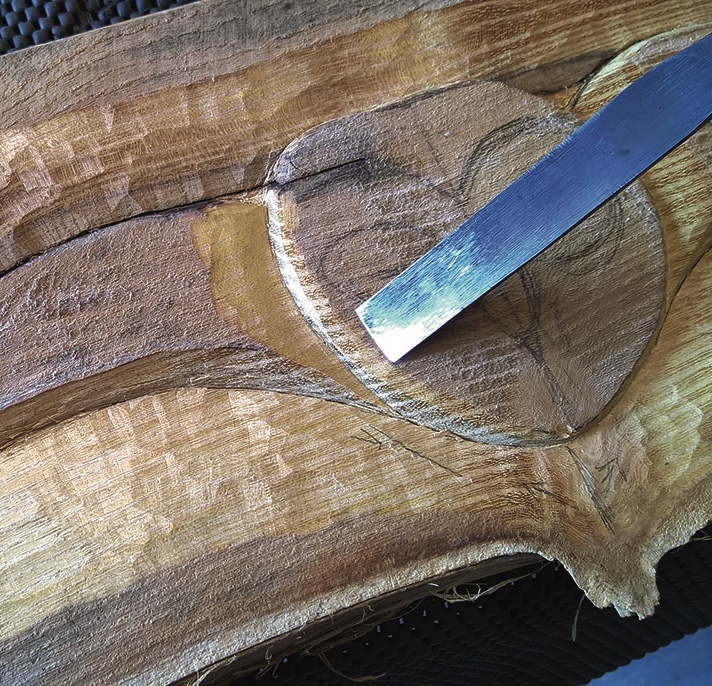
Wood carving in progress with chisel tool.
14. Round off the sides of the head by cutting outwards, lifting your gouge hand as you work over the edges
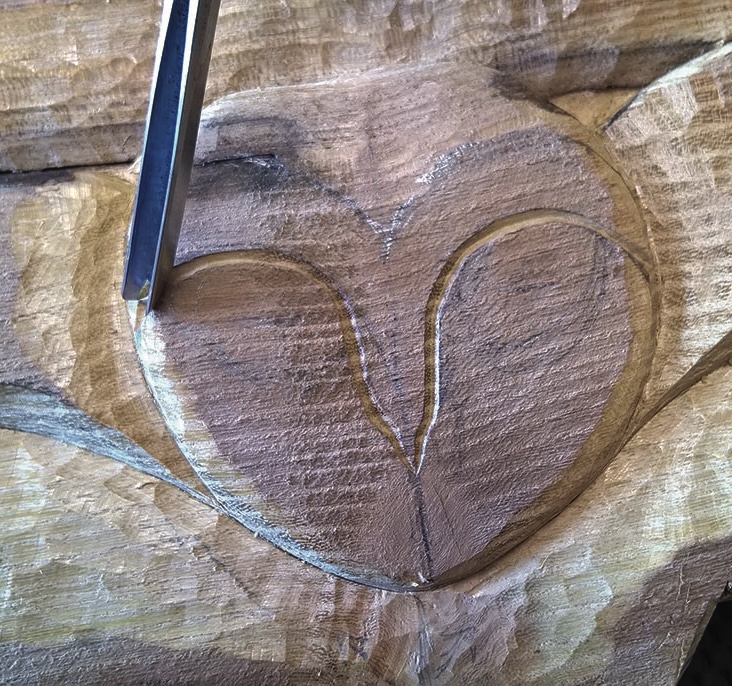
Chisel carving heart shape in wood
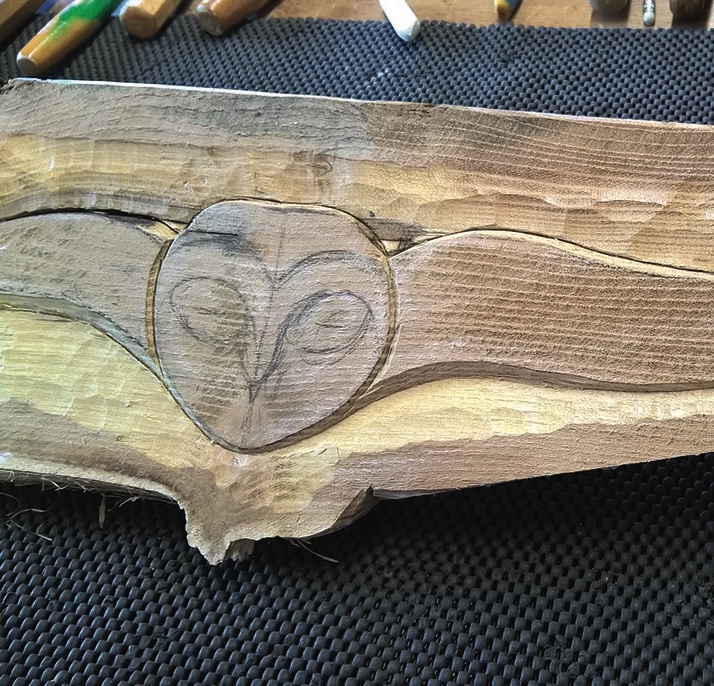
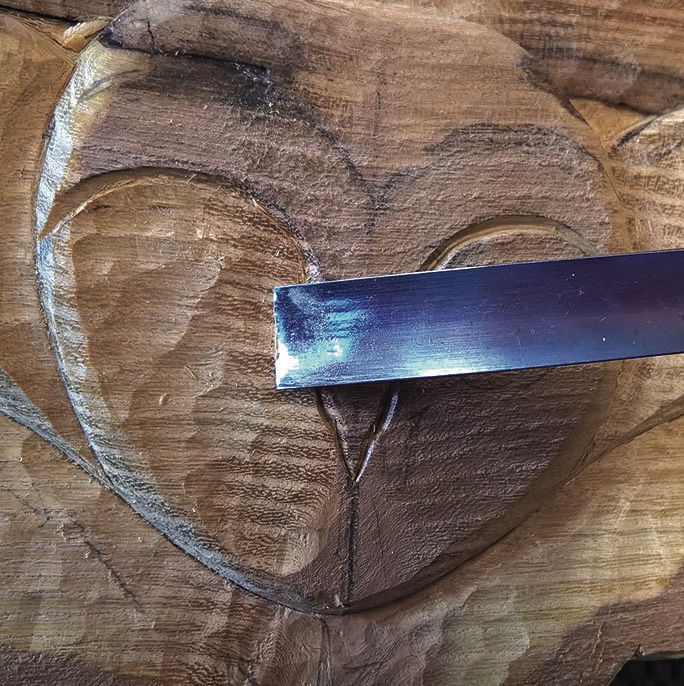
15. Using the V-tool mark the beak and the upper line of the eye discs
Carving owl face on wood with chisel tool.
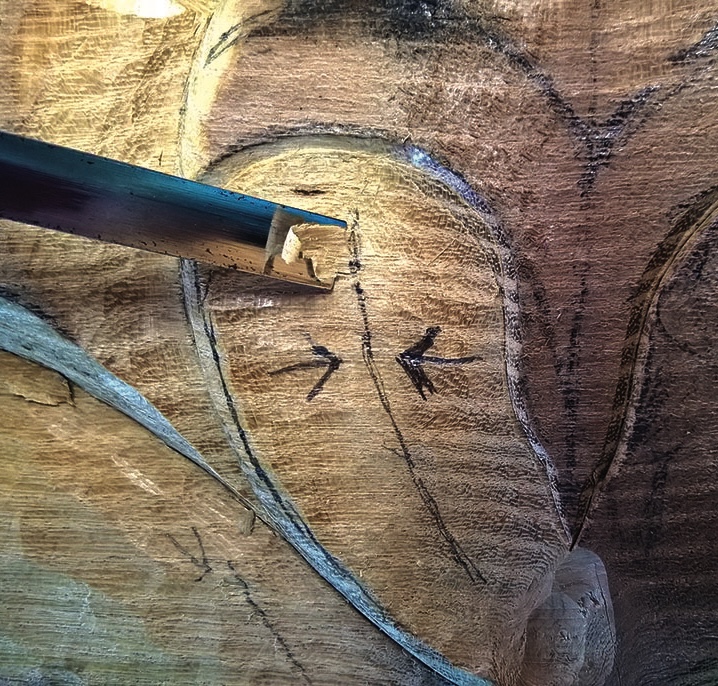
16. Each eye disc is hollowed using the No.5, 6 or 10mm. First, scoop outwards from the side of the beak
Close-up of wood carving tool in action
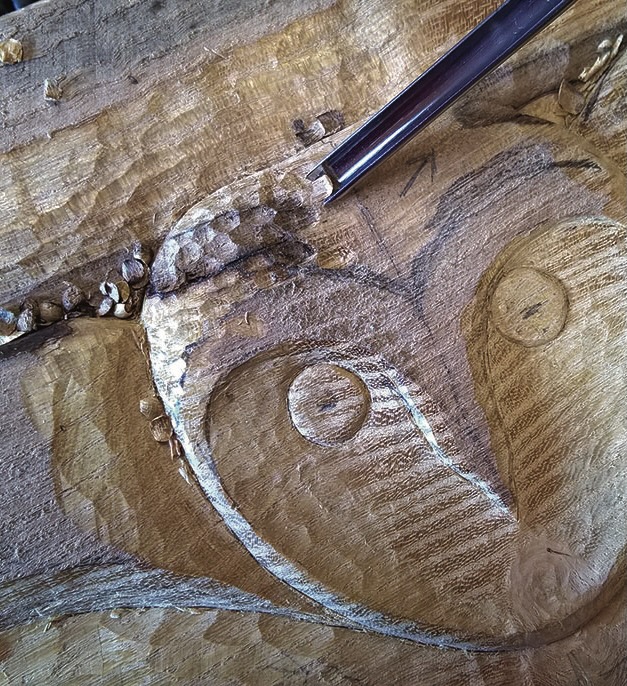
17. Because of the lie of the grain, when the eye disks are deeper you may have work into the hollow from each side to smooth their deepest area. Chamfer the edges of the division between the discs and reduce its end, the beak, into the face below. Then draw the eyes within each hollowed disk
Wood carving of eyes with chisel
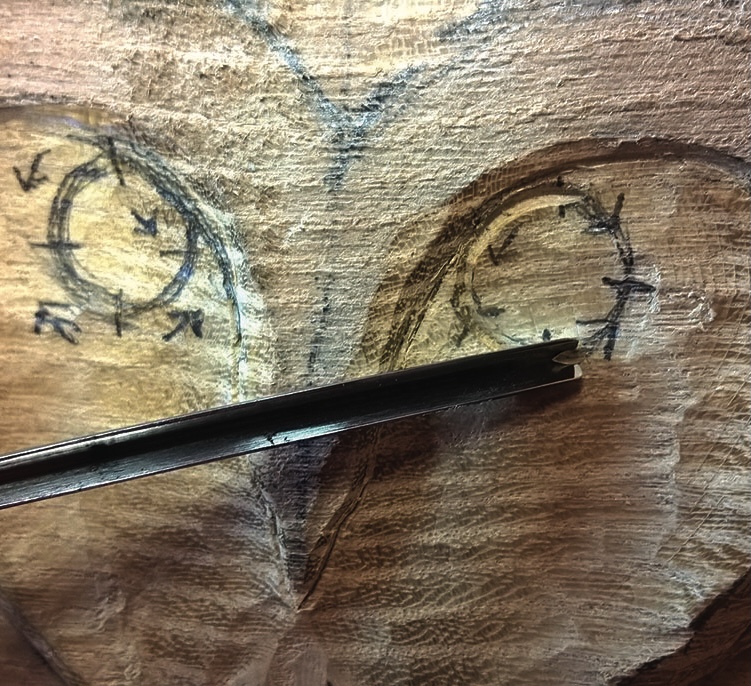
18. With the 3mm V-tool mark eyes, cutting in the direction to obtain a clean edge around the eye. Deepen and widen the V-channel using a V-tool or a No.3, 3mm inverted as described before, round over the edges of each away from the highest point at the middle. To enliven them, nick out a tiny cut here using the No.11, 3mm, then clean up the adjacent surface within the hollow discs
Wood carving progress showing owl face details.
19. Over the top of the head, working from each side and using the No.9, 6mm, start at the outer edge and make small, deep cuts back to the middle of the head, meeting them here from each side, to texture and add contrast to the smooth wings and eye discs. Chamfer and sharpen the beak to a point and mark its division above by cutting a shallow channel across with the No.3, 6mm
Carving chisel detailing an owl in wood
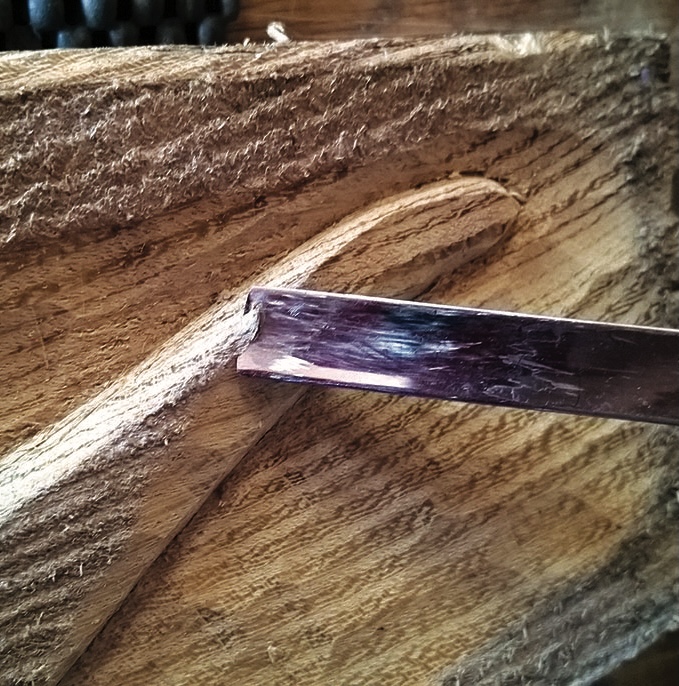
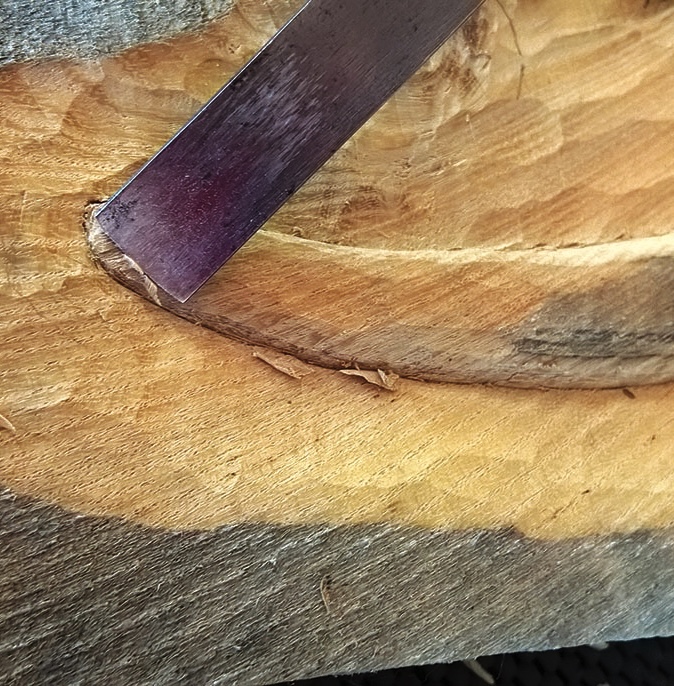
20. Undercut the lower edge of each wing by tilting back the No.3 gouge against it and cutting downwards beneath it, then towards the cuts from the background, meeting up cleanly below the edge
Close-up of wood carving with chisel detail.
21. Lightly work over the wings to remove any of the original surface remaining, gently undulating the surface with clean, shallow cuts with the No.3 gouge to remove any flat areas. You could use a No.5, 10mm gouge to tool the border to make a contrasting pattern with the smooth background and wings, at the same time removing any unworked surface remaining. Check all edges are cleanly cut, and remove any deep errant cuts or digs by paring them away. The carving was finished with a colourless wax polish applied with an old toothbrush, left overnight and buffed with a lint-free duster to a very pleasing sheen
Wooden owl carving with outstretched wings.
22. The finished carving

Leave a Reply

Your email address will not be published. Required fields are marked *