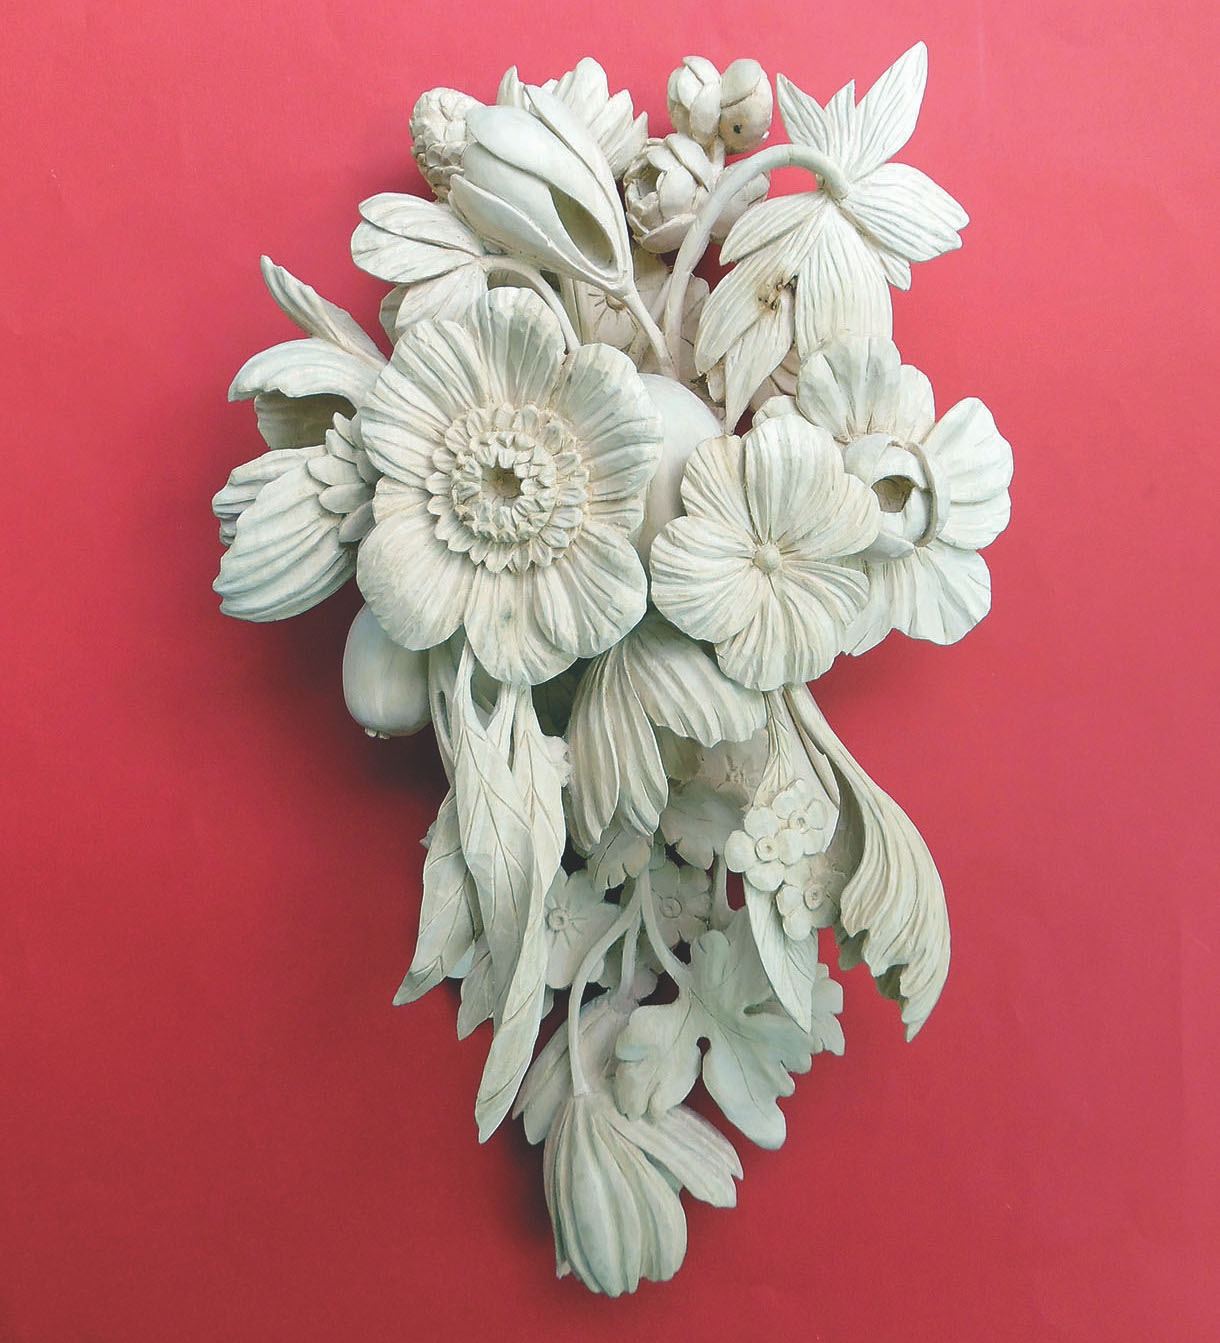
Grinling Gibbons’ projects are always popular with carvers who want to take on the challenge of a lime wood (Tilia vulgaris) foliage festoon.
This project is composed of elements featured in the overmantel festoons of the King’s Apartments at Hampton Court Palace. Hampton Court was a favourite residence of Henry VIII, but its Tudor buildings were old and out of date. King William III decided that this palace, 13 miles from London, was safer from the Jacobite mobs who plagued his reign after he ousted James II in the Glorious Revolution of 1688.
William set about building a large new baroque wing on to the old palace, fitted out in the current fashion with elaborate carved festoons decorating the state rooms, and there was only one man for the job – Grinling Gibbons, Master Carver to the Crown. The overmantel festoons in the King’s Apartments were made between 1699 and 1701, about 20 years after Gibbons had first developed the form, and are different in style to the earlier works. They are more compact in their layering and more floral in their content.
Gone are the fish, game birds, seashells and most of the fruit of earlier festoons. Gone are most of the ‘high-flying’ projections so prone to damage. Instead, flowers large and small cluster in bunches, linked by tightly-carved ‘ropes’ of little flowers. I have designed this as a stand-alone bunch of larger flowers without the linking ‘ropes’, but have used the ‘flatter’ style of layering, with two layers 50mm thick and a couple of forward flowers attached on the front. The layers are glued and dowelled for extra security. Visualising how they will look in 3D when assembled is a challenge, so leave the gluing until all the pieces are finished.
The Hampton Court overmantels turned out to be the final flowering of the lime wood foliage festoon that had made Grinling’s name and been the basis of his business. When King William died in 1702, his successor Queen Anne preferred just plain wainscot panelling. The lime wood festoon went out of fashion and the Master Carver to the Crown had to switch much of his business over to stonecarving in his later years, but his lime wood foliage carvings remain to this day among the greatest works ever created in wood.
Did you know?
Lime wood varies in colour from pale cream to orangey-brown. When you are making up a carving of several pieces try to take them all from the same block of wood, or at least from the same tree, to get them all the same colour.
Things you will need
Tools
No.3, 20mm fishtail gouge
No.3, 10mm fishtail gouge
6mm no.4 fishtail gouge,
No.9, 20mm
No.3, 10mm
No.8, 8mm
No.5, 7mm
No.5, 5mm
No.9, 3mm
No.3, 5mm bent gouge
No.5, 13mm curved gouge
No.9, 16mm curved gouge
No.8, 8mm curved gouge,
18mm spoon gouge
5mm bent chisel
8mm short bent gouge
10mm short bent gouge
12mm back-bent gouge
10mm L&R skewed spoon gouges
2mm veiner
Straight V-tool
Curved V-tool
16mm hooked skew chisel
10mm skew chisel
2, 3, 6.5 & 20mm flat chisel
Drill
Drill bit
Padsaw
Jigsaw
Bandsaw
Materials
Wood: Lime (Tilia vulgaris) 50mm thick
A board 640 x 260mm can accommodate all the pieces if arranged carefully, or other options can be used
PVA adhesive
6mm dowels for assembly
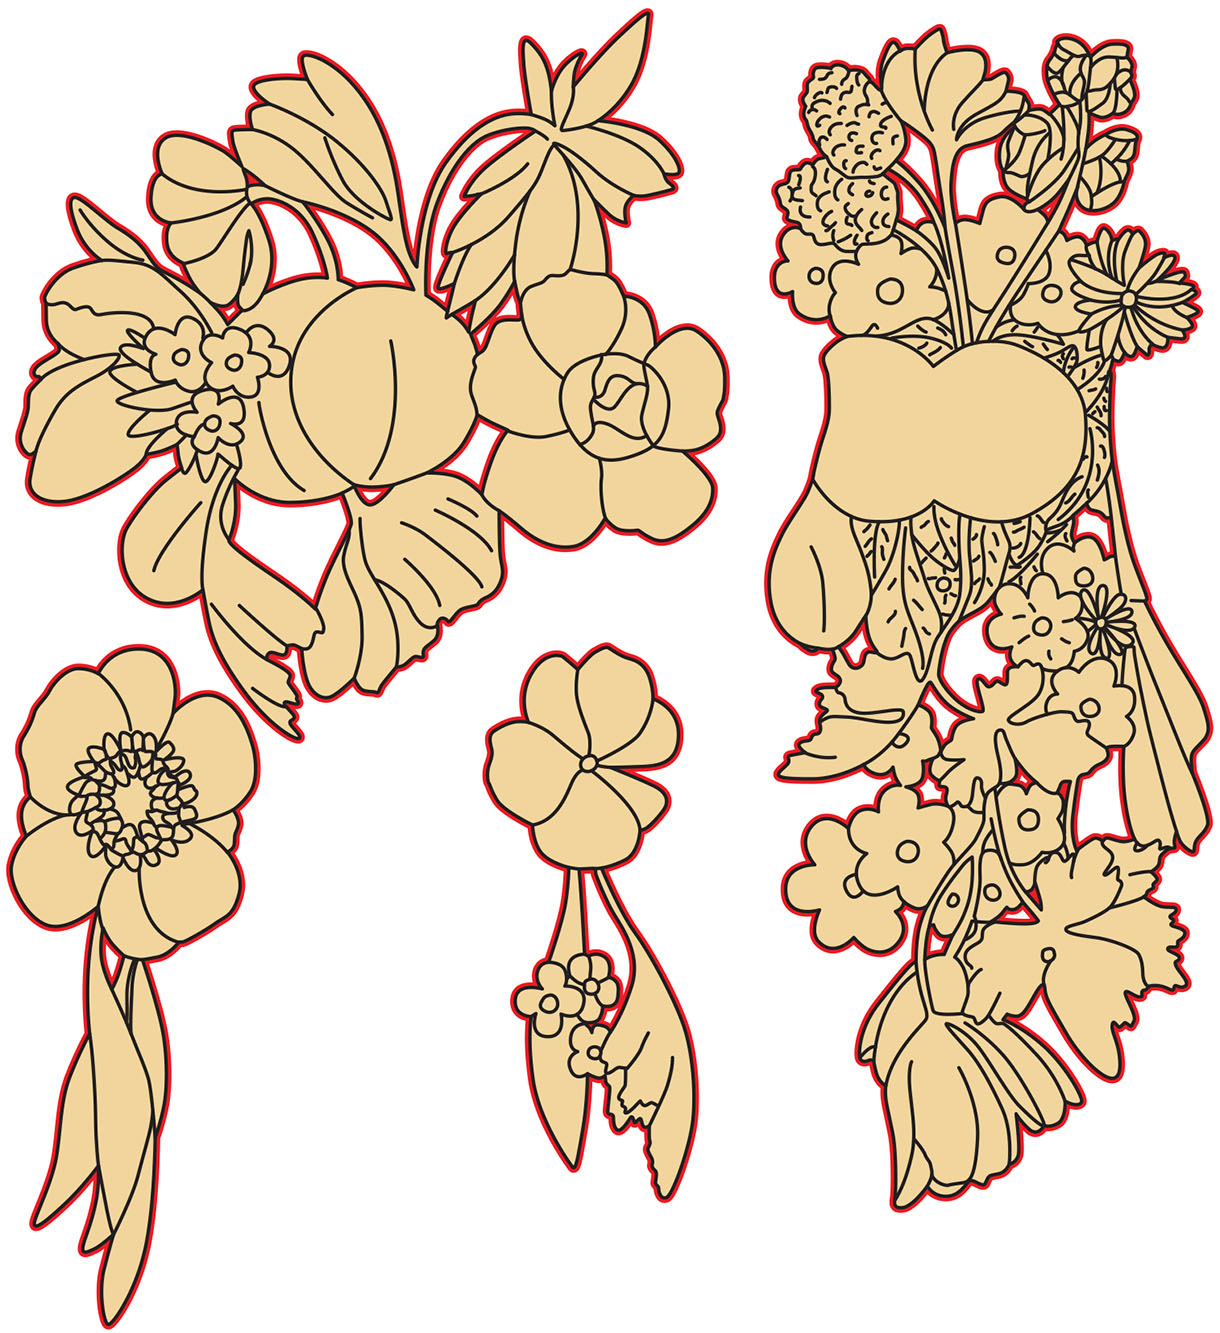
Flower festoon plan
How to resize drawings
To enlarge or reduce the size of drawings right click on the image to download it and then go HERE to watch a video on how to use paper with a grid to do exactly that.
Overmantels, festoons, garlands, swags and drops
The ‘naming of parts’ in large decorative carvings can be confusing and terms are often interchangeable. An overmantel, also known as a chimneypiece, is a large carving that occupies the space above a fireplace. But the same form is often used, especially by Gibbons, as a surround for a large portrait painting.
The overmantel is usually in the form of a festoon, also called a garland, with a horizontal cresting across the top and two vertical sections at the sides. The term ‘festoon’ is sometimes used purely for the top cresting, but also often for the whole assembly of top and sides. The horizontal top section is also called a swag. The vertical sides are also often called festoons, but are also known as drops and even swags and garlands. There is no universal agreement on the correct terms, so you can use the names festoon, garland, swag and drop with a fair amount of latitude.
Preparations
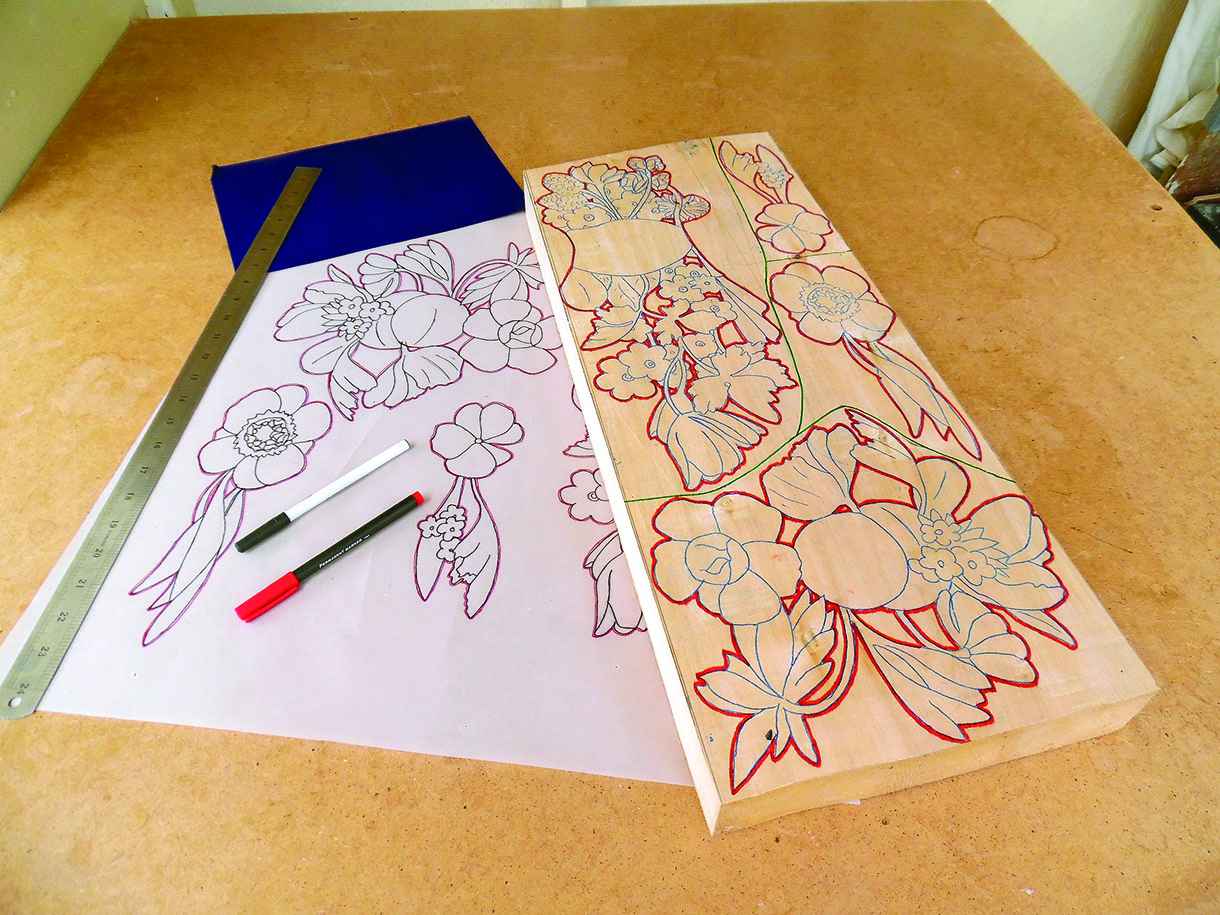
1. Get some lime (tilia vulgaris) 50mm thick. A board 640 x 260mm can accommodate all the pieces if arranged carefully, or other options can be used. Make a full-size copy of the drawing so that the base layer is 430mm long from end to end, trace the pattern onto the wood then cut out the four sections with a bandsaw, scrollsaw or jigsaw
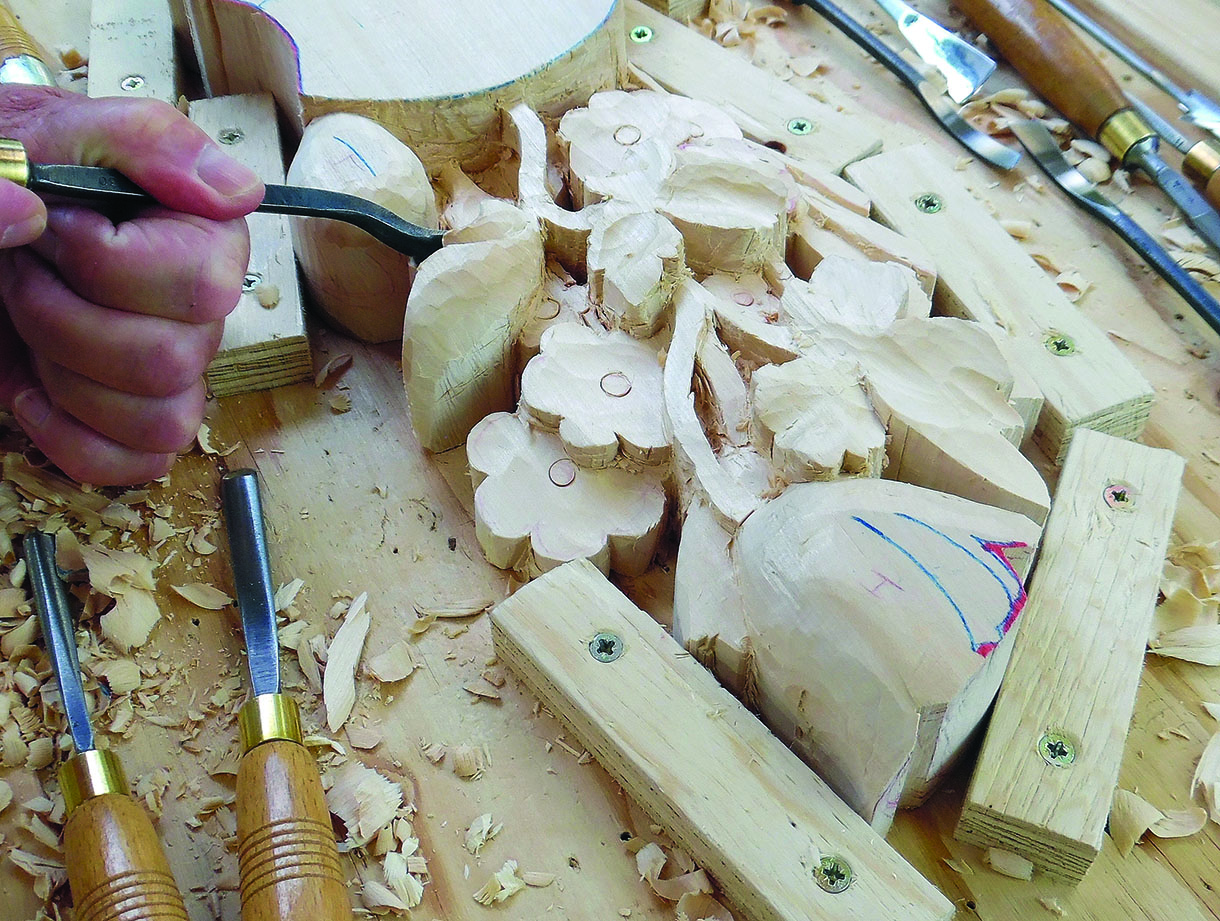
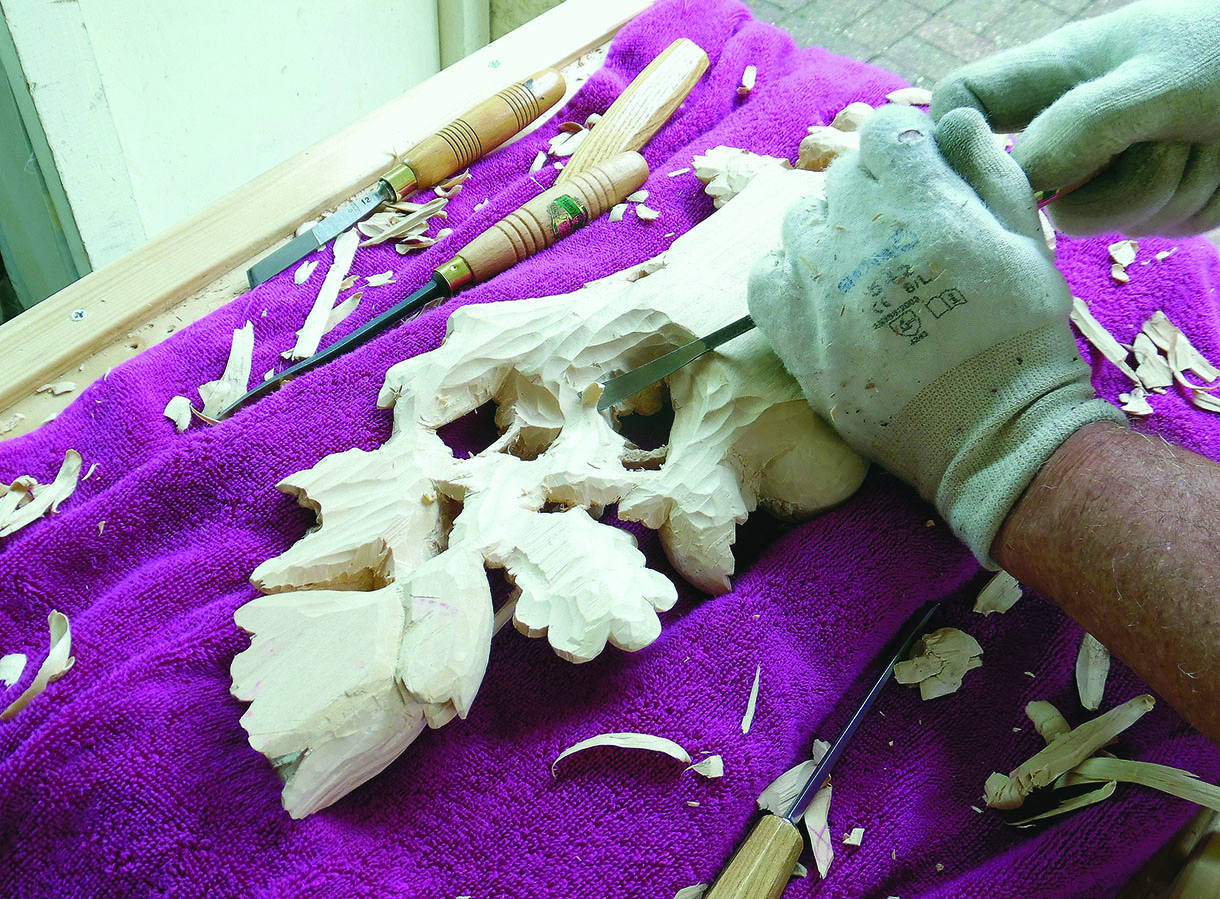
Carving the base layer
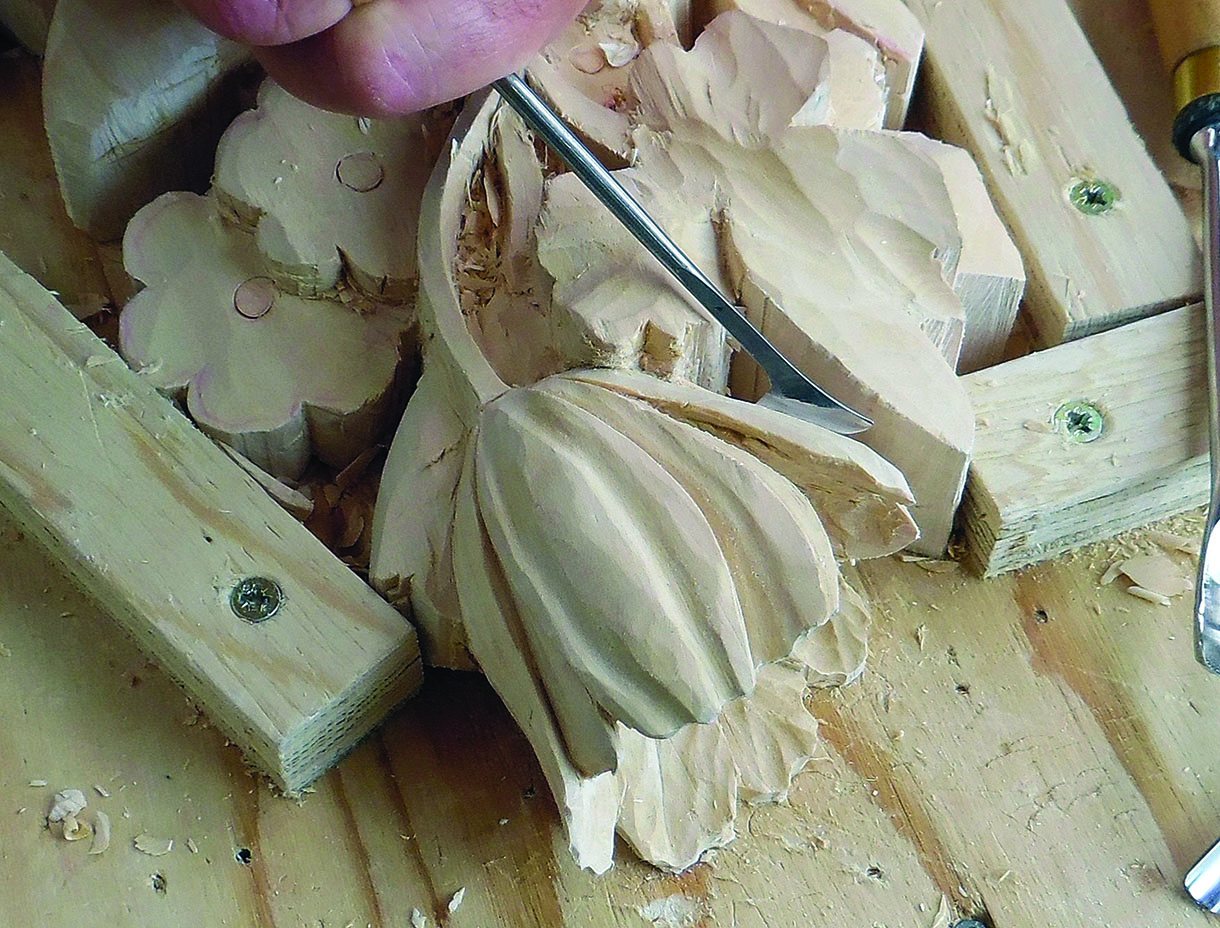
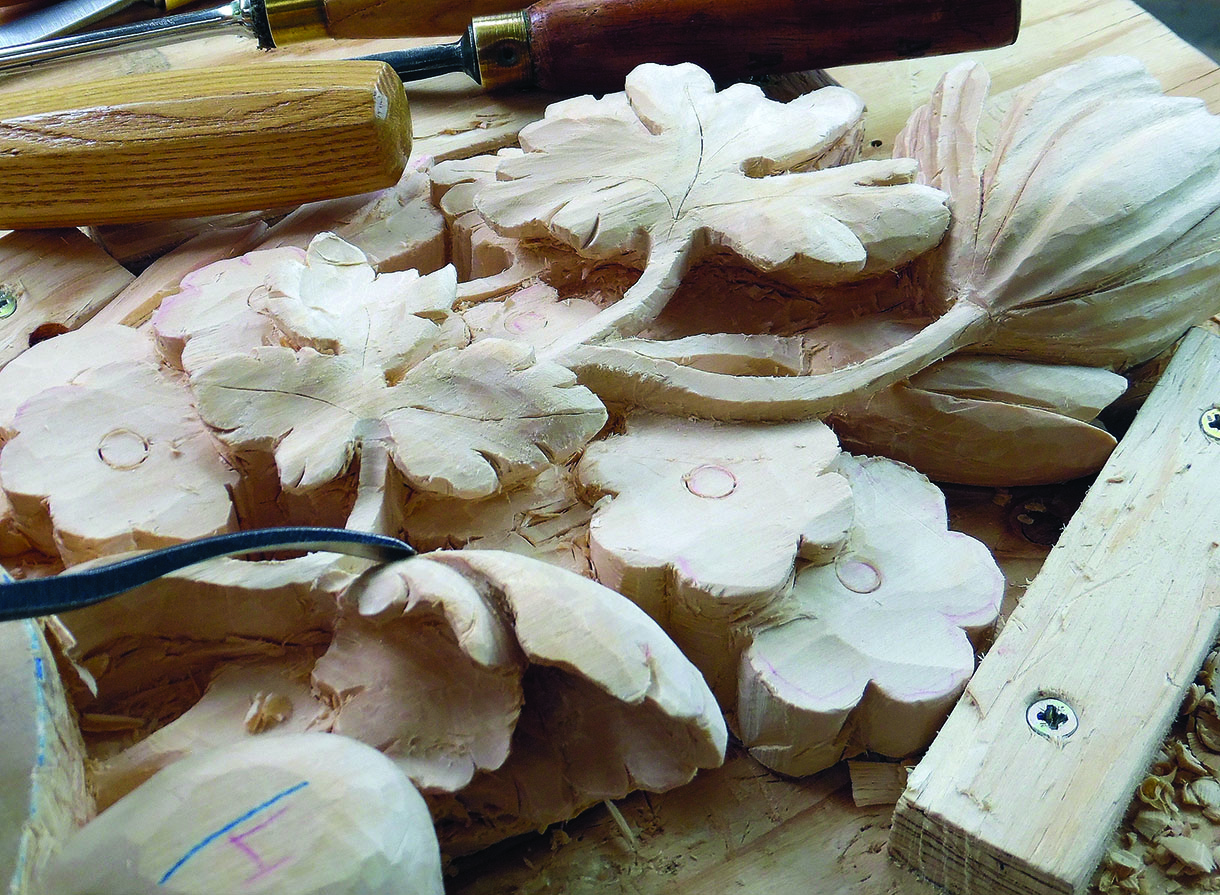
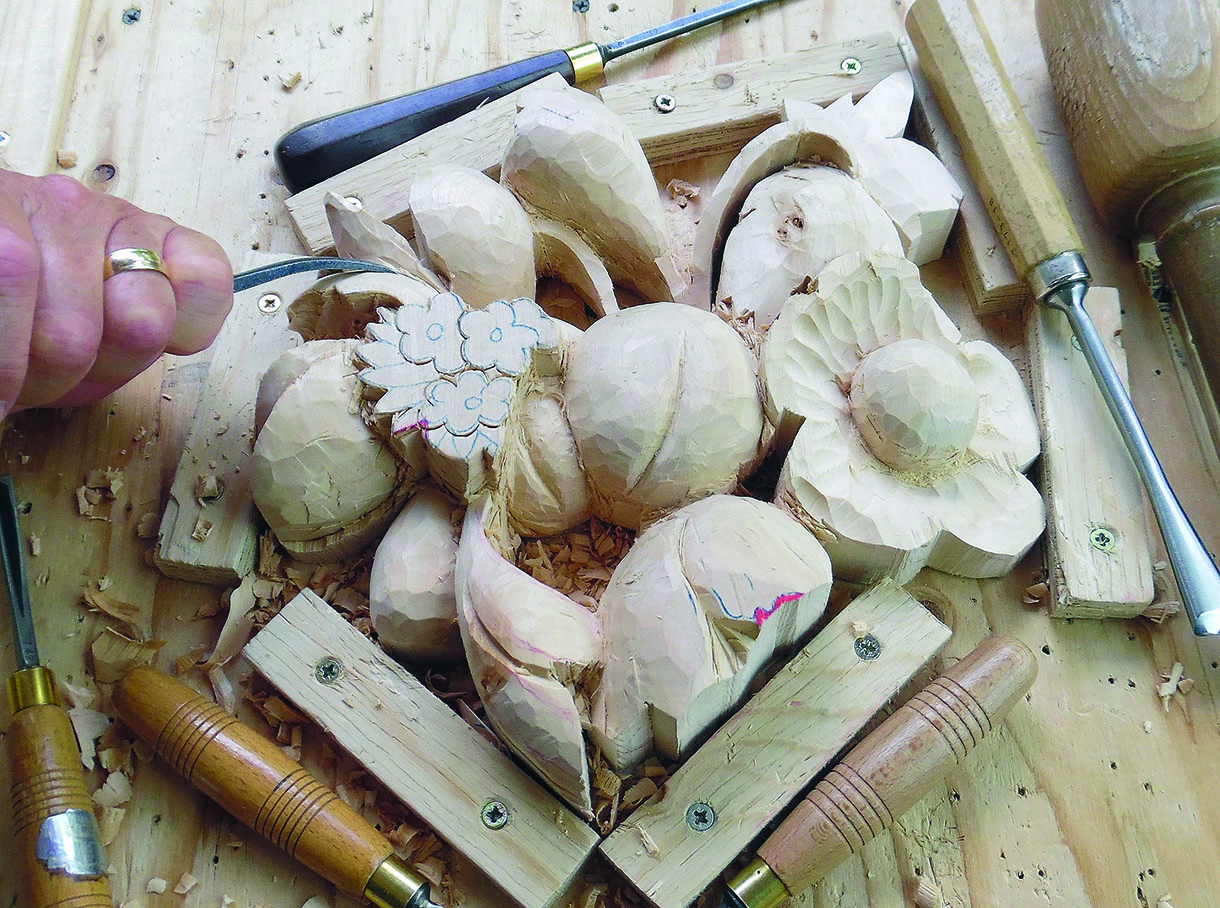
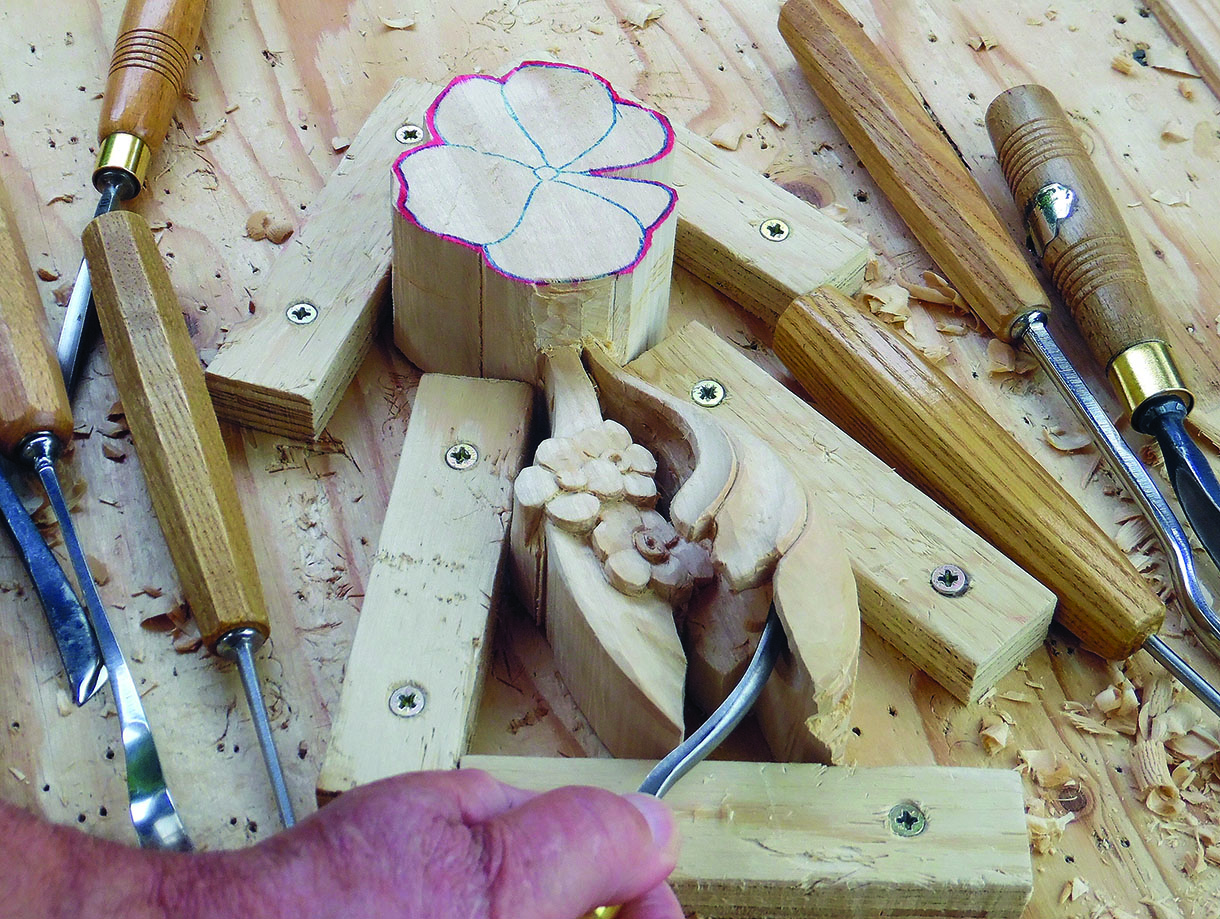
2. Secure the base section to the bench with some strips of wood. Mark each element to show whether it is high, medium or low, then reduce the levels of the medium and low elements, leaving the high elements standing clear3. Now rough out the shapes and levels of the high elements which are the key features. Make them three-dimensional, rounding off the big flower and the plum, and putting plenty of curl in the leaves4. Start the detail carving with the big flower at the bottom. It is best to hollow this out first with a drill and spoon gouges before carving the petals. The dome shape can withstand pressure from the outside better than from the inside. Use the full thickness of the board for this flower5. Also in a forward position are several three-lobed leaves. Most have a gentle curl with lots of ‘slashes’ around the edges, but the leaf in the upper left has a pronounced curl which must be hollowed out with spoon gouges6. Carve the plum on the left and the peapods on the right, then excavate around and under the leaves and stems to expose the lower levels. Here you can carve the small, flat flowers that populate the undergrowth – a Gibbons trademark. Link them together so that a solid band of wood is concealed behind them to create a supporting structure, allowing the stems to be very thin and ‘fly’ over the lower areasTOP TIP
Thin stems which turn across the grain tend to break in the short-grain turn. You can strengthen them by cutting a thin sliver of long-grain wood and gluing it to the underside of the turn where it will be invisible when finished.
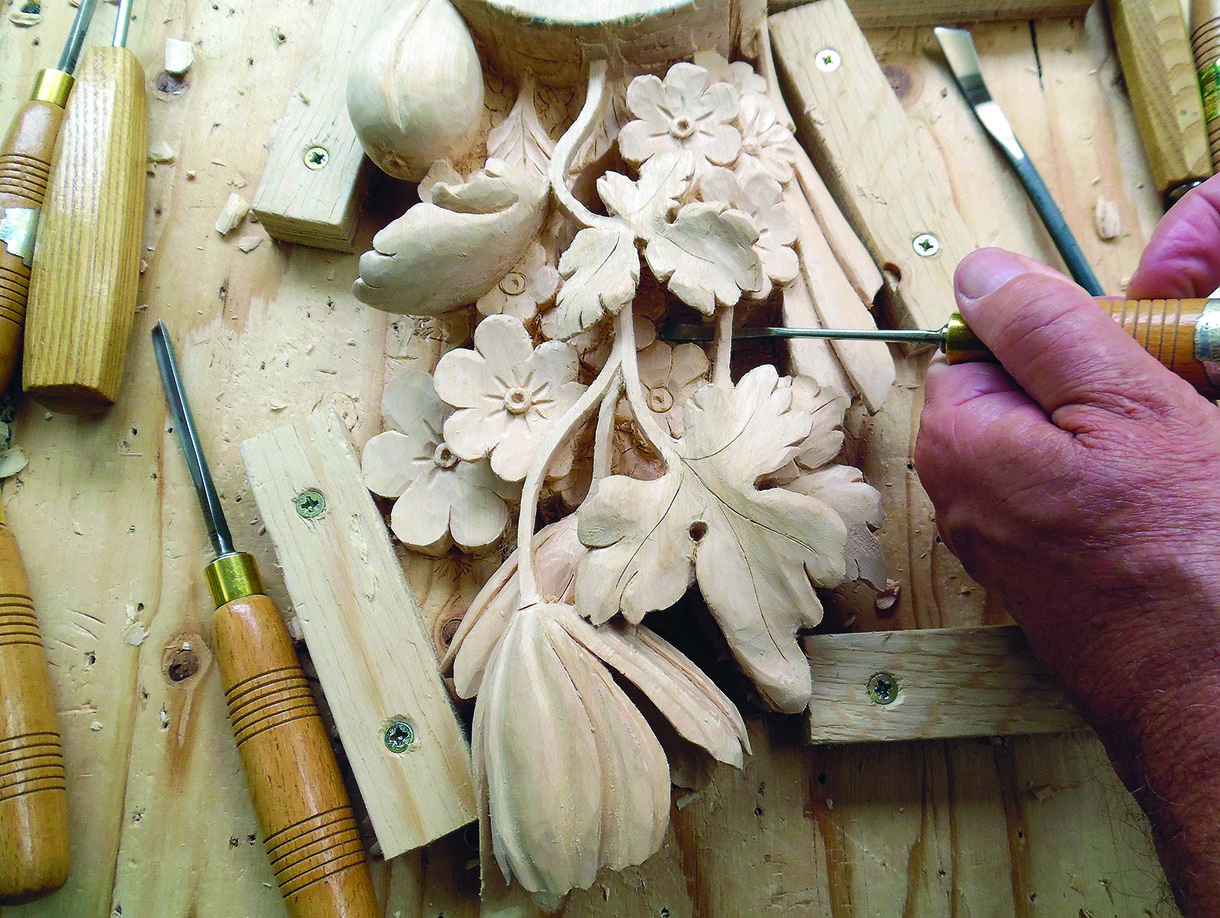
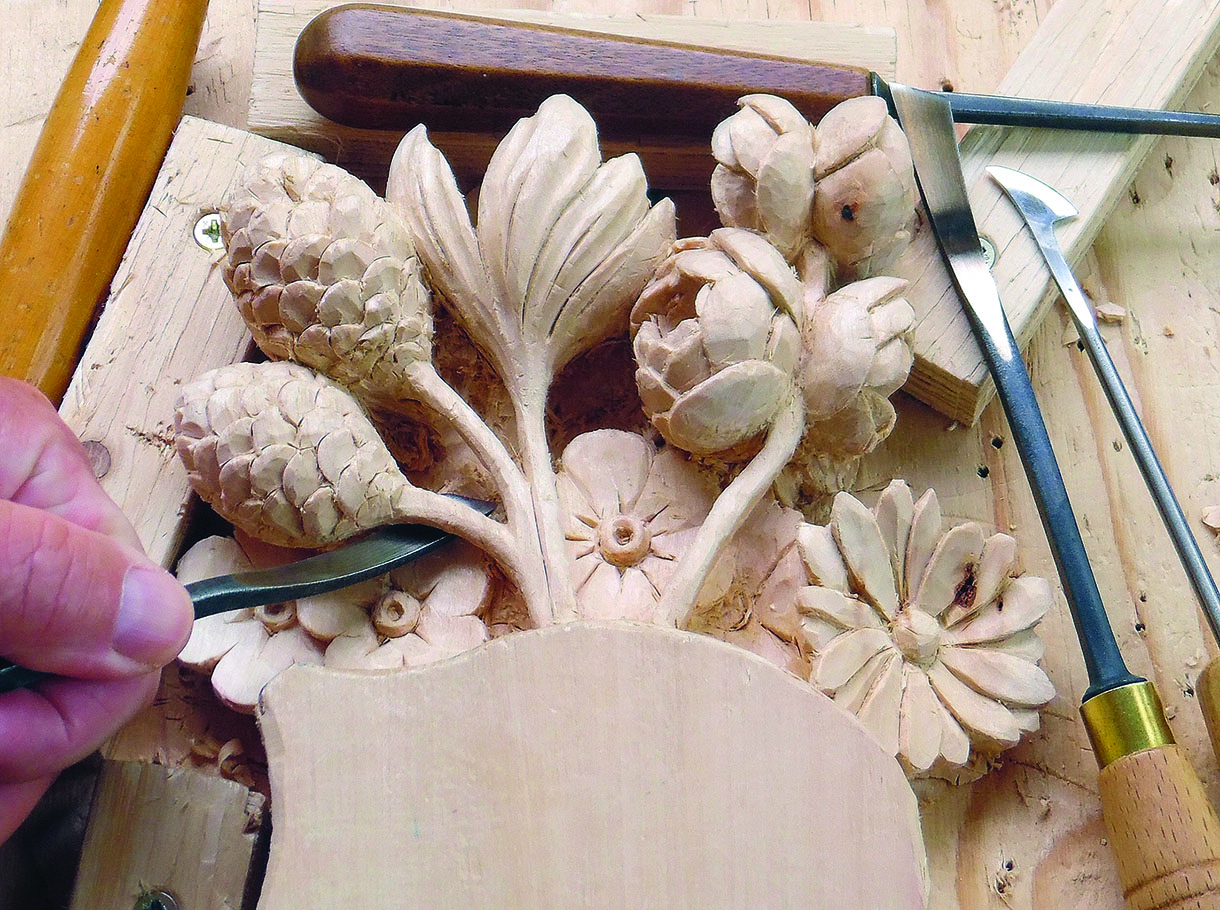
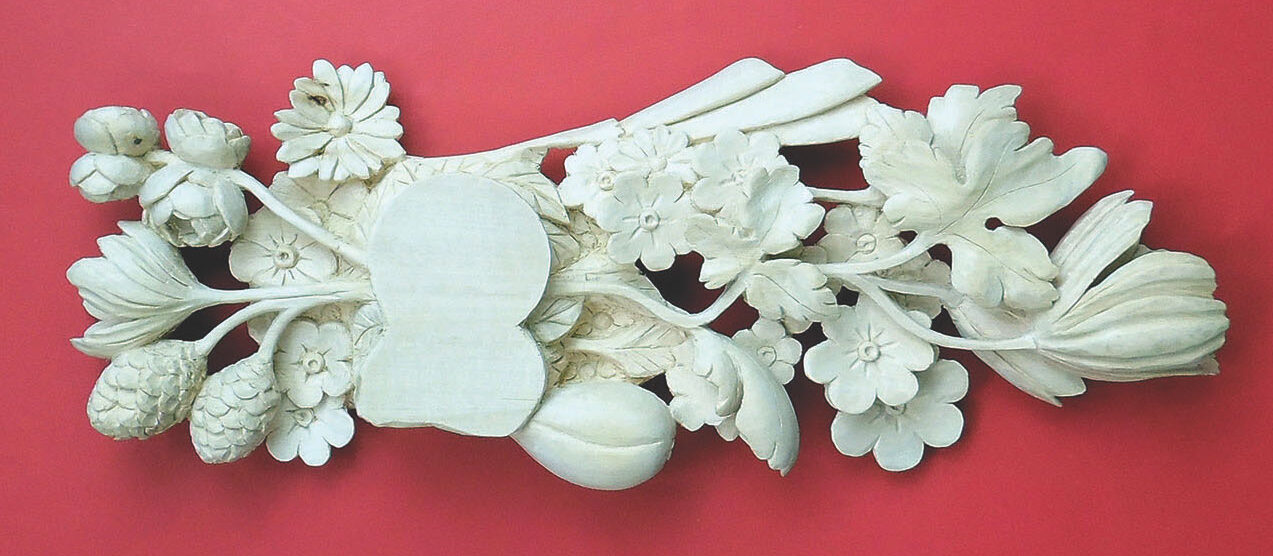
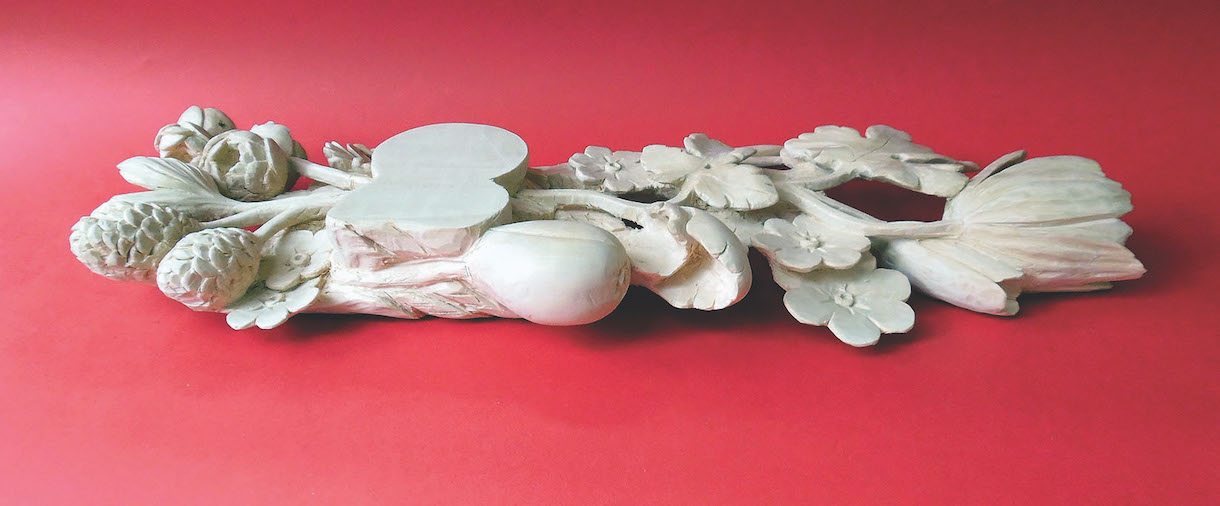
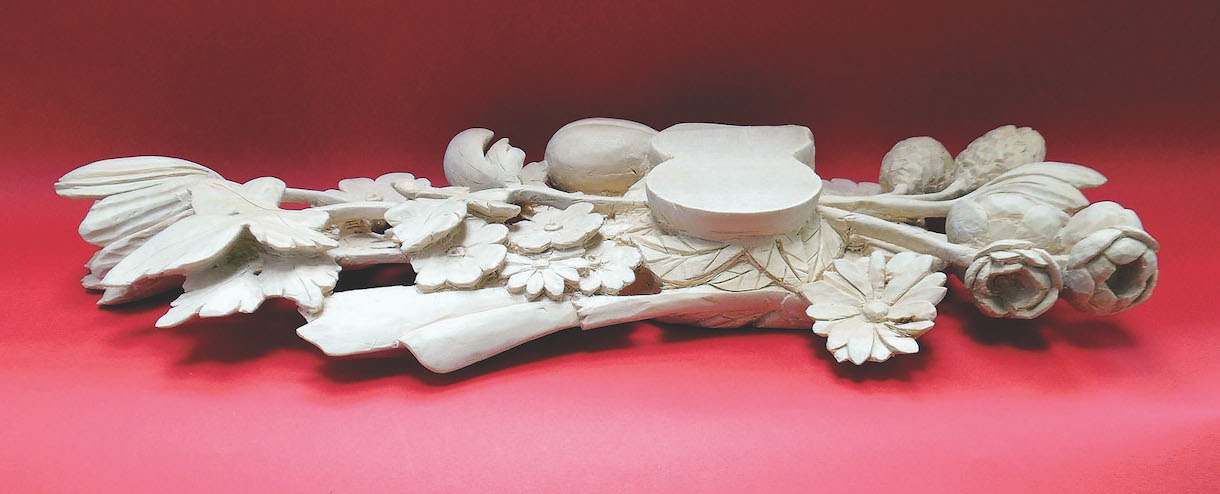
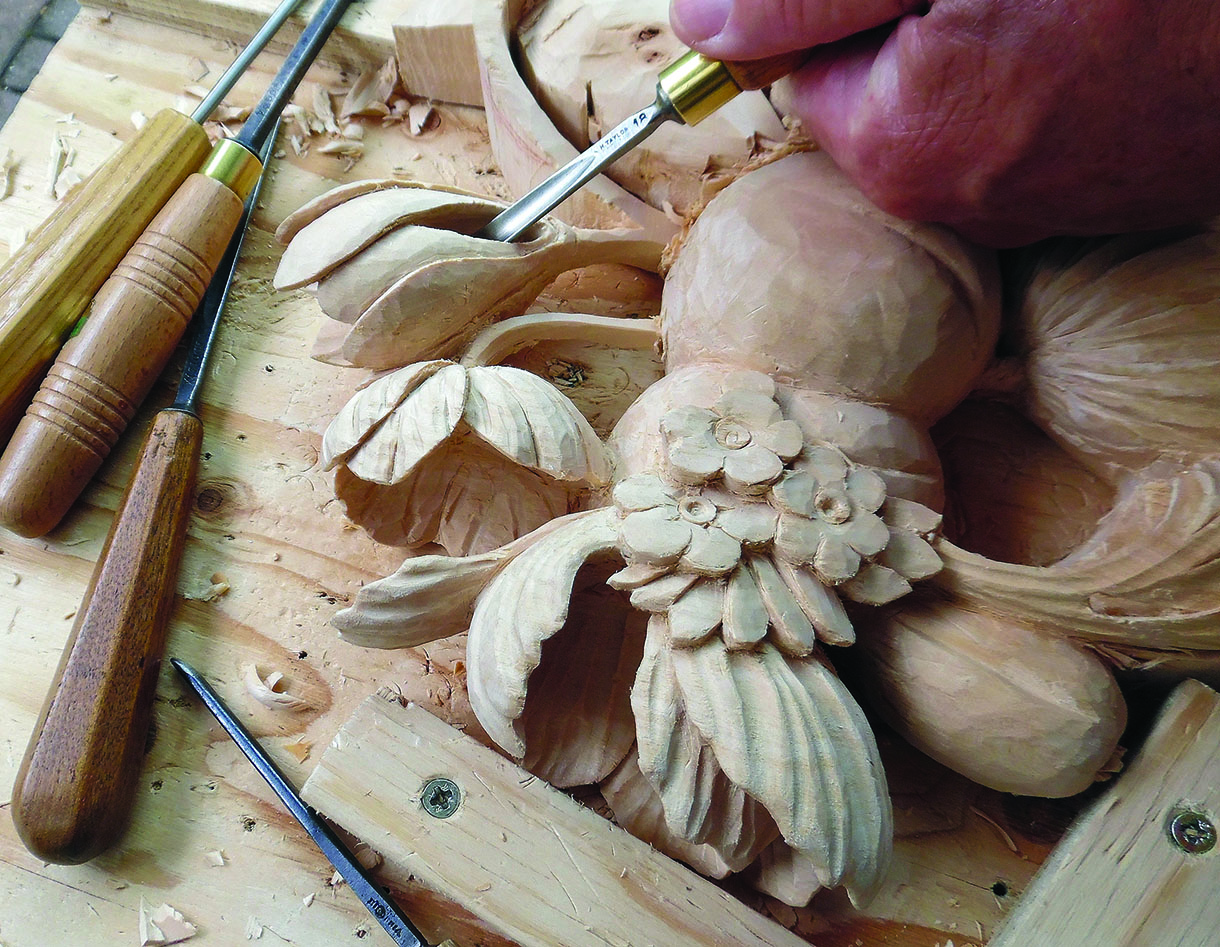
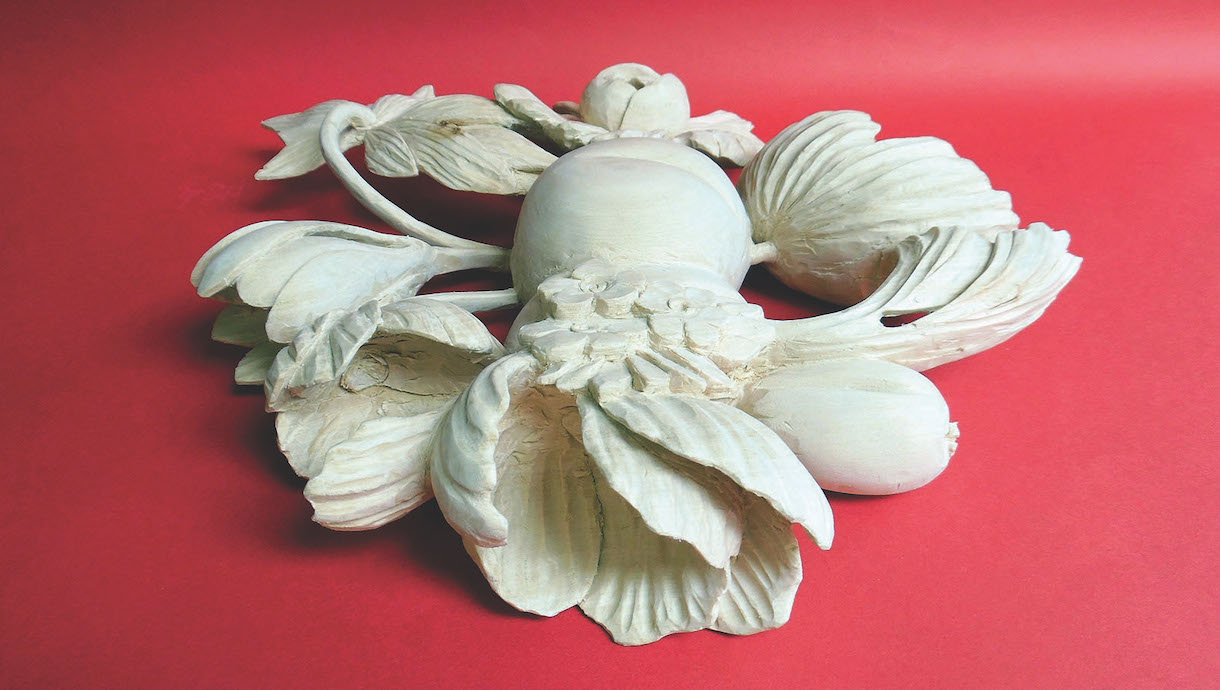
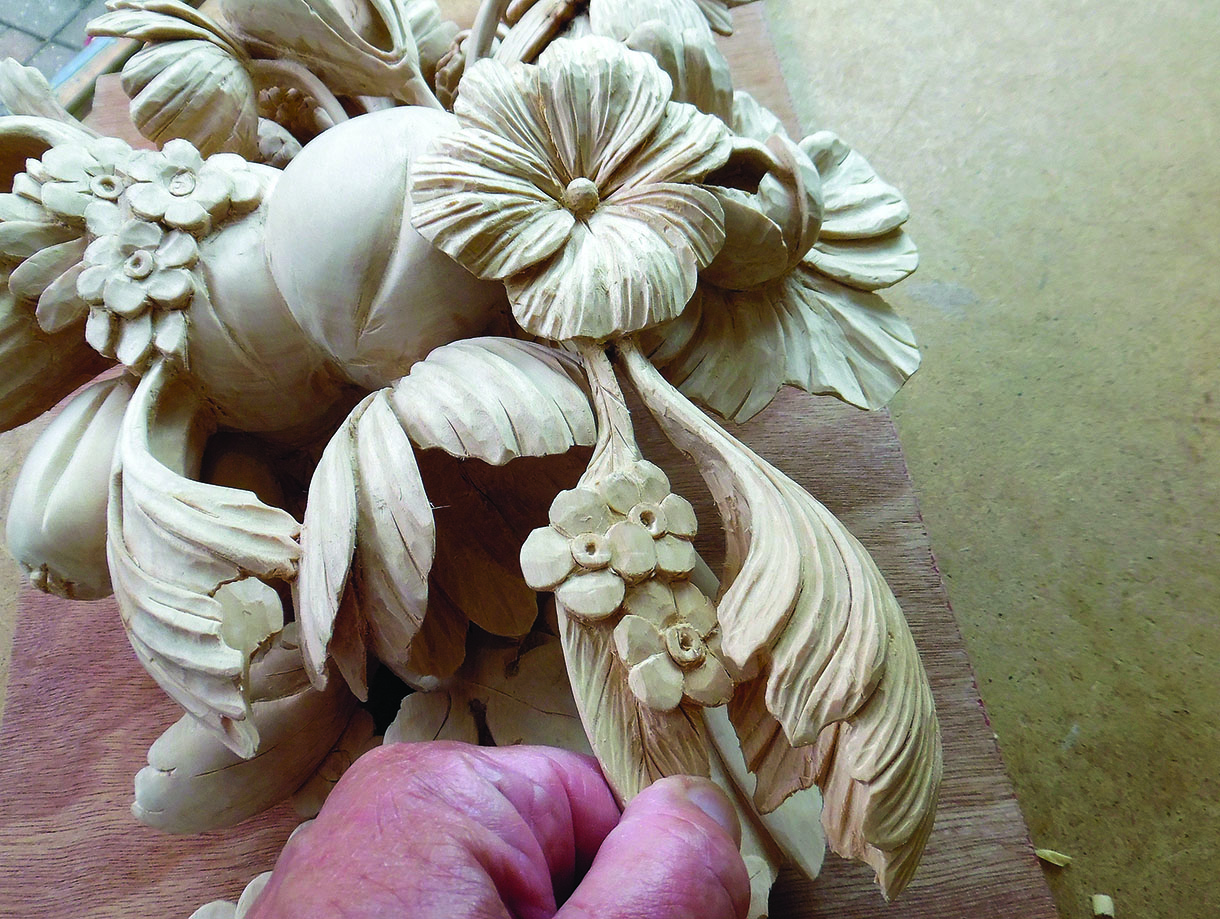
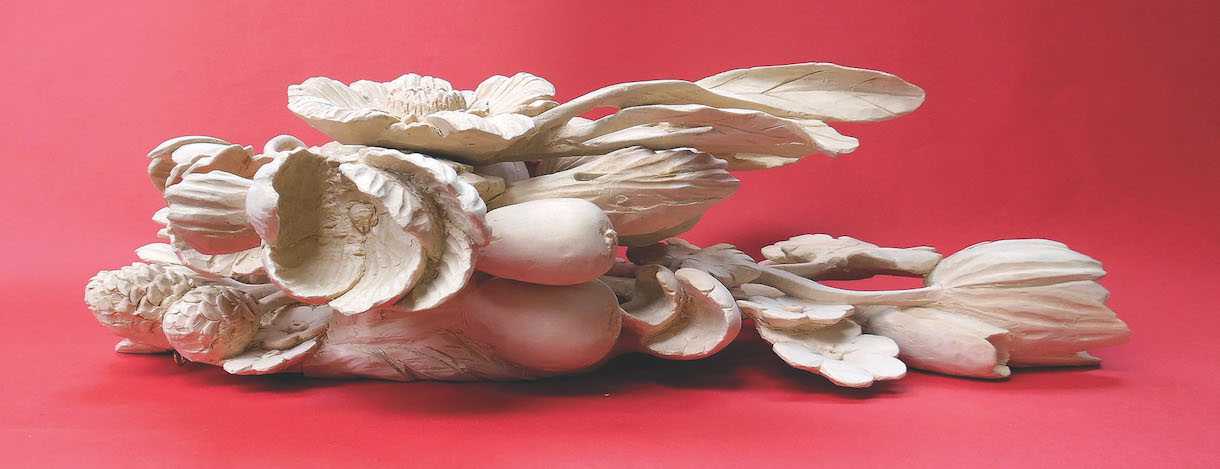
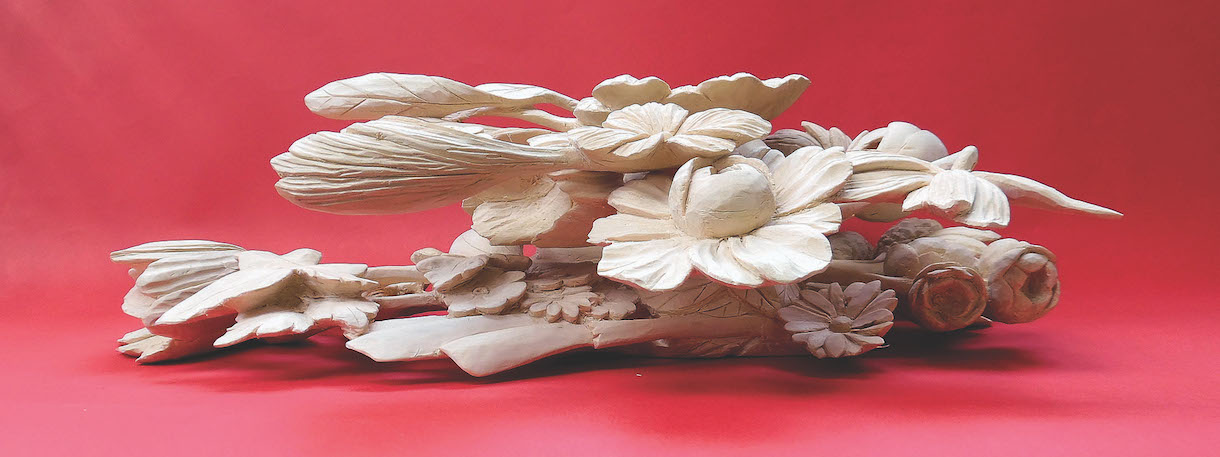
7. Repeat these processes on the top part of the base section which is above the flat attachment platform. The top section has some flowers, some small cones and roses, some stems and several of the flat ‘undergrowth’ flowers8. Finish the base layer by carving some rudimentary leaves as ‘undergrowth’ around the support platform, then lay the carving face down on a soft surface and undercut from the back. Shave away under the leaf and flower edges to give a sharp edge, and open through all the gaps between the foliage so the whole piece looks light and airy from the front and sides9a. Lime wood generally needs a light sanding with fine abrasive to remove odd fibres, but don’t lose the texture or blur the details. The photos show the finished base layer from the front and sides. Now is the time to fix your hanging fittings on the back before the next layers go on9b.9c.
Carving the middle layer
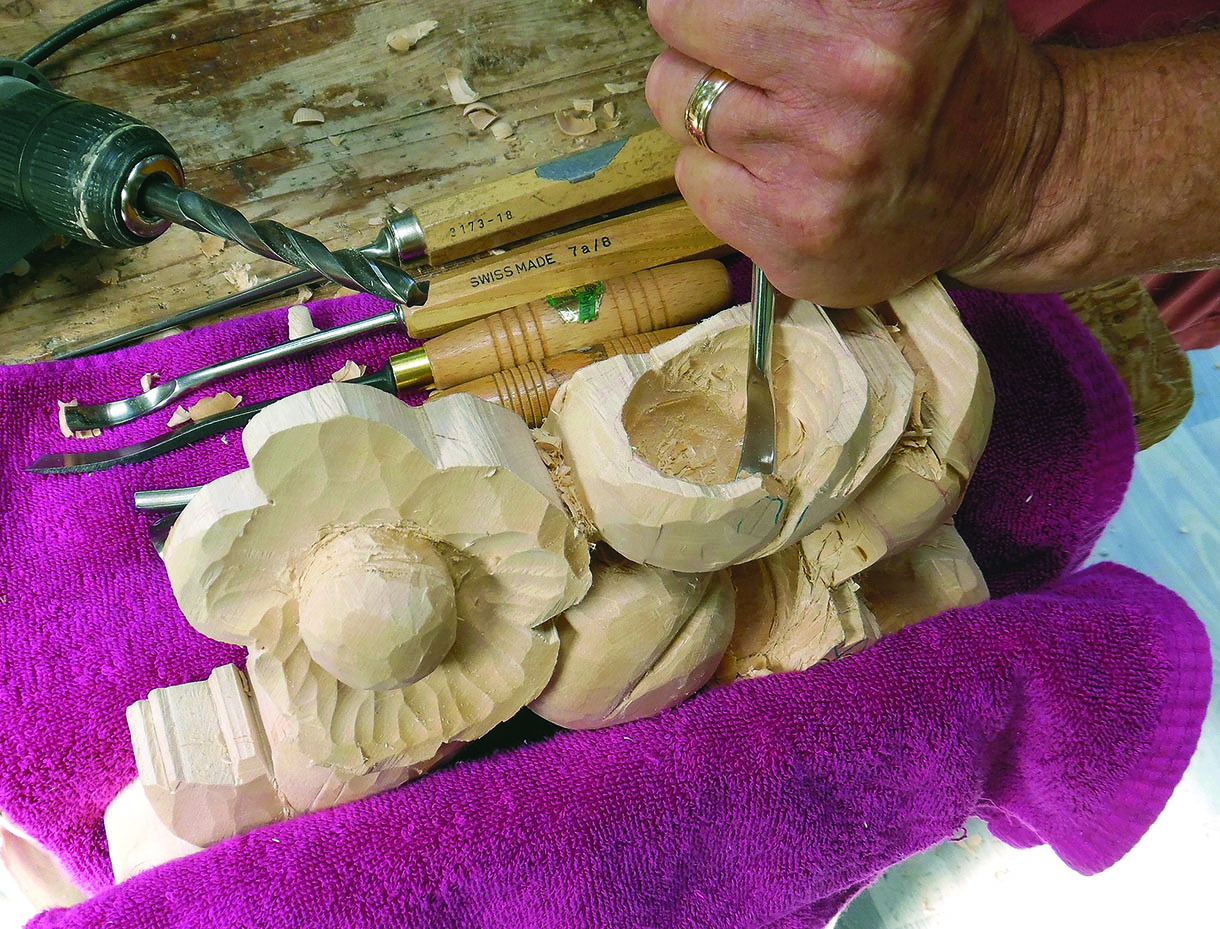
10. Rough out the levels of the middle layer, which sits on the support platform of the base layer. The elements on this layer are mainly large flowers that require the full thickness of the 50mm board. The peaches in the middle will be the support points for the forward layer11. Several of the flowers need deep hollowing and the bulk of this is best done now. It is easier to work if you secure the piece on its side in a bench vice with some padding. You can first make a hole with a drill, then open it out to the required width and depth with a spoon gouge. The flowers are ‘foreshortened’ with an oval hollow to make them look deeper than the 50mm board12. The large bell-shaped flowers mostly have a gap among the upper petals which gives a view of the interior and the rear petals. The gap makes the final hollowing a little easier, but also more necessary as all the petals must be thin with sharp edges13. There are more hollow flowers in the top left, including a crocus flower hollowed through from the stem end to the open top – a motif favoured by Gibbons at Hampton Court14. On the right-hand side there are two fully-open flowers. One faces us, sloping down to the right. The other has its back to us with its stem protruding in the foreground – another favourite Gibbons motif15a. With the piece undercut, opened through and lightly sanded, it should look like photos 15a to 15c, shown from the front and both sides15b.15c.16. Position the middle layer on top of the base layer as shown here. Tap a couple of panel pins into the middle of the peaches in the base layer, snip their heads off and push the middle layer on to them to mark the hole positions in both pieces. Now drill 6mm holes about 25mm deep in the joining sides of both layers in the positions marked by the nails and insert 6mm dowels about 45mm long. Don’t glue them yet as you may need to take them apart againTOP TIP
Some parts of the carving can become very fragile when flowers are carved thinly. You can brace them from behind by adding extra stems attached to more solid parts to prevent damage in use.
Carving the forward flowers
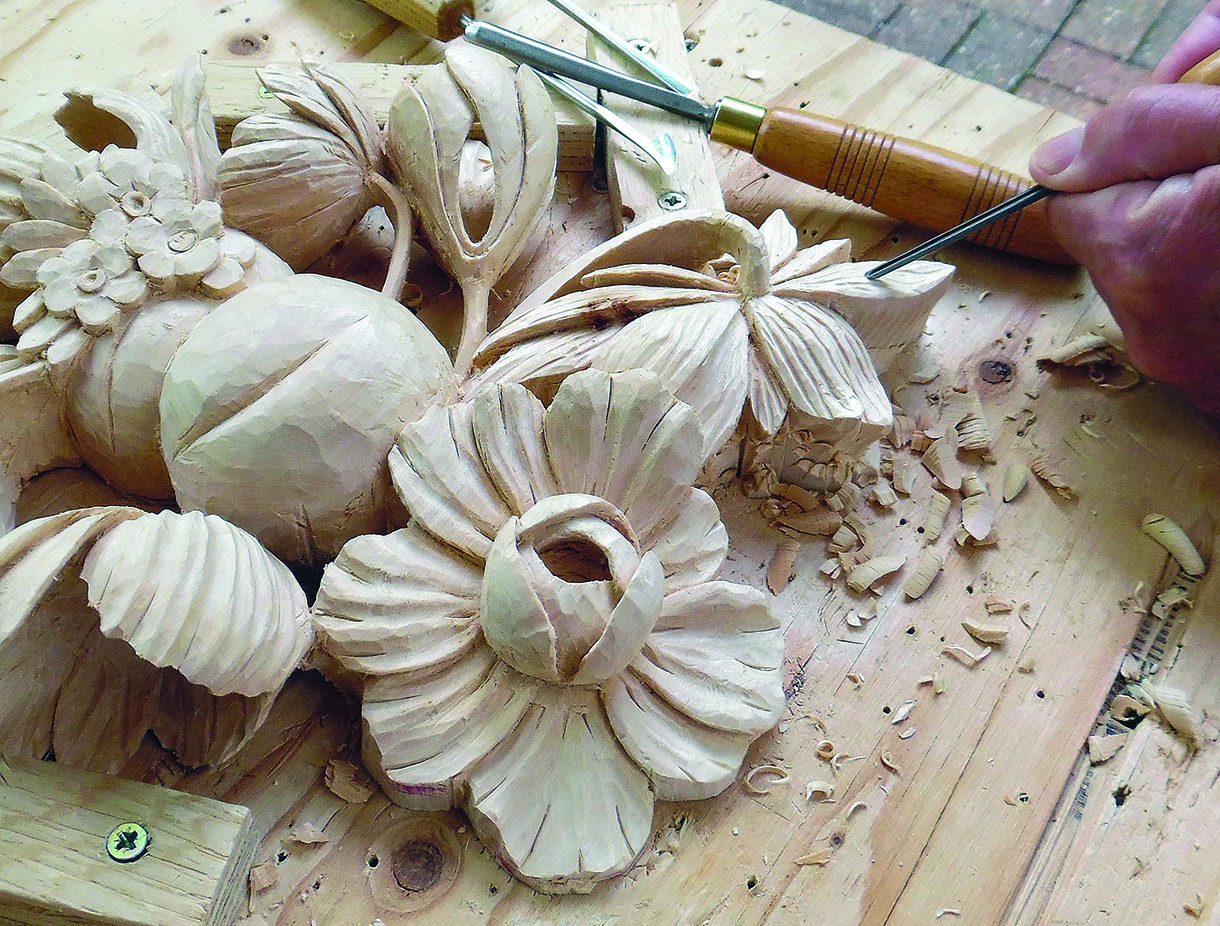
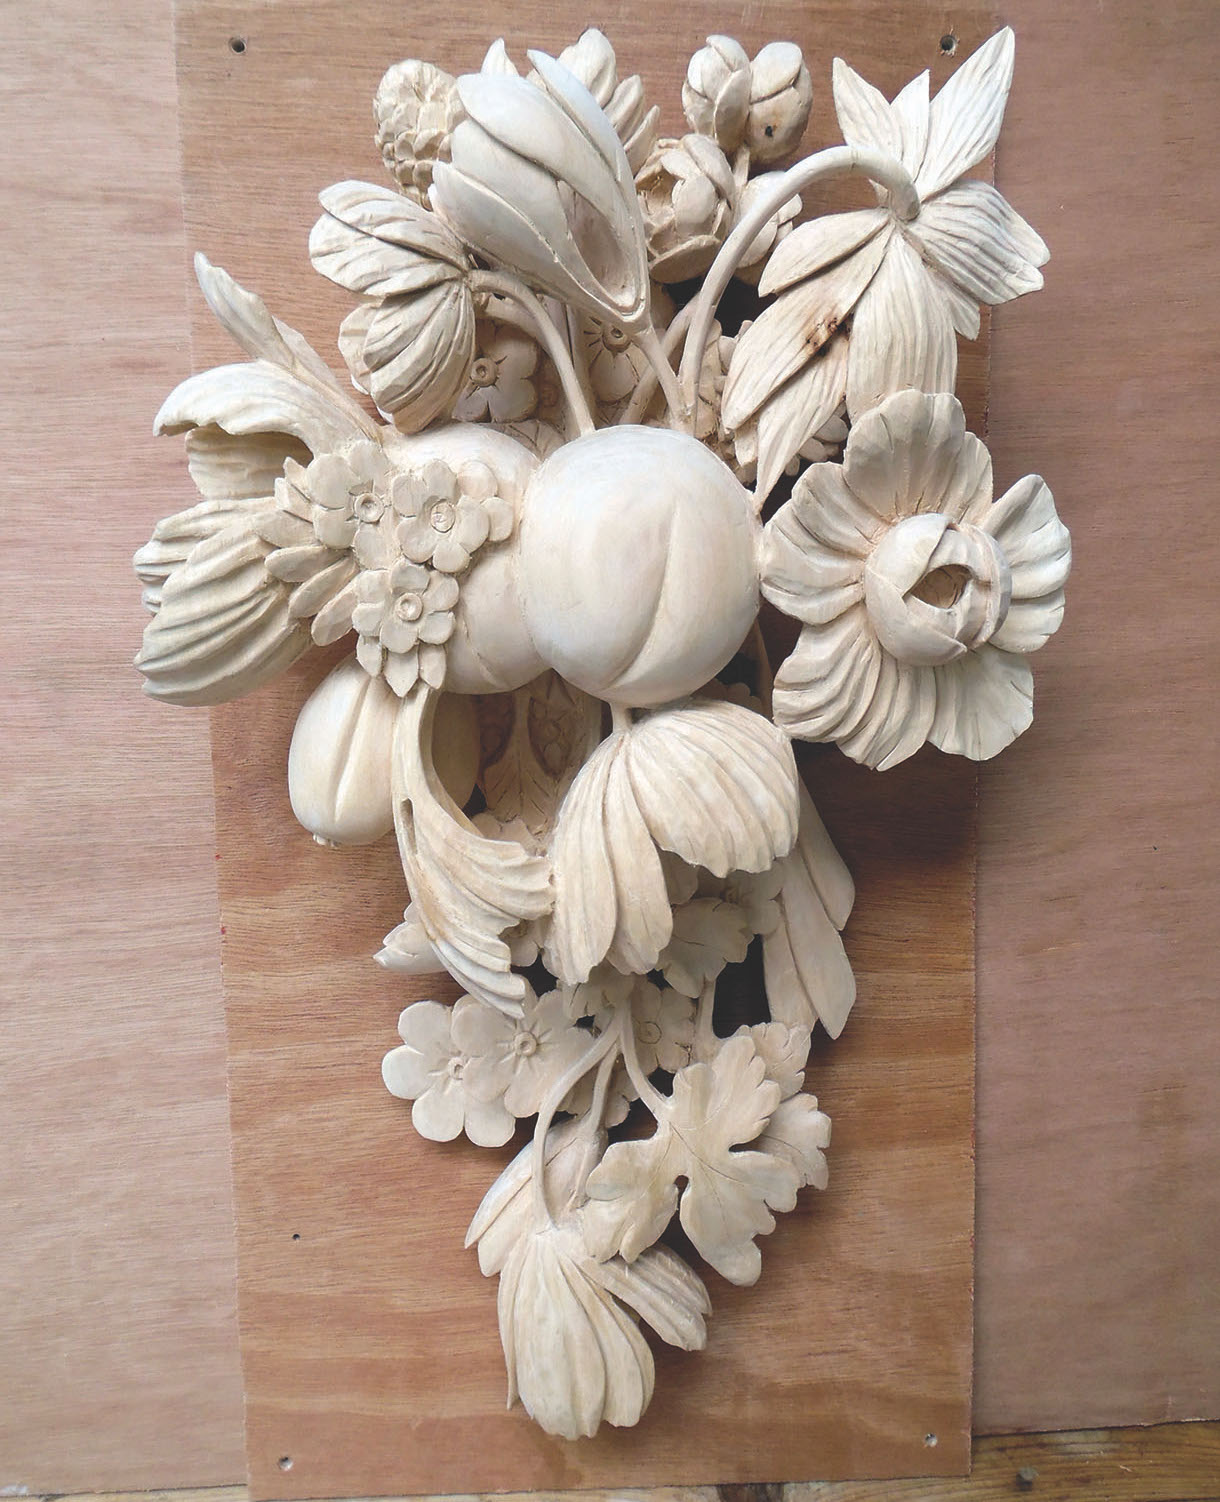
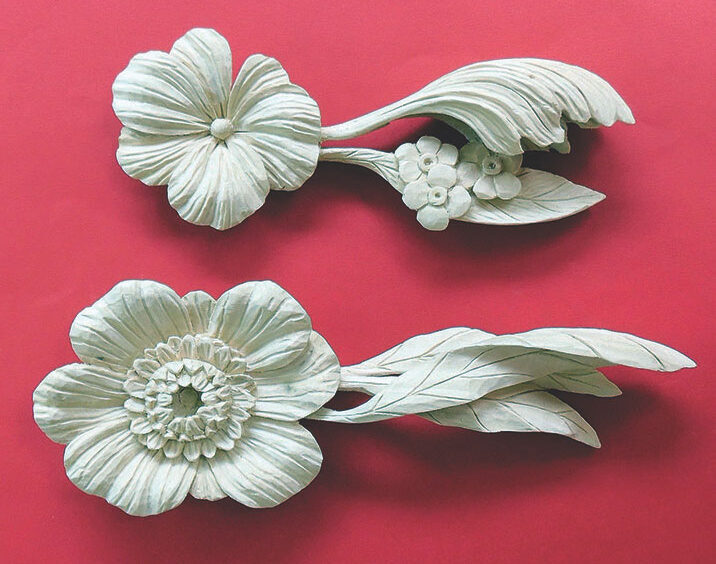
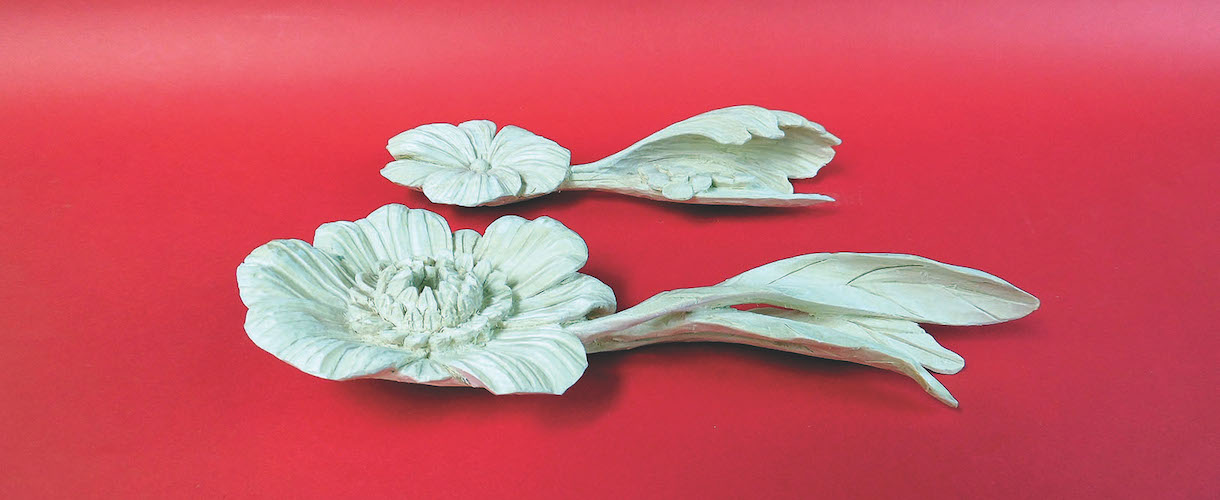
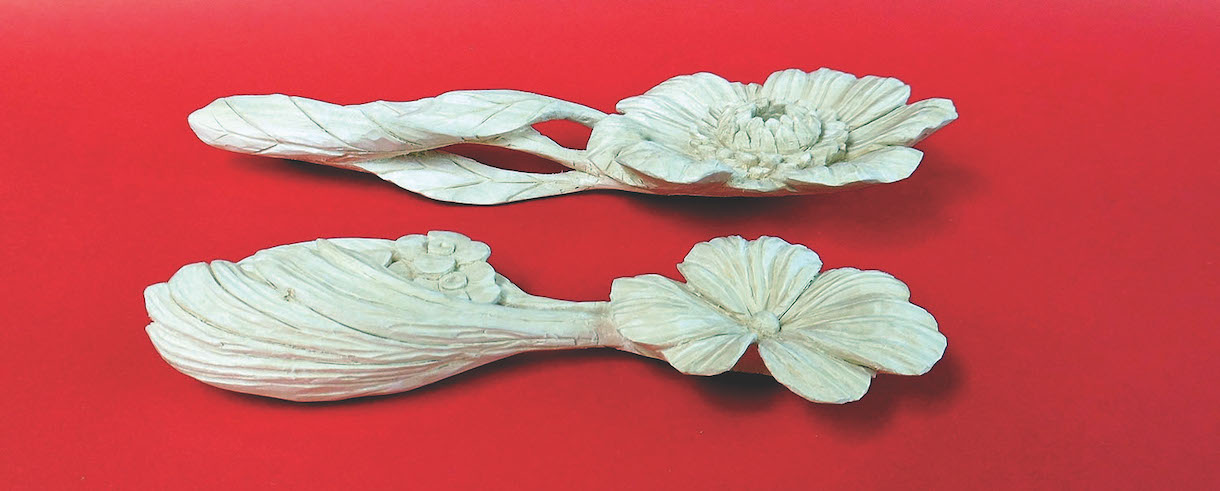
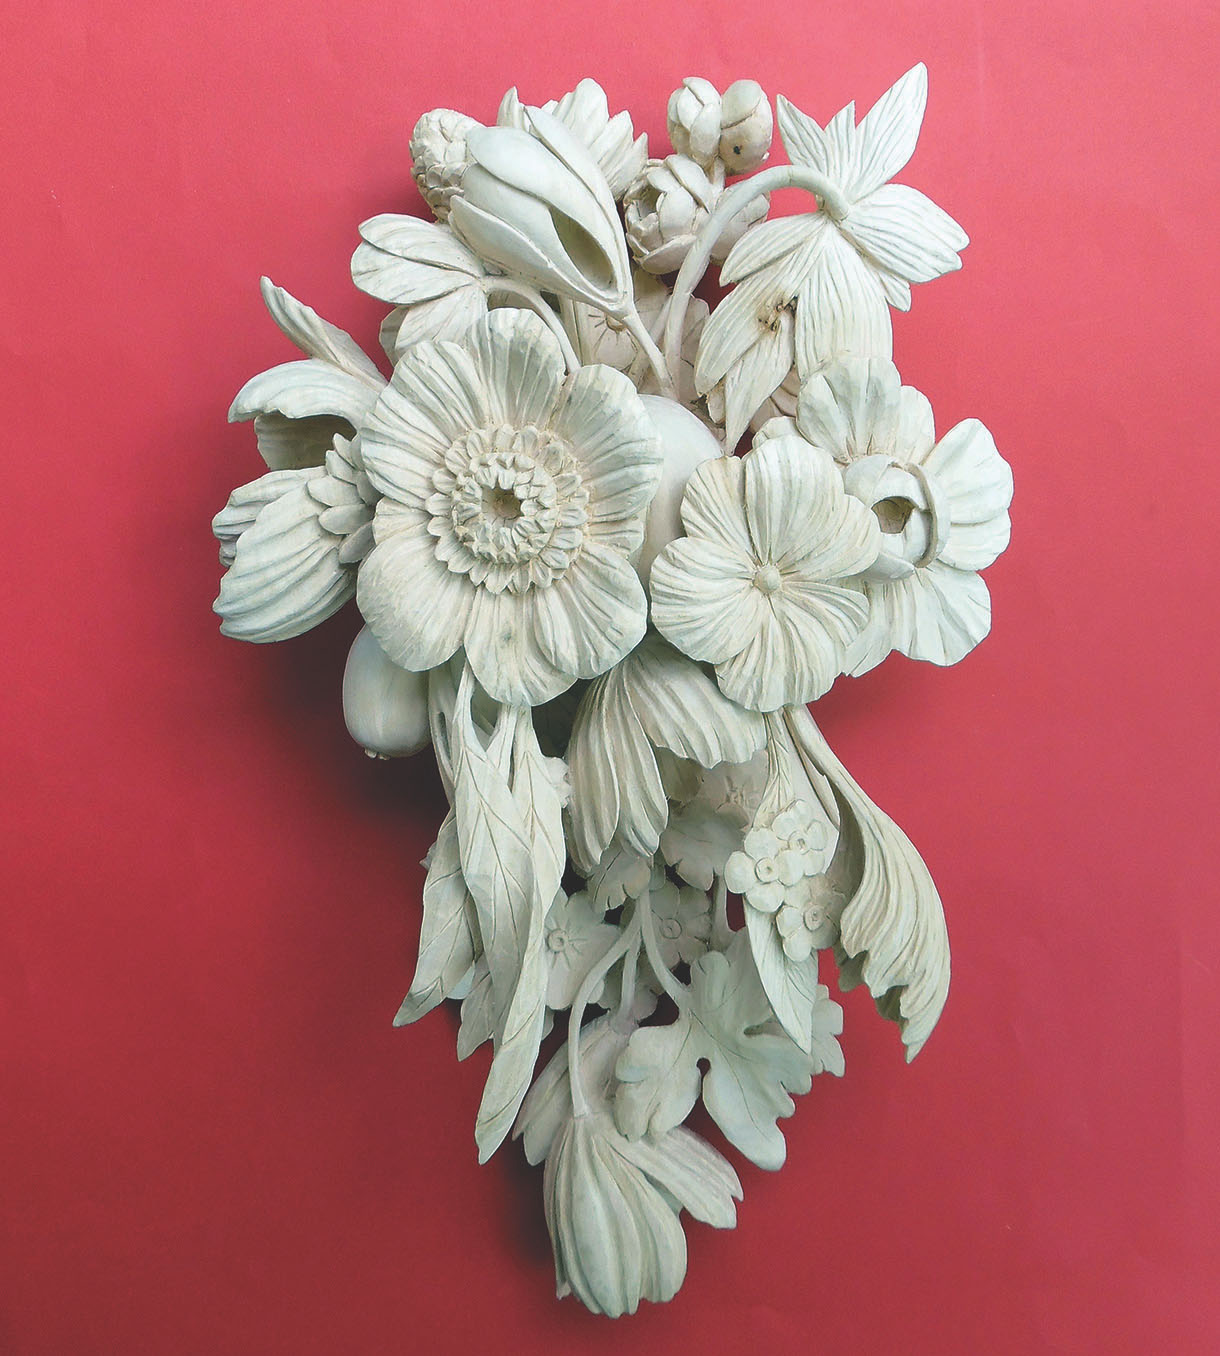
17. The two flowers that make up the forward layer both have long flowing leaves hanging down from under them. Build plenty of rise and fall into these leaves, and check how they will touch the elements on the middle layer. The smaller flower doesn’t need the full 50mm thickness of the board so you can cut the board down to 40mm thick to save some undercutting18. When you undercut, mould the underside of the flower to fit its position beside the large peach in the middle layer. The small flower spans from the right of the peach on to the large flower on the outside, with one of the leaf stems touching the large flower in the right centre below it. Try to find three points of contact to give it more strength and stability19. The larger flower has some very curly leaf stems and a more complex centre. The flower head needs to face a little to the left and, when undercut, fit on the left side of the peace20a. Photos 20a to 20c show the finished flowers, fully undercut and lightly sanded. They must be glued into position on the middle layer, ideally with three points of contact. A short piece of dowel protruding about 6mm into the underside of the flower from the adjoining peach will help to give the join long-term security20b.20c.21a. With the middle layer glued to the base layer, and with the forward flowers glued in place, the carving is now complete. Photos 21a to 21c show it from the front and sides. You can hang it directly on the wall, or you could mount it on a polished oak board to reflect the ‘wainscot’ on which Gibbons’ festoons were mounted21b.21c.
Recommended reading
David Esterly – Grinling Gibbons and the Art of Carving (V&A Publications) – the definitive, fully illustrated ‘textbook’ on the life and work of Grinling Gibbons.
David Esterly – The Lost Carving (Duckworth Overlook) – His own account of a year spent remaking a Gibbons carving at Hampton Court after the devastating fire of 1986 and the complex story surrounding the restoration.
I replied to this article earlier today. What I didn’t mention was (and I understand so many photos are already exhibited) I would have liked to see one photo of the pins in place so I could see how that is accomplished. It would be helpful to those of us who do not have a lot of carpentry experience. That being said this article was very helpful and many thanks for publishing it. Steve Bisco is an excellent carver and seems to know exactly what other carvers are looking for in the detailed photos.
I had some brass tacks laying around and cut off the heads, hammered them into the first layer and then slowly pressed the second layer into position to mark it. I ordered the little ribbed furniture pegs that came with a 1/4” drill bit, drilled the 4 spots where the nails pierced, added some glue and put it all together.
Great tutorial, very inspiring. Looking forward to trying. Having the instructions broken down so carefully is also helpful towards designing a custom pattern. The project results here are really beautiful.
To provide the best experiences, we use technologies like cookies to store and/or access device information. Consenting to these technologies will allow us to process data such as browsing behaviour or unique IDs on this site. Not consenting or withdrawing consent, may adversely affect certain features and functions.
Functional
Always active
The technical storage or access is strictly necessary for the legitimate purpose of enabling the use of a specific service explicitly requested by the subscriber or user, or for the sole purpose of carrying out the transmission of a communication over an electronic communications network.
Preferences
The technical storage or access is necessary for the legitimate purpose of storing preferences that are not requested by the subscriber or user.
Statistics
The technical storage or access that is used exclusively for statistical purposes.The technical storage or access that is used exclusively for anonymous statistical purposes. Without a subpoena, voluntary compliance on the part of your Internet Service Provider, or additional records from a third party, information stored or retrieved for this purpose alone cannot usually be used to identify you.
Marketing
The technical storage or access is required to create user profiles to send advertising, or to track the user on a website or across several websites for similar marketing purposes.


4 responses
This was an exceptional study of the carving process and very much appreciated for my learning the fundamentals of the layered carving process.
I replied to this article earlier today. What I didn’t mention was (and I understand so many photos are already exhibited) I would have liked to see one photo of the pins in place so I could see how that is accomplished. It would be helpful to those of us who do not have a lot of carpentry experience. That being said this article was very helpful and many thanks for publishing it. Steve Bisco is an excellent carver and seems to know exactly what other carvers are looking for in the detailed photos.
I had some brass tacks laying around and cut off the heads, hammered them into the first layer and then slowly pressed the second layer into position to mark it. I ordered the little ribbed furniture pegs that came with a 1/4” drill bit, drilled the 4 spots where the nails pierced, added some glue and put it all together.
Great tutorial, very inspiring. Looking forward to trying. Having the instructions broken down so carefully is also helpful towards designing a custom pattern. The project results here are really beautiful.