
Peter Benson considers how repeated application improves our carving
When I was a small child, like many others of my age, I was sent off by my parents for piano lessons. It seemed to have been the thing at the time. I duly went each week and attempted to play the piece I had been set, making most of the same mistakes I had made the week before as I had done little or no practice in the intervening time. I suppose that, as I was around 10 or 11, this is fairly understandable – there were far more exciting things to do with my time.
What I find difficult to understand today is that most of the carvers I come across are not that different. There are those who spend as much time as they can carving and those who carve whenever they can snatch a spare moment, but how much do they actually practise? If you only carve when you meet at club sessions or regular classes you are unlikely to make any significant progress and, even if you carve regularly on your own at home, are you really going to improve much or are you actually only repeating the same mistakes over and over again?
I have probably carved around a hundred heads in my carving life but I still feel I need to practise carving eyes, noses, mouths and ears. What chance does the average carver have of getting these right if they have only carved them two or three times?
I feel we are all guilty of wanting to carve our own masterpieces or challenging carvings but very often don’t know anywhere near enough about the subject we are carving or how to achieve what it is we want. We carve a face and dread doing the eyes, for example, in case we mess them up. As a result, many faces are spoilt because this is exactly what happens.
All this can easily be avoided by slightly changing the way we approach our carving. Even a short period of practice can change things dramatically. It doesn’t have to be a chore or take up much time but it needs to be regular and specific. There are ways of practising carving hands, eyes, noses, ears, mouths and even similar parts of any figure or animal that you intend to carve and, in the next few issues, I will show you how you can do this.
One of the problems of getting detail correct in any carving is that the carver creates his or her own stress as there has almost certainly been a great deal of carving done before the fine detail is attempted.
As a result there won’t be too many opportunities to get it right.
The answer is to practise all of these parts on a waste piece of wood, separate from the carving itself, giving you the opportunity to make mistakes and experiment until the result is what you want.
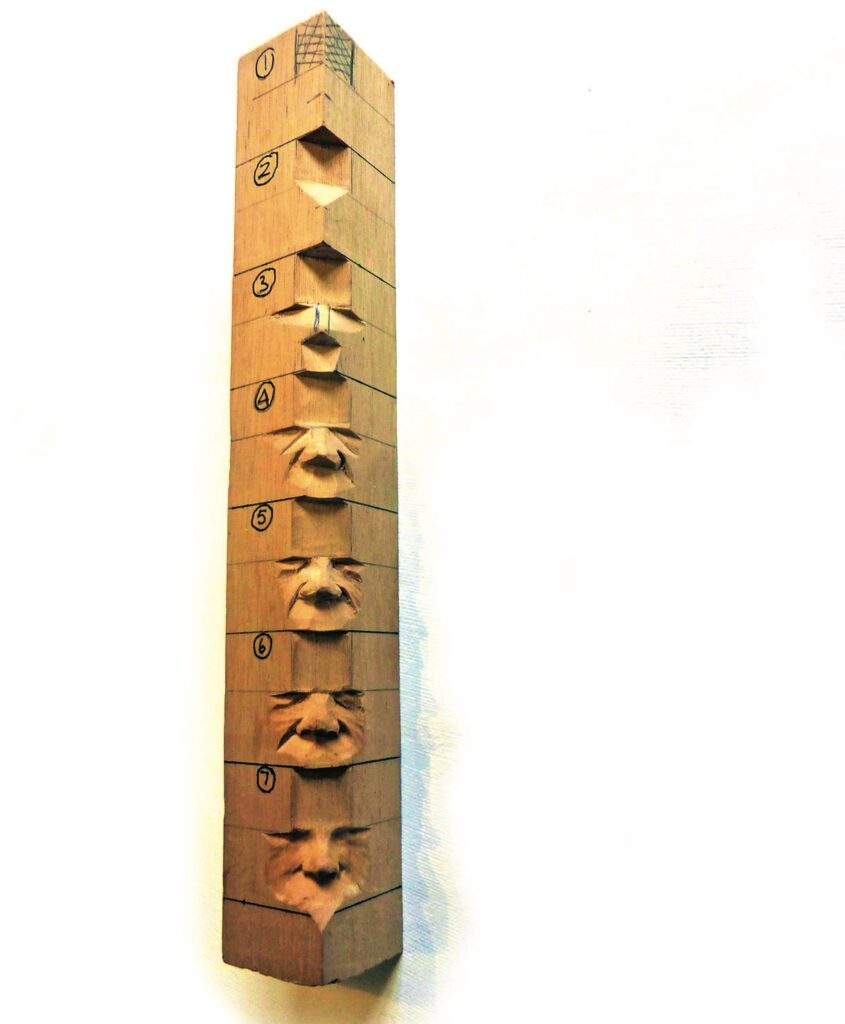
This is where the study stick comes in. This is a piece of spare wood of an appropriate shape to go through the stages of carving a mouth or nose etc. until you can do it without stressing yourself out or worrying in case you get it wrong.
What I will show you is simply one way of working so that you repeat each stage until it you are comfortable with it. You then add each successive stage one at a time so you have your stick with each one clearly shown for future reference. You can, of course, use your own stages if you prefer.
While this principle applies to all carvings, I will be concentrating on the human face as this seems to be the area that causes most problems for carvers.
I will deal with the nose, mouth, eye and ear and then put them all together in a complete face.
As most faces we carve tend to be quite small, I suggest that you start with a piece of wood approximately 40mm square and 300mm long, but you can use whatever you have available. I tend to use a knife and perhaps a small No.9 gouge or block cutter, but you can use whatever you feel comfortable using.
The cutting sequence
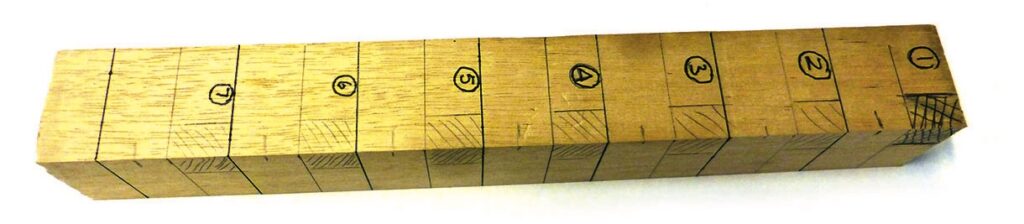
1. Divide your stick into equal sections of around 40mm and mark these off with a pencil line all round on the four sides
2. Draw another line all round each section approximately half-way down
3. In the bottom half put a small mark again about half-way down on one edge
4. On the same edge now mark off an area about 12mm deep from the edge towards the middle on adjoining faces
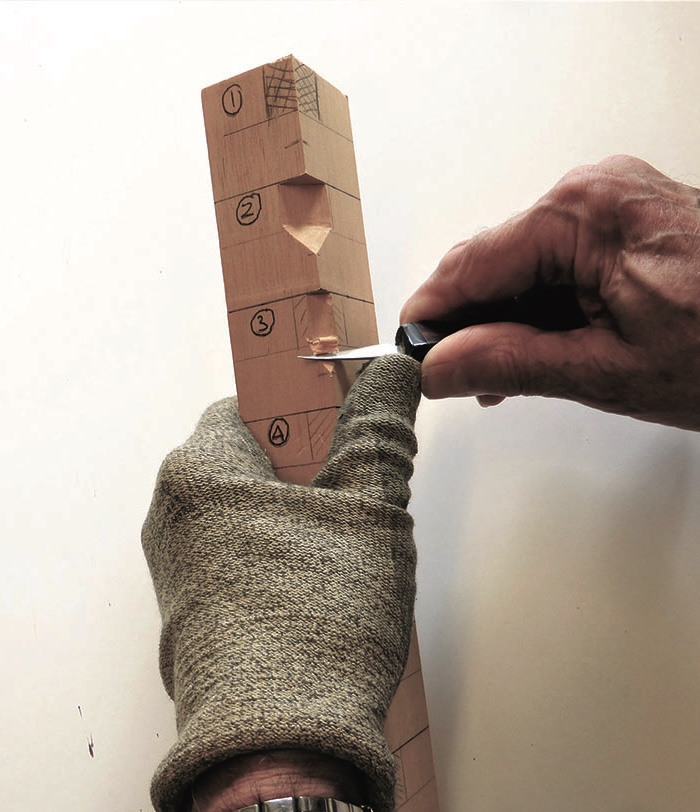
Leave the marking on the first section, use your knife to remove the shaded area as shown. Repeat this for section 3 and each one following. Leaving the second section untouched we will move on to the third
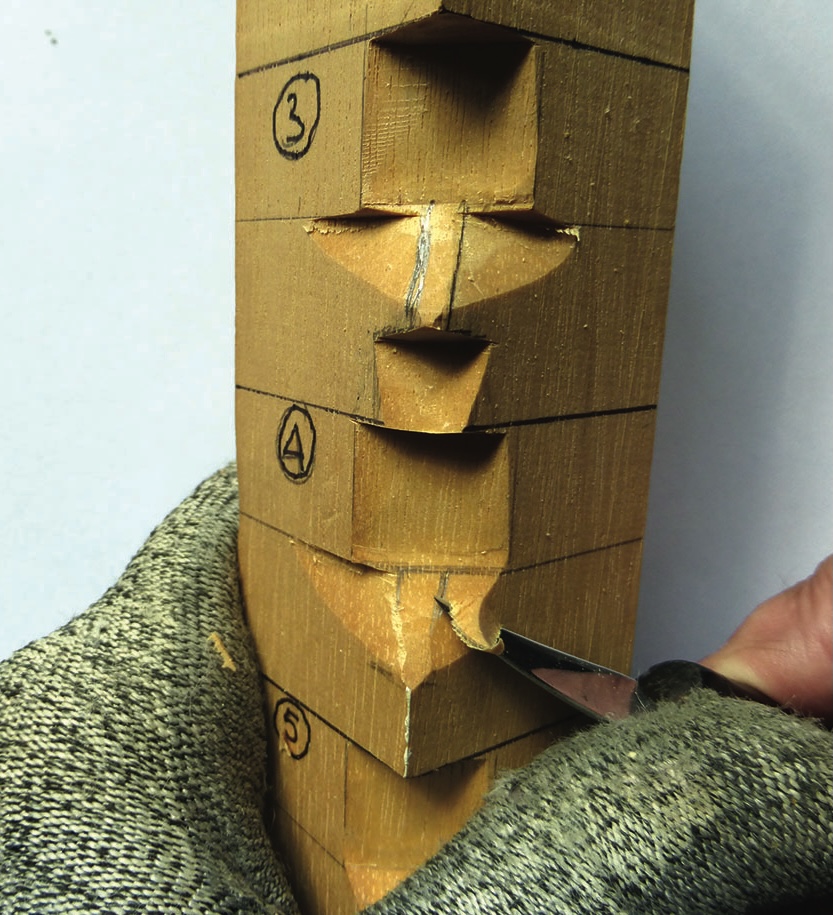
Draw two parallel lines along the nose as shown in picture 3 and cut an angle each side, as shown, up to the middle line of the section and back to at least half the depth of the stick. This will form the eyeline at the top and give enough slope to form the side of the nose. Now cut under the tip of the nose to a depth of around 7mm and remove the waste down to the next section. Be very careful as you do this as it is very easy to take off the end of the nose. Repeat on section 4 and each successive section
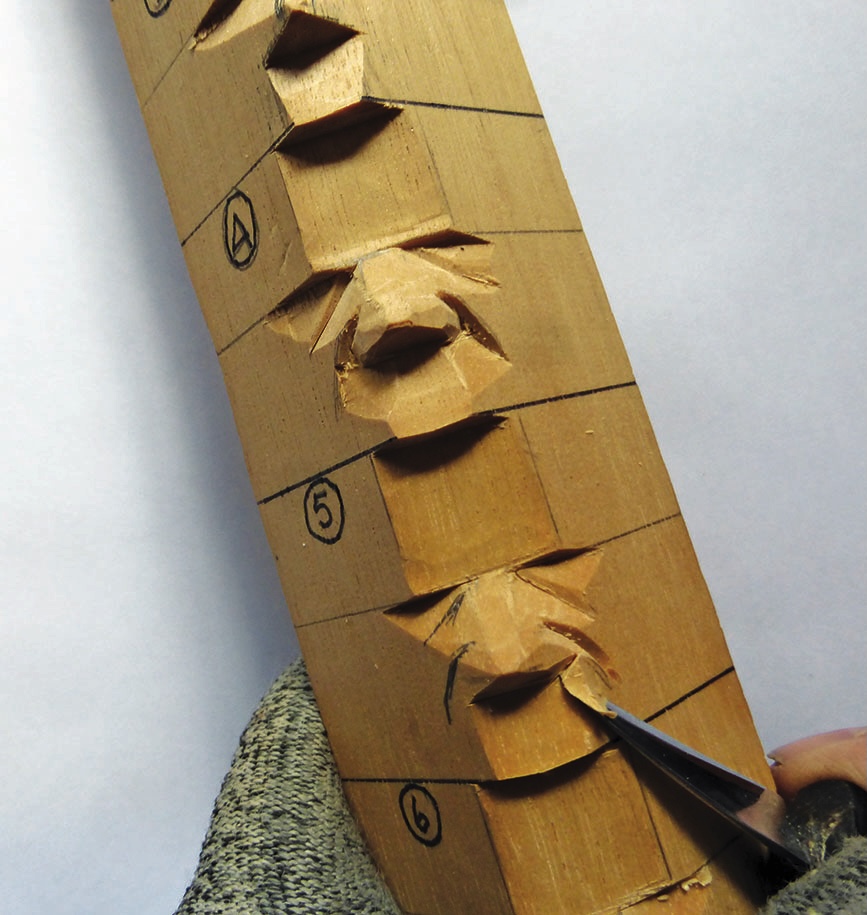
The most important lines on the face are the tear lines from the inner corner of the eye, and the laugh lines from the side of the nose above the nostrils, so these need to be drawn in now. Cut them both as shown and then cut the angle of the top lip to the back corner of the nostril. Roughly shape the curve of the nostril and repeat for each following section.
Repeat on section 5 and each following section
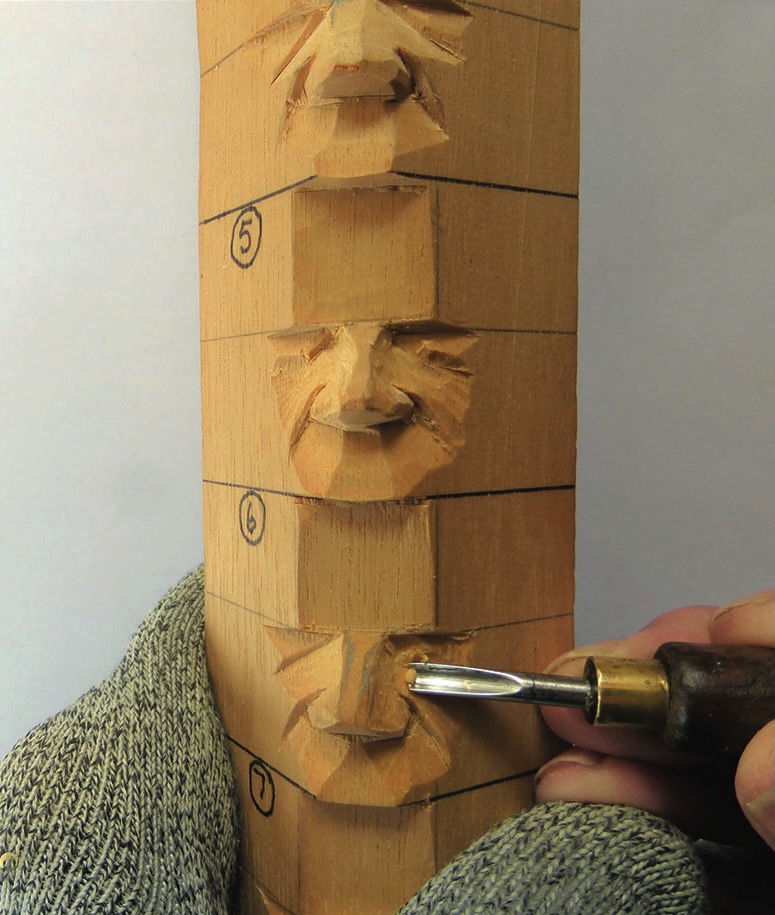
Using a small gouge, I used a No.9, 3mm, slim down the nose each side to the shape you prefer, avoiding making any sharp lines down either side as this tends to make a nose look more like a piece of cheese.
Repeat for sections 6 and 7
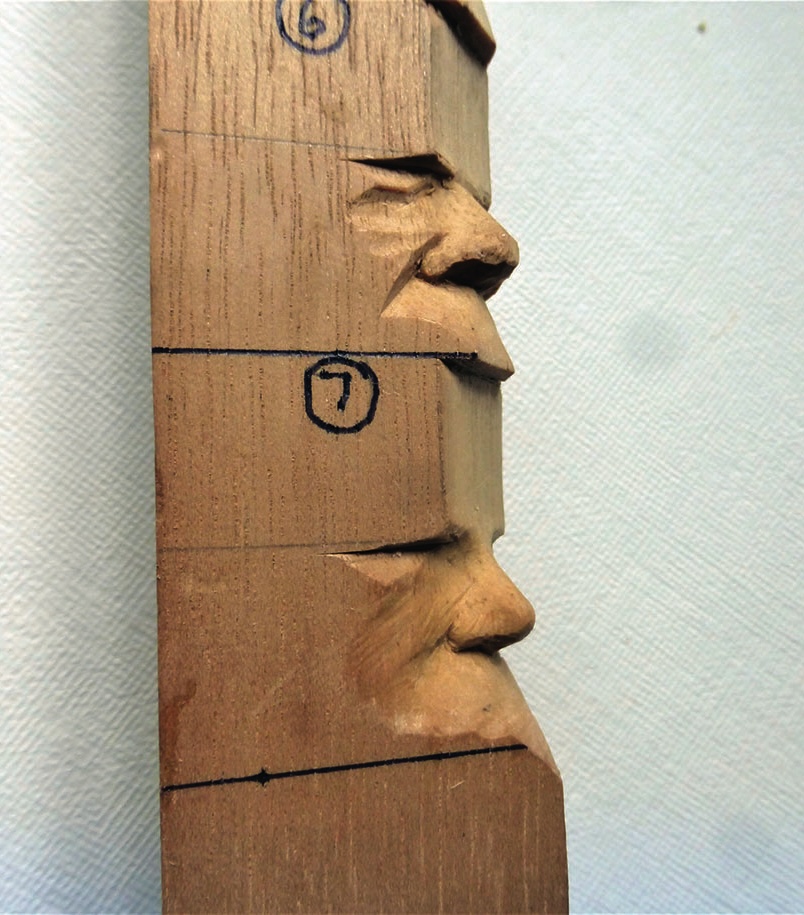
You can now refine the nose to get the particular shape you want. A male nose tends to be a little straighter and longer than a female one and this will look more feminine if you add a slightly turned up end and smaller nostrils
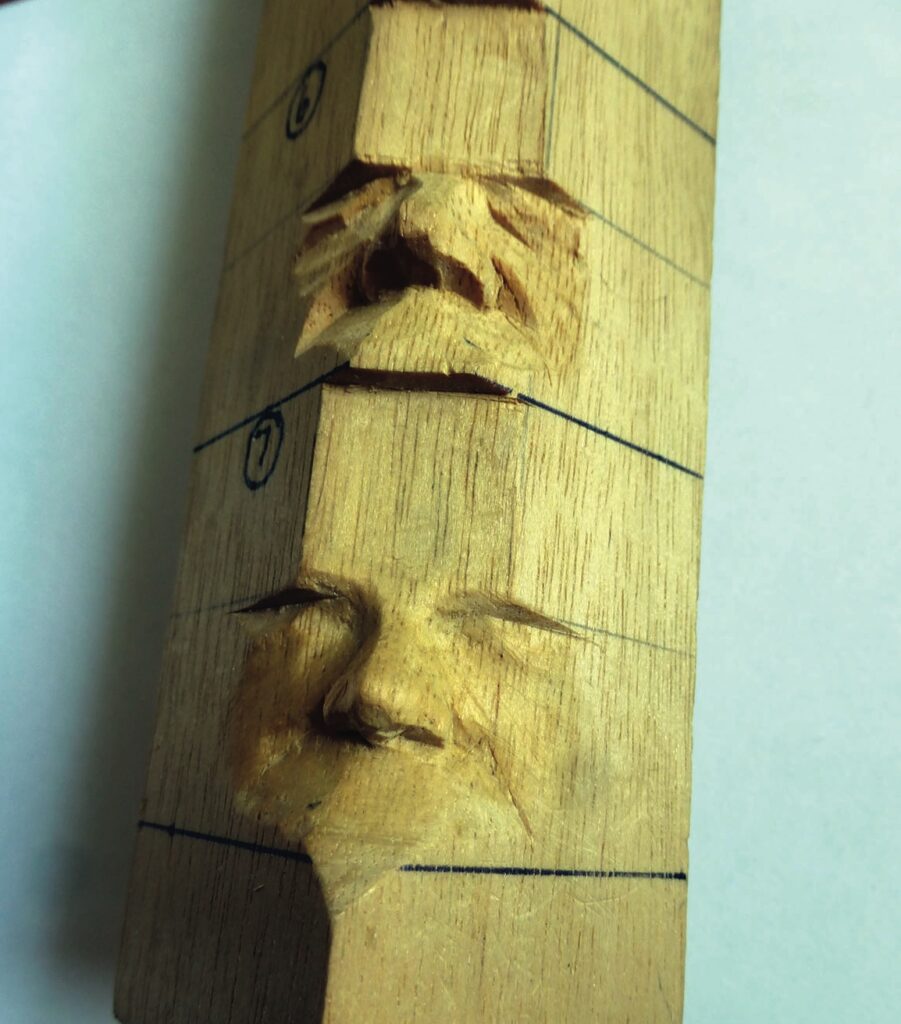
Don’t cut the holes in the nostrils until you are completely happy with the shape of the nose as there is no going back once you do this. One thing that is important to bear in mind when carving a human nose is that the back of the nostrils are as far back in the face as the tip of the nose is in front. You will too often see noses that appear to be stuck on to the front of the top lip, looking very strange indeed