Split Decision
Chris Grace rarely refuses the offer of free wood, but then has to decide just what to do with it…
Chris Grace rarely refuses the offer of free wood, but then has to decide just what to do with it…
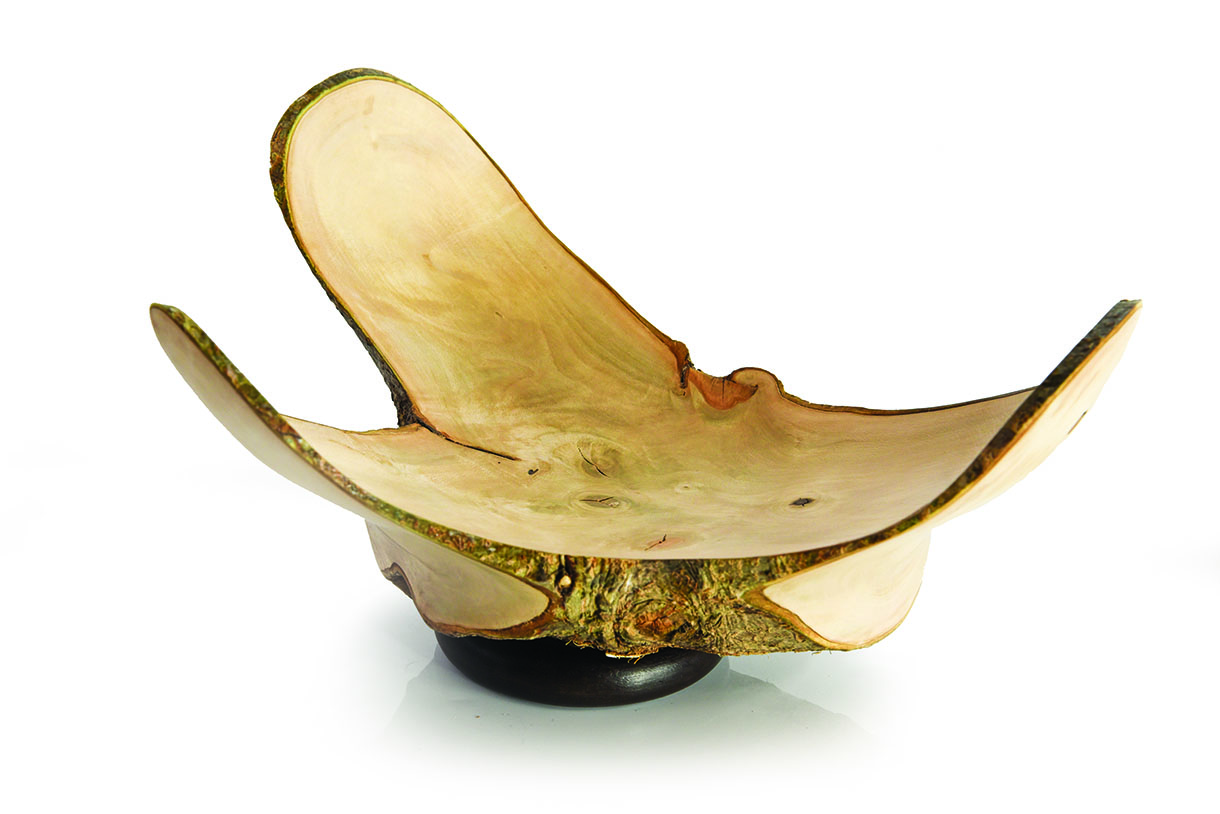
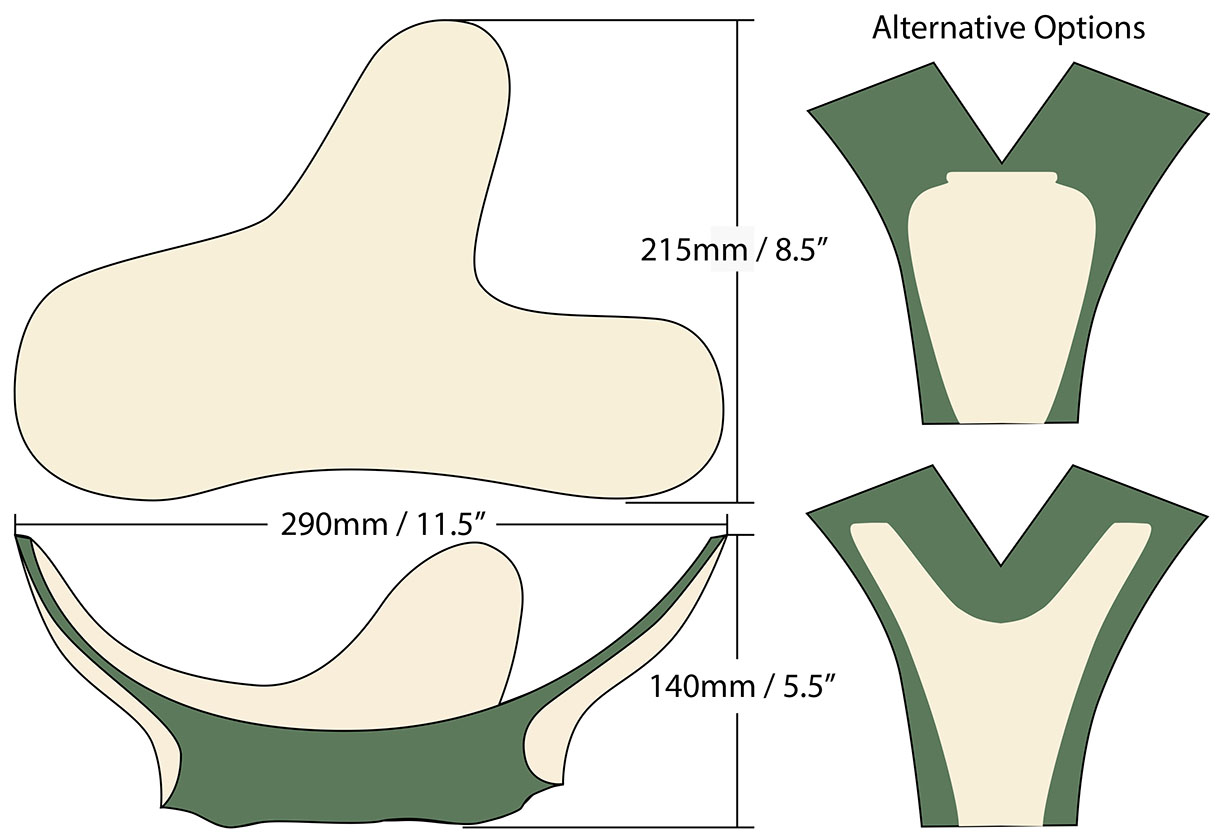
As I help run South Downs Woodturners, I am often offered wood. Sometimes I pass it on to other members and other times it is obviously meant to be a personal challenge! This time it was clearly intended to be the latter: a freshly cut piece of holly (Ilex spp.), complete with its wrapper of ivy (Hedera spp.), presented to me by a fellow turner. What to make with it took a little pondering. I considered a traditional hollow form or an open natural-edged vase, however holly isn’t that exciting as a wood, despite being a piece of crotch and there was clearly some evidence of grey in it. I wanted to use the features of the wood as much as practical, so I settled on a bowl shape, but I couldn’t make a simple traditional shallow bowl as I would end up turning away too many features.
As it was given to me by another woodturner, I thought I would create something that might pose questions; such as how was it held, and where’s the chucking point? Looking at the knot holes left by previously long-gone branchlets, I knew I wanted to retain them as a feature, but because of the shape of the wood, they would need to be on the bottom. I decided to pick the ivy off carefully in case I could make use of it later, and the more I looked at the naked wood, the more the idea developed.
I typically give my turnings quite a lot of thought before I start my lathe, to ensure that I can actually achieve what I have in my mind. Having said that, sometimes the ideas aren’t fully formed; rather I let the creative process wander a little to allow the wood to influence the final result. Holding this piece was going to be tricky, but I thought I knew how I would be able to mount it safely, so it was off to the workshop to make some jigs.
Information and Plans
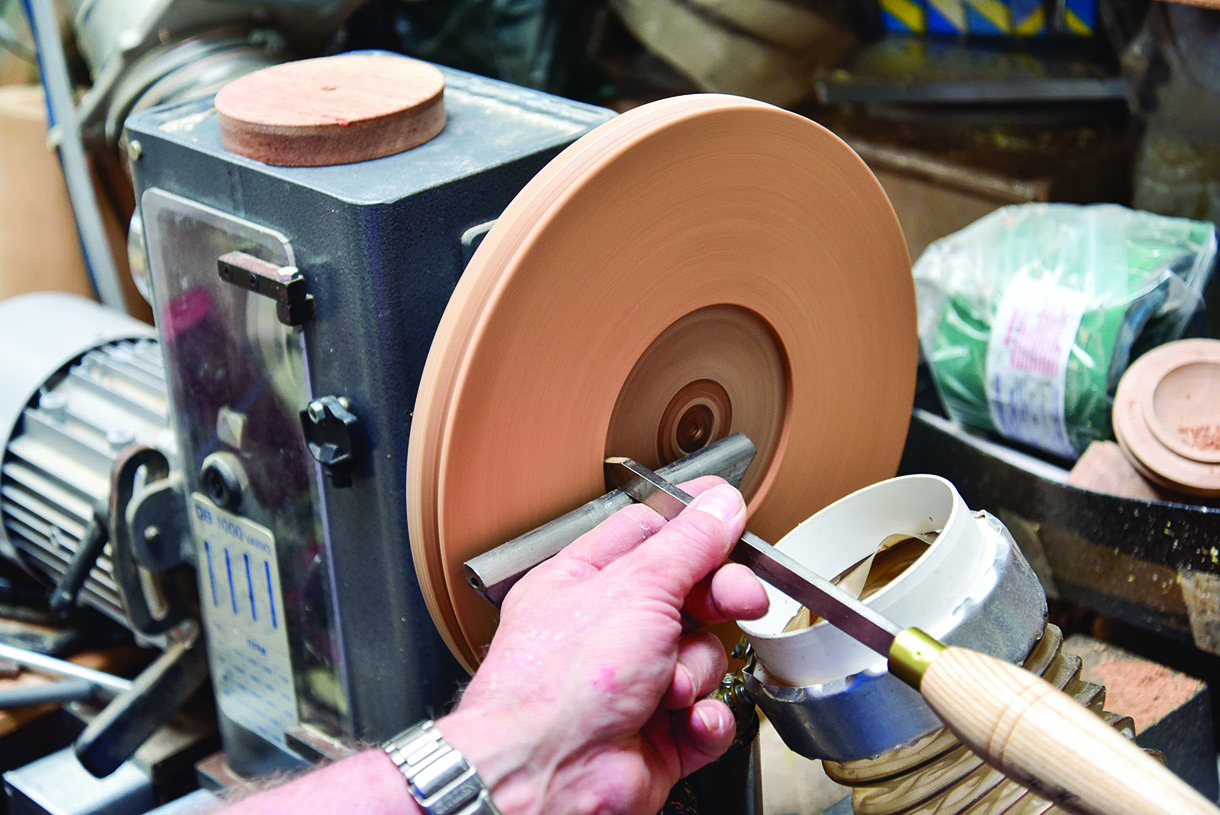
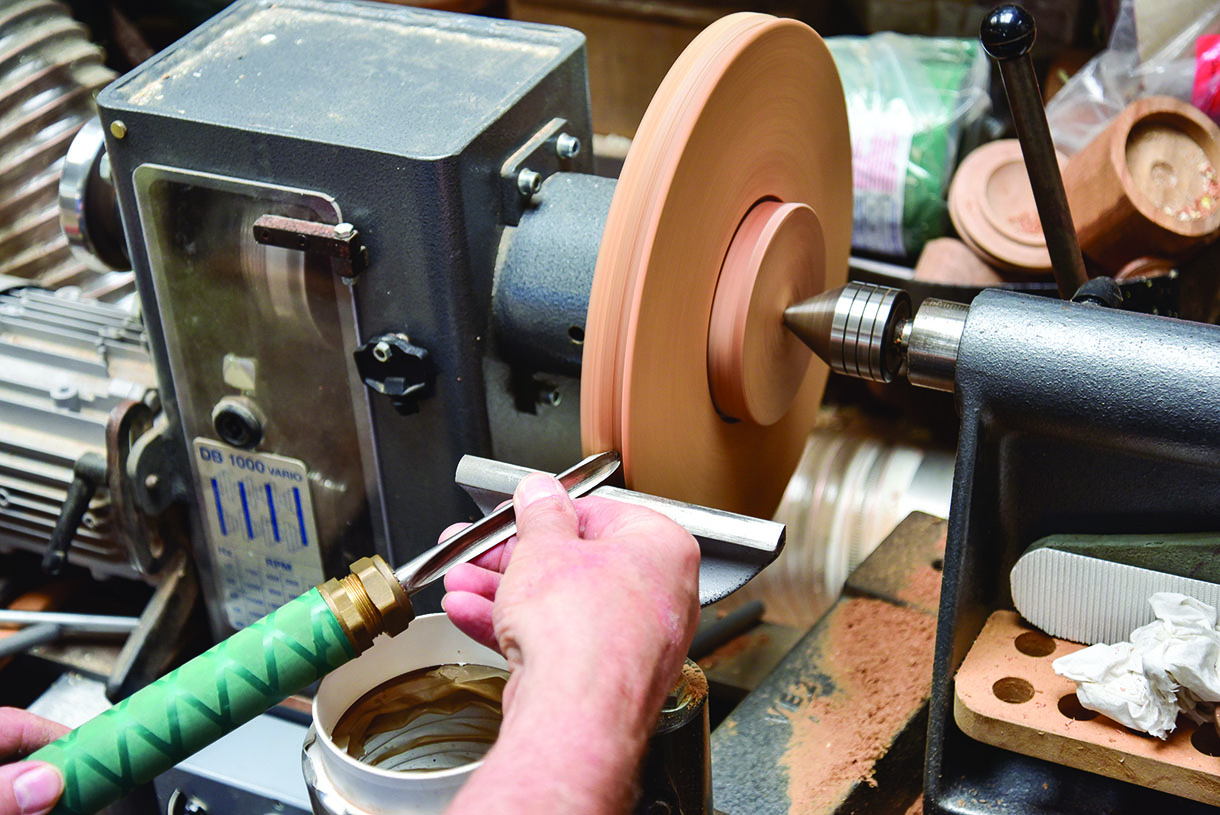
EQUIPMENT USED
Medium bowl gouge
Large bowl scraper
Power sander
Bandsaw
Screwdriver
Hot melt glue gun
150mm faceplate
A piece of crotch
18mm MDF faceplate (to cover the diagonals) 400mm square
Cork tile
Sanding sealer
Superglue
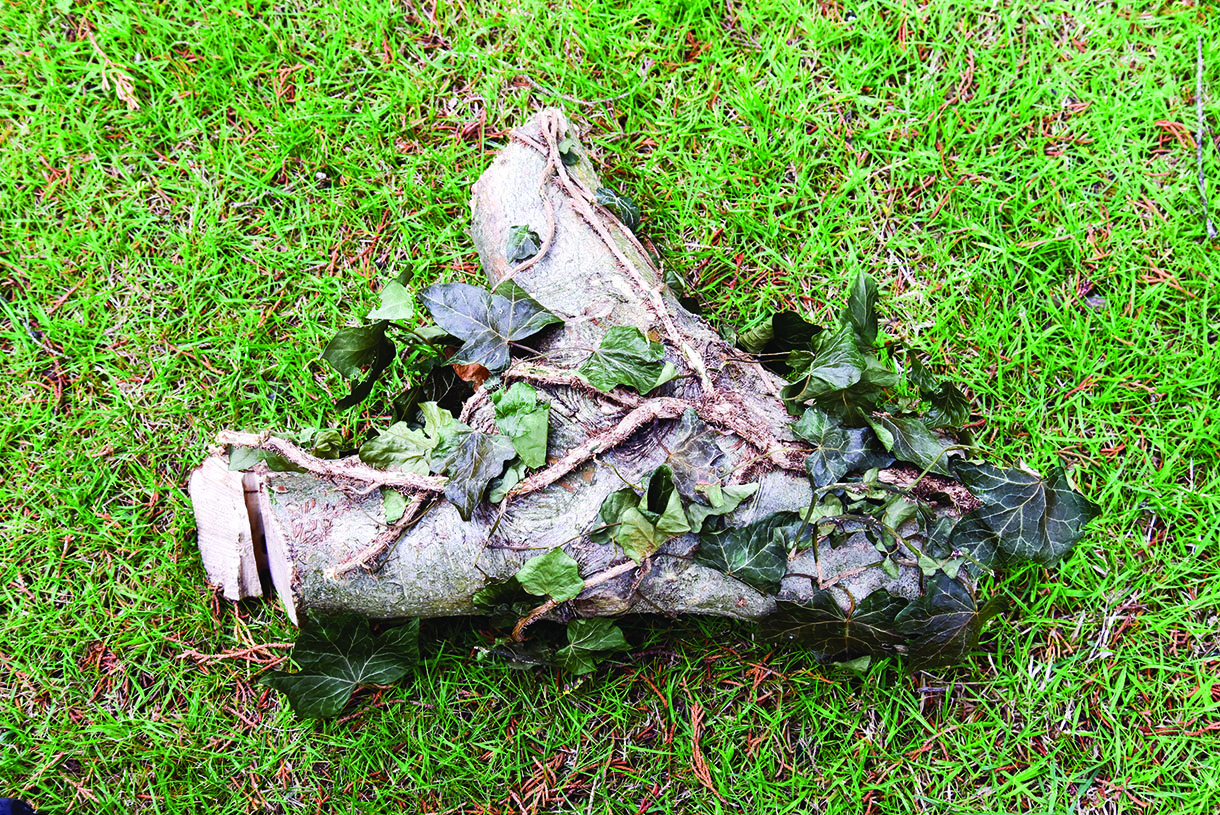
1. Take your piece of crotch and remove any extraneous material. In this case I carefully prized the wrapper of ivy from my holly and put it to one side for possible use later – as I originally intended to use the ivy to make a stand for the finished item. I always avoid discarding pieces of wood that might come in handy later. Offcuts are often useful for testing finishes, etc.
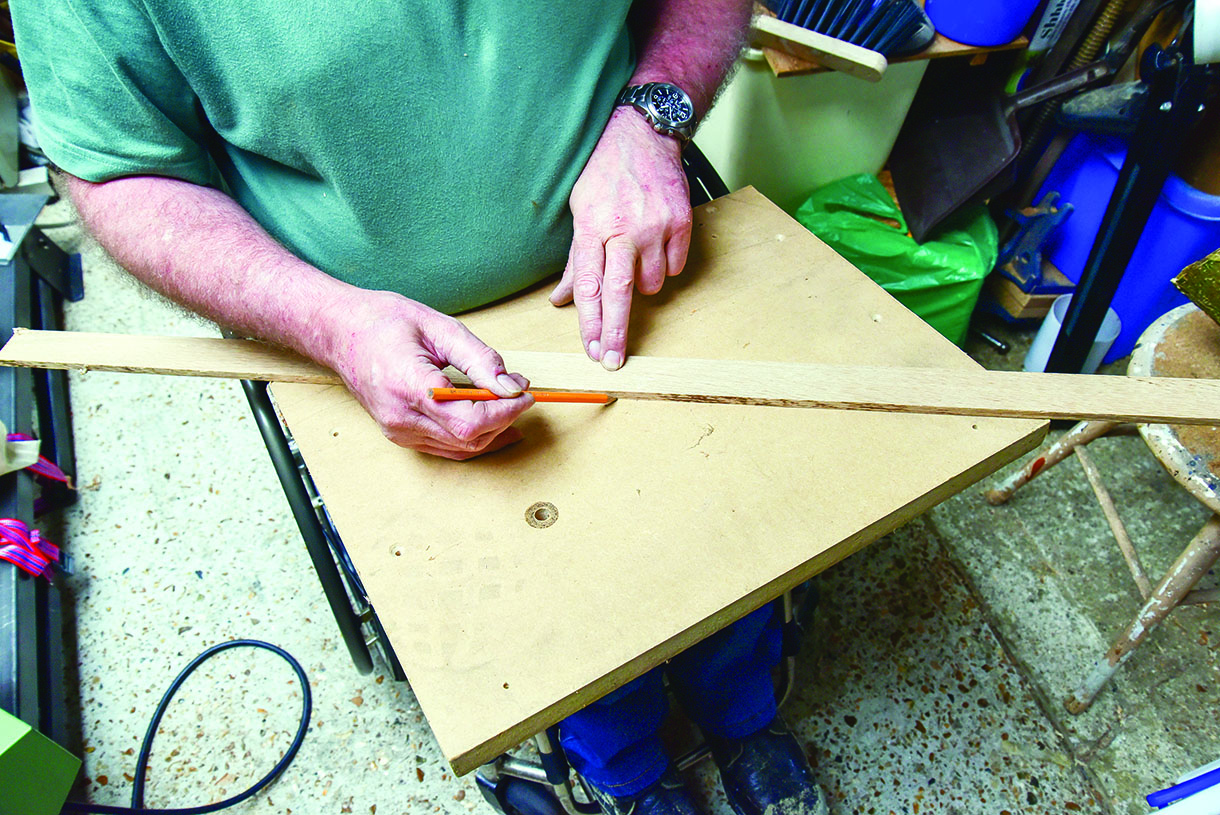
2. Using a scrap of MDF – mine was recovered from a previous jig – locate the centre and draw on a circle just larger than the diameter of your faceplate. This will enable you to accurately position it for screwing on
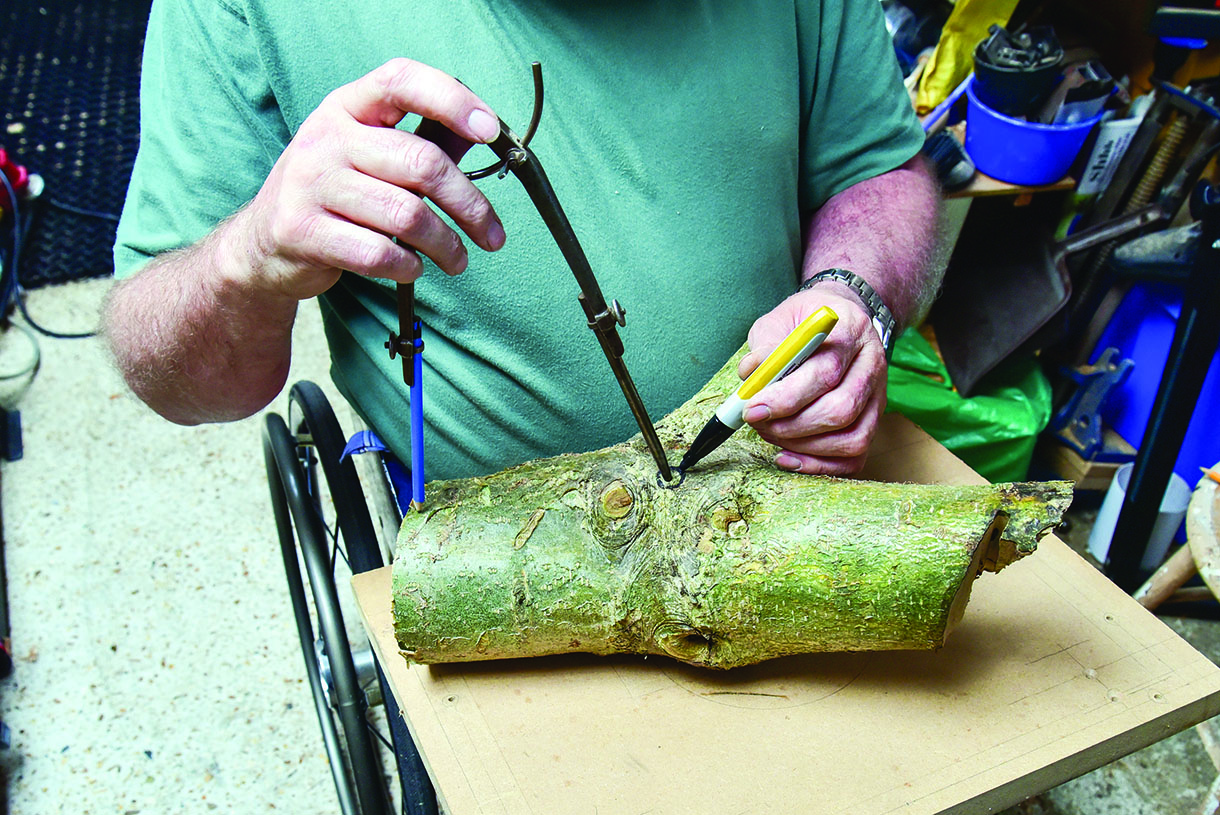
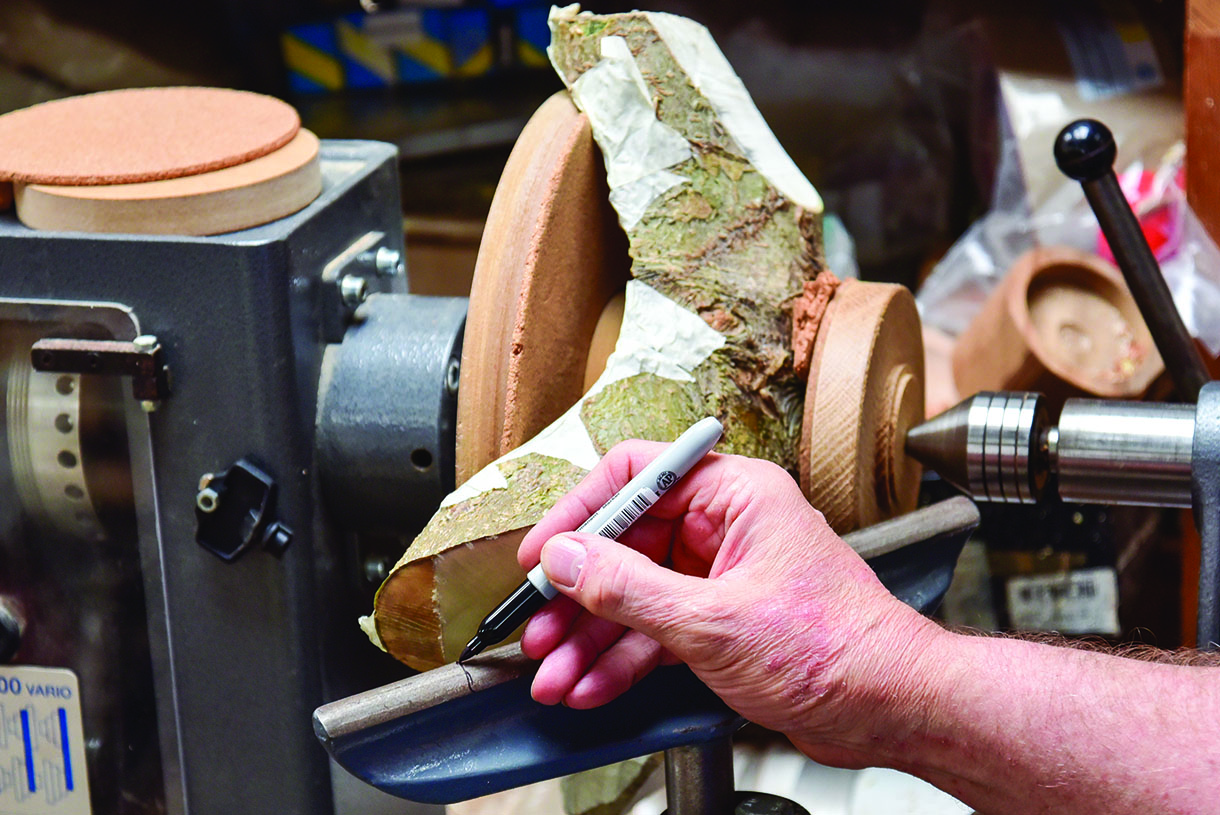
3. Having made sure the wood fits on the MDF board, mark the centre and planned extremities on your piece of crotch wood
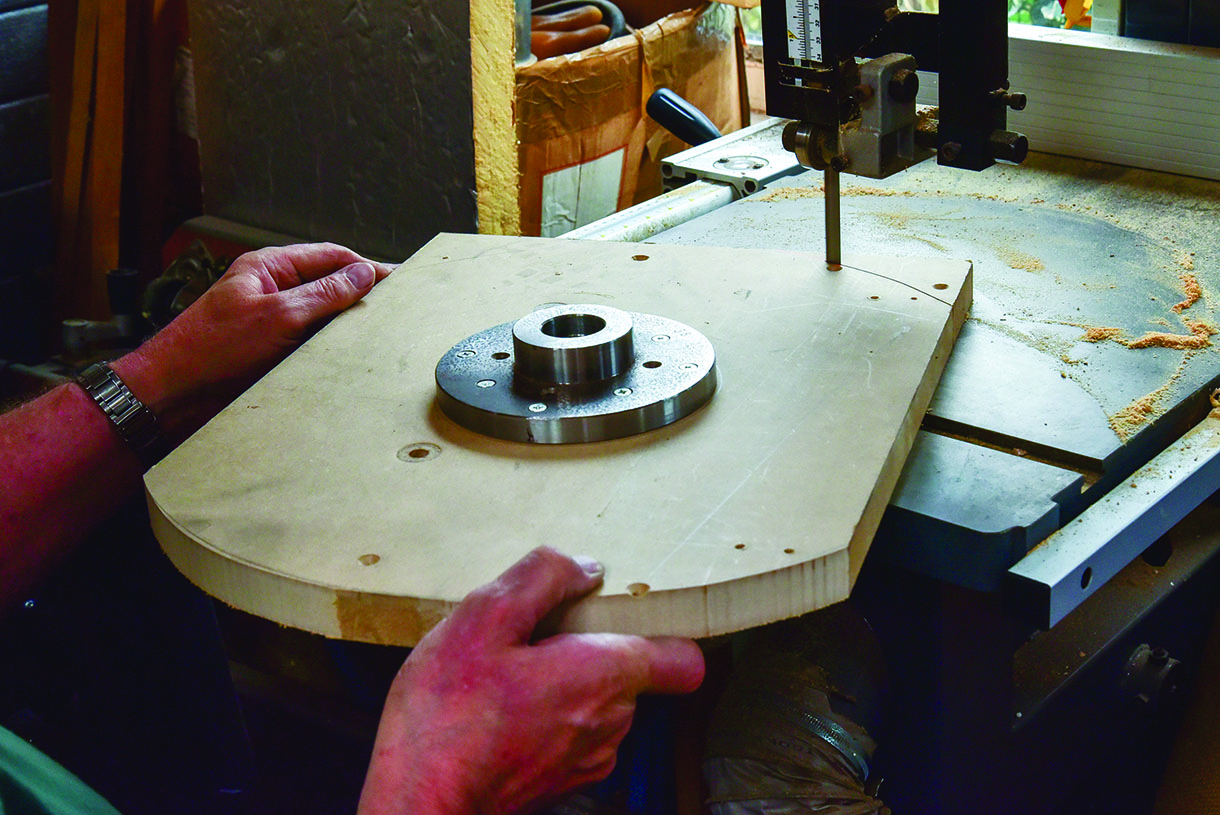
4. If the rectangular MDF looks a bit scary, round off the corners to make it safer. Keep clear of the spinning edges nonetheless
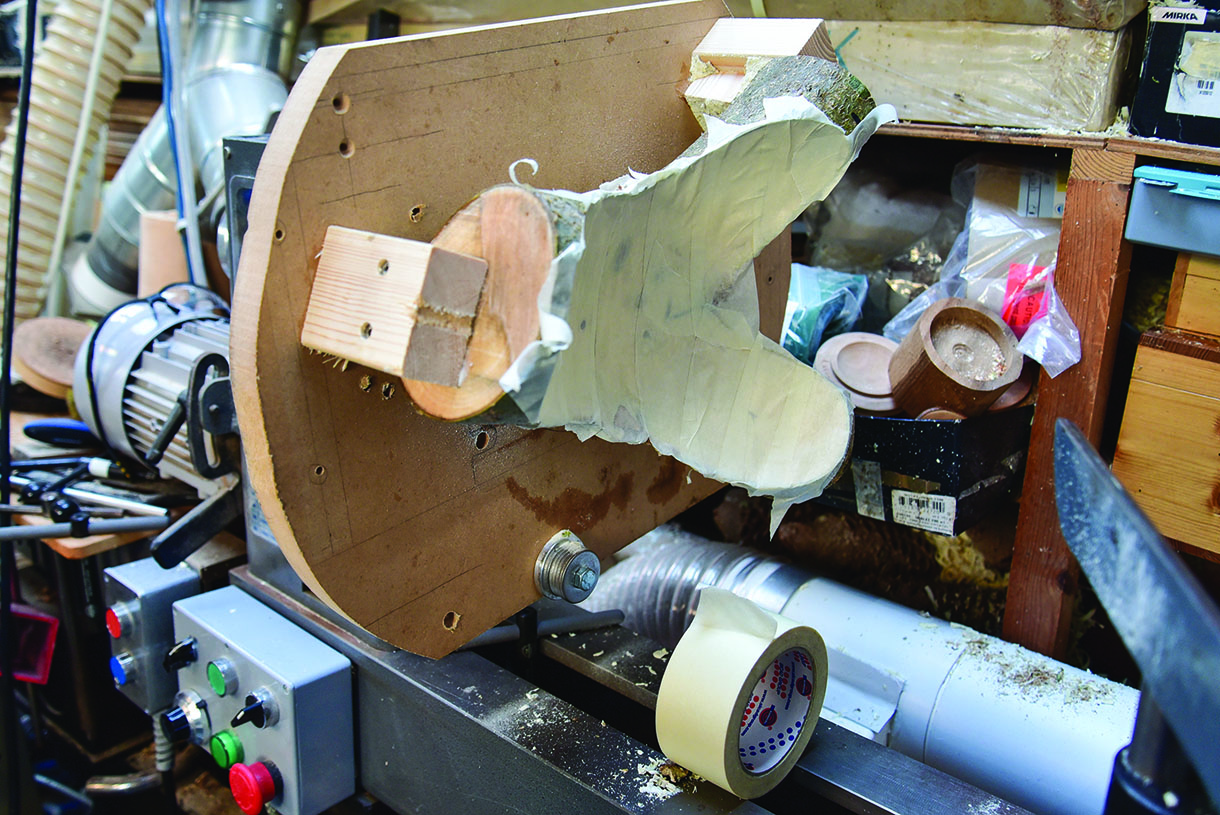
5. Secure a cork pad in the centre of the MDF faceplate using double-sided tape. This helps protect the bark while centering the blank. Unfinished cork tiles are a great non-marking, slightly compliant material for use in jigs. Press the blank against the cork pad with a revolving centre to adjust the height of the wings for the finished piece
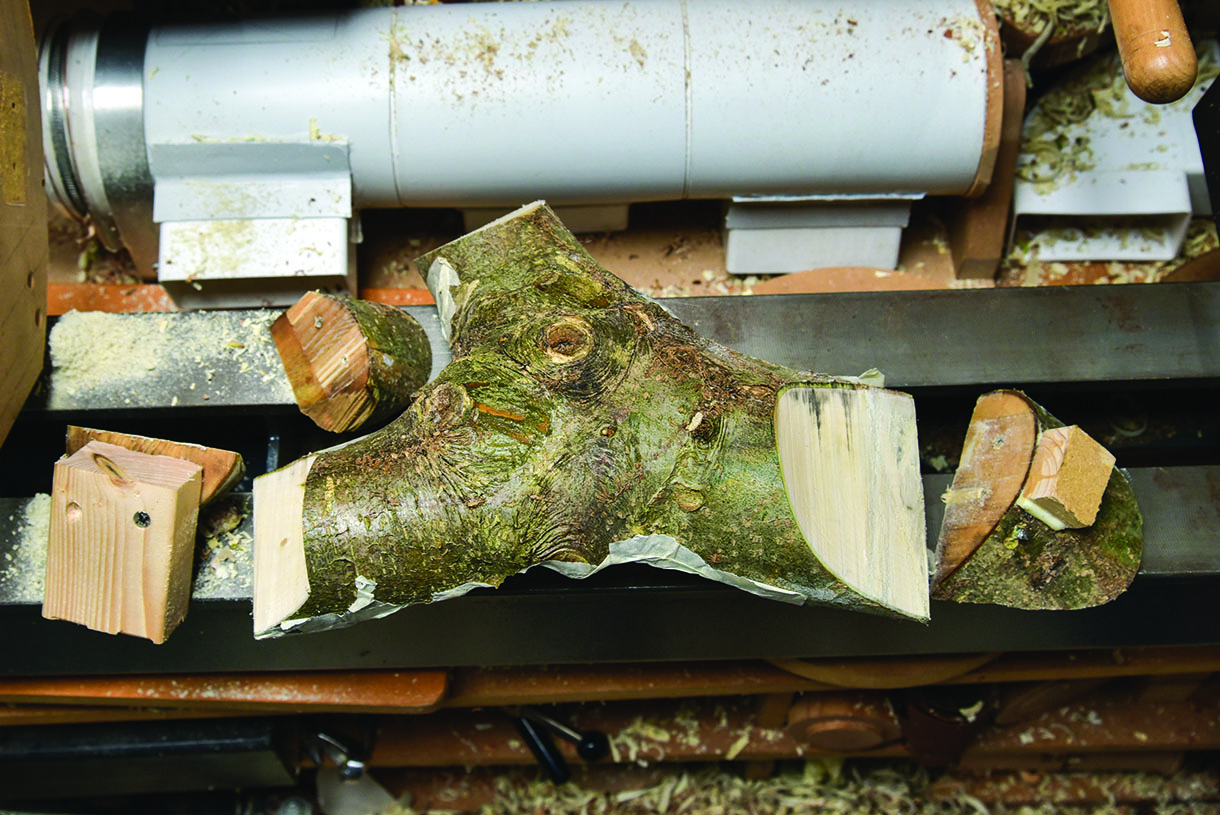
6. Secure your wood to the faceplate and ensure you are happy with its safety. My initial plan was to mount the blank to the MDF with screws using a scrap block for support. Unfortunately one of the 125mm screws jammed in the green wood, then snapped when getting it out, so I realised this wasn’t going to work. If you are in any doubt about the safety of an awkward shaped piece, stop and re-think, then make sure it is safe
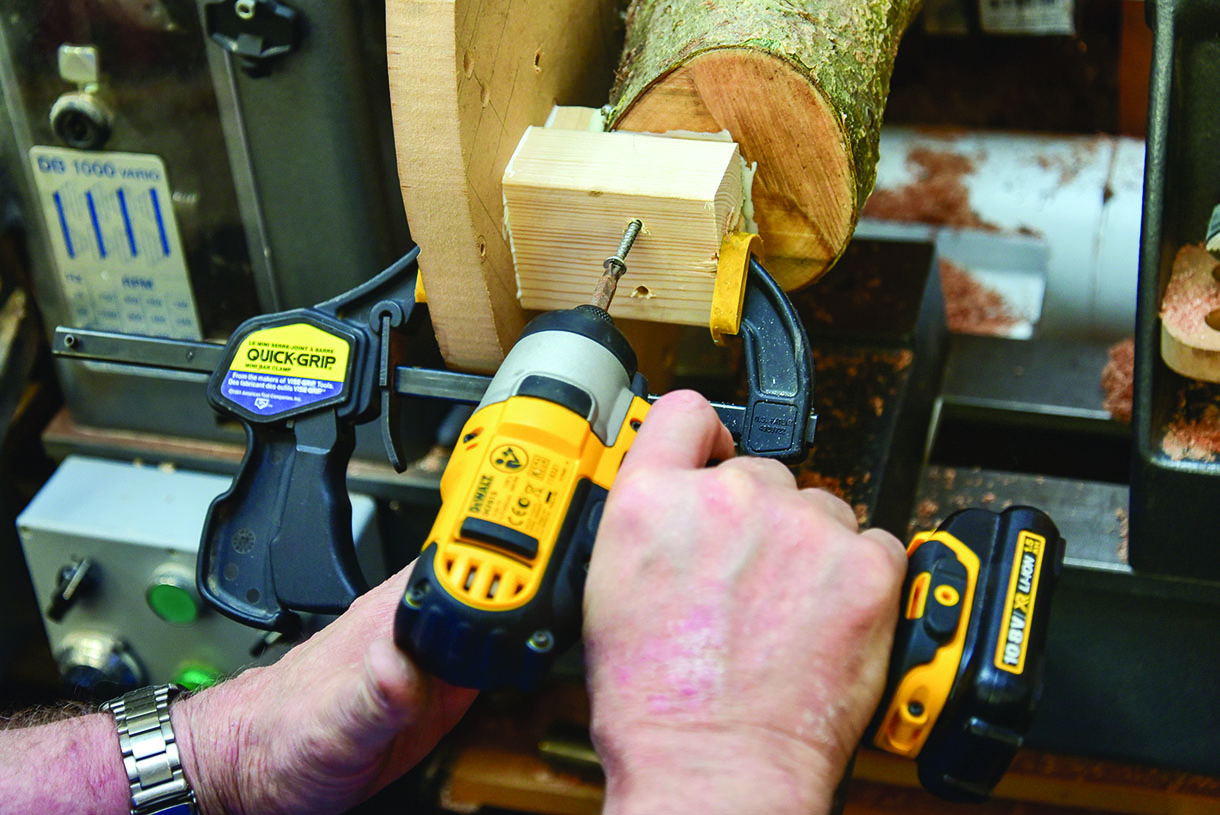
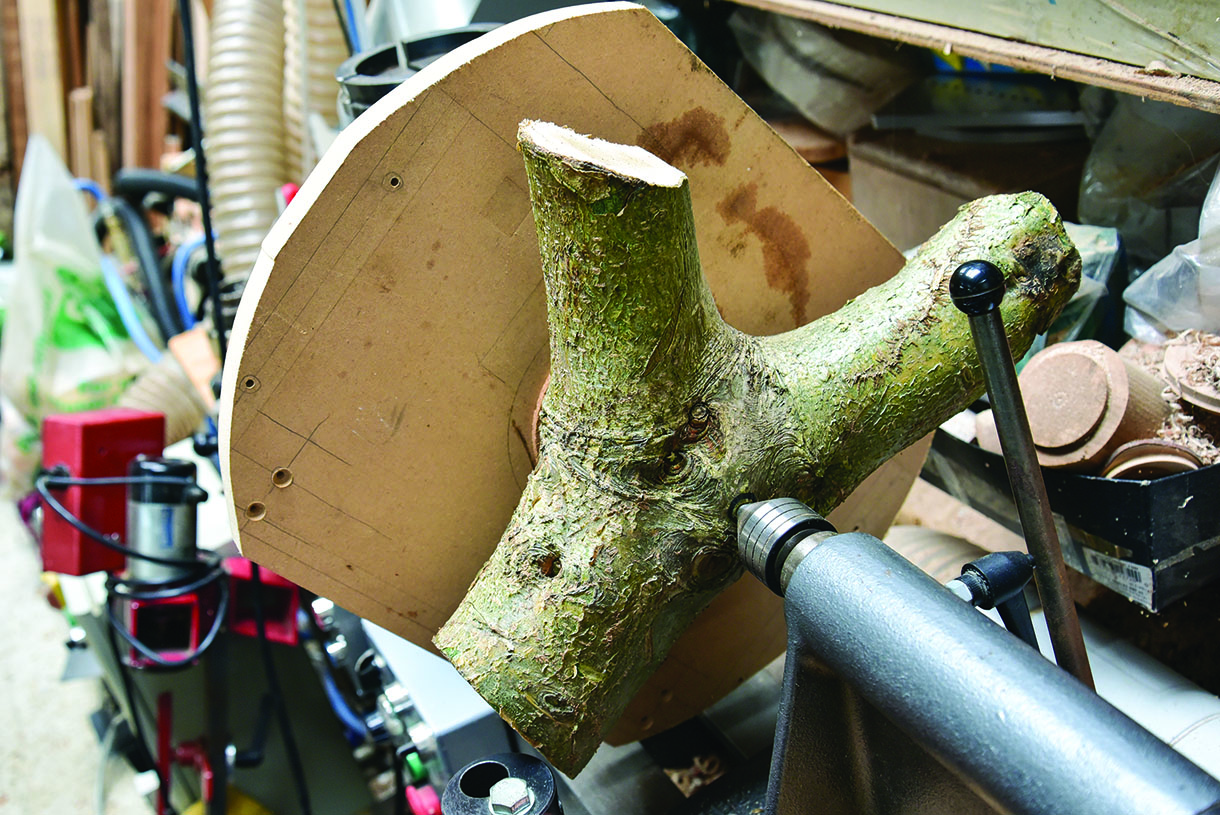
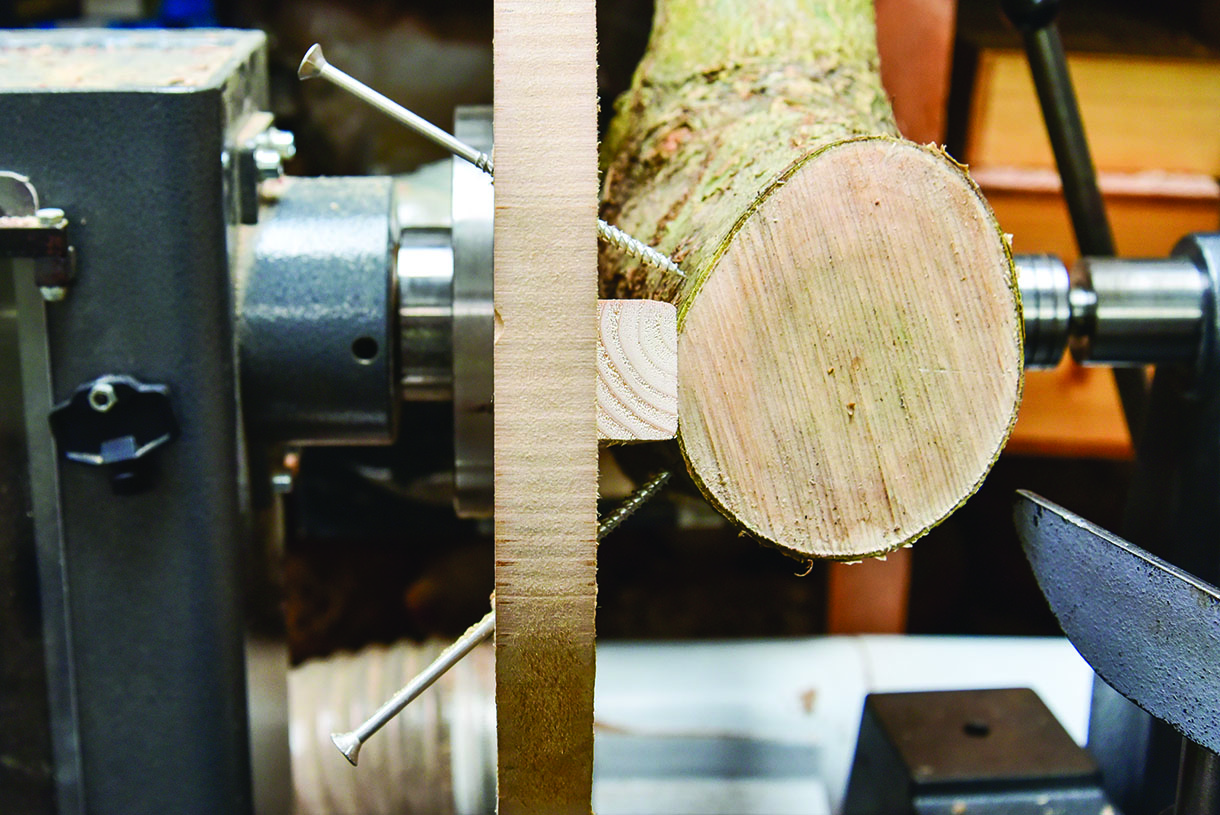
7. A more secure method of fixing is to square off the ends of the piece and use scrap blocks to attach the crotch to your faceplate. As a belt and braces measure, use screws and glue. Ensure you only screw into areas that will be cut away later

8. If your piece is out of balance, which it almost certainly will be with a crotch, add a counterweight to enable you to turn safely at a realistic speed. I used a 12mm bolt and penny washers. This will enable you to accurately balance even the most unusually shaped blanks, and you can easily adjust it as you turn the wood away
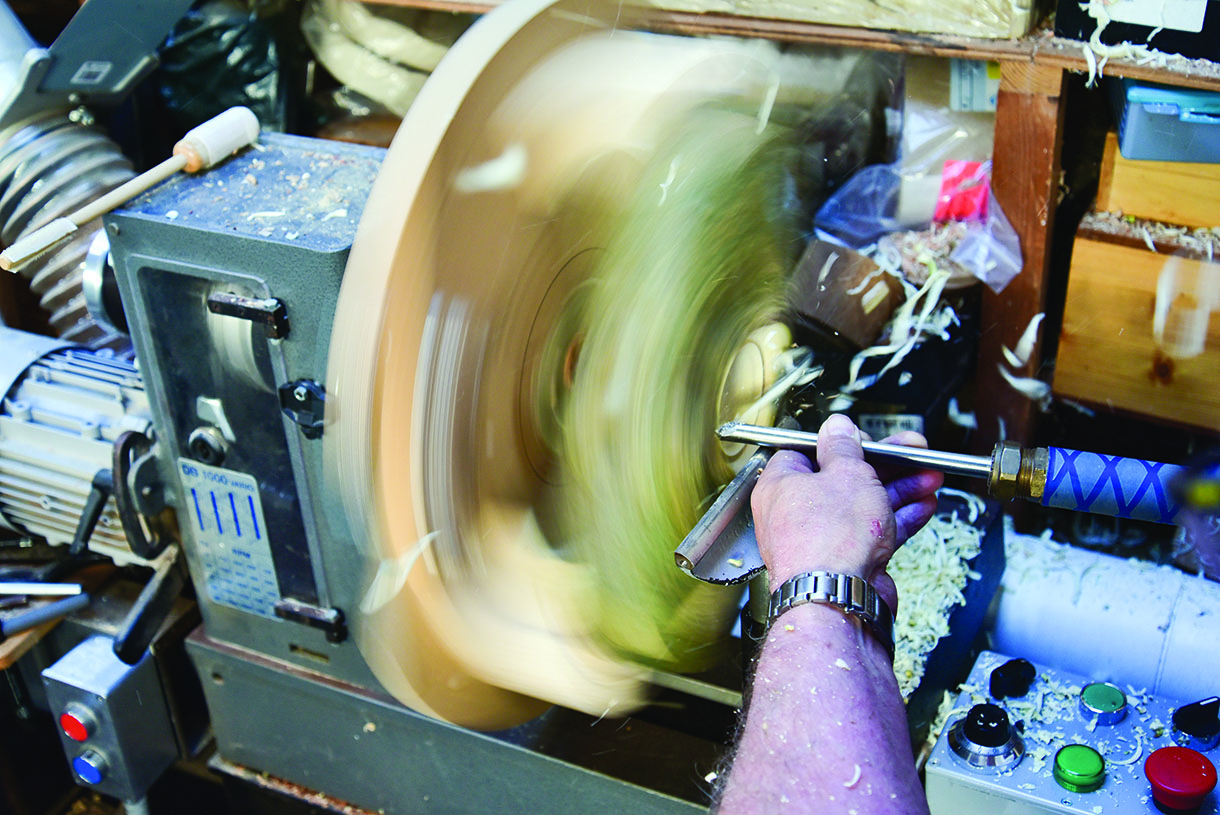
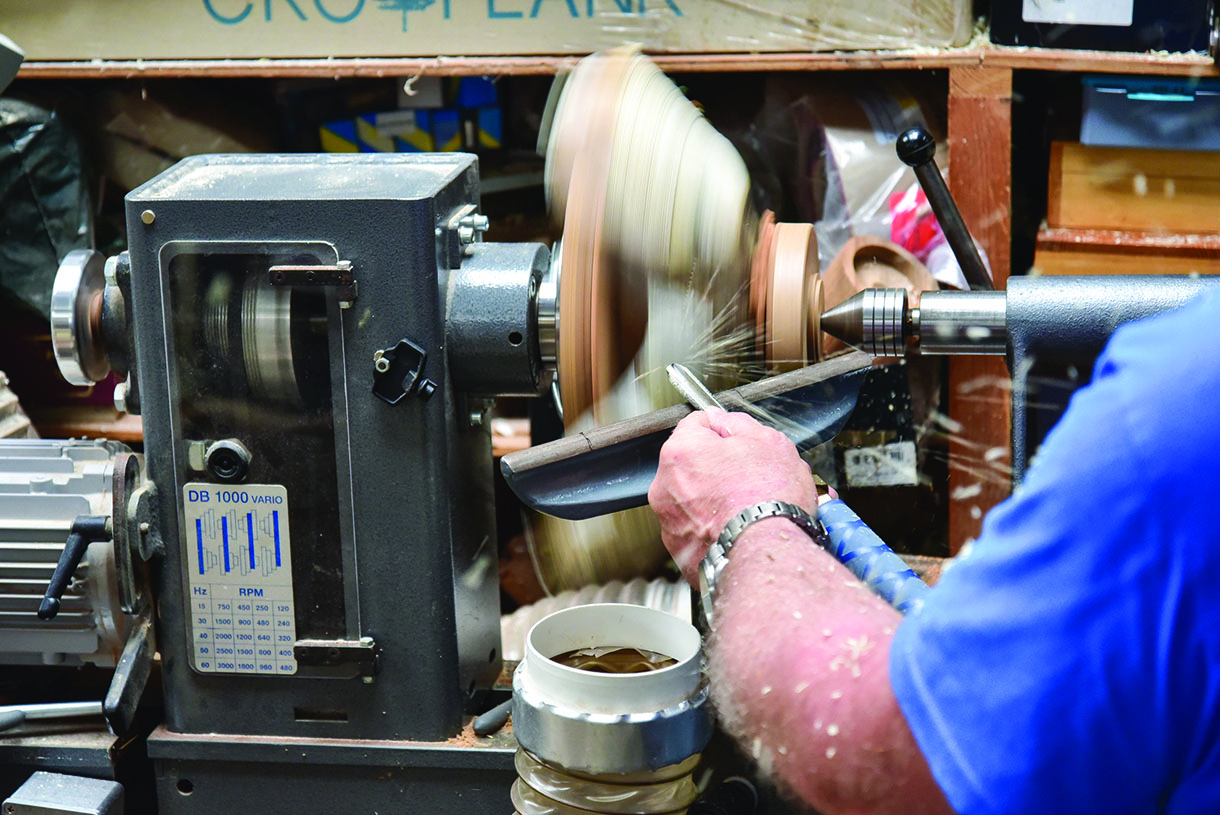
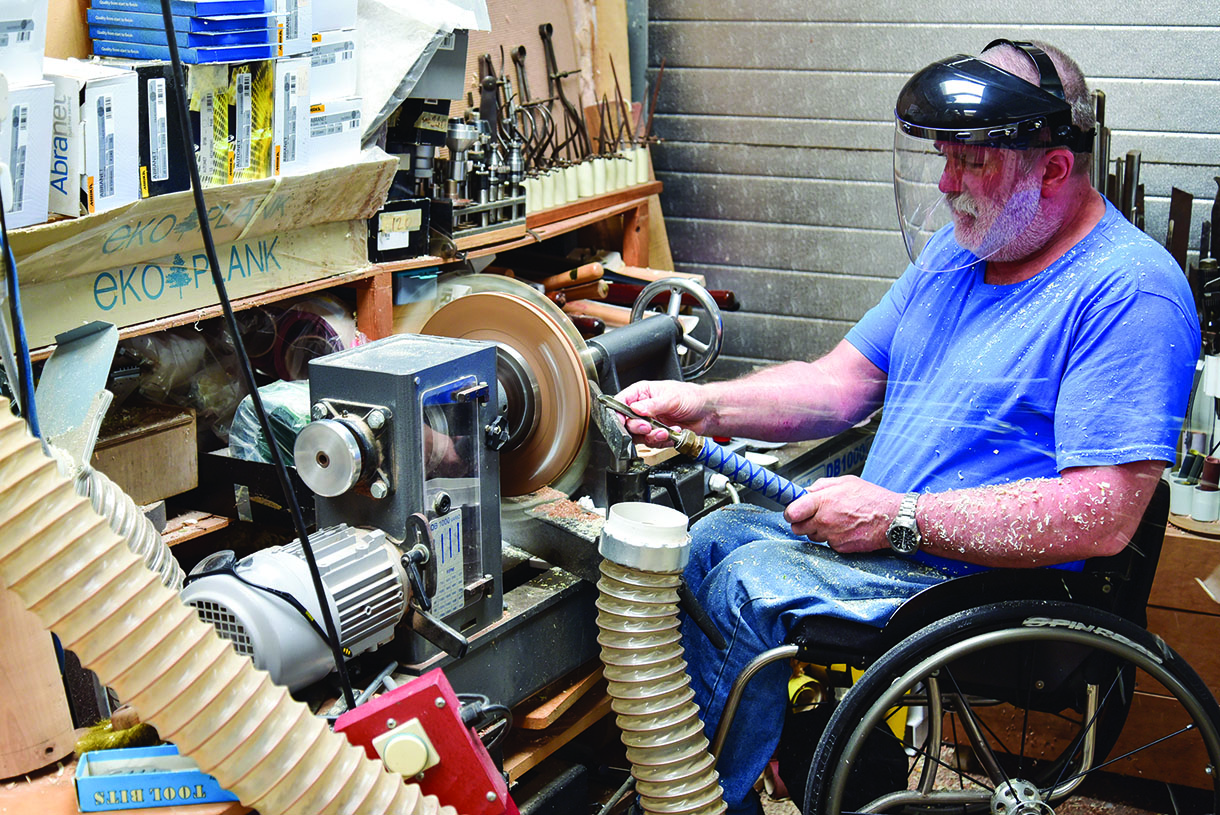
9. Start the lathe slowly and increase speed as far as possible without undue vibration. With something like this all you will see is a blur, so it’s important to know where the wood is. Position the rest to ‘protect’ yourself from touching extremities that are difficult to see. Start hollowing using a medium bowl gouge. Initially it is fairly easy as the tool is mostly in contact with the wood. Stop the lathe frequently to see progress from an aesthetic and safety perspective. Make sure you can quickly and easily get to your stop button, particularly when you are turning more challenging pieces
10. Take notice of all your senses when turning, look, listen and feel what is going on, you will often get an early warning of something about to go awry. Having heard some slightly different sounds, I stopped the lathe to find a large void which was soft and could be marked with my thumbnail. Luckily it wasn’t that big so could be turned away
11. Make sure the piece is fundamentally sound before you continue cutting the void to achieve the desired winged outline. A 13mm bowl gouge is fine for this project as you don’t want to take too big a cut at any one time. When you start tuning a lot of air, it’s important to follow the line of your ‘bowl’ smoothly, and not to ‘fall’ into any of the gaps. At this stage you may find it beneficial to use a heavy curved scraper in a shear cutting action to help you obtain a smooth profile. Use a scraper presented in a pronounced trailing position to minimise the potential for a catch
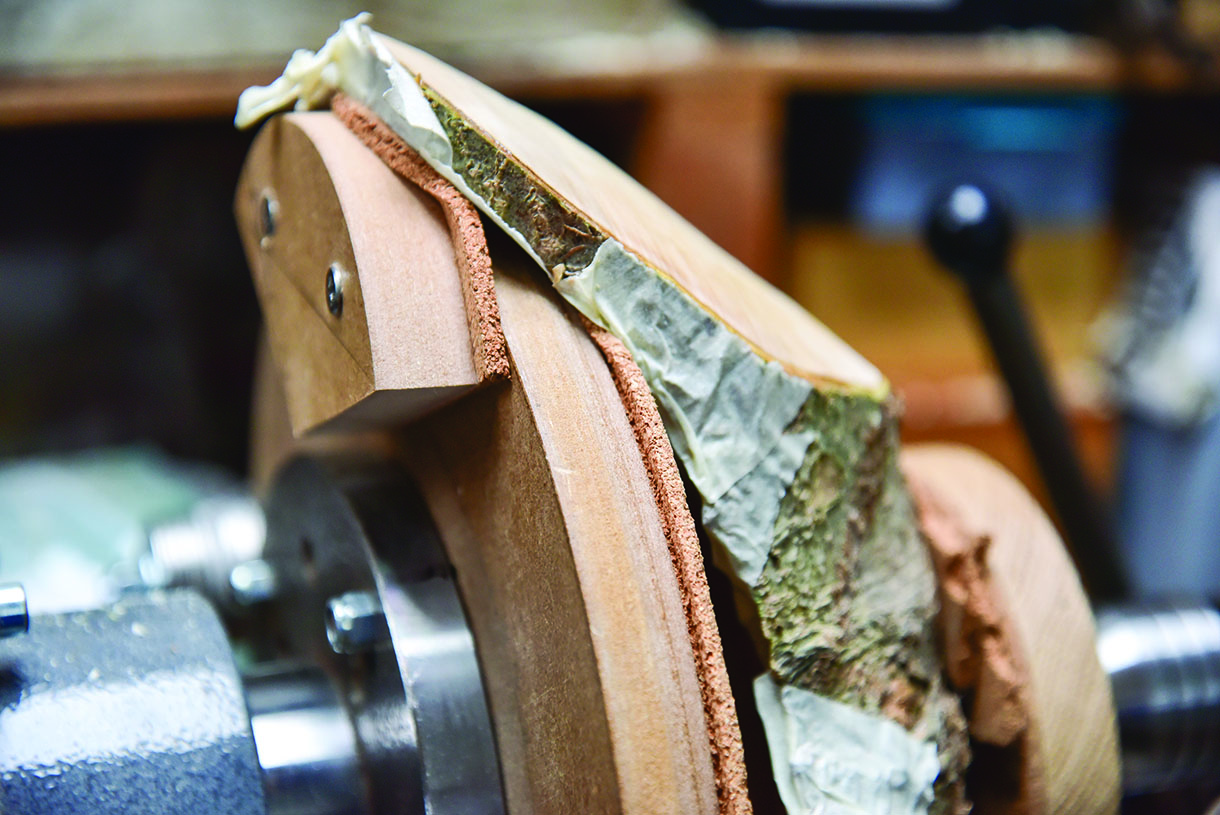
12. If you are unable to complete turning green wood in one session, and you need to leave it for any period of time you need to find a way of stopping the wood drying too quickly, especially from the newly cut endgrain. Use masking tape to temporarily seal the wood to help prevent distortion from uneven drying
13. To release the blank from the faceplate I find it easiest to saw off the attachment points. This reduces the wood you need to turn away later and, in my case, it ensured that I got rid of the remnants of the broken screw from my first failed mounting attempt
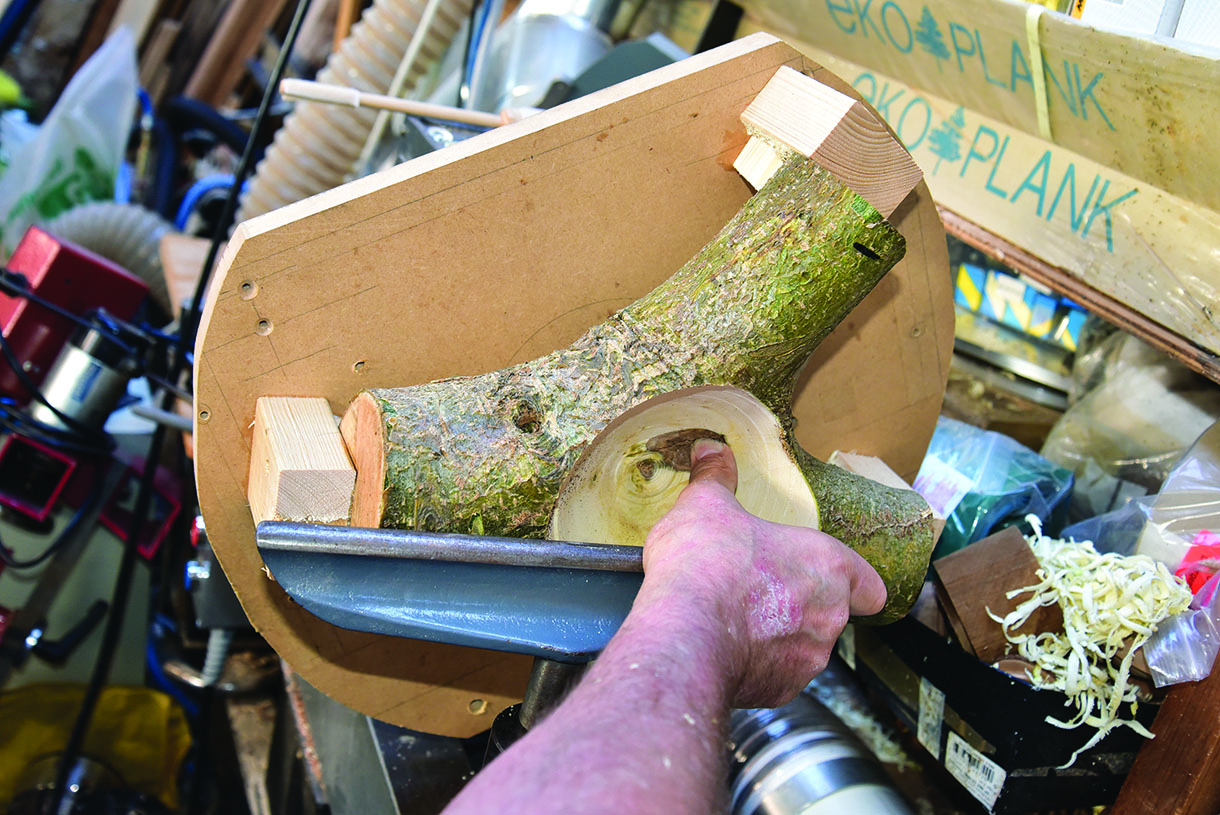
14. To support the inside of the bowl well, so that the wings can be turned as thin as possible, use a cork covered MDF faceplate. Prepare a section in the centre to take a raised block that will touch the bottom of the bowl
15. To ensure good support for the wings, undercut the edge of the MDF behind the cork, until both the wings and the centre of the bowl touch firmly when pressure is applied by the live centre
16. Use a cork-faced pad so as to not mark the bottom of your turning with the live centre. And, mindful of the extremities that you might not be able to see clearly at the moment, mark these on your toolrest before you start turning the bottom
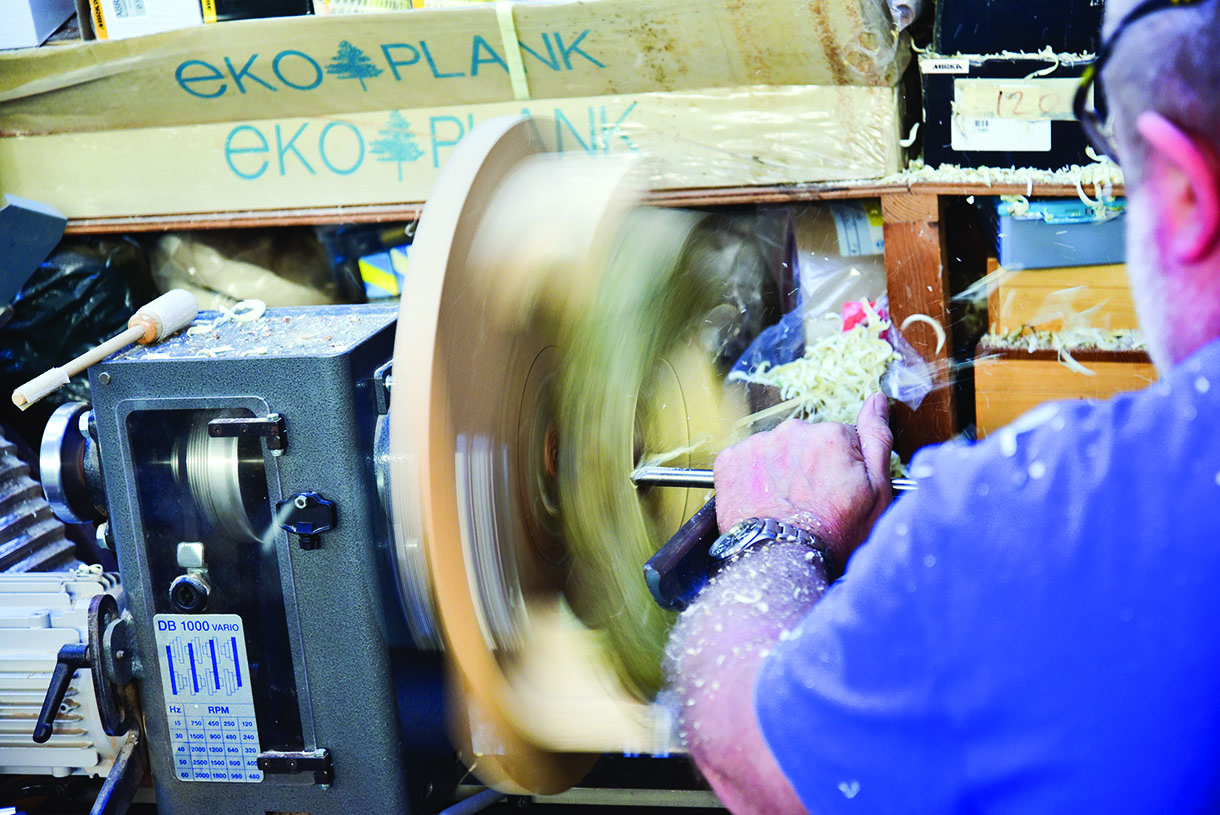
17. Turning is now very hit and miss, with lots of air between the ‘wings’. You need to concentrate on moving the gouge smoothly to create the shape you want, ignoring the temptation to cut deeper as the resistance decreases when you get nearer the tips. Keep stopping the lathe to check your progress
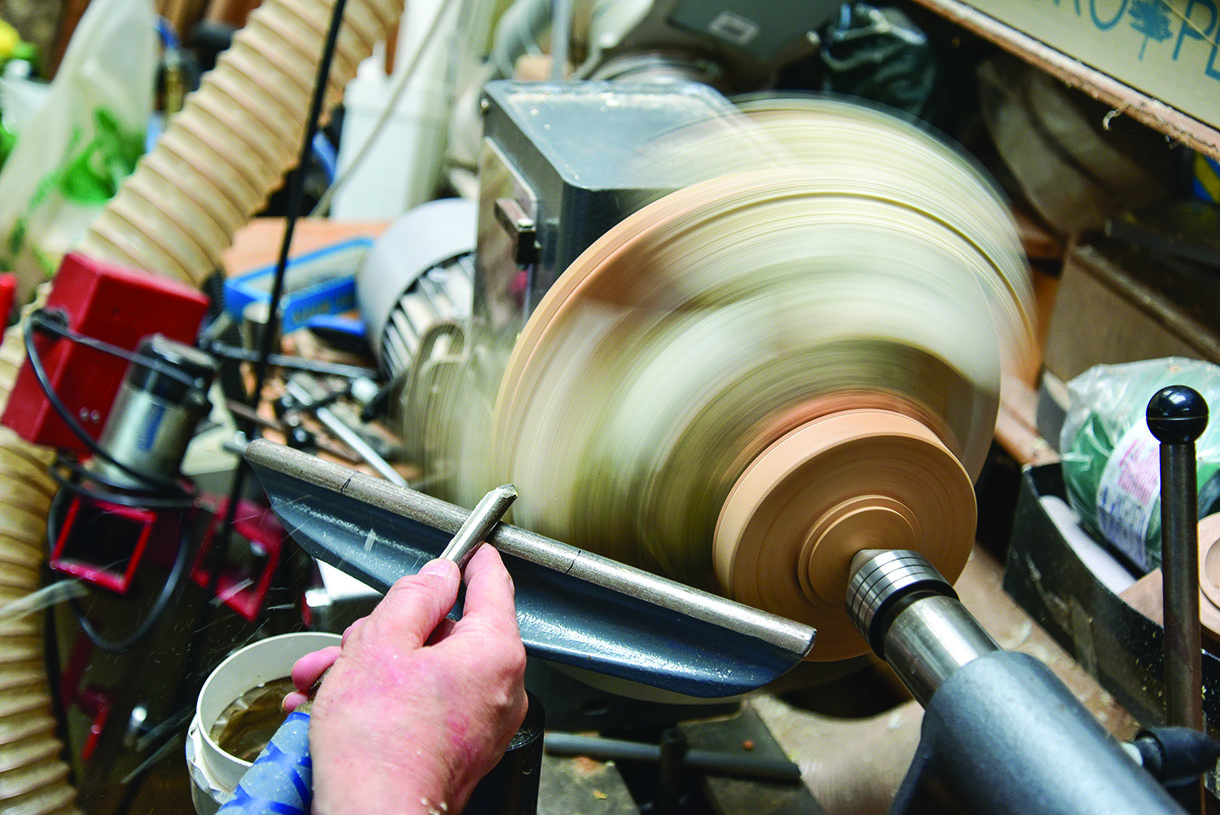
18. It’s very difficult to see the small extremities of the wings when turning, so just keep the gouge moving in your chosen arc until the clicking sound stops
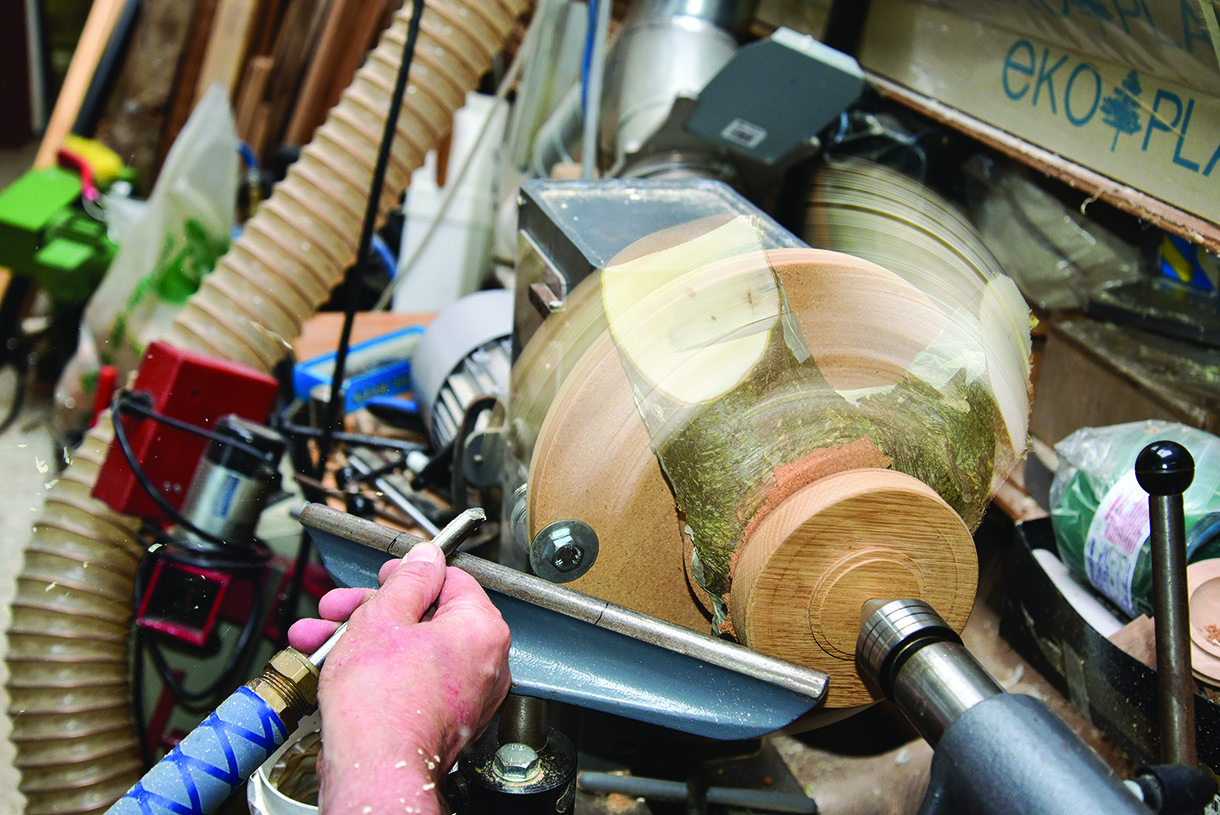
19. Using the flash on the camera, you can clearly see that I am mostly cutting air. The counterweight is on the back of the faceplate keeping it well out of the way of my gouge
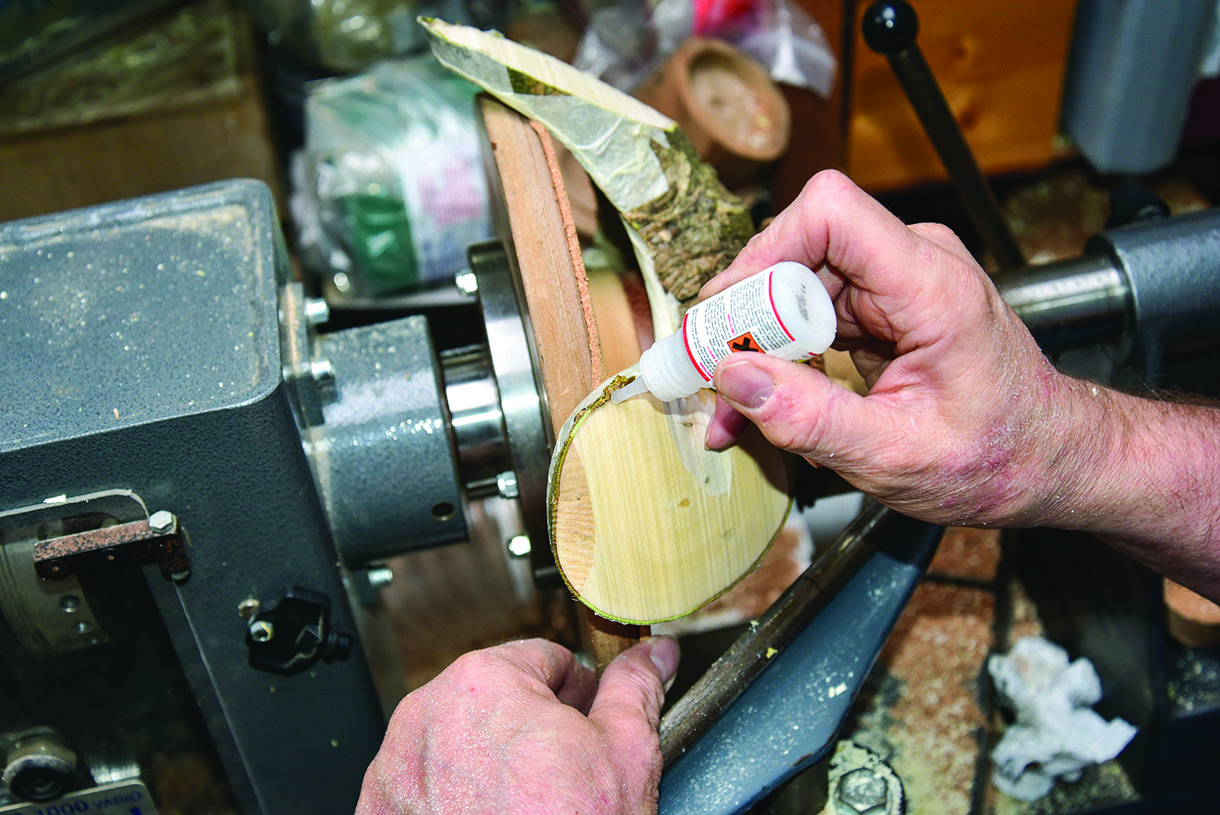
20. I found the wood was tearing out and pushing the bark off on the trailing edges of the ‘wings’, so superglue came to the rescue
21. Ensure that you can move the gouge smoothly from the start to the end of the cut, as picking a cut up is more difficult when you are turning so much air
22. As the wings get thinner, they need more support. Cut a small cork faceplate into thirds and screw them on the back of the faceplate. This will enable you to continue cutting with the grain to the tips. Never press
on regardless; if you can modify your jigs part way through the job to make it easier or safer it is usually well worthwhile
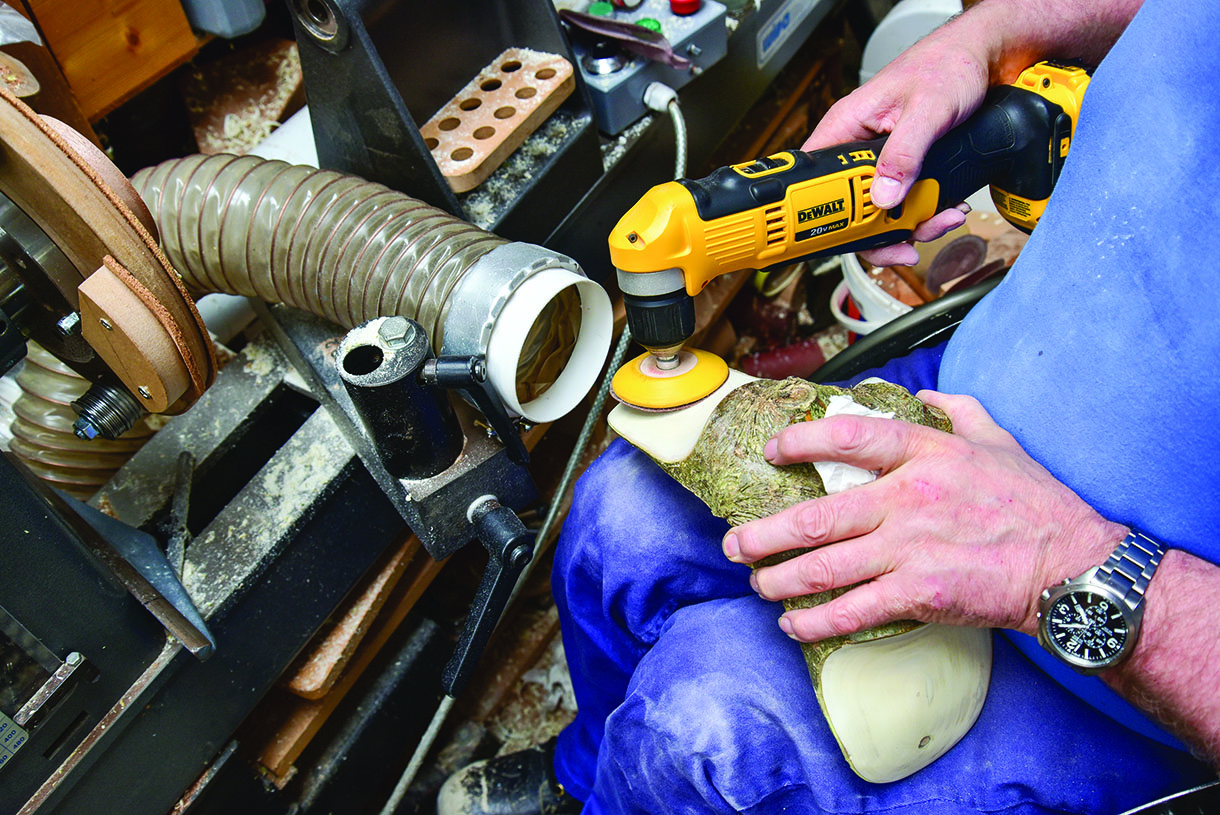
23. You can power-sand initially (I used my favourite angle drill) work through to 400 grit. Areas that can’t be reached by power sanding have to be done by hand, rolling the abrasive into a suitable shape. In any case sand with the grain by hand before changing grits. Use a strong lamp to check for sanding marks before moving on to finer abrasives. Alternatively, wander outside into daylight
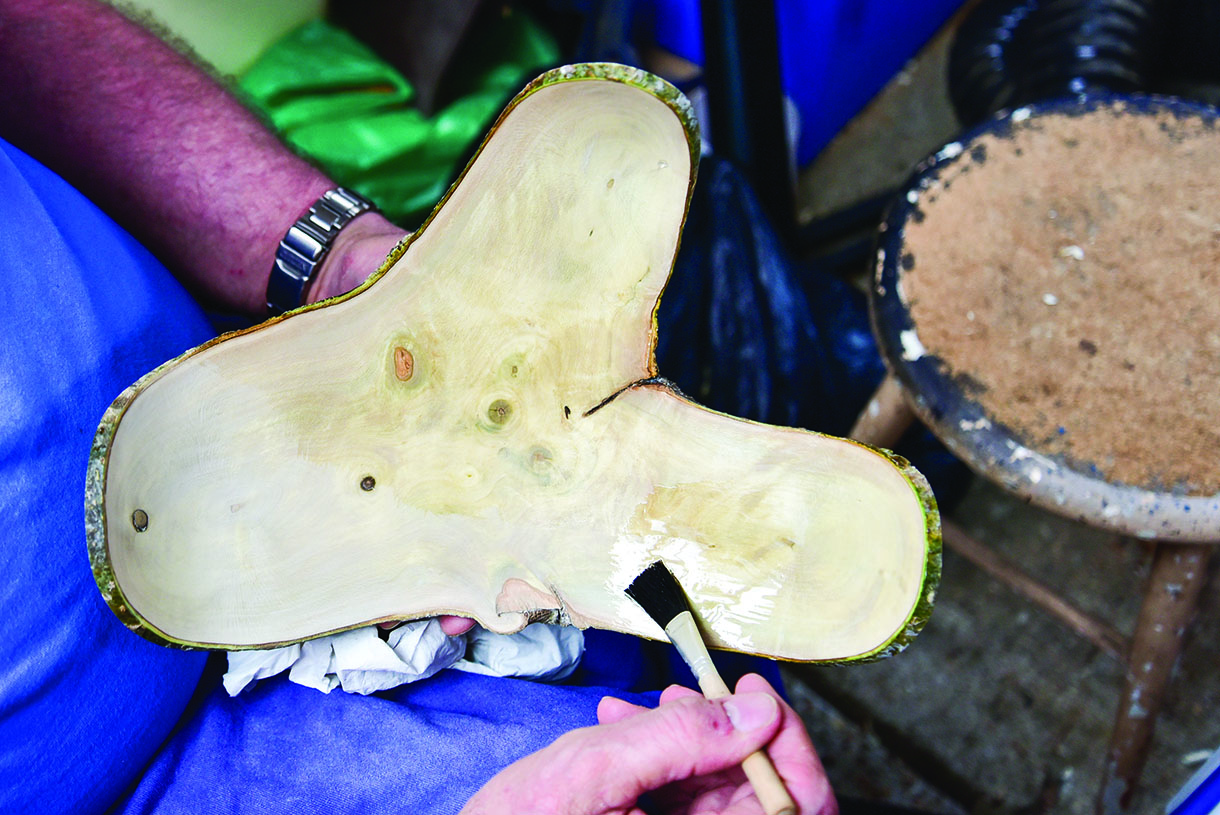
24. For an organic feel, use a coat of sanding sealer on the turned surfaces, and cut back with 600 grit. You can leave your piece ‘naked’ at this stage. My piece isn’t really a bowl, or even intended to hold anything. Rather it’s meant to be a conversational piece, so to me it needed a little something extra
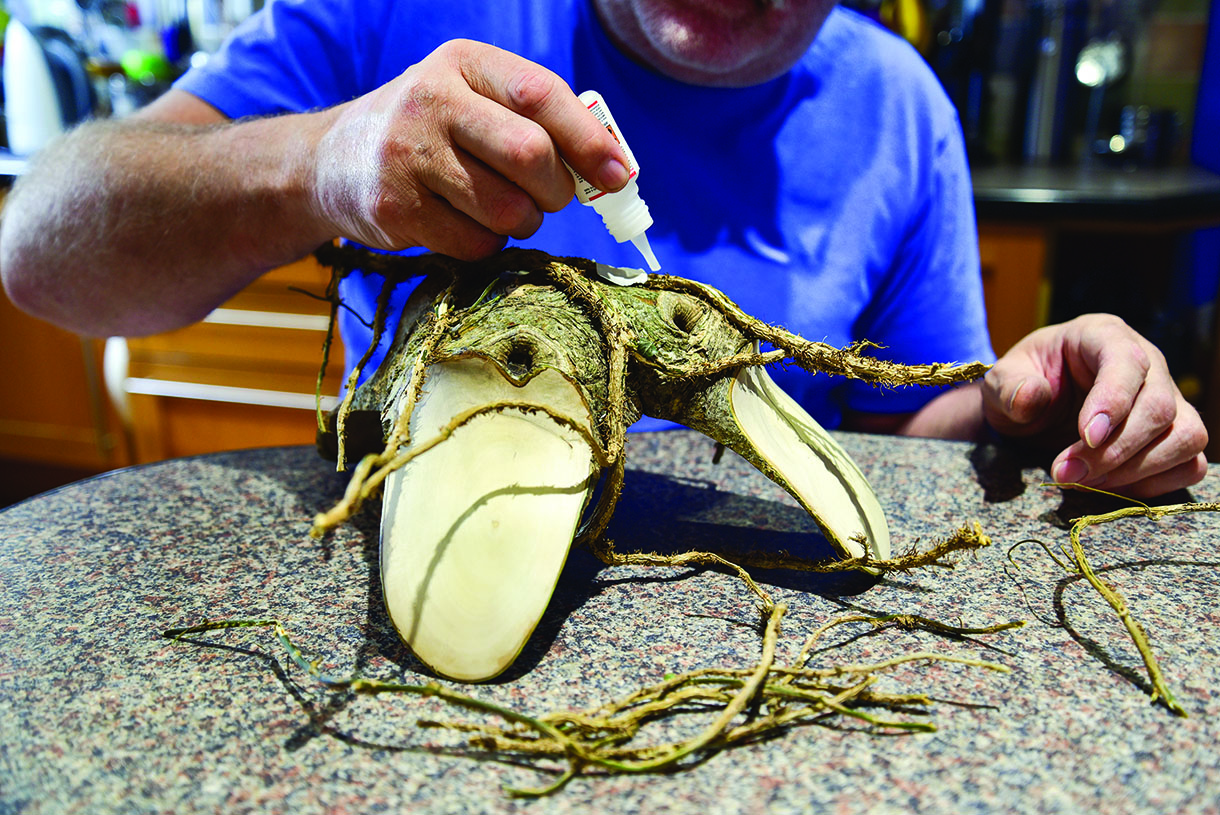
25. It just seemed right to wrap the finished piece with the ivy removed at the start, though it needed a bit of encouragement with superglue to stay in place
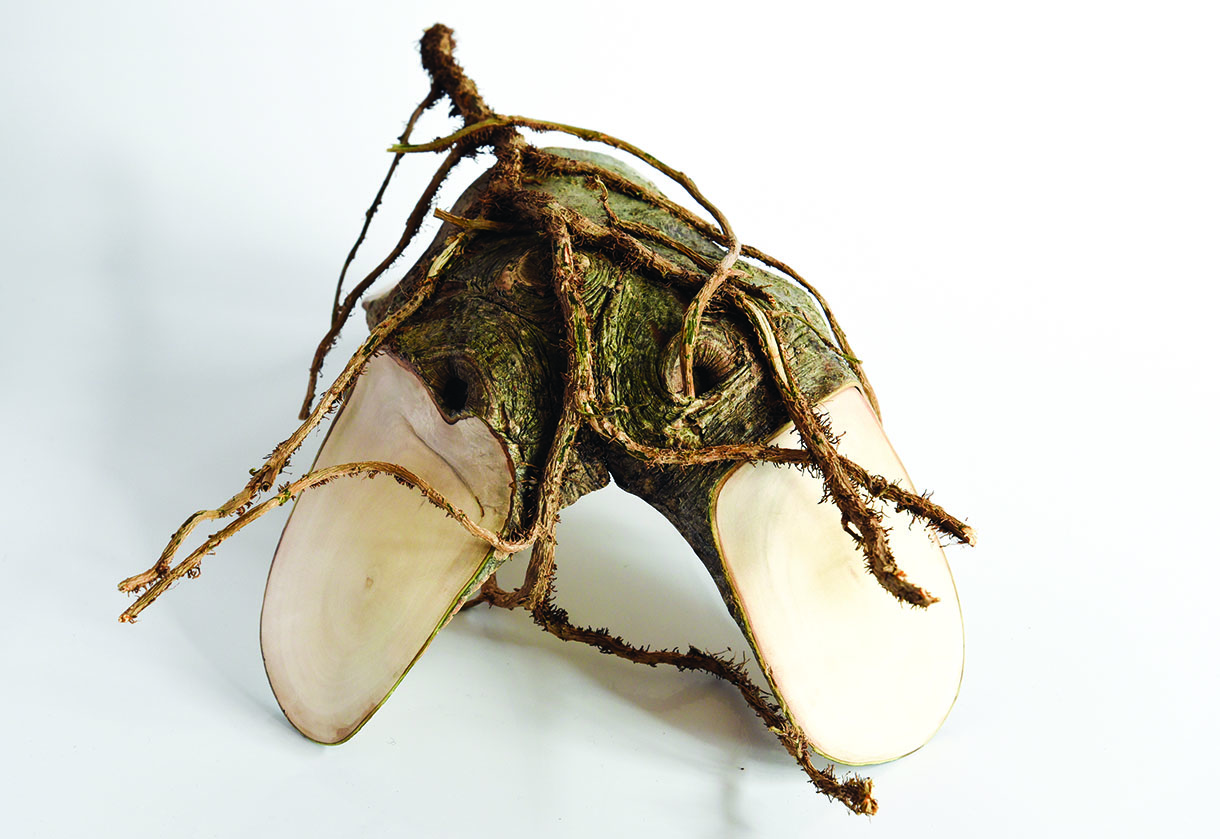
26. The final piece looked like this
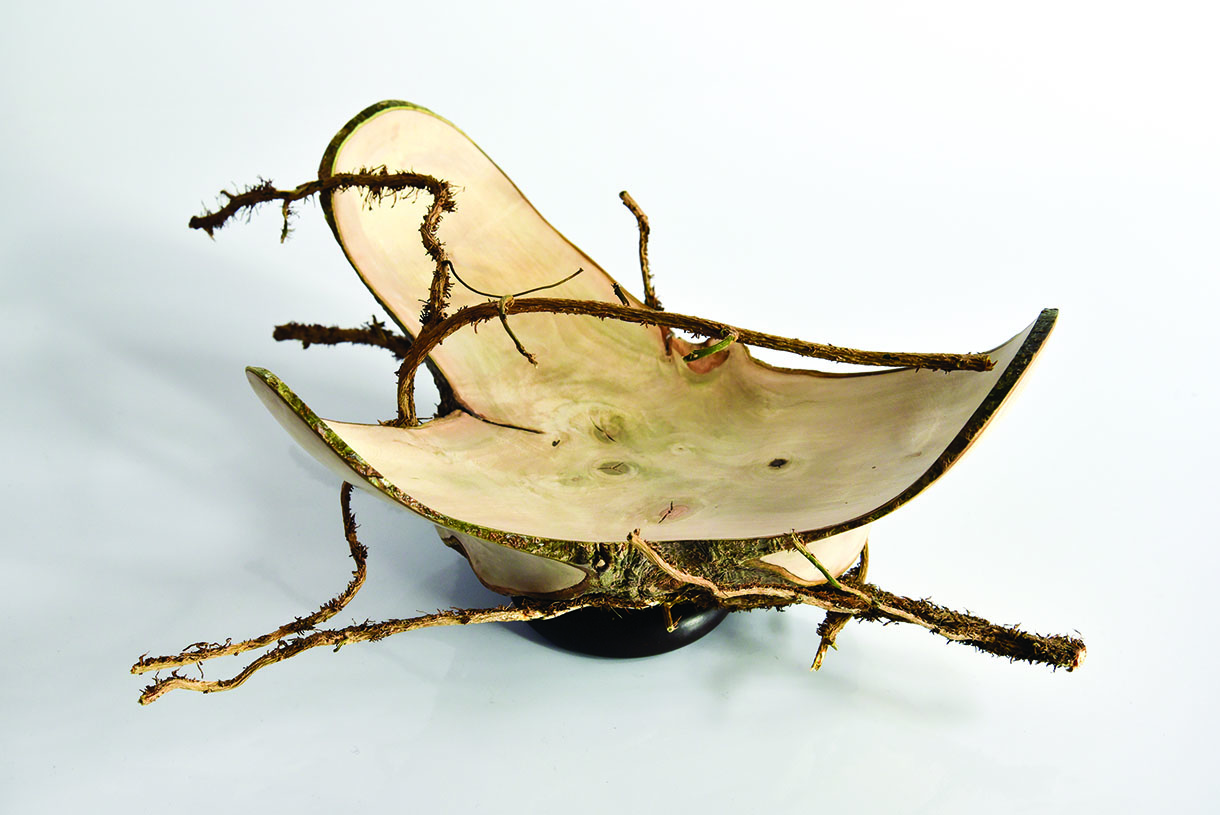
27. The final piece looked like this


