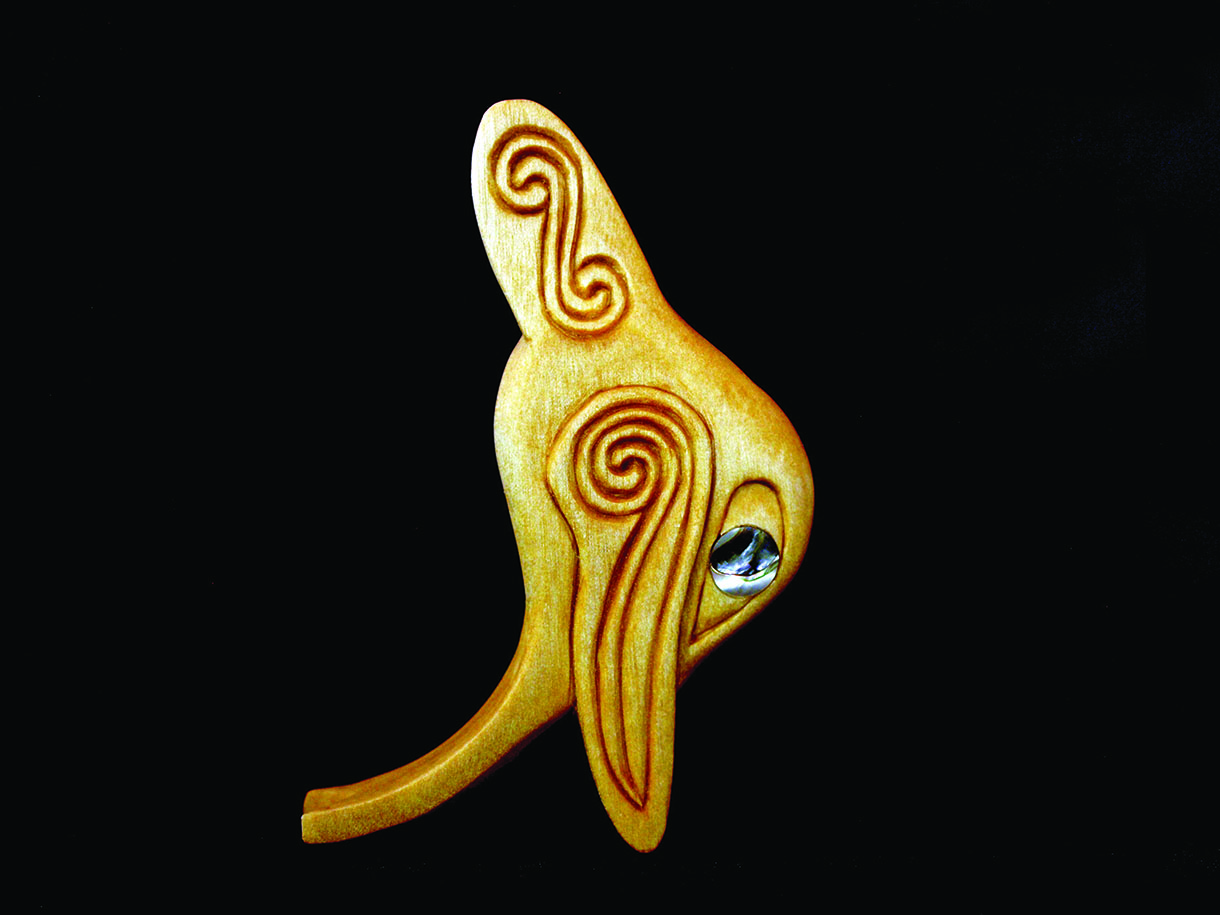
Stylised Killer Whale:
Dave Western creates from scrapwood a killer whale that is based heavily on a dramatic form of stylisation common to Celtic and Northwest Coast Art.
Dave Western creates from scrapwood a killer whale that is based heavily on a dramatic form of stylisation common to Celtic and Northwest Coast Art
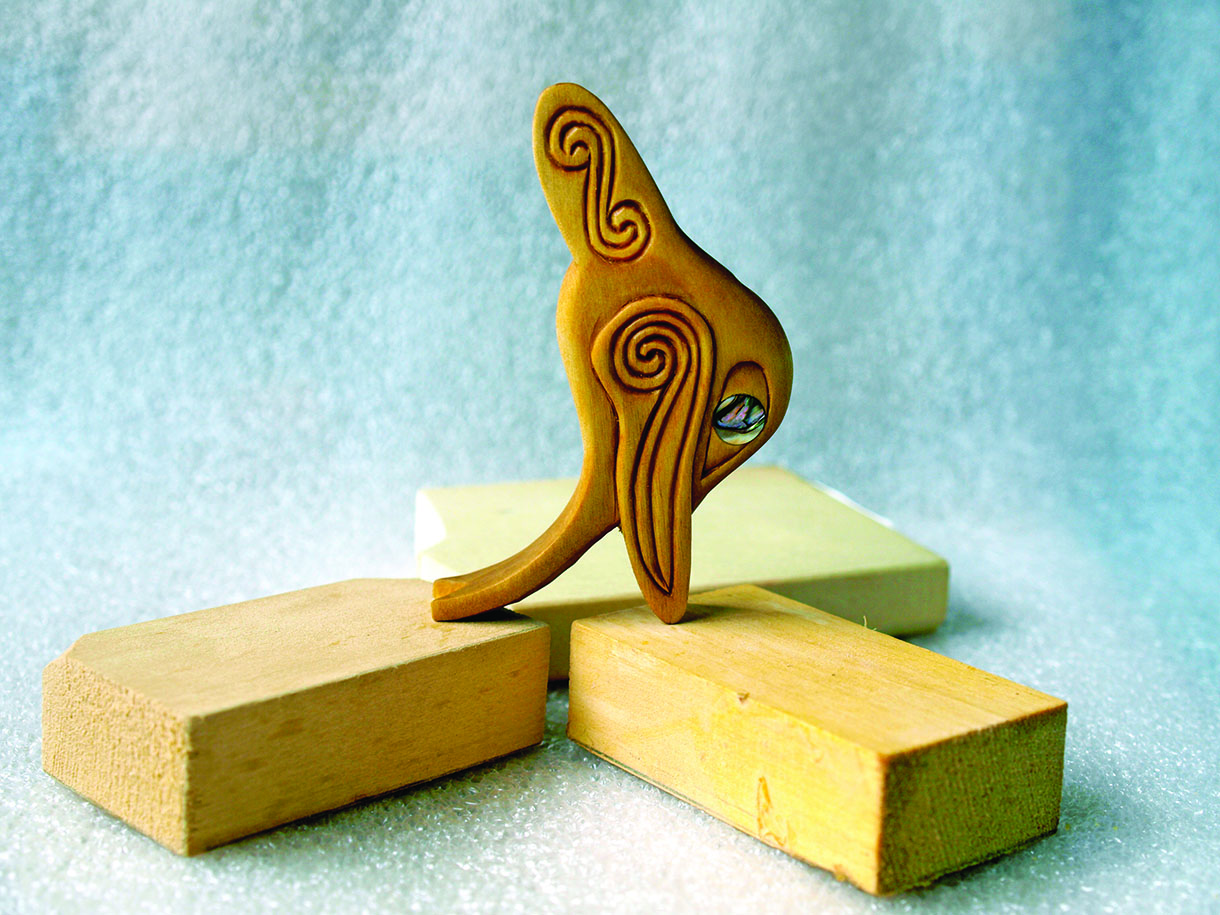
If you are anything like me, you find it really difficult to get rid of those little scraps of wood that are too small for your usual projects, but you just know will be perfect for something one day. I have boxes full of these odd bits but ,to be honest, I never get around to using them for anything much. A case in point is a little piece that has been teetering on the edge of my bench for about three years. I’ve often considered throwing it in the burn box because it is really nothing special, but have somehow always resisted the urge. I’m glad I did, because the other day this little killer whale design suddenly popped into my head and it worked just right for the little scrap. The design is based heavily on the dramatic form of stylisation so common to Celtic and Northwest Coast art. In these forms, literal representation often gives way to exaggeration and distortion, so, in this particular piece, the dorsal and pectoral fins become the focal point, with the head and chest areas playing a secondary role. The tail is under-emphasised so that the idea of the whale breaking the surface but not leaping can be achieved. I think the result is a lovely little piece that is both relatively straightforward to carve and attractive to the eye.
No effort was made to ensure anatomical accuracy in the design, rather, the idea was to exaggerate the dorsal fin, pectoral fins and eyes and to give the piece a feeling of motion. It was also important the piece stand unsupported, so the pectoral fins and the tail act as a tripod, keeping the whale surprisingly stable. The beauty of this project is that you can play with the design to suit your piece of wood.
Things you will need
• Bandsaw or scrollsaw
• 25 & 38mm straight carving knife
• Fine file
• Abrasive
• Adhesive – fast-set epoxy or cyanoacrylate
• Abalone/mother of pearl, or similar for the eye
Materials
• 110mm long x 76mm wide x 31mm thick
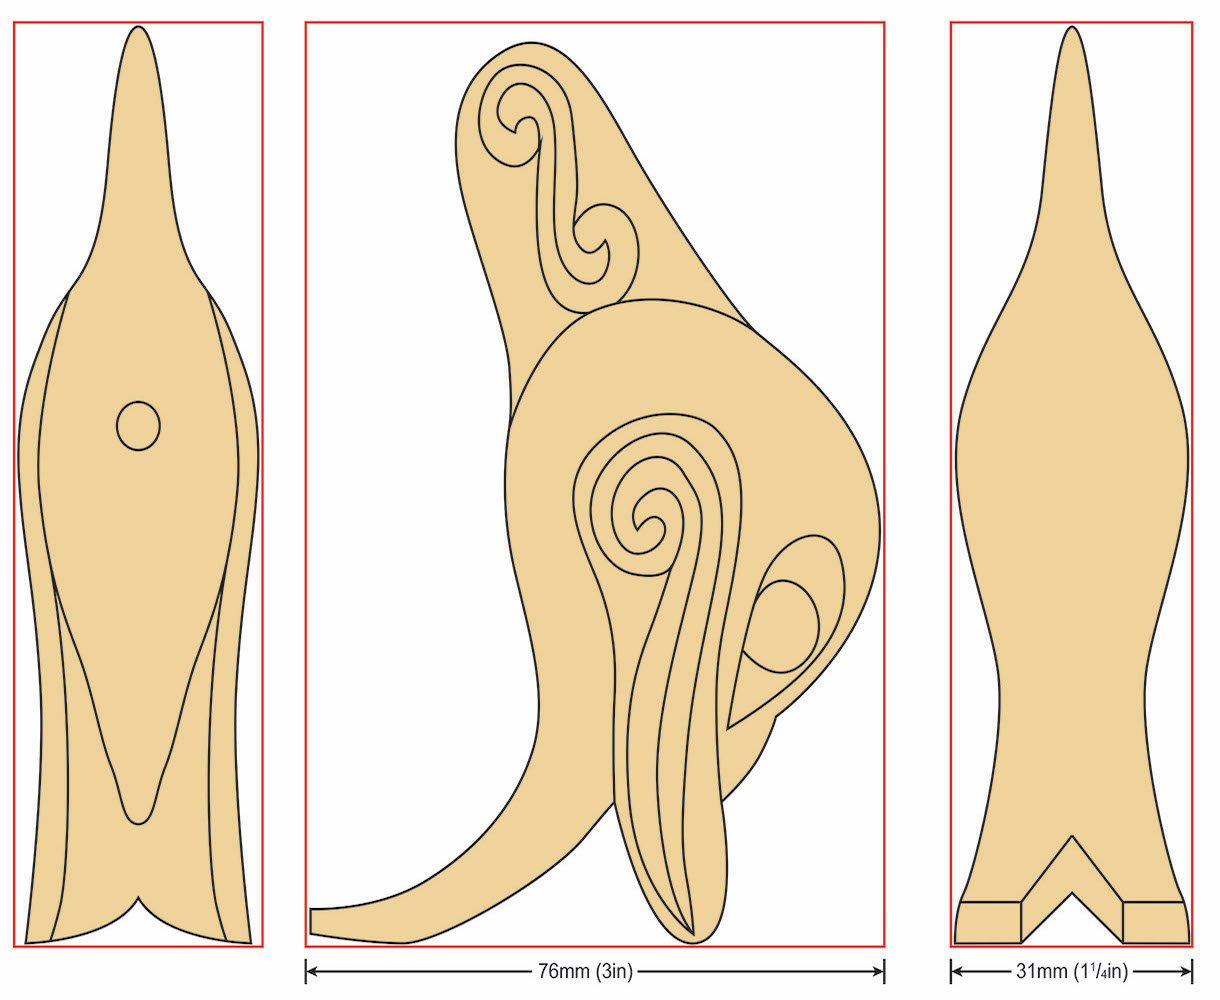
Drawings and how to resize them
To enlarge or reduce the size of drawings right click on the image to download it and then go HERE to watch a video on how to use paper with a grid to do exactly that.
1. To make this carving, photocopy my finished drawing, glue the photocopy directly to the block being used then saw the waste off
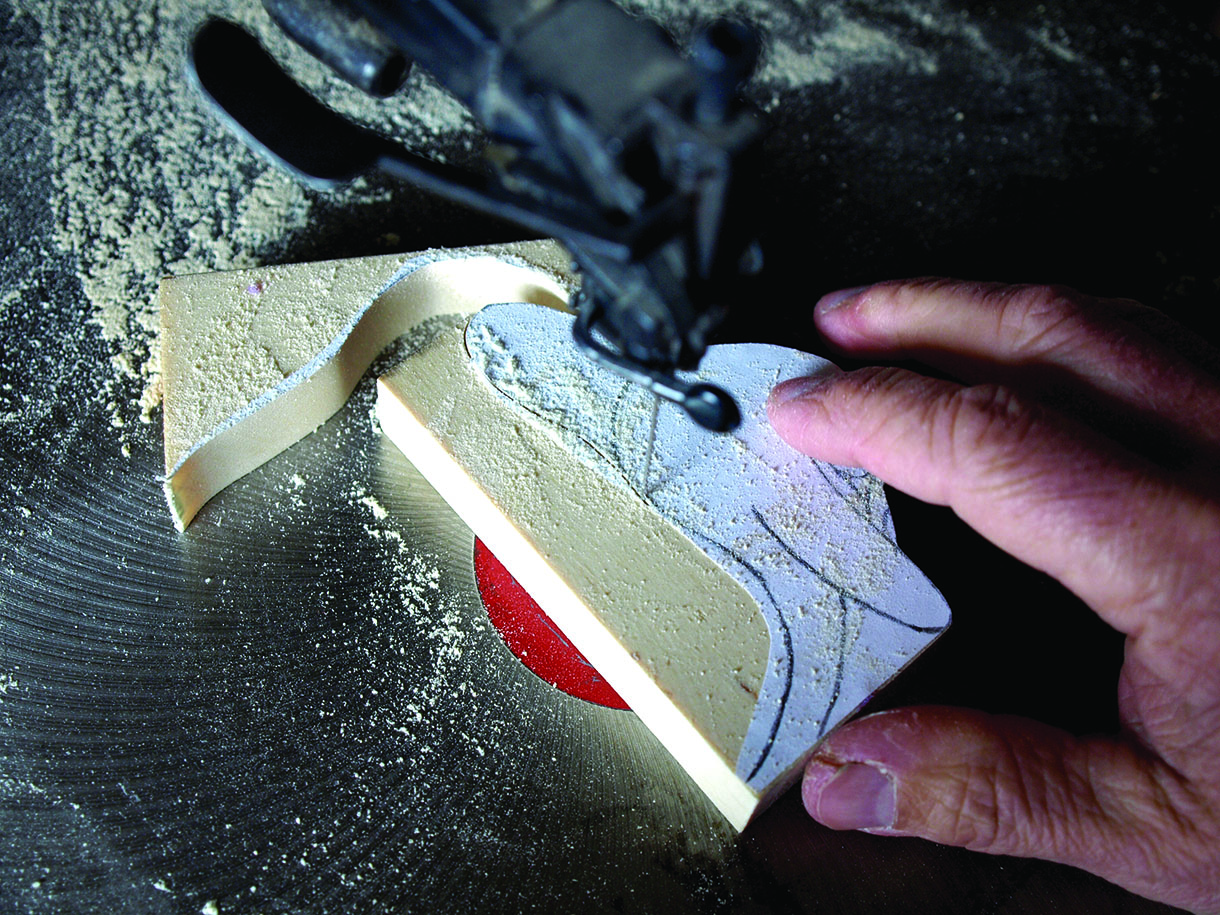
2. With the block roughed out, measure a centreline around the entire carving to ensure that the dorsal fin is centred, and ensure that both sides of the body are equally thick and the tail fin is even. Then use a saw to rough out a tapering cut, which quickly removes material and shapes the outline of the dorsal fin. This same cut could be achieved by knife cutting, but the process is much more rapid with a saw
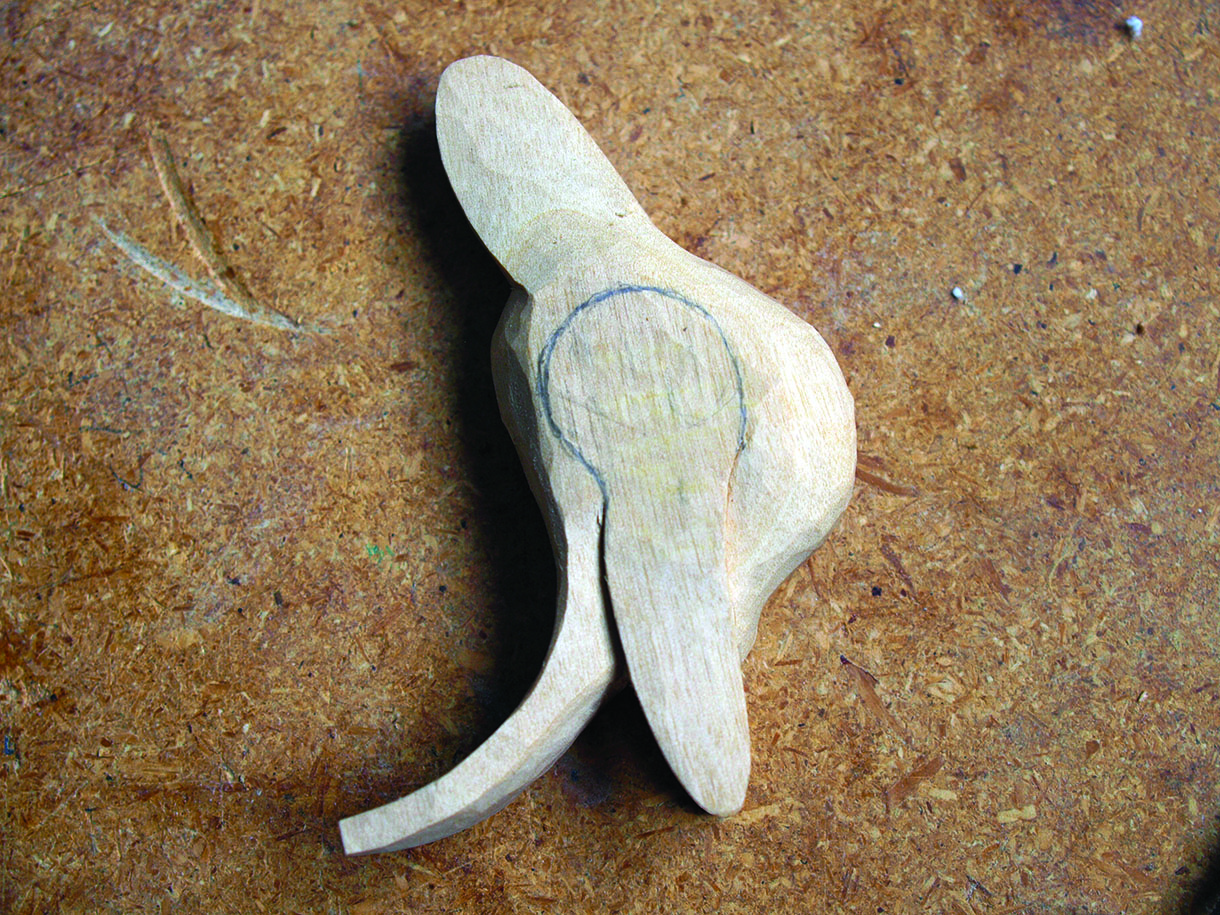
3. With the centreline ascertained and the rough outlines cut, begin the process of hogging away excess material. The idea at this point is to round out the body shape, form the dorsal fin and clean the areas around the tail fin. The cutting can be deep and bold at this initial stage of proceedings. Continually refer to the centreline to ensure the carving remains balanced and both sides appear equal. If one side looks to be fatter than the other, spend a bit of time with some shallow, careful cuts to even both sides back up before advancing any further in other areas
3.
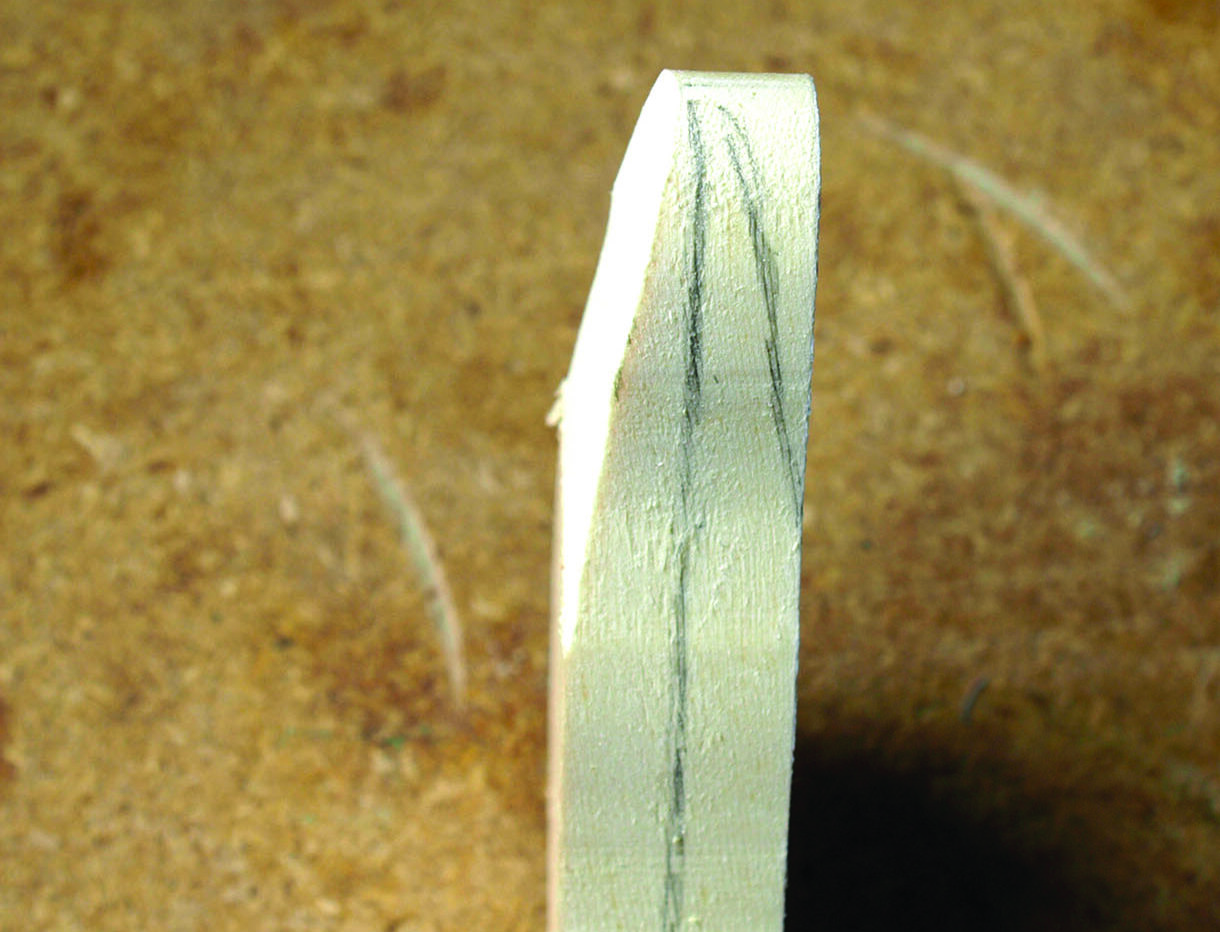
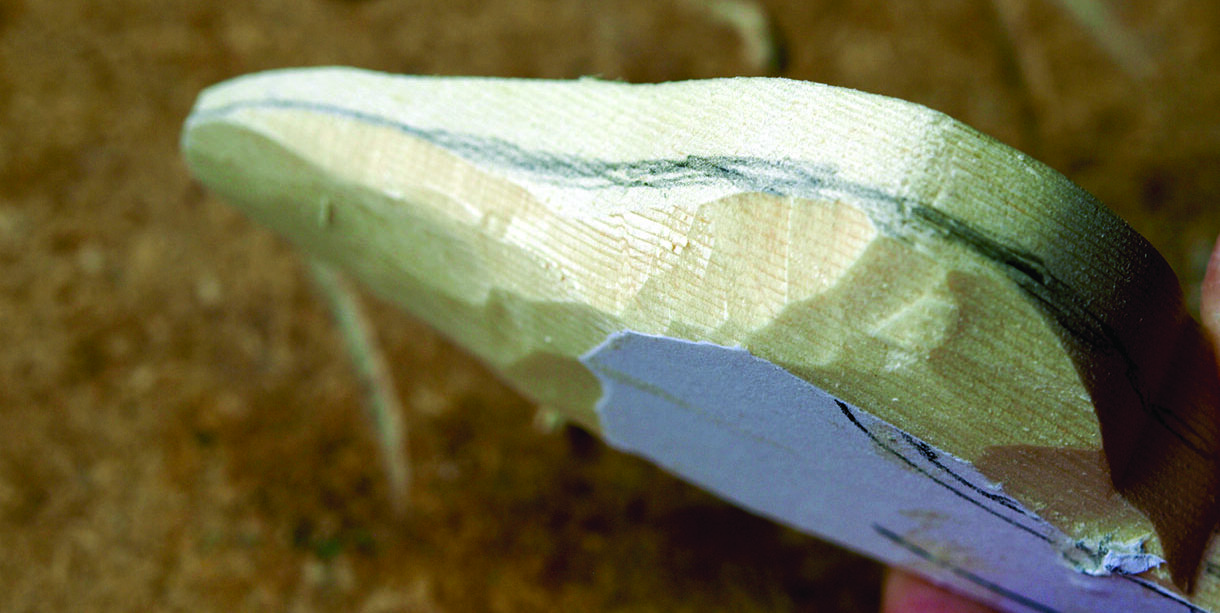
4. As you get closer to the final shape, pay particular attention to the shape of curves and the depth of your cuts. In this photo, you can see that the curve on the left side of the dorsal fin is longer than the one on the right. You need to make things nice and even
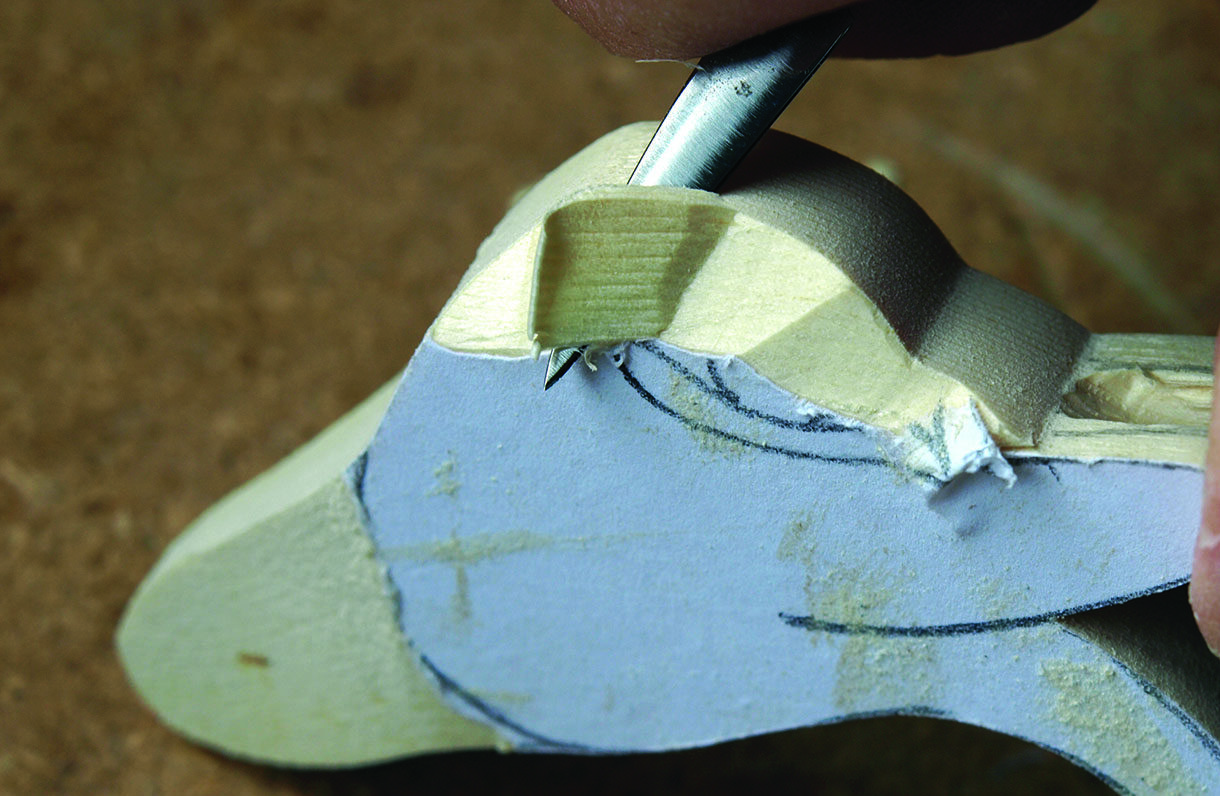
5. Now outline the shape of the pectoral fins and begin shaping them. Scribe a line by drawing the knife along the outline in the manner of a pencil. Cut down about 3mm into the wood and then start cutting away surrounding material to ‘raise’ the fin away from the body
5.
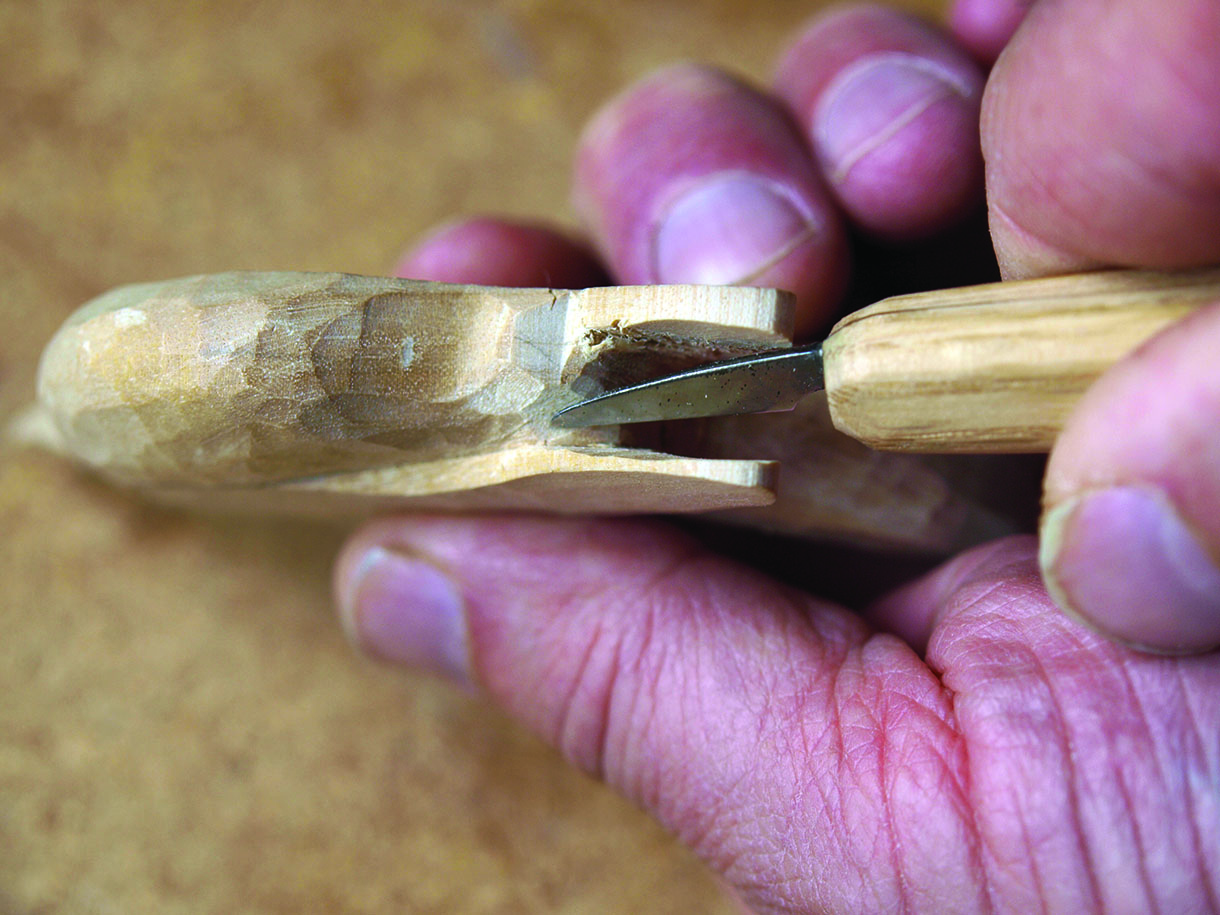
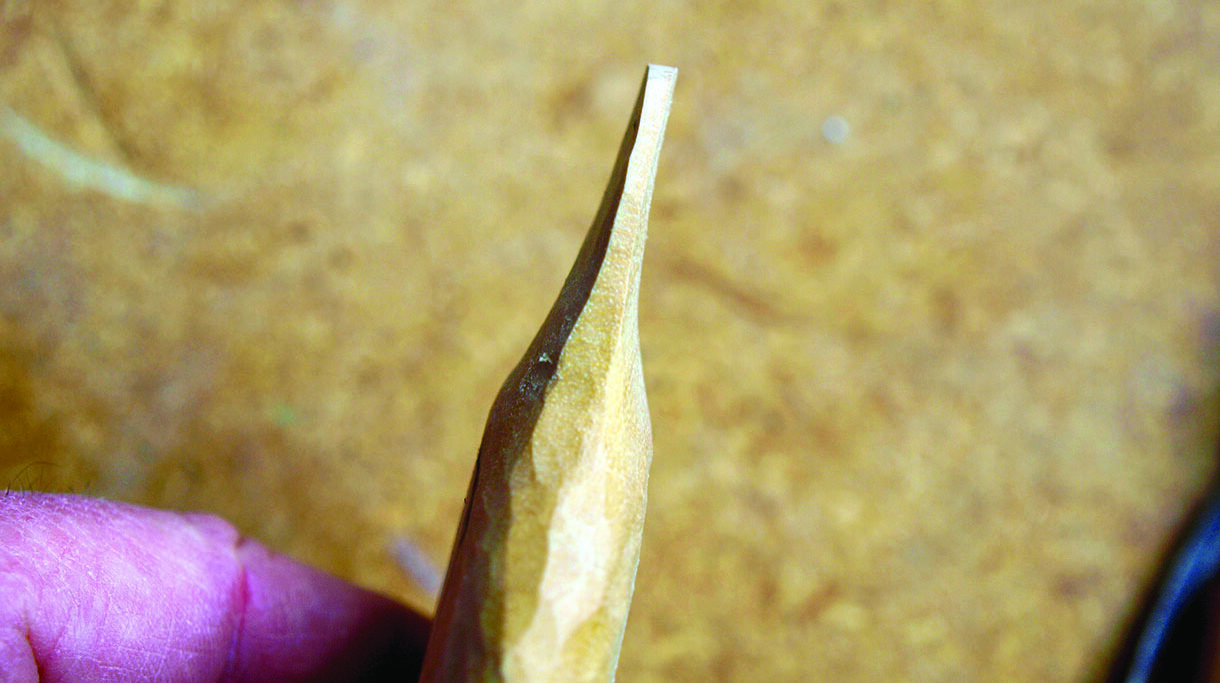
6. As the pectoral fins take shape, they can be separated underneath the body. Use the straight knife or gouge to rough it out, keeping the knife back for the cleaning cuts at the end of the operation. Ensure both fins are equal thickness. With the fins defined, the body shaped and the face formed between the pectorals, the whale can either be left ‘off the knife’ or it can be sanded smooth. I opted to sand it for the sleek, glossy look that a wet killer whale’s body has
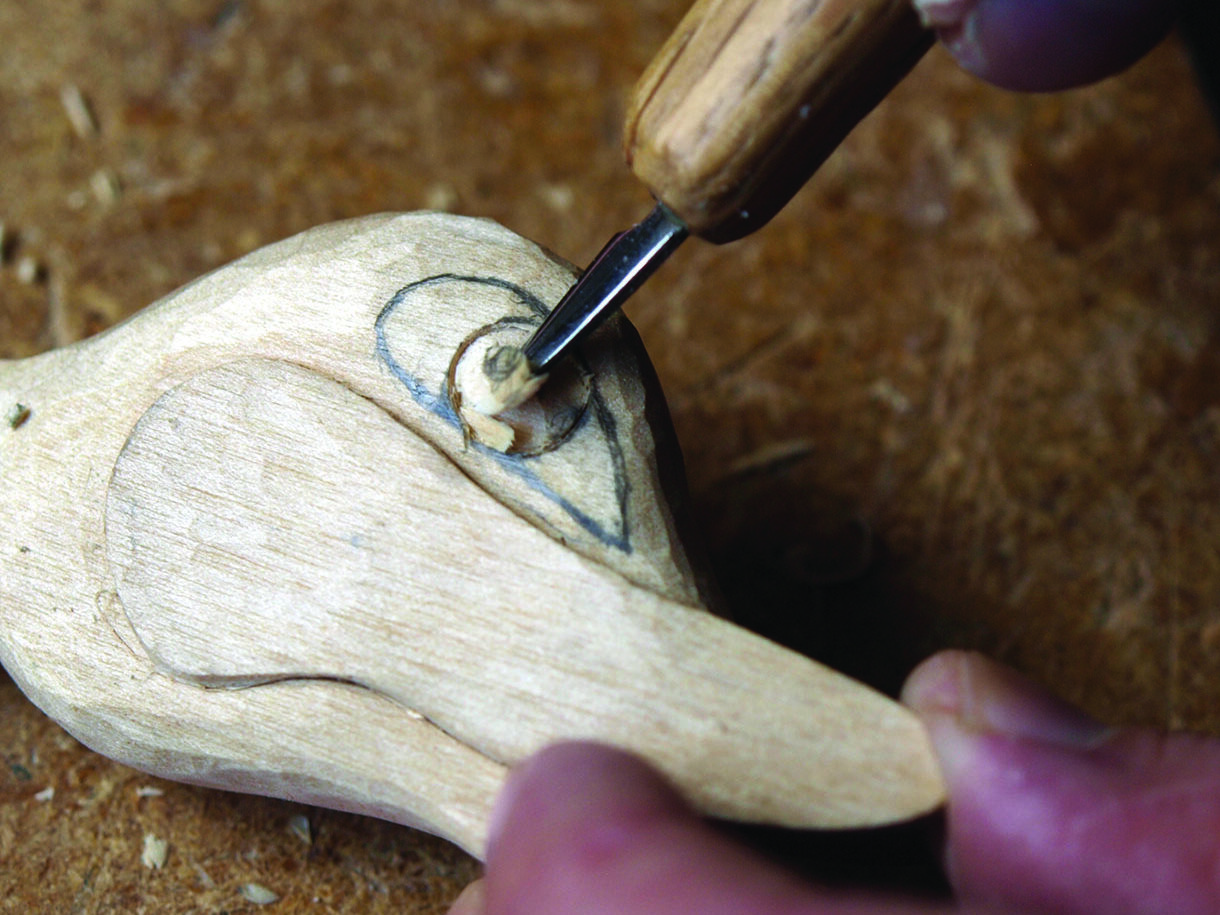
7. I used a small disc of abalone – available from craft suppliers and bead shops – in the whale’s eye but you can carve an eyeball with a gouge and straight knife. To shape the cutaway section the disc will be glued into, use a gouge the same diameter as the abalone disc to scribe a circle. Then cut the material enclosed by the circle to a depth just slightly less than the thickness of the inlay
7.

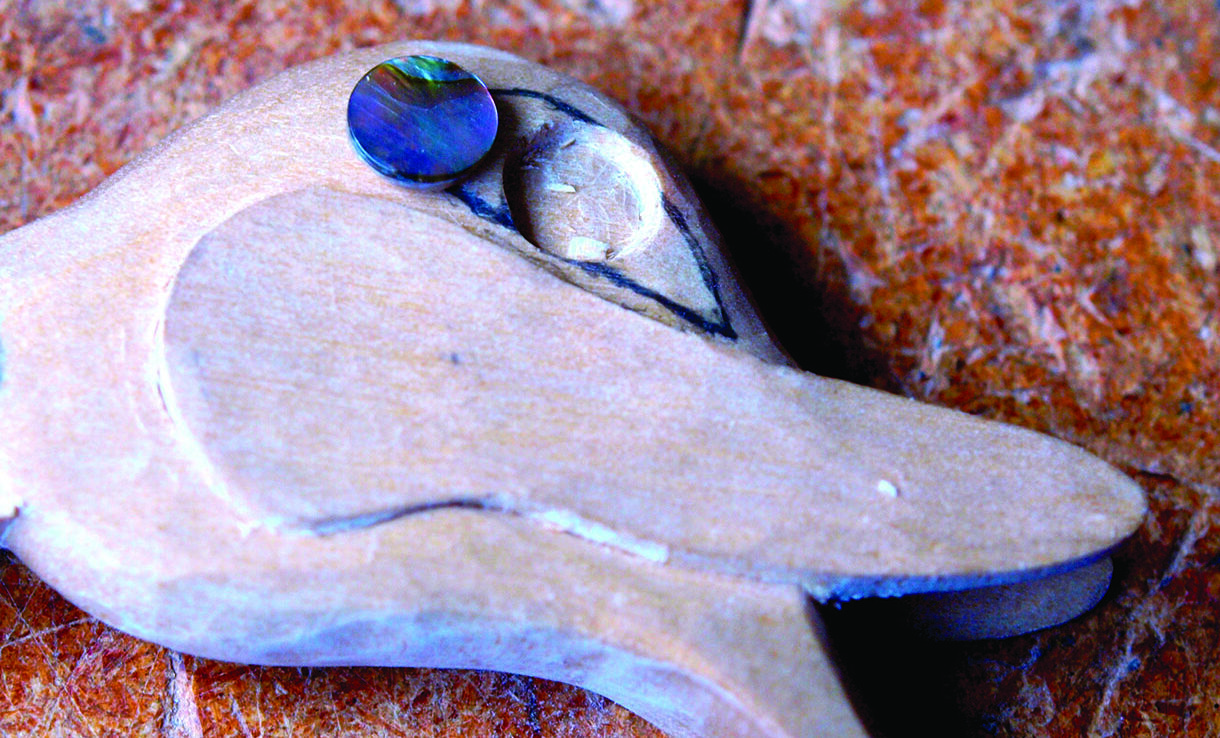
8. Ensure the abalone lays flat before gluing in place to make sure it sits right. Now clamp the disc in place while the glue sets. Once set, shape the disc to follow the curve of the whale’s face. I use a file. Always wear a mask and work in a well-ventilated area when filing/sanding abalone as the dust can be both an irritant and a health hazard. I use a lightly dampened rag to clear away the dust. Once the eyeball has been shaped, use a straight knife to clear away the remaining material around the eye. Make sure the outlines are cleanly scribed
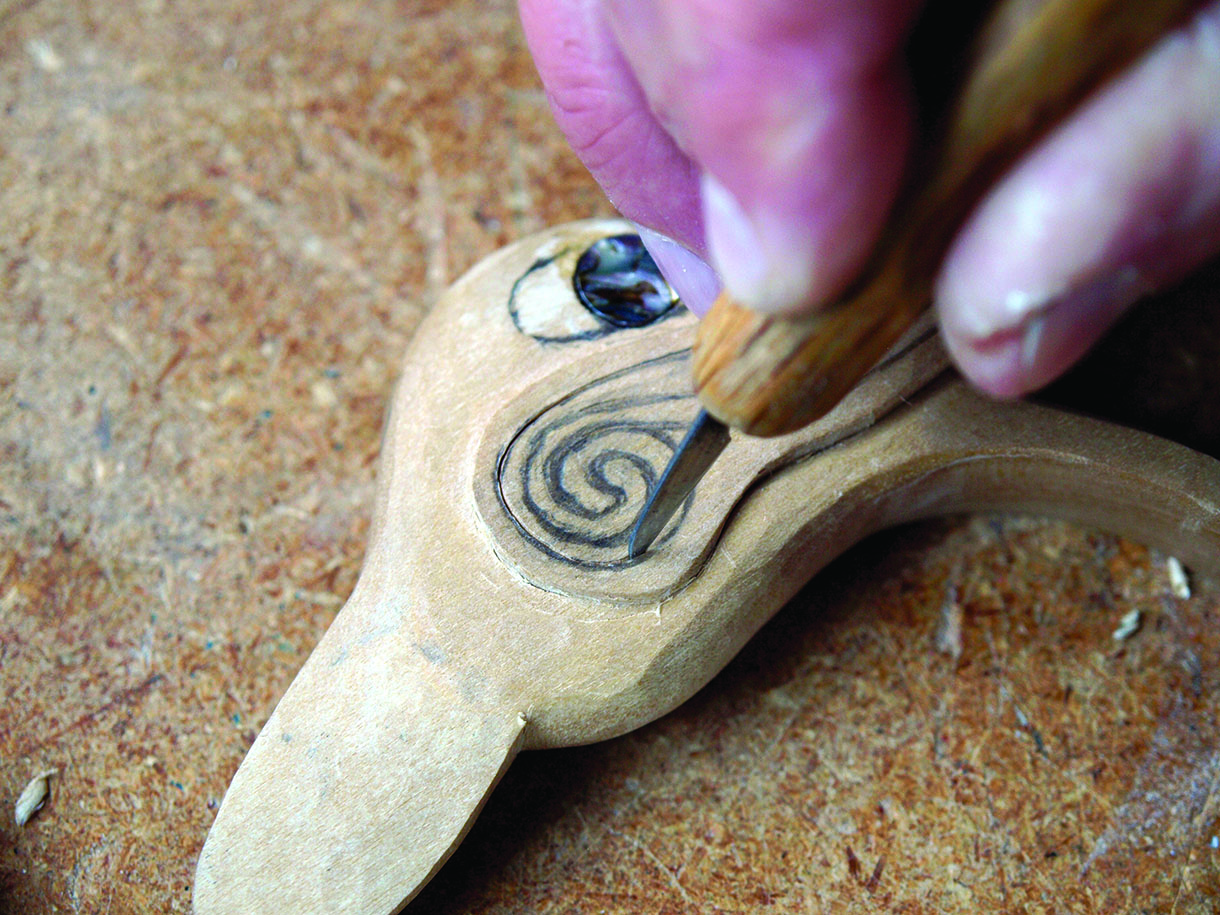
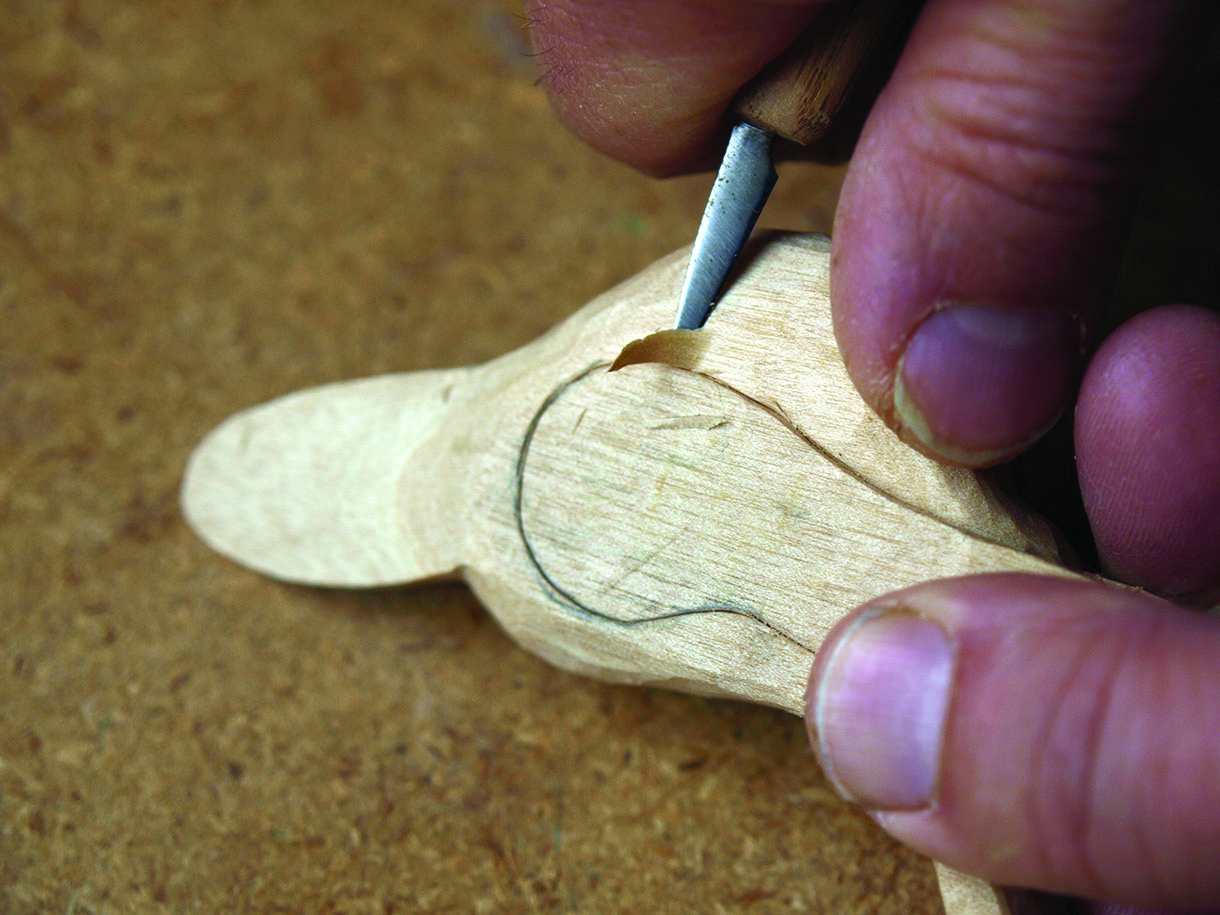
9. Scribe all the Celtic ‘swirls’ cleanly and to a consistent 2-3mm depth before removing any material. You can use the straight knife to trace the design outline or you can use the gouge to shape the curves and the knife for the straight sections. Keeping a consistent depth to the cut is the key point
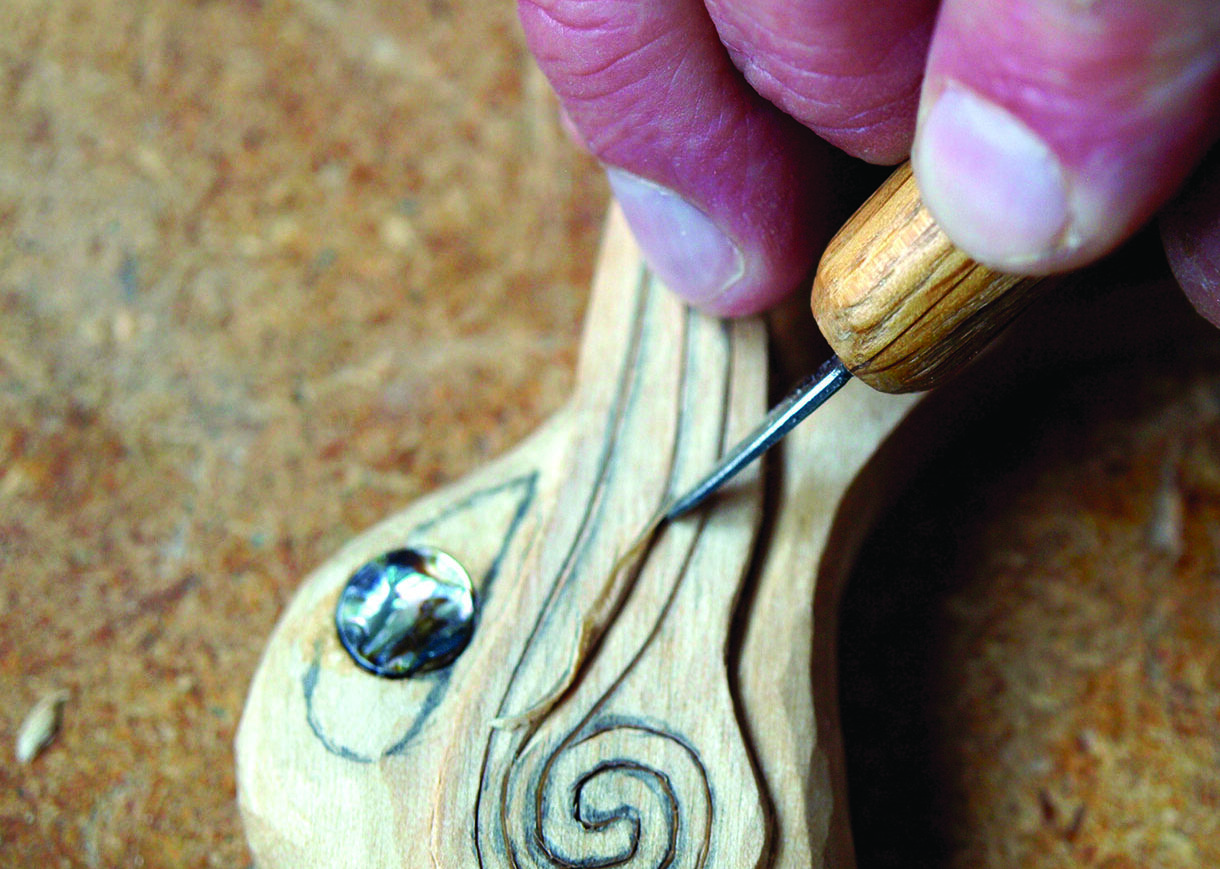
10. To refine the pattern, angle in and cut from either side of the scribe line. The goal is to meet cleanly at the bottom of the central scribe line in the manner of letter carving. Once an initial small V-shaped groove is created around the entire pattern, sections can be deepened as required to create a vibrant design. If you find a knife leaves the curved areas of the Celtic scrollwork a bit unruly, you can use gouges to cleanly cut the scrolls for a more refined look
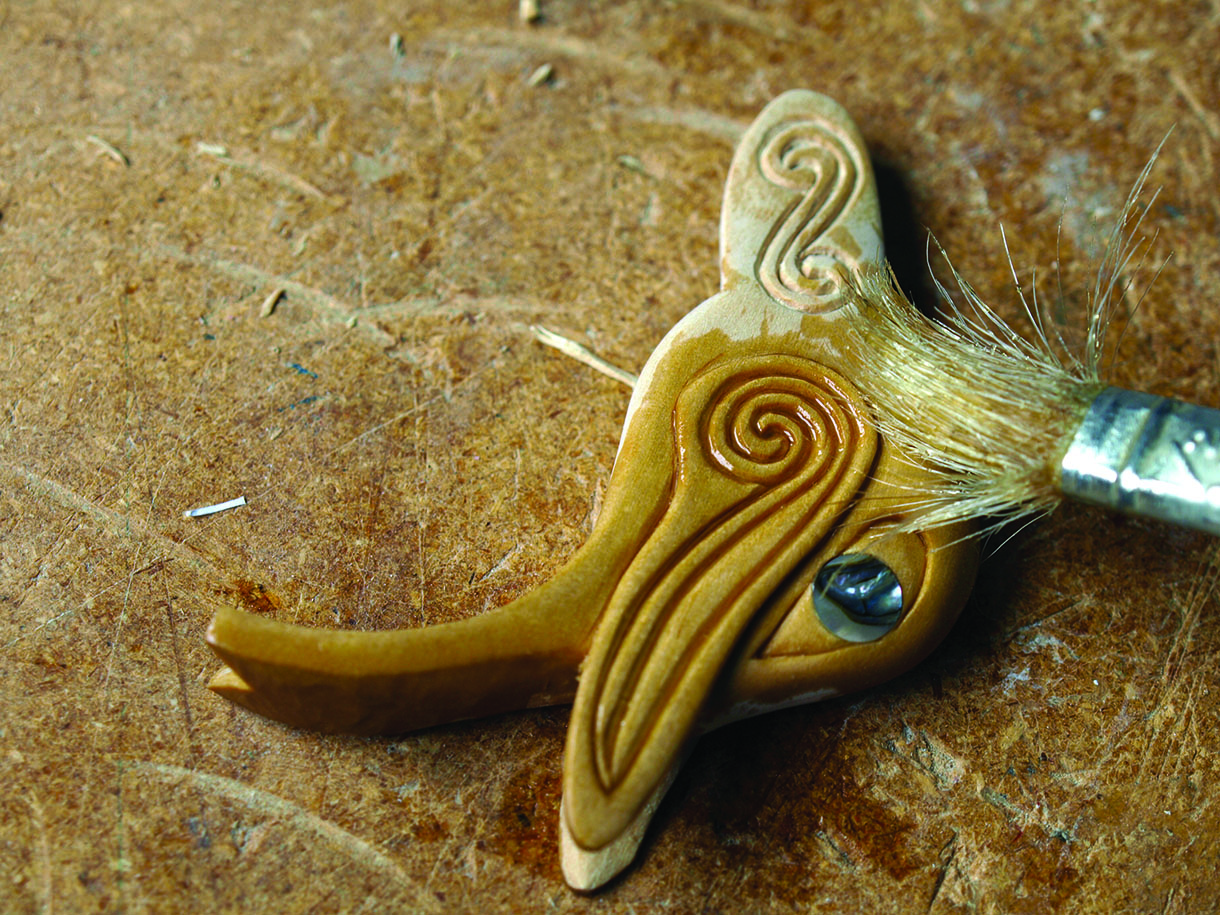
11. With the cutting and sanding all complete – make sure all sanding marks are removed – apply a couple of coats of penetrating oil to bring out the wood’s colours and make the abalone dot really sparkle
12. Although I went with Celtic designs for this particular whale, it would also look good with NW coast designs, abstract markings or just left unadorned


