DIY Bi-Fold Doors:
An ‘open and shut’ installation job that definitely needed closure.
An ‘open and shut’ installation job that definitely needed closure
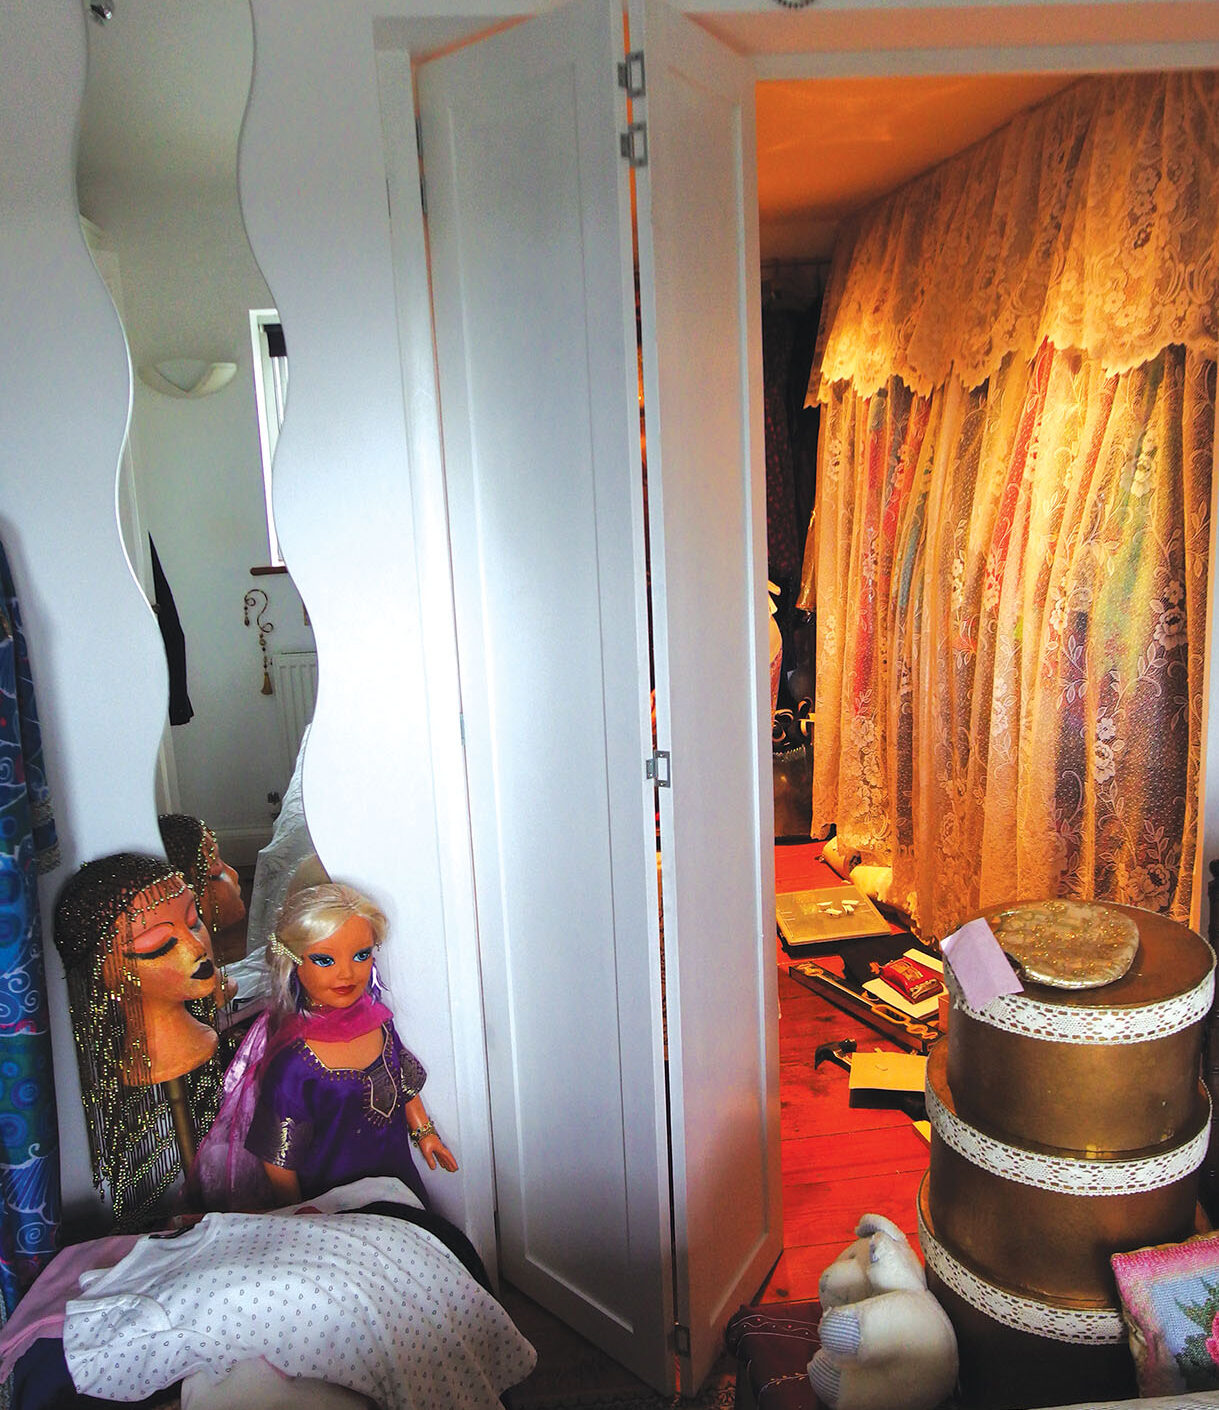
The space in question was a small Victorian cottage bedroom to which a sympathetic modern extension had been added. The low ceiling original part needed to be divided off as a walk-through hanging space from the new, larger vaulted roof bedroom area. It had to be done quickly and cheaply, this was my solution.
Fitting the frame

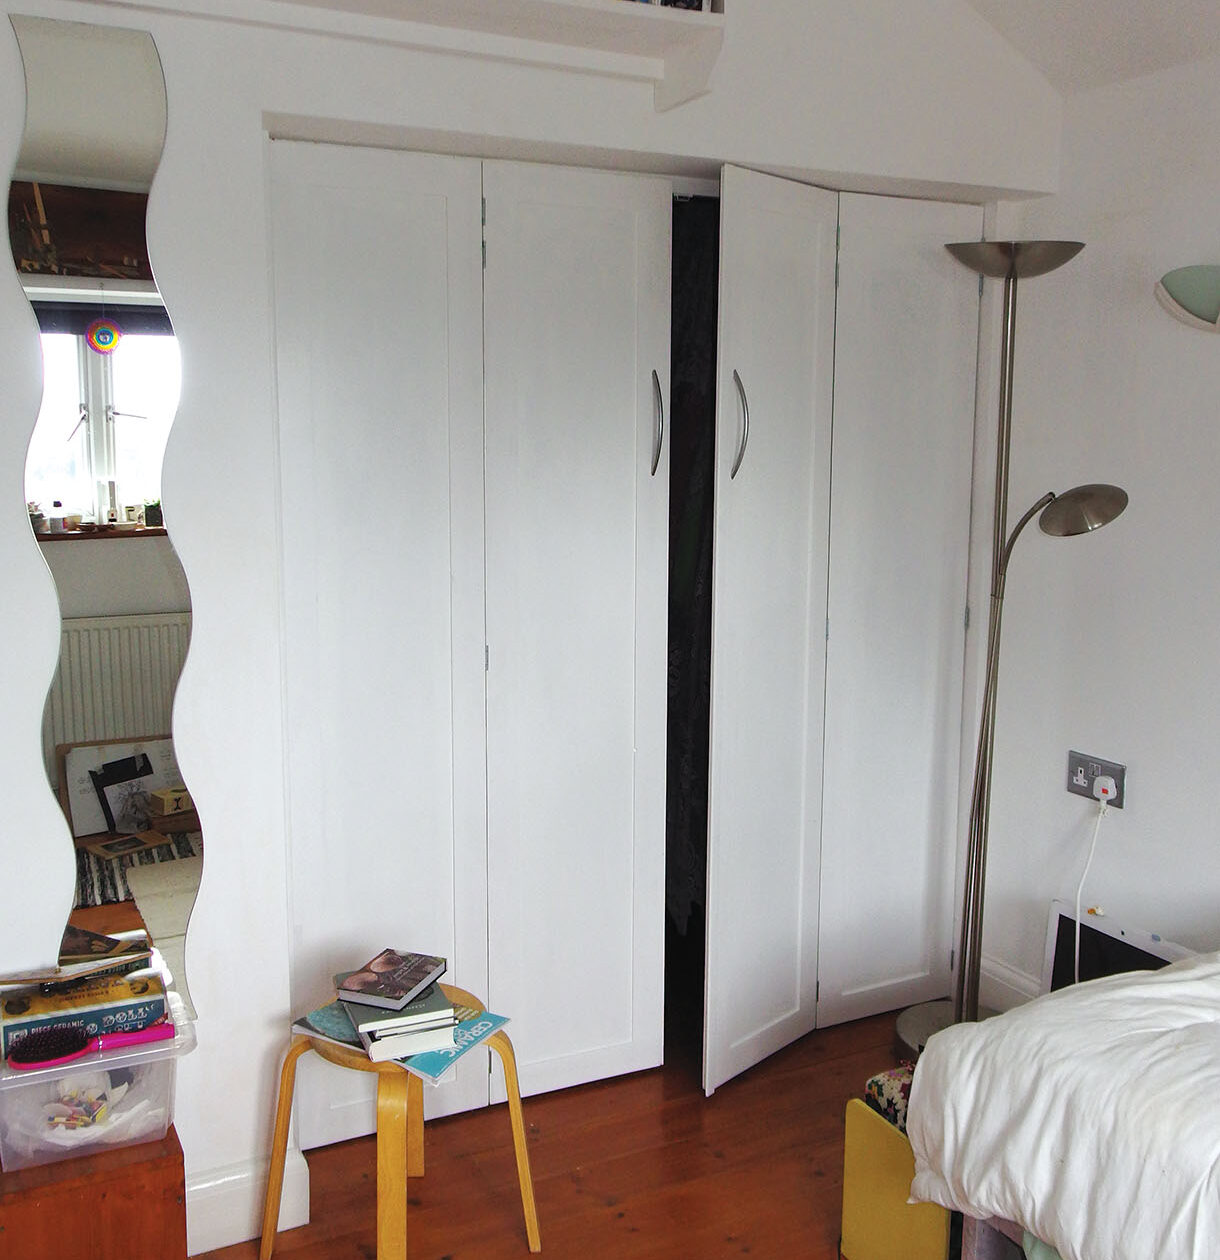
1. This is the opening that needed closing, so the dressing room area with its hanging space could be separated from the larger bedroom
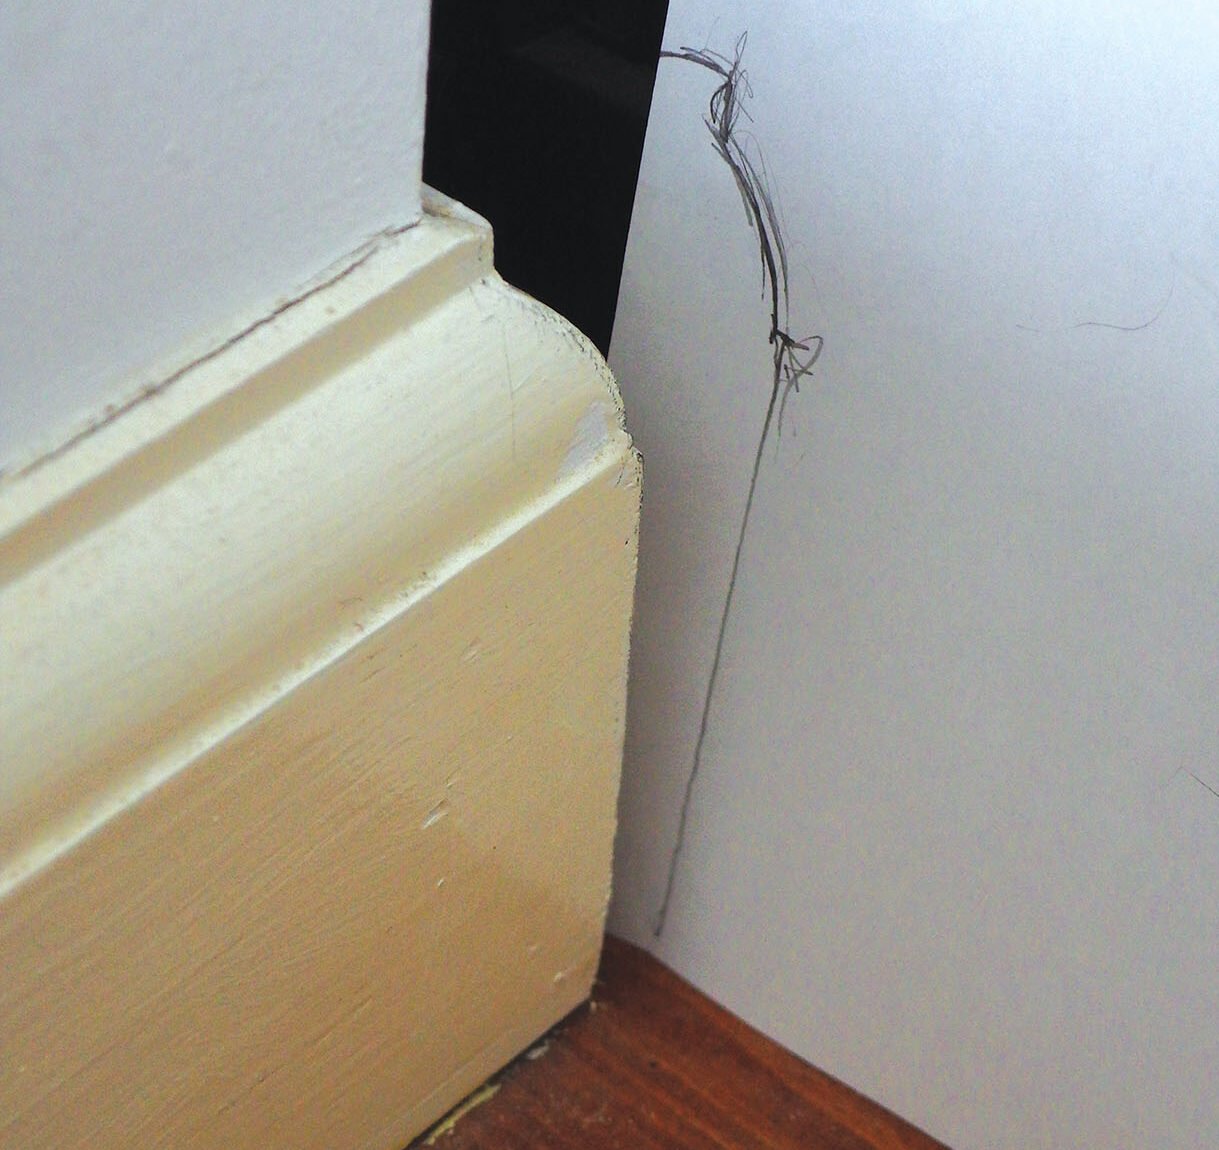
2. I had some surplus 75 x 50mm PAR softwood with ‘eased edges’ that I could re-use for this job. The opening was measured and checked for verticality of the walls. I made a template from the skirting, so the frame sections could be cut to fit over the skirtings
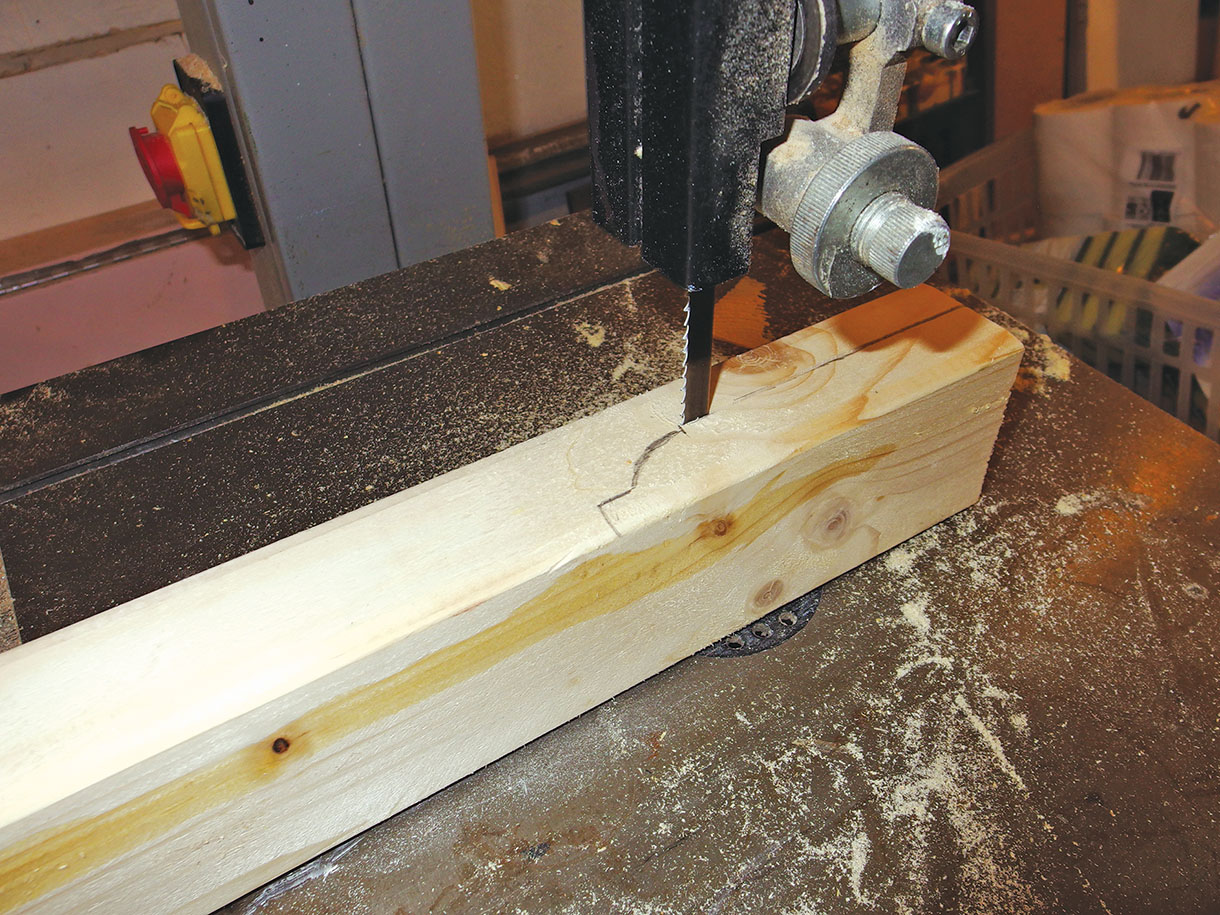
3. The cutting was done on a bandsaw which did a neater job than a jigsaw, although the curved shape had to be ‘nibbled out’ as the blade was too wide, and swinging the long timbers around would not have been possible
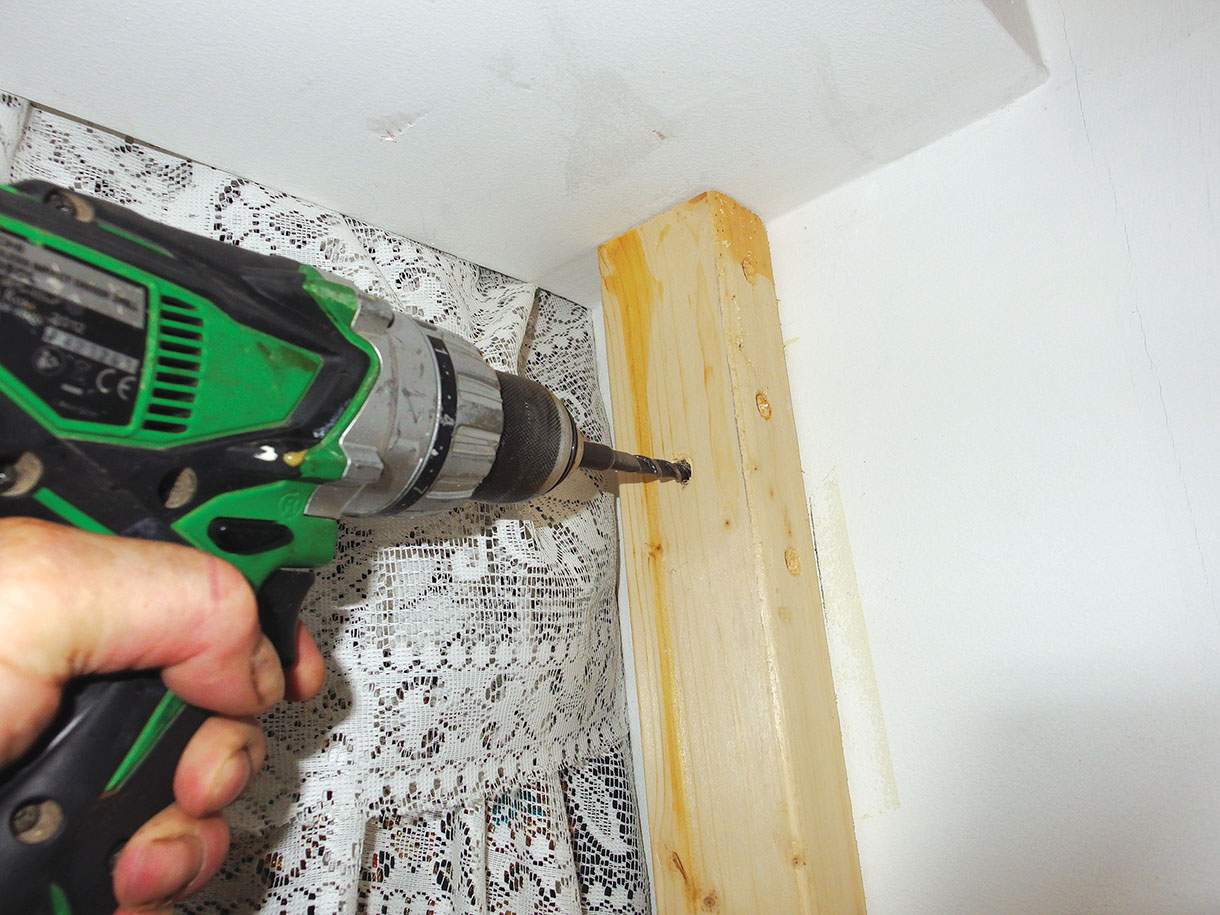
4. The first step to fixing the frame was drilling through the wood and leaving an impression in the plasterwork after marking the vertical positioning on the wall. I was going to use ‘knock-through’ frame fixings
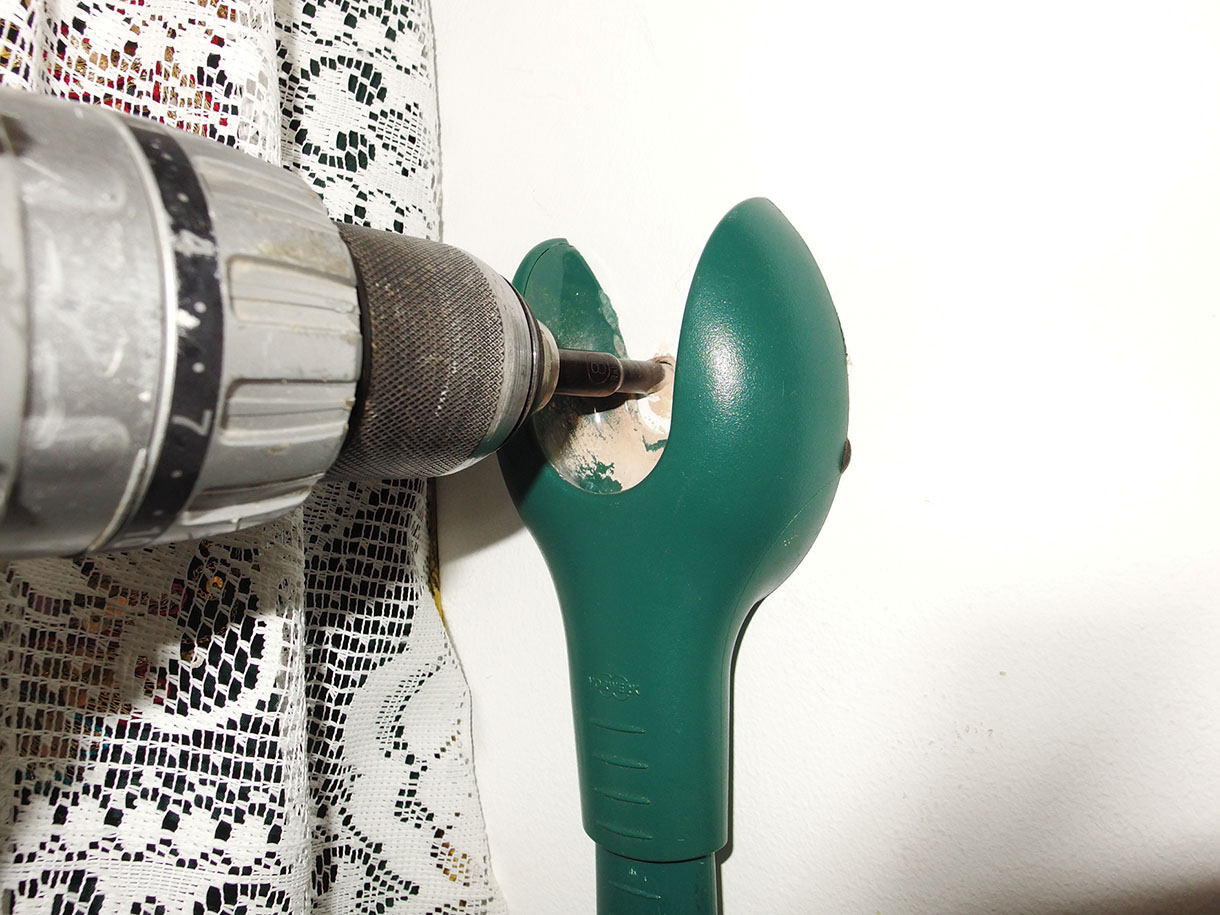
5. Next, the masonry drilling was done using the marks on the wall as a guide. I used a domestic vacuum cleaner with a special drilling vacuum head to remove the messy brick and plaster dust
Making the doors
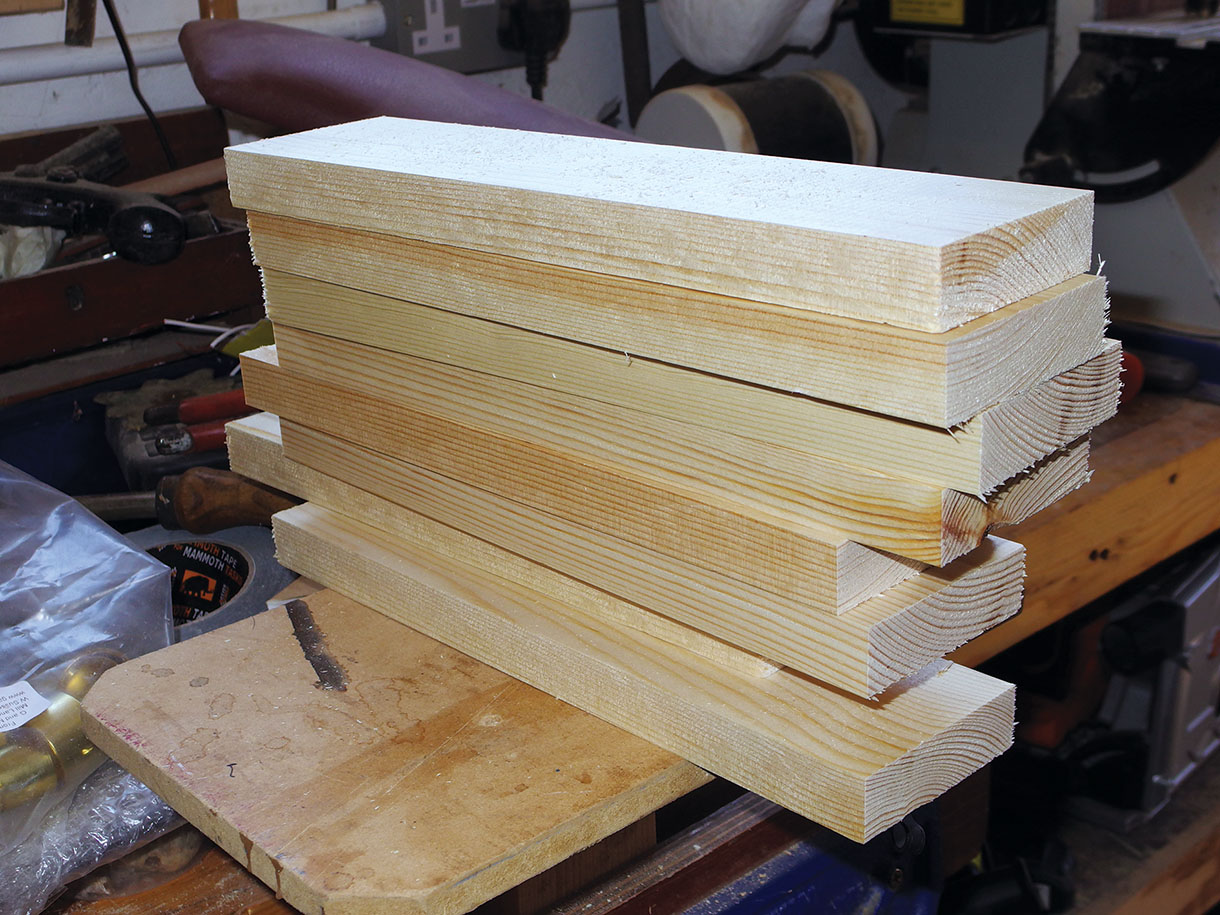
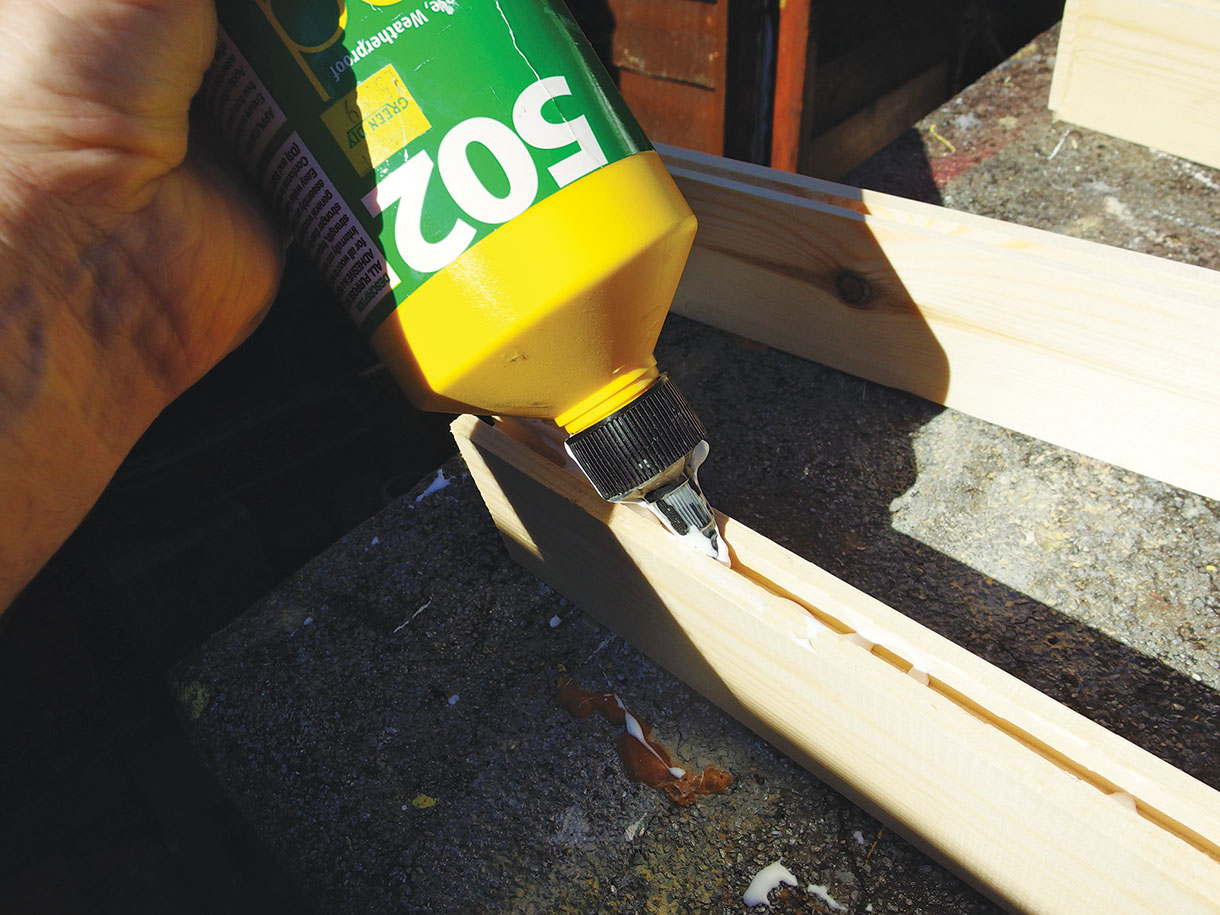
6. I chose some decent quality 75 x 25mm PAR softwood for the door frames and 6mm MDF for the panels to fit in them. I needed four doors without and overlapping rebates which would need more time and effort to get right. I did some calculations that took account of the tongue-and-groove frame joints
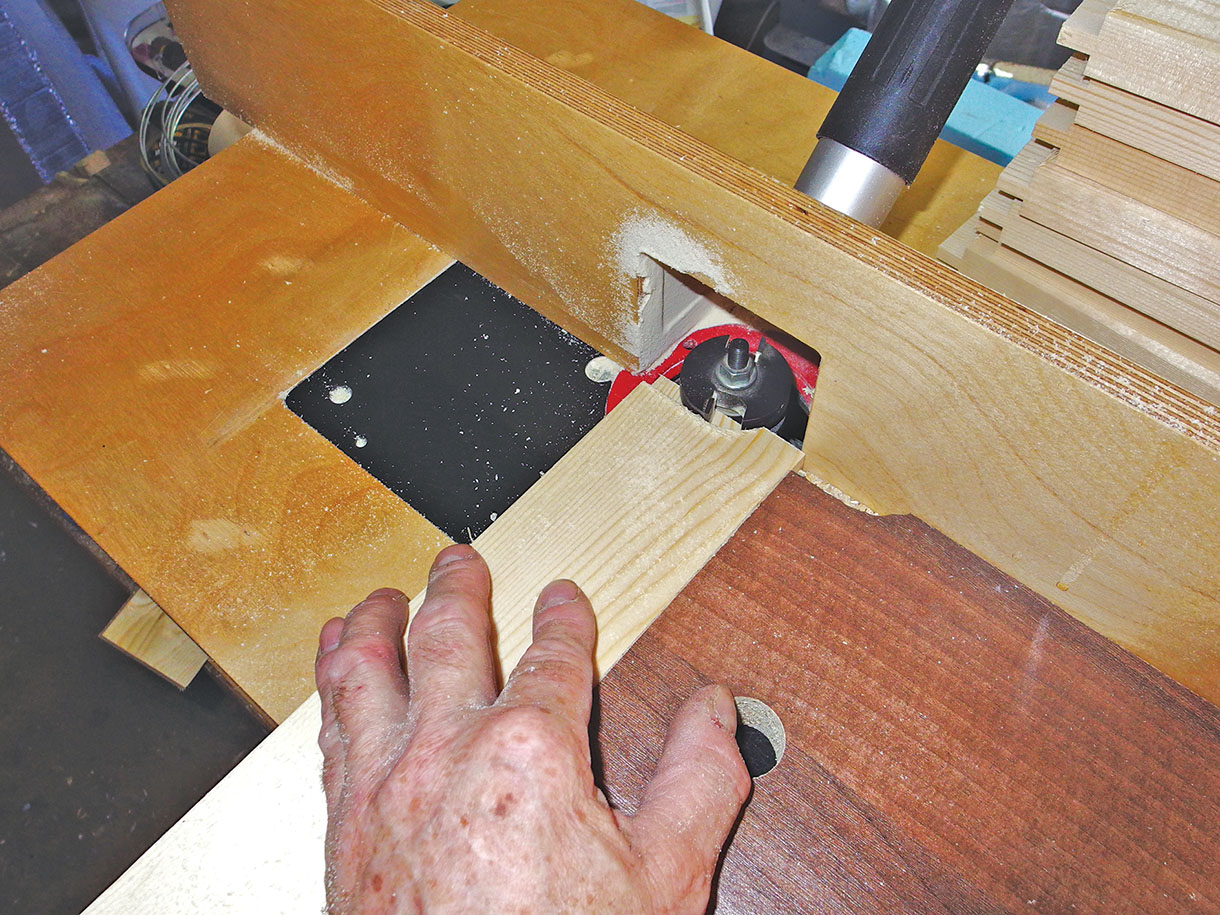
7. First, the rail scribing joints were done to create a tongue that would match the grooves in the stiles. These were centred in the ends of each rail but were still marked so the surfaces would be flush when assembled
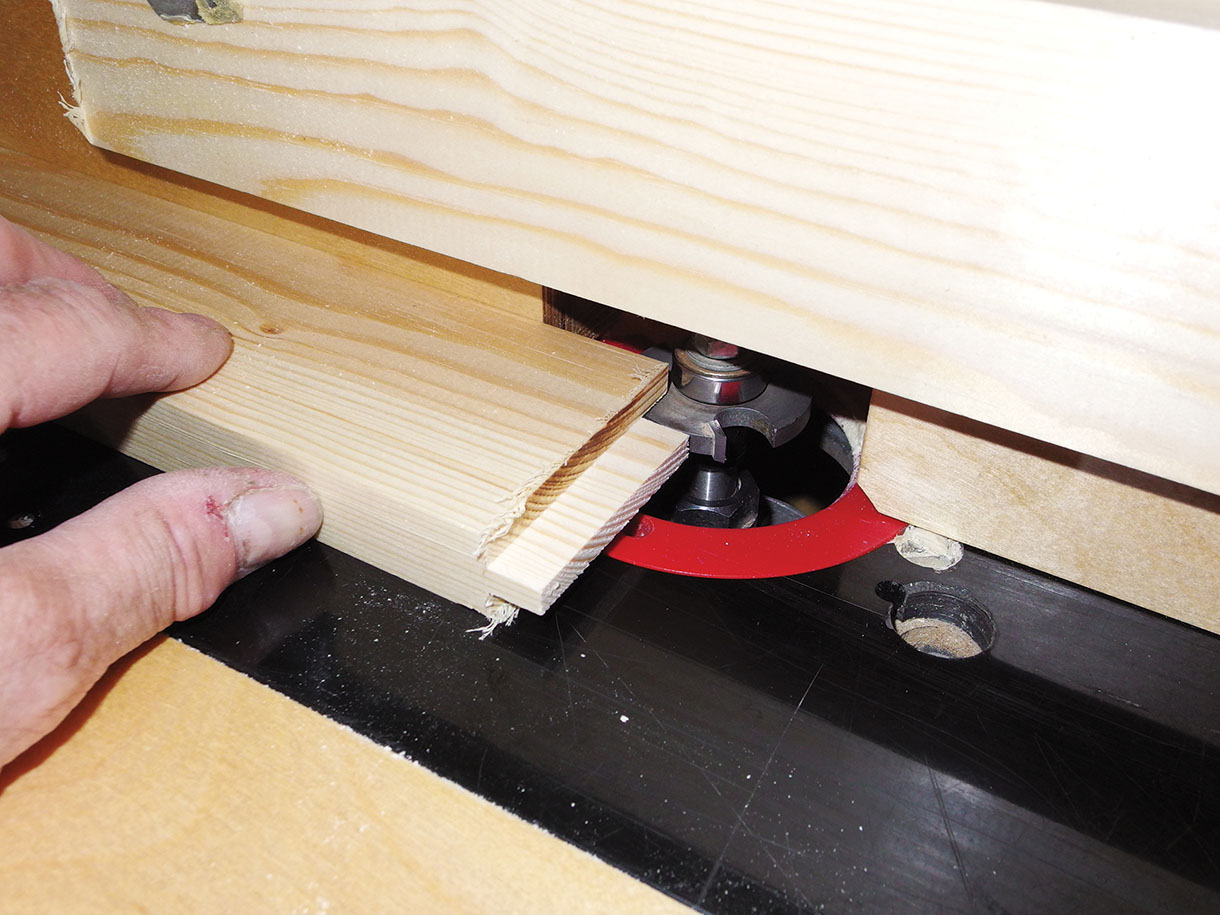
8. The matching groove cutter was set up in the router table and the height carefully adjusted to align with the scribed tongues. Once the test cut was done, a board sitting over the extraction opening was lowered down to act as a hold down on the workpieces
9. The panels were cut to width at my local timberyard on their vertical panel saw (for no extra charge). I just had to cut them to length. I figured that because there was no shrinkage involved with MDF I could glue the frame all round so the panels would be set solid
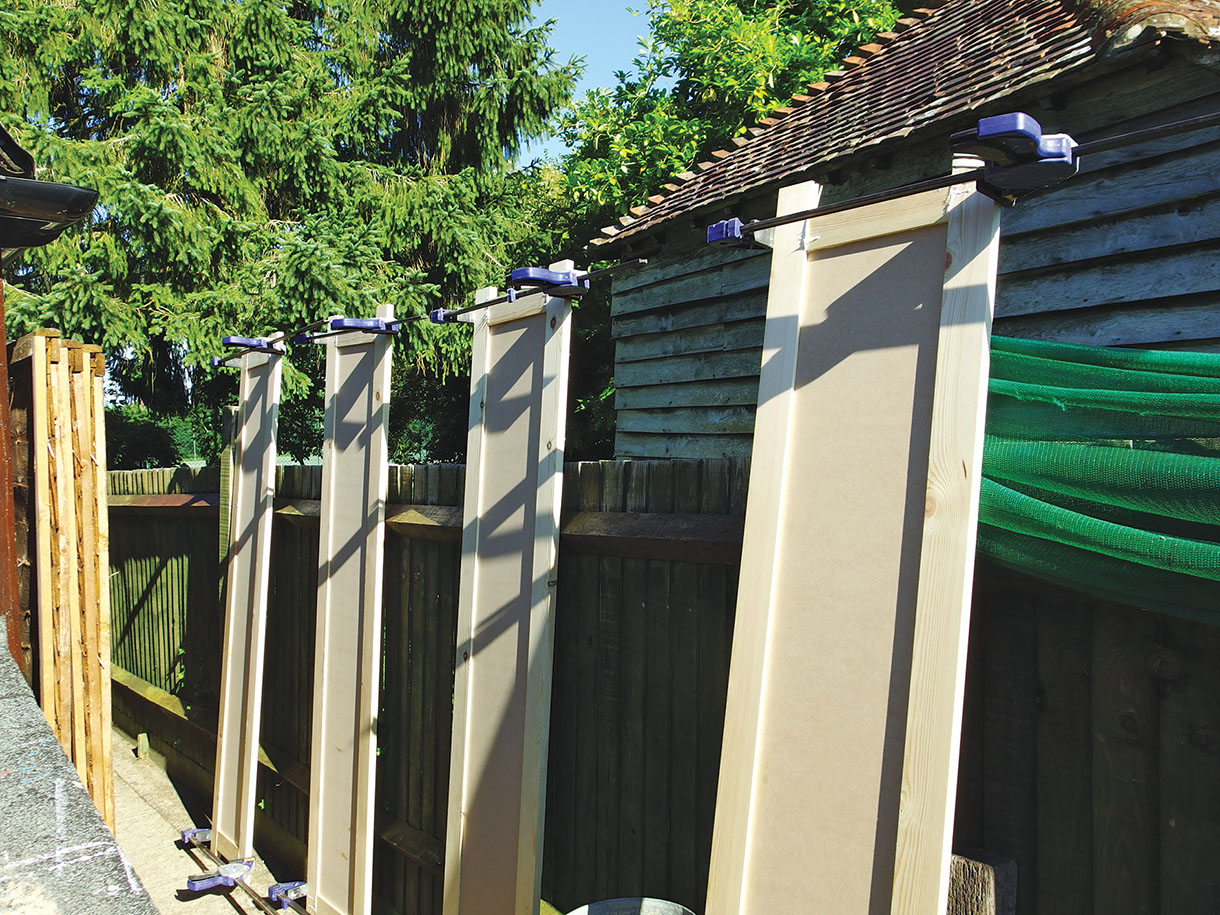
10. Four panel assemblies later, check for length and squareness and surplus glue removed. Once the glue was dry the ‘horns’ were cut off the panel ends
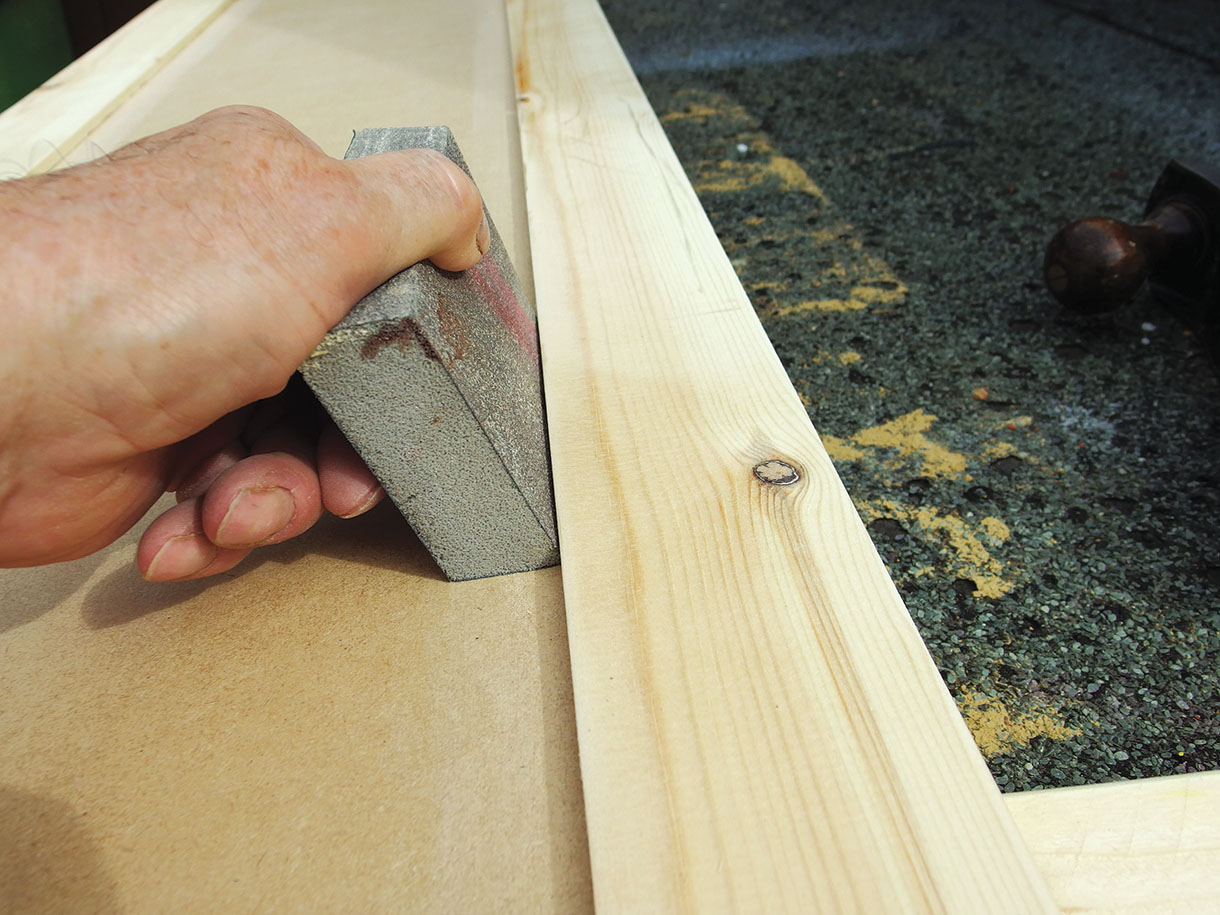
11. A bevel profile foam sanding block was ideal for sanding internal edges. I used a random orbital sander for all the main surfaces and to ‘break’ the arrises slightly
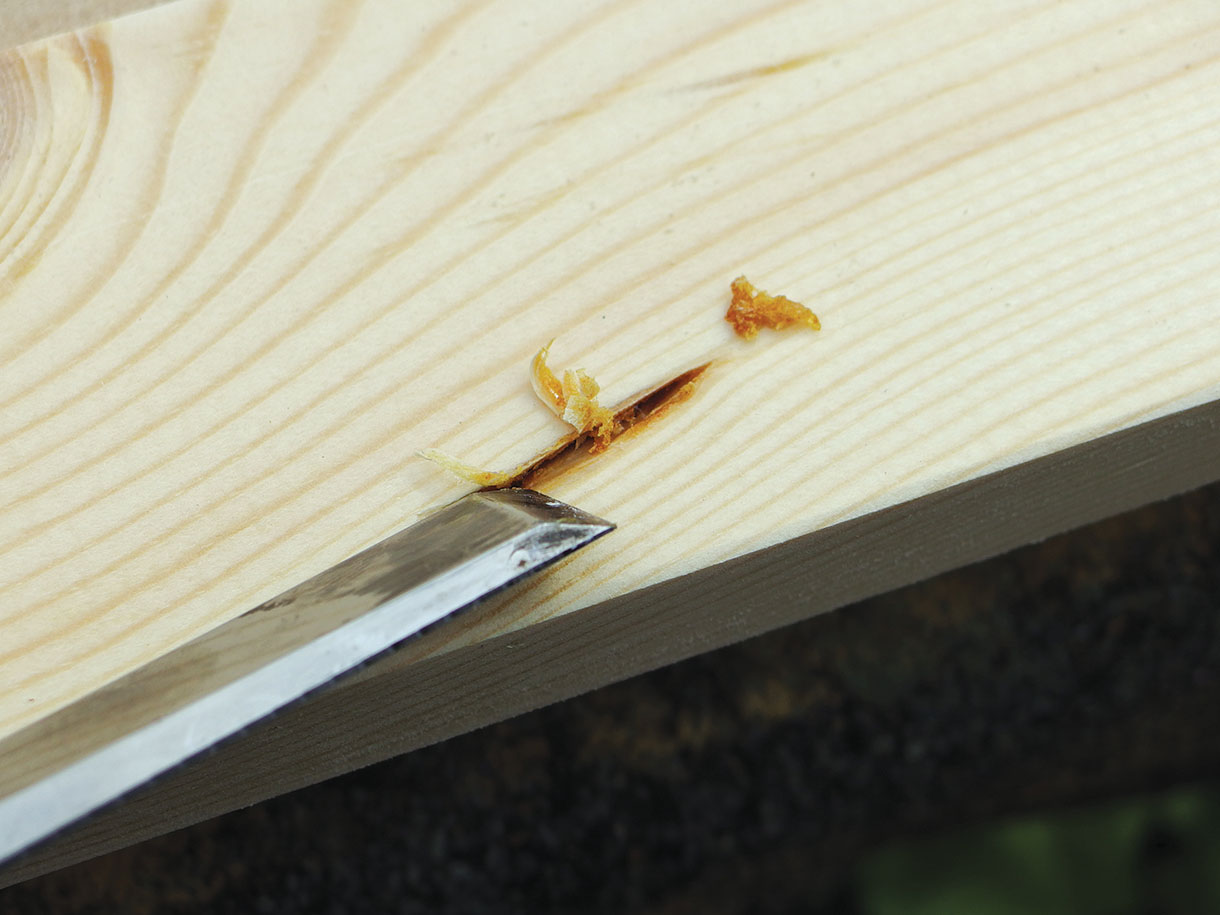
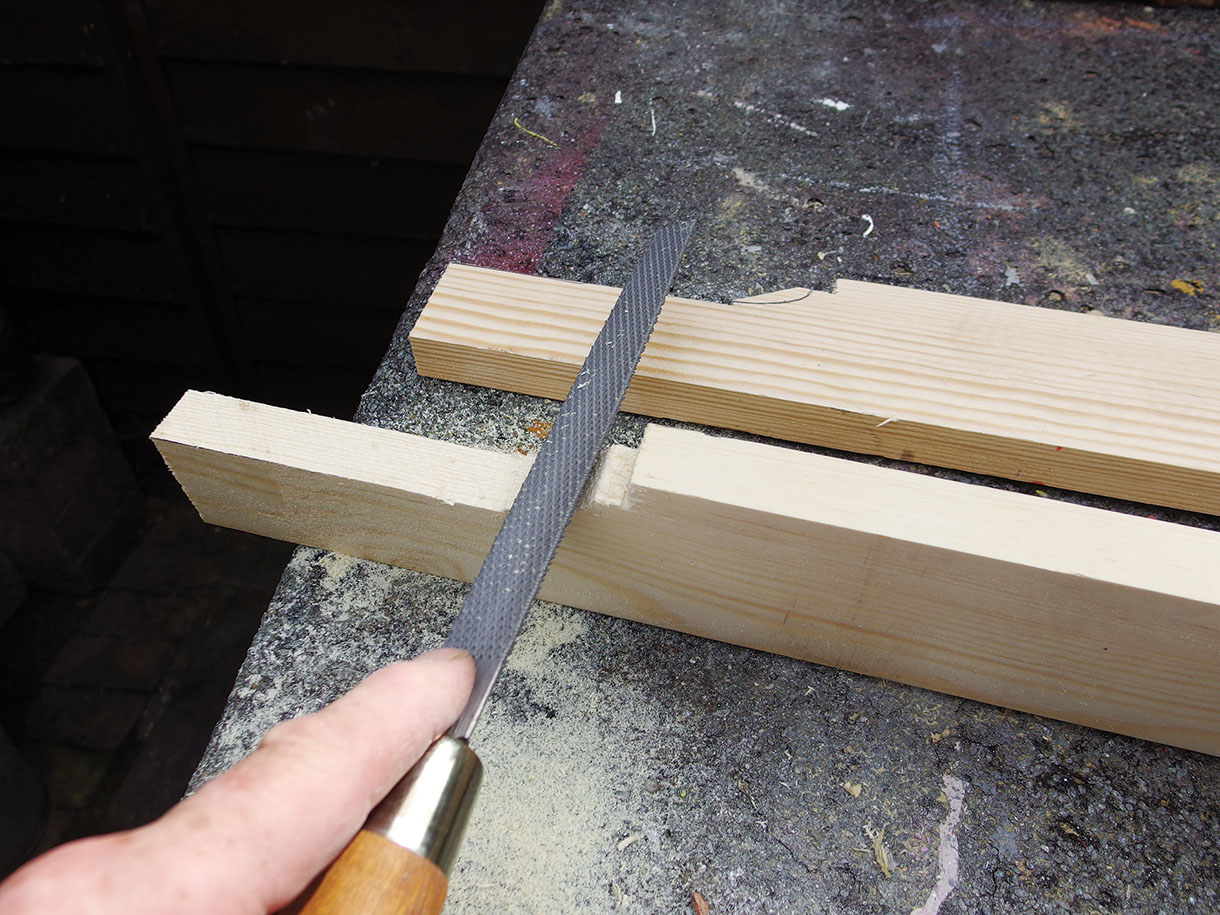
12. There was just one resin pocket and it had to go, to stop it leaking in the future. It was carefully chiselled out and wood filler used to fill the hole
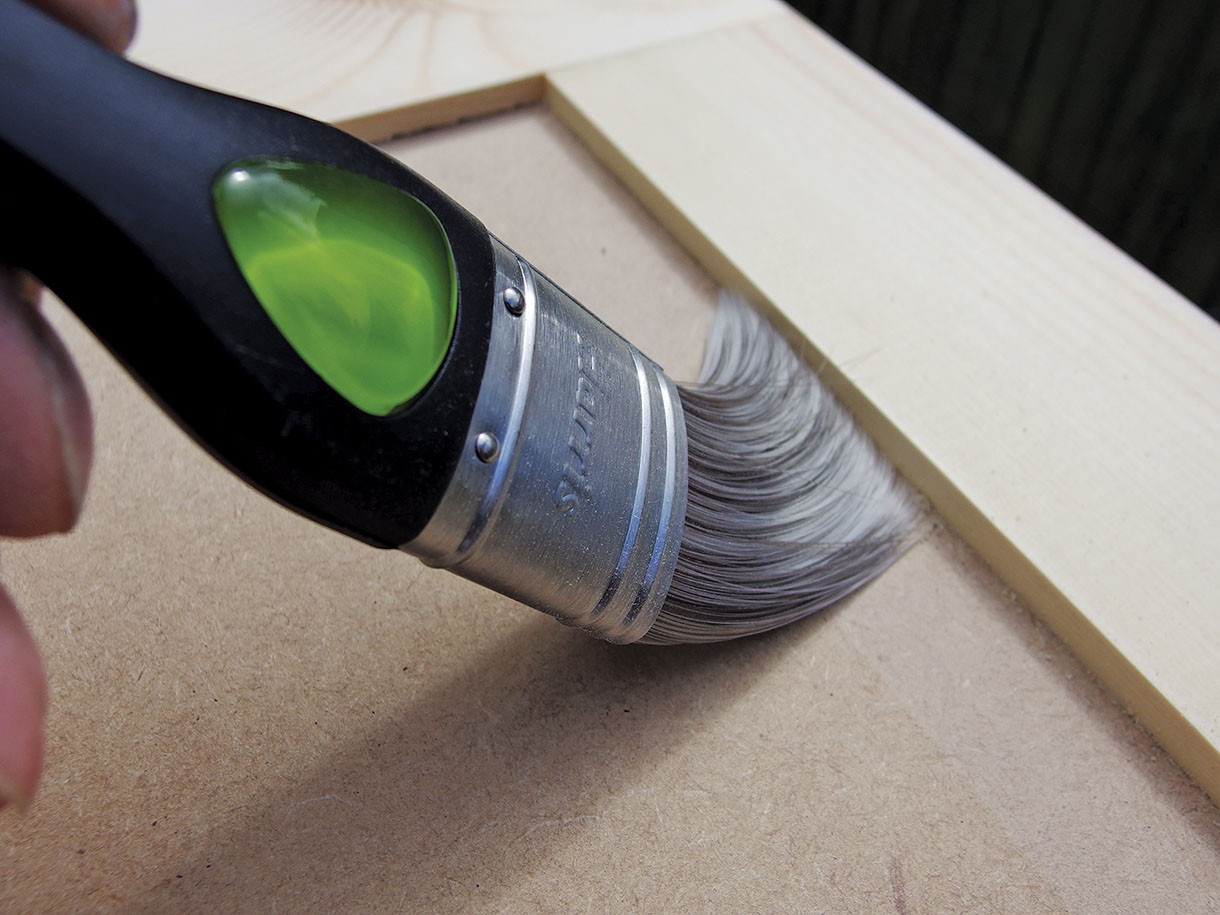
13. A new clean paintbrush was ideal for removing dust that was adhered to the internal frame edges
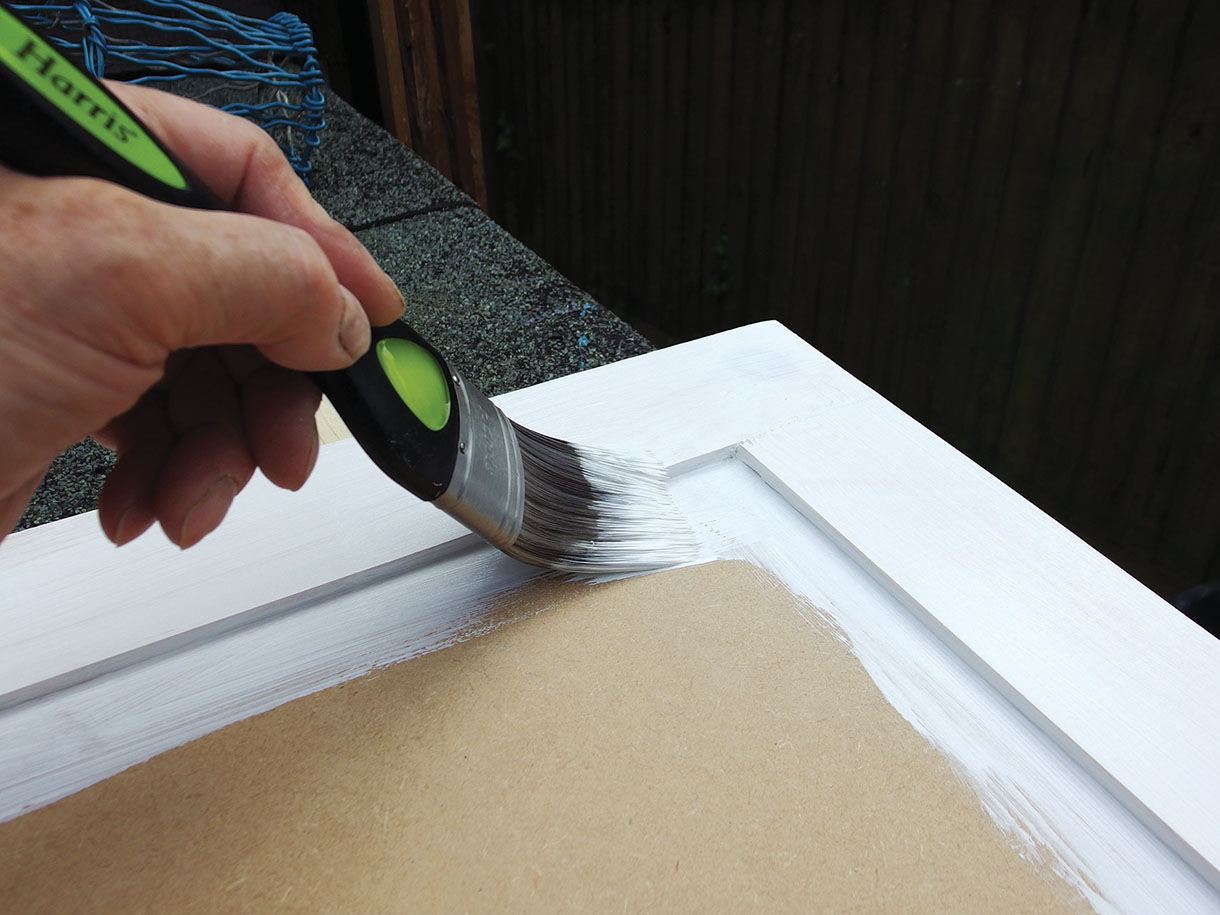
14. The frames were painted before the panels, using a silk brilliant white emulsion. This was applied in three coats and is remarkably dirt resistant and tough compared to matte emulsion
Fitting the doors
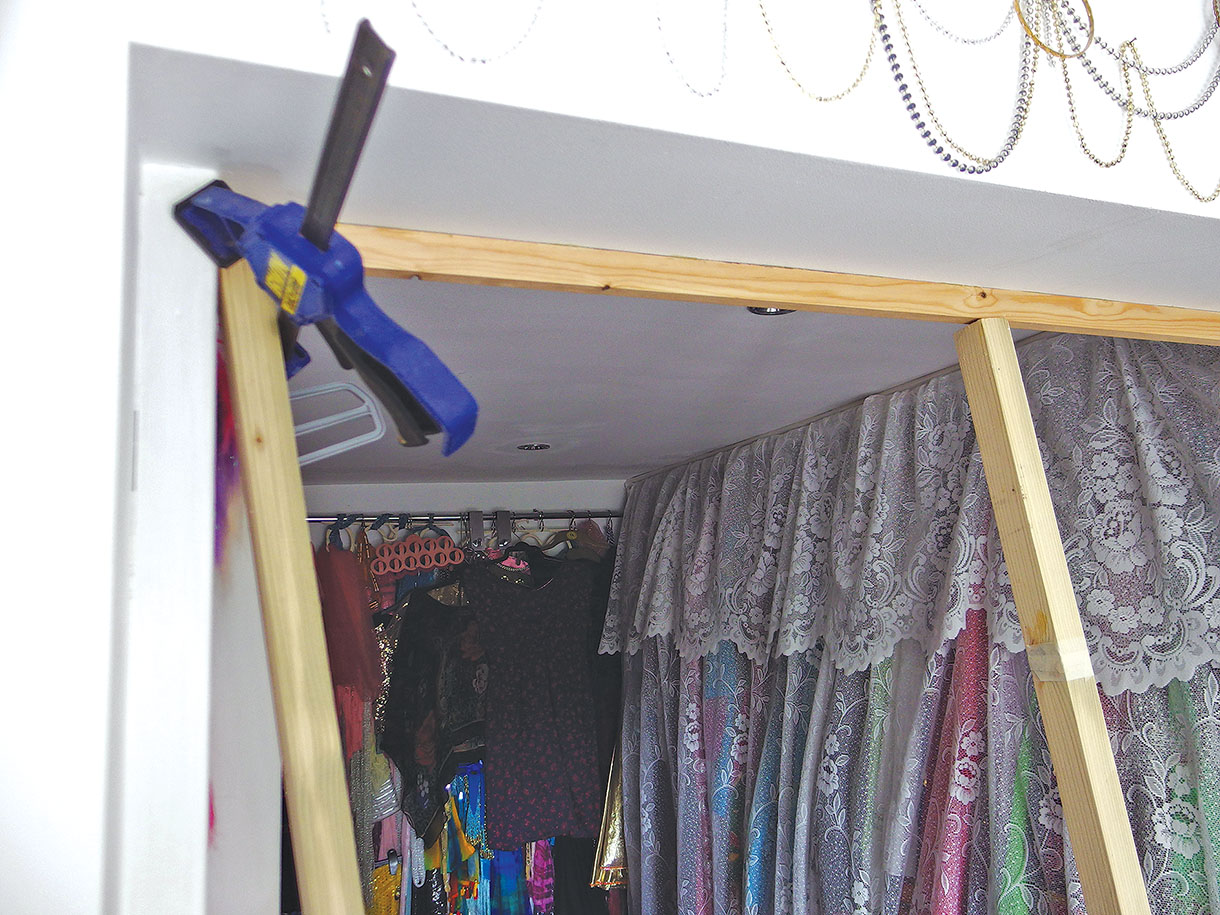
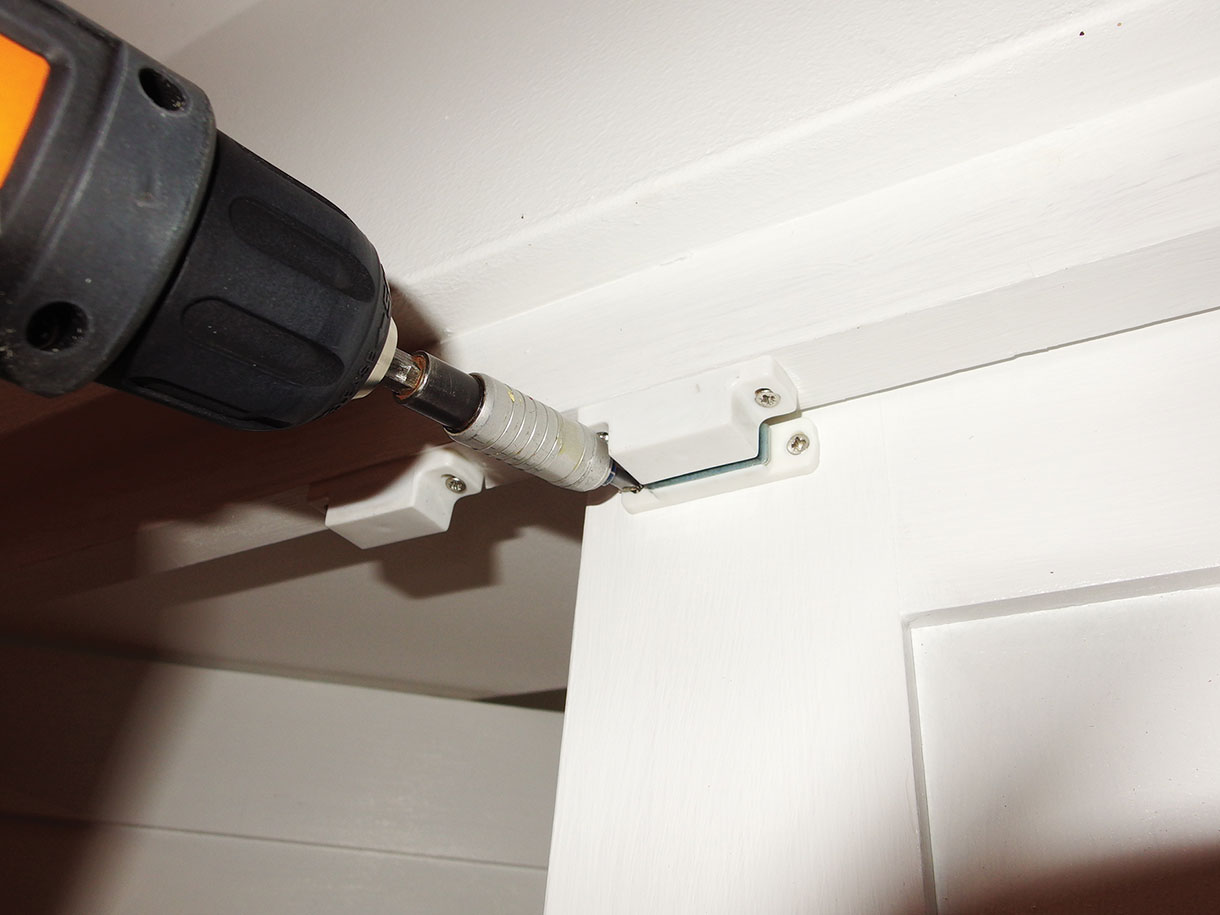
15. Before the doors could go in I needed to install a door stop across the top of the opening. This was screwed to the vertical pieces after applying builder’s mastic along the top edge so it would bond to the boxed in I-beam above. While that was setting overnight it was pressed firmly in place by a couple of battens
16. Two facing pieces were cut and shaped to fit over the skirting, using the original template. They would act as a door stop like the overhead section
17. It became obvious that the wall frames weren’t quite vertical so a bit of judicious cardboard packing
was needed to start the run of doors from each side as vertical as possible
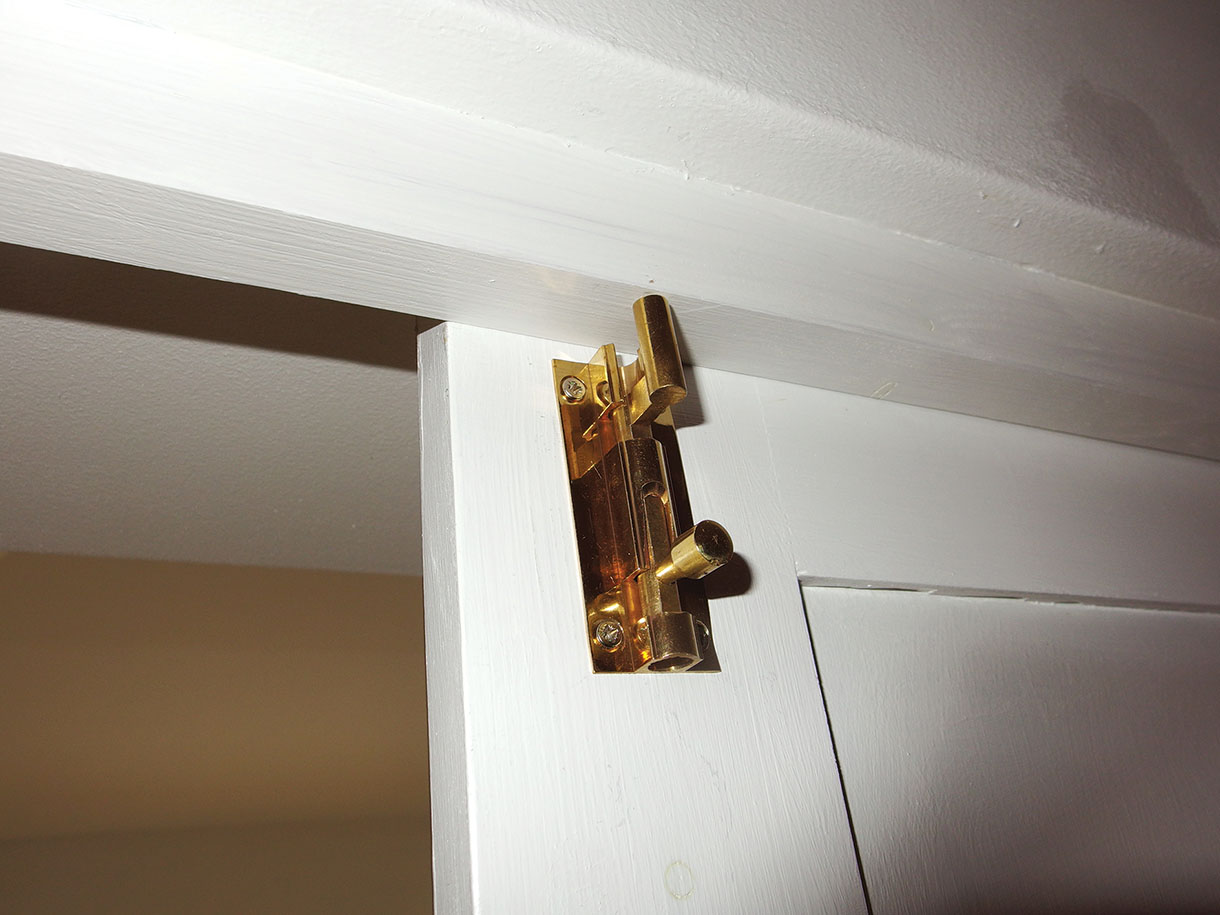
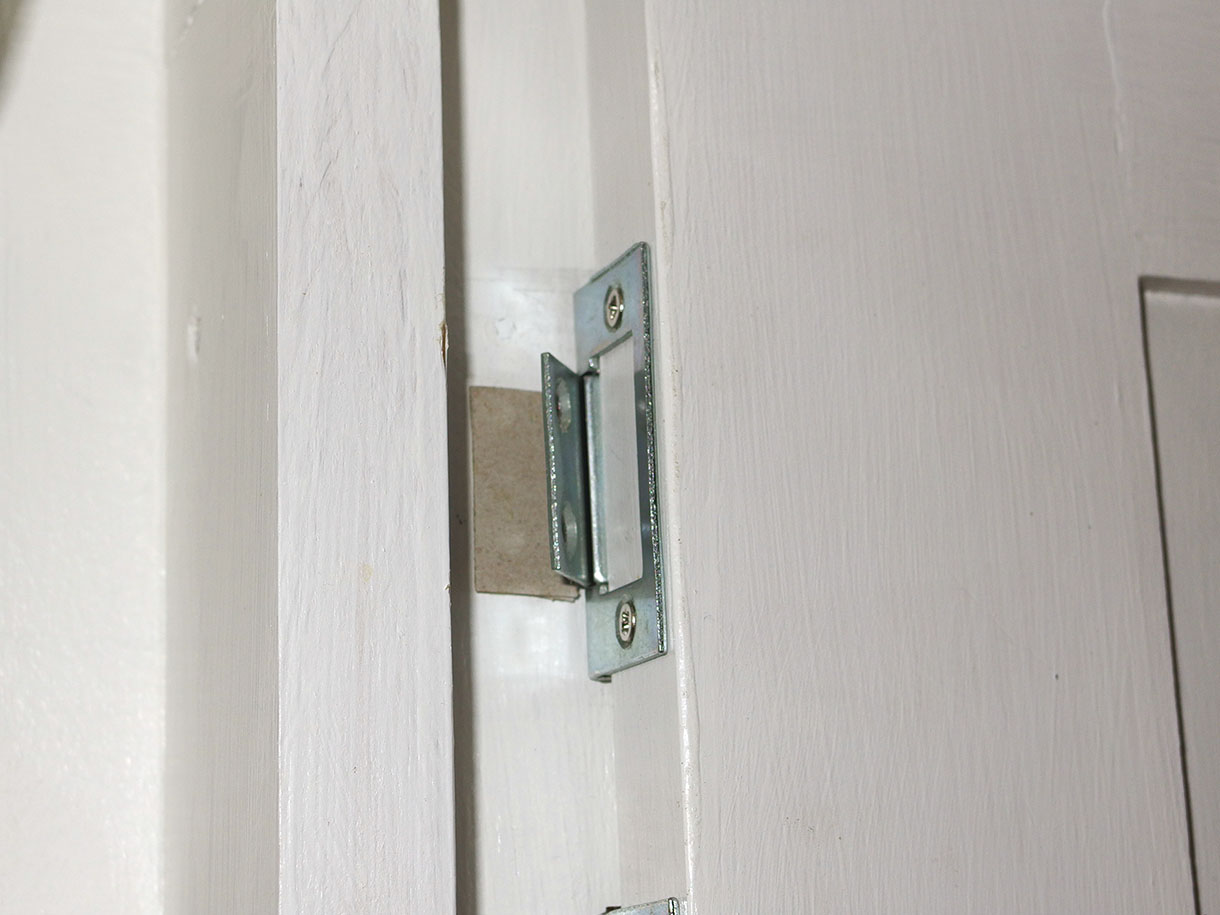
18. The two outer doors would normally be bolted shut at top and bottom, so only the inner doors would be used. Unfortunately the bolts came right near the edge of the overhead batten
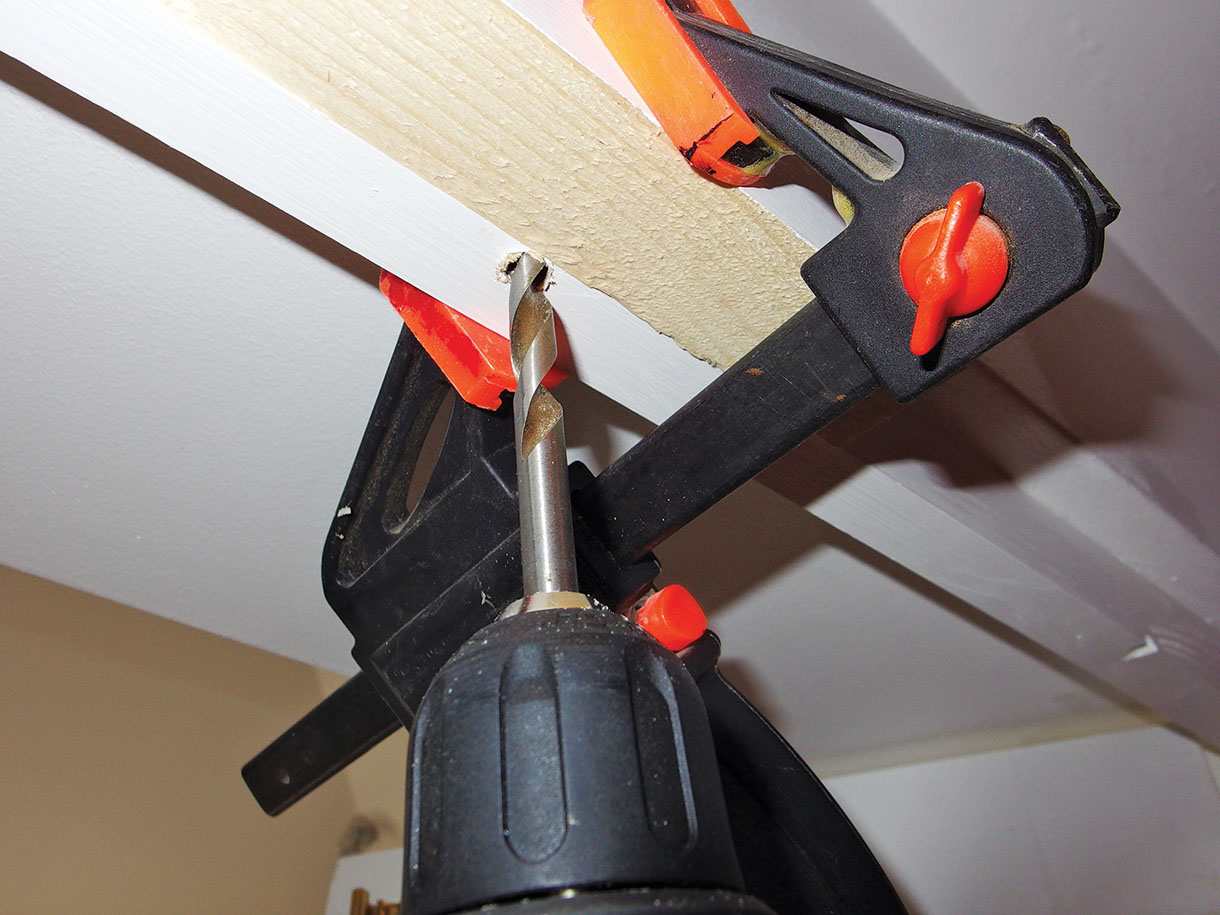
19. To drill without breakout I clamped a piece of wood alongside making drilling accurate and no danger of spoiling the wood
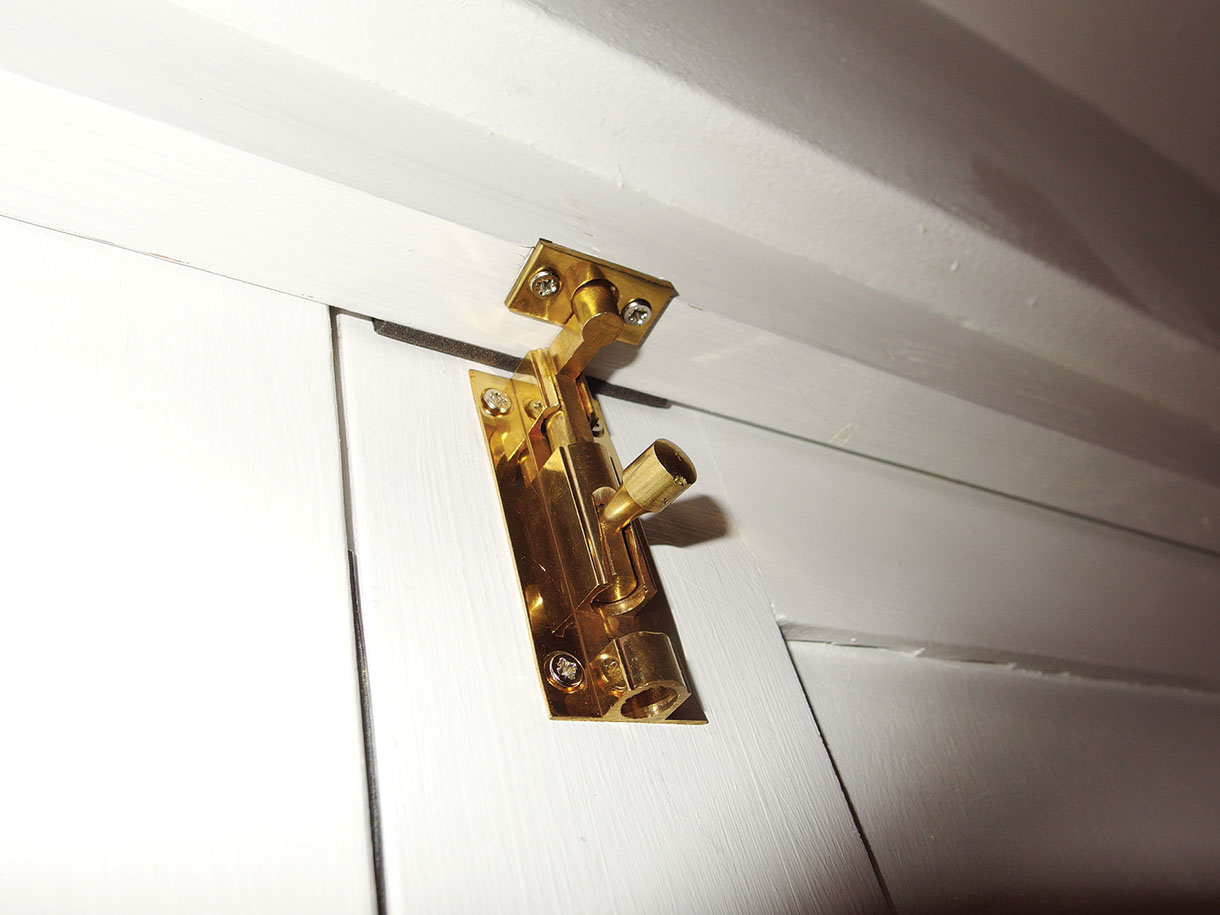
20. The brass plates were screwed in place for secure locking
21. I tried two opening options, first where the two doors both slide back together as seen here. Note two hinges at the top for strength under load. I settled on the second option where the inner door folds outwards and lies back against the facing wall as the outer door sections needed to stay closed most of the time
22. The inner doors were held shut with strong magnetic catches fitted only at the top
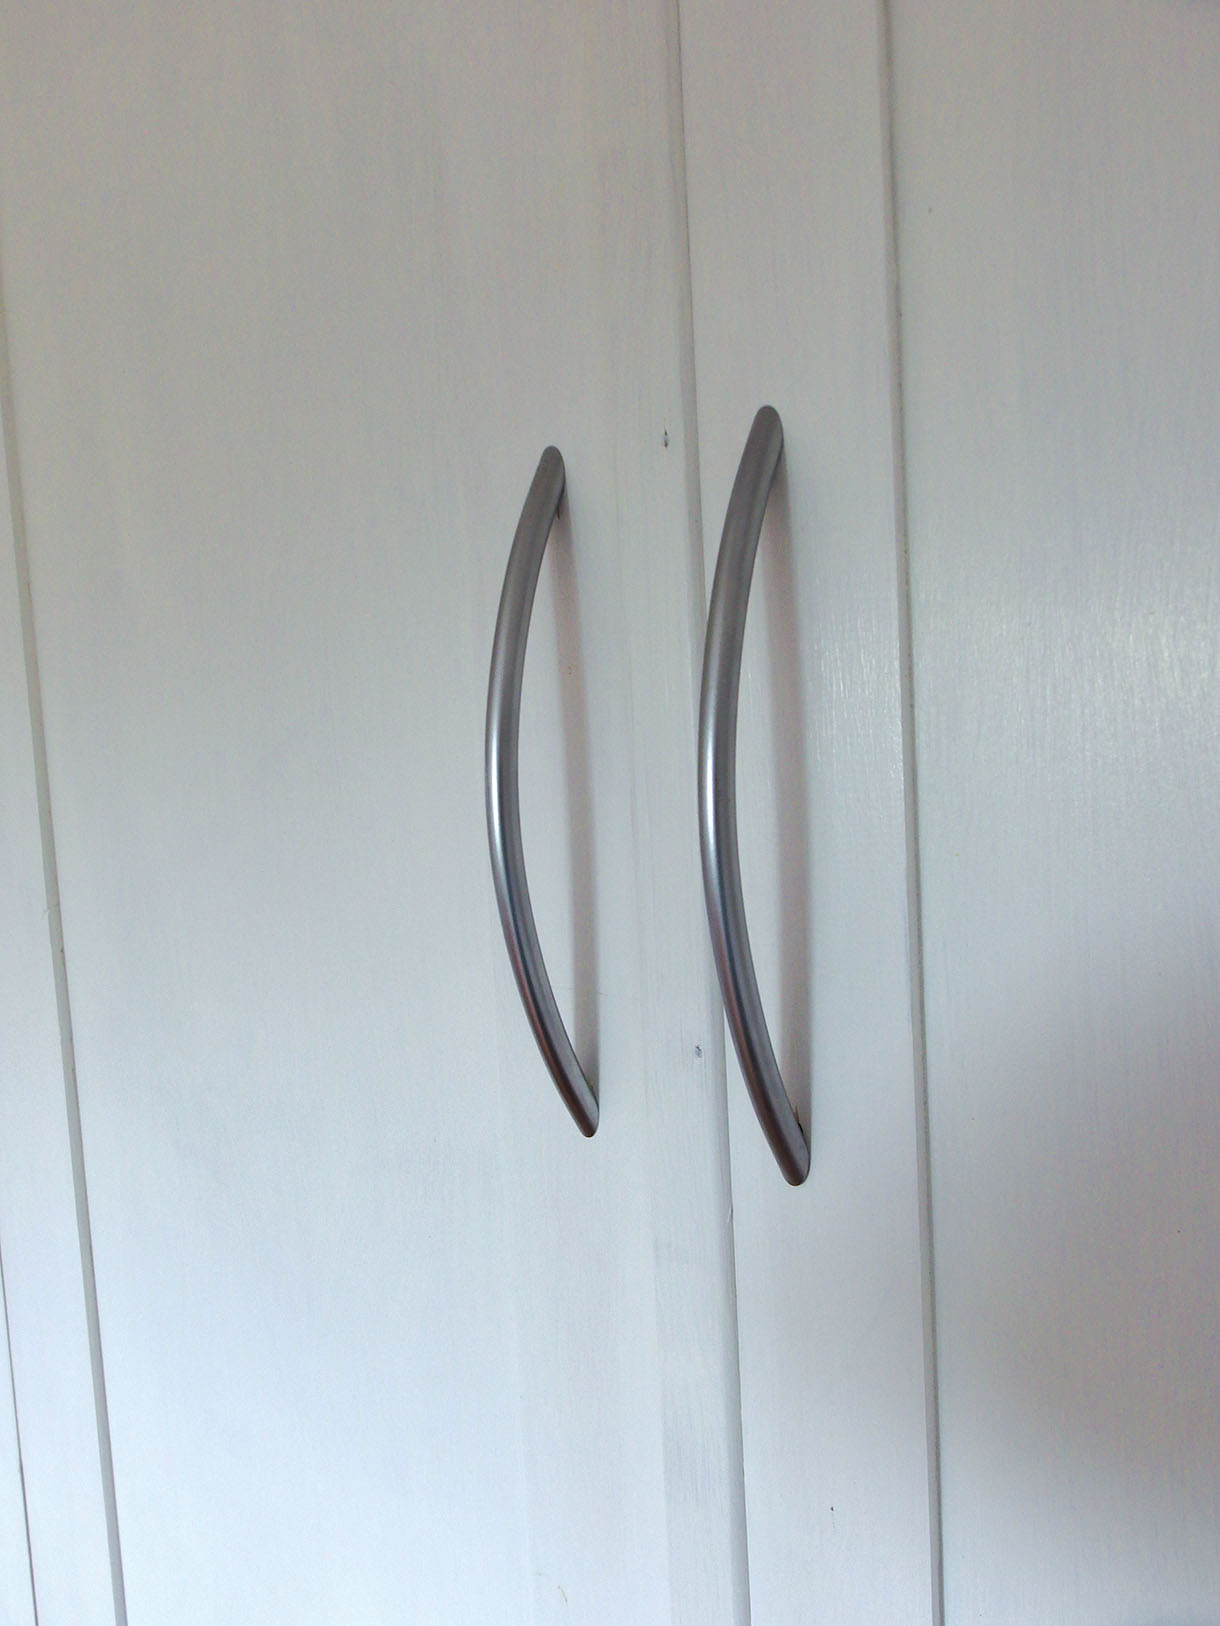
23. On the bedroom side I fitted long pattern solid aluminium handles so the doors pull shut
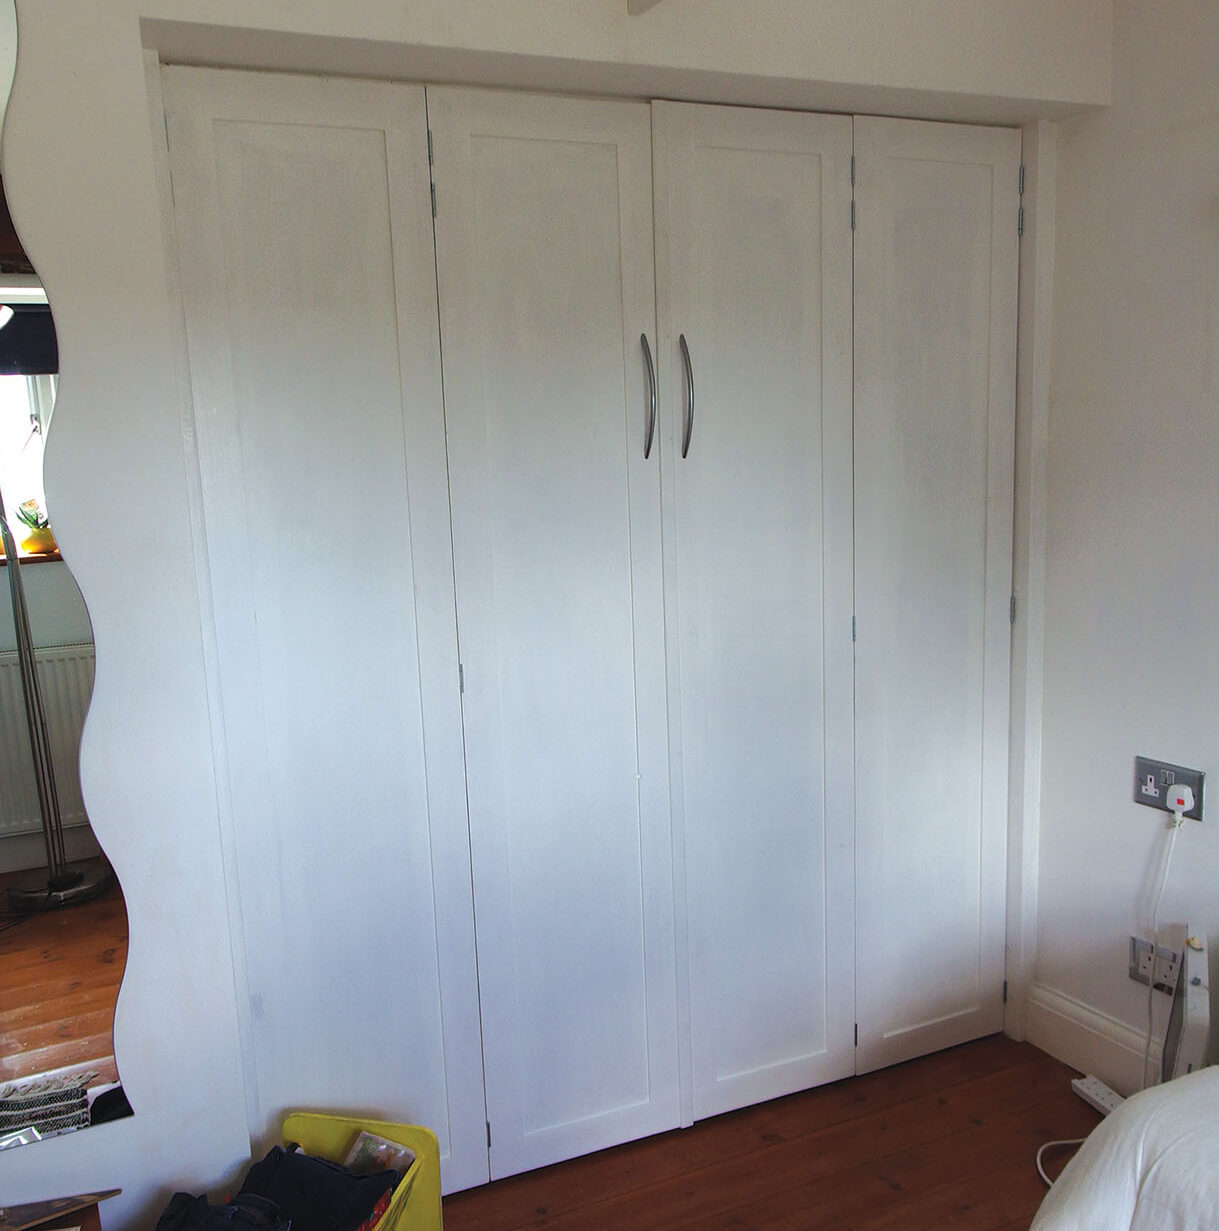
24. The doors were fitted, checked and a cover strip pinned on one of the doors to close the gap


