German Incense Burner (Rauchermen):
Colwin Way makes a traditional German smoker
Colwin Way makes a traditional German smoker
We’re going to go back to southeastern Germany and the Erzgebirge Mountain area, famed for the craftsmen and toy making. This project focuses on a personal favourite, the German smoker or incense burner. Otherwise known as Rauchermen, these wonderful little characters send out plumes of Christmassy smelling incense. Incense has been used for centuries in religious ceremonies and as a way to cleanse the air of evil spirits and is often considered a treasured gift. In Germany, the 12th night of Christmas is a celebration of the gifts of the three wise men and people light incense to mark the end of the Christmas season. I think the smoking men were likely given as a good luck charm to keep away the nasty spirits.
Unlike the nutcrackers that portray figures of authority like kings, queens and soldiers, our smokers are the opposite and represent the working man like builders, carpenters, and in my case, a farmer and a woodturner. Originally, these figures would have been carved out of one piece of wood and the incense burnt beside it, but since the mid 1800s and the invention of incense cones, the figures have been made in two pieces and the incense placed inside. Staying true to German craftsmen and their heritage of making these wonderful figures, I am going to keep to the traditional tools as much as I can: this means 90% of this project will be turned with a skew chisel and I would encourage you all to do the same. I’m a very keen collector of original German nutcrackers and smokers but want to purposely distance myself from their designs to pay tribute to, but not copy the figures and skills that have been passed down from father to sons for centuries.
All pieces to be painted are turned from lime (Tilia vulgaris) as this has a plain grain and covers well, but where I leave timber unpainted, I’m going to use beech (Fagus sylvatica), as it has a nice woody fleck to it which I like.
Plans and equipment
Equipment and materials used
• 3mm parting tool
• Sanding disc
• 6mm drill bit
• 10mm drill bit
• 10mm skew chisel
• 25mm skew chisel
• 10mm spindle gouge
• 6mm beading and parting tool
• Paints to decorate
• Bottle caps with rubber removed
• Incense cone
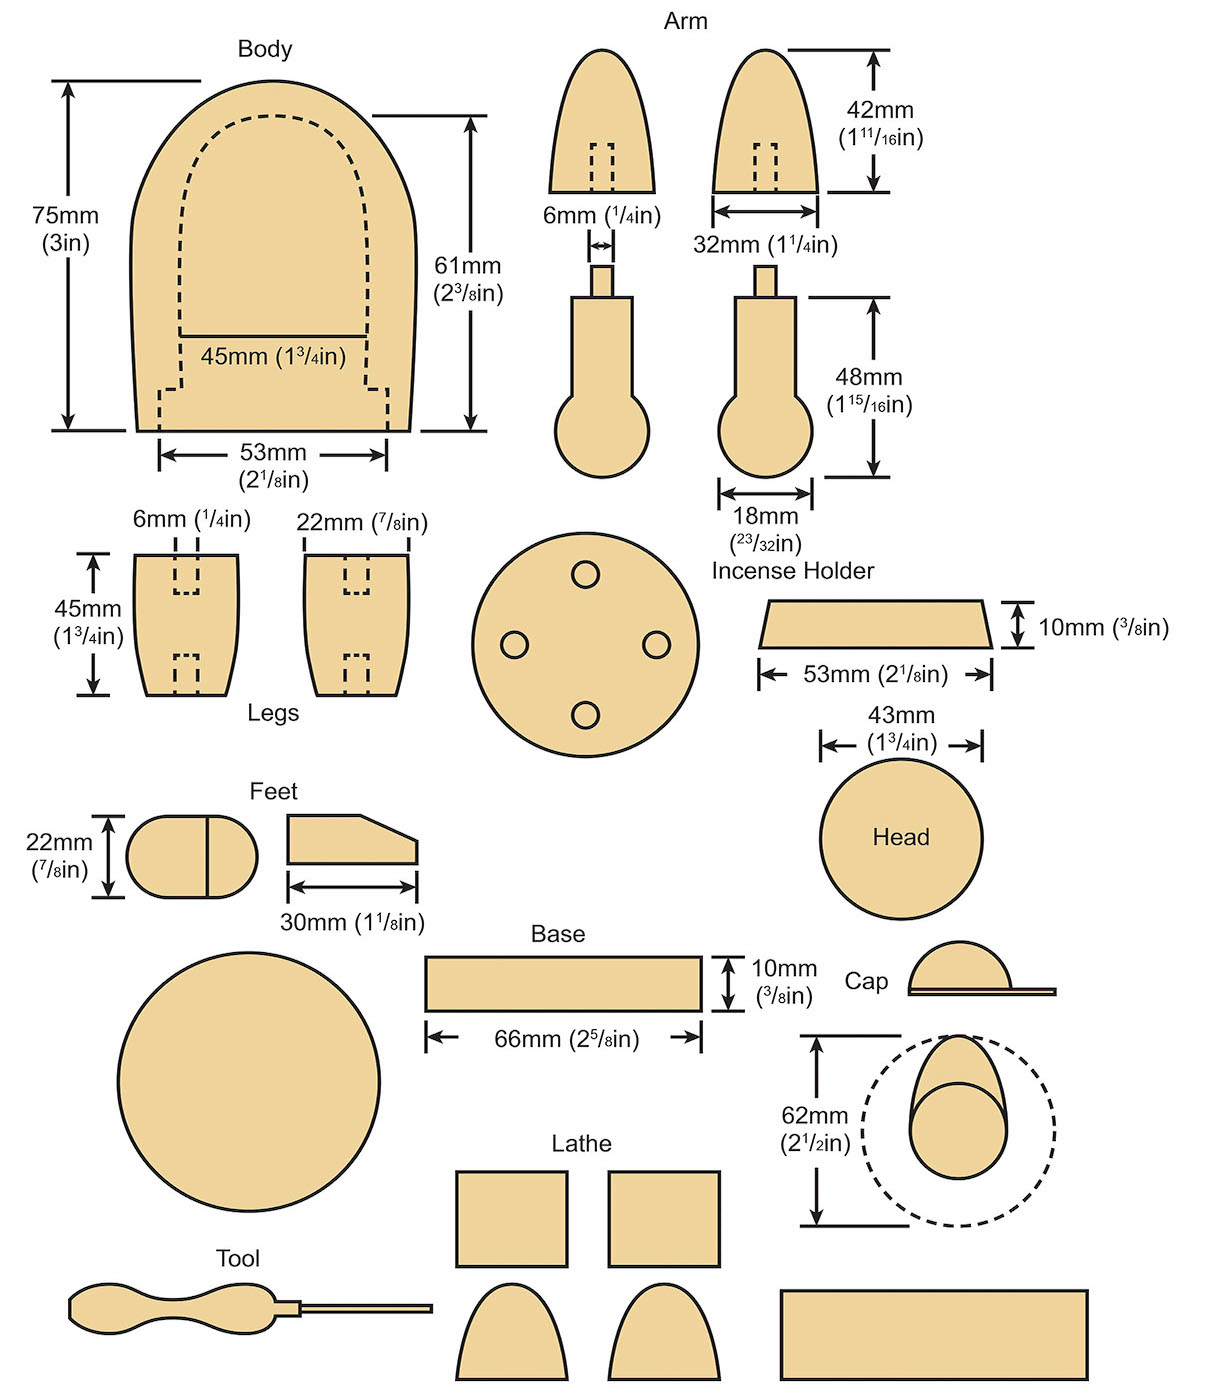
Drawings and how to resize them
To enlarge or reduce the size of drawings right click on the image to download it and then go HERE to watch a video on how to use paper with a grid to do exactly that.
The base
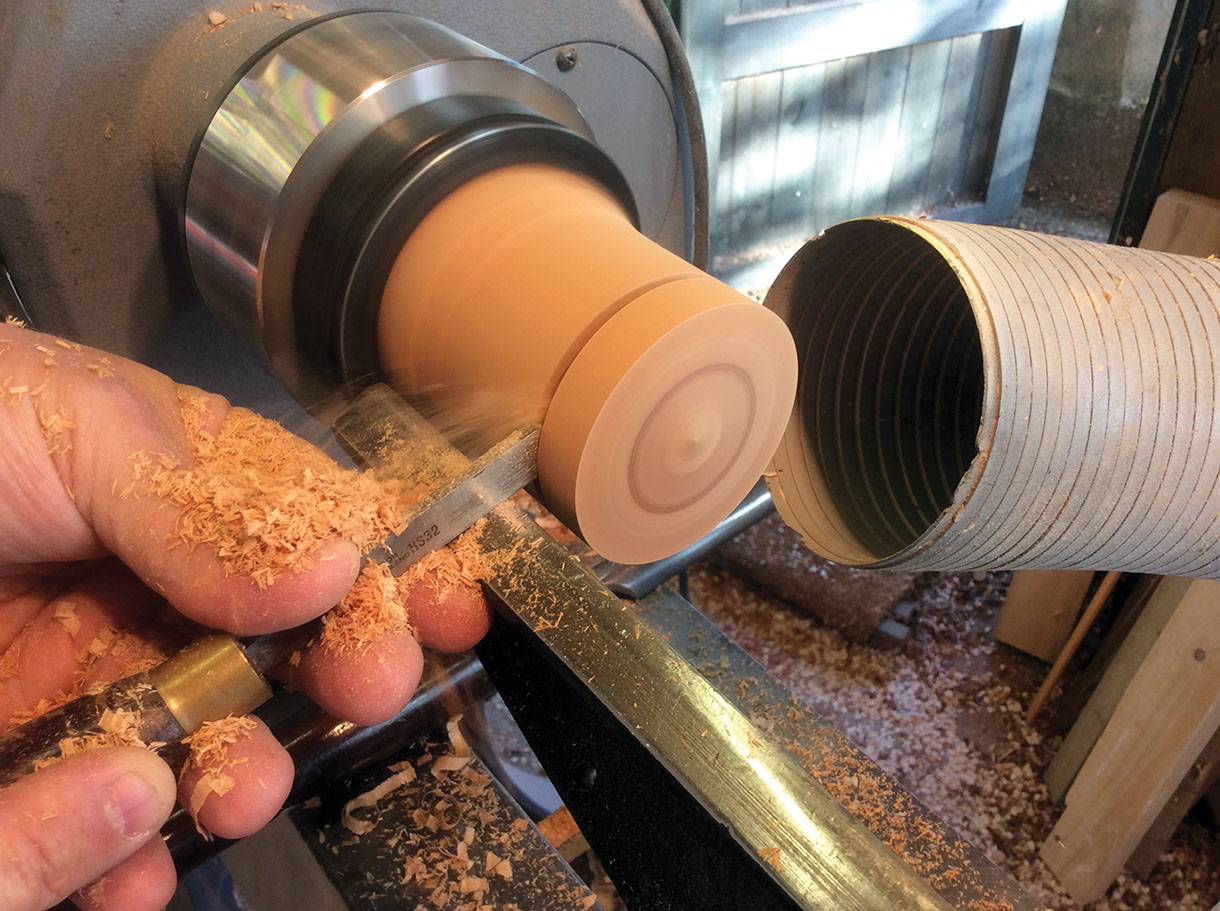
1. We’re going to use a selection of jaws throughout this project and start with a set of dovetail jaws to hold a piece of 70mm lime (which will end up making the base), incense burner and hat. Rough the piece to a cylinder then holding in the chuck, use a skew chisel to clean up the exposed face of end grain. This is a good point to sand the face and edge of the base ready for parting off, use grits 150, 240, 400 on all the parts to be painted. Remember the face of the base will be facing upwards so take your time with this area. Now you’re ready to part off using a narrow parting tool. Once the base has been parted, sand the rough face on a disc sander to tidy it up
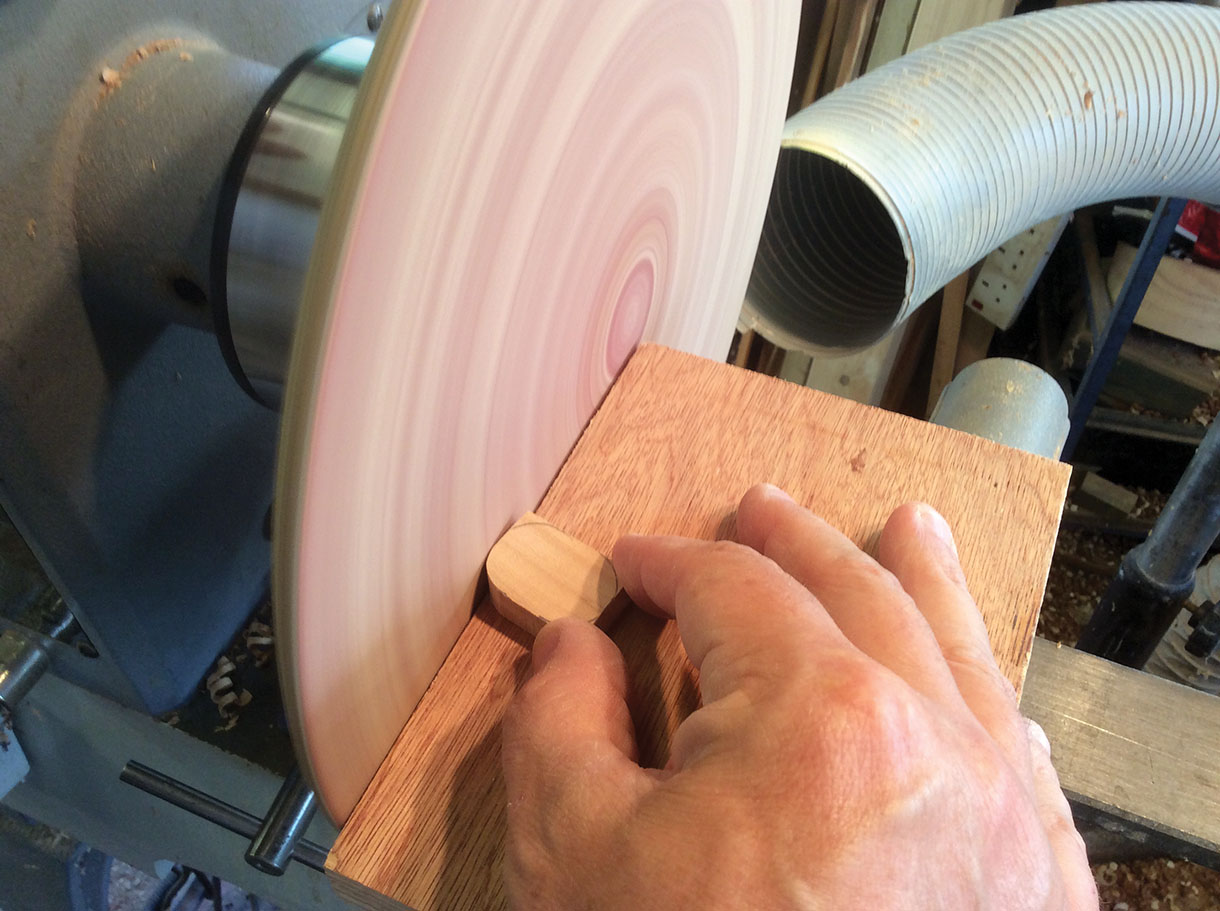
2. Sand the feet to shape, not forgetting to sand an angle toward the toes to give a more foot-like shape
3. Next, add a couple of 6mm holes to the feet which will help attach the legs to the figure
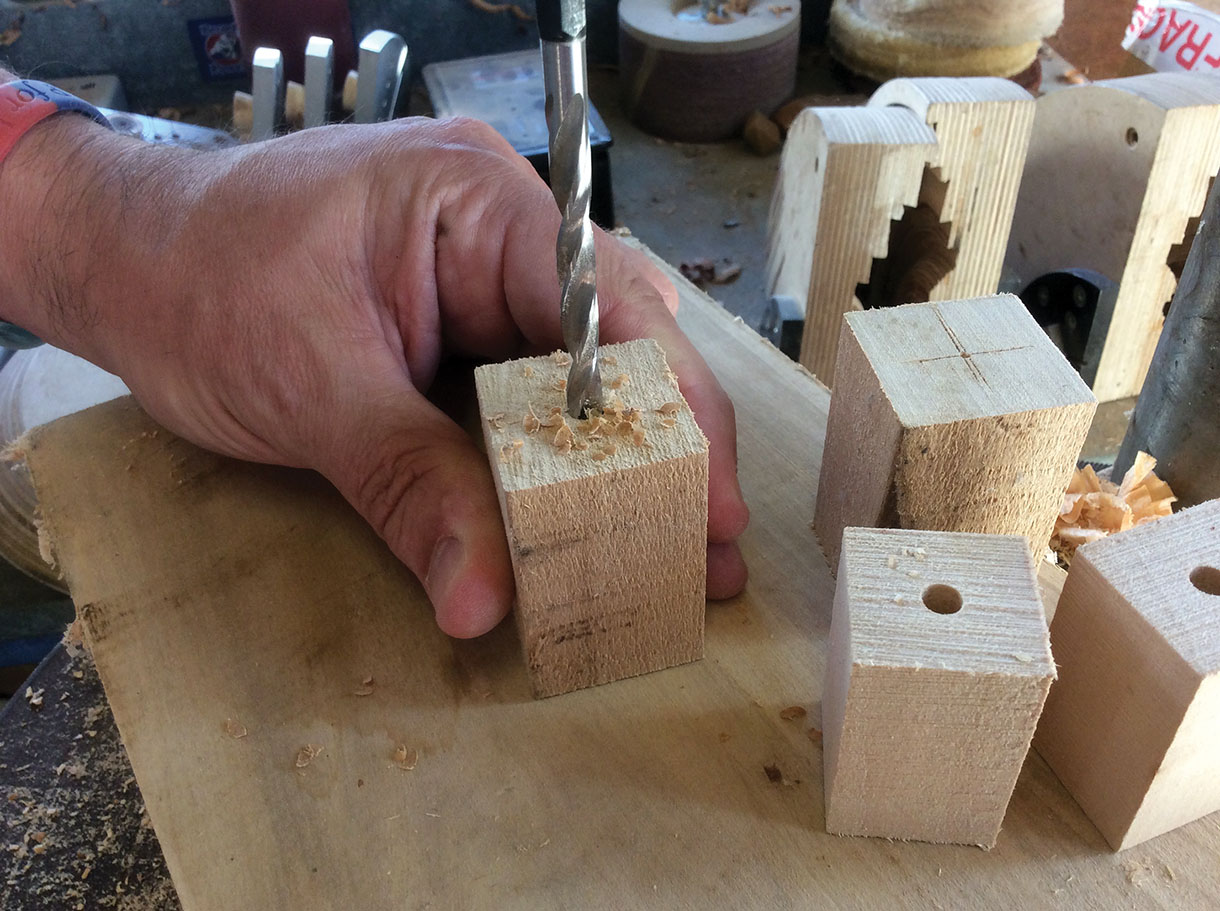
4. Before turning the arms and legs, a little preparation is required, the legs need a 6mm hole drilled to both ends at a depth of 10mm, and the arms the same size holes to just one end. These holes are used to connect to the feet, body and arms
5. We continue with the legs, which are a very simple turning and a simple taper toward the foot making sure that each of the ends are cleaned up to ensure a clean join when the piece is put together. Because of the holes at either end of this blank, use a light pull drive to drive the blank and a single pointed live tailstock centre. Make sure that when you make the second leg you take the measurement from
the first, then sand them both
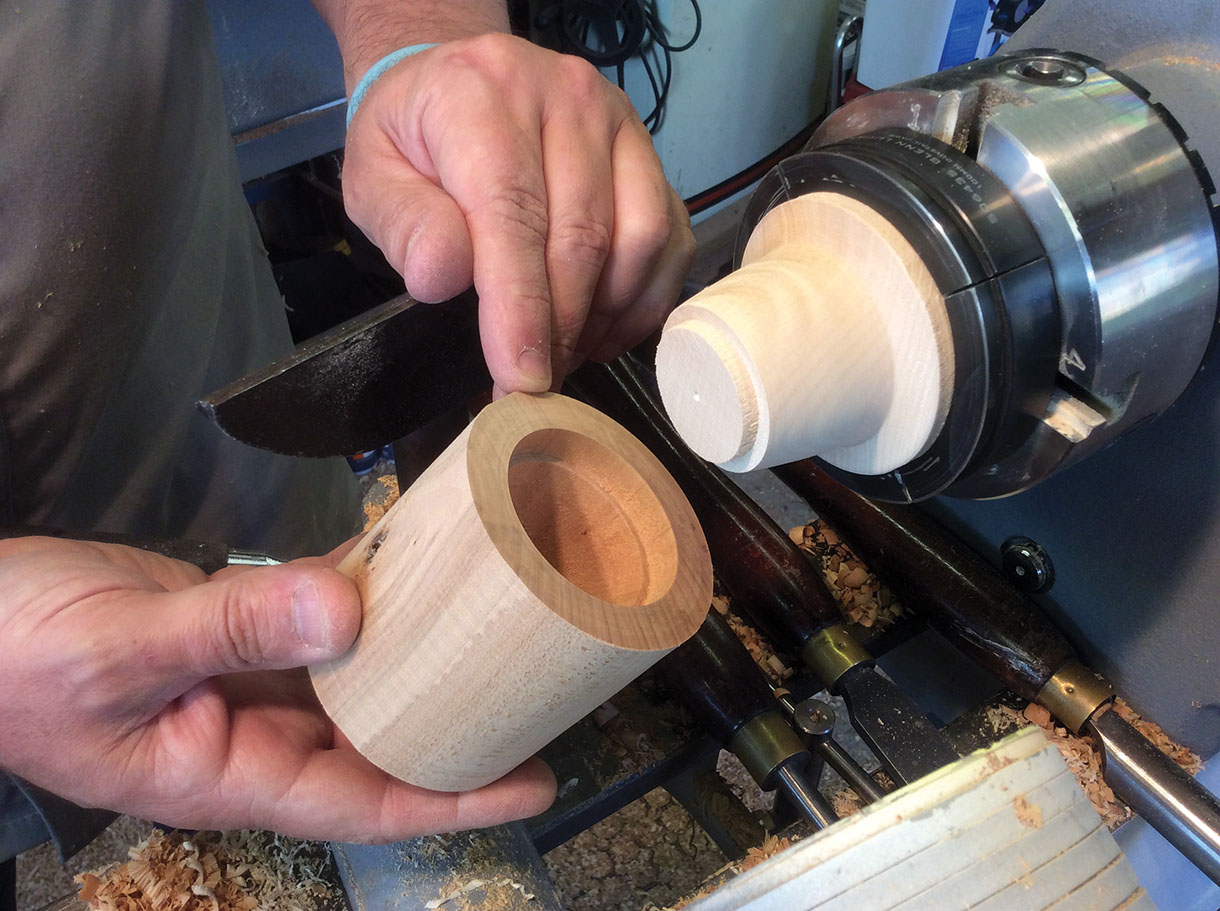
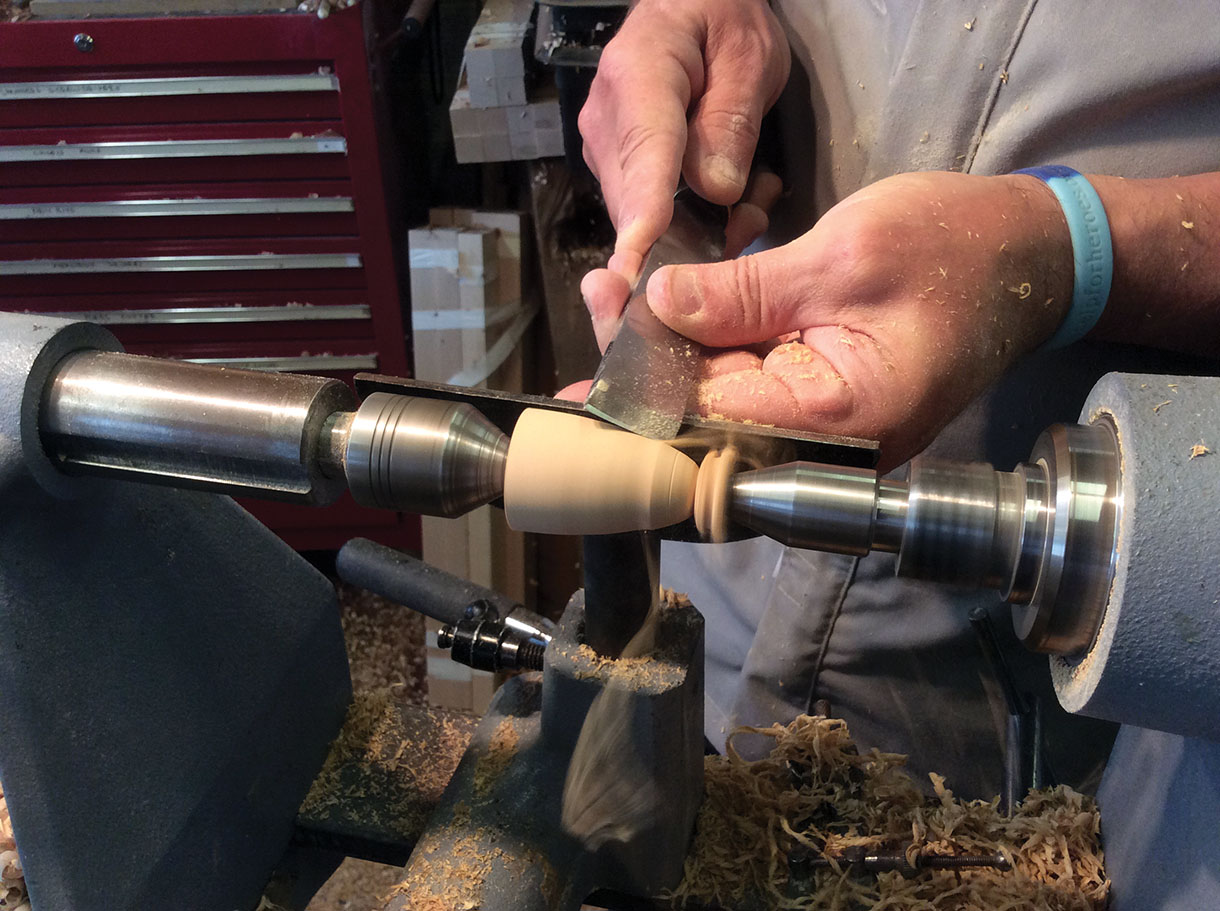
6. Making the main body part is the most complex of all the parts but still relatively easy. Rough down the main body piece to a cylinder before holding it in our set of dovetail jaws. The exact dimensions and shapes of the pieces are on the line drawing, but now in the dovetail jaws we need to hollow the body out leaving a ridge 12mm up for the body to sit over the incense holder. Do this with a 6mm bowl gouge cutting from centre outward. To drive the hollowed out body, turn a drive dog from a piece of scrap wood and give it a slight taper, this taper gives a tight fit and means at later stages of shaping we can take the tailstock away to clean this area up and sand without interference
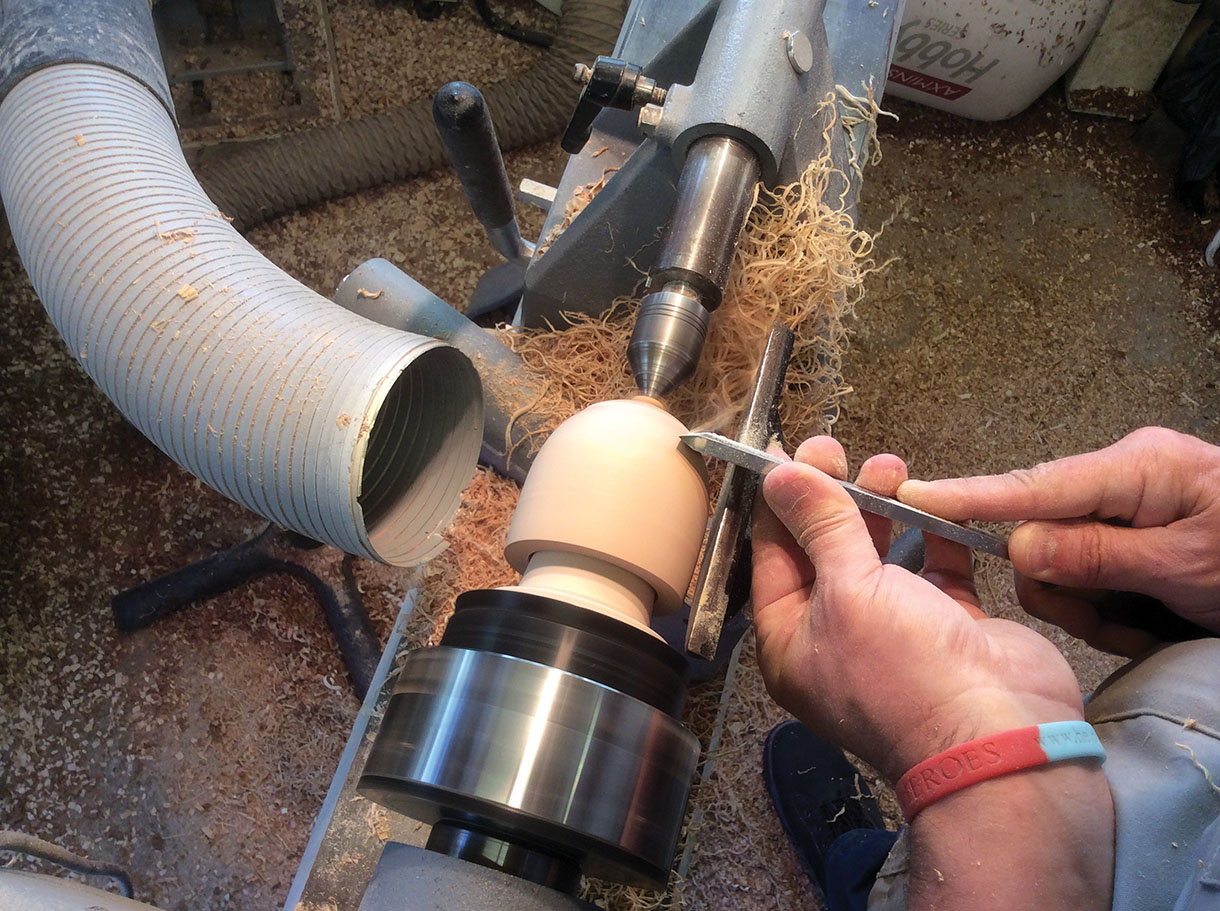
7. Now, shape the body into a dome. You can see the skew working well, it’s a cutting tool so leaves a really nice finish to the timber
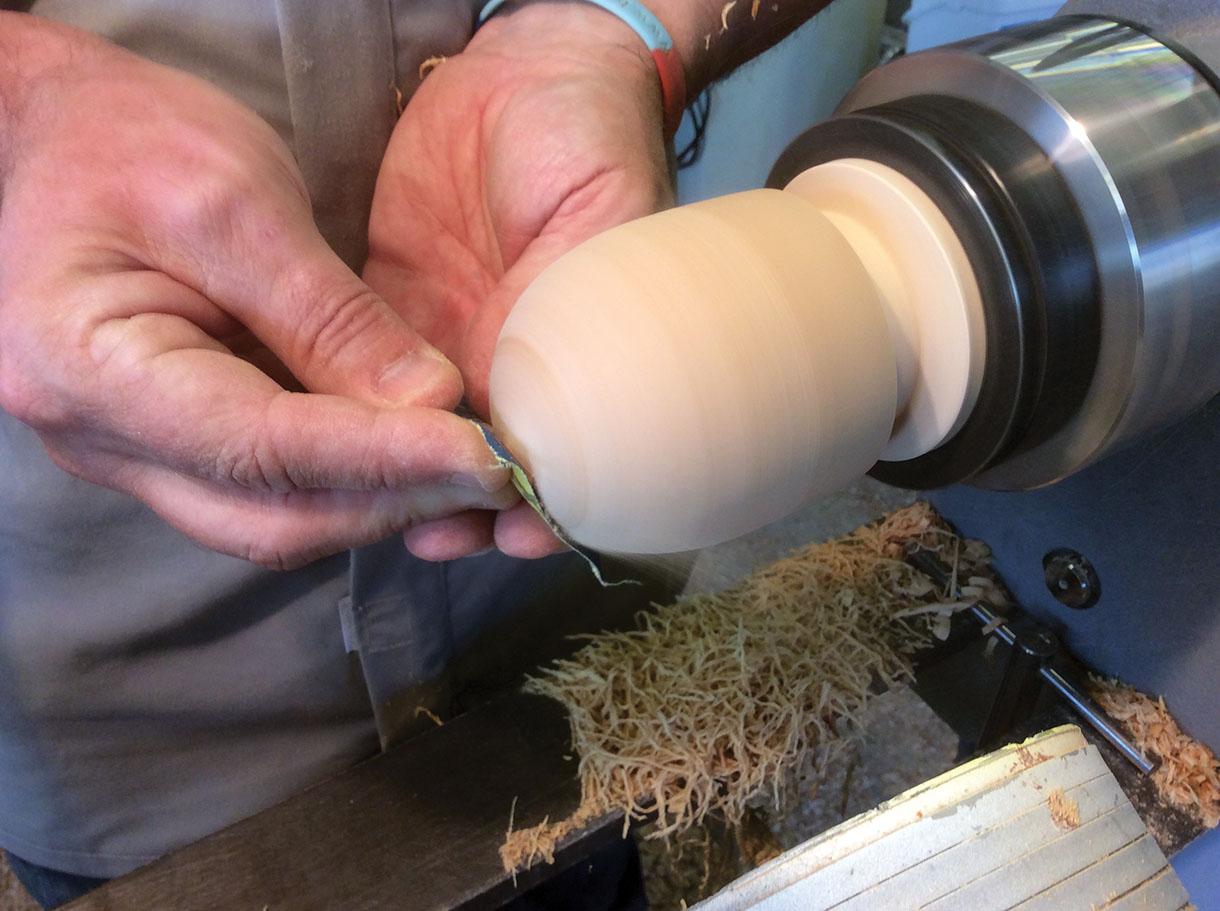
8. After shaping the body, take the tailstock away and clean up the area that the tailstock was supporting before sanding
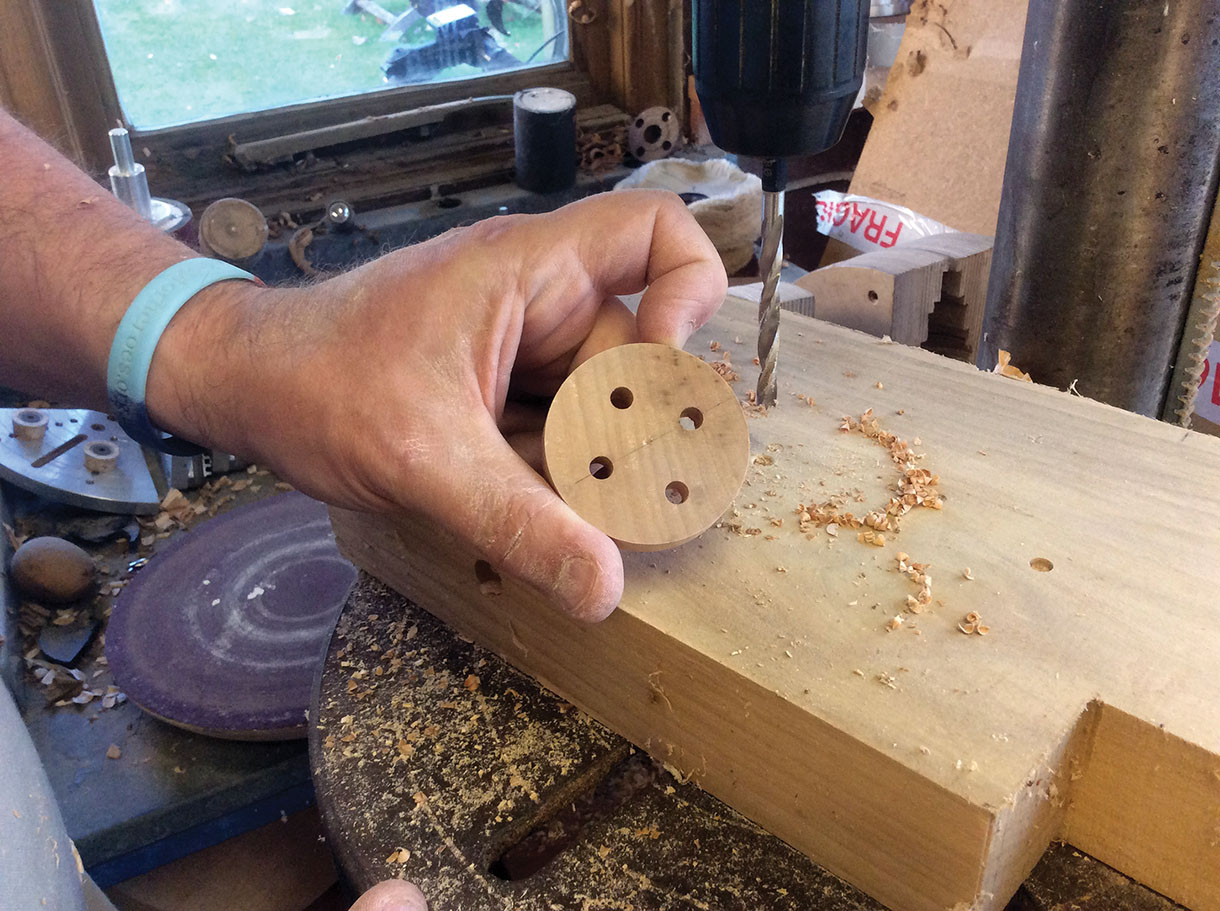
9. Now to join all of these pieces together to make the incense holder. This is a piece of lime turned to fit the inside of the body up to the ridge we spoke about in step 6. This fit needs to be good but not tight as you will need to light the incense cone then put the figure together and you don’t want to be forcing the two parts together. I’ve drawn a line straight through the centre of the holder and then drilled four 6mm holes, two for the legs to fit in 28mm between centres and two more in the opposite quarters as flue holes to allow good air flow for the smoke
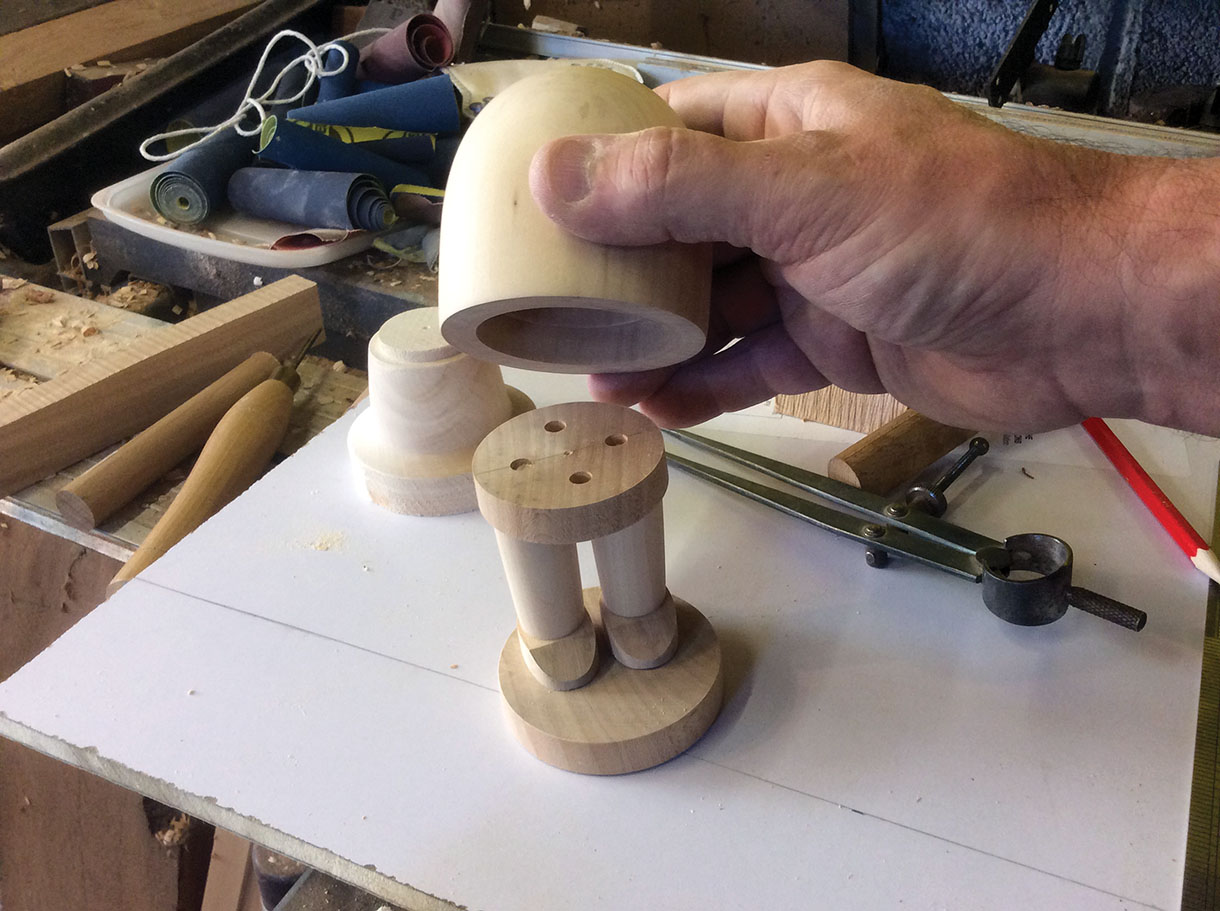
10. You should now be able to see how the body goes together and we can move onto the next stage
11. Turning the arms is fairly simple and involves a convex taper, I’m using a ring friction drive to drive the piece with a single pointed tailstock centre. Leave a bit of waste to clean off the narrow end of the arm before sanding to 400 grit then repeat on the second arm
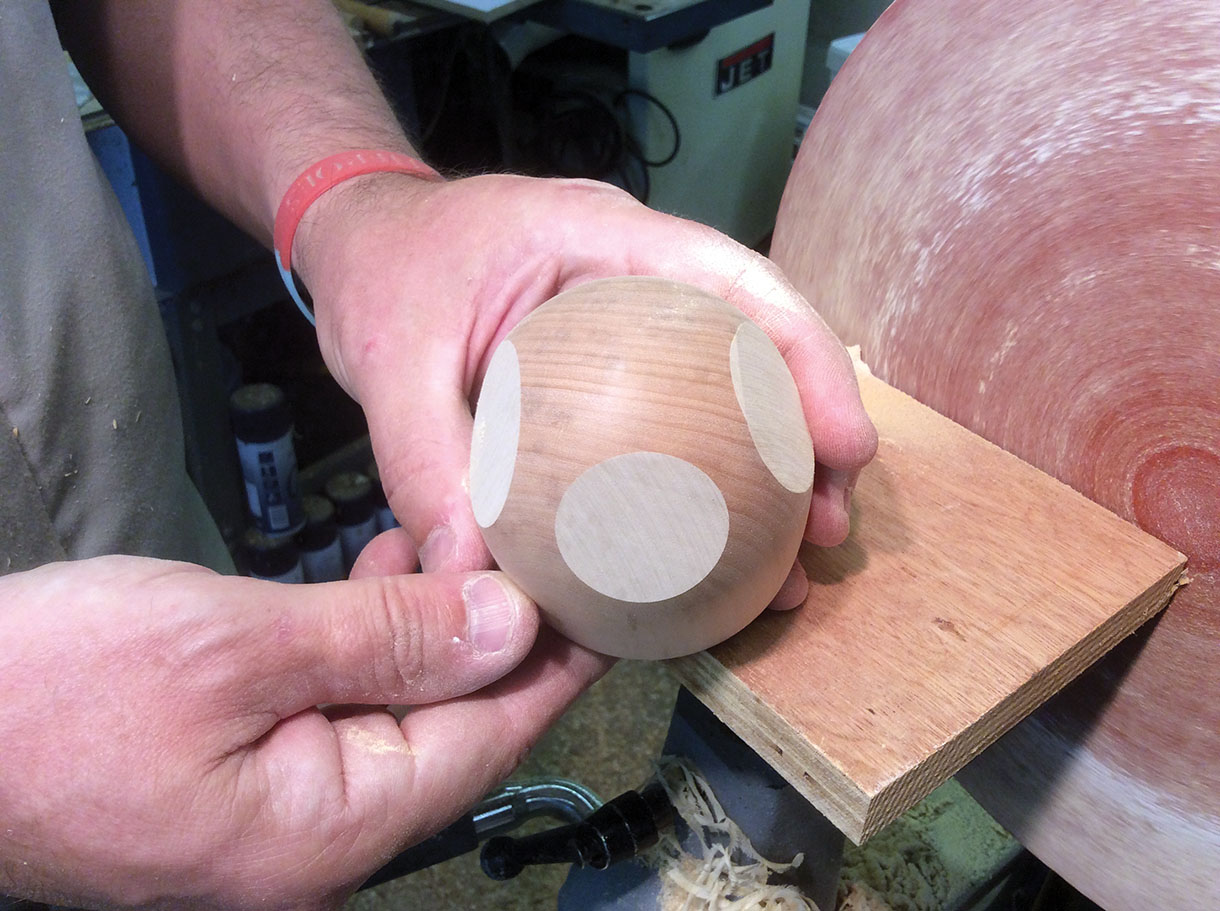
12. In preparation to start assembly we need to sand a few flats to the body and arms. Firstly, on the body in opposite positions two flats to take the arms and then in between these another flat to take the head and positioned slightly higher up the body

13. In the same way, sand a flat on the arms to position the arms onto the body. You can alter the angles here to suit the gesture you want your smokers to stand at
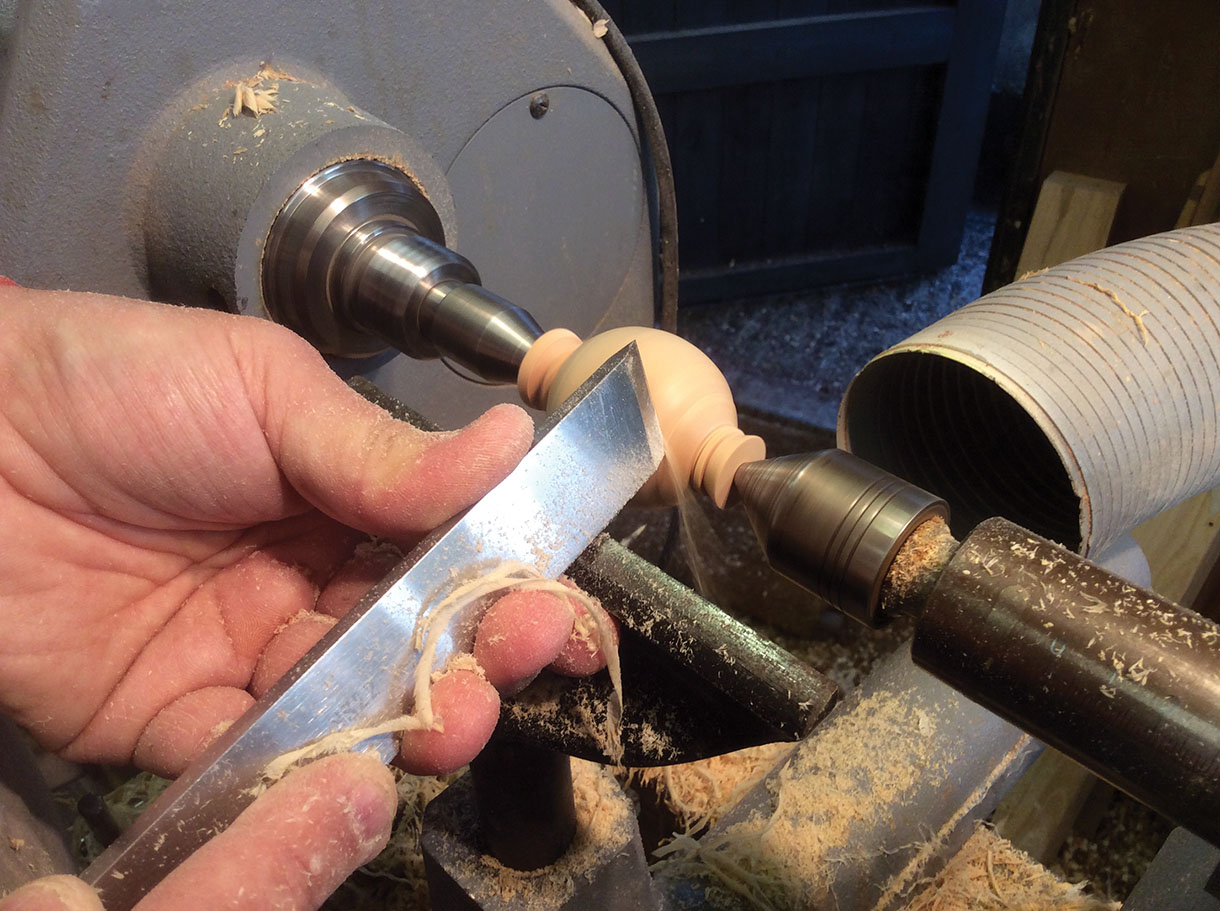
14. Another bit of turning here and onto the head, which is a simple ball shape turned between two centres. You can see here that I have a bit of waste at both ends of the head which can be easily sanded away when finished and another reason for using lime as it works so well
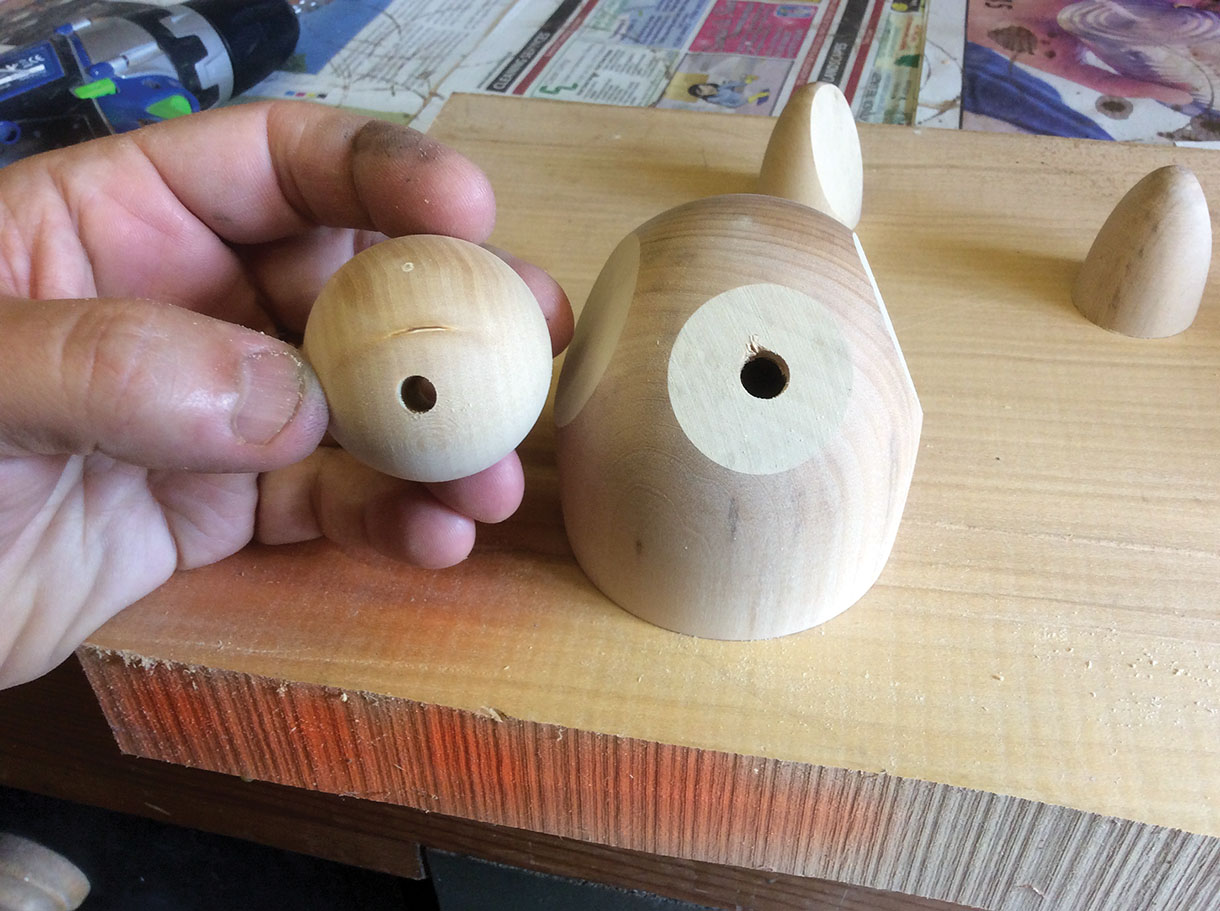
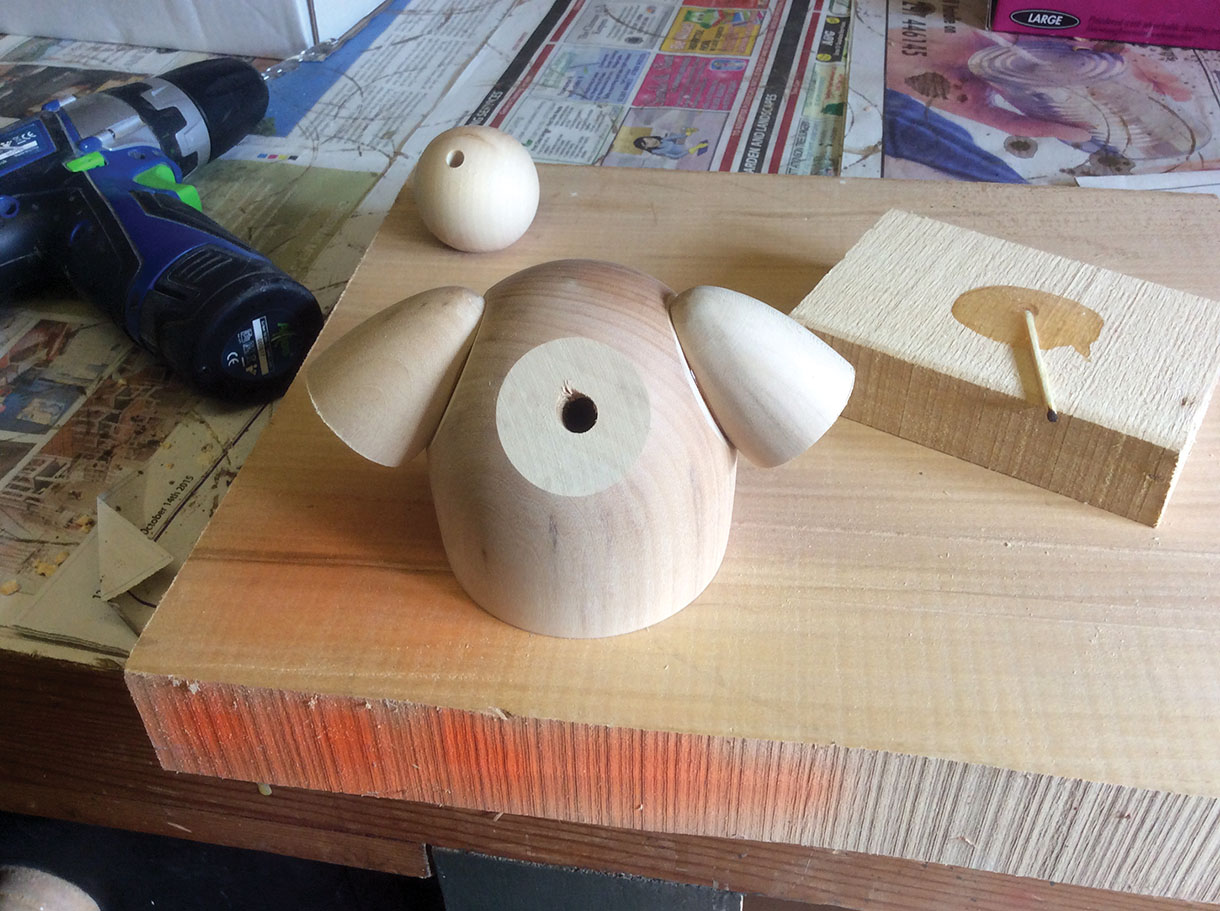
15. Before gluing anything together we need to drill another couple of holes this time to allow the smoke from the incense to come through. Firstly the main hole in the body which is 10mm at a downward angle then the second 6mm hole in the head, this needs to be done with a sharp lip and spur bit to avoid breakout. To make sure the holes line up, I position the head over the body and eyeball with the drill in position before taking down and placing on the bench to actually drill
16. This picture shows the first part of the gluing of the arms in position, I use epoxy resin which dries extremely quickly and is incredibly strong
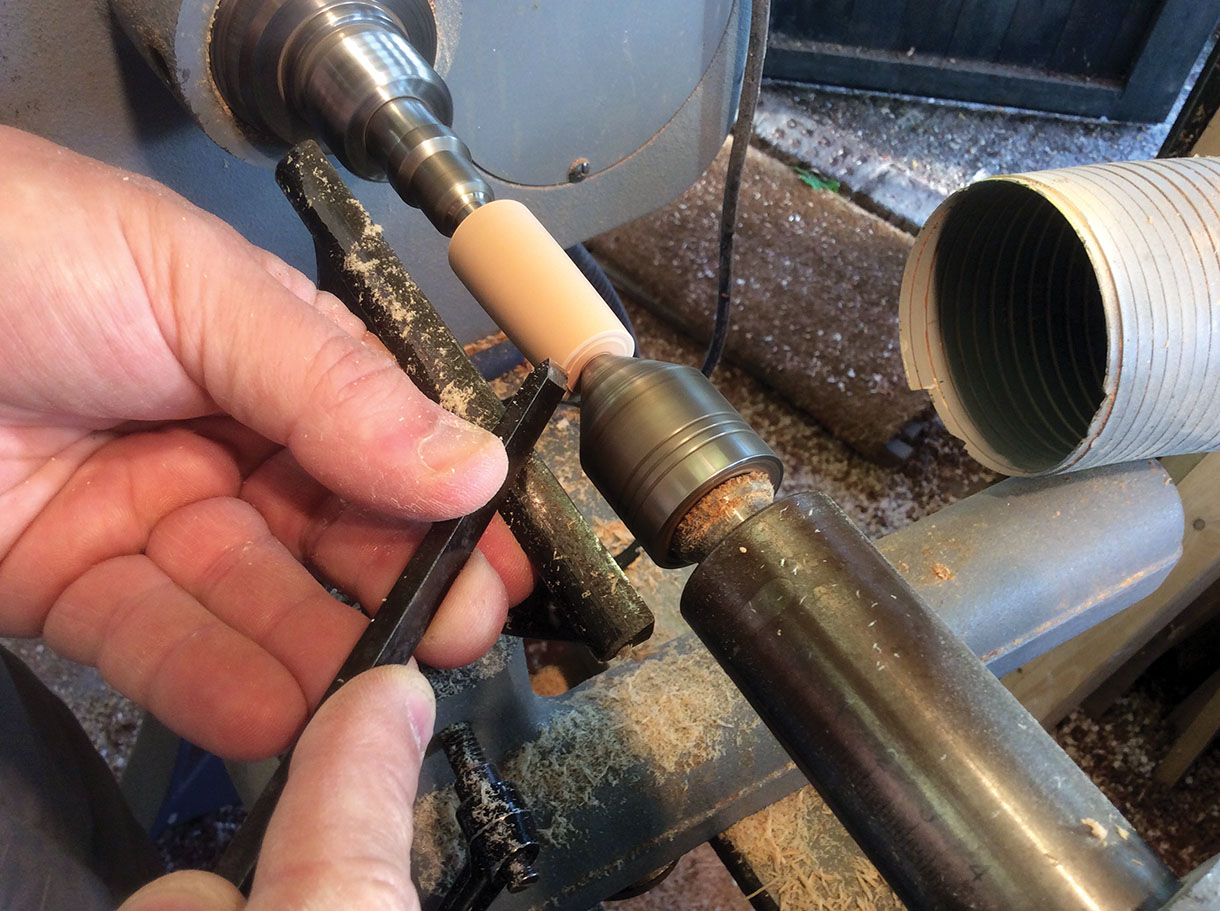
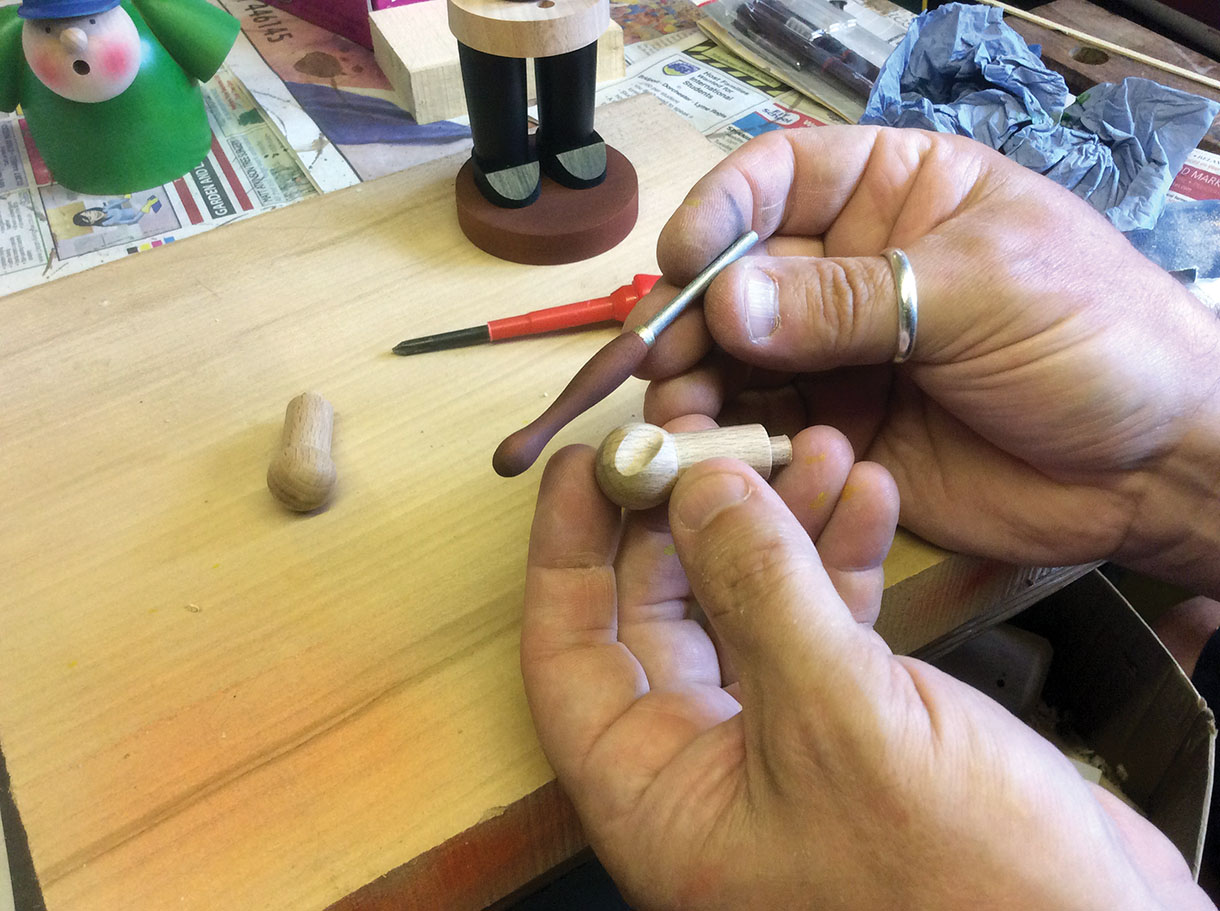
17. While the glue is drying on the body we can move onto some of the accessories starting with the beech arms. I’m using a set of internal step jaws here to hold a piece of 20mm dowel and start by turning the ball of the hand then turning down the wrist section before creating a 6mm tenon that will end up slotting into the hole in the arm
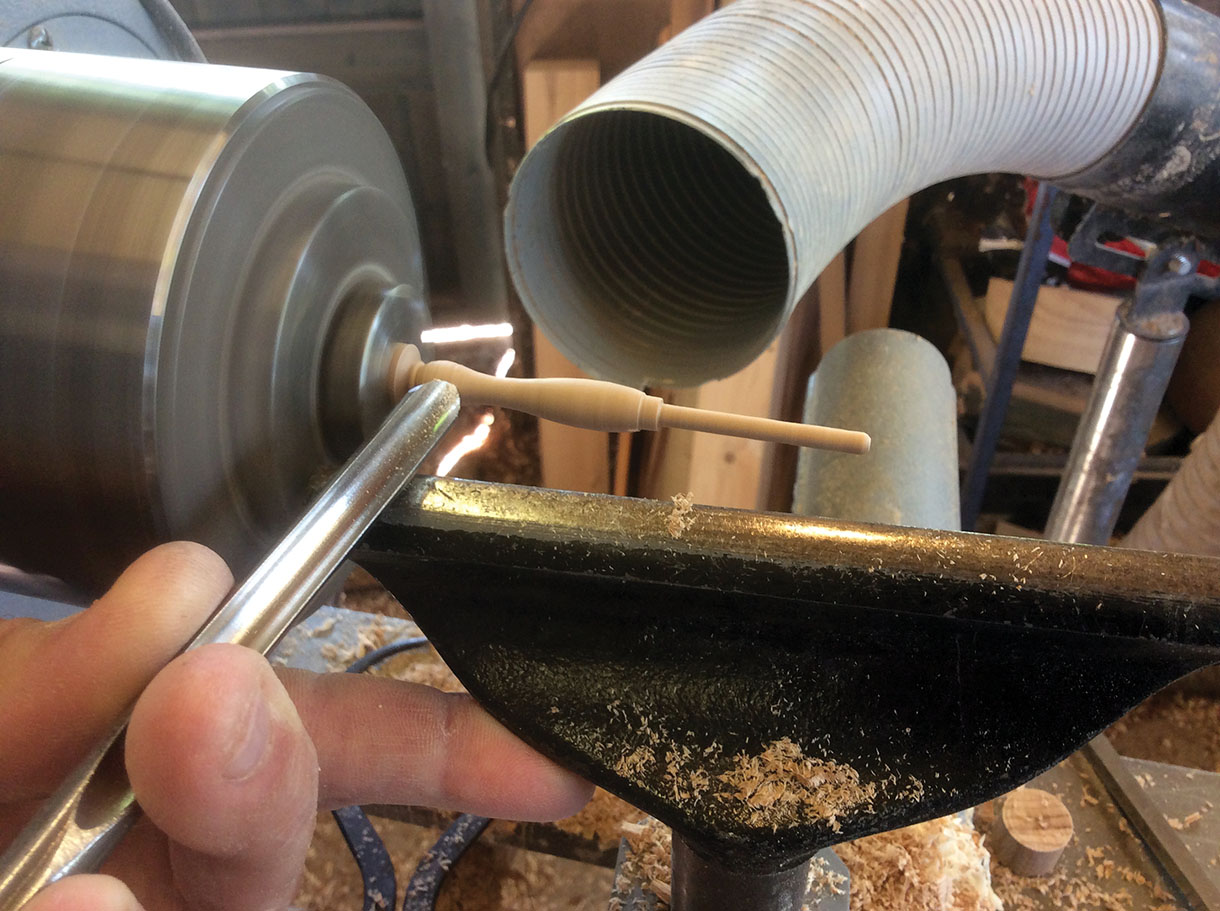
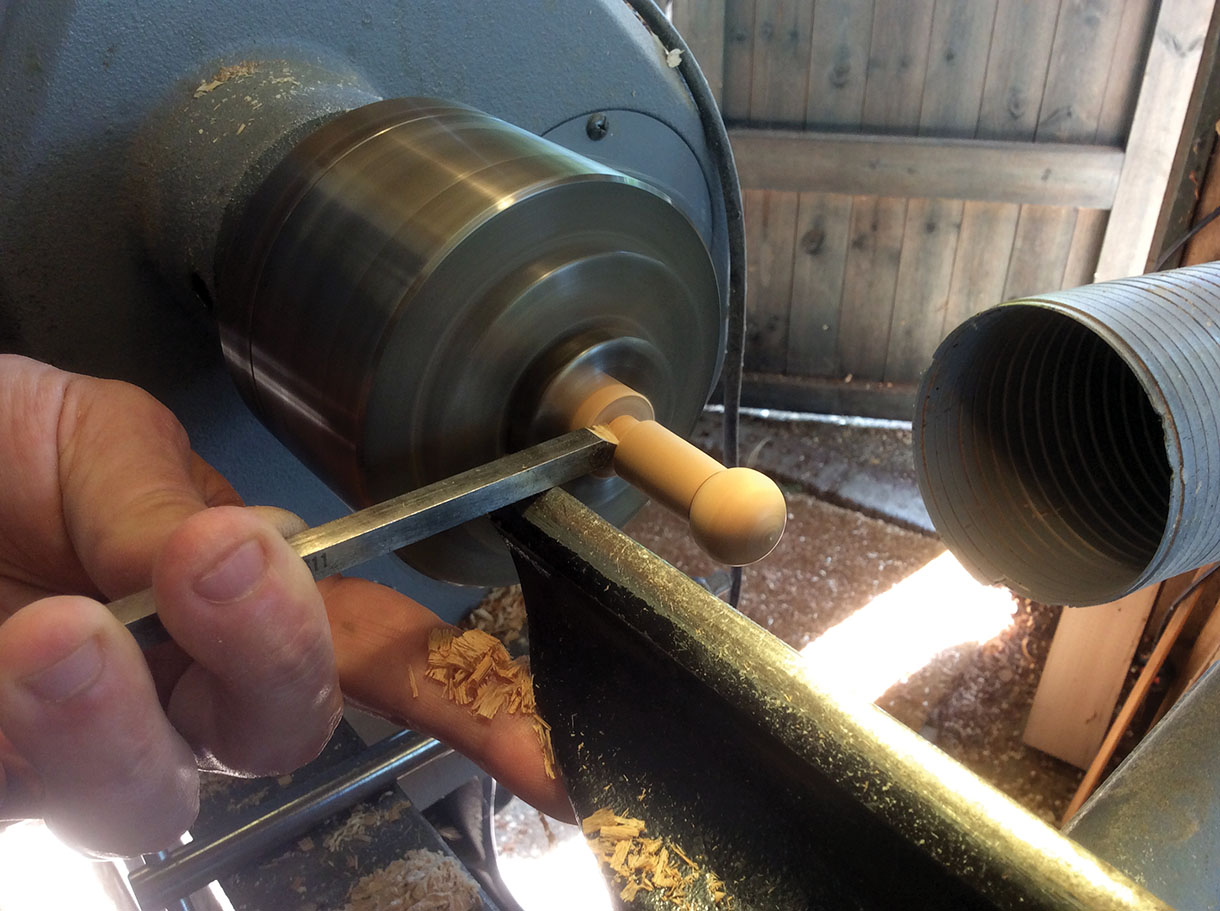
18. Now this is a bit of fun turning the ‘turning tool’ working back toward the chuck before sanding. The small table lamp on the lathe was turned in the same way

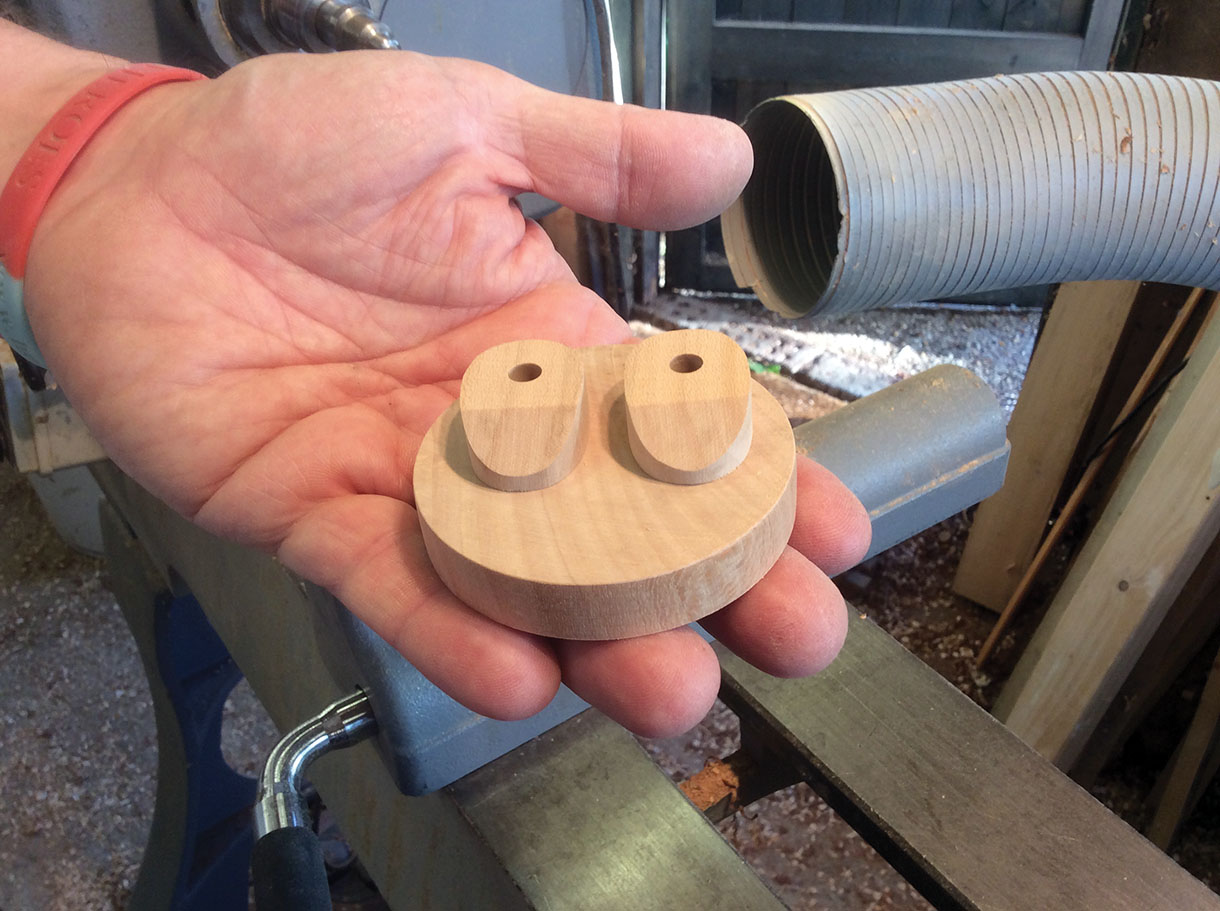
19. I’m using the same piece of timber here that we used for the base and the incense burner, this is going to be the baseball cap. I start by facing off the front of the blank to a good finish before making a hollow to fit over the head which I keep offering into the hole until it fits perfectly. Then once the underside of the cap is complete we can look to shape the top, you have to leave enough peak to shape on the sander later. Don’t forget to sand before parting off with a skew chisel
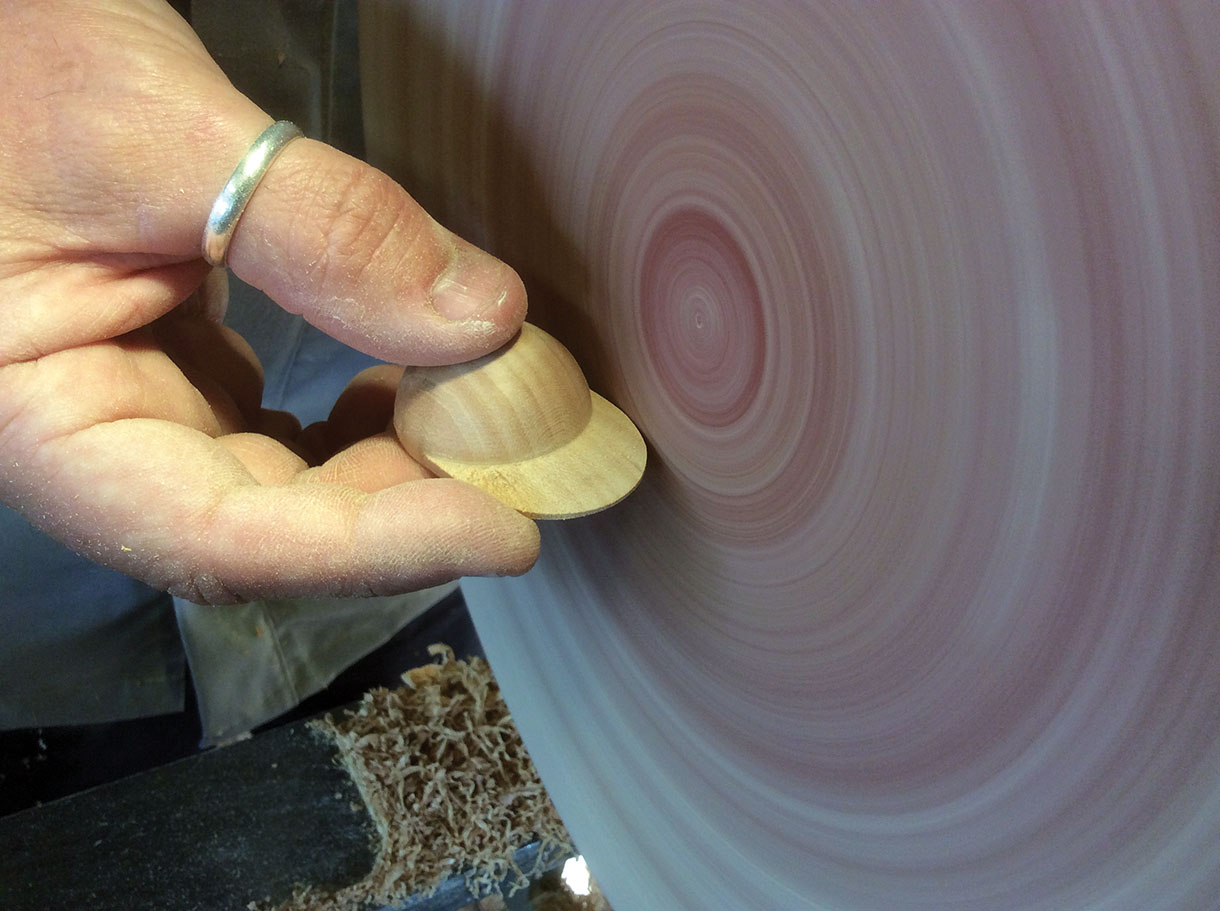
20. So here you can see how the peak is formed easily with the disc sander, but if unsure, use a pencil to sketch out first then sand to your lines
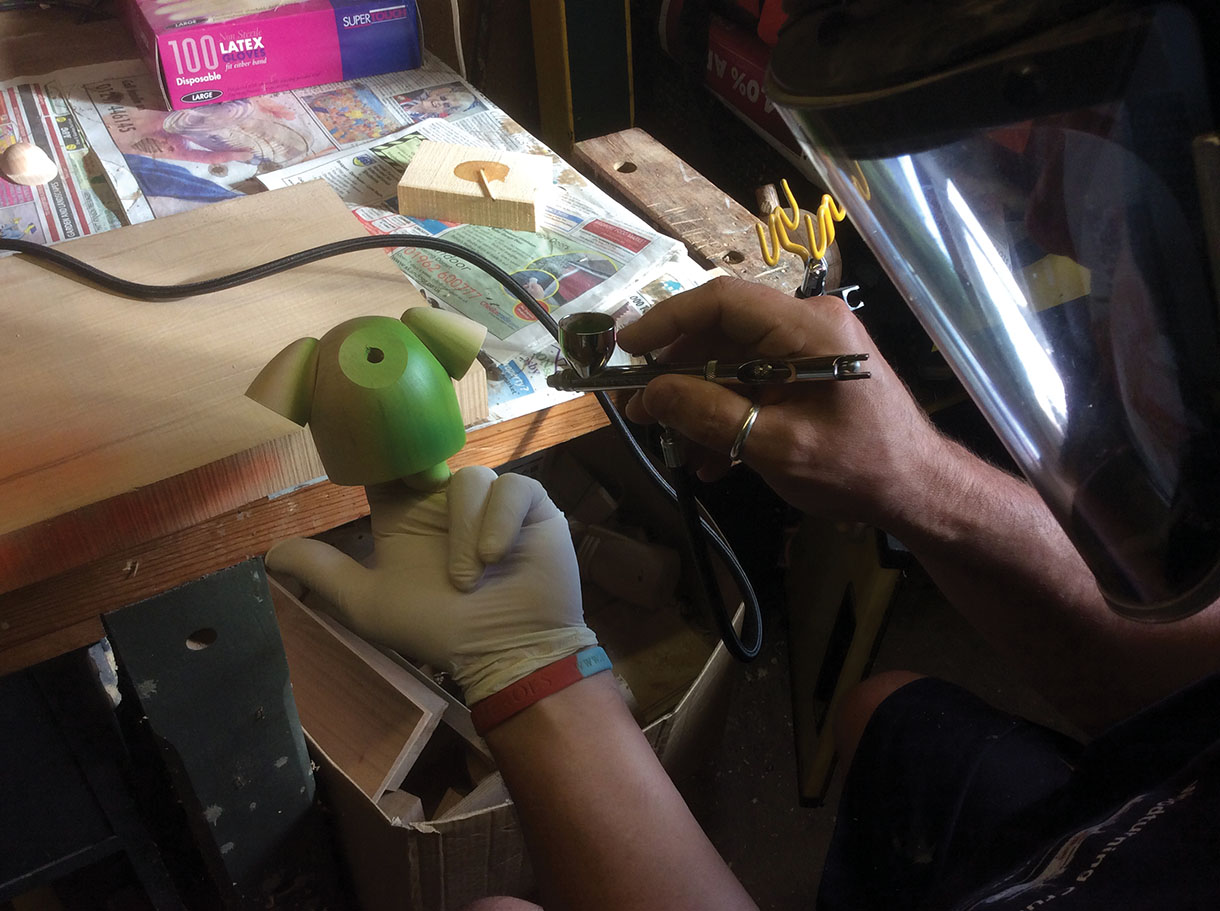
21. We can now move onto my favourite bit, the painting, I always paint the arms and body after gluing, but before the head is attached, which saves me having to mask anything off. I’m using an airbrush to do most of the painting, however there are small areas like the turning tool that are done with paint brush. This picture shows the airbrush being used to do the main body colour of the smock. The great thing with airbrush paints and how they’re applied is that they dry instantly so there’s no waiting between coats or colours

22. To add a bit more detail here, I’m adding the ‘soul’ by putting the eyes in witha permanent marker then airbrushing the red cheeks on before adding the turned nose on a 3mm spigot
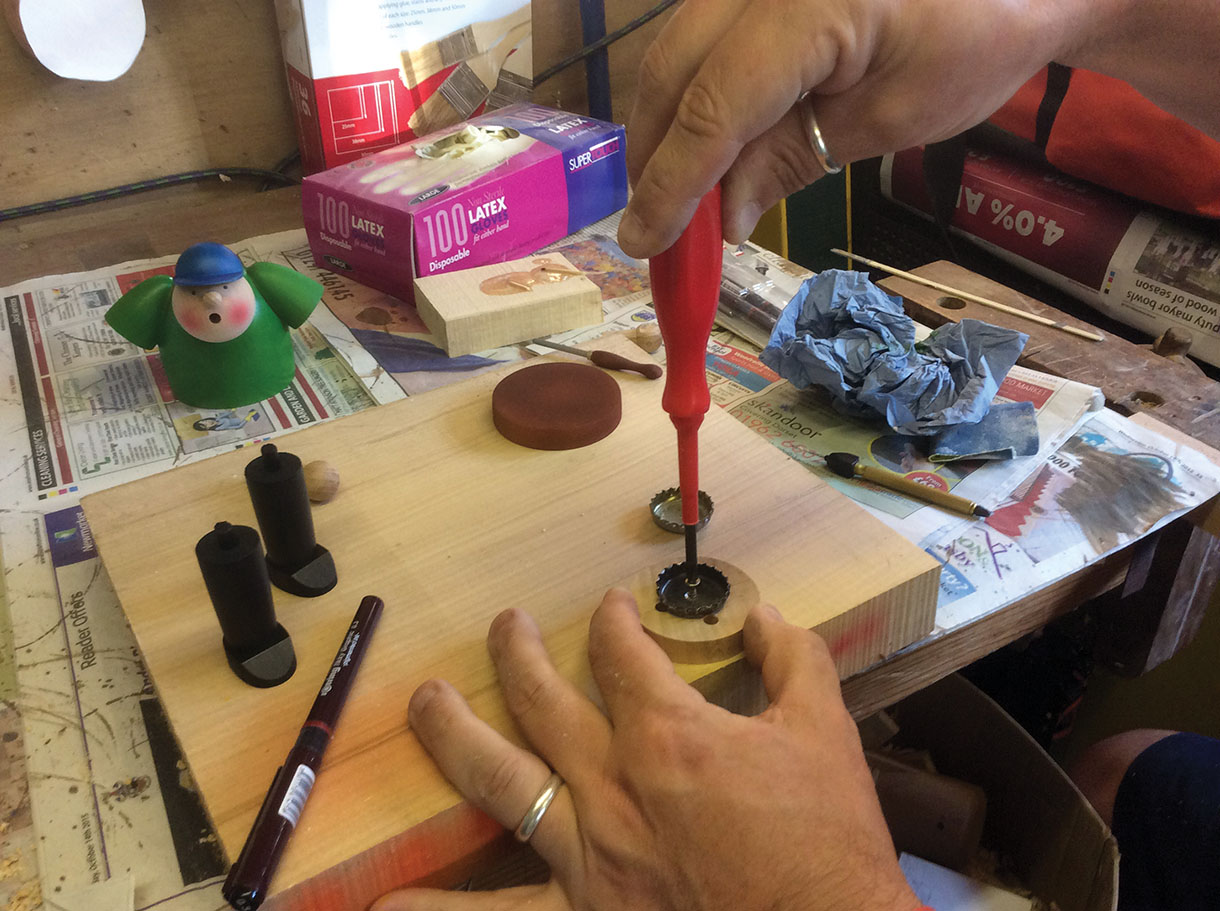
23. So the incense cone can smoulder safely, I’m using an old bottle cap as a dish to sit them in. Make sure that you peel away or burn off any silicone used to create a seal on the cap before installing it onto the figure. I drill these caps and screw them on instead of gluing for safety reasons as this cap will be in touch with the smouldering cone
24. Here you can see that I’ve used a rotary tool to give a slight recess to the hand allowing the turning tool to be glued to it more securely
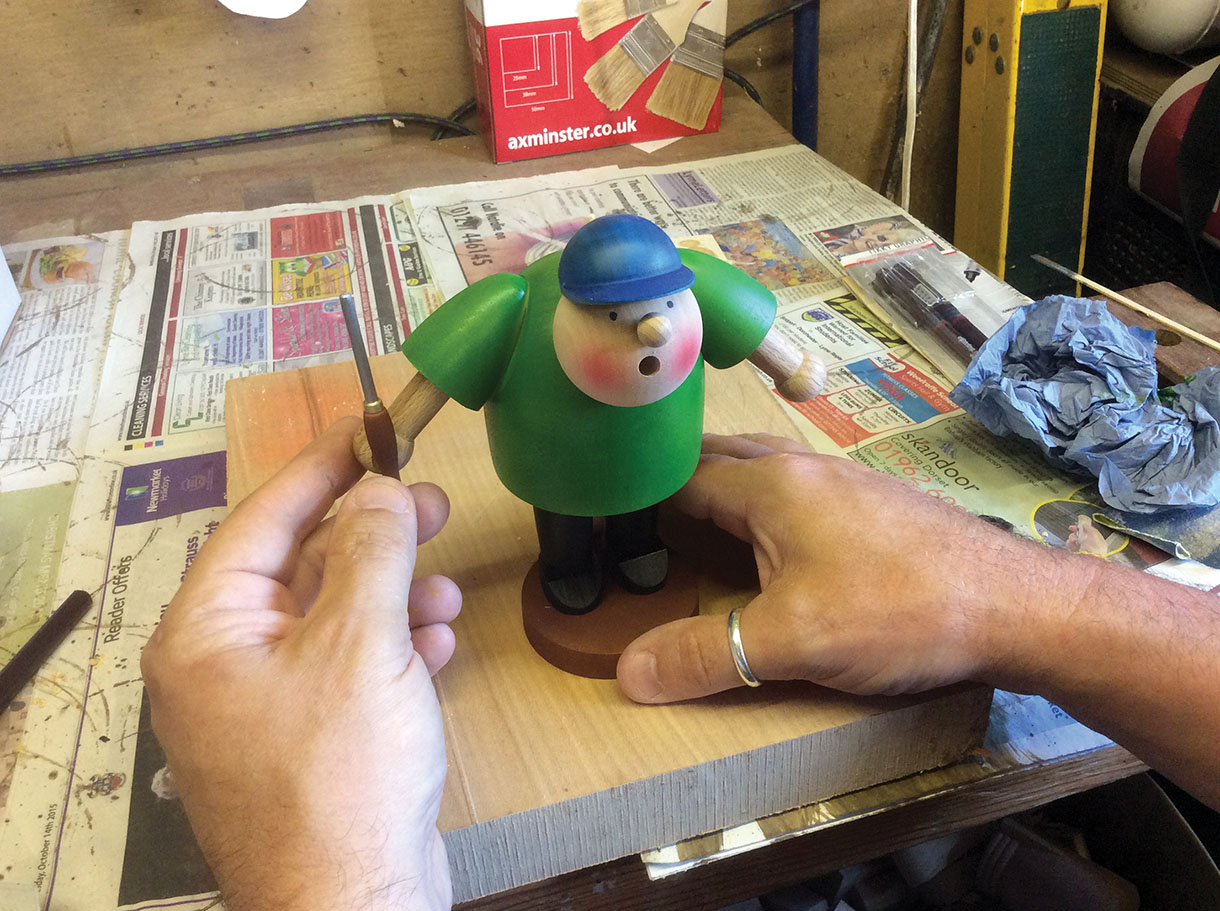
25. So here we have the finished smoker ready to have its tool glued on, I then give the whole figure a couple of coats of satin lacquer to lift the finish. As you can see from the main finished picture, I’ve included a small lathe hanging around the neck which is a bit of artistic license on my behalf so please don’t email me asking where you can get them from

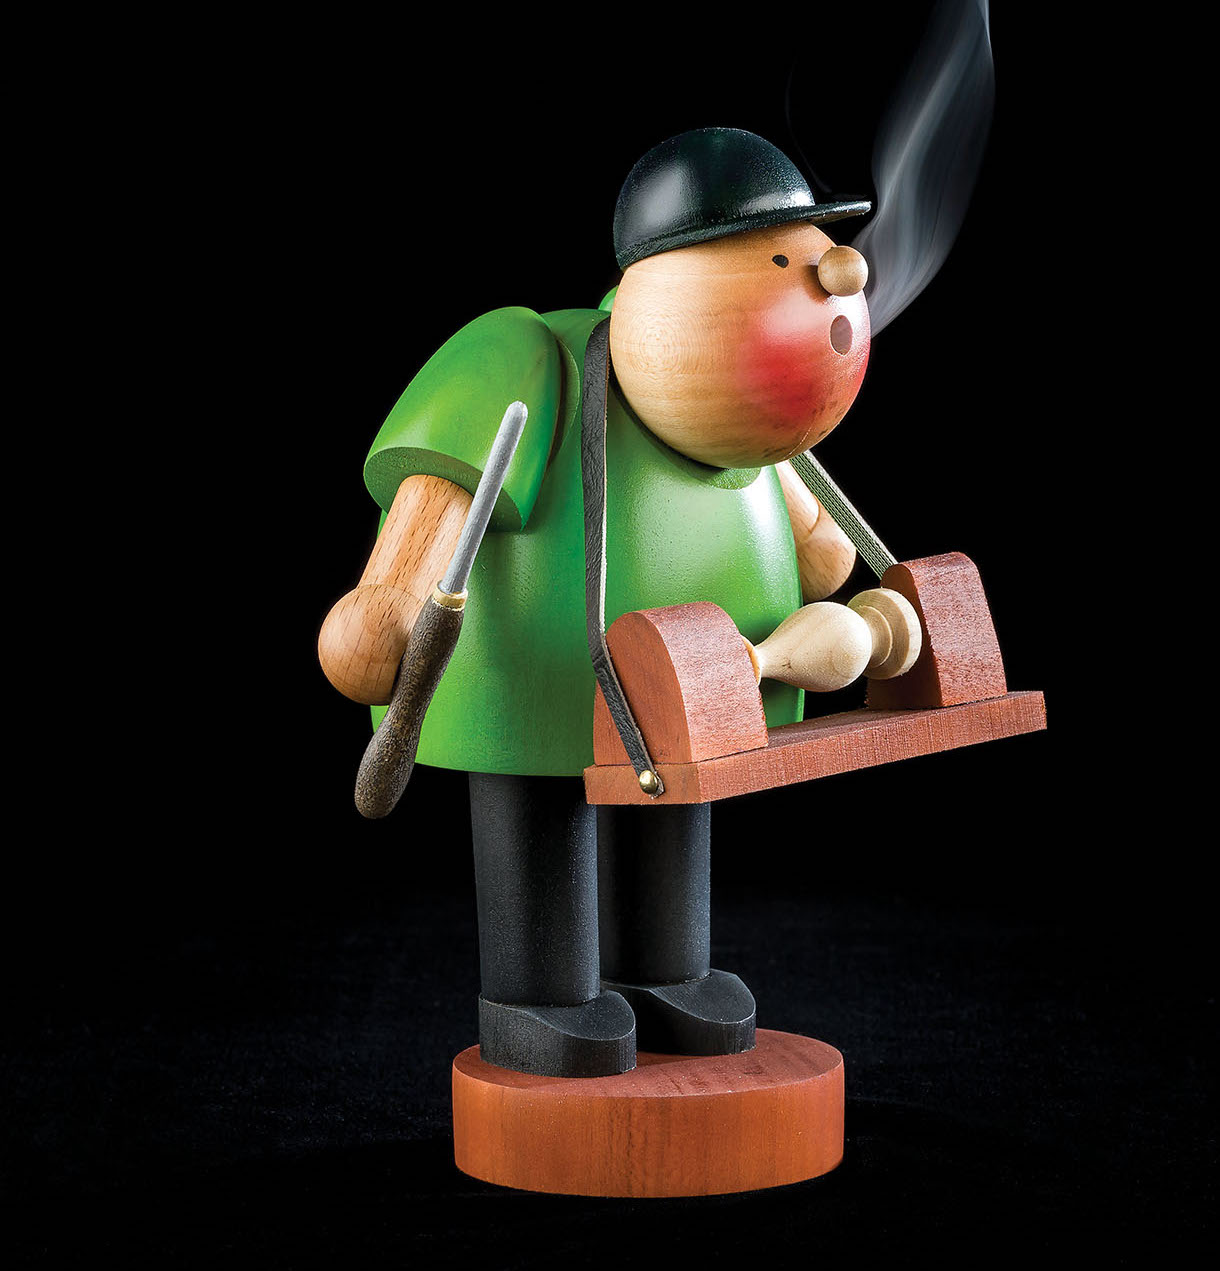
26. The finished German insence burner, and a fun alternative design
Incense cones
I’m an avid collector of these lovely figures and pictured here are a selection of incense cones I use. These are especially designed for these types of burners and are easily available over the internet. Well there we are, just like before and last year when we made the nutcrackers, I hope you think about the recipient when making these figures and build a bit of their character into them.
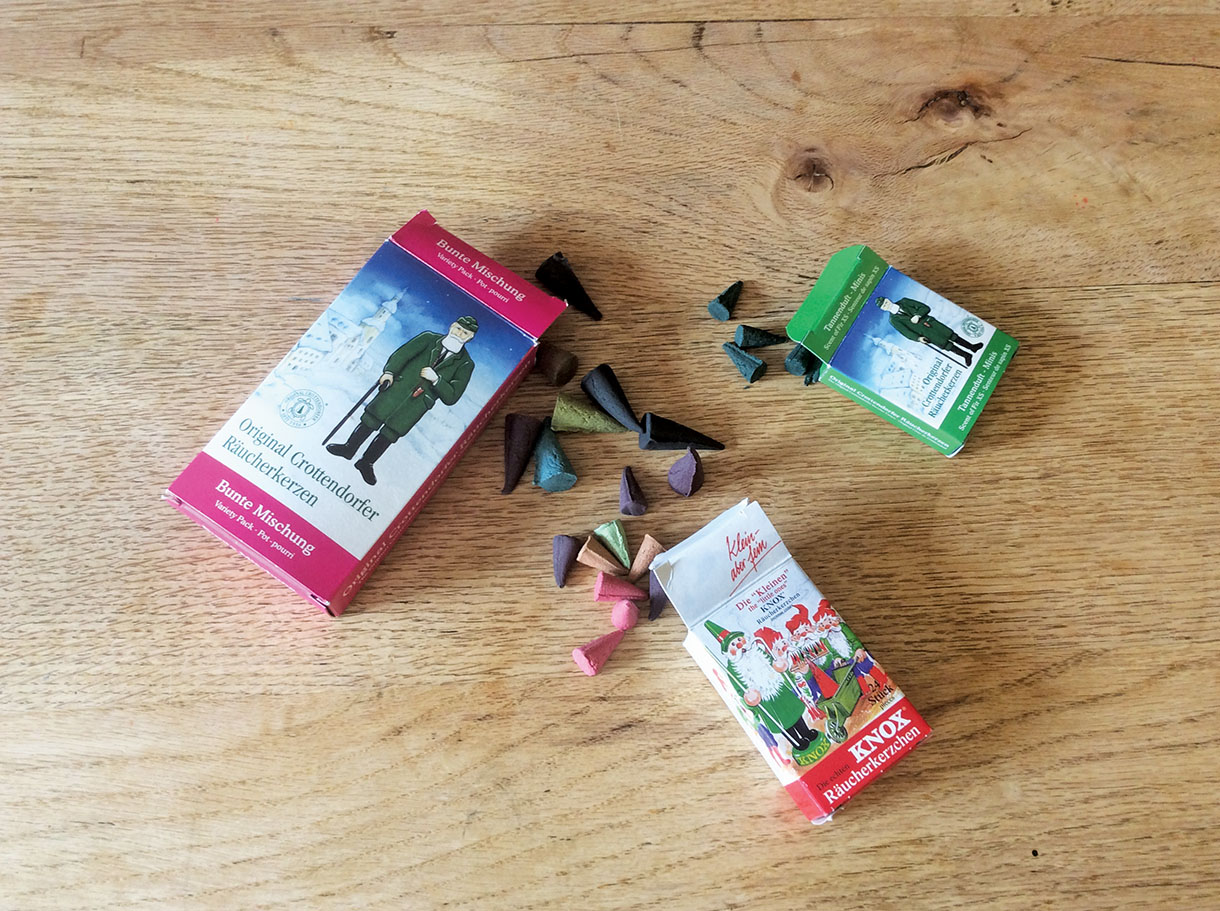
Just a few of the available incense cone packs


