Celtic Snowflakes:
Dave Western shows how to create some wintery decorations.
Dave Western shows how to create some Celtic decorations
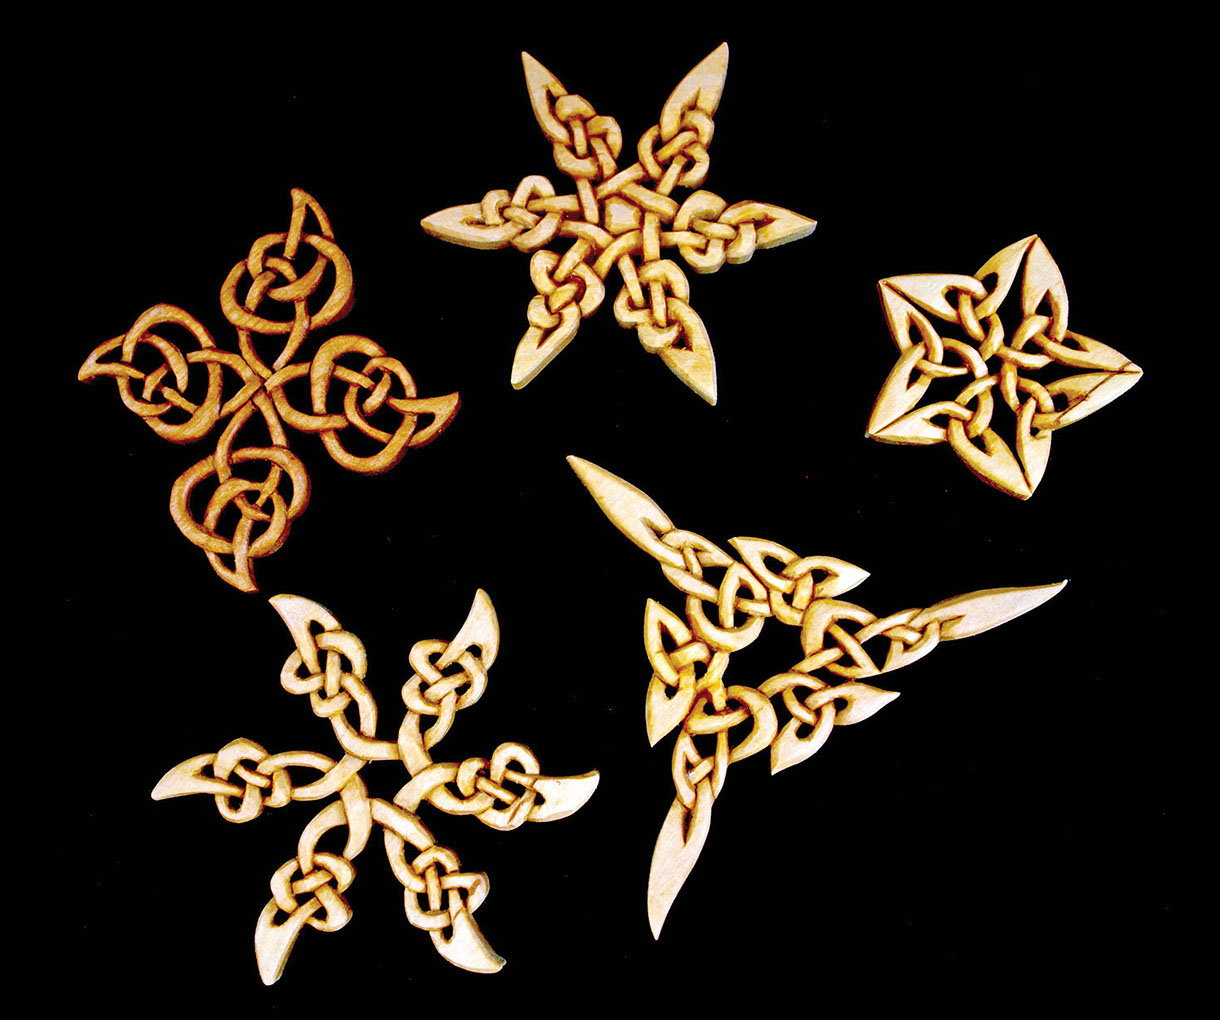
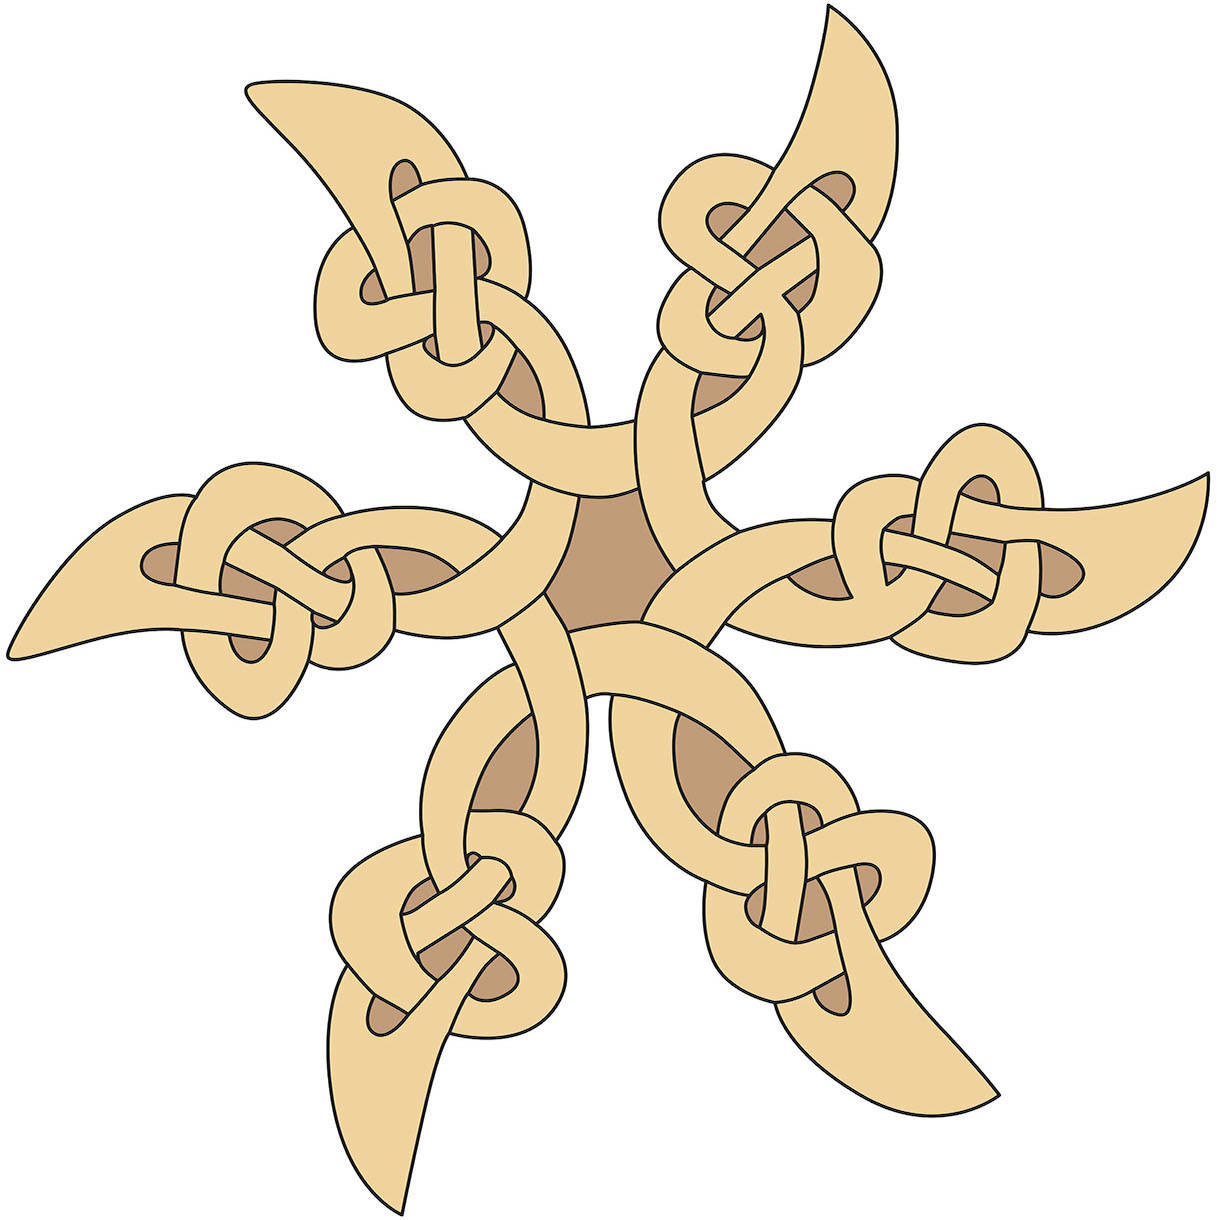
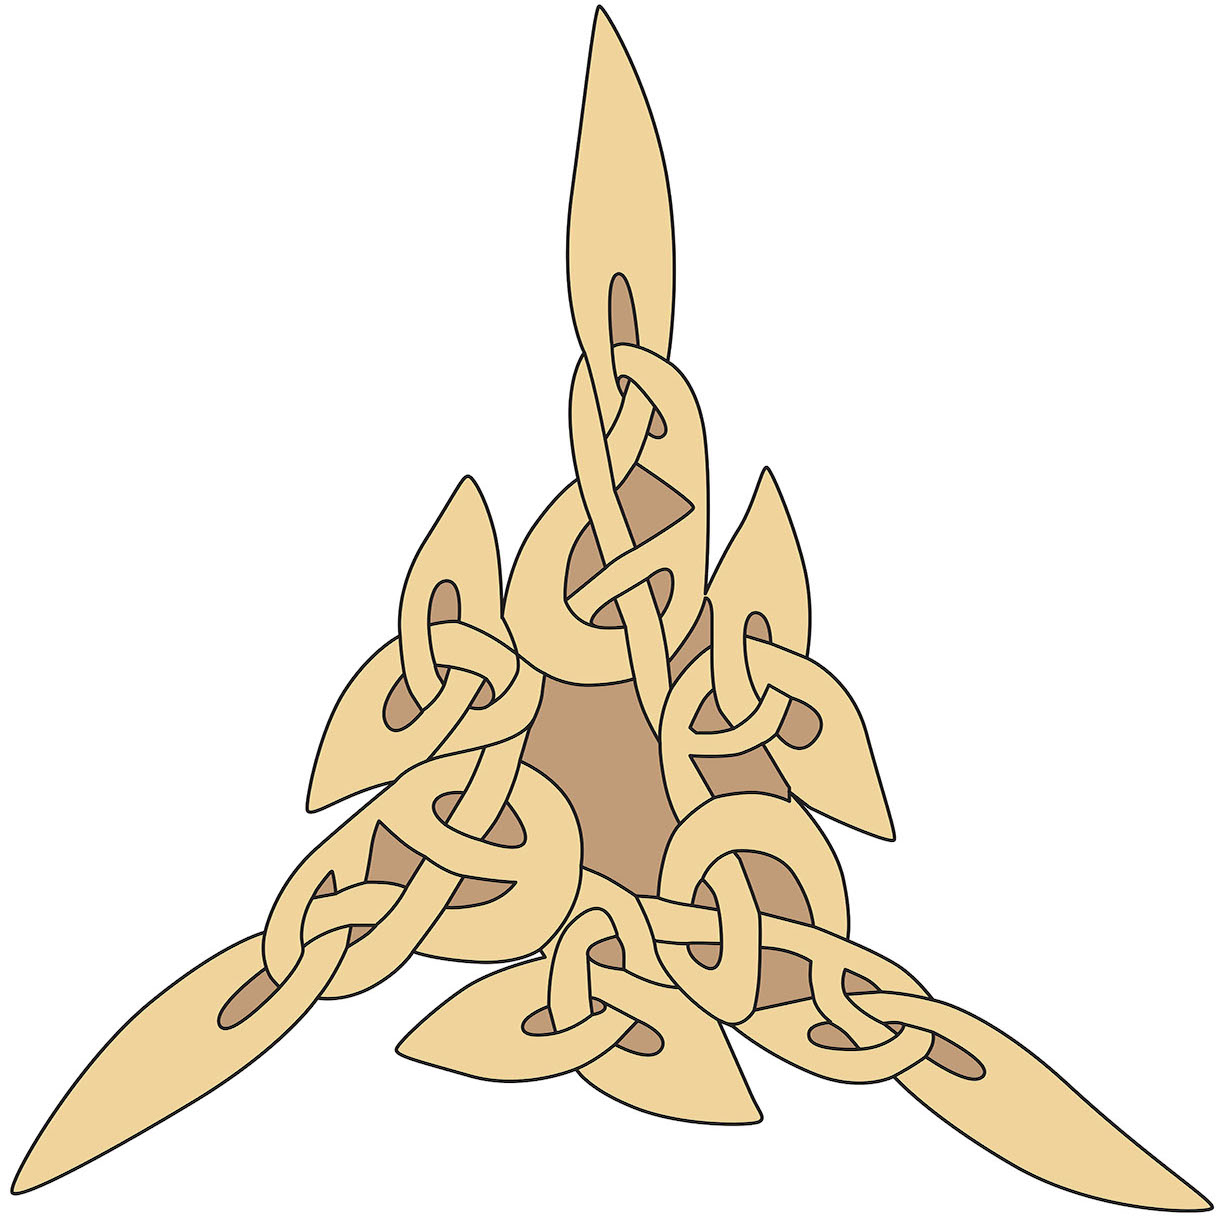
With wood bins bursting with all sorts of off-cuts that will have to be dealt with, here’s a perfect little project to use up some scraps and win some accolades. These Celtic knot snowflakes are beautiful to look at and highly engaging to make. Although they appear pretty complex, all are fashioned from very simple knots which have been repeated to form three, four, five or six-arm patterns. I make my snowflakes from 5mm thick material and generally carve both sides to heighten the over and under effect of the knotwork. The knots can be made highly fretted or simply relief carved. Depending on how your shop is set up, I have included carving methods for those with scrollsaws and for those who plan to make them totally by hand.
Things you will need
• Scroll/jeweller/coping saw
• Drill and a variety of bits
• 1in straight knife
• 1/8, 1/4in wide chisels
• Needle files
• Small paintbrush for oiling
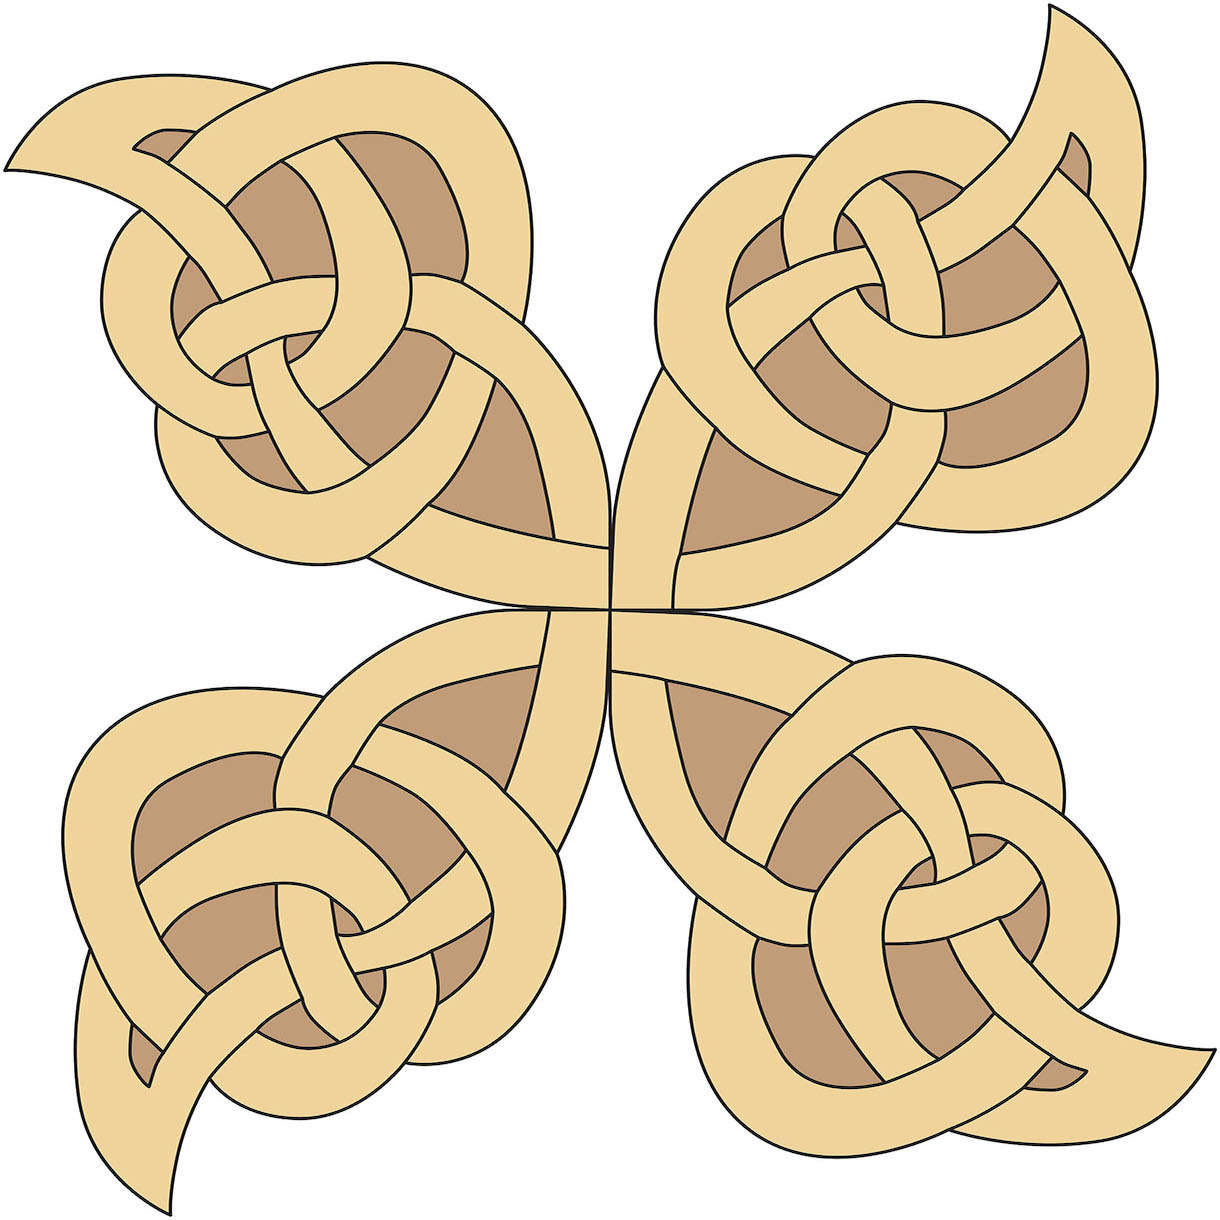
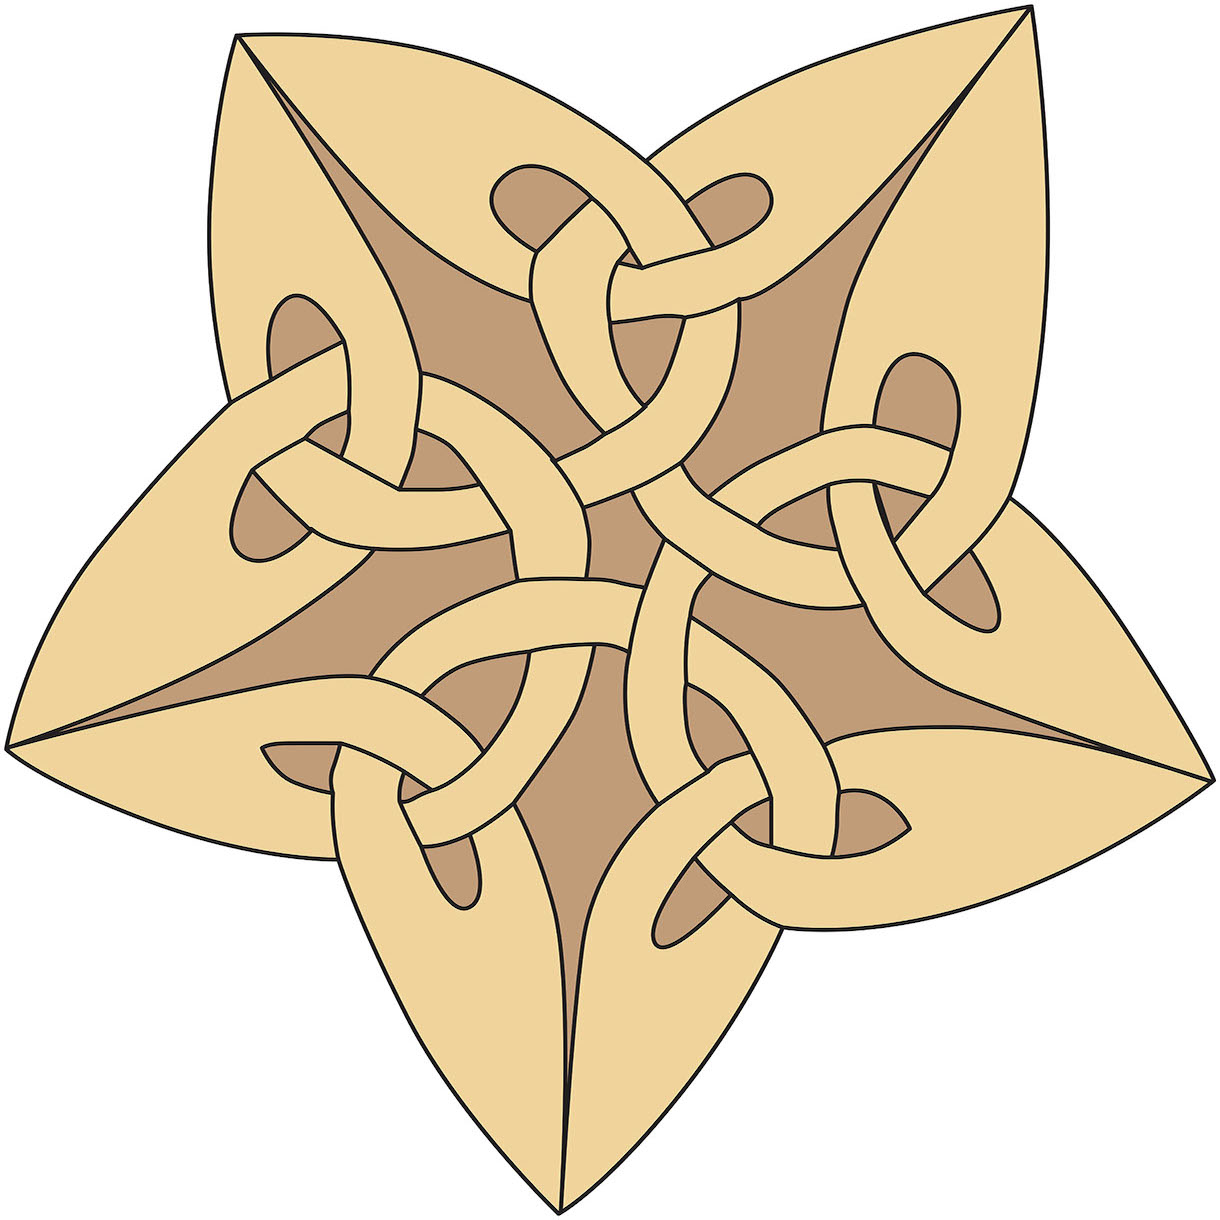
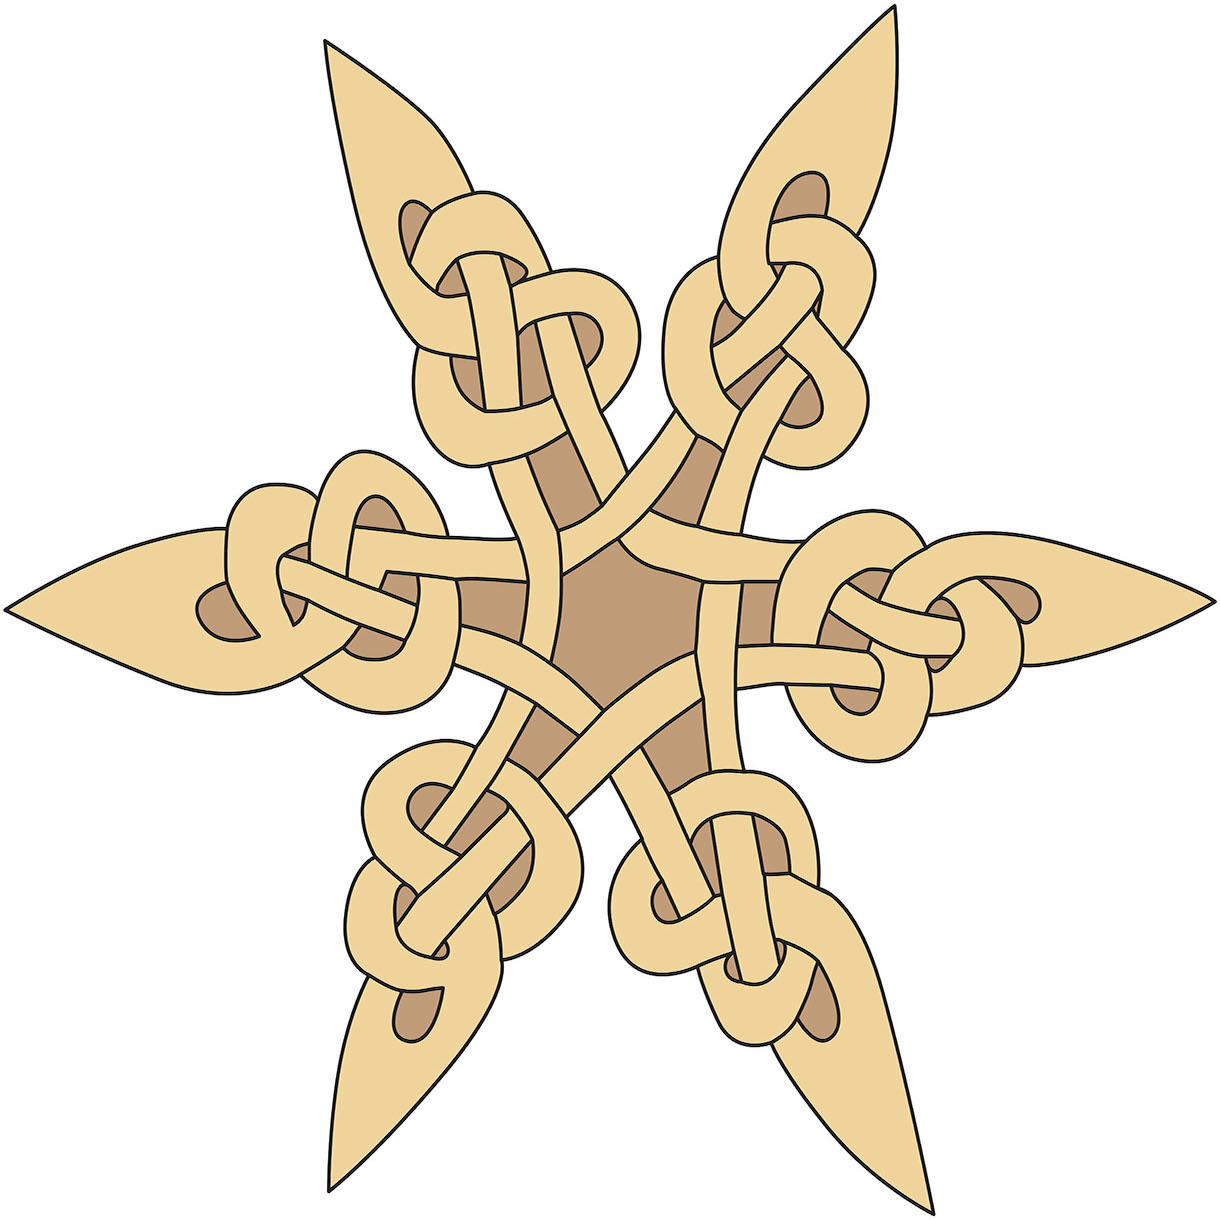
To get you started, here are a variety of three, four, five and six-point knots. The six-point is the most like a snowflake, but the others are lots of fun too.
Drawings and how to resize them
To enlarge or reduce the size of drawings right click on the image to download it and then go HERE to watch a video on how to use paper with a grid to do exactly that.
Deciding on a pattern
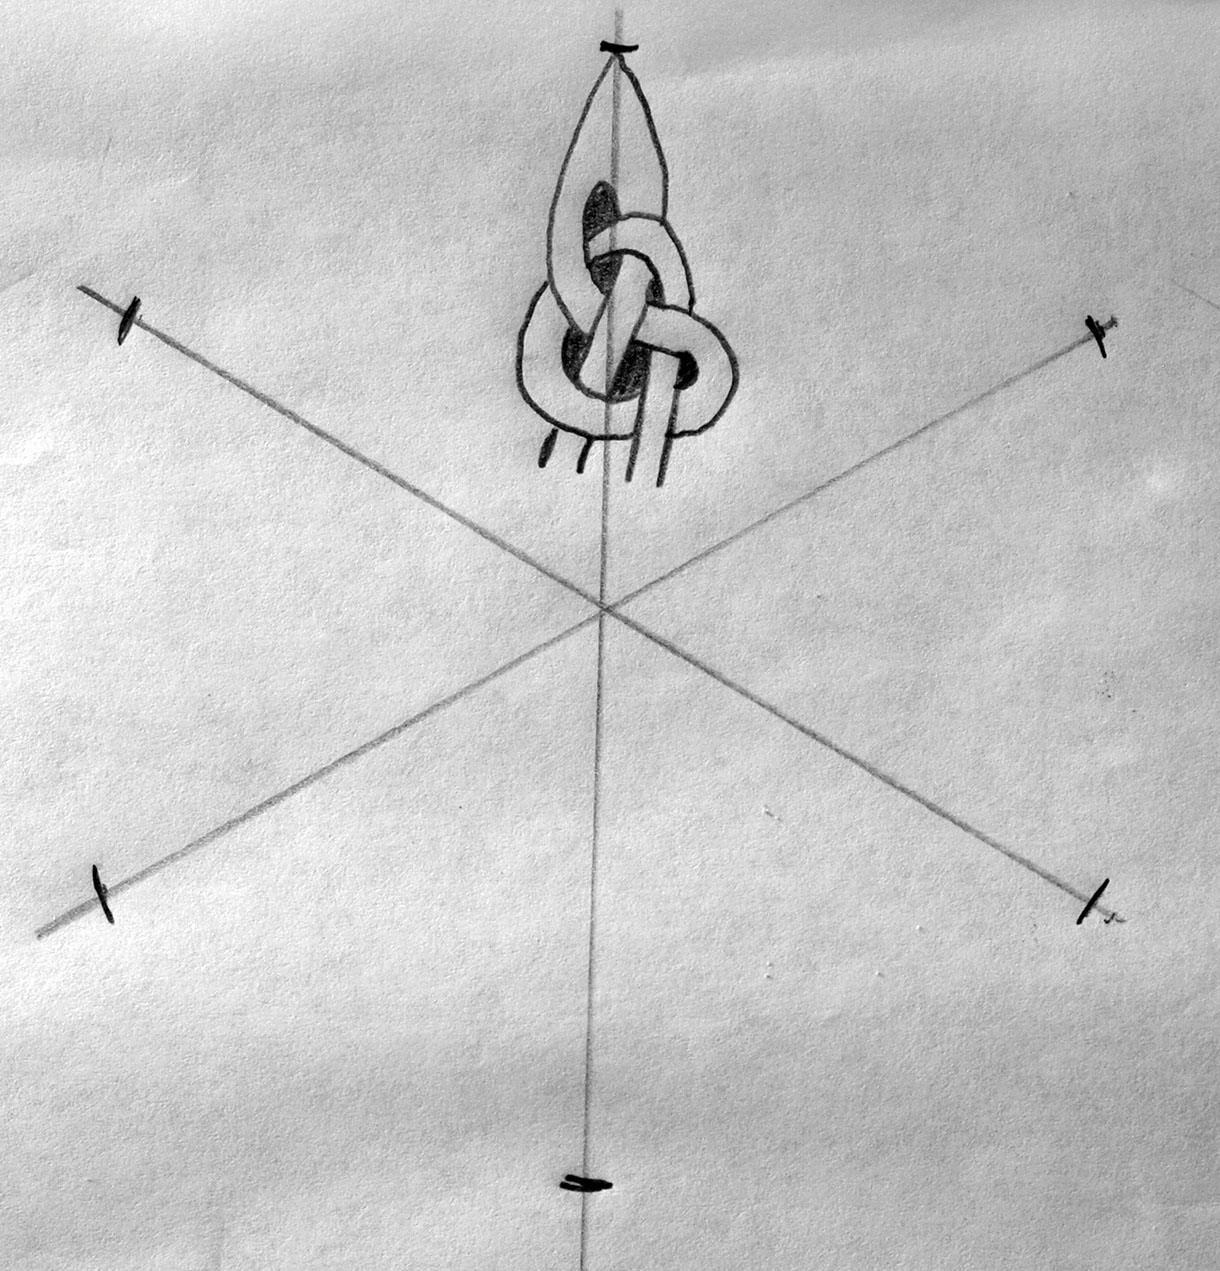
1. You can fire up the photocopier and churn out some copies of the patterns I have included, or you can have a bash at making your own. I love to use tracing paper when I do my sketching – it allows me to recycle ideas without having to totally redraw. For something like these snowflakes, it allows me to quickly and easily repeat a pattern by simply moving the paper around over the original drawing. It is important to use a knot with two strands so that the ‘over and under’ pattern can more easily continue as you circle the snowflake. To make a quick and easy snowflake, draw out a pattern of straight lines indicating where each arm of the snowflake will locate. Place your small knot section on the first arm and trace or scribe
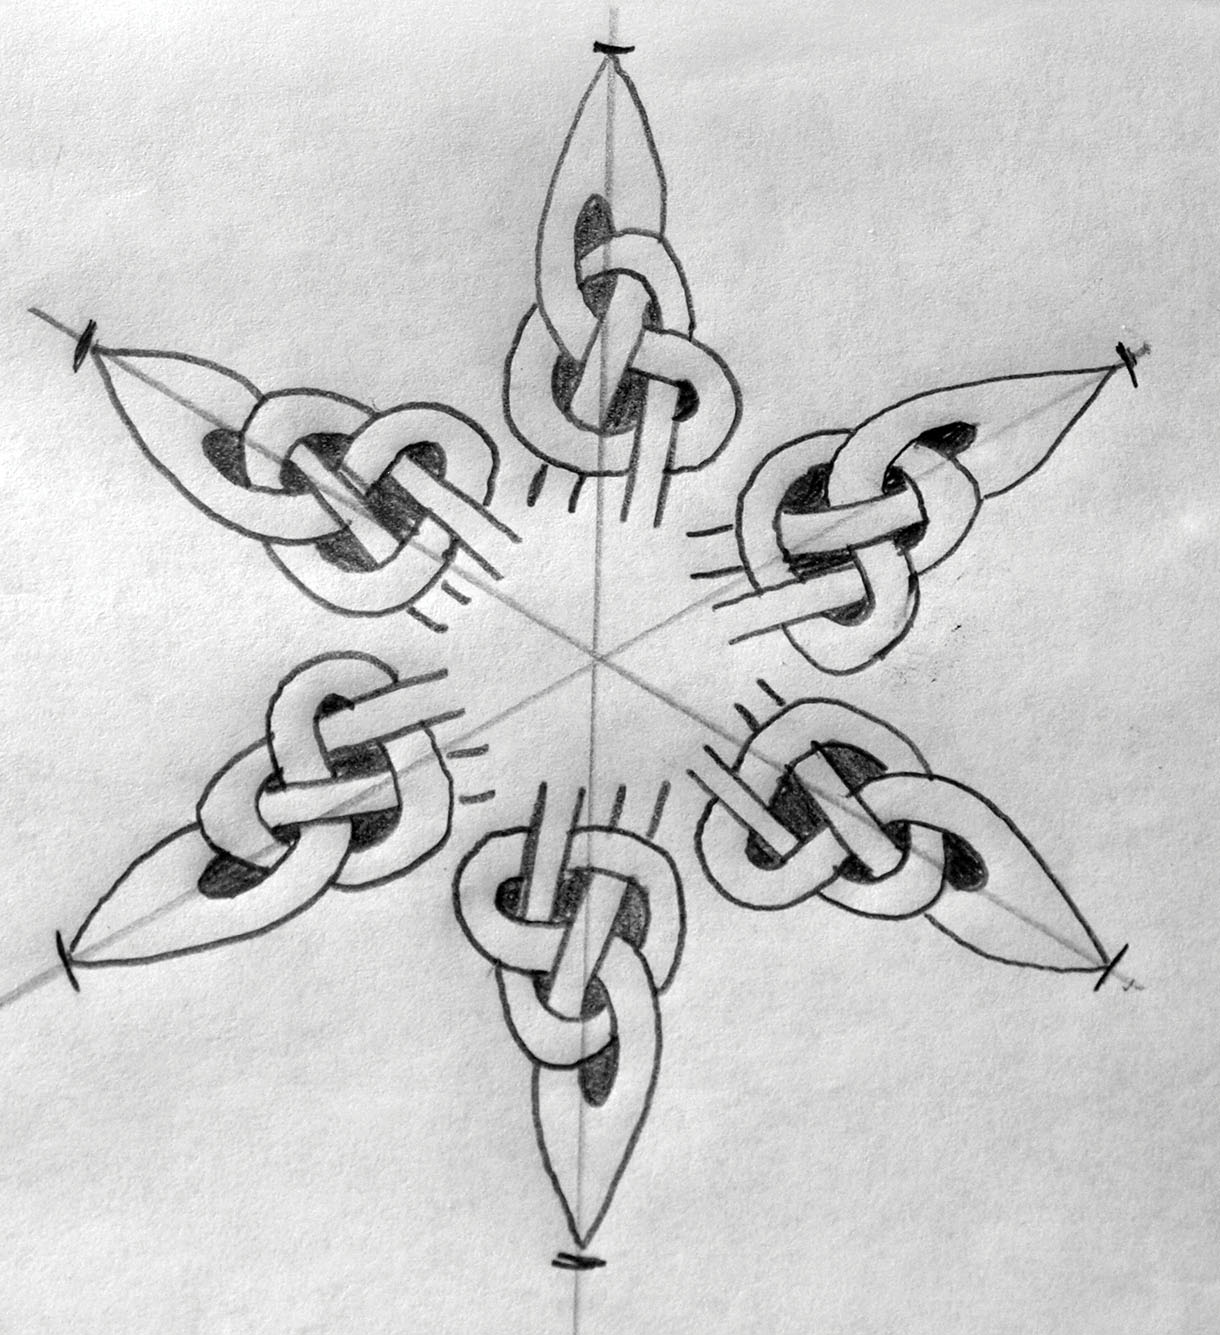
2. Repeat this operation for the rest of the arms. With all the arms drawn, carefully link them together while keeping your ‘overs and unders’ consistent. Sometimes this can be a bit tricky and require some concentration, but as long as you consistently repeat the pattern, you should be OK
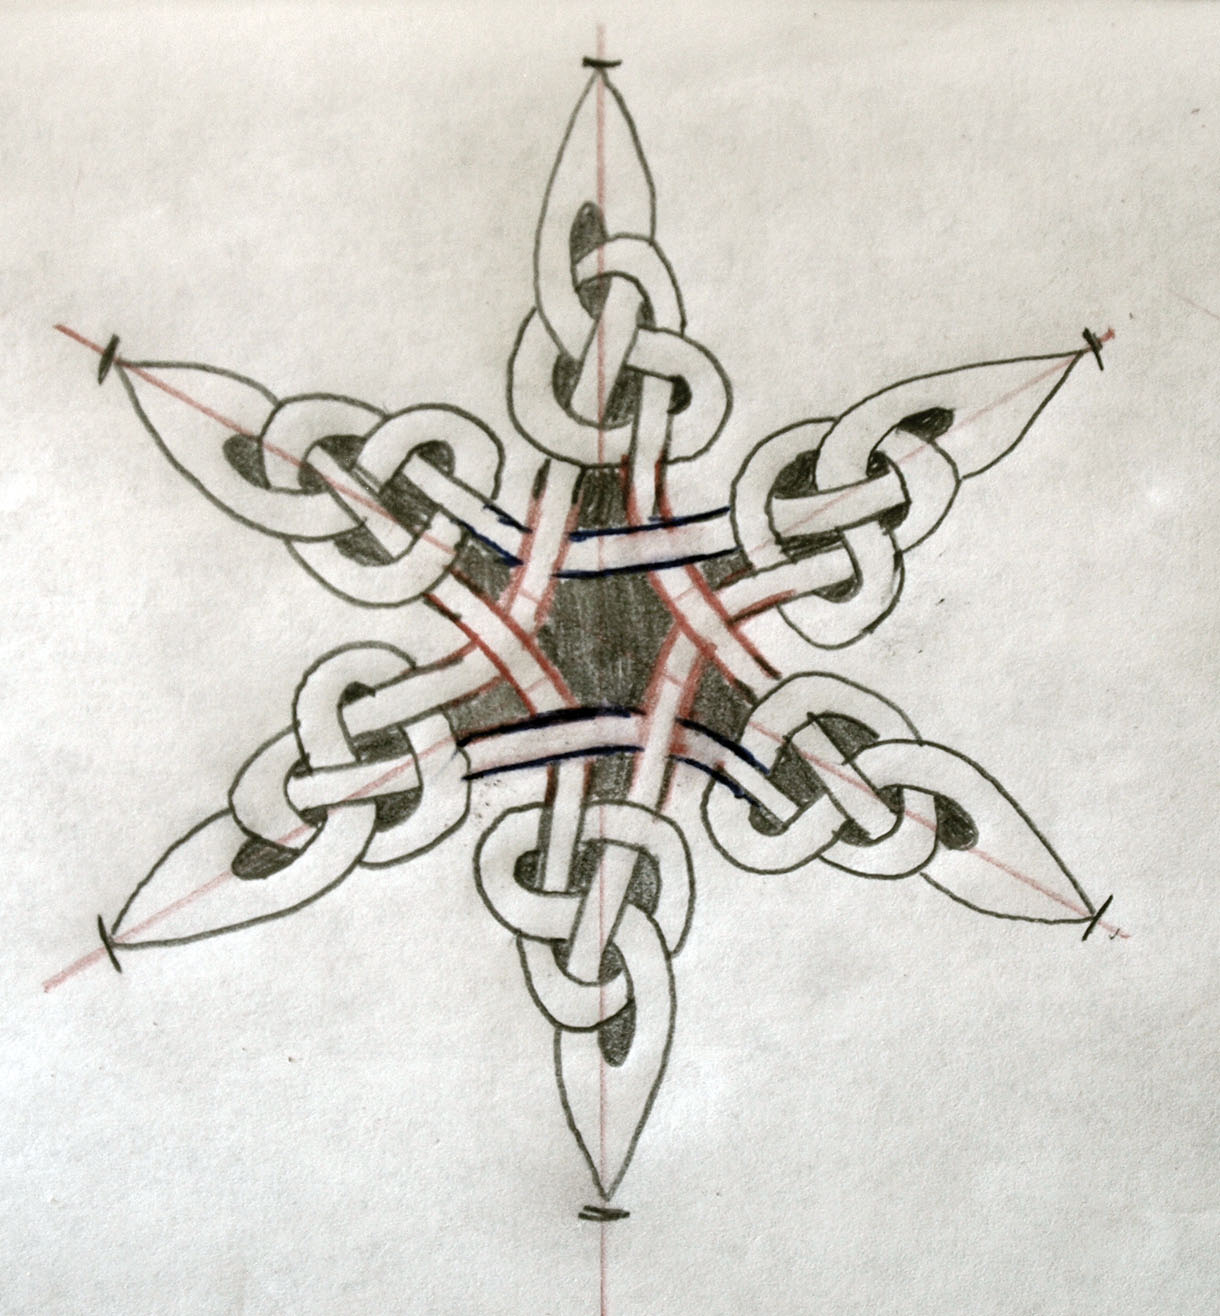
3. The result is a stylish knot that looks much more complex than it actually is
Shaping out
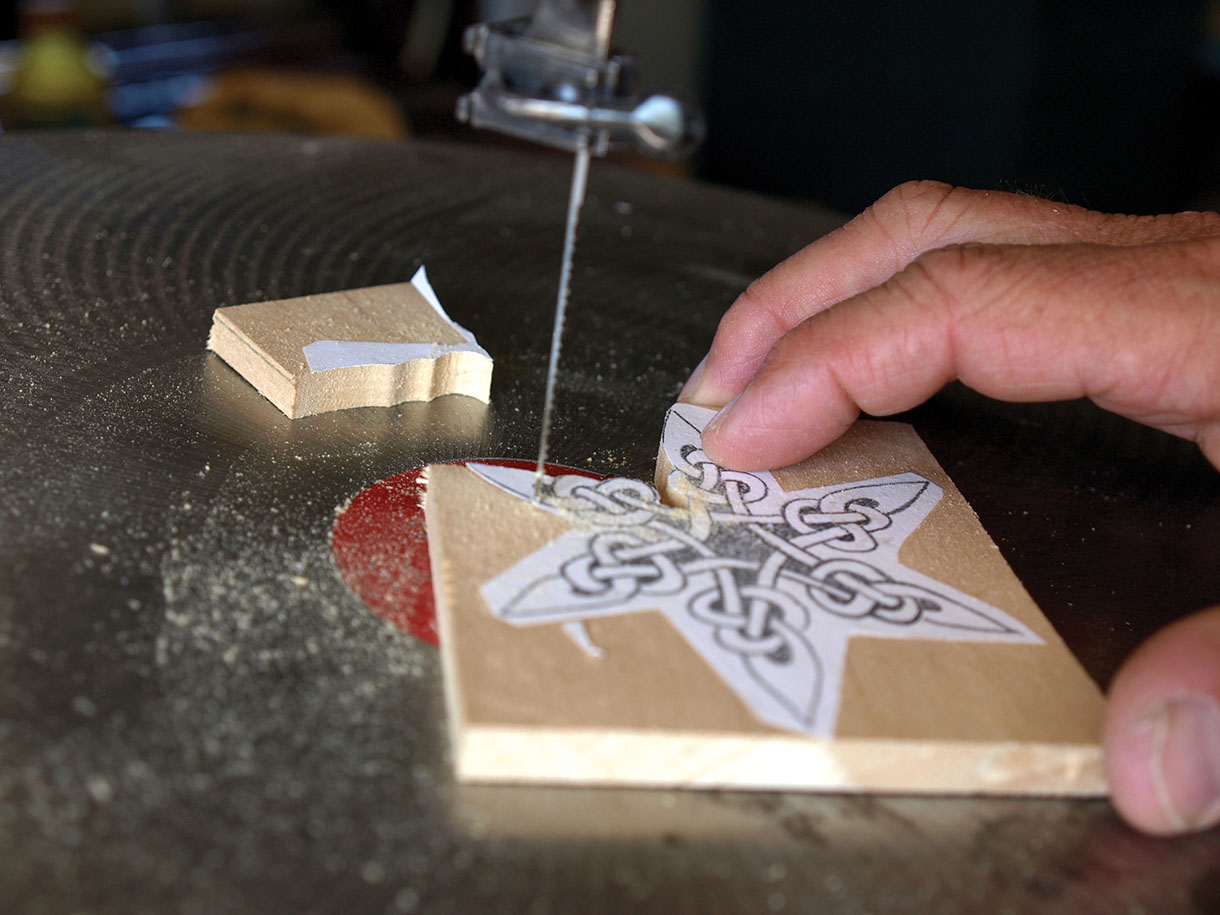
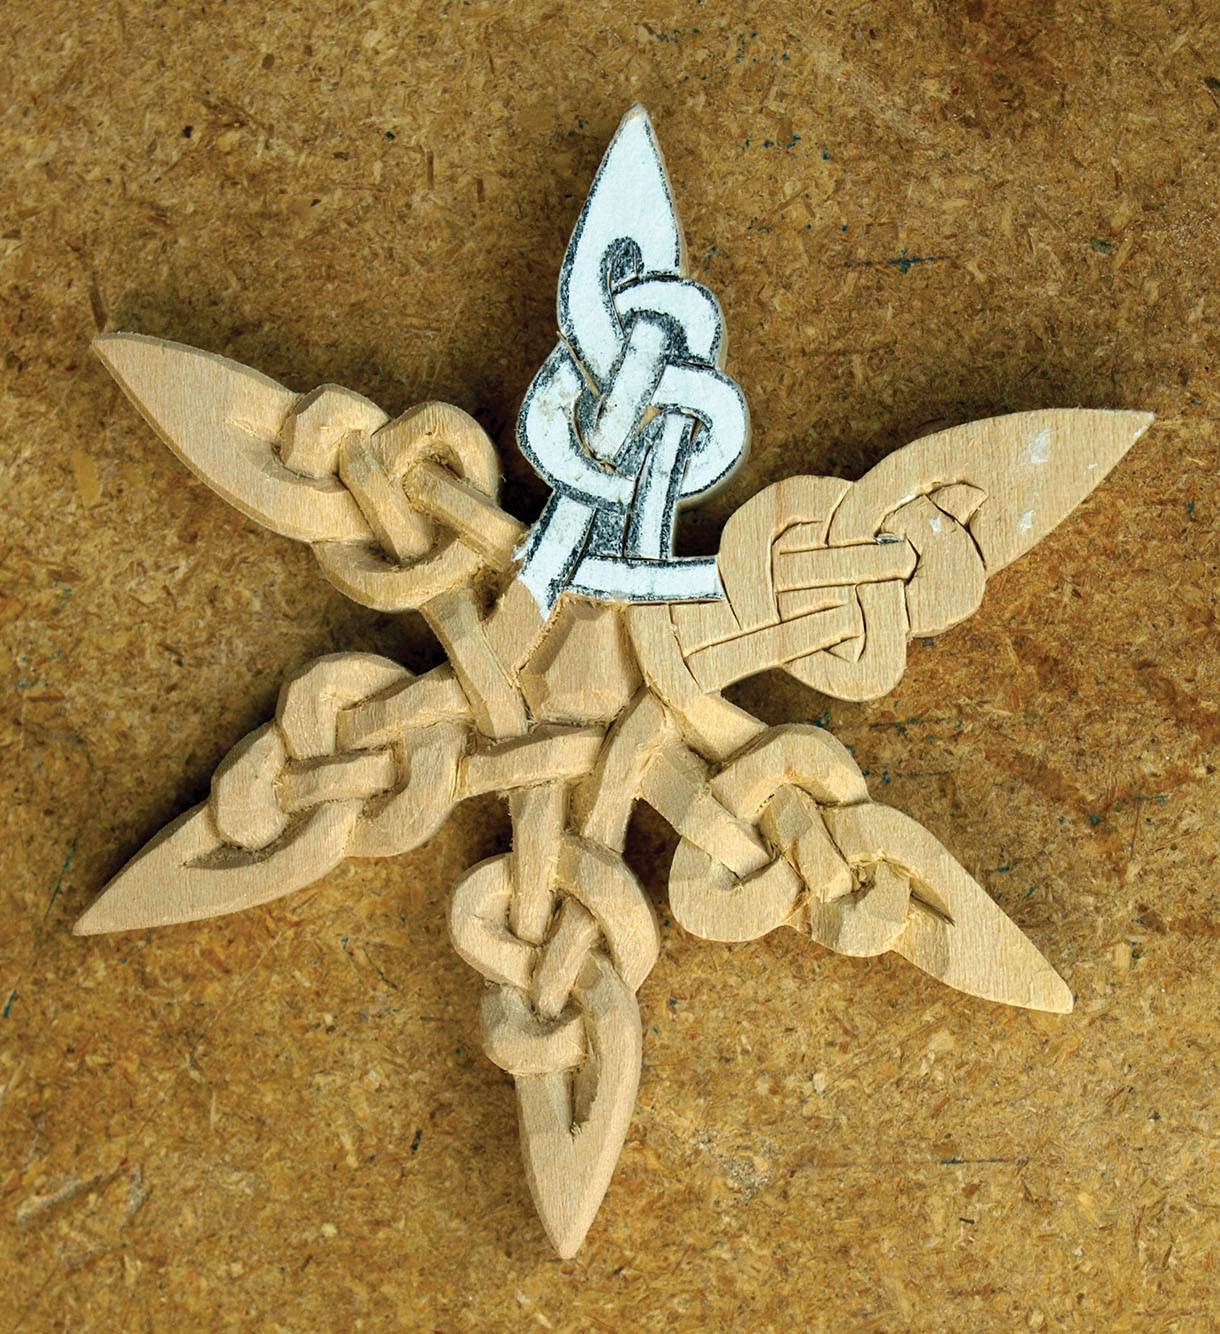
4. With the pattern glued to the wood workpiece, it is time to rough out the external shape of the snowflake. If you have a band or scrollsaw, it is a pretty quick and simple task

5. If you are using a coping or jeweller’s-type saw, remember to clamp your work and make sure it is supported. This is especially important as more of the snowflake’s arms are exposed and the wood becomes structurally weaker
6. If you lack a saw, you can cut the arms clear with a knife. There are several ways to do this – I like to cut a channel along the drawn lines then work my way through the wood using an increasingly larger triangle cut-out. This creates a ramp-type cut which can be made deeper with each consecutive pass
7. If you prefer something a bit more aggressive and less structured, simply remove extra stock and work back toward the lines. Remember to keep the knife at 90° to the work when you get close to your lines. Whichever method you feel most comfortable doing is the way to do it. Your ultimate goal is to get nice and close to your drawn lines and to maintain a crisp 90° angle as much as possible
Detailing the knotwork
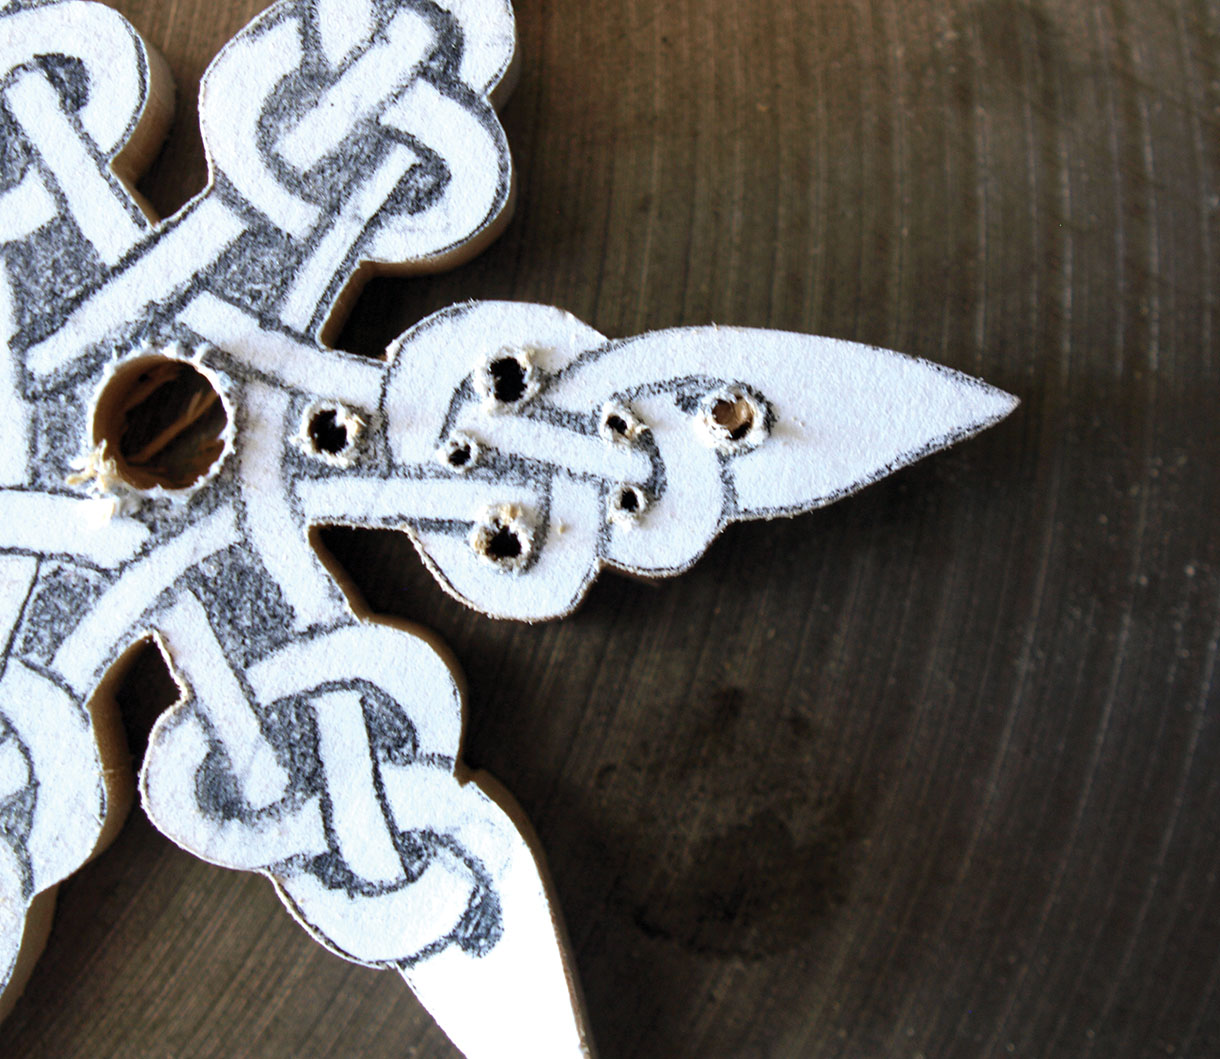
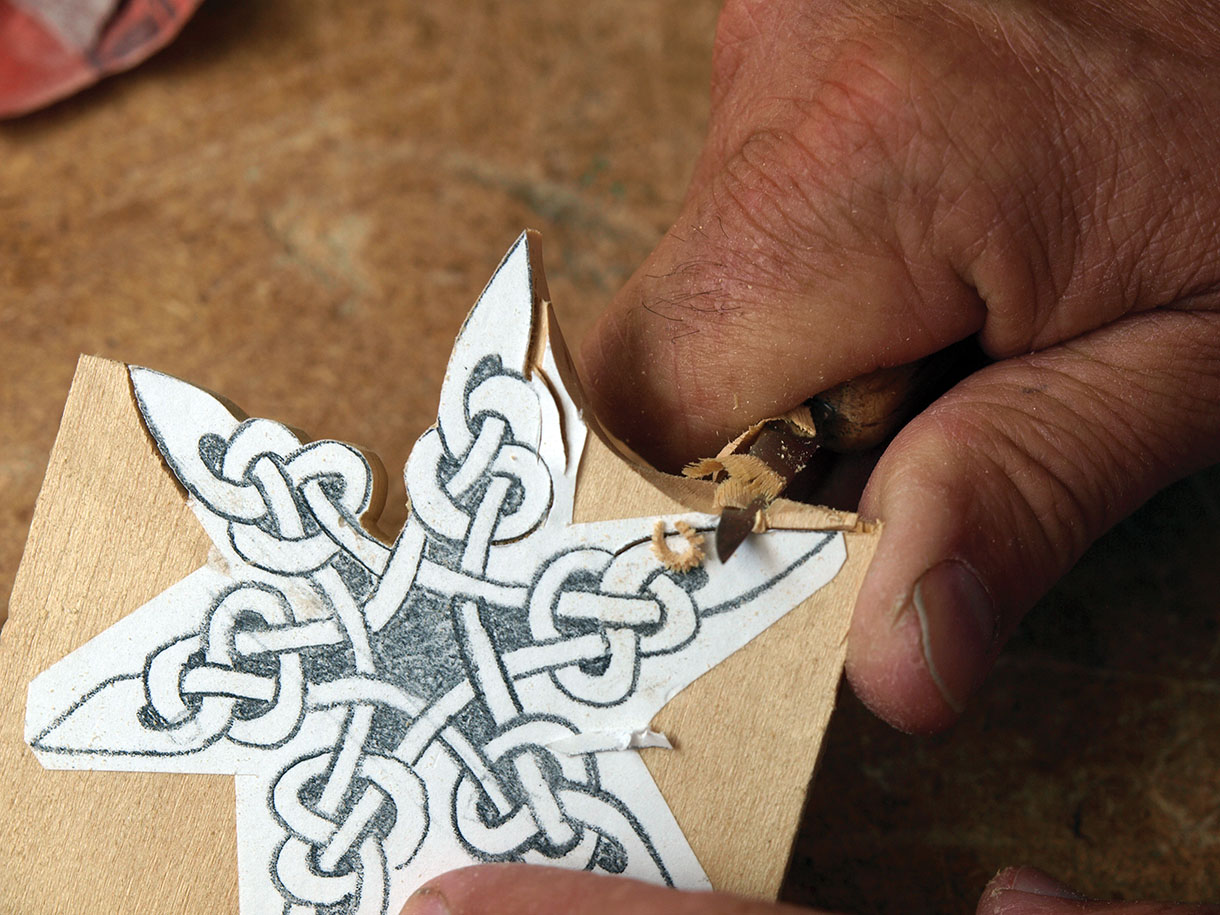
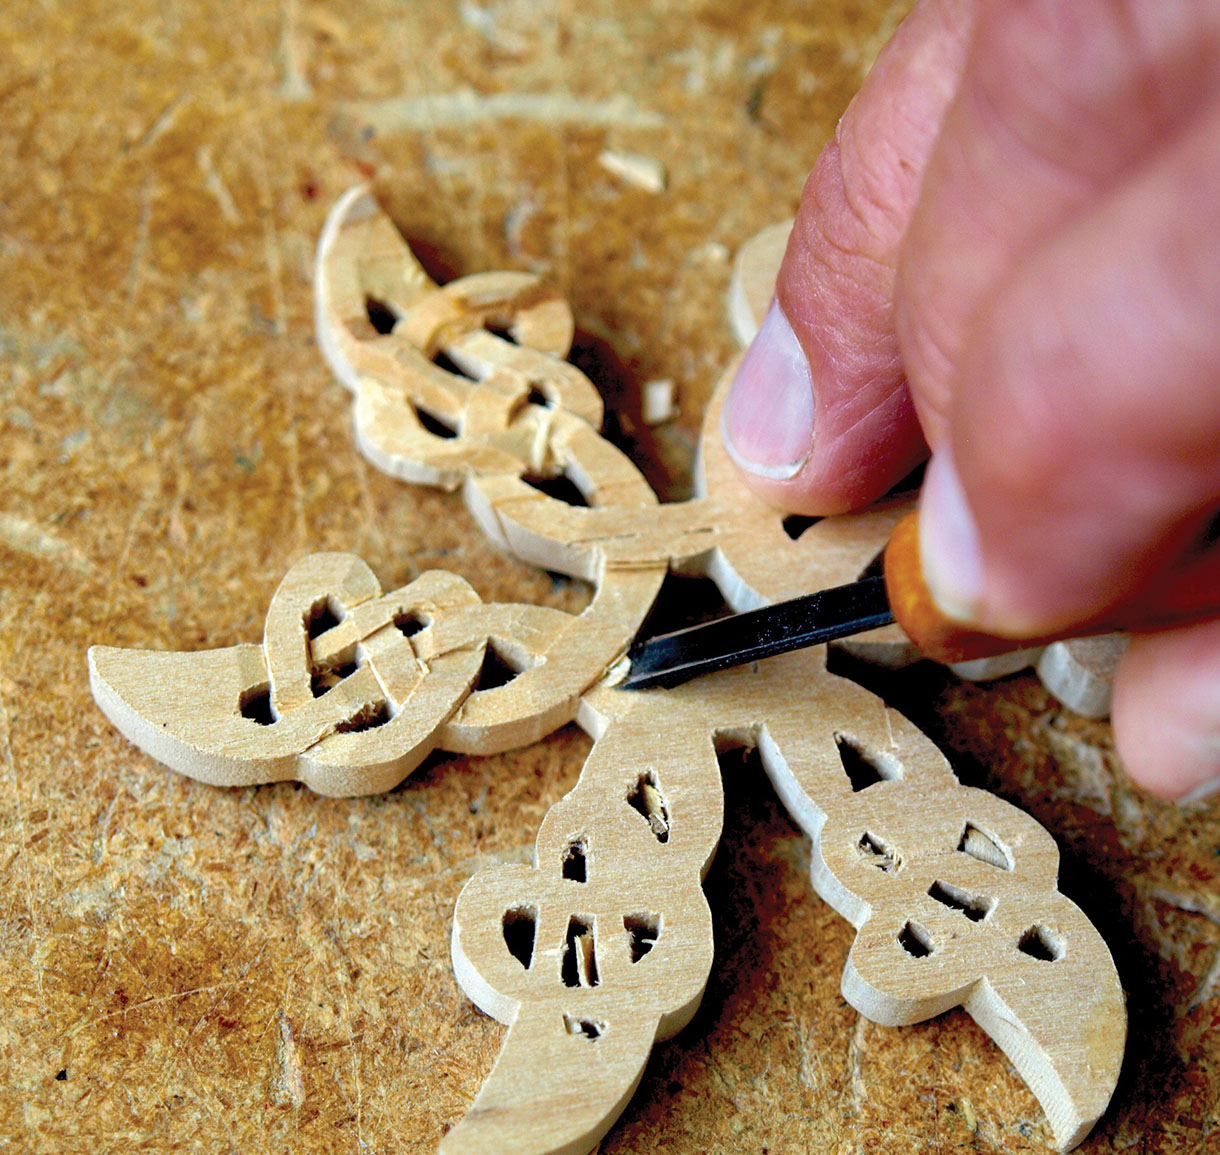
8. If your plan is to fret the interior sections of the knotwork with a jeweller’s saw or a knife, save time by drilling holes to clear away as much material as possible. I use a variety of drill bit sizes to clean out as waste, leaving as little waste material behind as possible. This helps speed things up nicely
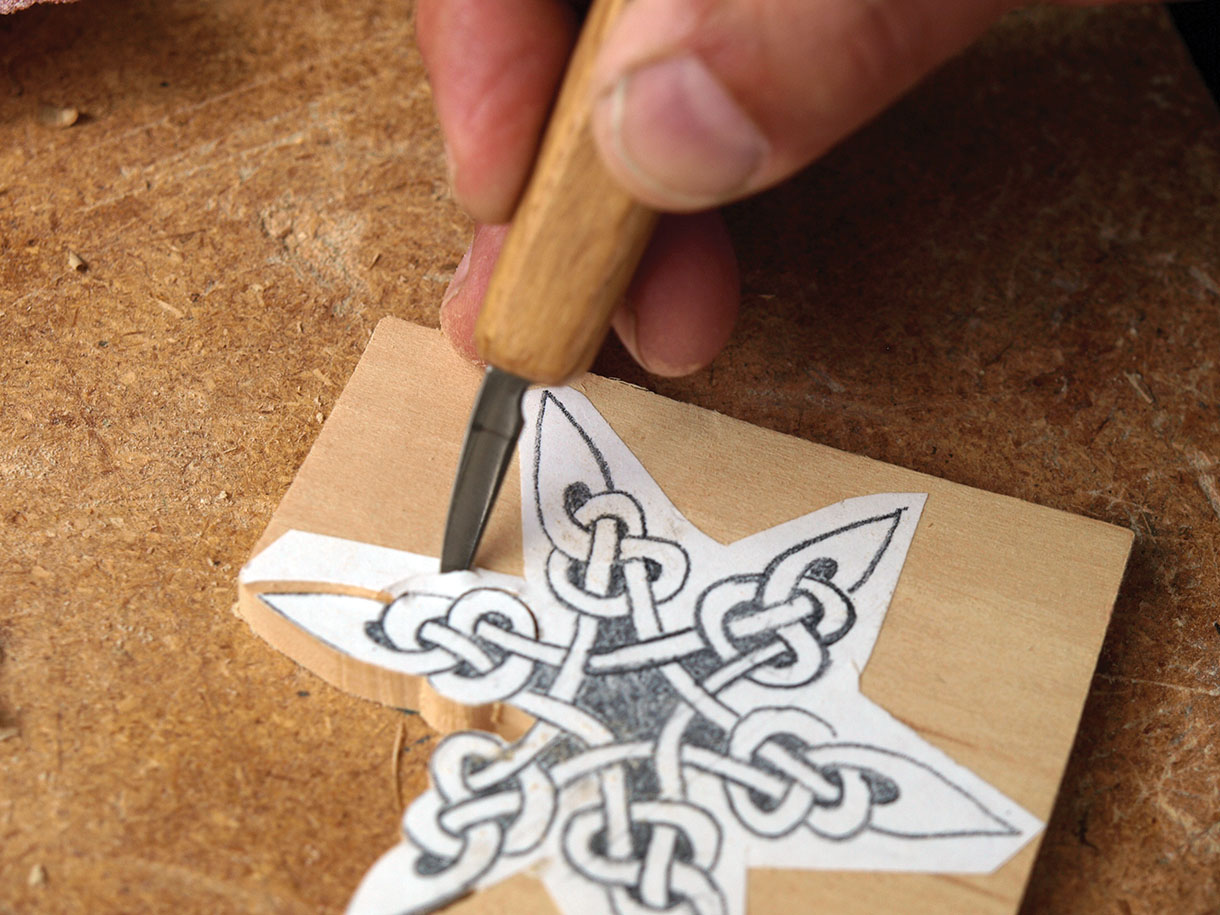
9. If you are not cutting through the knotwork, scribe the lines with a knife tip. Run the knife along all the lines to a depth of about 1.5-2mm and make sure all of the pattern has been scribed before beginning your cutting out
10. Clear the sections between knots by tilting the knife at an angle so that the chip removed is the shape of an inverted triangle. This will leave a hollow and help define the knotwork
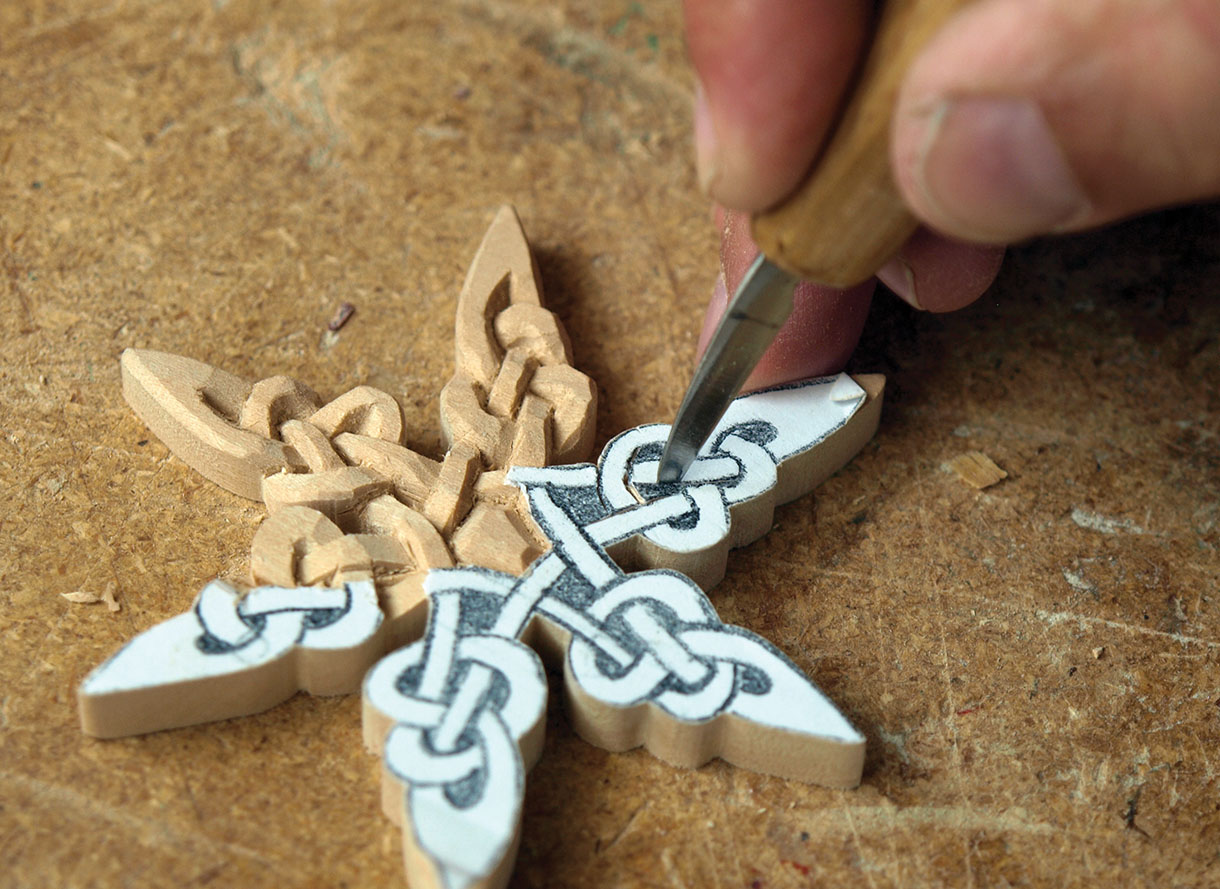
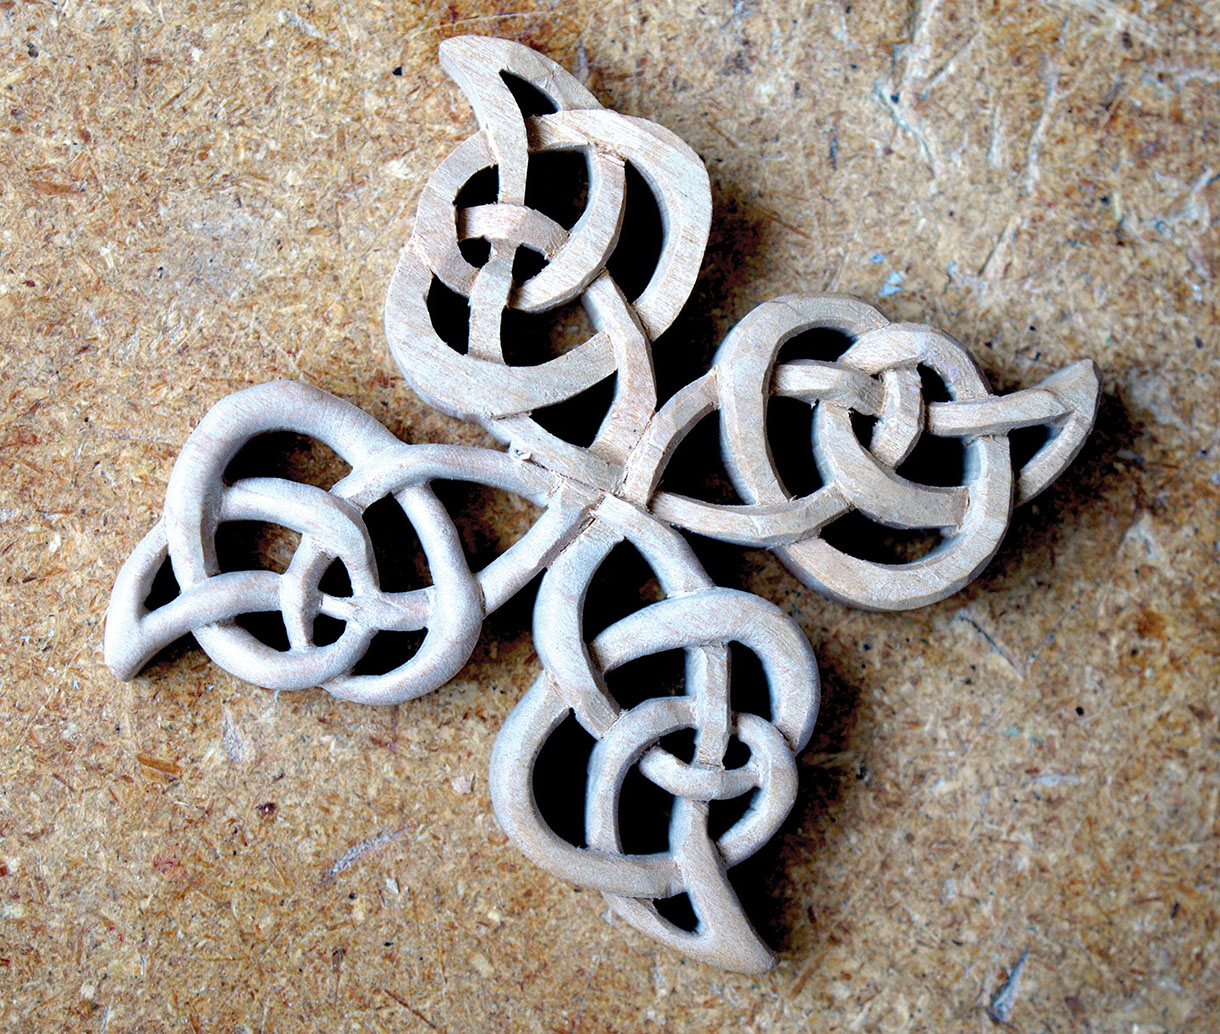
11. This picture shows a series of steps in forming the knotwork when not fretting through the wood. Imagined as a clock face, the arm at 12 o’clock shows the scribe lines following the drawn lines. At 2 o’clock, the paper has been removed to show the pattern carved into the wood. At 4 o’clock, the initial chip cuts have removed the material in the spaces between the knot threads and some shallow ramping has been done. At 6 o’clock, the hollows are being tidied up and the ramping made deeper. Some of the edges of the threads are also rounded a bit. At 8 o’clock, the knotwork is pretty much completed and all that remains is for a bit of fine sanding or filing to smooth edges and refine the knot. At 10 o’clock, a couple of the ‘hollows’ are still a bit frazzled. A razor-sharp knife will be required to make the fine shavings to give a final tune-up
Fretted knotwork
12. If you have fretted the knotwork, ramp the ‘over and under’ intersections. Take shallow cuts until you have ramped the entire design, making sure that the knot flows as it should. If you hit a section with two consecutive overs or unders, you’ll have enough material left to make a suitable save. Dig in too deep and you are committed to whatever happens
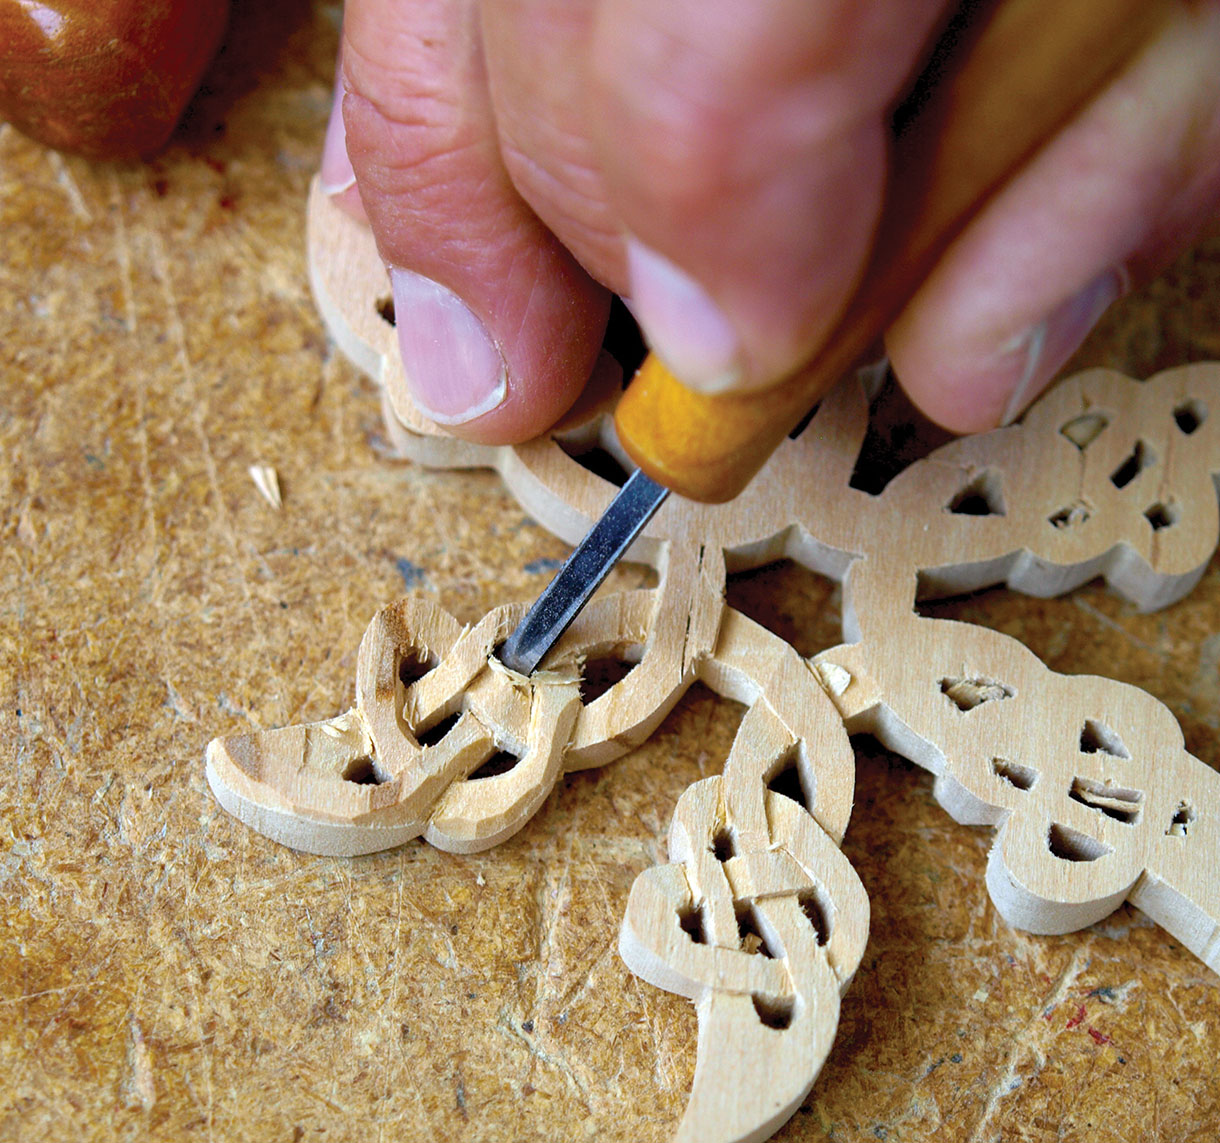
13. Once all is in order, add depth to the ramp cuts and start defining the knot a bit more. Be careful not to pull straight up to clear at the end of your cuts or you will risk chipping out the crossing knot thread. Instead, cut downward to clear material at the intersection
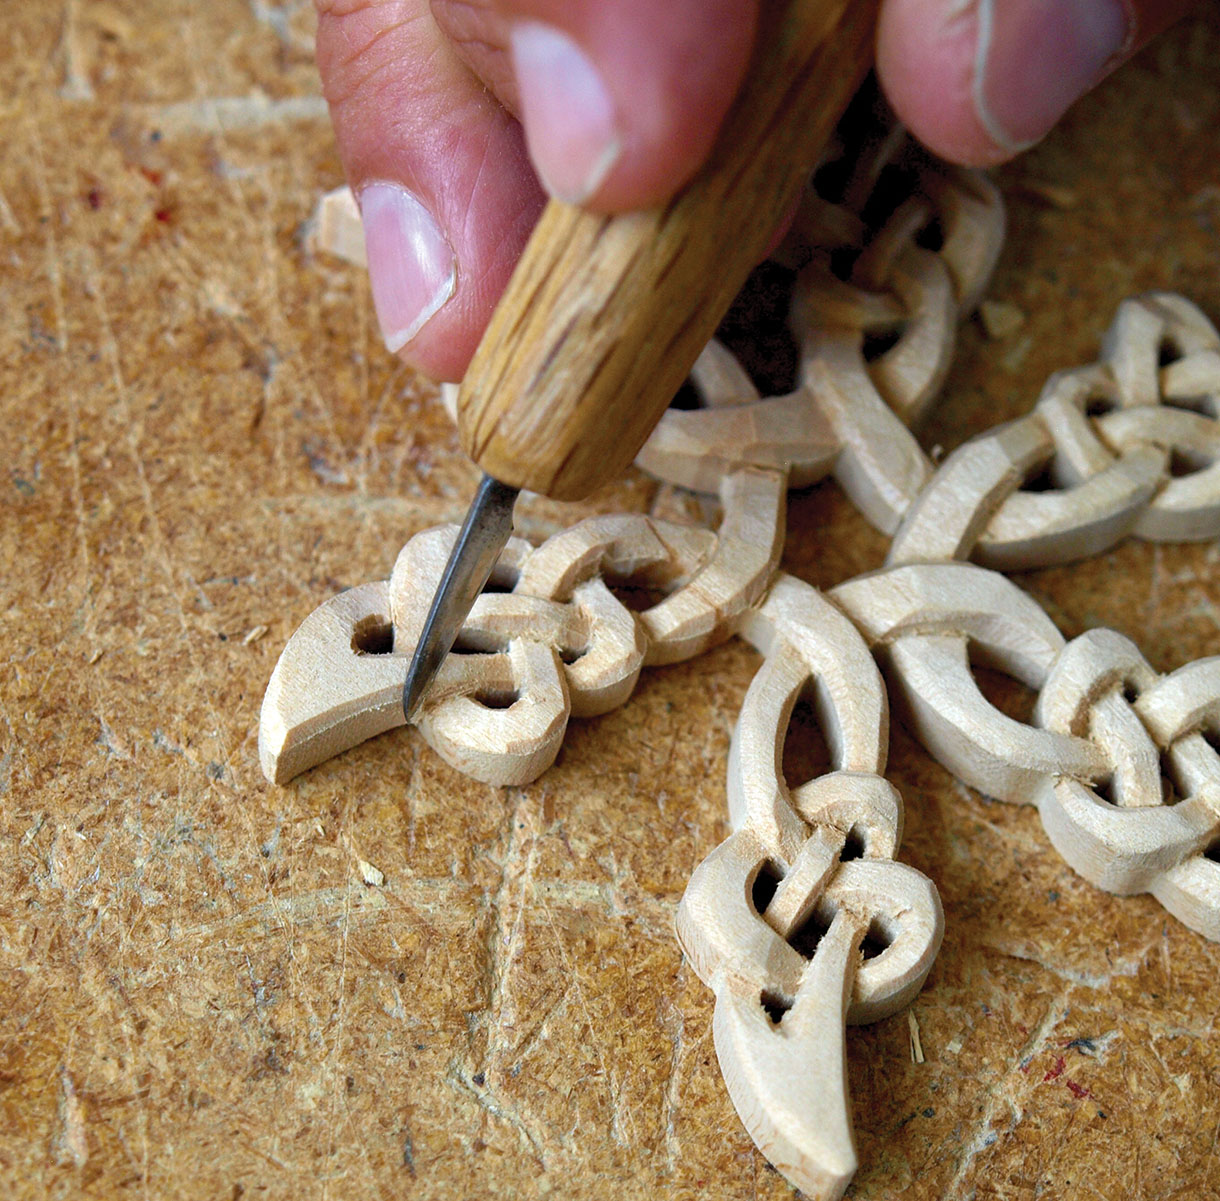
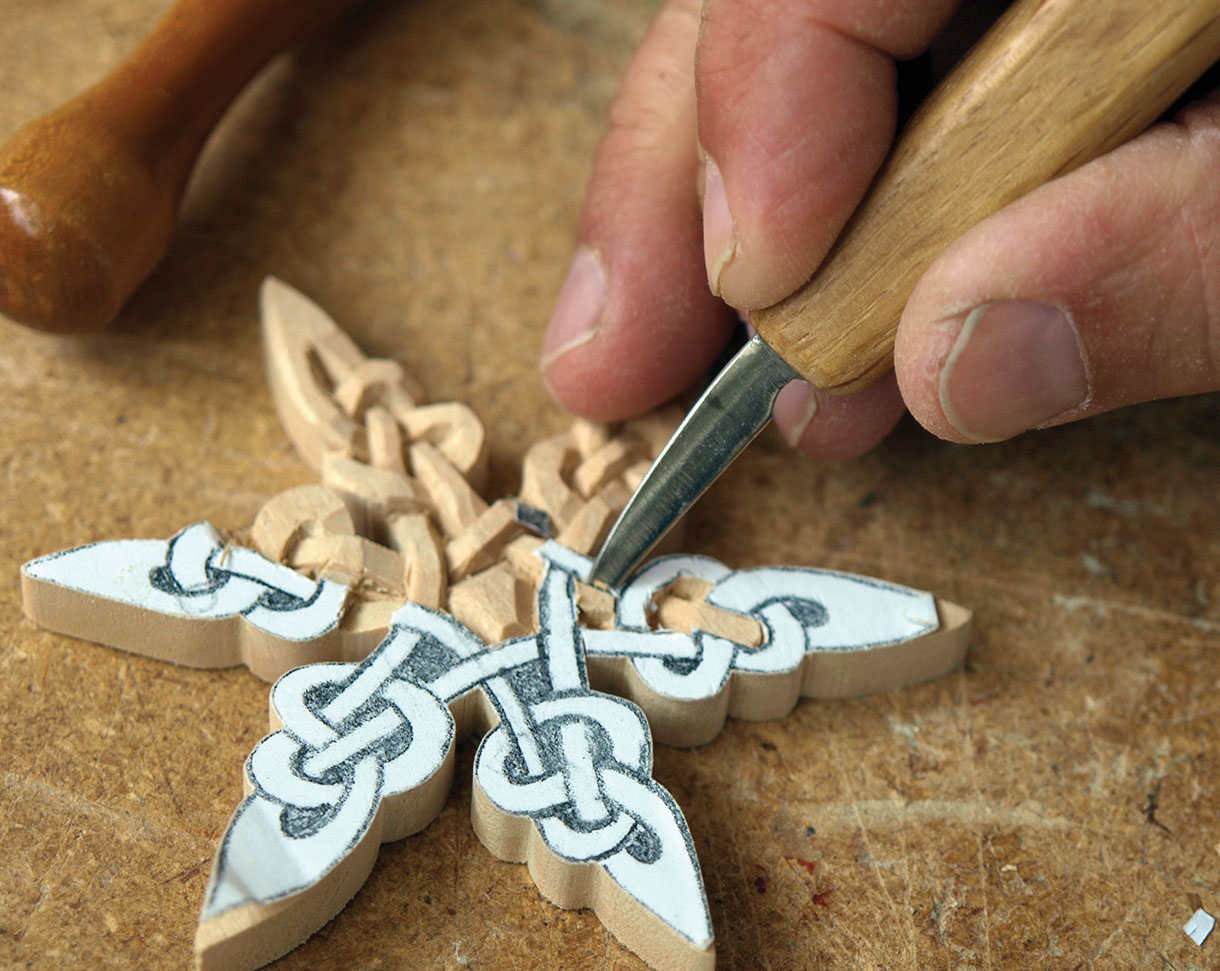
14. Now clean up the various loops by chamfering the edges with a shallow knife cut. This refines the knot and makes it look much more finished than leaving the edges square
15. After you are satisfied with the knotwork, you can use needle files to clean up any scruffy interior cuts or wood fuzzing. A small set of needle files make much finer work of this than rolled up sandpaper as the file cuts the wood rather than abrading it
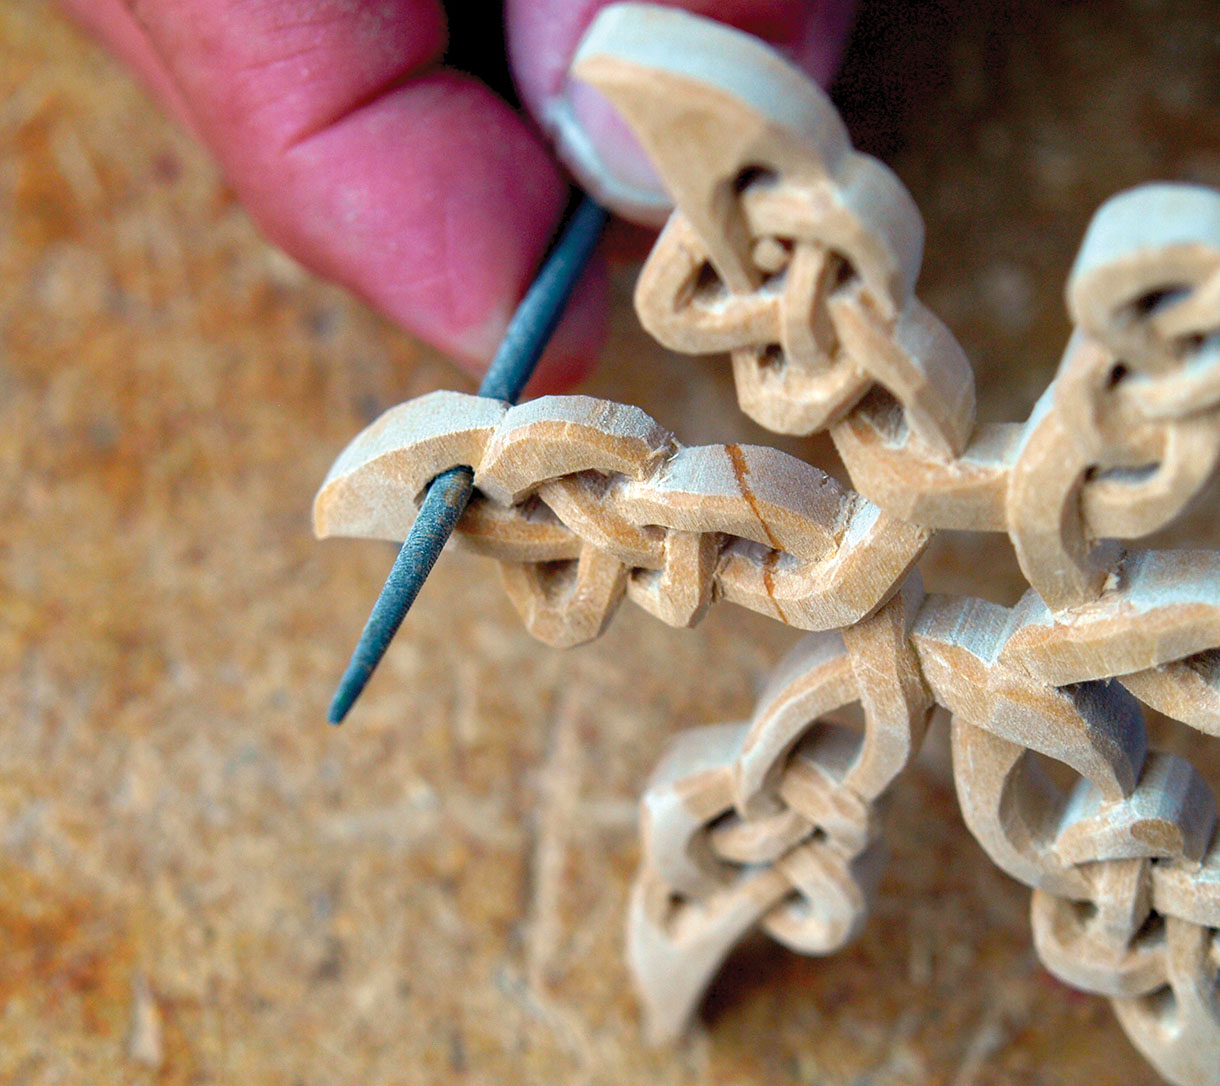
16. This picture shows a variety of methods for finishing fretted Celtic knotwork. The arm at the 12 o’clock position is unfinished, with square edges and refinement necessary. At 3 o’clock, the edges of the arm have been chamfered a bit. At 6 o’clock, the chamfers have been lightly sanded and anomalies smoothed out. At 9 o’clock, the loops have been heavily sanded and take on a bit of a shoelace look. To finish them off, apply a couple of coats of oil or wax then thread a bit of fishing line through a hole to allow you to hang them


