A Drilling Jig with a Difference:
Colin Sullivan gets to grips with drilling shaped work from virtually any angle.
Colin Sullivan gets to grips with drilling shaped work from virtually any angle
To be able to drill accurately and safely without the use of a pillar drill is not a very easy feat. In fact, however careful you are, the result is never as clean and square as it would be if you were using a machine. I use three in my workshop: one is permanently set up as a drum sander; one is a mill drill for heavy work like drilling metals, and one is for regular drilling. Even with these options, holding work on the pillar drill can be difficult because drill vices tend to be quite small and therefore limited to the size of work they can hold. For best results they need to be bolted down and are ideal for holding small metal components, but not of much use when it comes to drilling timber sections for furniture. Wood is best worked on wood and any pillar drill will benefit from a sacrificial top fixed to the metal table. A simple method to achieve this, if your table is square and without fixture, is to design it in such a way that it slides onto the table with battens on three of the sides. Further improvements can be made by clamping a fence to the back edge. This can be upgraded with an aluminium ‘T’ section and stops to provide an adjustable mechanism for repeat drilling.
Hybrid jig
The jig shown in this article is a hybrid of the two just mentioned and might be described as a wooden drill vice. It is designed to be as versatile as possible and is capable of holding workpieces in both horizontal and vertical planes. It is constructed from plywood offcuts that were too useful to throw away. To construct this handy jig, you will need to carry out the majority of the work using a bandsaw and disc sander, apart from the centre groove used to bolt it to the drill table which can be machined with the help of a router. Vertical drilling on the end of wood is usually done by rotating the drilling table through 90°. I wanted to avoid this so designed it with overlapping sides that would allow me to hold things vertically.
Making the jig
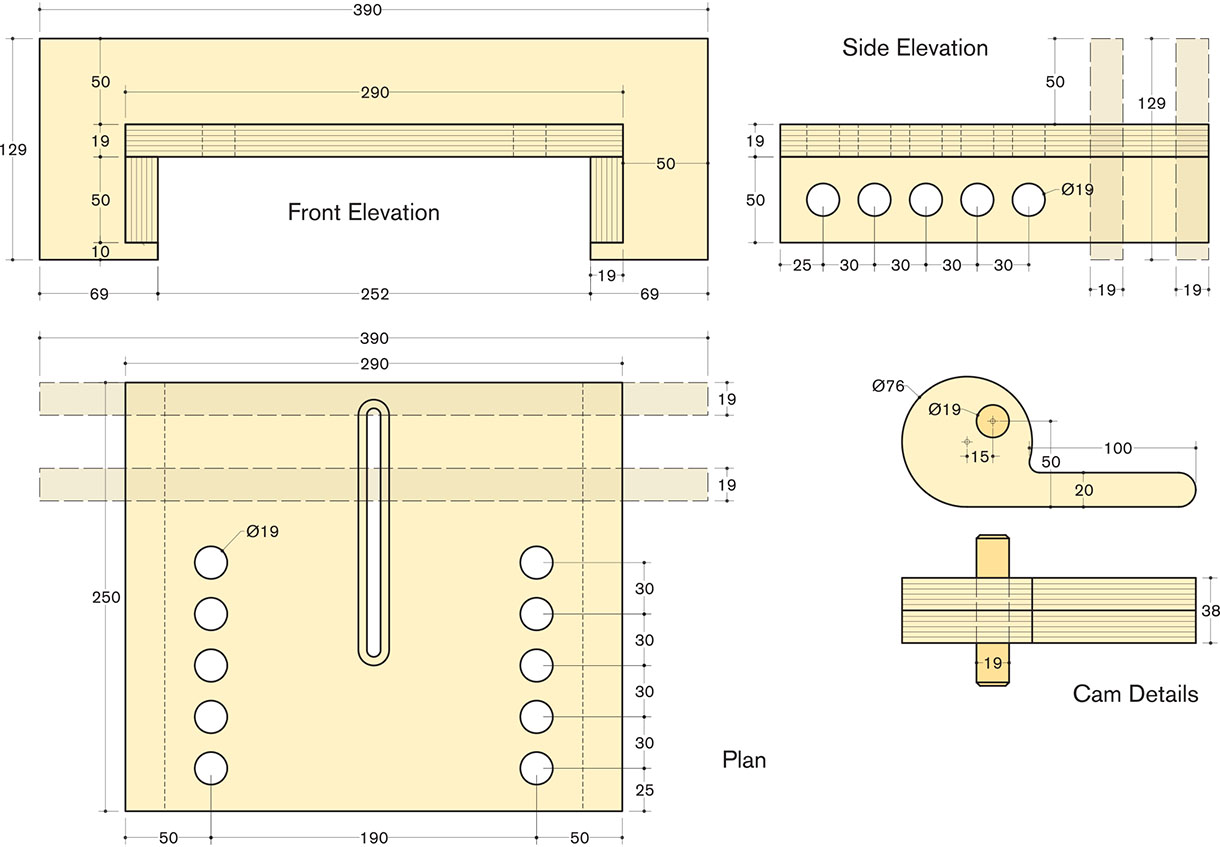
Construct the vice by laying the top piece of 18mm ply on the drill table and marking the width from underneath. Next, using these marks, drill and screw on the two side pieces. Always use a cramp where the screw goes into the side piece; this will help avoid the ply splitting and spoiling the fit on the table. Do not glue this joint until all the holes have been drilled and you have a sliding fit on the drill table. Mark the centre and rout a slot to suit the bolt head you have – I used a 10mm coach bolt and filed the dome off the top so the slot was only 3mm deep. Clean up the edges so the top ply is flush and square with the two sides members. Remove the sides and mark out the centres of the holes to the top and side pieces and drill the 19mm holes carefully. Now the sides can be glued and screwed back in place.

Overlapping jaws
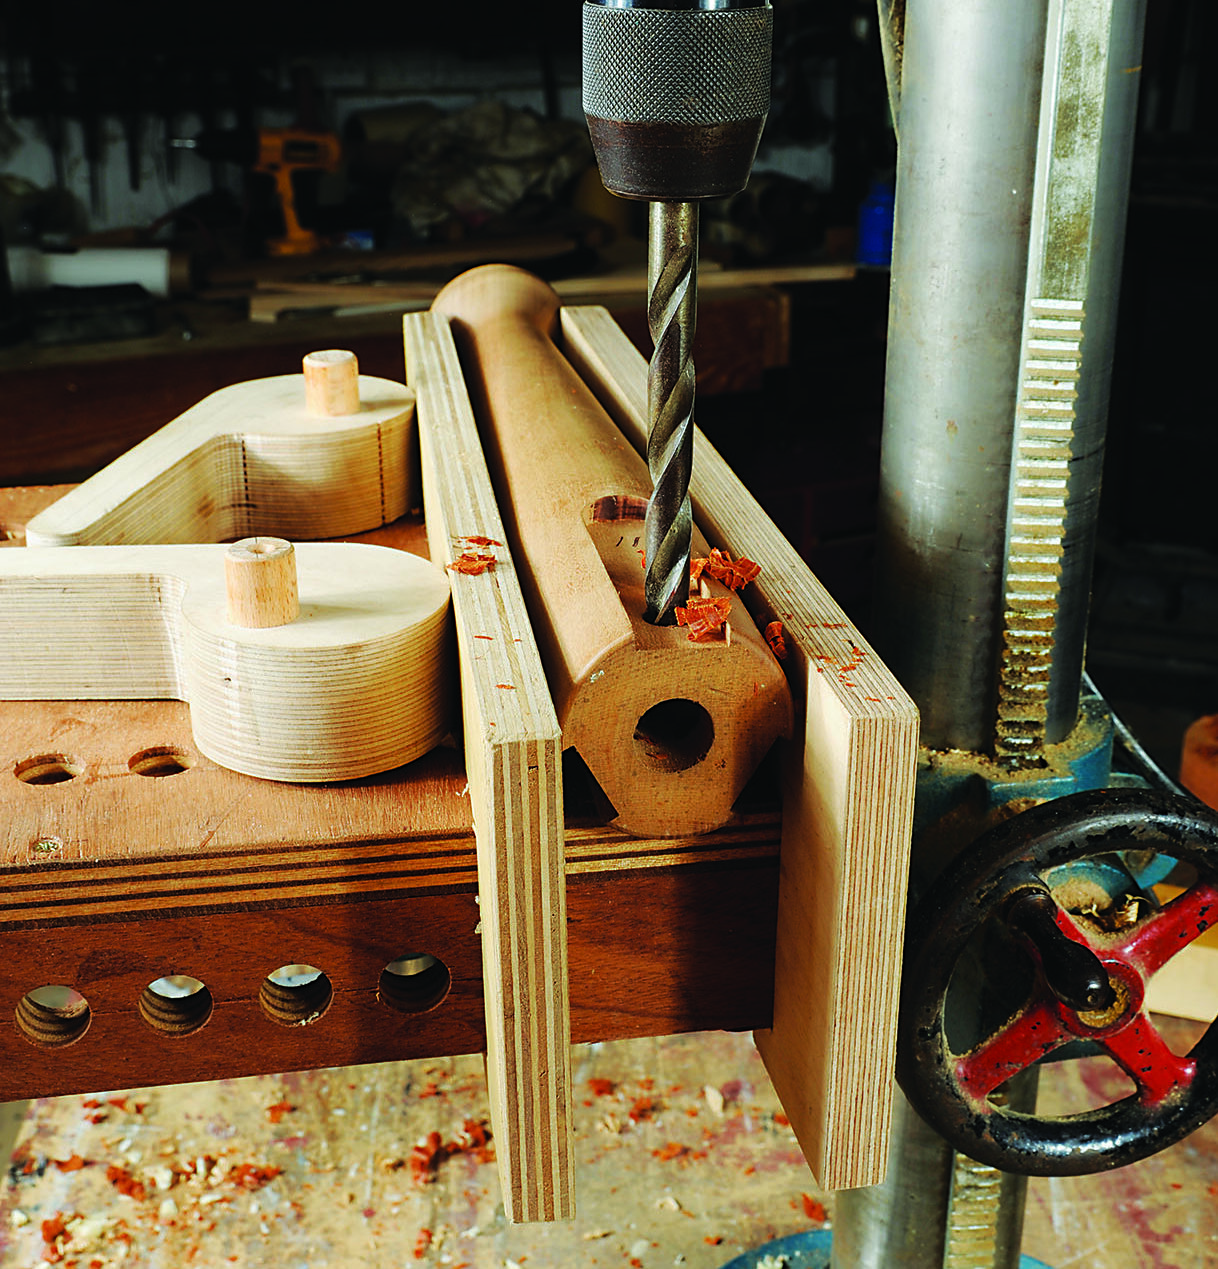
Cut two pieces of 18 or 25mm plywood for the fences, which will measure 390 x 130mm. Stand the board ‘above’ on these, 50mm from one edge and central to mark the piece to cut out. The rear fence should be a tight fit and glued and screwed in place at 90° to the top board. The loose fence can be made a sliding fit with the inside vertical edges rounded over to allow the fence to move at an angle to the rear fence. The cams are made from two pieces of 19mm ply glued together and cut to shape on the bandsaw, followed by a clean up on the disc sander. Drill the 19mm holes as shown on the drawing and glue in the dowels. Use a good hardwood such as steamed beech (Fagus sylvatica) turned to an exact fit for the holes. The centre bolt will have to be made to fit your particular pillar drill and the lower section can be made of wood with a nut let into it; this will engage the bolt. Fit the vice on to the drill and try it out on some scrap wood. Always put a thin piece of ply under the work to avoid drilling the vice top section. Once a piece of work is clamped, an additional cramp can be used to hold the work more firmly if required. Like any new gadget, it will take a bit of practice to get the best from it. I would love to hear feedback from anyone who decides to make one for their workshop.
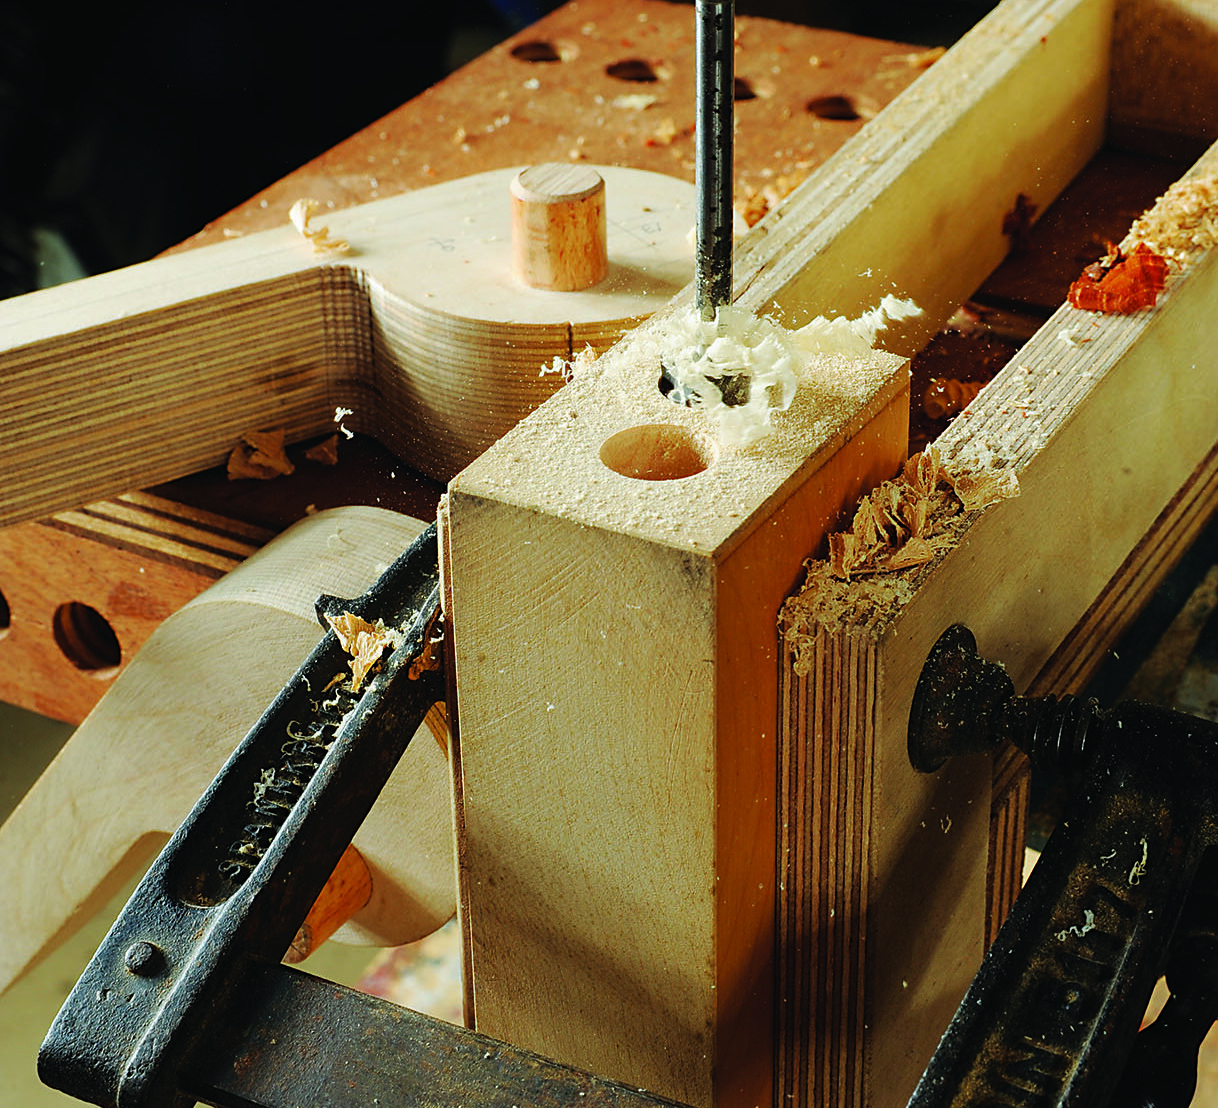
Use a packing piece at the other end of the vice to generate a pinch effect. An additional cramp can also be used
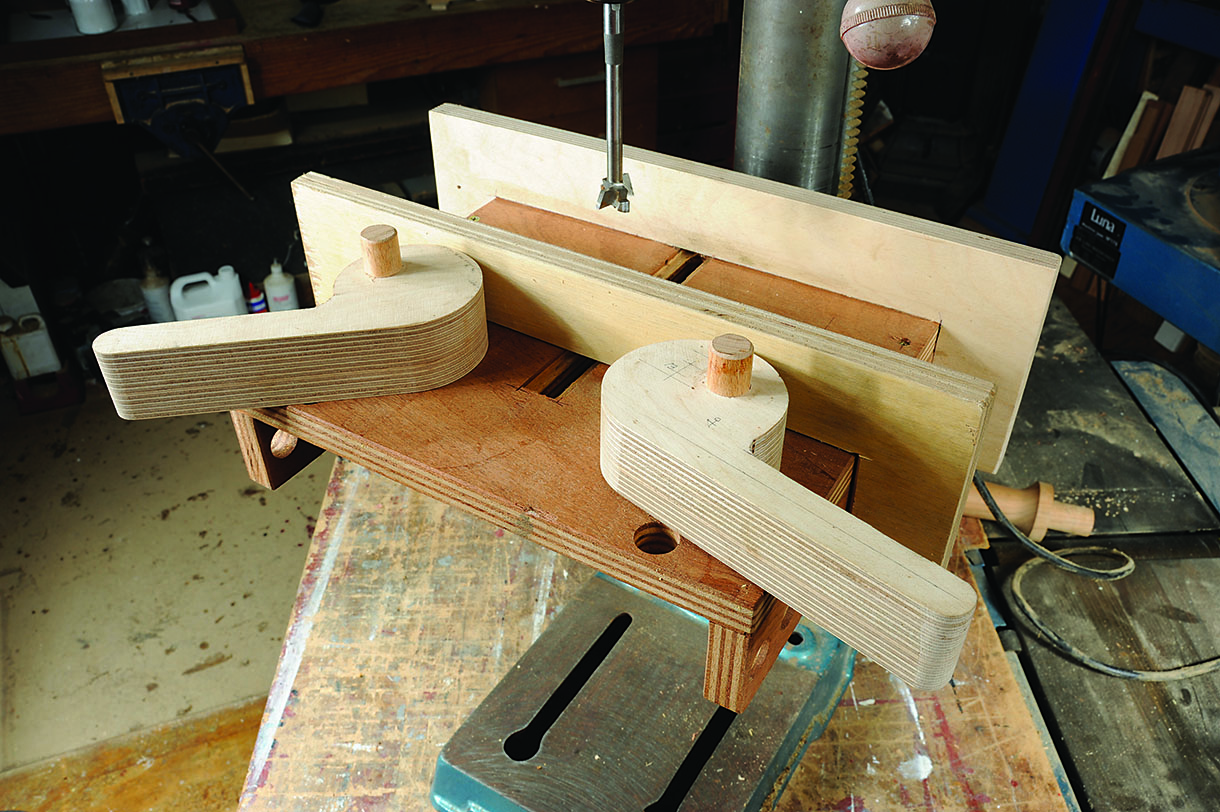
Position the cams in the most convenient holes to secure the workpiece
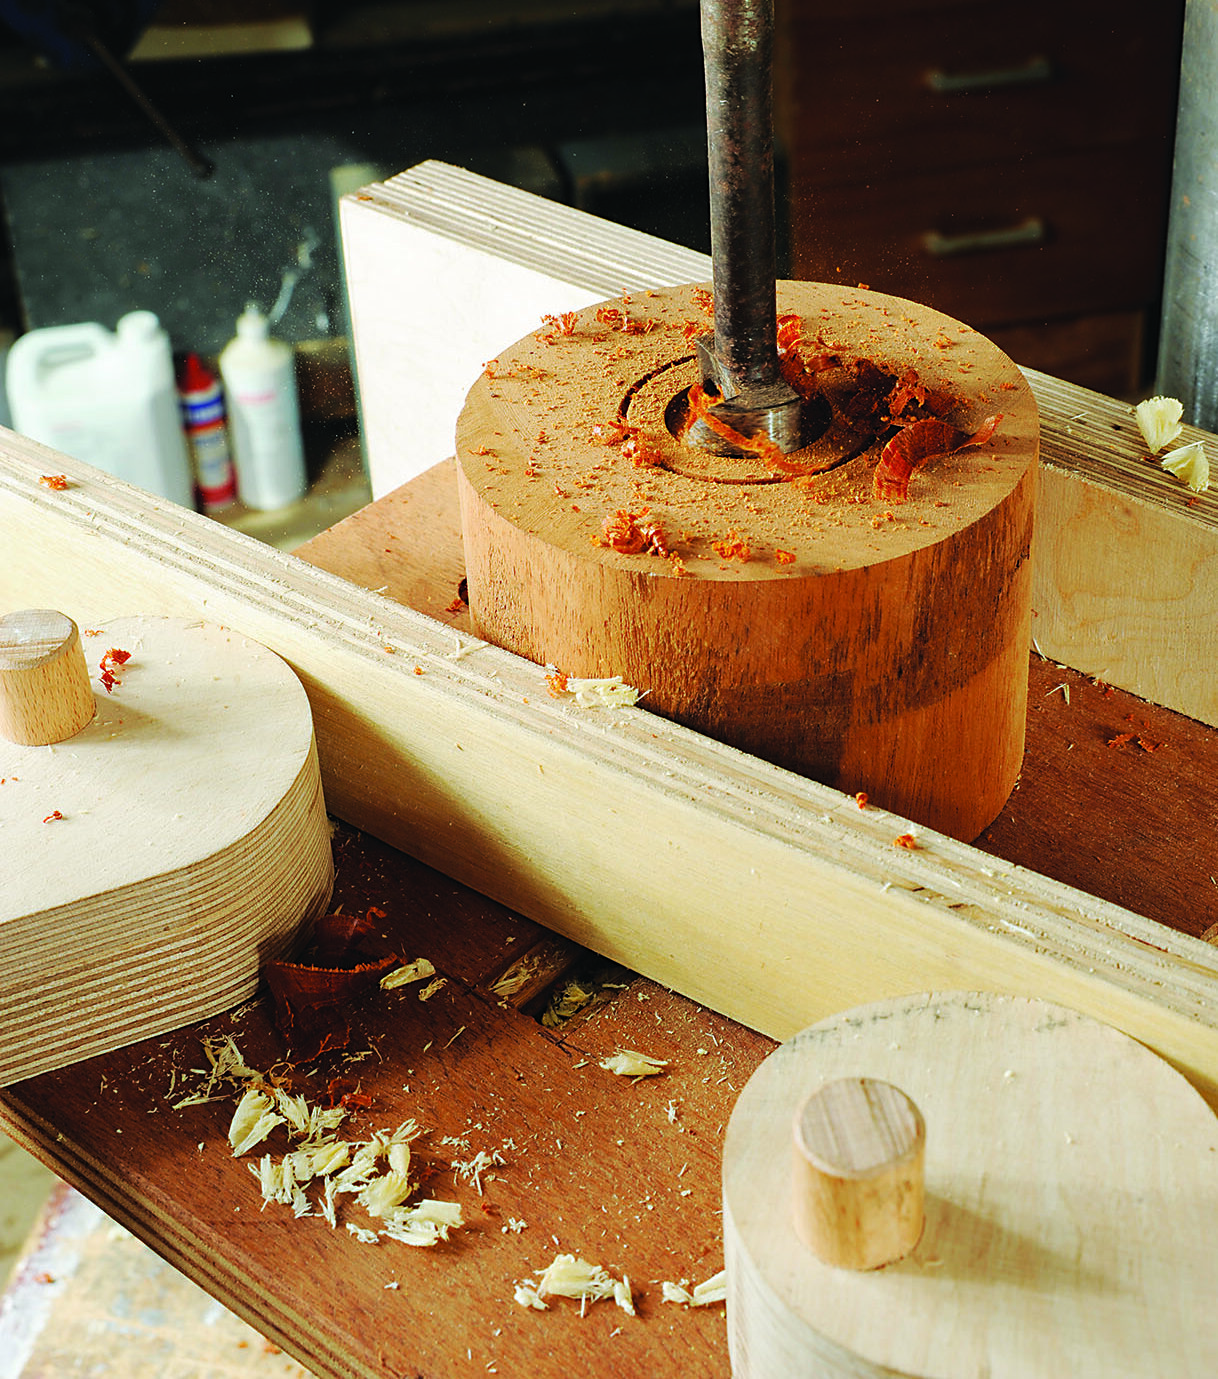
Round sections benefit from a little spring in the front fence to hold them tight


