Hare in the Ferns:
Zoe Gertner shows how to carve this much-loved countryside character in its natural habitat.
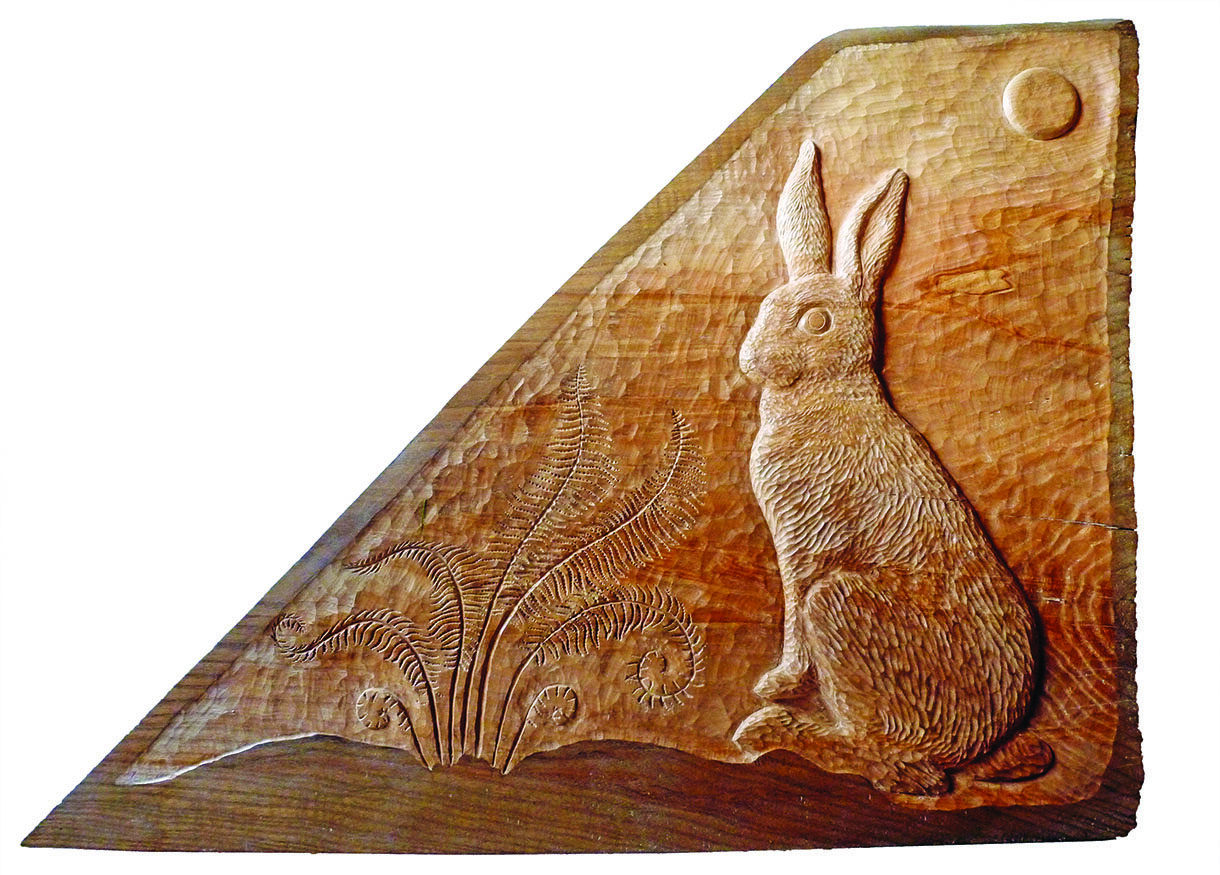
Zoe Gertner shows how to carve this much-loved countryside character in its natural habitat
My eye was caught by a movement – bounding across our field in front of my workshop was a big brown hare. It paused, looked round, then disappeared into the ferns at the edge of the field. During the next few days it reappeared again about the same time, and I began to look out for it. Hares are one of my favourite animals. Quite by chance at our local auction the following week was an interesting lot (‘offcuts from someone’s coffee table – anyone want ’em? …’) among which was an ideal piece of timber which I carried home with great joy, for it cost just £4 and would be ideal for my Hare in the Ferns carving.
Most timbers can be used for this project – the offcut I used is a sizeable piece about 600mm at its greatest length and about 50mm thick. But, of course, this project can be scaled to be as big or as small as you like. It was reputed to be either ash (Fraxinus spp.) or elm (Ulmus spp.), but this remains a matter of conjecture as in certain areas it has both the working characteristics or appearance of either timber. It was planed ready for its outline to be drawn on with a soft pencil, having referred to various photos and books beforehand as well as my field observations. Although I drew the hare directly on to the timber, as an alternative you can enlarge, trace and transfer the design using carbon paper to fit your own piece instead.
Did you know?
• Hares are swift animals: the European hare (Lepus europaeus) can run up to 56km/h (35mph)
• Normally a shy animal, the European brown hare changes its behaviour in spring and they can be seen in daytime chasing one another and also ‘boxing’, one hare striking another with its paws (probably the origin of the term ‘mad as a March hare’.
• Hares do not bear their young below ground in a burrow as do other leporids, but rather in a shallow depression or flattened nest of grass called a ‘form’.
Things you will need
Tools:
• No.39, 6mm 60° V-tool
• No.3, in 3, 6, 13 and 25mm sizes
• No.5, in 13 or 15mm sizes
• No.9, 6mm
• No.11, 3mm
• Mail punch
• Light hammer
• Mallet
• Finish of your choice
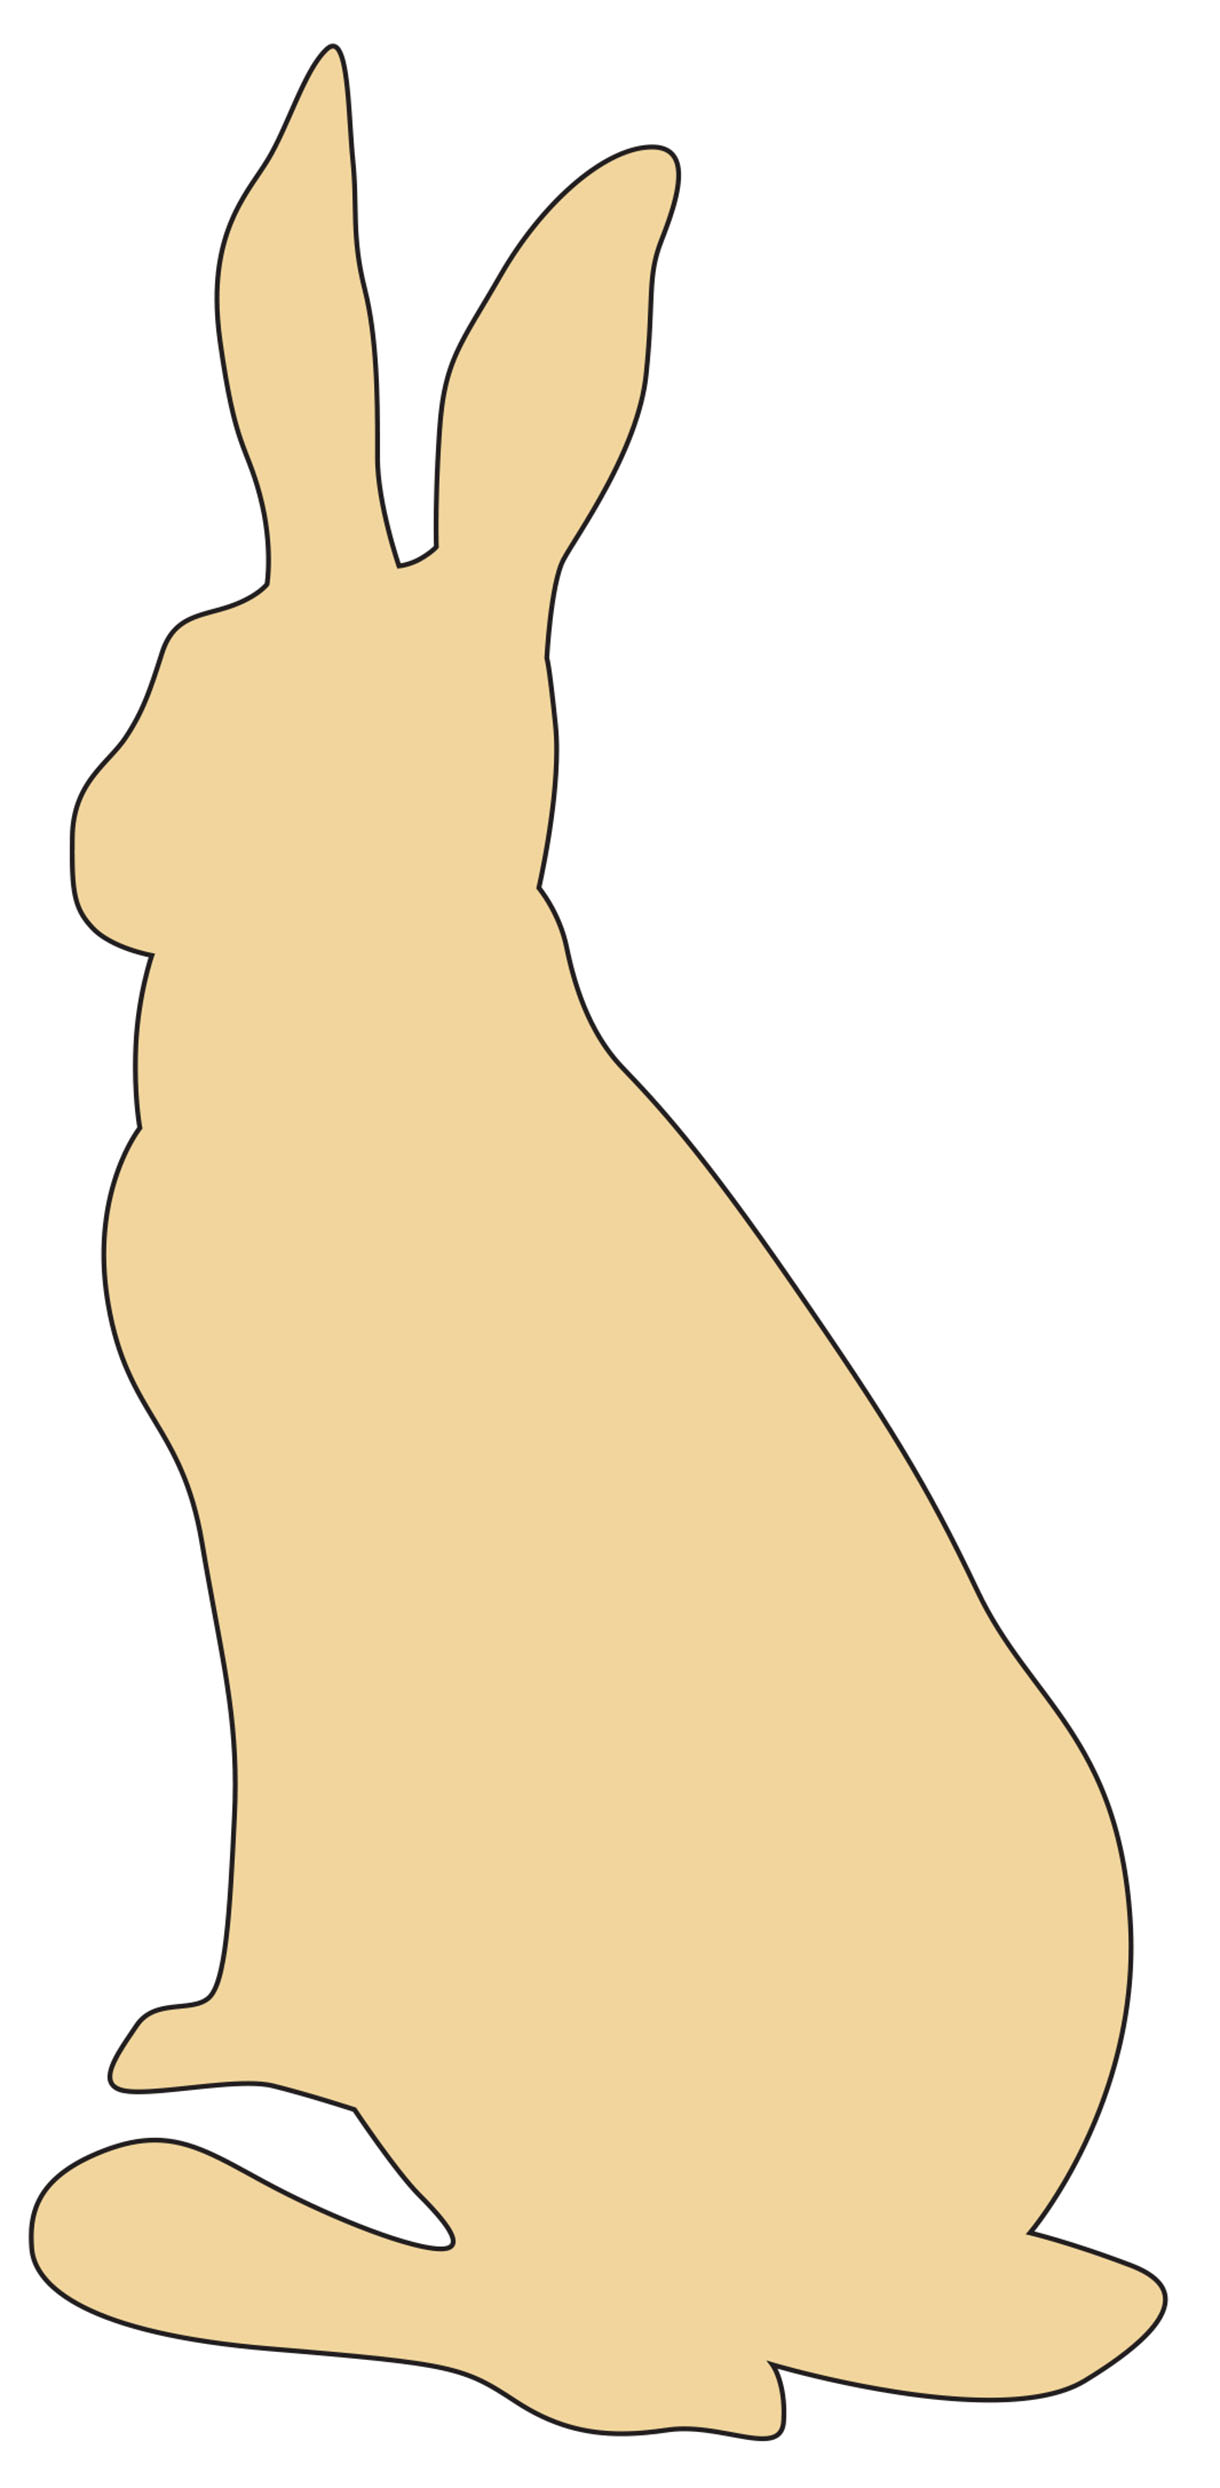
Drawings and how to resize them
To enlarge or reduce the size of drawings right click on the image to download it and then go HERE to watch a video on how to use paper with a grid to do exactly that.
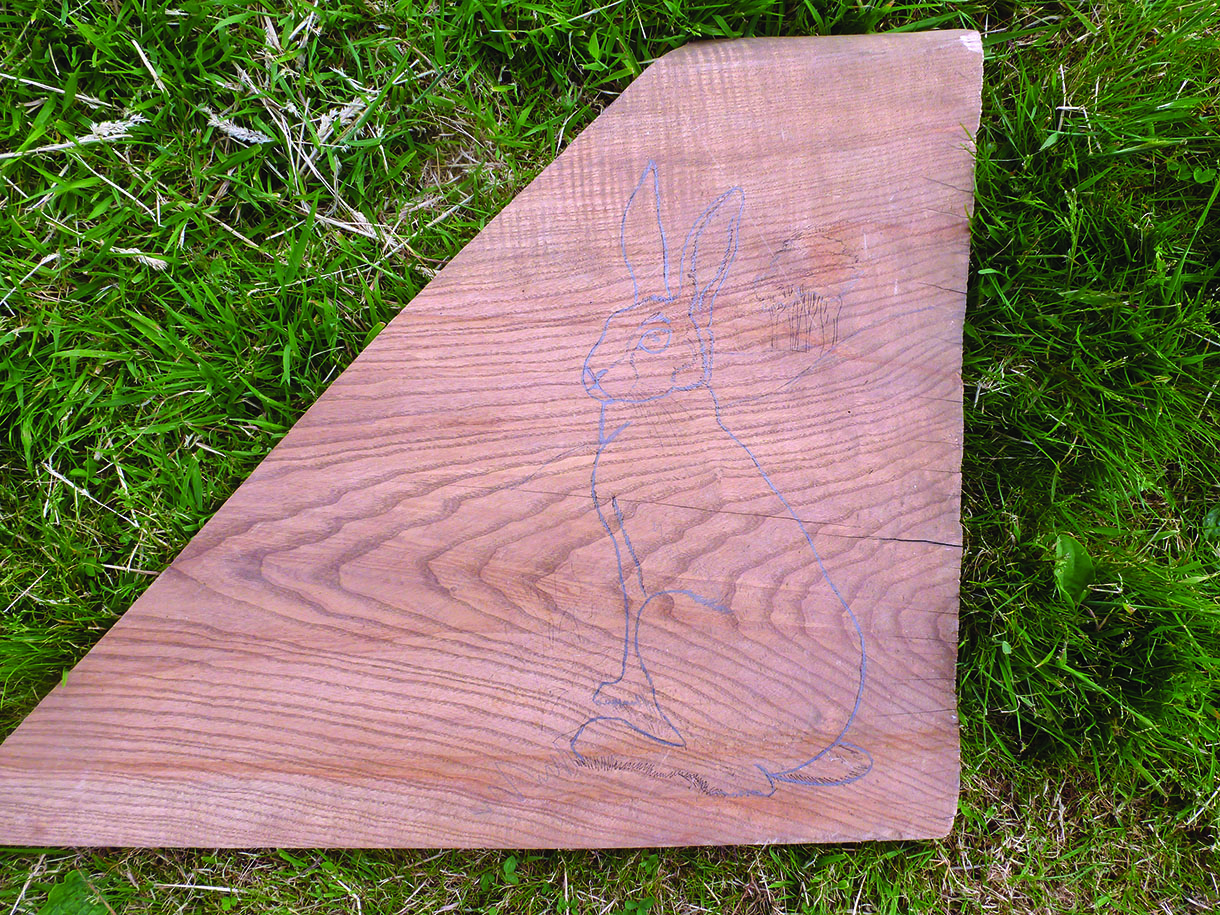
1. Transfer the design to your timber
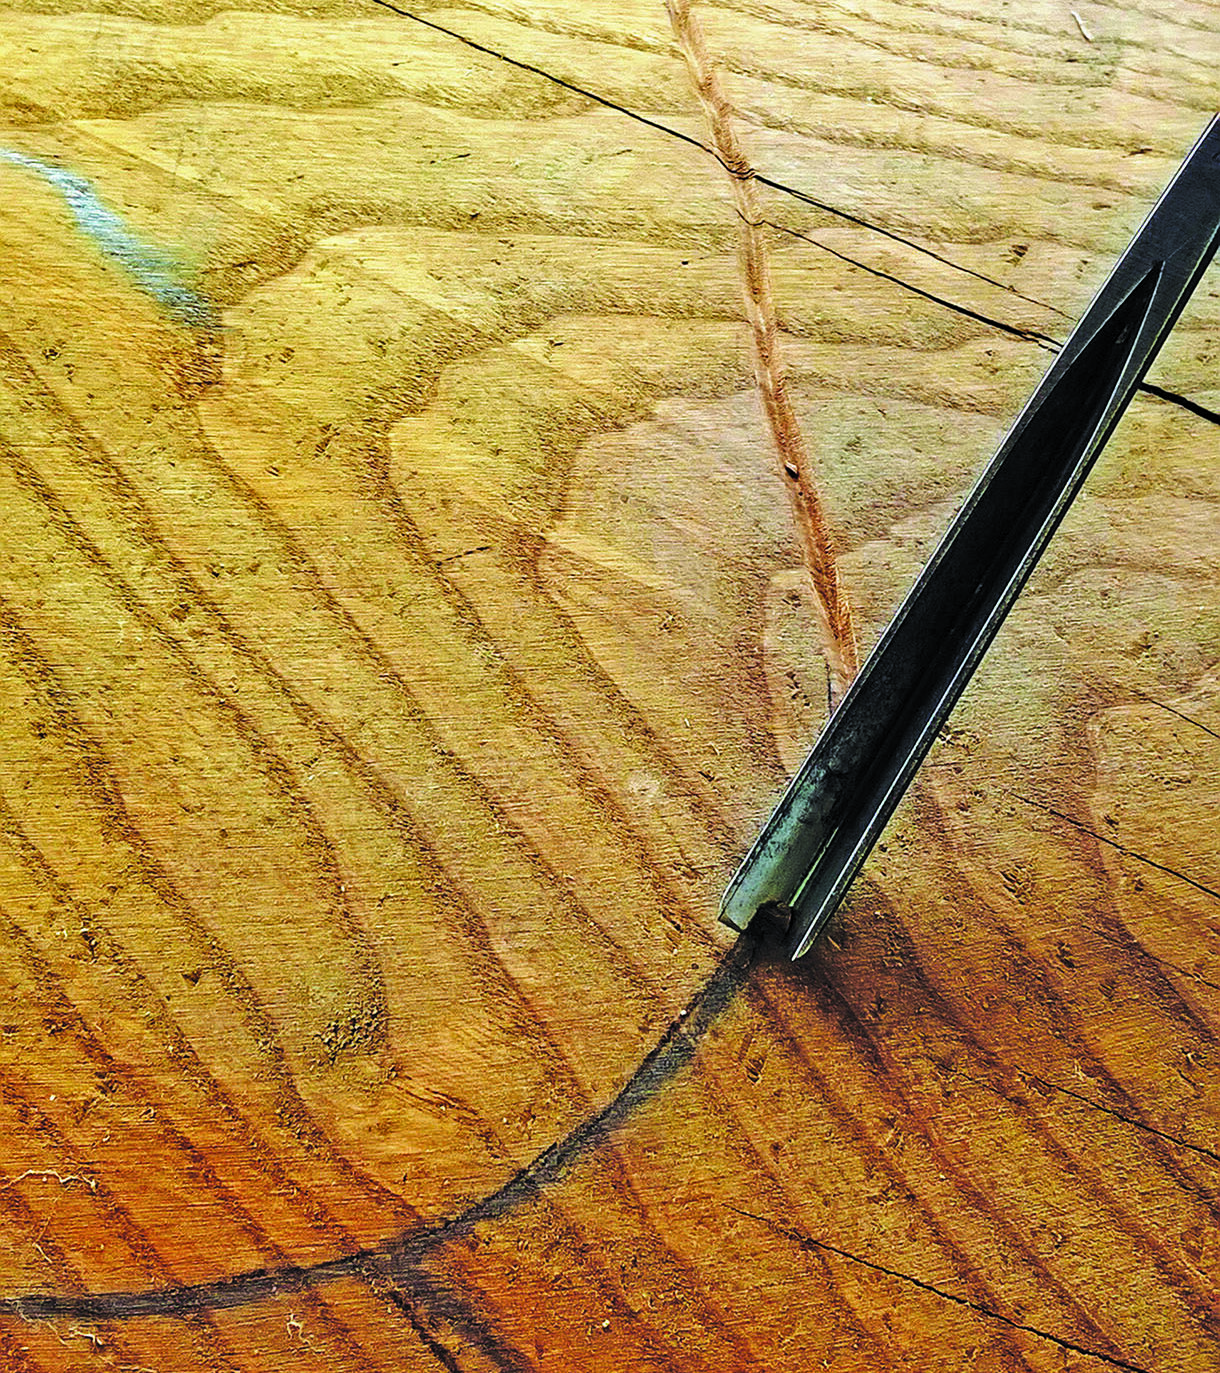
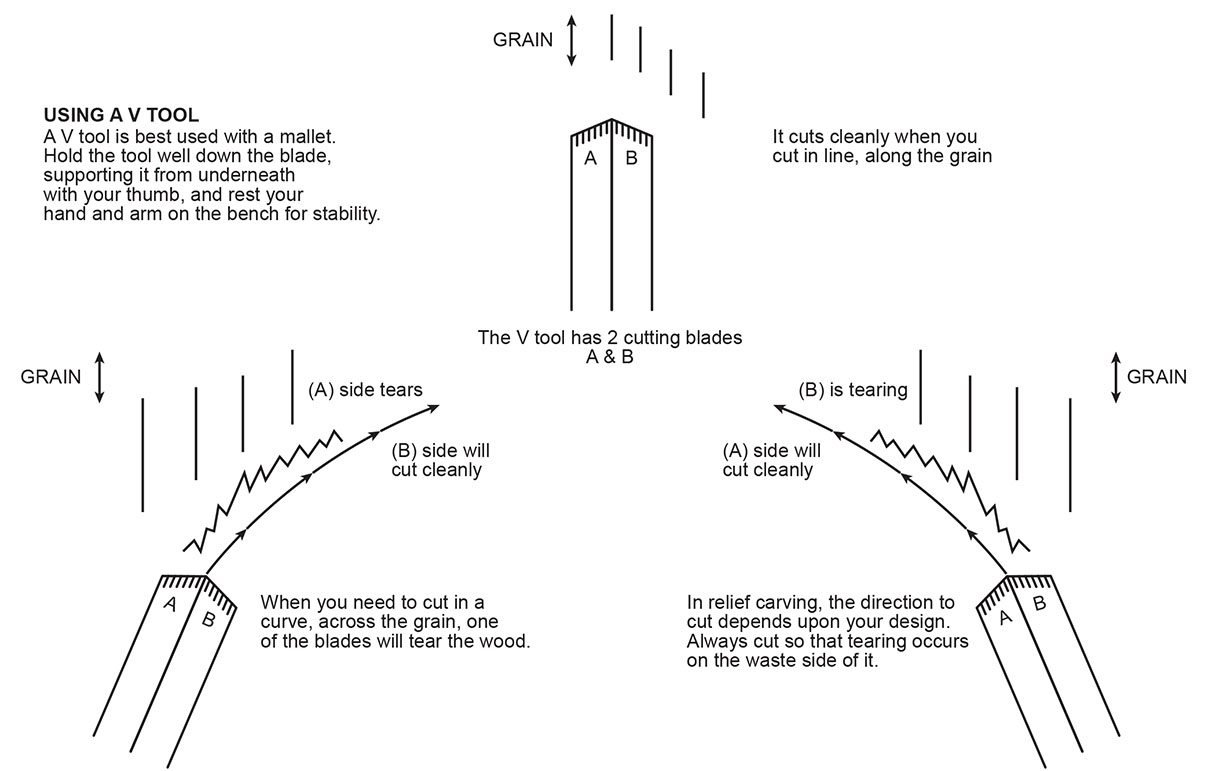
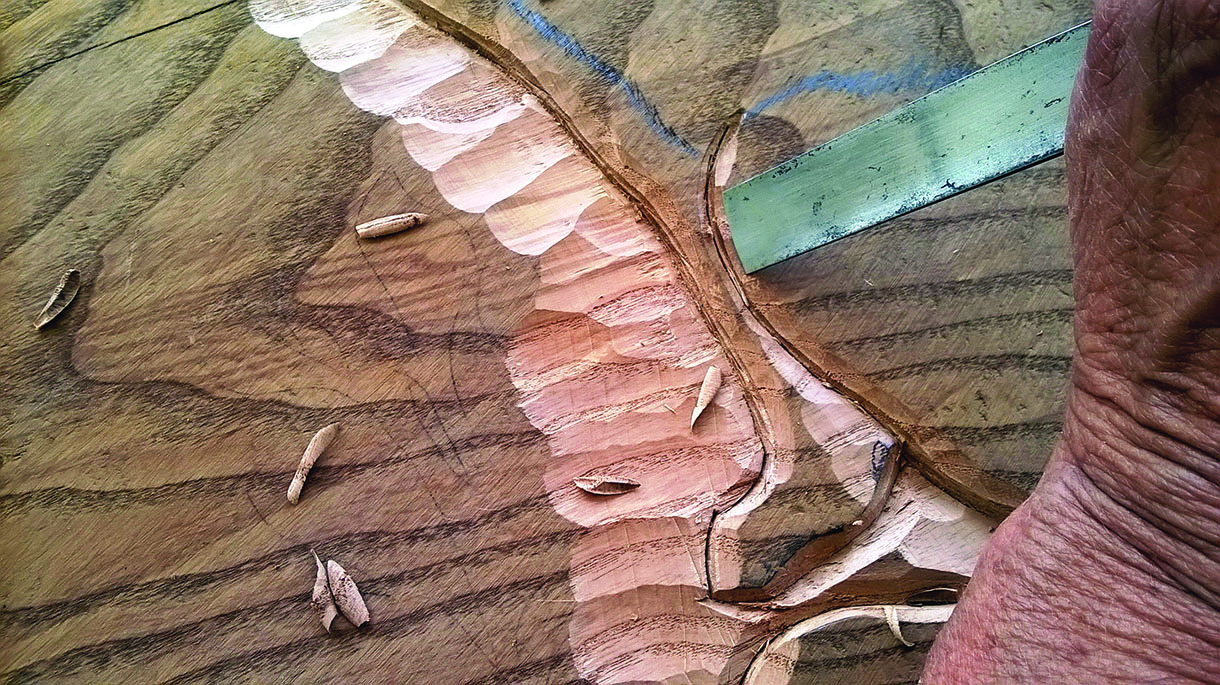
2. Use a no.39, 6mm (60°) V-tool with a mallet to outline by cutting it in the appropriate directions to make a clean cut V-channeled edge around the hare. Then, by using your V-channel, cut a series of opposing cuts around its outline as follows
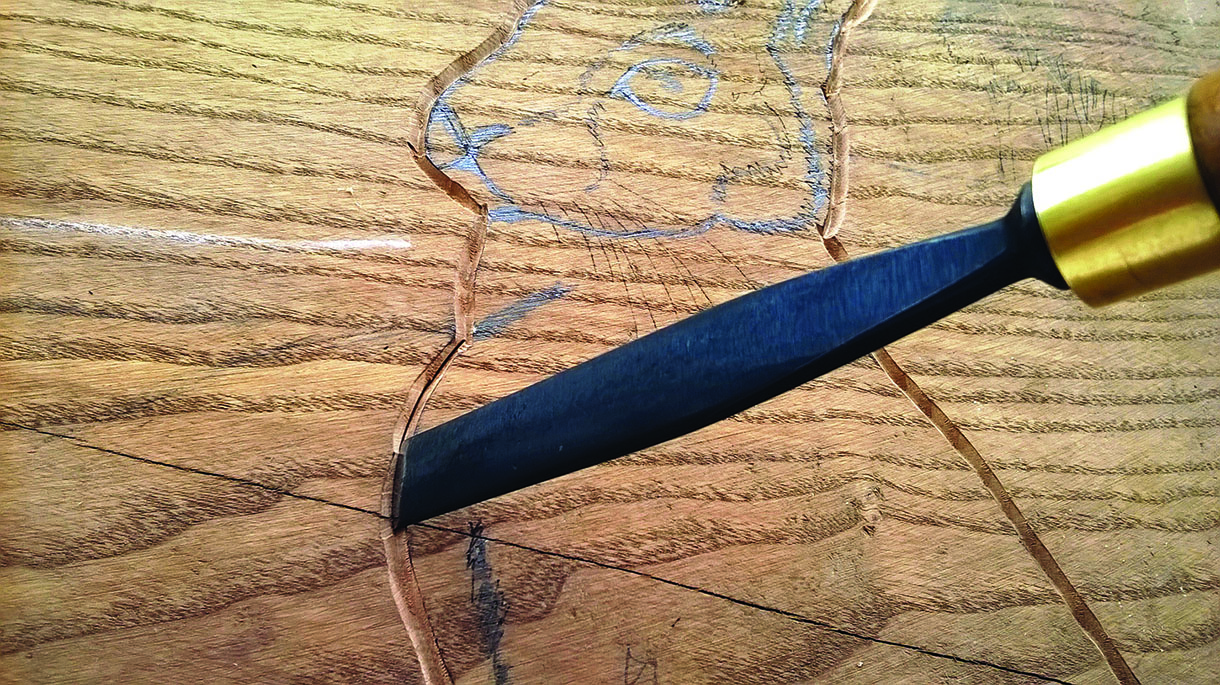
3. The first set of cuts is made around the hare. Rest the no.3 gouge in against the side of the V-channel and make successive cuts around the outline, continuing your cuts downwards along the angled side of the V-channel adjacent to the hare, so cutting away from him. Turn your gouge where necessary so that the shape of your cuts matches the curves of the outline. Where a curve is tight use a narrower no.3 gouge that fits, and do not cut towards the hare – always away for the first set of cuts
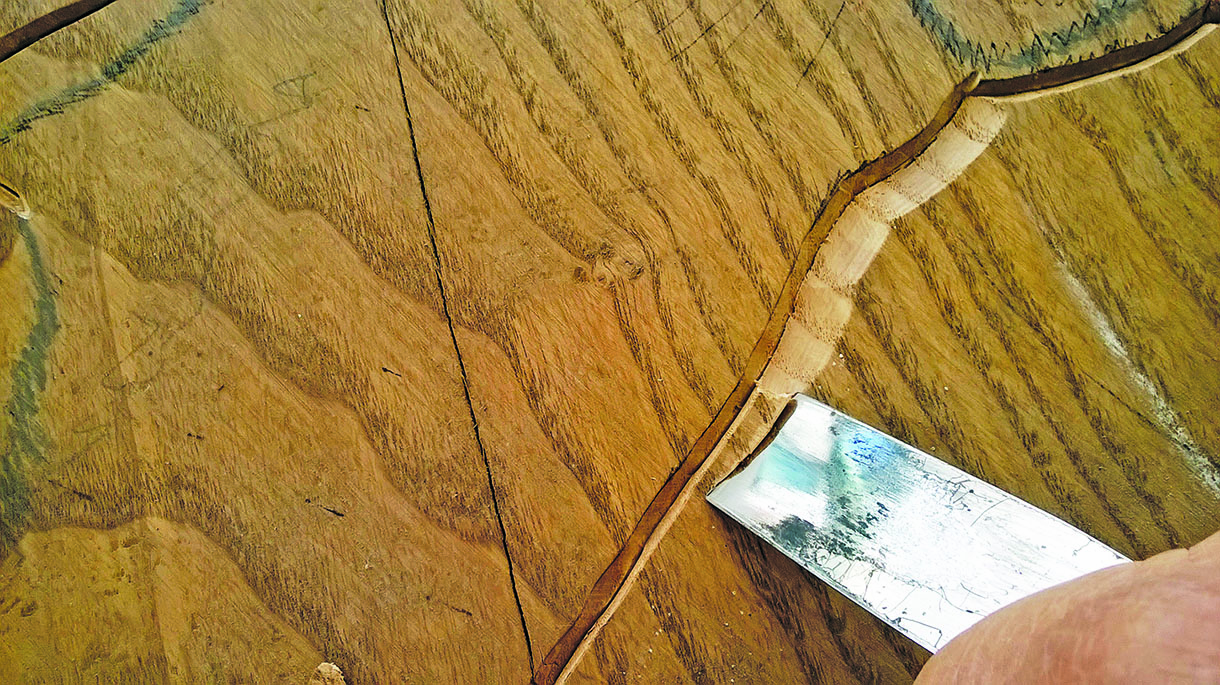
4. For the second set of cuts use a gouge bevel downwards, and from the opposite direction cut in towards the first set of cuts. Angle each cut so that it meets cleanly with the first ones, thus enlarging the original V-tool outline around the hare to a deeper and wider V-channel. To cut the channel cleanly the gouge bevel must always be downwards. At a convex curve swing the gouge cutting edge slightly sideways so that its width meets up with the cut from the edge
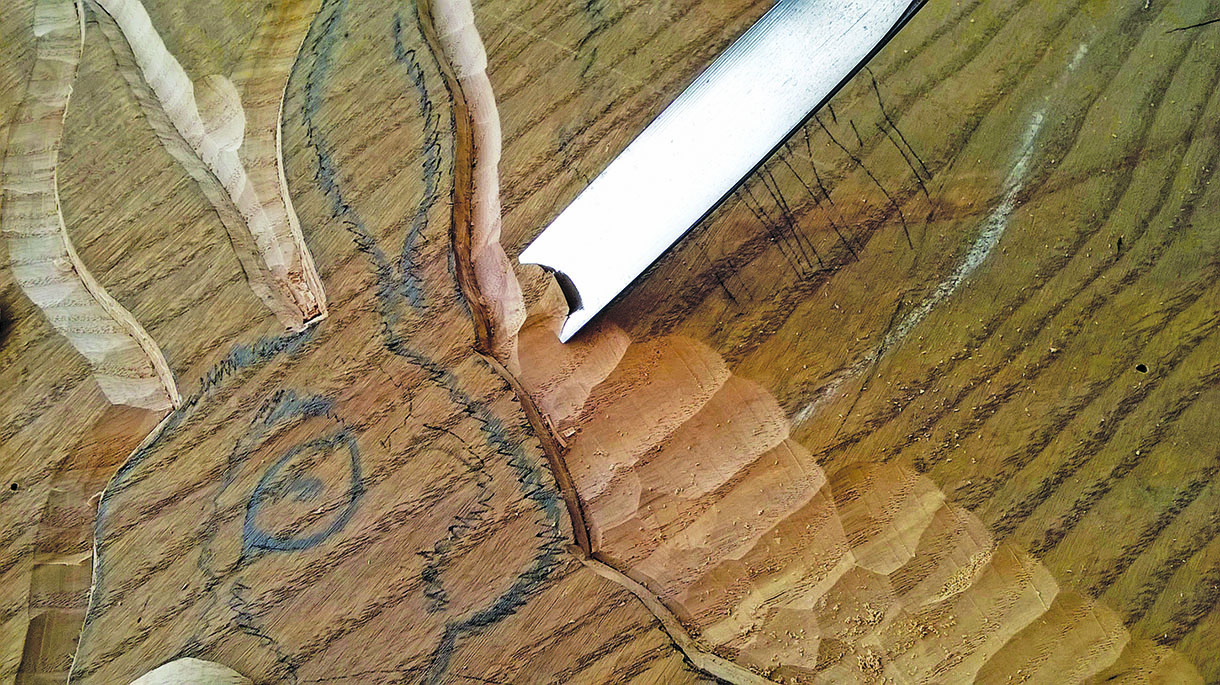
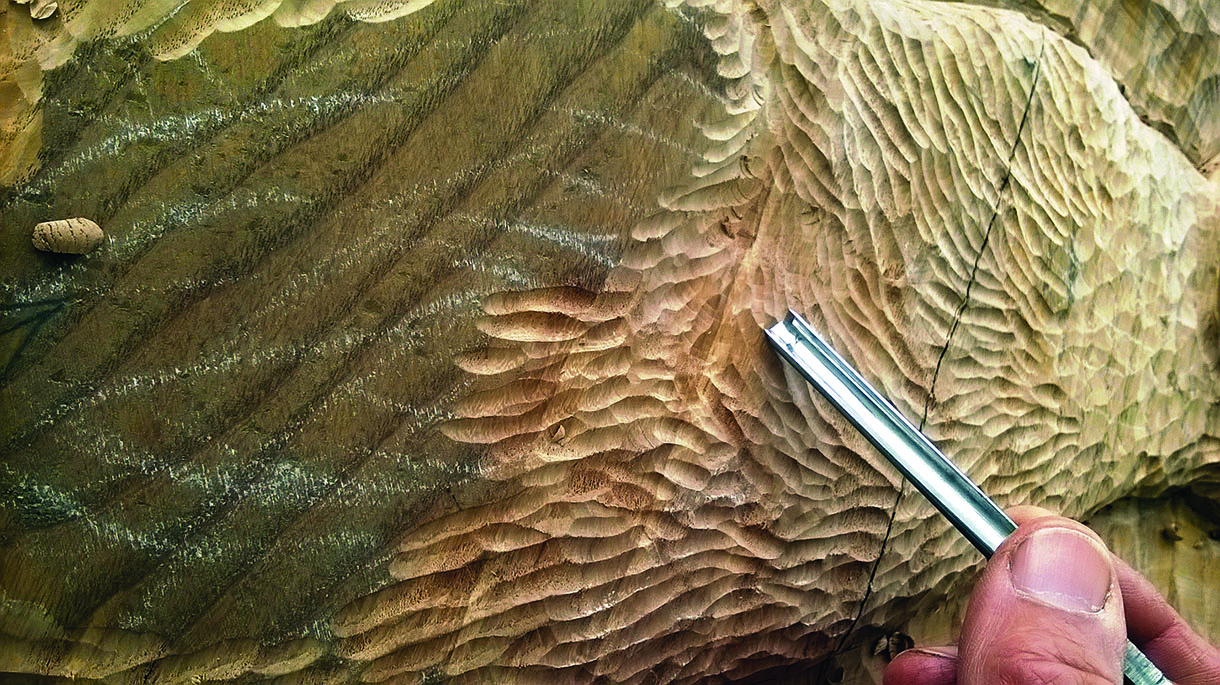
5. It’s time to sort out the background. Using a no.5, 13 or 15mm and a mallet work away from the enlarged V-channel around the hare. Start these cuts at the outer edge of the V and cut towards the hare, dropping your hand to scoop out the chips along the outer edge of the channel. Make a longer second row that overlaps the first row, thus producing a gentle slope towards the hare and over the adjacent background. Taking care not to slip or damage the outline as you approach it, continue with further overlapping rows until the hare stands proud
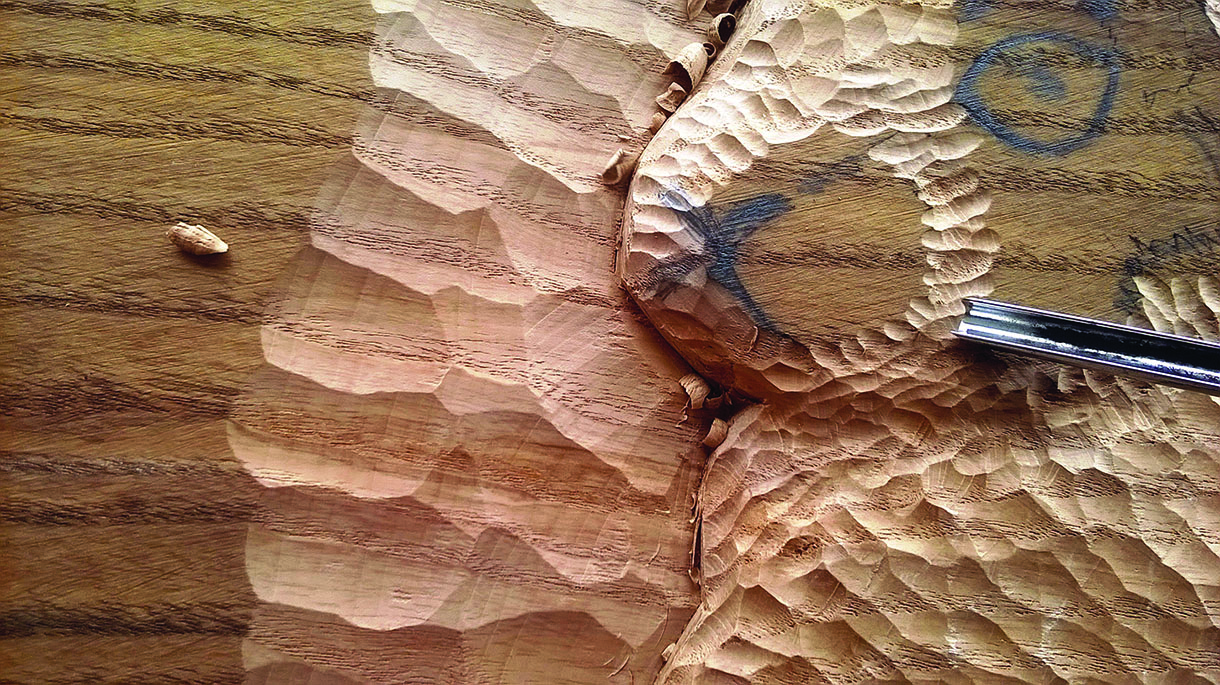
6. When there is sufficient depth around the hare, round over its outer edges. To make a rounded cut use a wide no.3 gouge and lift your gouge hand over the edge while cutting across it. Reduce the foreleg and its foot, cutting away from the middle of it towards its outside edges, it being cross-grained along its length. Cut a channel between the tail and the hare’s back and, by working into the channel from each side, round over the edge of the back, then reduce the tail
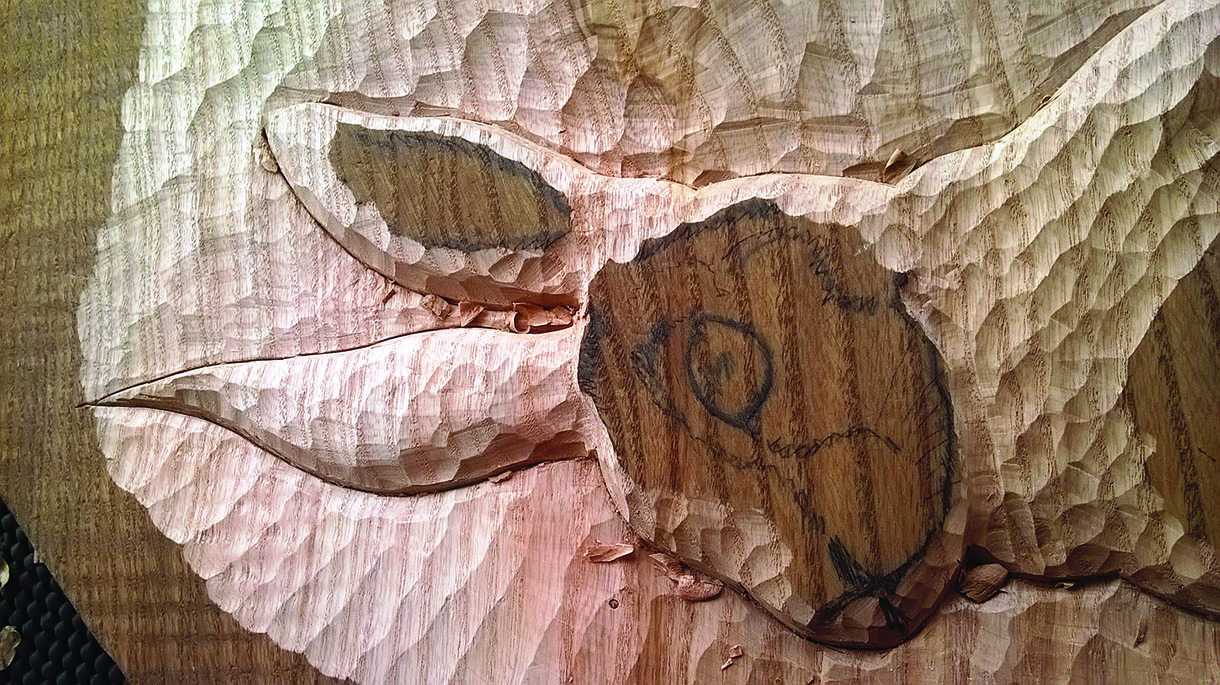
7. Reduce the neck area between the jawline and the shoulder, the furthermost ear and the base of the nearer ear so that the side of the head is proud
8. Round over the top of the haunch and deepen the waist area. Use a no.9, 6mm to cut into the deepest area from the shoulder, then from the haunch, to make the hollow. The hind leg was then reduced lower than the haunch and the rear foot shaped
9. Now move to the head. Reduce the edge of the muzzle and slope the mouth area downwards towards the neck, then round over the edges of the nearer ear, ready for hollowing it within
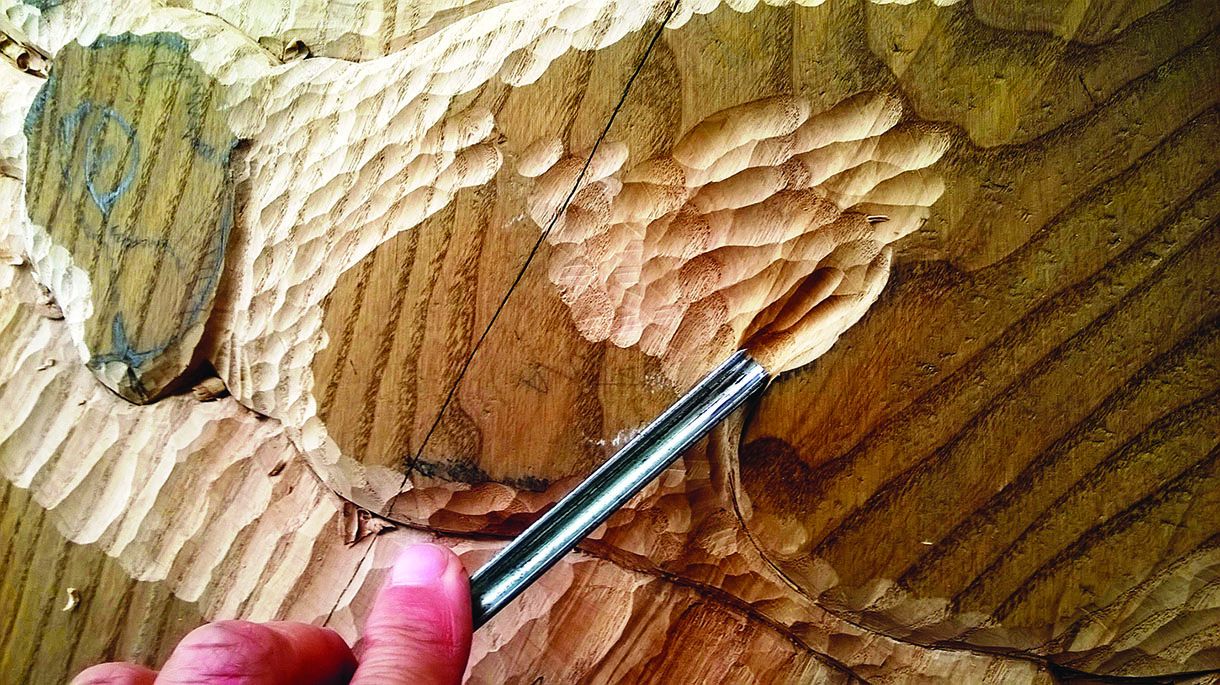
10. Using chalk, draw the lines of the fur flowing over and around the animal as a guide for texturing the fur. Using the no.9, 6mm, follow your lines with gouge cuts of varying lengths and texture over the whole surface, working into the hollows and around the shape. At the edges roll the gouge furrows over, taking care that your cuts meet cleanly with the background. If necessary, deepen the adjacent background areas using the appropriate no.3 gouge and remove any errant no.9 gouge marks that may have cut in to it
11. Continuing with the no.9, 6mm cut in from each side to make a shallow curved hollow between the muzzle and the cheek, extending it to the jawline, and blend the surface of the forehead into the bottom of the furthermost ear. Then, with a no. 3 gouge, carefully reduce the tips of both ears. As they lie ‘across the grain’ of the wood, cut outwards from each side so that you do not damage the ends
12. Reduce the lower end of the nearer ear and merge its surface down and to the edge of the head below
13. On the nearer ear outline the orifice with the no.9 gouge and hollow the area. Alternatively, deepen the inner surface next to the furthermost edge of the orifice by tilting the gouge as you cut along its edge, then roll the hollowed surface over the opposite side of the ear
14. Round over the edges and surface of the furthermost ear by cutting outwards from each side along its length, as described before
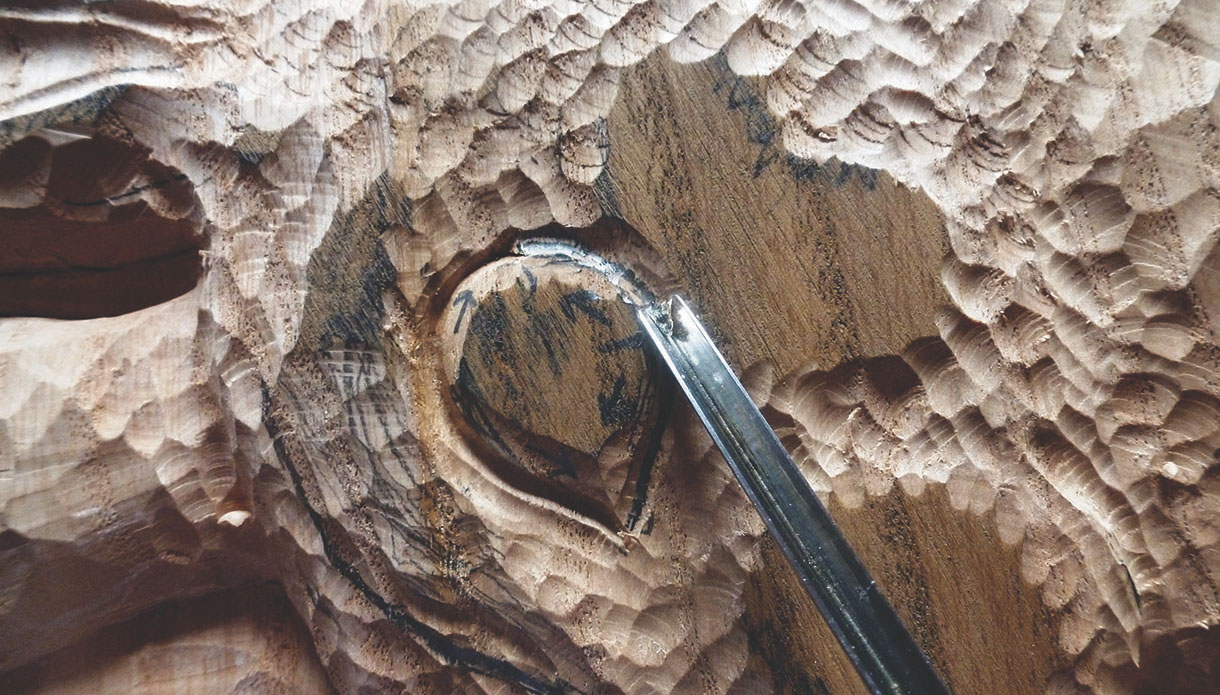
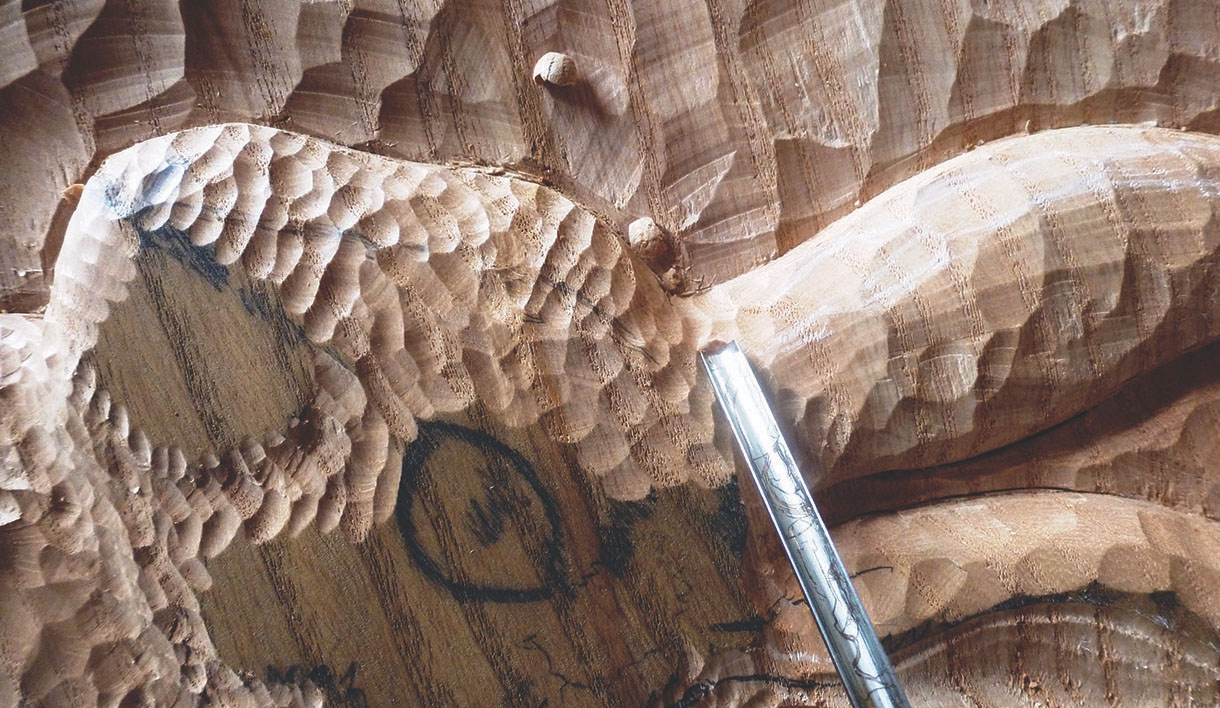
15. Now to the eye. Using either a 3mm or 6mm V-tool, cut around the eye in the directions shown and then relieve it by making sets of opposing cuts with the appropriate width no.3 gouge as described earlier. Now invert the no.3 gouge ready to round over the surface of the eye. Work outwards from the edges over the whole surface until the centre, the highest area, is reached. This is done by tilting the gouge’s cutting edge slightly, at the same time sliding it over and across the edge of the eye, little by little from all round, until the eye is completely convex. To avoid damage, pare in the directions shown when marking it out with the V tool
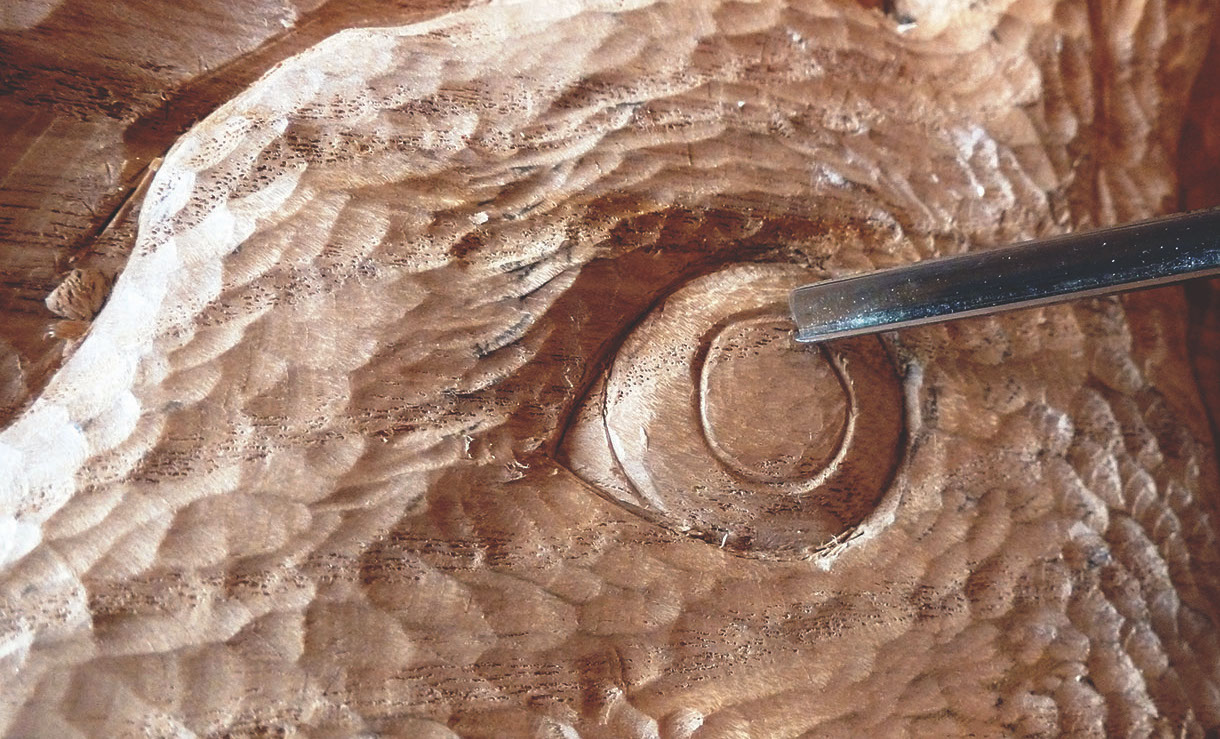
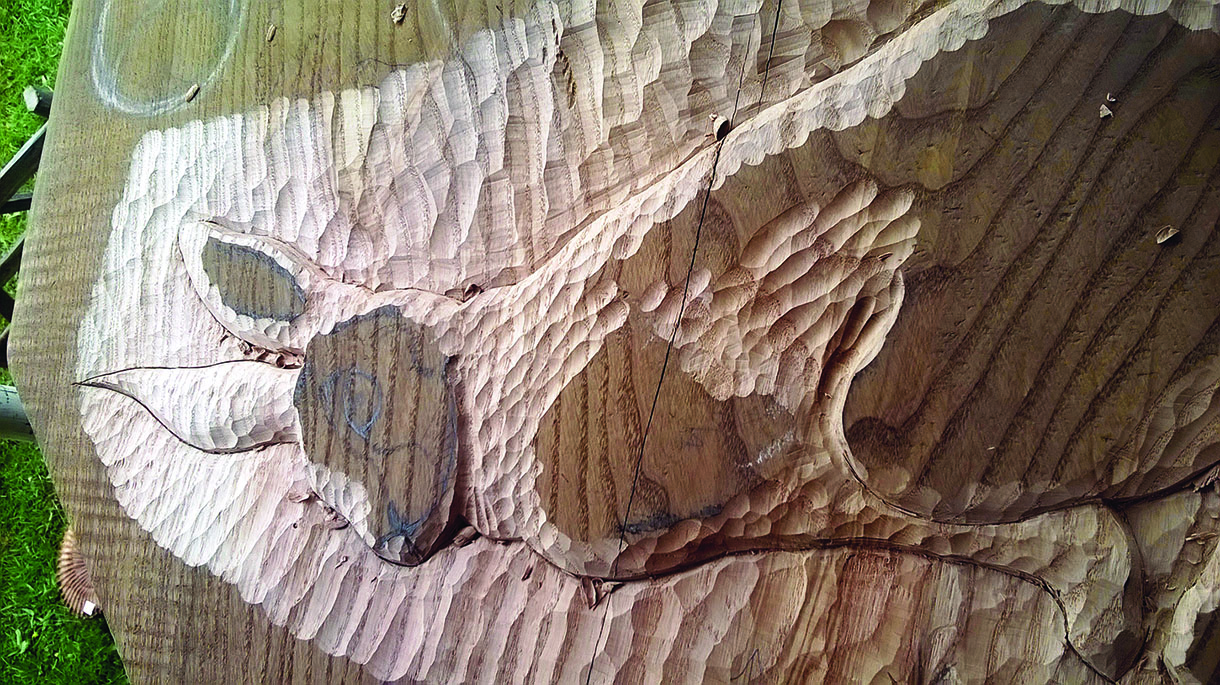
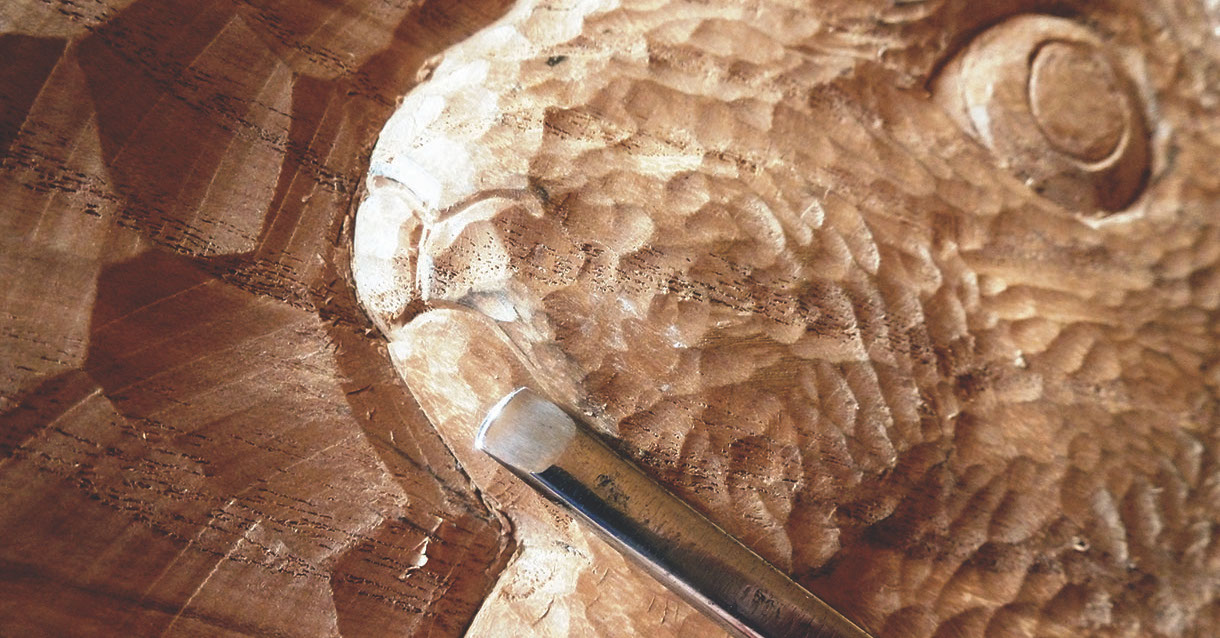
16. Finish the details on the eye using the 13mm V-tool. Then, with the no.9, 6mm gouge, cut a shallow curved hollow above the eye making the raised area between as the eyebrow. Similarly, cut a hollow beneath the eye which runs towards the nose and above the cheek and the muzzle. Using shallow cuts now work over the head, deepening hollows where necessary until no original flat surface remains
17. With the V-tool mark the mouth and nose with its division, then invert the no.3 gouge and round and reduce the edges of the lower jaw so it is within the lower edge of the mouth
18. Since hares have an association with the moon I decided to include this to add interest at the top corner of the carving. It was carved in the same way as the eye – outlined with the V-tool, sets of opposing cuts around it using a no.3 gouge to relieve it from the background, followed by an inverted wide no.3 gouge to pare its shape convex
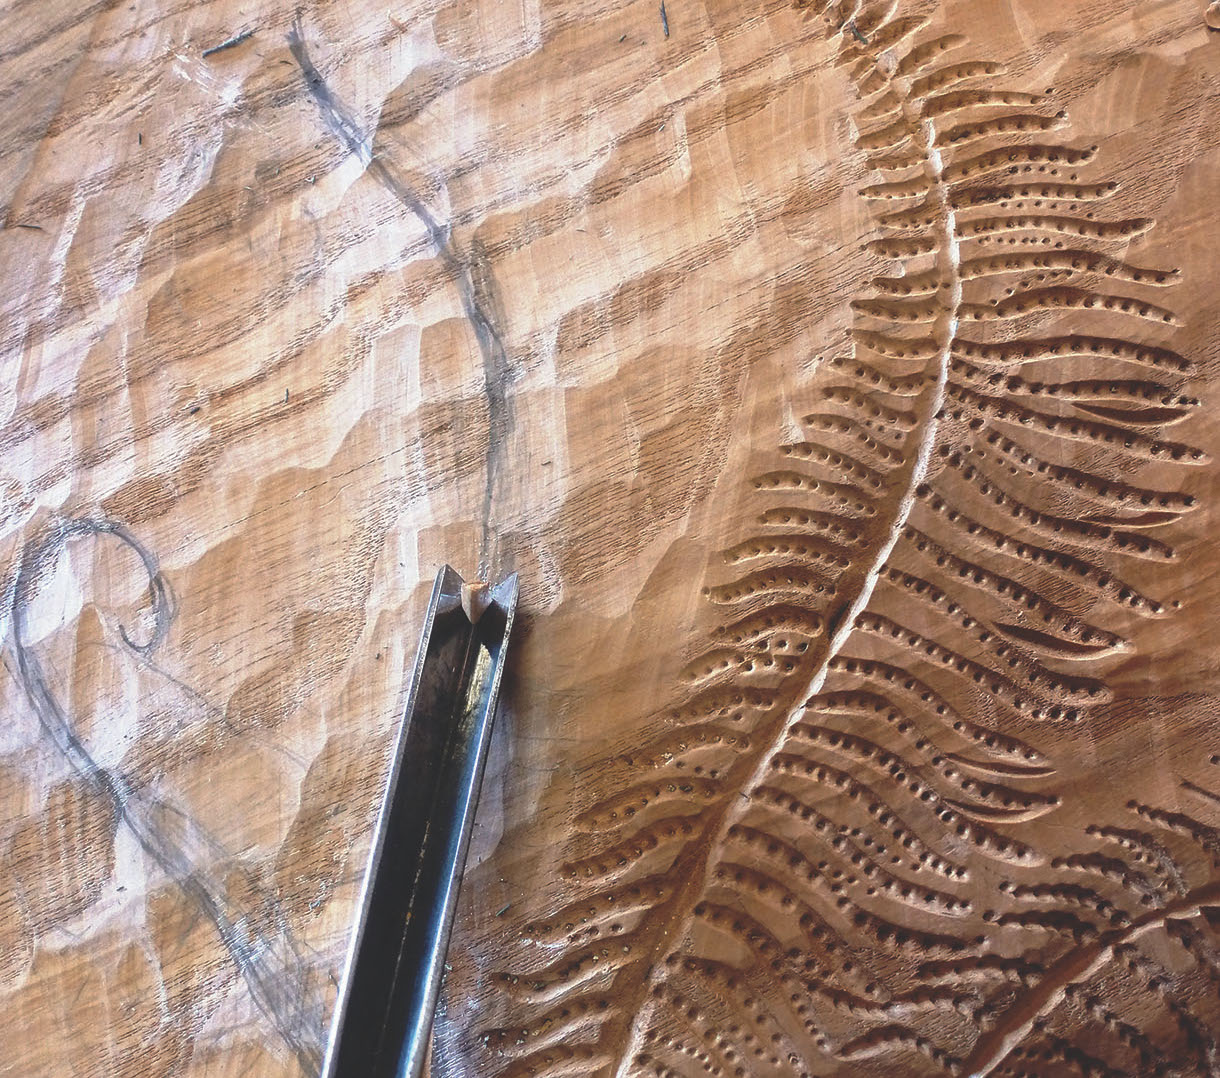
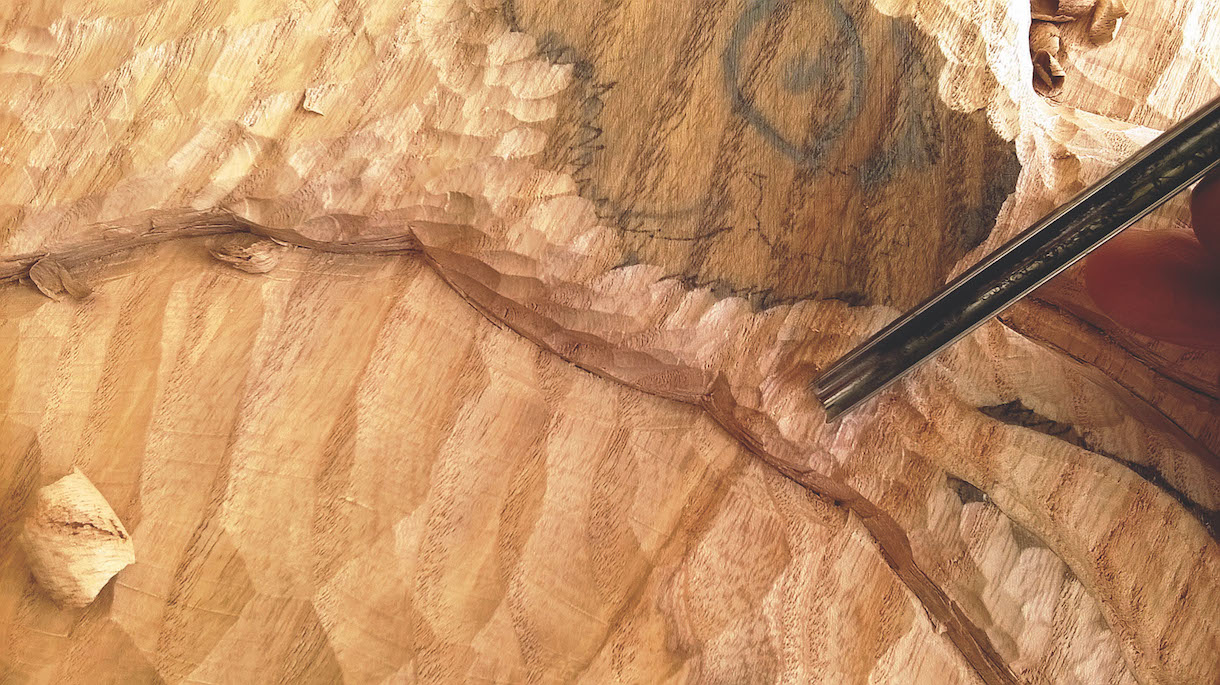
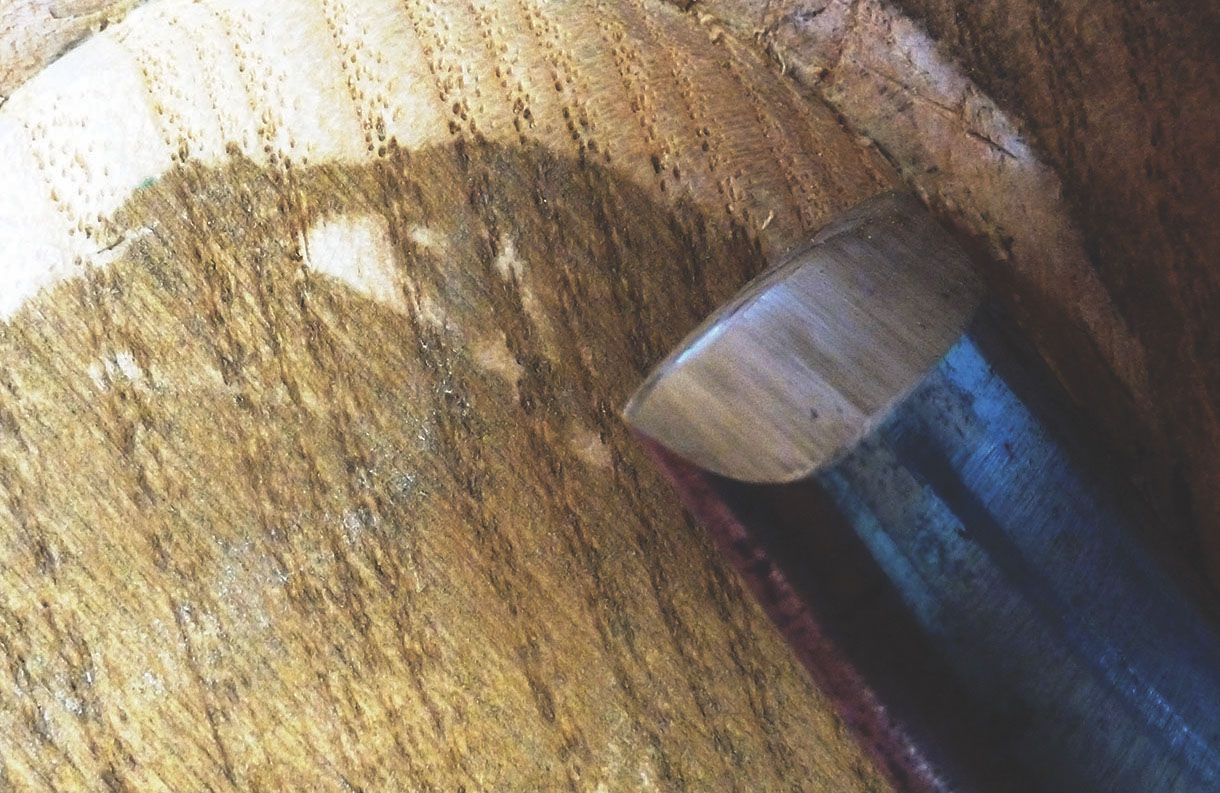
19. Draw, then in one continuous cut, mark the main stem of the fern using the V-tool. Towards the end of the fern gradually drop your tool hand to taper and reduce its depth as you finish. Should the emerging chip obscure your drawn line, put your mallet down, break off the chip using that hand and resume the cut without having withdrawn the V-tool from its pathway
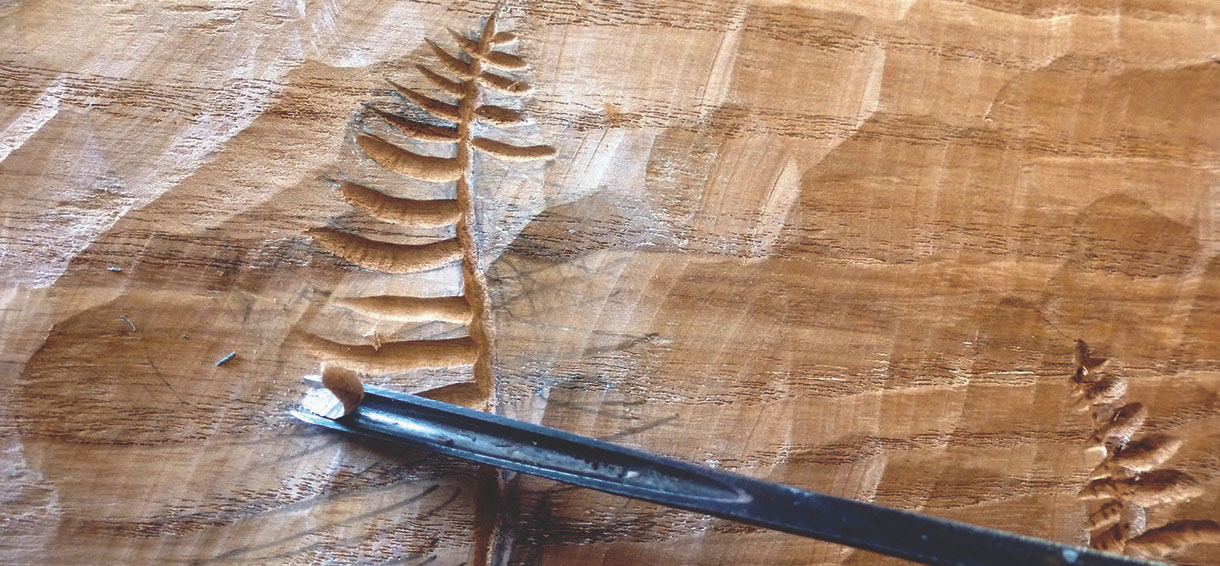
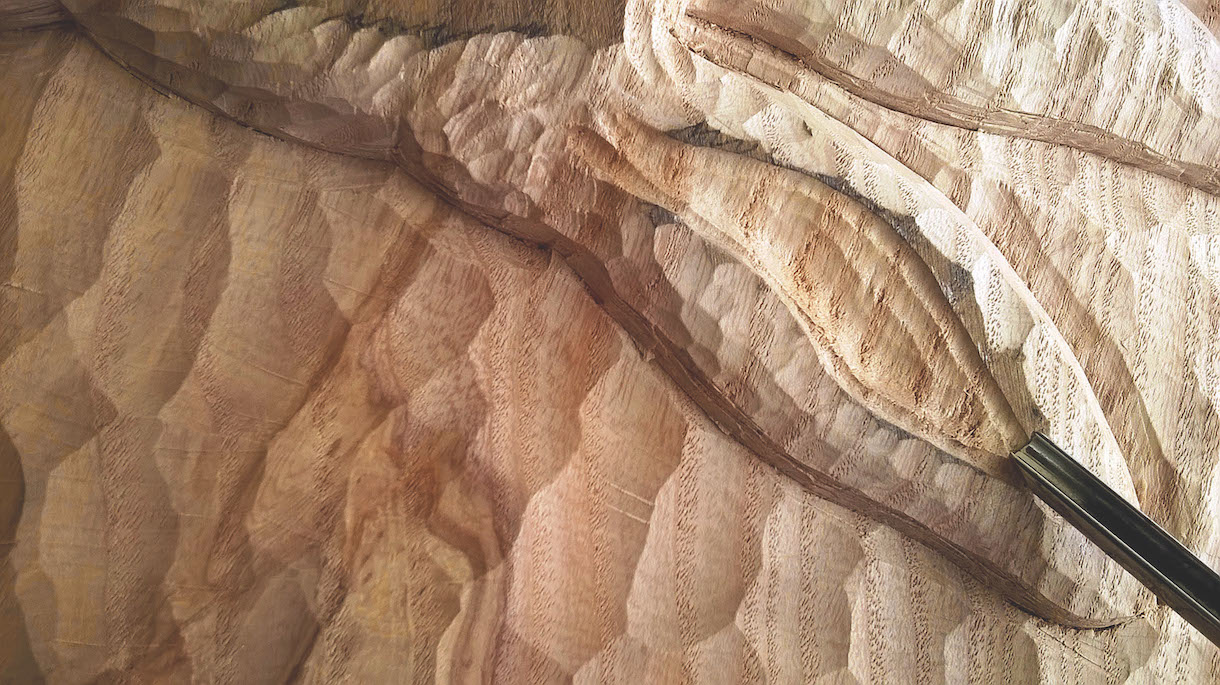
20. In the same way, the separate fronds were cut with the no.11, 3mm and the V-tool for marking the tiny ones at the ends of the main stem
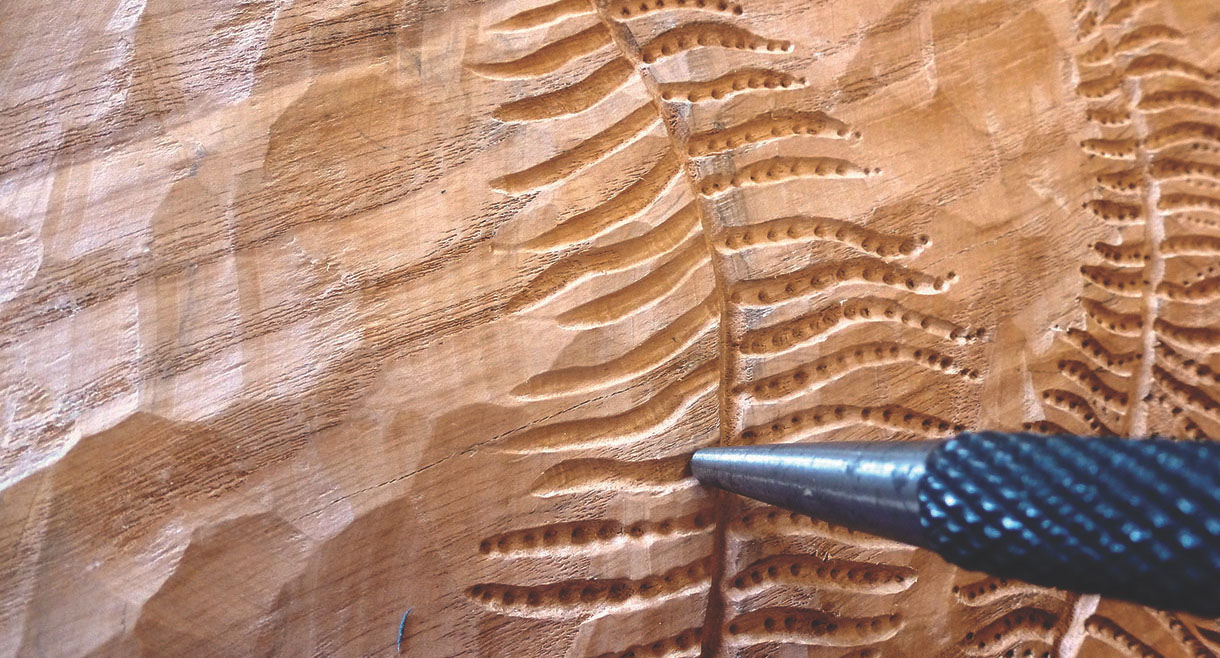
21. Along the fronds, lightly tap the nail punch using the hammer to give a light and lacy effect
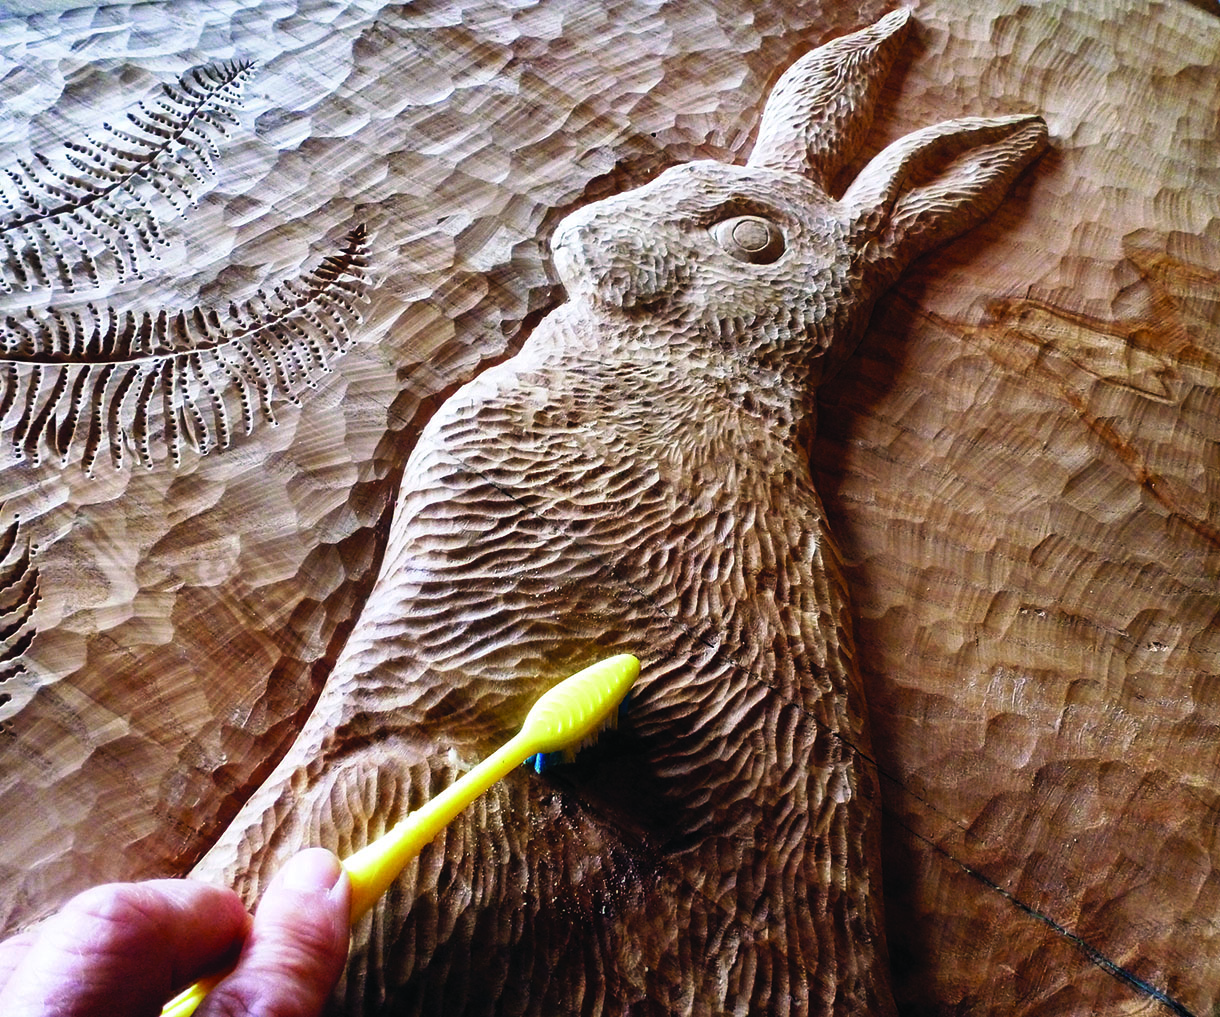
22. Now for the finishing. Examine your carving and pare away any deep and errant cuts around the outline/background to remove them, and check all edges meeting are cleanly cut. To finish the carving I used a colourless wax polish applied with an old toothbrush over the textured fur, left it overnight to soak in then buffed it with a lint- free duster to produce a nice sheen


