Garden Snail:
Zoe Gertner carves from a log a large snail for a garden ornament.
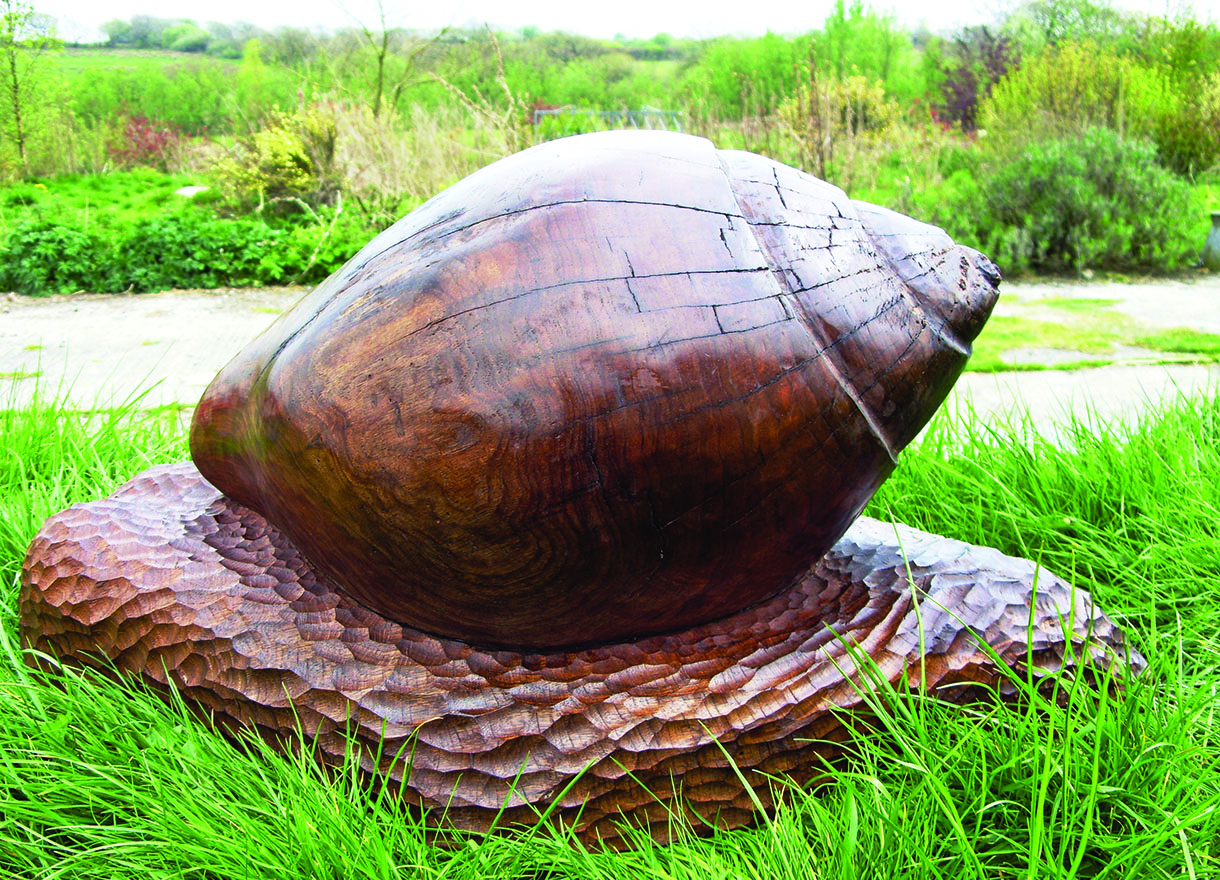
Zoe Gertner carves from a log a large snail for a garden ornament
W hat can you carve from those awkward-shaped branches which well-meaning people give you from their gardens or firewood piles? When it becomes general knowledge that you carve wood, sometimes well-intentioned friends, neighbours or relatives will present you with various branches, logs and trimmings from their gardens in the hope that you will make use of their donations and produce for them a lovely carving, rather than simply dispose of it in a shredder or bonfire. A rather daunting idea, though, if you
are accustomed to using only prepared cubes of wood with a bandsaw to cut it. But, given a little thought, you might be able to use some of the pieces for carving rather than for toasting your toes at the woodburner stove. Some years ago I was given some pieces of timber from a large walnut tree (Juglans regia)that had been blown down in a storm, among which there was a very large part that had broken away from the wind-blown trunk. Having set the piece to one side for future use, one day its shape suggested that, with a little modification, it could be ideal to carve into a nicely pointed snail shell. Using a similar-shaped branch or crotch of any size this project will show you how to use an unorthodox piece of carving wood to its full potential, one which you might well have discarded in favour of some warmth, instead.
Things you will need
Tools:
• No.3, 25 or 38mm
• No.5, 13mm
• No.6 or 7, 13mm
• No.7, 38mm
• No.8 or 9, 13mm gouge
• No.11, 10 or 13mm
• No.39, 10 or 13mm
• Handsaw
• Mallet
• Surform, Microplane or spokeshave
• Cabinet scraper
• Wax polish or oil
• Coloured wax stick to match
Materials:
• Crotch or timber with branch angled outwards from it
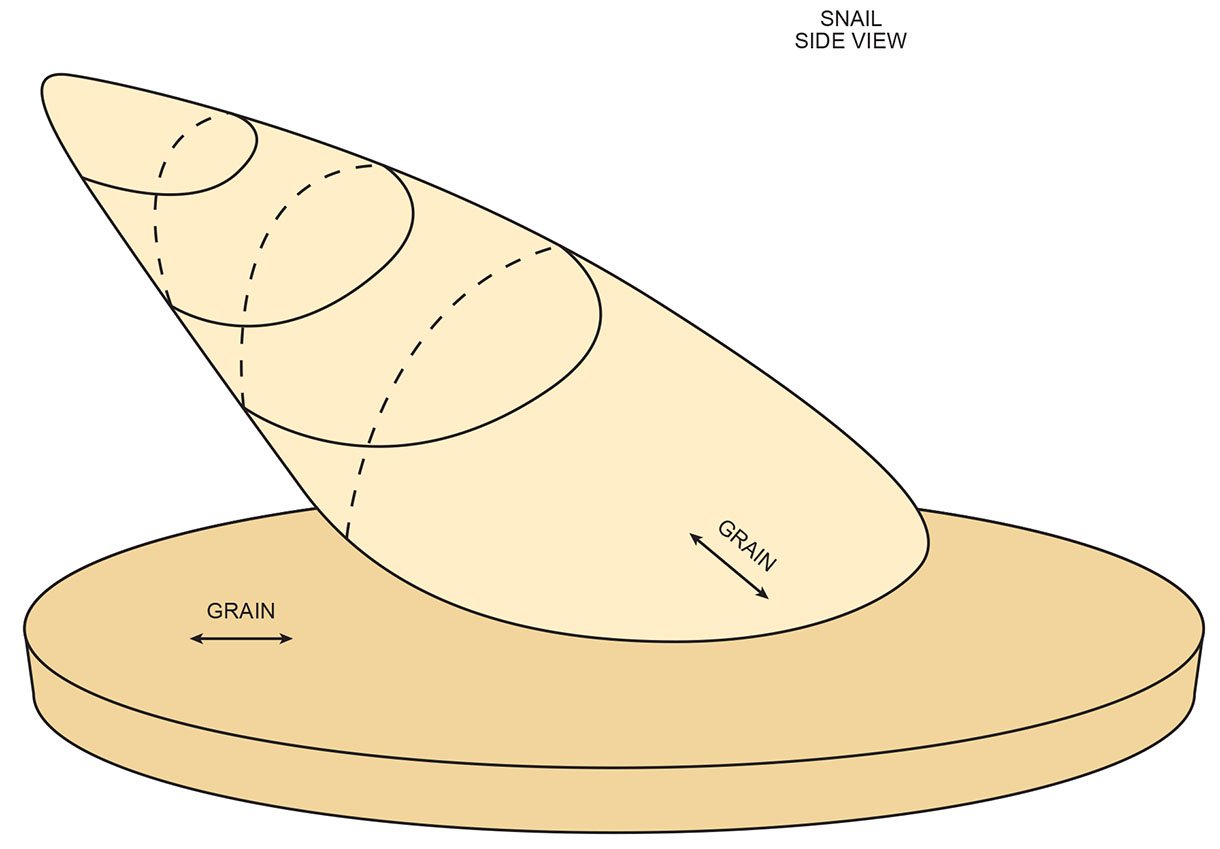


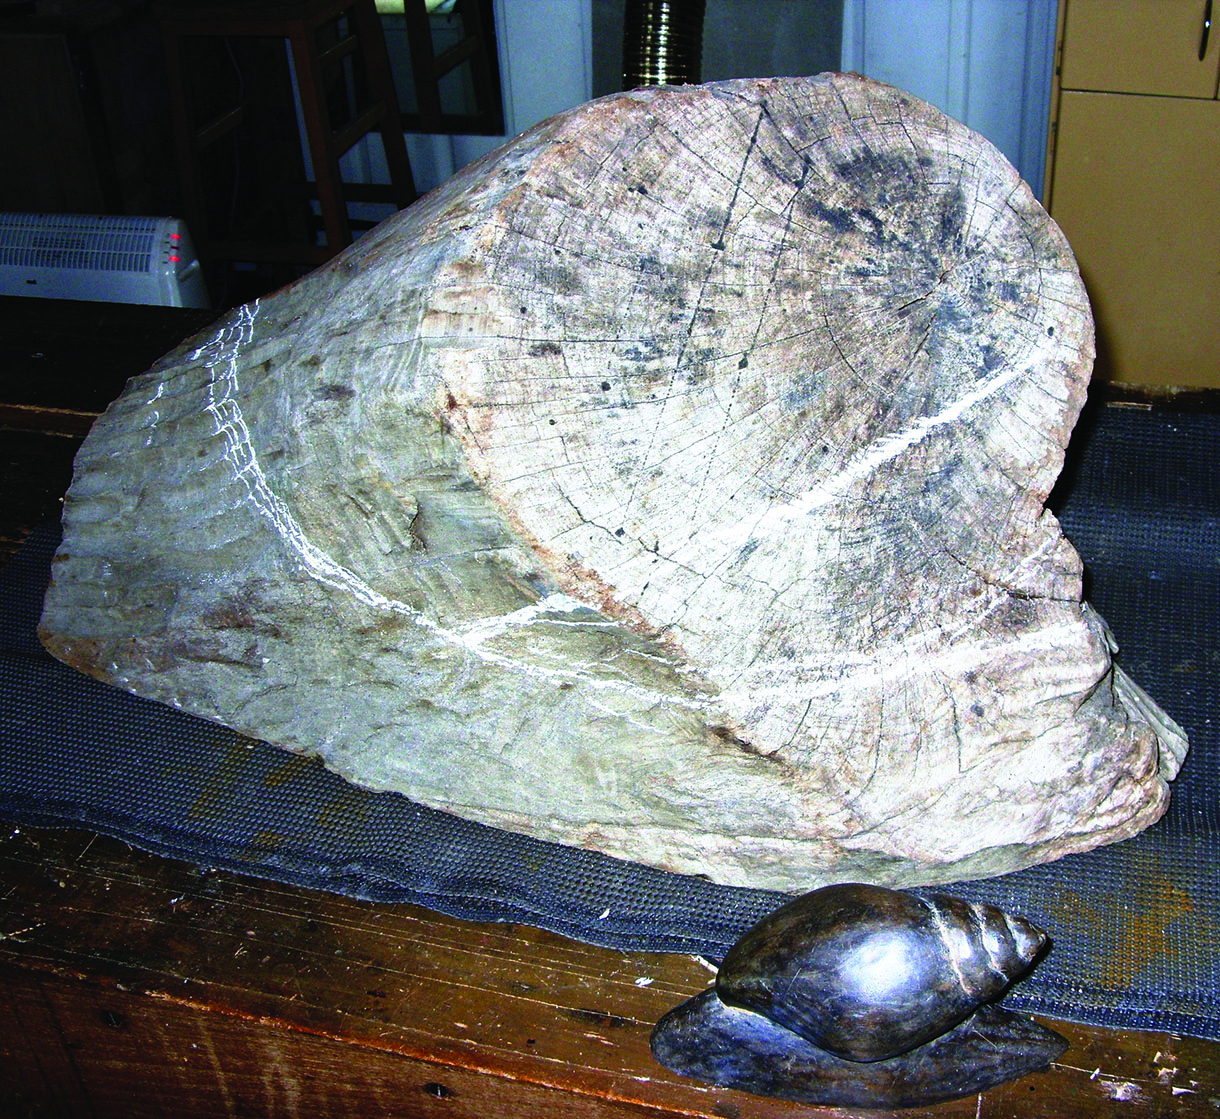
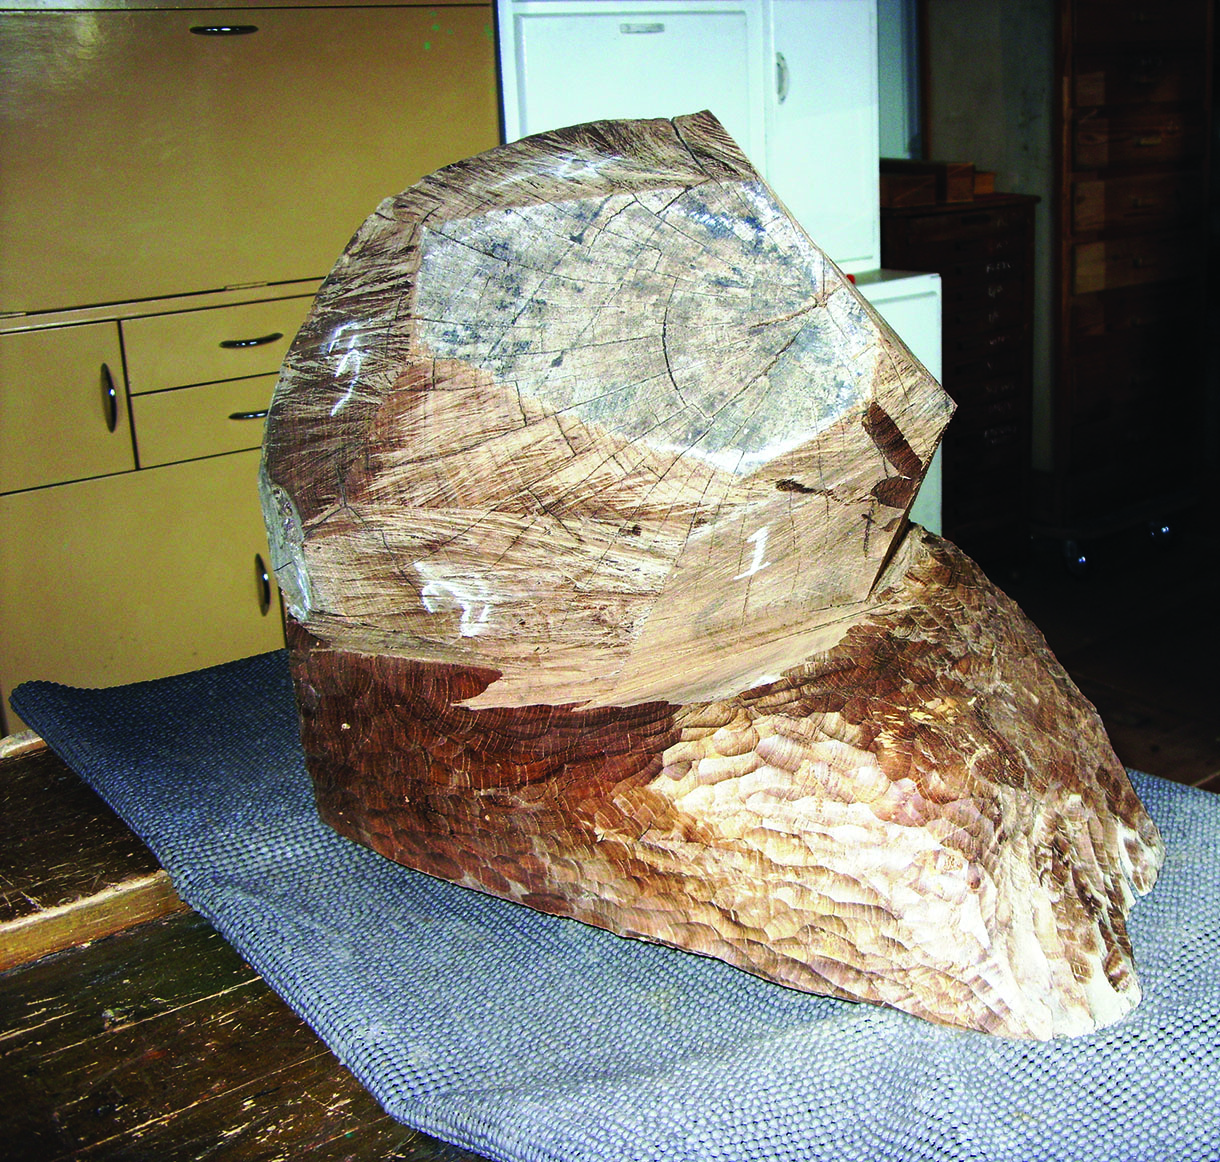
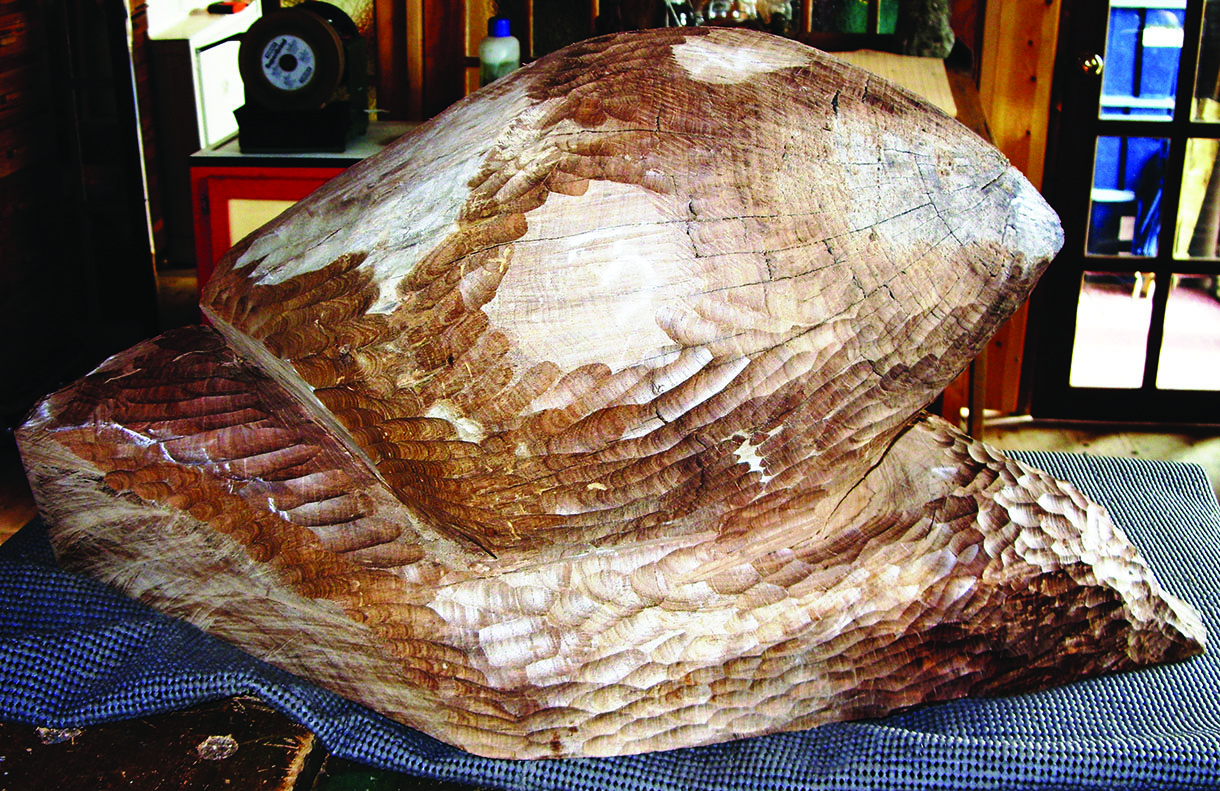
1. A short piece of branch would be suitable for this carving, of any size or species. I used a large crotch of walnut that had been blown down several years ago, the base or foot of the snail being about 600mm and its finished height about 450mm. Remove the bark using a wide No.7 gouge and flatten the underneath of the foot so it will stand steadily. Now draw a chalk line marking the base of the shell on its foot
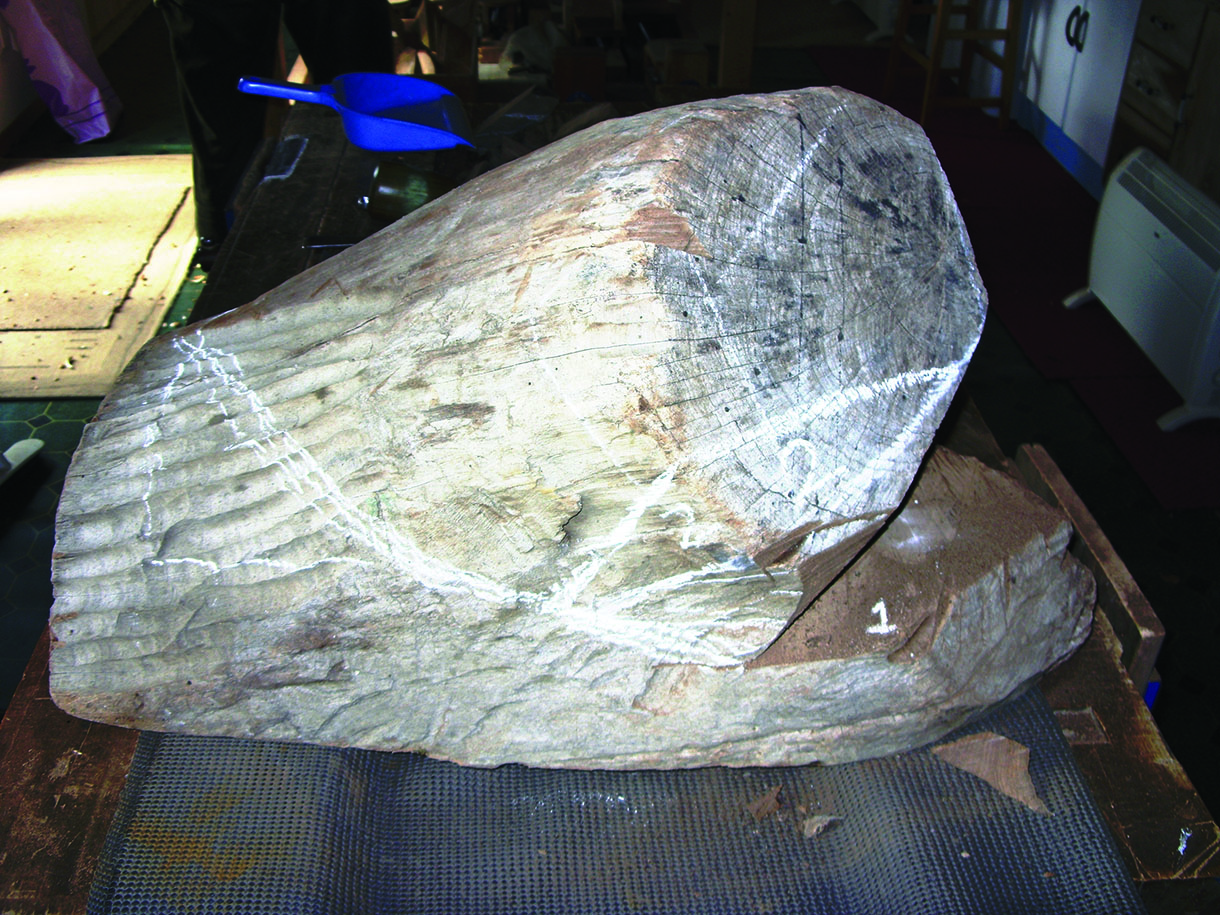
2. Use a handsaw to remove a wedge, saw cut 1, below its apex and above the foot. Then, angled across its corner and above the foot, remove another wedge, saw cut 2, at the edge of the previous saw cut
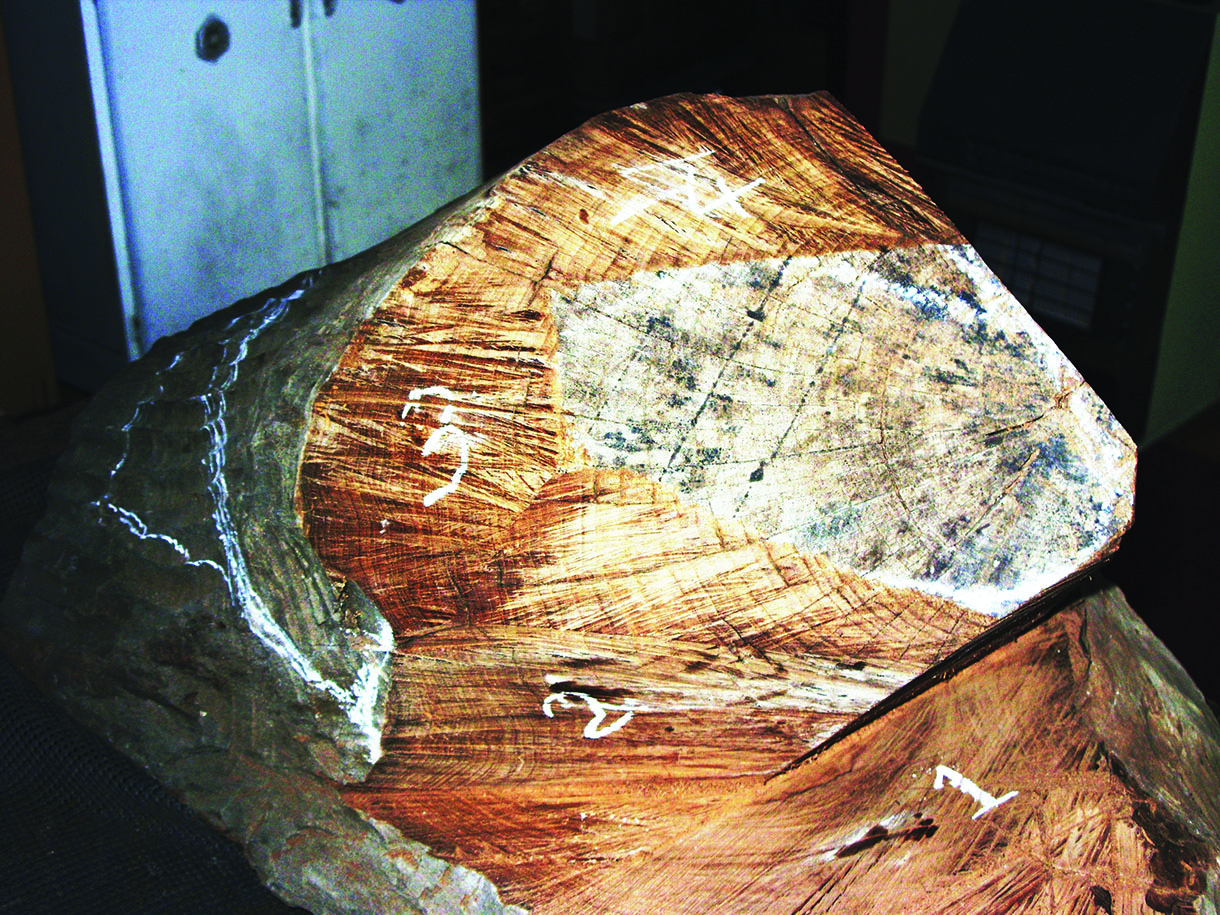
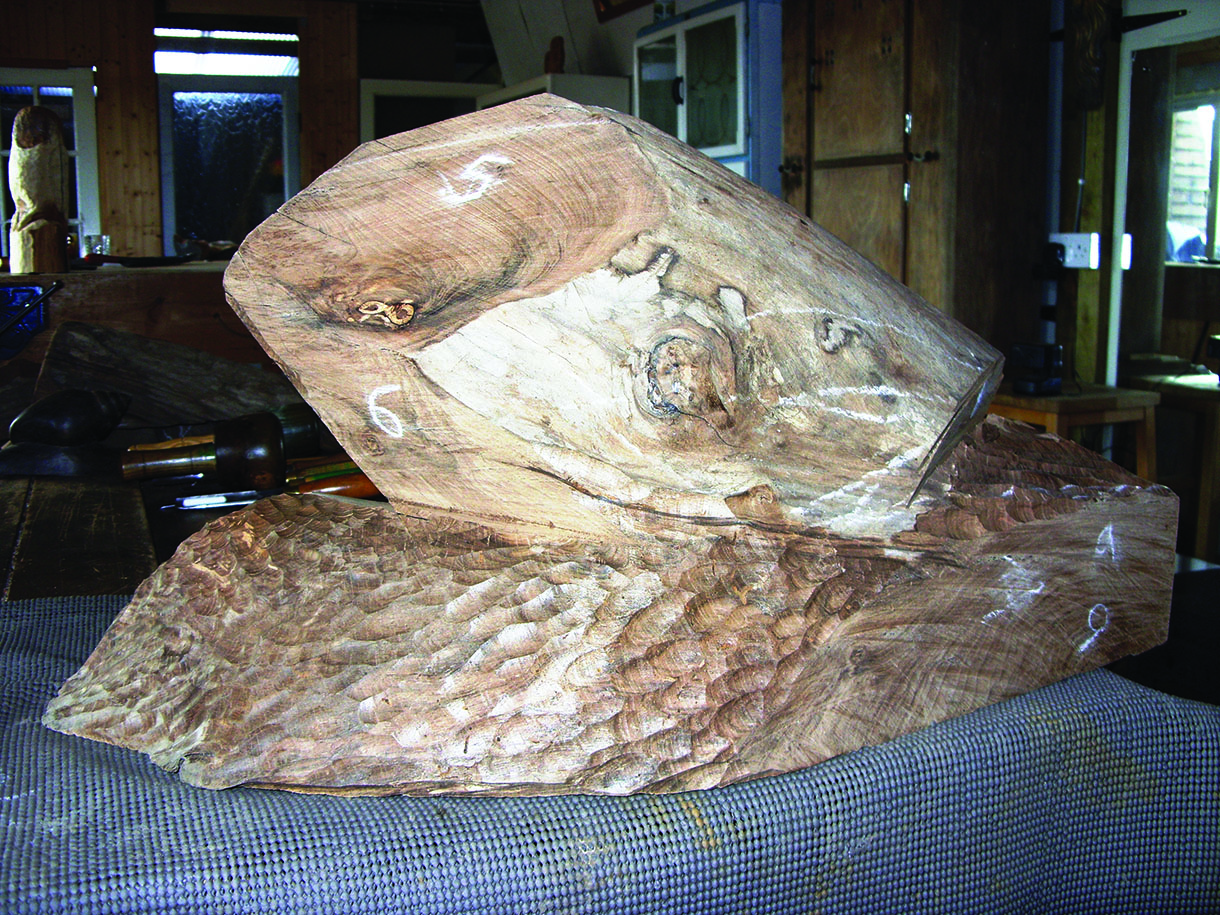
3. Now make saw cuts 3 and 4, which are angled along the upper surface of the shell towards its apex. Saw cuts 5 and 6 need to be made around the apex, with saw cut 6 finishing on the foot beneath the apex and across the edge of the initial saw cut 1
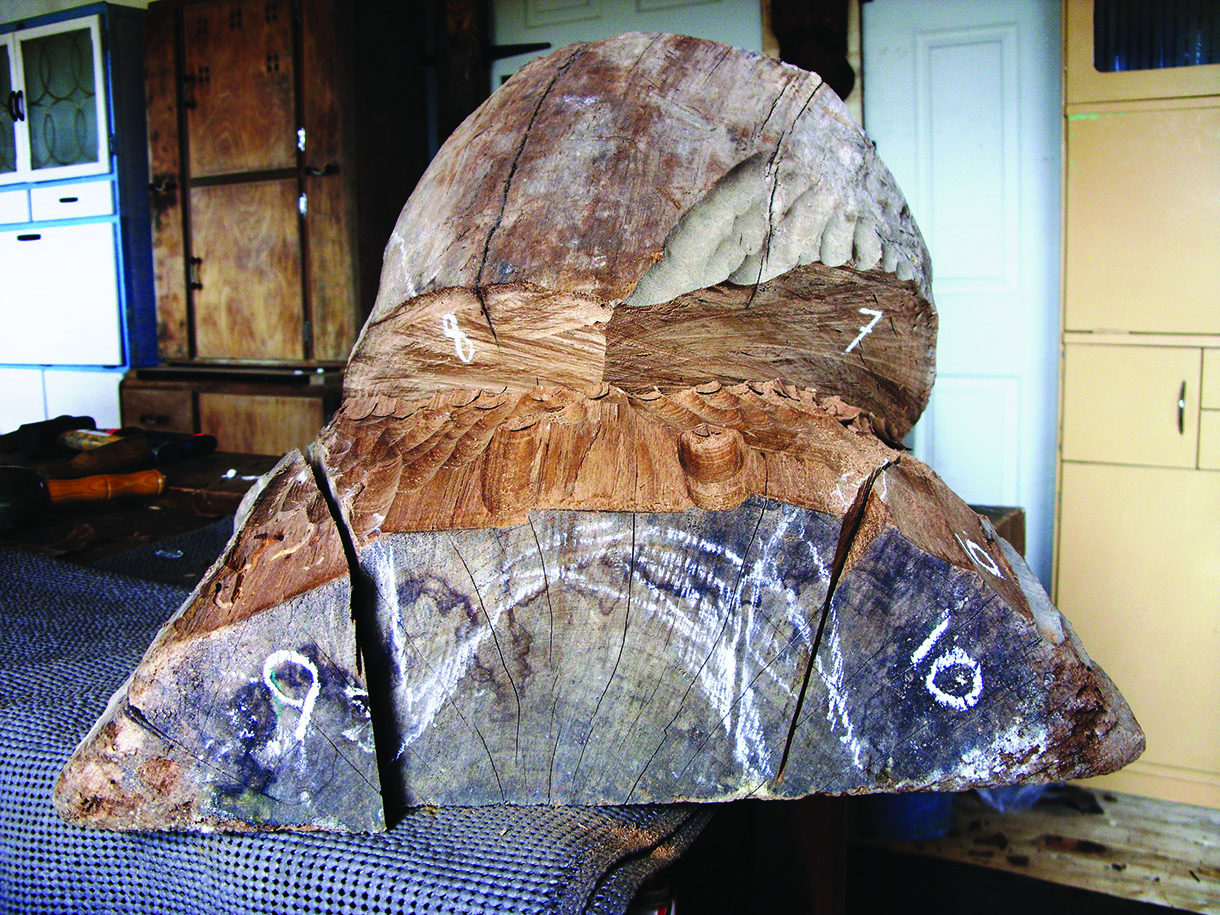
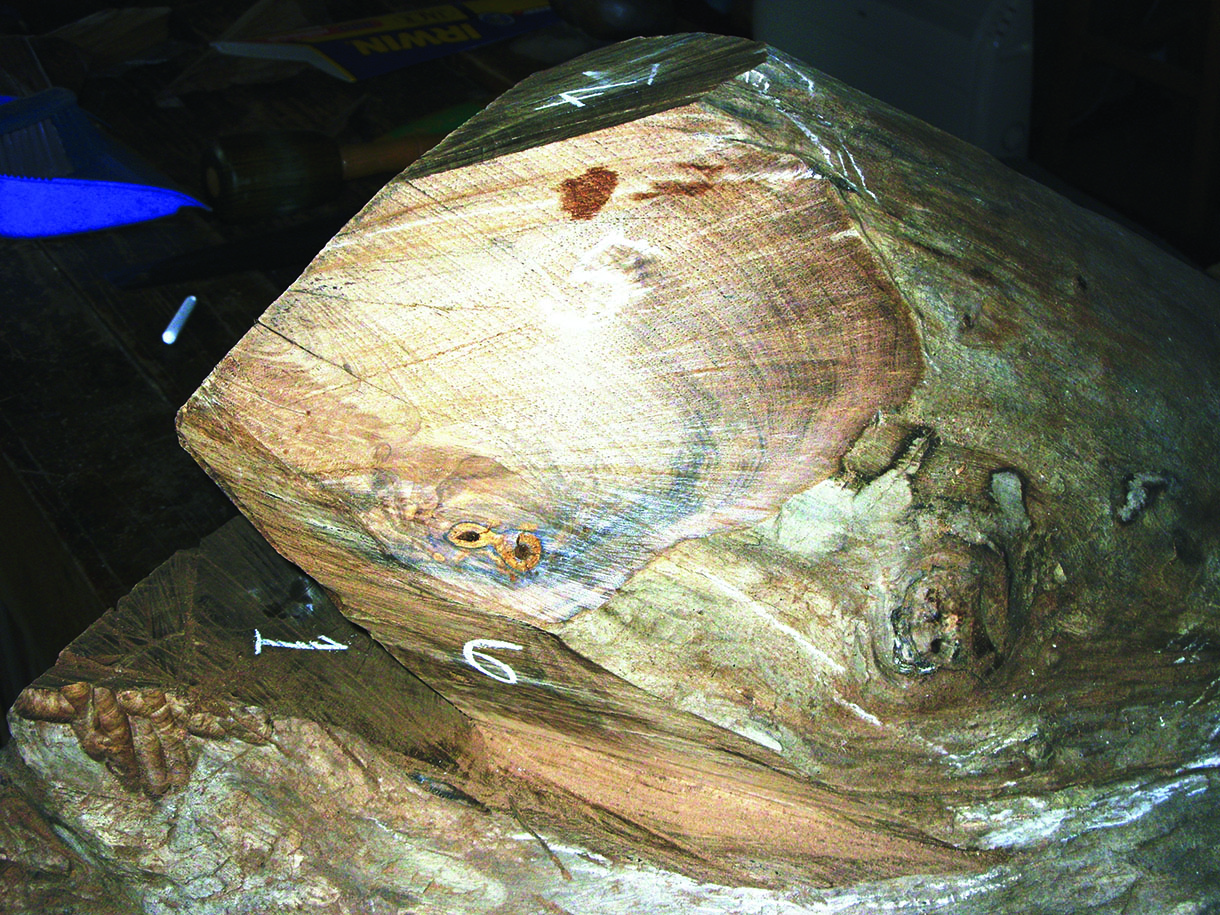
4. At the aperture end opposite to the apex, make angled saw cuts 7 and 8, cutting downwards to the top of the foot, then remove the outer corners of the foot with saw cuts 9 and 10
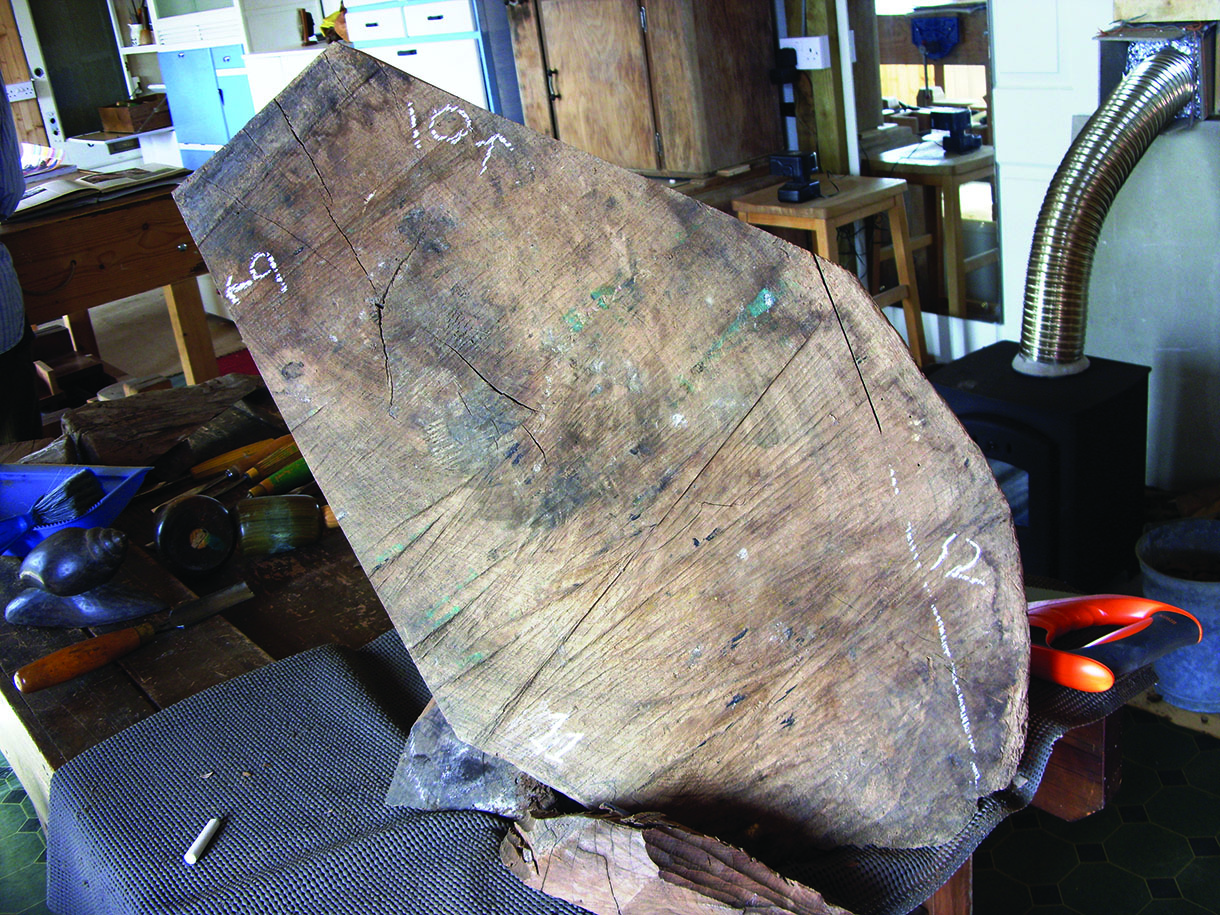
5. The outer corners of the other end of the foot, saw cuts 11 and 12 seen from beneath, now need to be removed
6. Starting at each corner, cut outwards using a No.7, 8, or 9, 13mm. The upper surface and sides of the foot need to be rounded until the flat sawn surfaces are removed
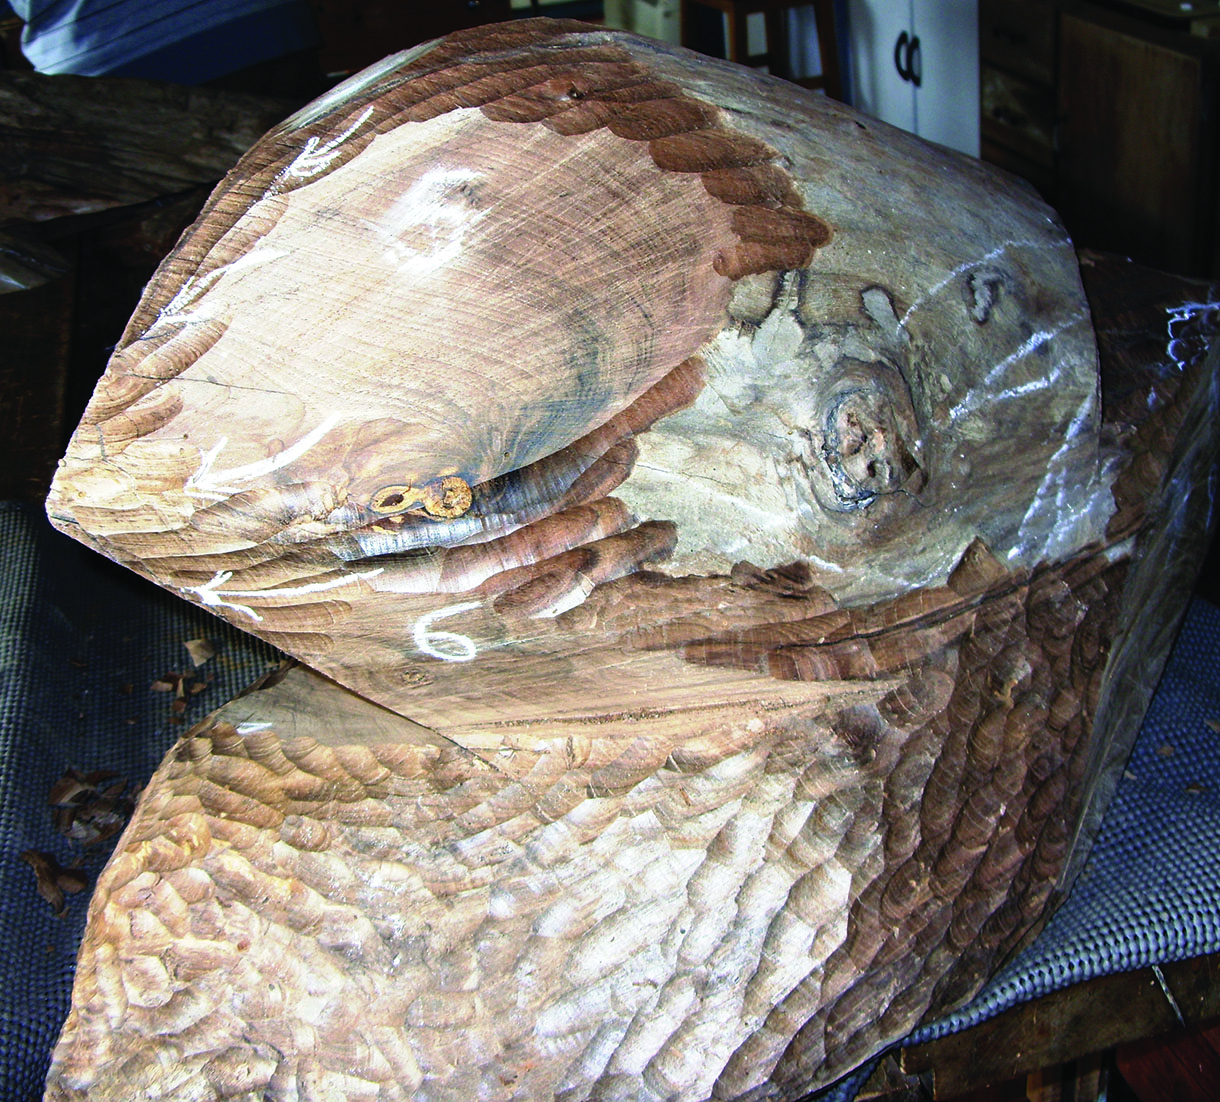
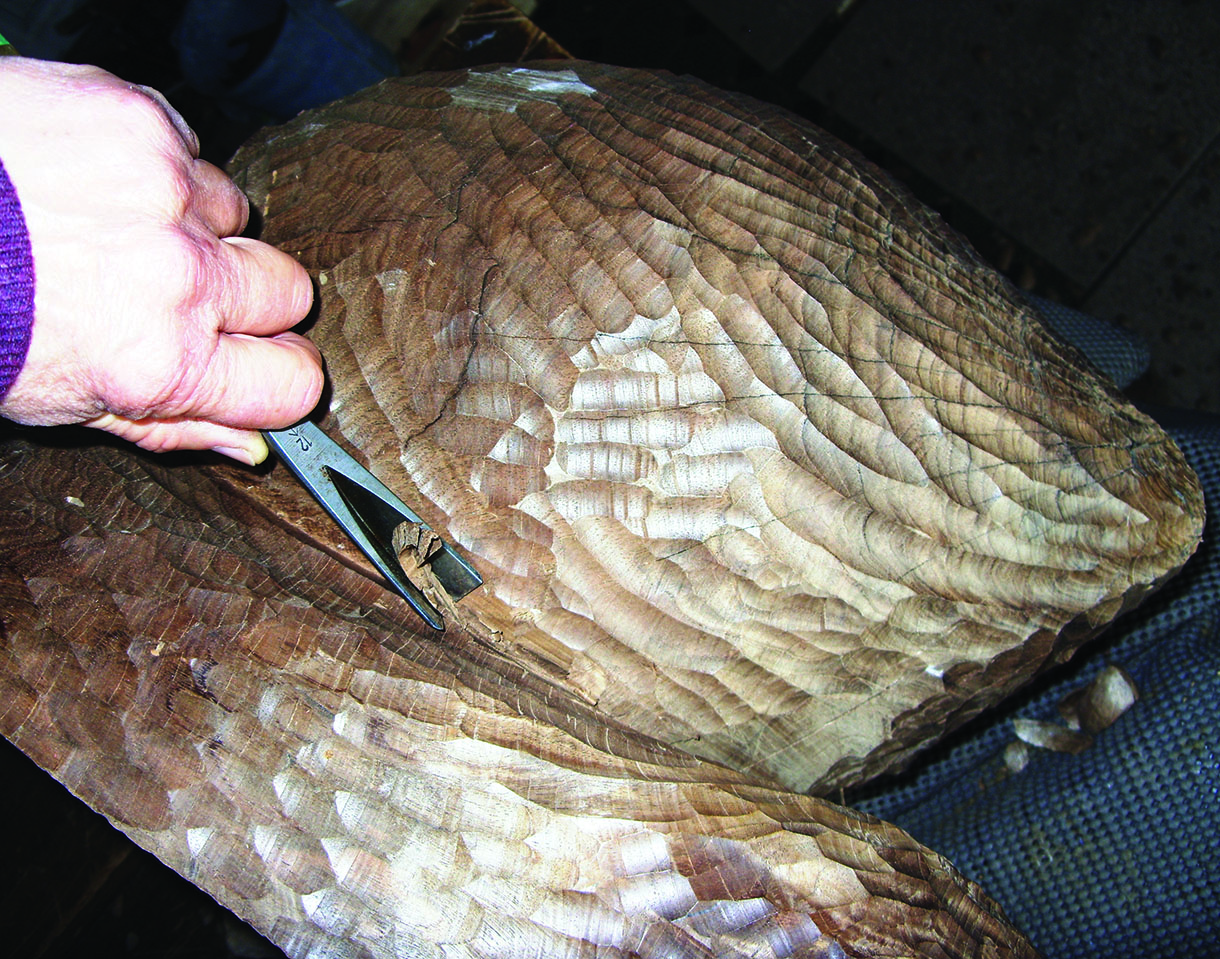
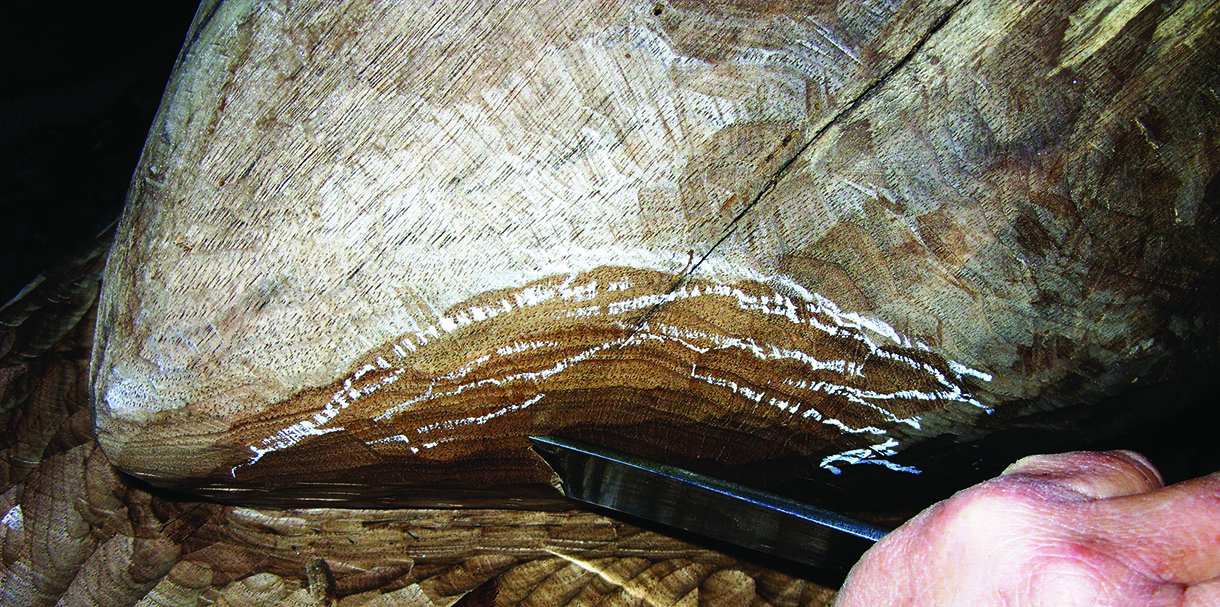
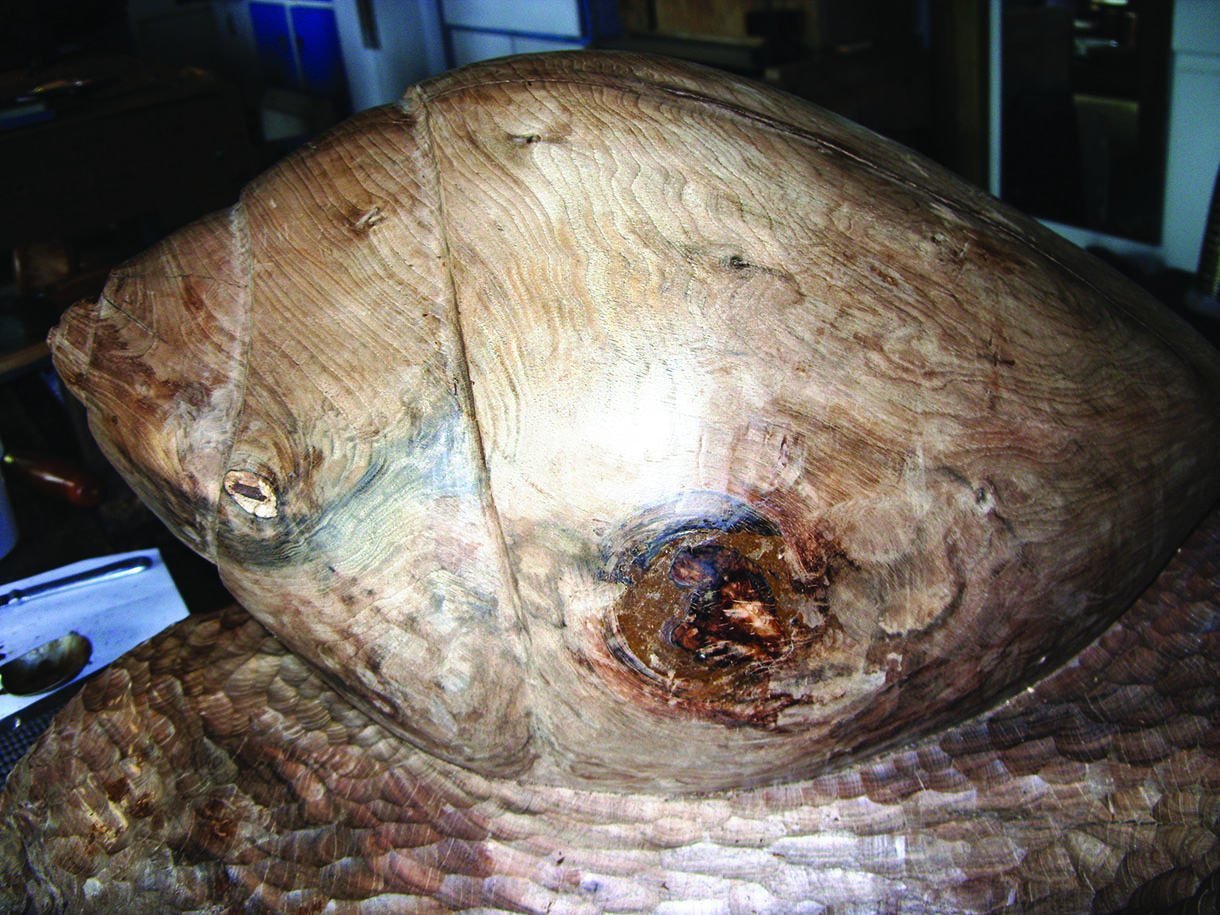
7. Starting at the apex, use a No.7, 8, or 9 gouge to make curving cuts towards the point-end of the shell. The edges of the sawn surfaces should merge into each other until no flat surfaces remain. Now, remove saw cuts along the base of the shell between the top of the foot by cutting along them with a deep gouge, cutting outwards, beginning these cuts at the outer ends. Notice the large loose knot which has appeared. This will be repaired later on
8. The surface of the shell and foot now need to be worked over until the surface of the shell is rounded and remaining saw cut kerfs have been removed
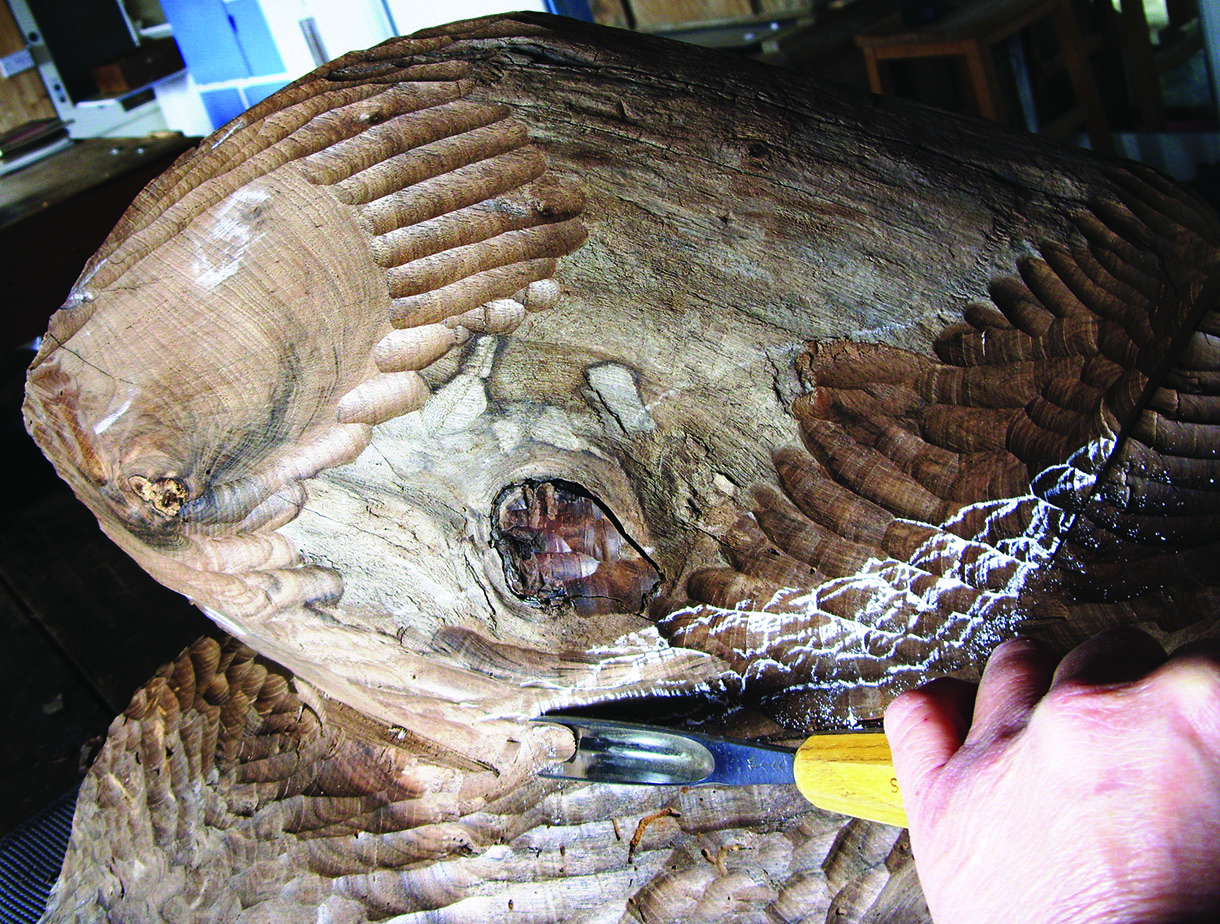
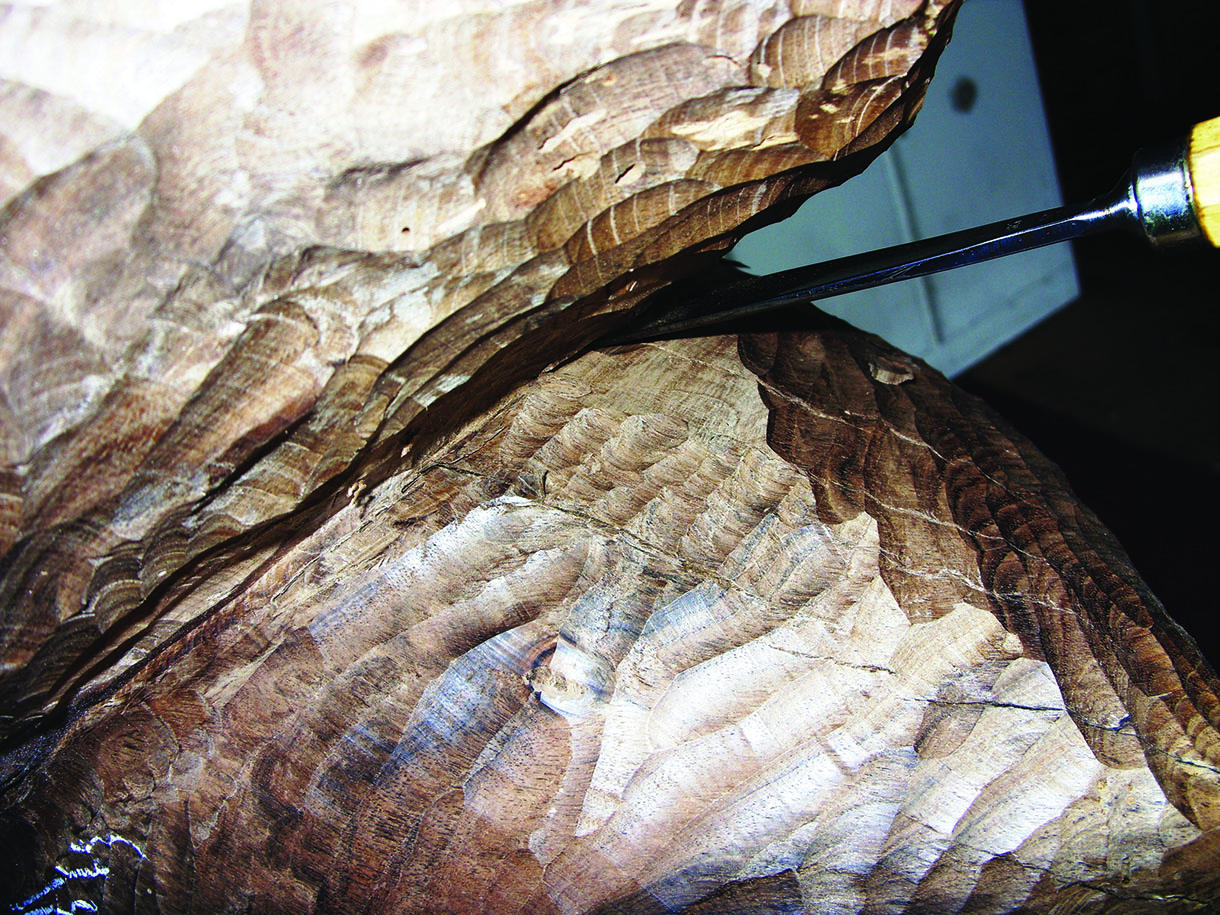
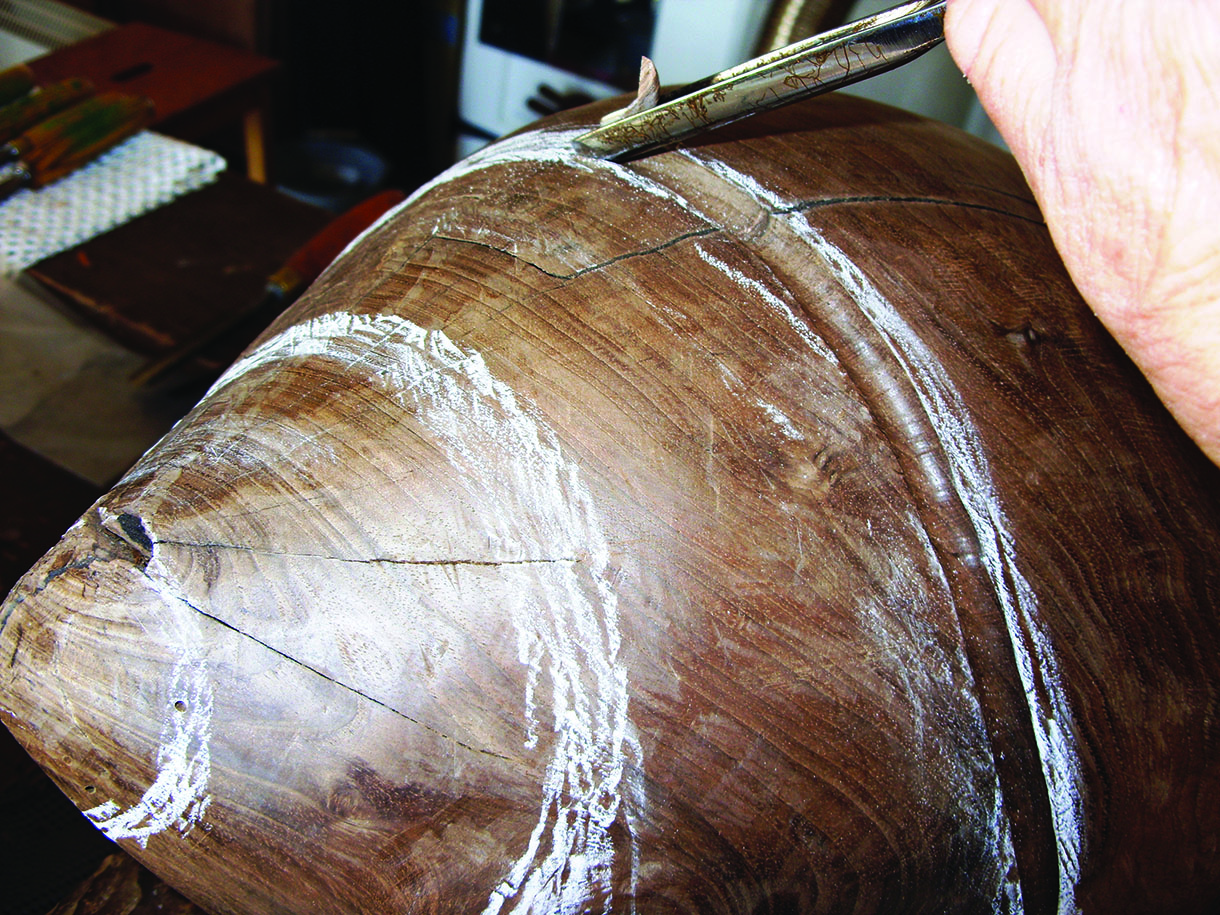
9. Next, use a V-tool to cleanly cut the line of the edge of the shell and its foot, beginning the V-cut from the middle and cutting forwards towards the outer ends from each side. The shell needs to be undercut at the apex end. You can do this by tilting and cutting downwards at an angle with a wide no.3 gouge against the shell along the top of the foot
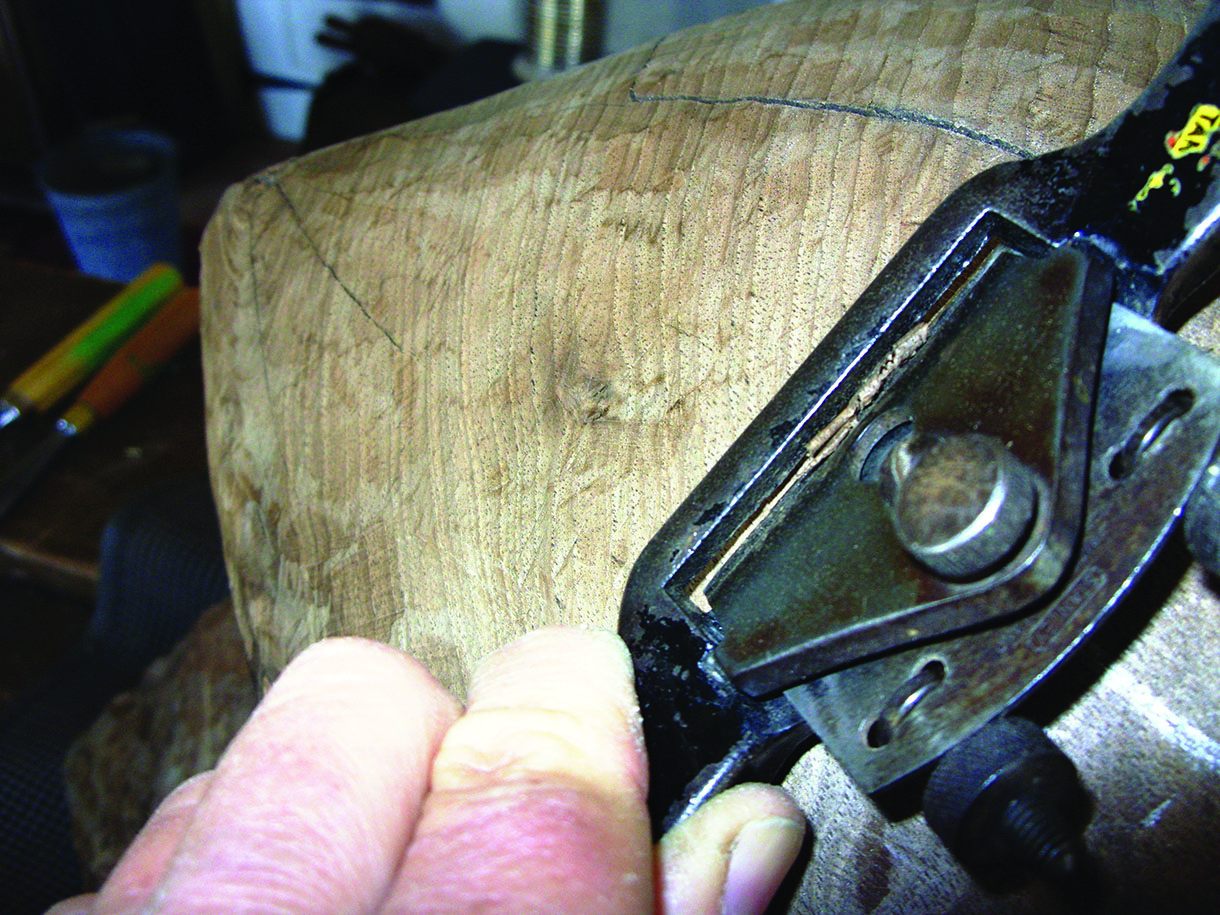
10. Smooth off the surface of the shell using a wide No.3 gouge or a spokeshave, a Microplane or similar, in readiness to cut the spiral channel up to its apex. When the shell is completely smooth, adjust the shape of the edge opposite to the apex using a no.5 gouge
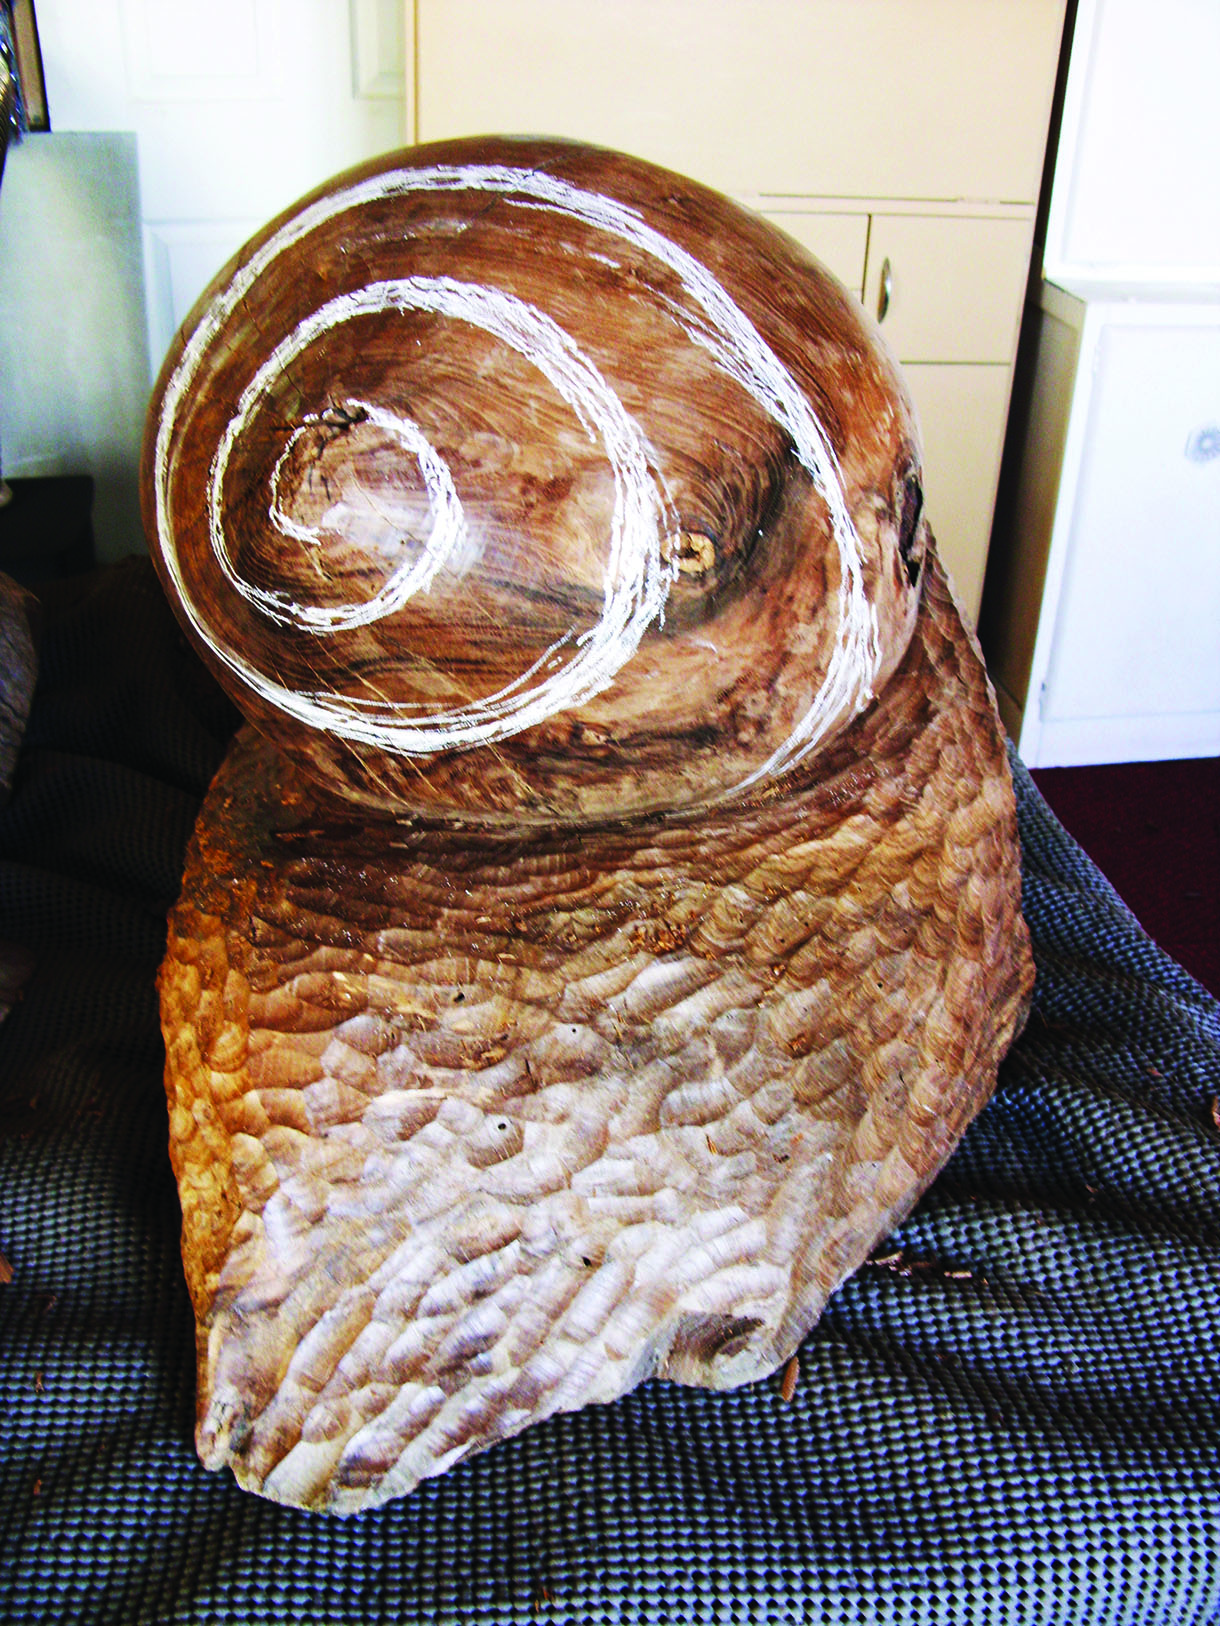
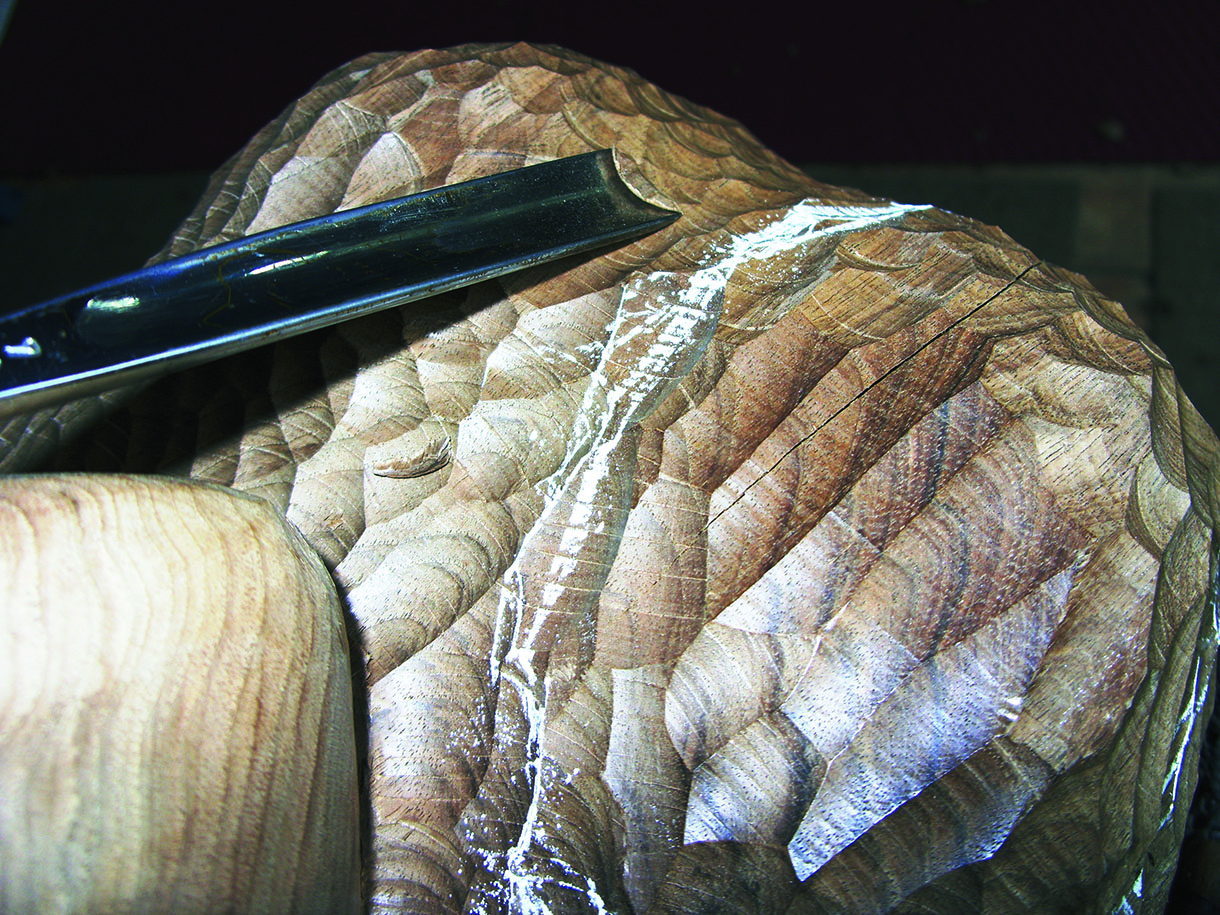
11. Using chalk, draw the spiral channel from foot to apex on the smooth surface of the shell, widening it slightly at its start by the foot. Now use a deep gouge, such as a no.11, to cut the groove of the spiral channel
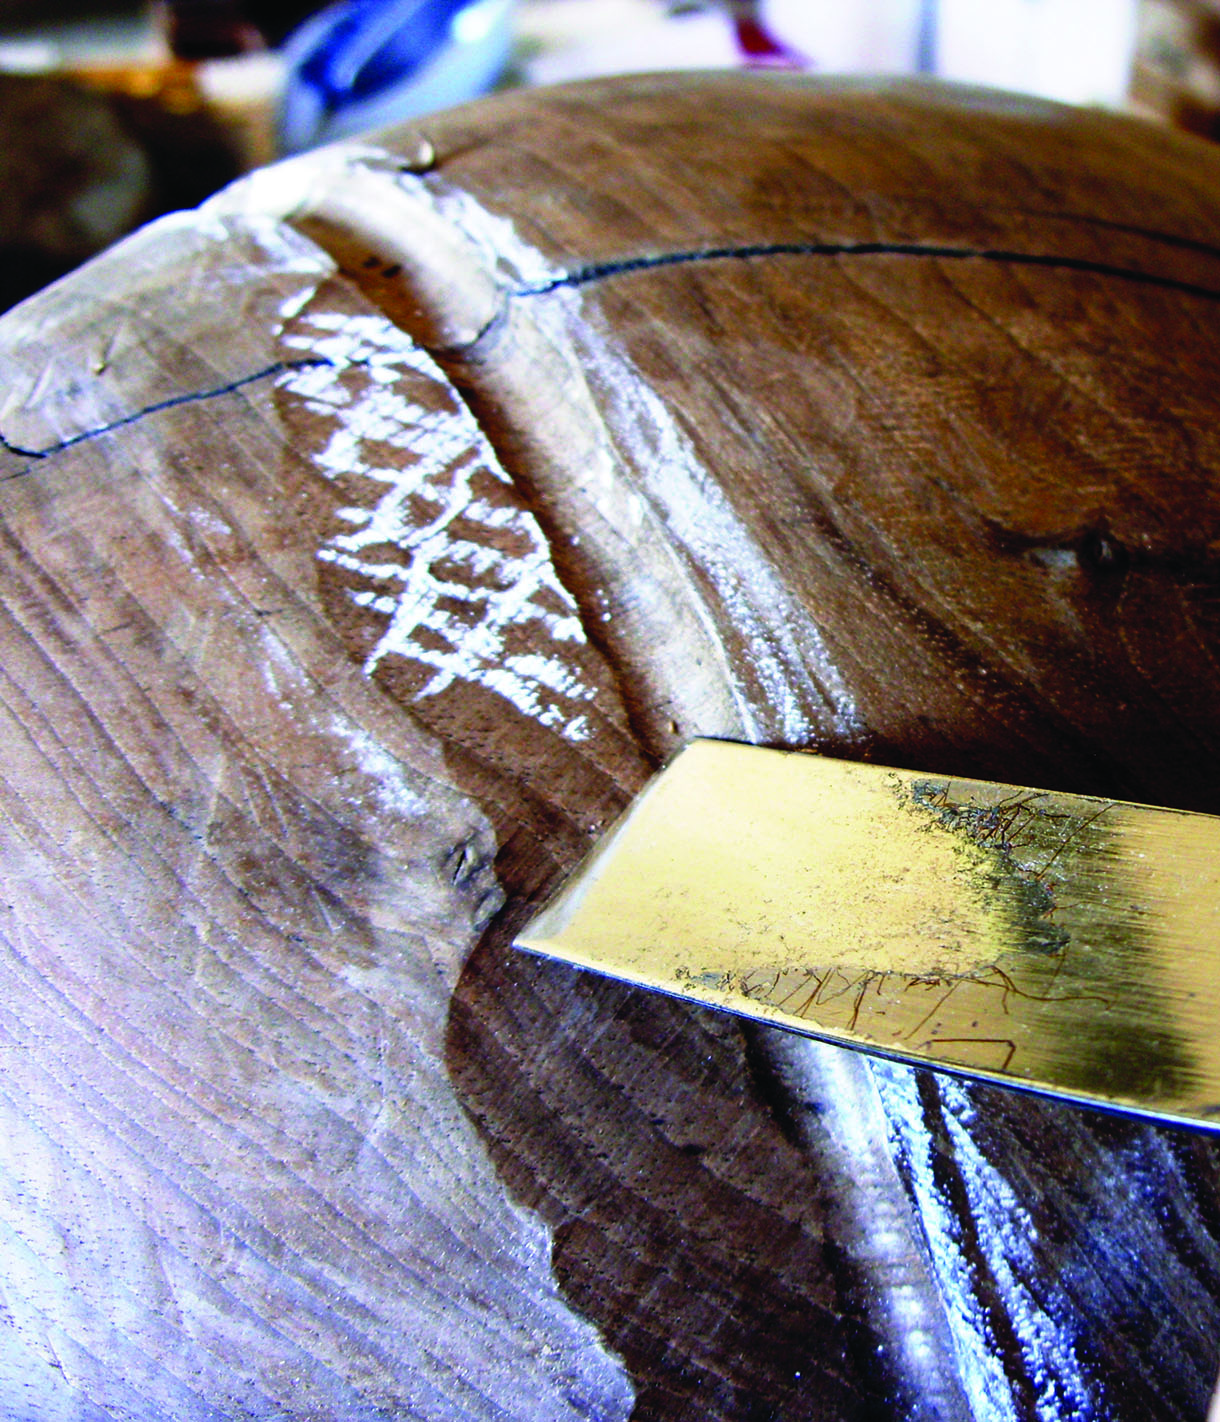
12. Remove the apex side of the groove with a no.3 gouge, blending its edge into the adjacent surface of the shell, then round over the opposite edge of the groove. Pare any deep cuts from the surface and use a cabinet scraper to finish smoothing the surface
13. If need be, adjust the shape of the foot, then texture its surface and sides with a No.5, 6, or 7 gouge to contrast with the smooth surface of the shell
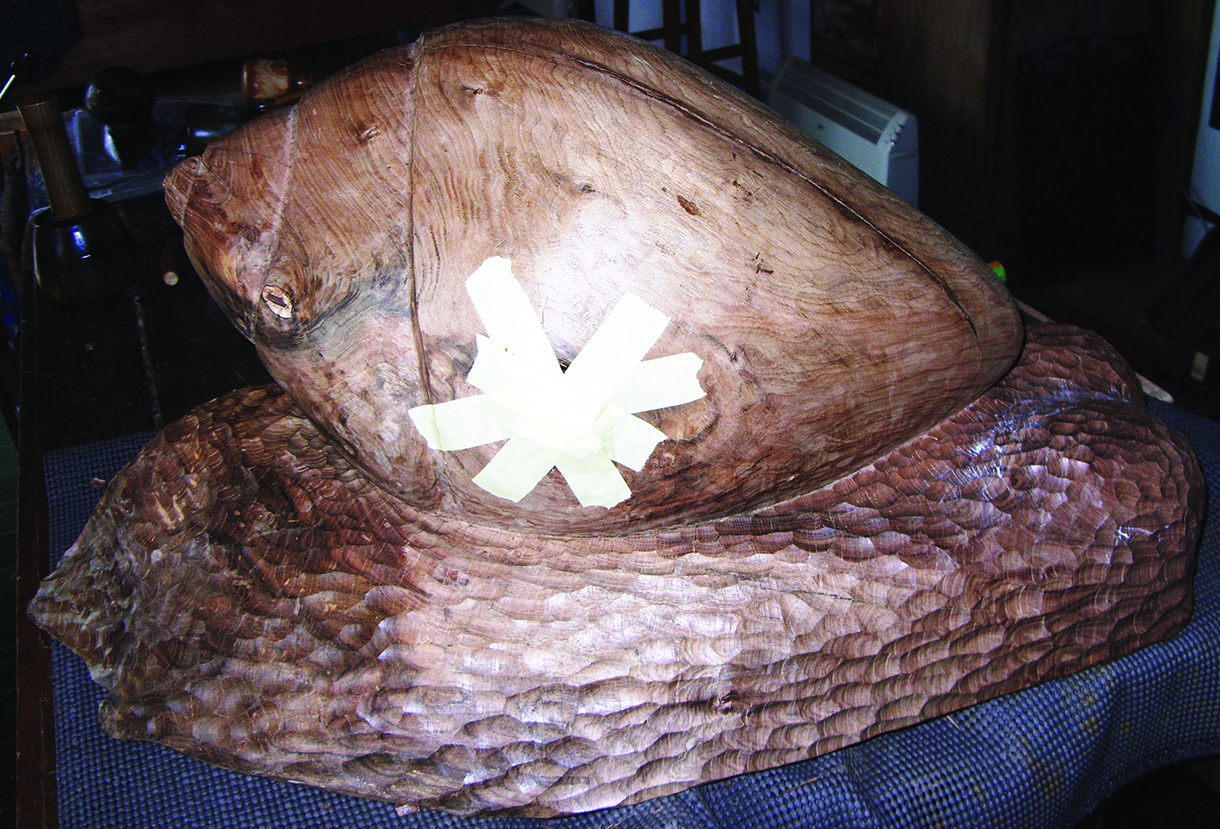
14. Now to deal with the knot. Carefully remove the knot along with any soft or loose fibres, then glue the knot back in place, holding overnight using masking tape. When the adhesive has set, remove the tape and press some molten walnut-coloured wax into the surface of the knot. Allow this to set and smooth it with a scraper to blend the area into the surrounding wood. You could use coloured epoxy adhesive instead of wax if you choose
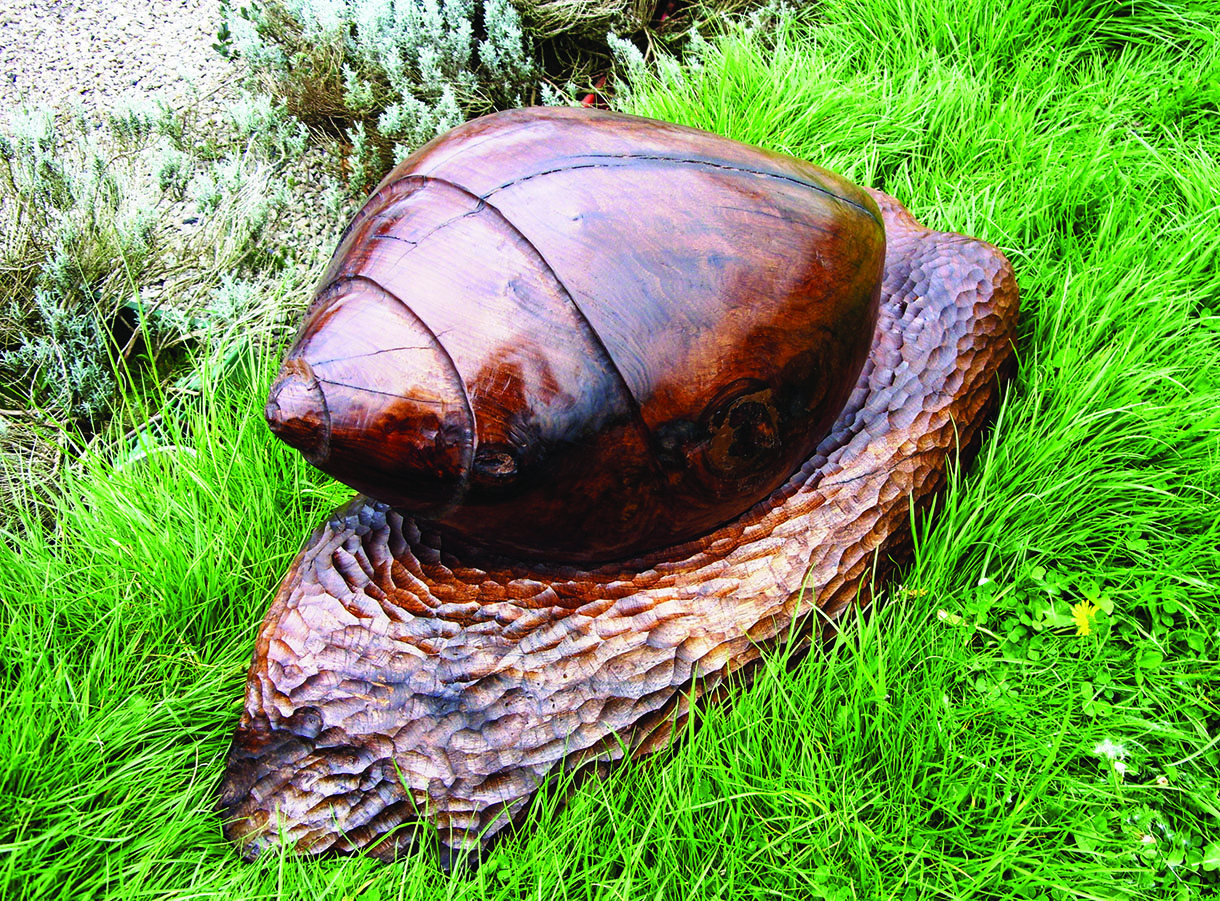
15. Check all surfaces are cleanly cut and remove any errant cuts or jagged edges. I finished my big snail with several coats of wax polish and buffed it with a lint-free duster and soft brush to give a lovely sheen. If your snail is to be outside, then use an exterior finish, preservative or oil


