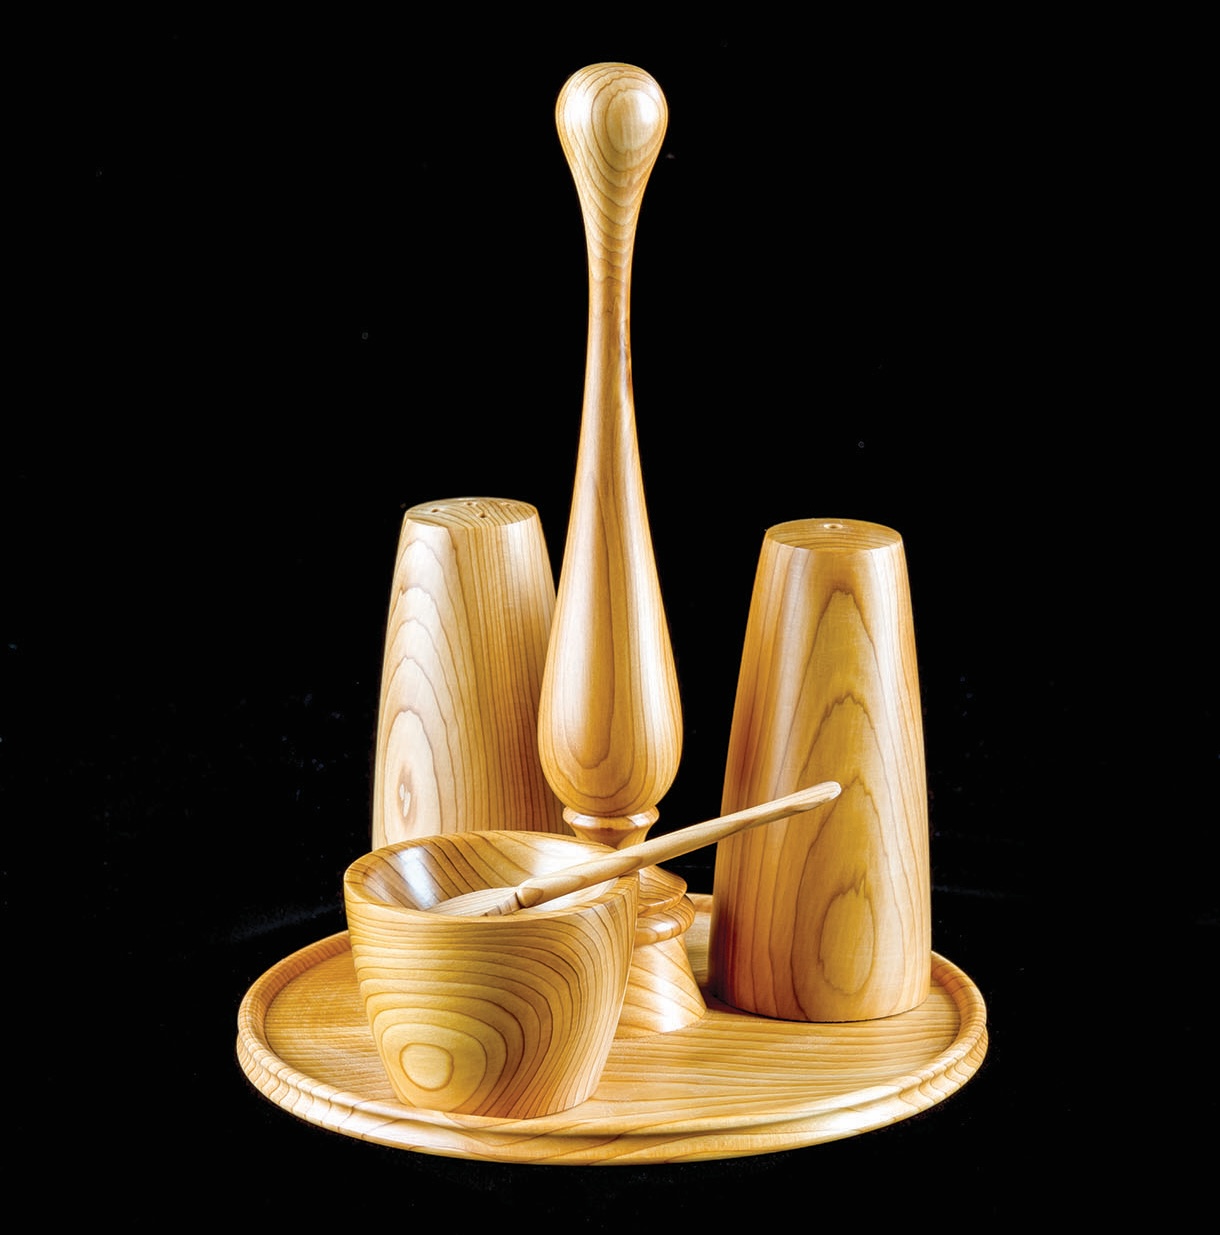
Condiment Set:
Colwin Way turns a simple, but beautiful condiment set.
Colwin Way turns a simple, but beautiful condiment set
This project is going to be a real mixture of turning techniques and tips. I will be showing you how to turn a condiment set, where we can explore different holding techniques and design opportunities. The set itself, when broken down, is a straightforward enough project and easily achievable with moderate turning skills and kit, however you can expand on this idea if you want and make it suit your needs and design.
I’m using yew (Taxus baccata) for this set (one of my favourite timbers), it has a fantastic orange colour with a really dense close grain. I’ve purposely cut away any sapwood to keep the grain consistent because the white sap for this project would be a distraction. It’s also important to note that yew as a timber is poisonous, so just oiling this project isn’t good enough, and my intention for the set is to plastic coat or lacquer them before any food or drink comes into contact with them. As usual though, there are lots of other timbers that would be equally as nice, just make sure you research them for toxins and treat them accordingly by applying an adequate sealer, finish or by adding the addition of glass or plastic liners within your creations.
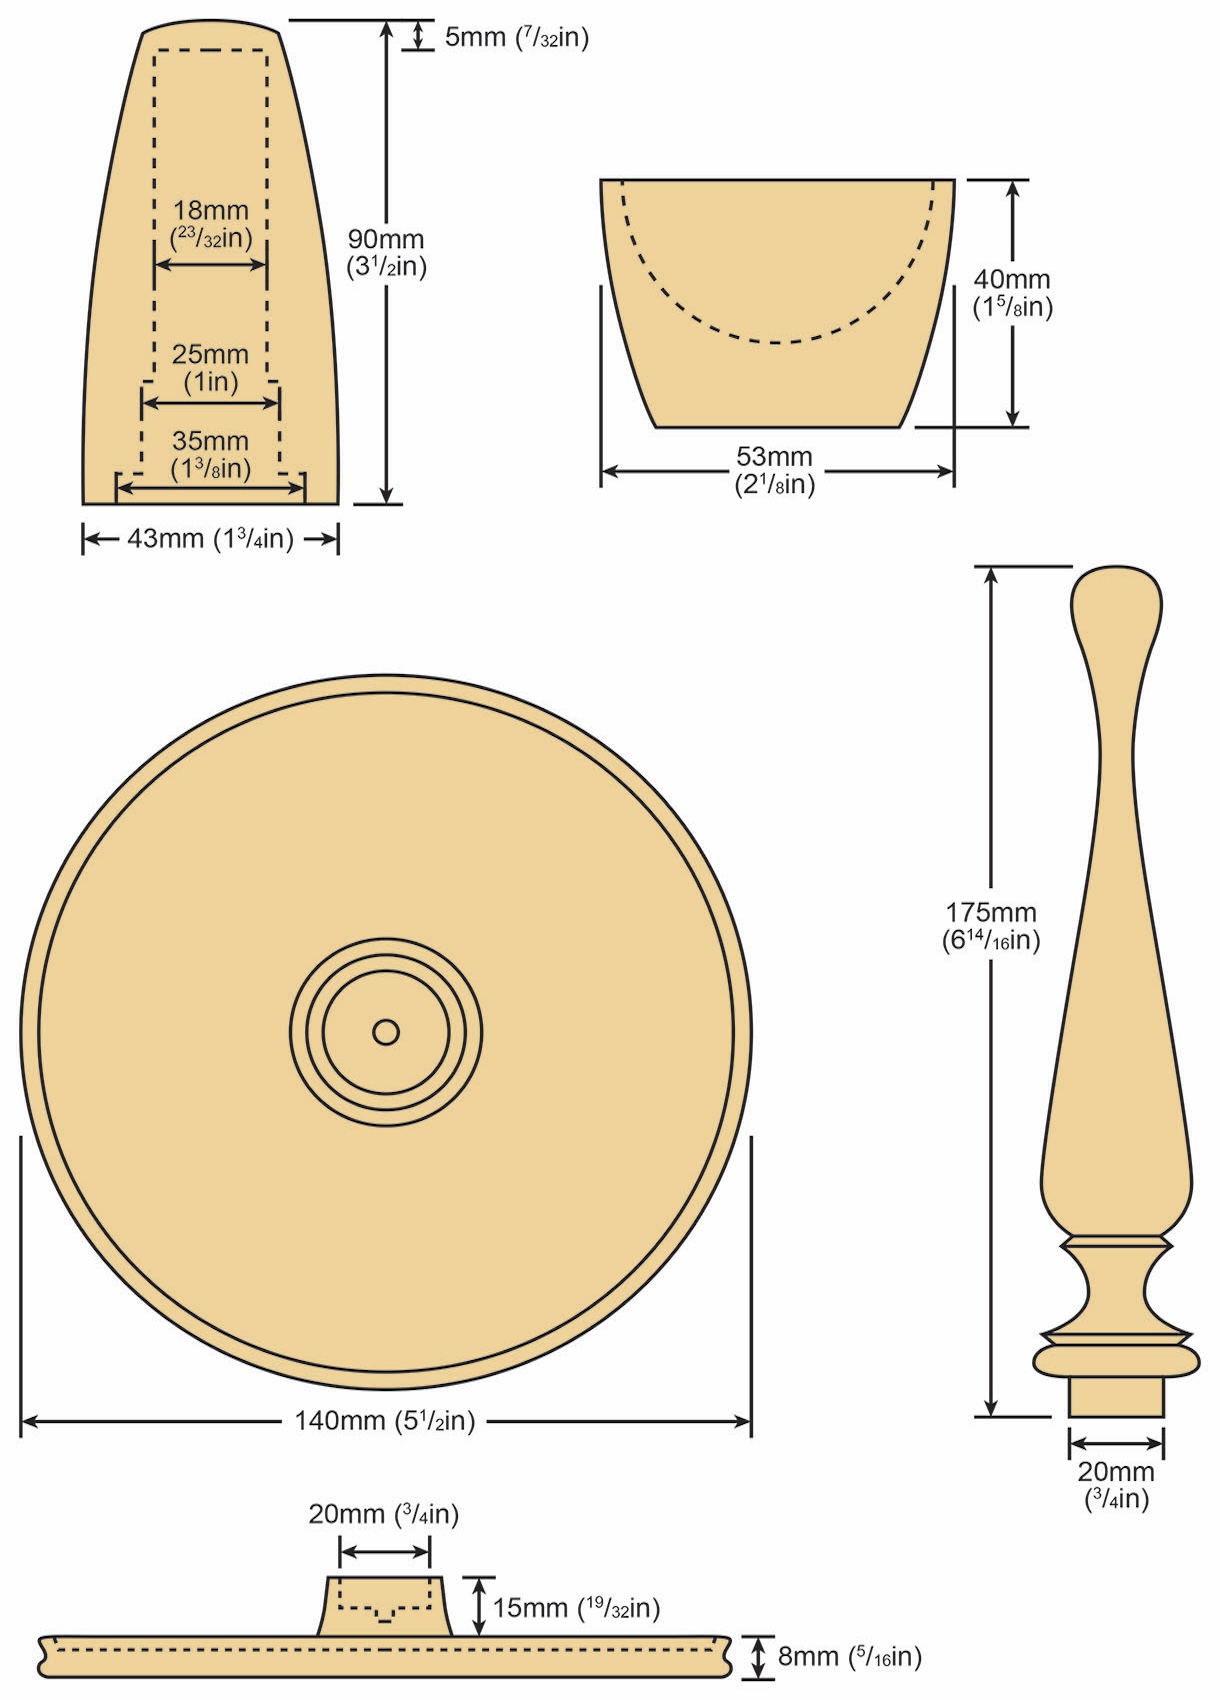
Plan your design and don’t rush; maybe do one item when you can and just enjoy what you’re doing. All the sizes are on the drawings, but as always they are guides for you to use and adapt as you wish.
Plans and equipment
Equipment and materials
Tools
• 6mm bowl gouge
• 10mm skew chisel
• Screw chuck
• 6mm, 18mm, 25mm and 35mm drill bit
• Callipers
• Drill chuck
• Sanding disc
• Cork or plastic bung
• Wood plate jaws
Stand base
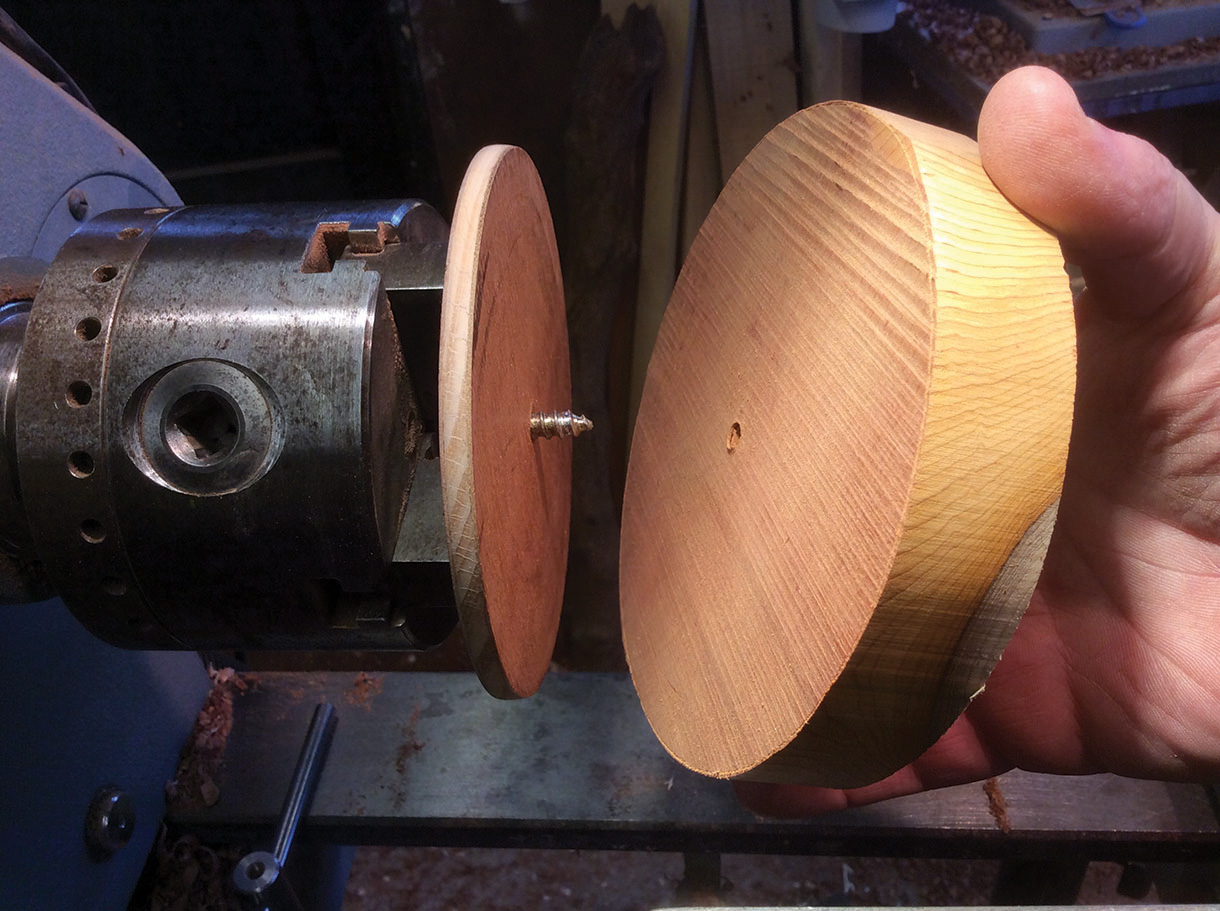
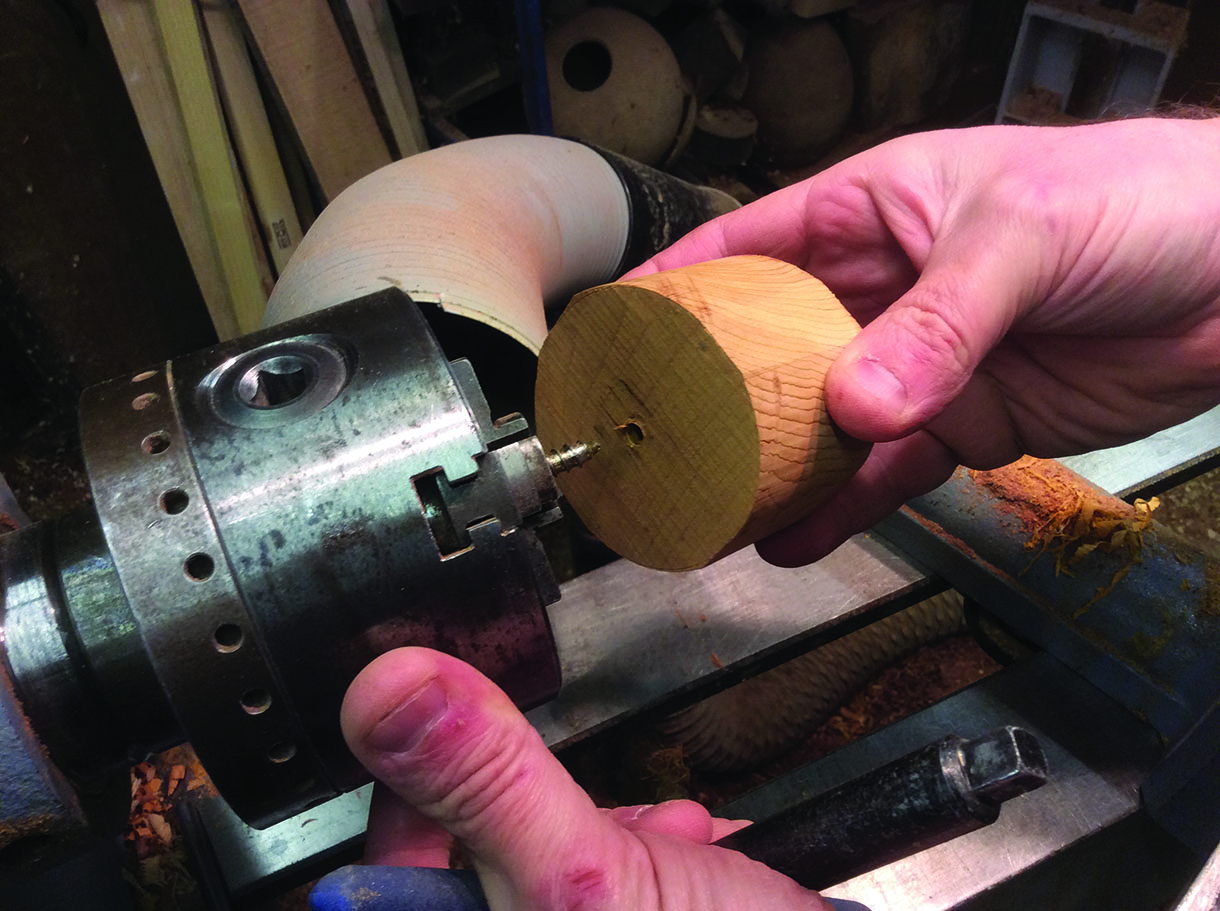
1. First make the condiment stand. It needs to be big enough to take three items, so cut a piece of timber to 150 x 25mm. Because the stand is so thin I’m not going to use a faceplate with big screws coming through, but instead a screw chuck arrangement, and instead of a dedicated screw chuck use a four jaw self centering chuck with a good quality screw held in it. This means you can adjust the screw to the length you want and change the screw gauge for different size projects. Drill a central 6mm hole in the face of the blank to about half of its depth, then screw the blank onto the chuck ready for turning. You can alternate between internal or external jaws to give you a different size of screw chuck
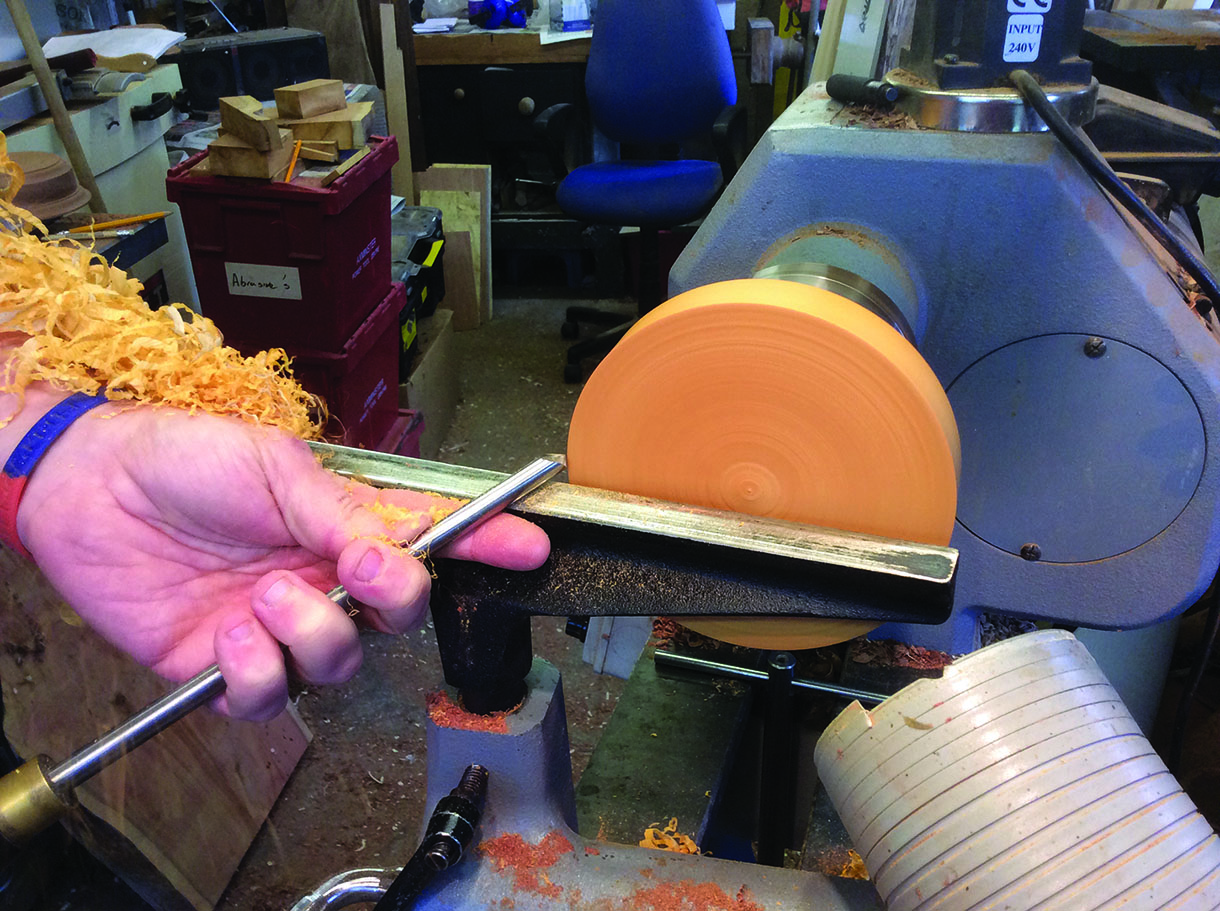
2. Now the blank is secure, start to true it up. Cut the outside edge first by dropping the handle of a 6mm bowl gouge down low and run the bottom cutting edge along the timber at 45°. This should create a nice ribbon shaving and avoid tears to the end grain. When the edge is true, turn your attention to the underside. Use the same 6mm bowl gouge to draw across the face, from the centre to the outside edge. Face the flute towards 10 o’clock and move slowly. When you’re happy with the profile, tidy the finish either with a push cut from the same bowl gouge allowing the bevel to rub, or a gentle scrape with a skew chisel on its side before sanding
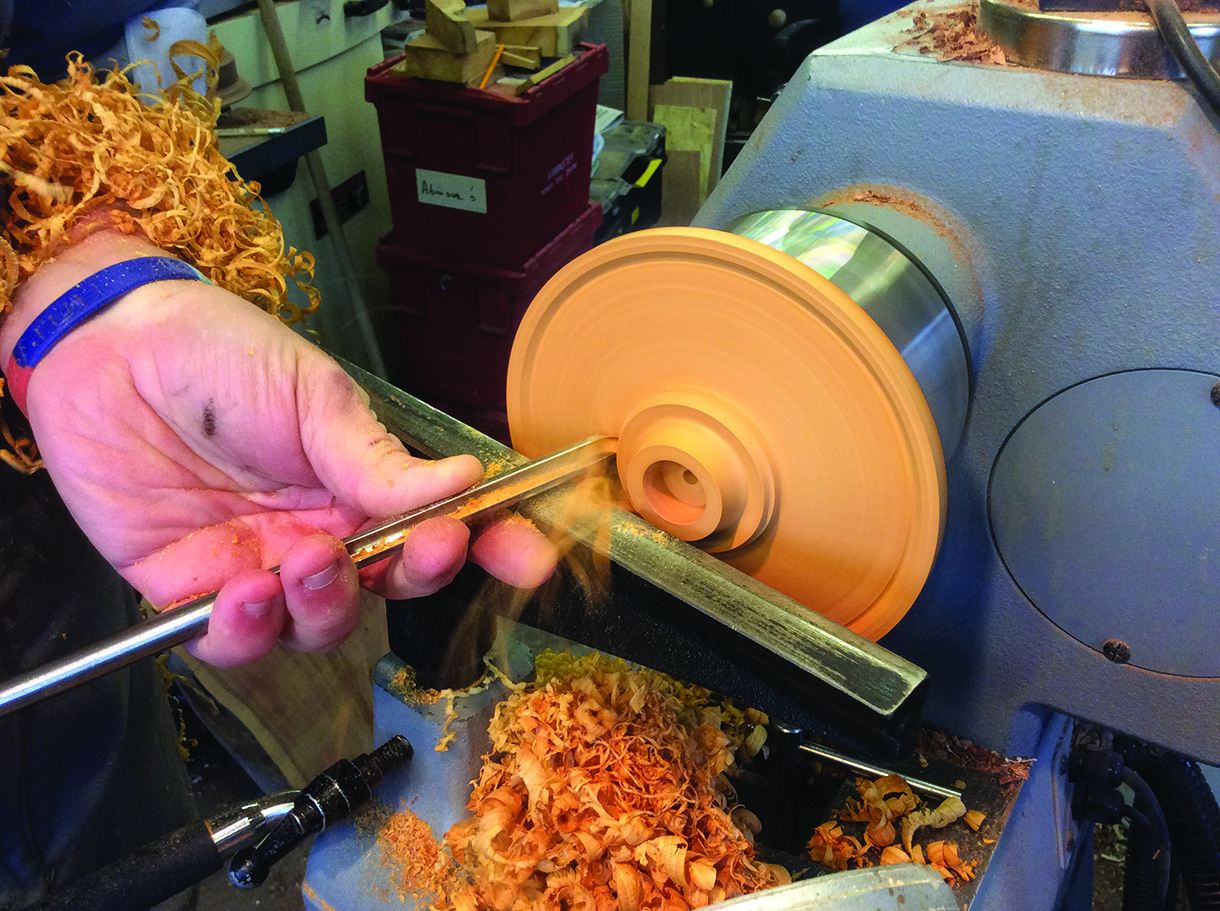
3. Create a recess on the bottom of the base as a hold point for the chuck. Use a four jaw chuck with a set of dovetail jaws. These jaws have an optimum external size of 69mm; in this case optimal means where the jaws are at their perfect circle. Cut this recess to a depth of 3mm. Because yew has a high level of tannic acid, sandwich a piece of tissue paper between the wood and the metal jaws, to avoid any reaction and discolouring
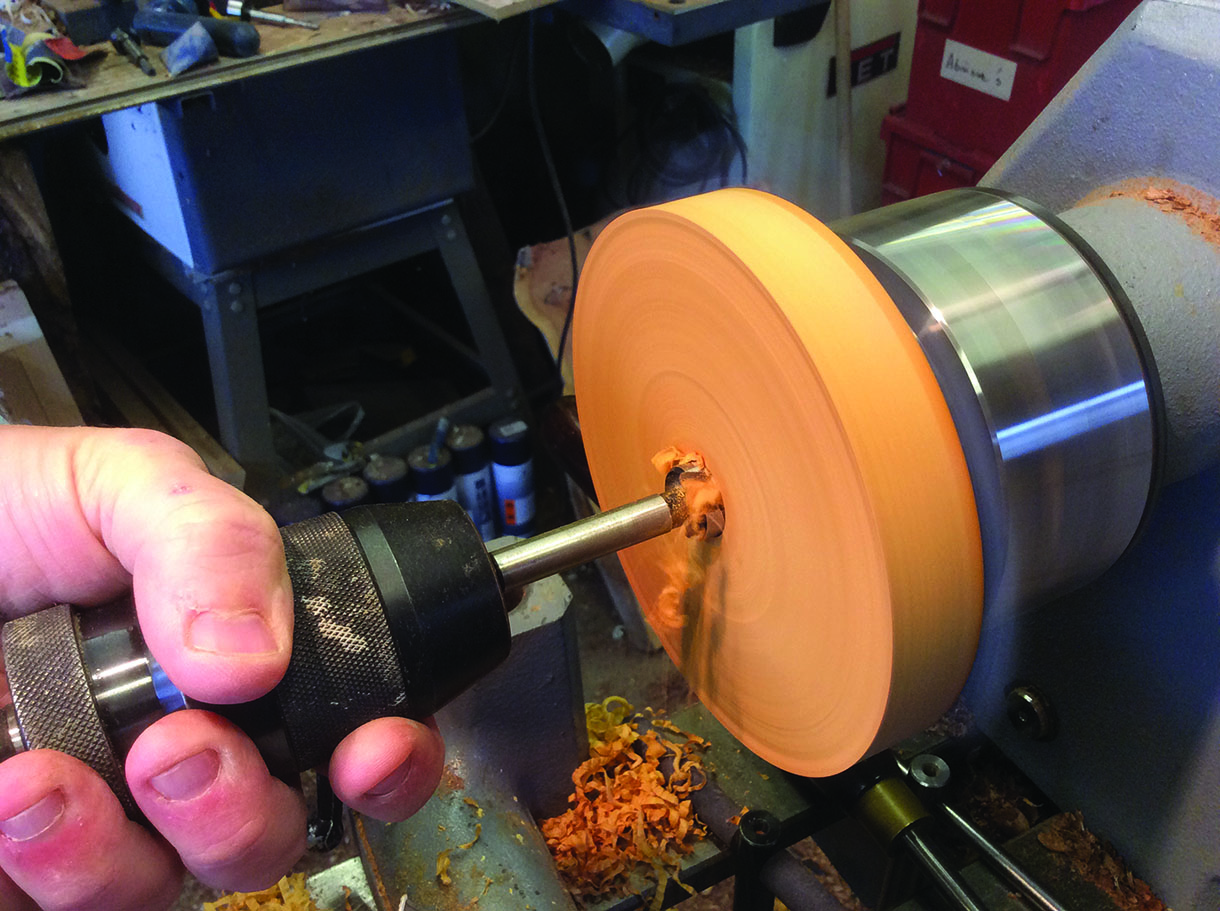
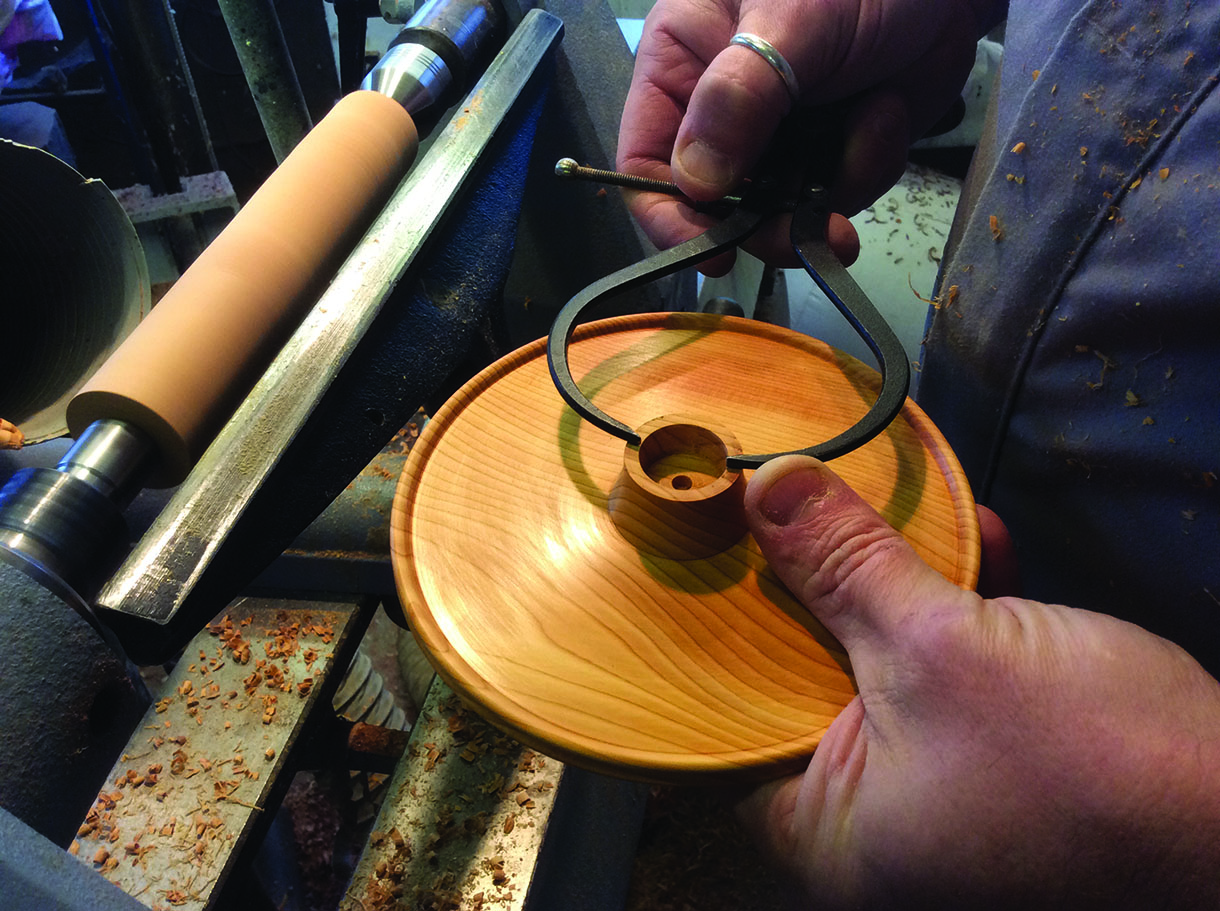
4. Before we start shaping the top side of the base, drill the hole to take the base handle. Use a drill chuck in the tailstock with a drill size of 20mm and drill to a depth of 10mm. Keep the lathe speed at around 500rpm and support the drill chuck with your hand while drilling, this helps to absorb any vibration. Cut a small hole 2mm deep with the tip of a skew as a locating hole to guide the main drill in to the base
5. Now the hole has been drilled you can see how much timber you get to play with, leave a wall size to the centre column of 3mm. Take the tray thickness down to 8mm thick overall. This is important, otherwise the base would look heavy. When happy with the shape you’ve created, sand the base and seal with sanding sealer
Stand handle
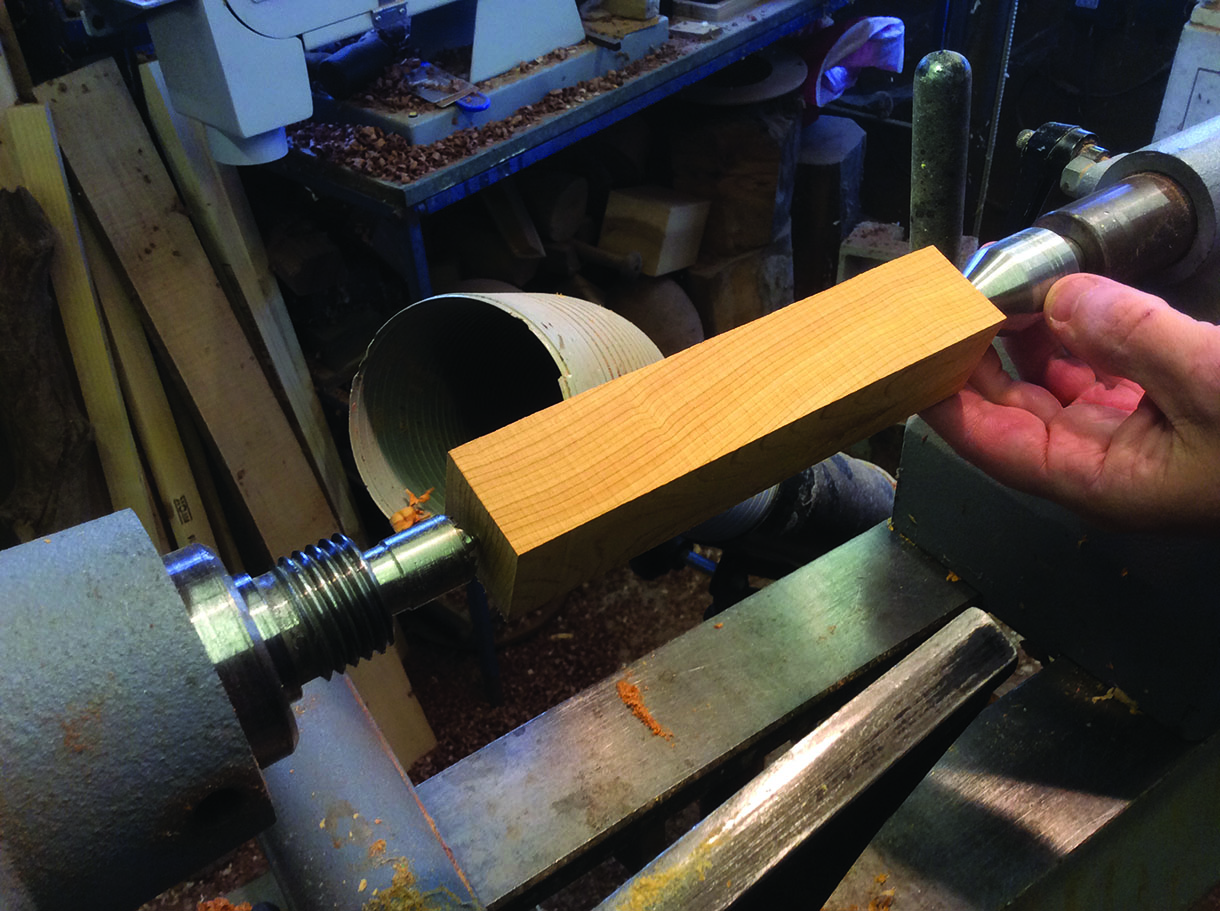
6. Now, let’s make the centre handle. Use a ring friction drive to turn the blank 180 x 35mm at a high-speed of 2000rpm and rough down to a cylinder before shaping
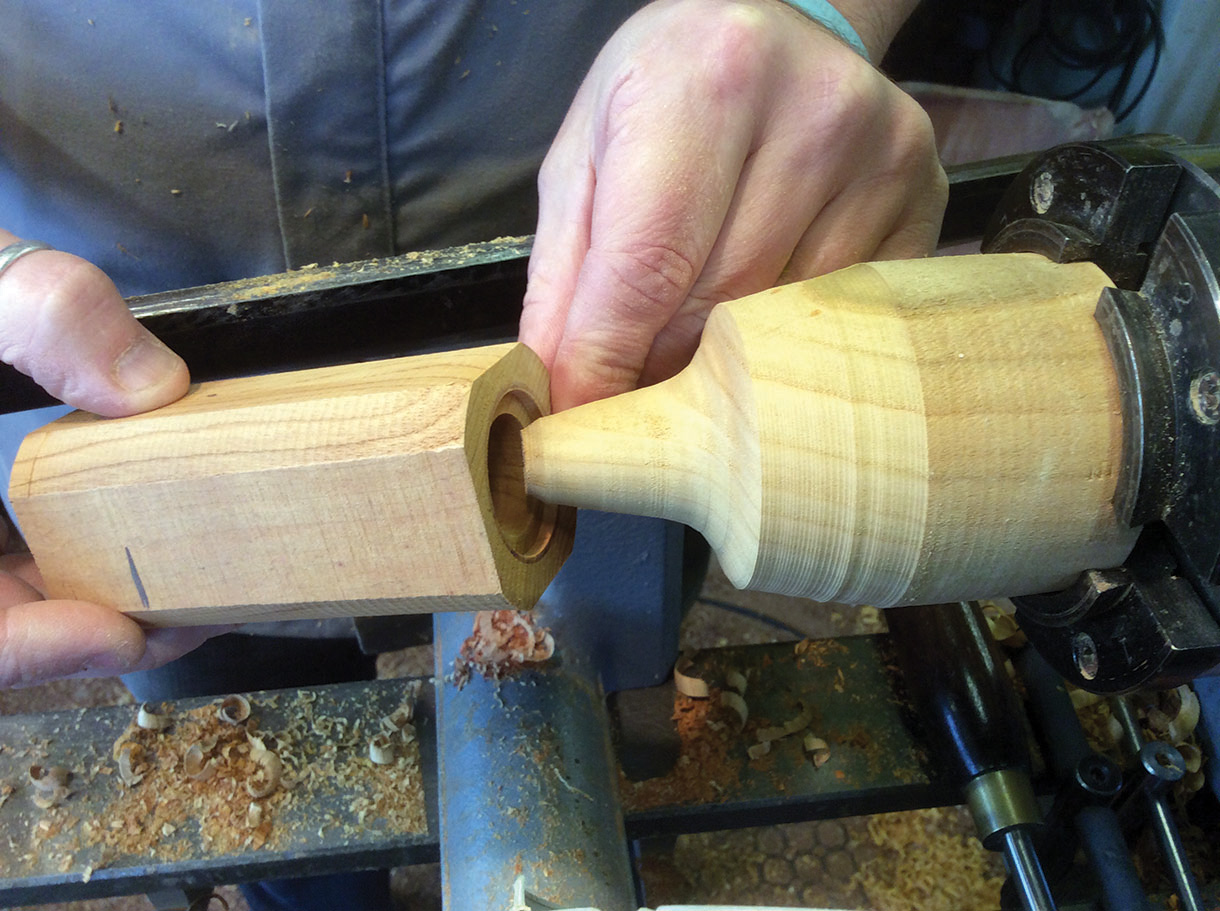
7. Once the handles have been turned round, turn the spigot to the hole drilled earlier in the stand base of 20mm. Measure the hole in the base with callipers or measure the drill used to cut the hole, then transfer these measurements to the handle and cut a tenon around 10mm long
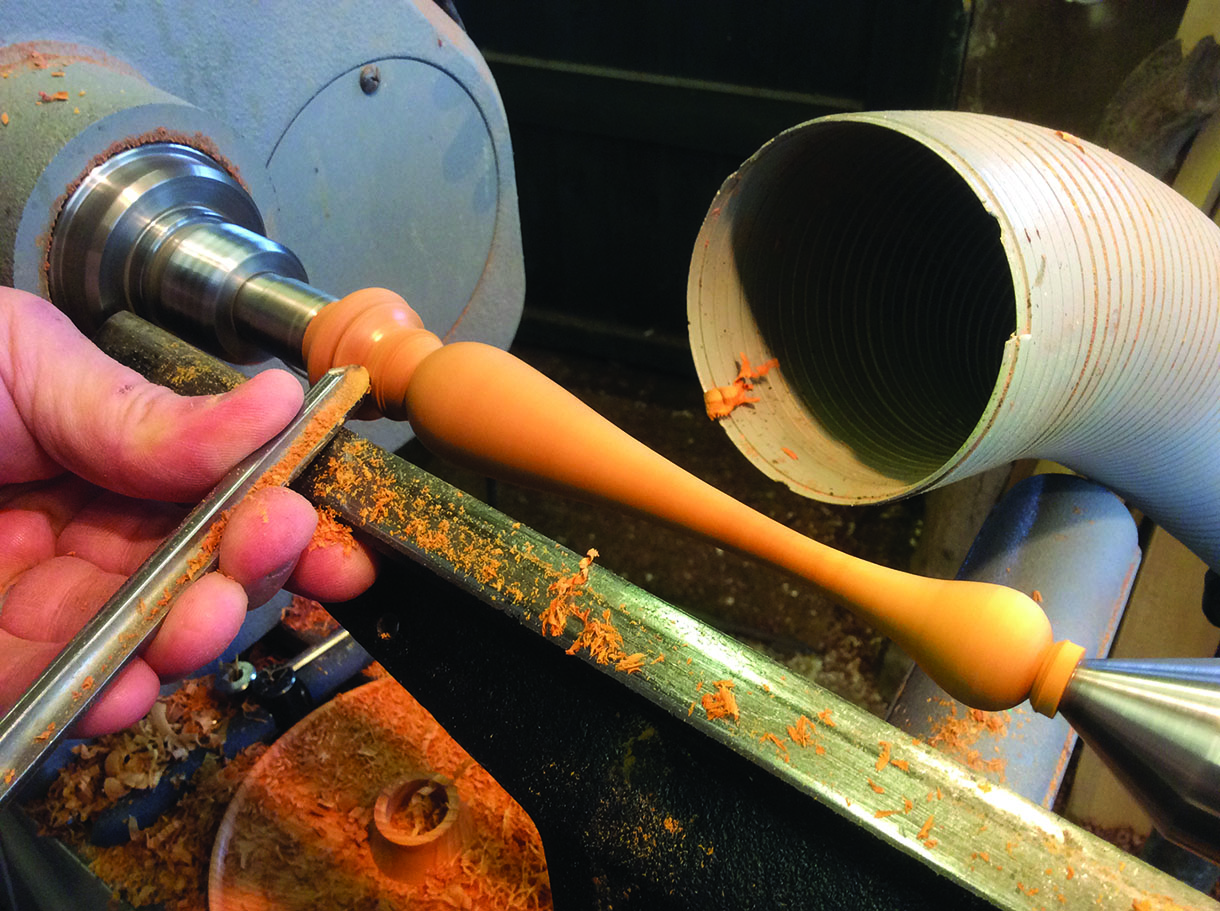
8. Turning the handle shape is an important part of the process and can completely change the overall look of the piece. Keep the design fairly plain and stretched out, making the centre quite thin. This gives a teardrop style with a bead and cove towards the bottom of the handle, which will blend in nicely to the base. Again, when you are happy with the shape, sand and seal
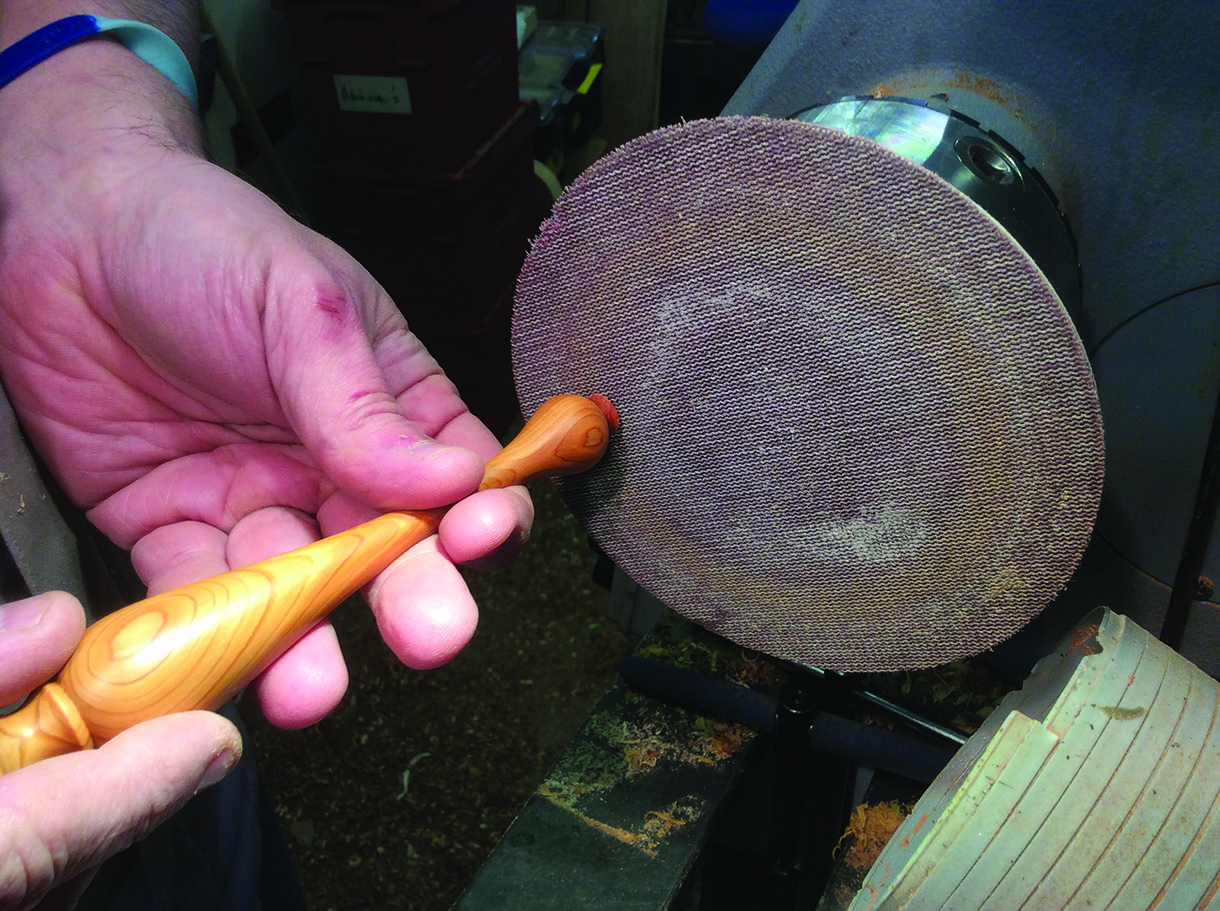
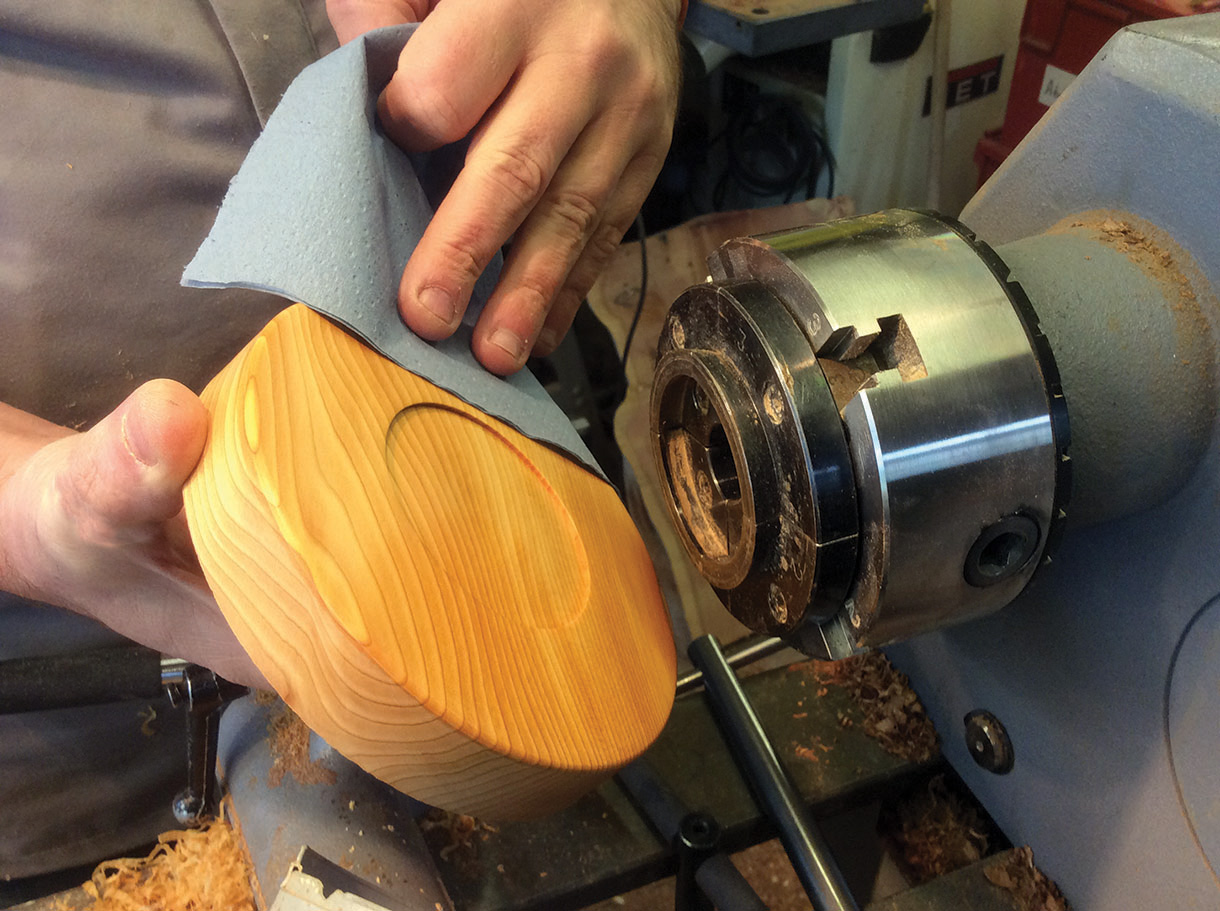
9. Leave a small area of waste timber at the top of the handle to clean off at the end, which will allow you to get rid of the hole made by your tailstock centre. Use a small sanding disc and as you can see here, hold the disc in the chuck to gently sand off the waste area before fine hand sanding with 600 grit abrasive. The sanding disc is made from a piece of MDF with a foot on the back; this foot is then used in the jaws of the chuck
Salt and pepper shakers
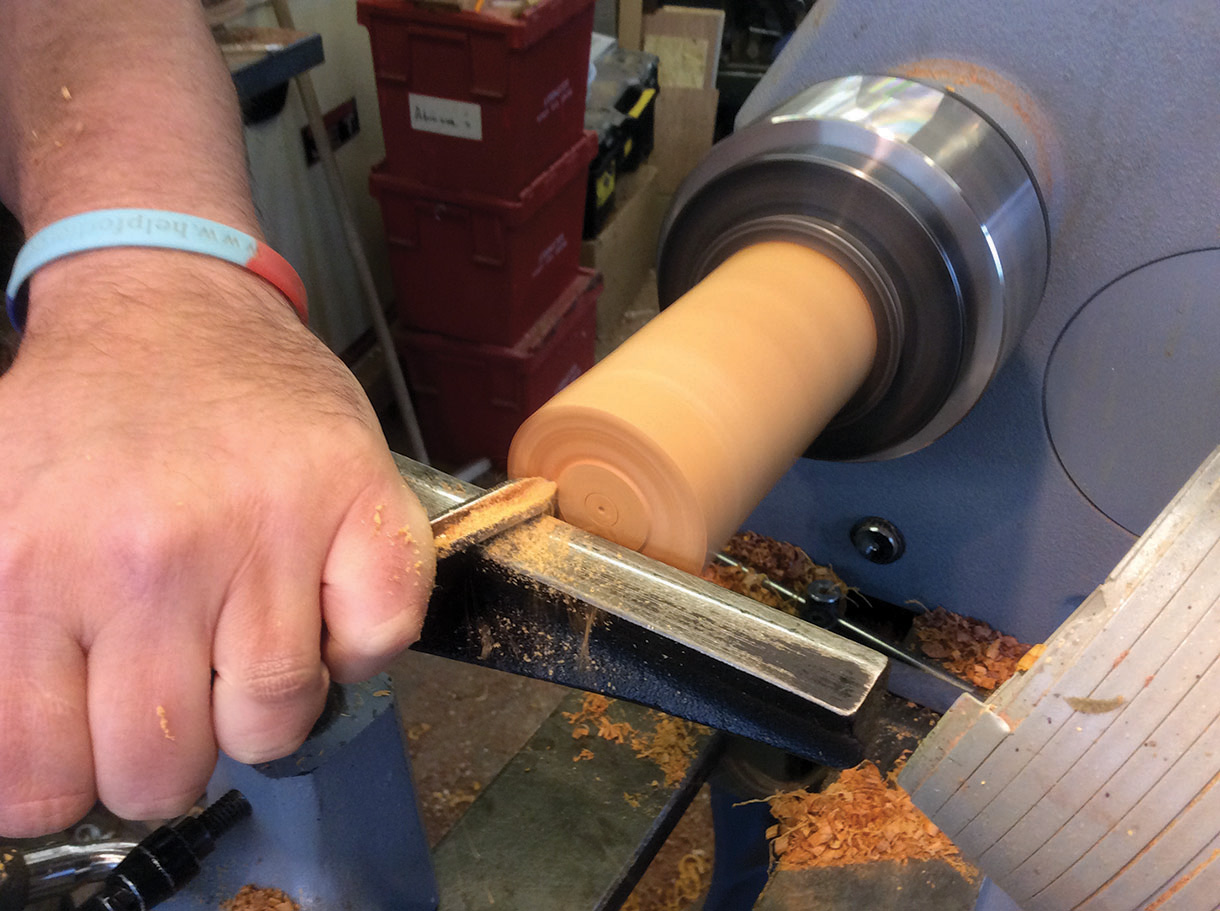
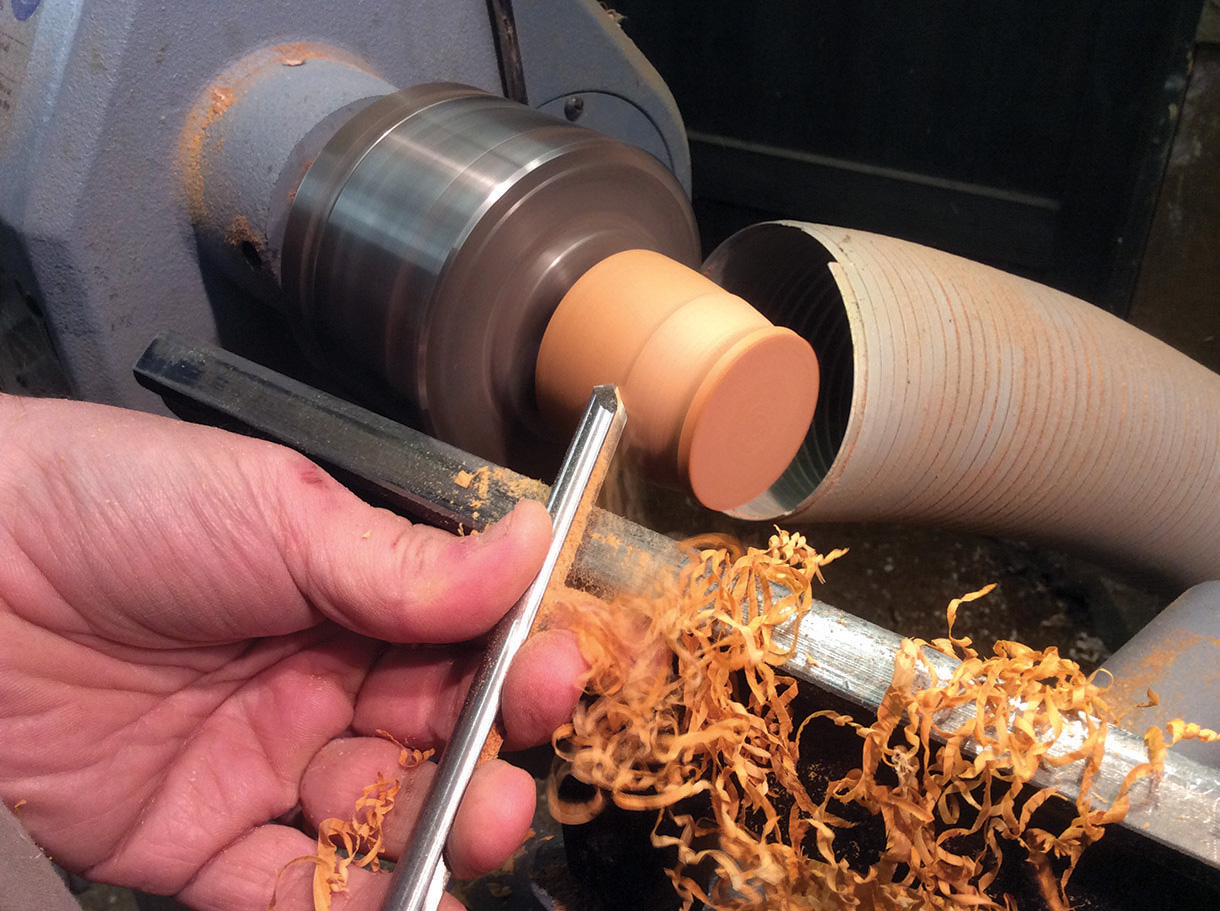
1. Take two pieces of timber, 100 x 45mm, and rough them down to a cylinder to hold them in your chuck. Drill several holes in the blanks. When firmly in the chuck, clean the end grain off with a 6mm bowl gouge using the push cut method. Point the flute to 10 o’clock and with the bevel rubbing the surface cut toward the centre
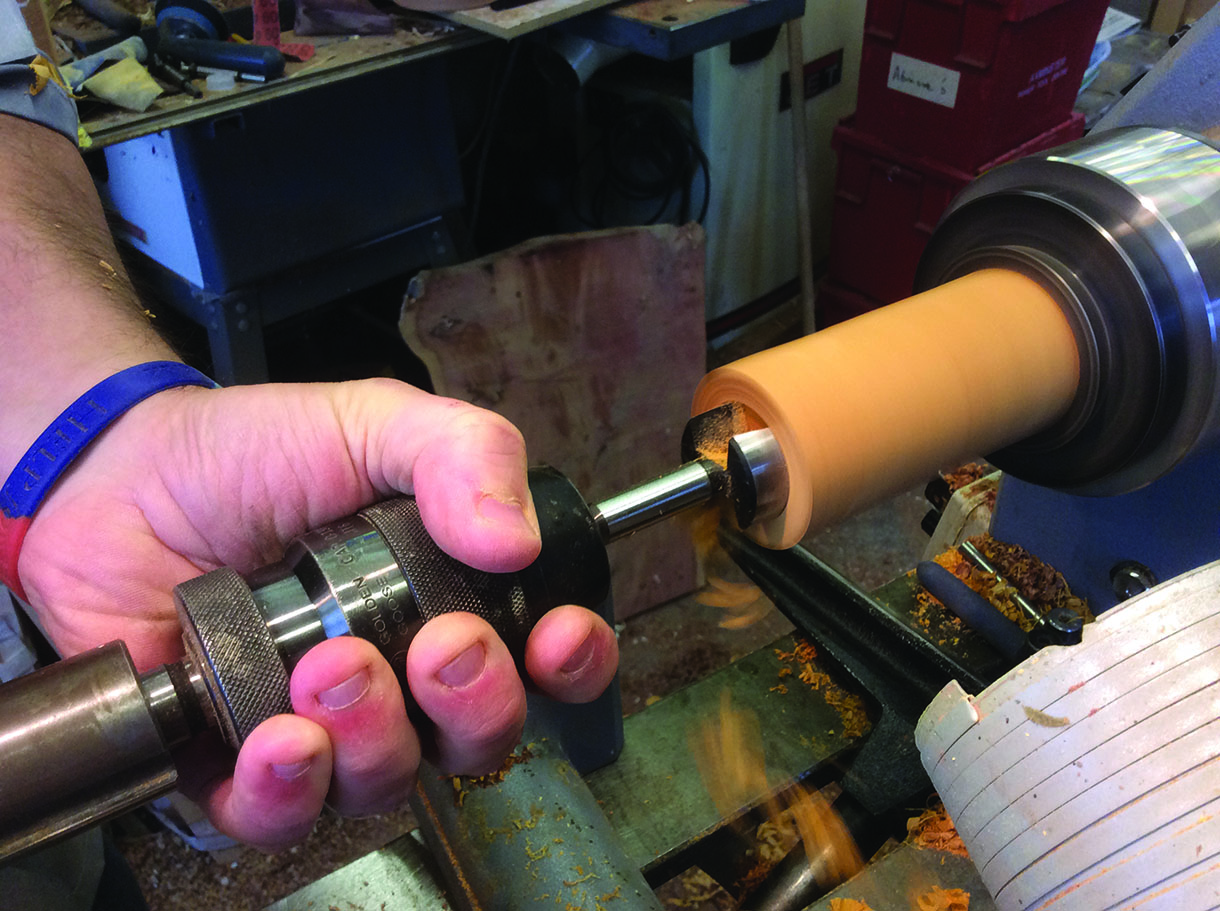
2. The three drill bit sizes are 35mm at 4mm deep for the clearance hole so the plug can sit up in the shaker, 25mm at a depth of 10mm for the plug itself and 18mm up the length of the shaker for the salt and pepper. You want the top of the shakers fairly thin, so drill up the length of the blank with the 18mm drill bit, until you’re 10mm from the end. Support the chuck by hand while drilling to take out any vibration and to stabilise the drill. Clear the shavings regularly and turn the lathe to 500rpm to keep the heat down
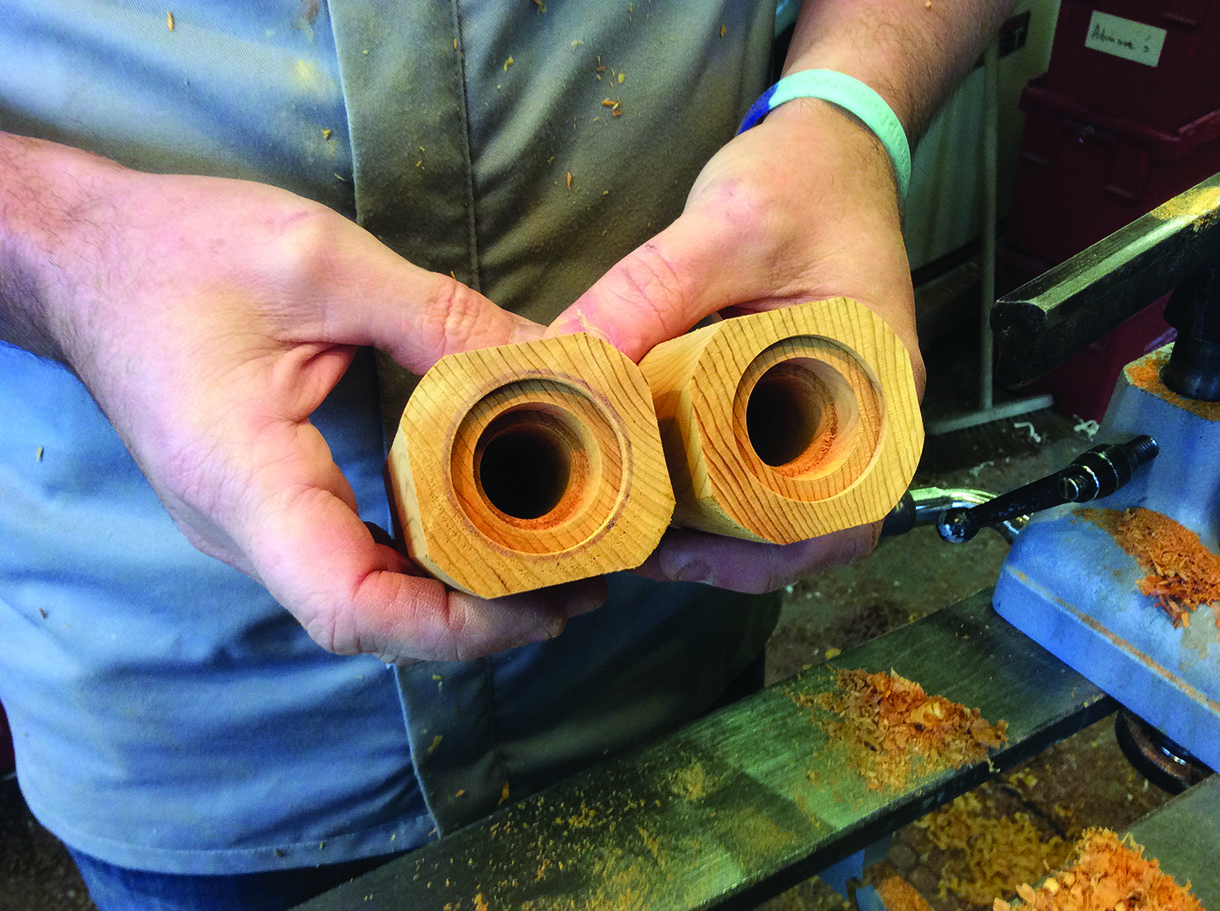
3. There we are, both of the shakers drilled with all three drill sizes, but note the blanks haven’t been completely rounded off. This is so you can true them around the hole. Give the holes a bit of a blow out and seal the insides with sanding sealer or lacquer
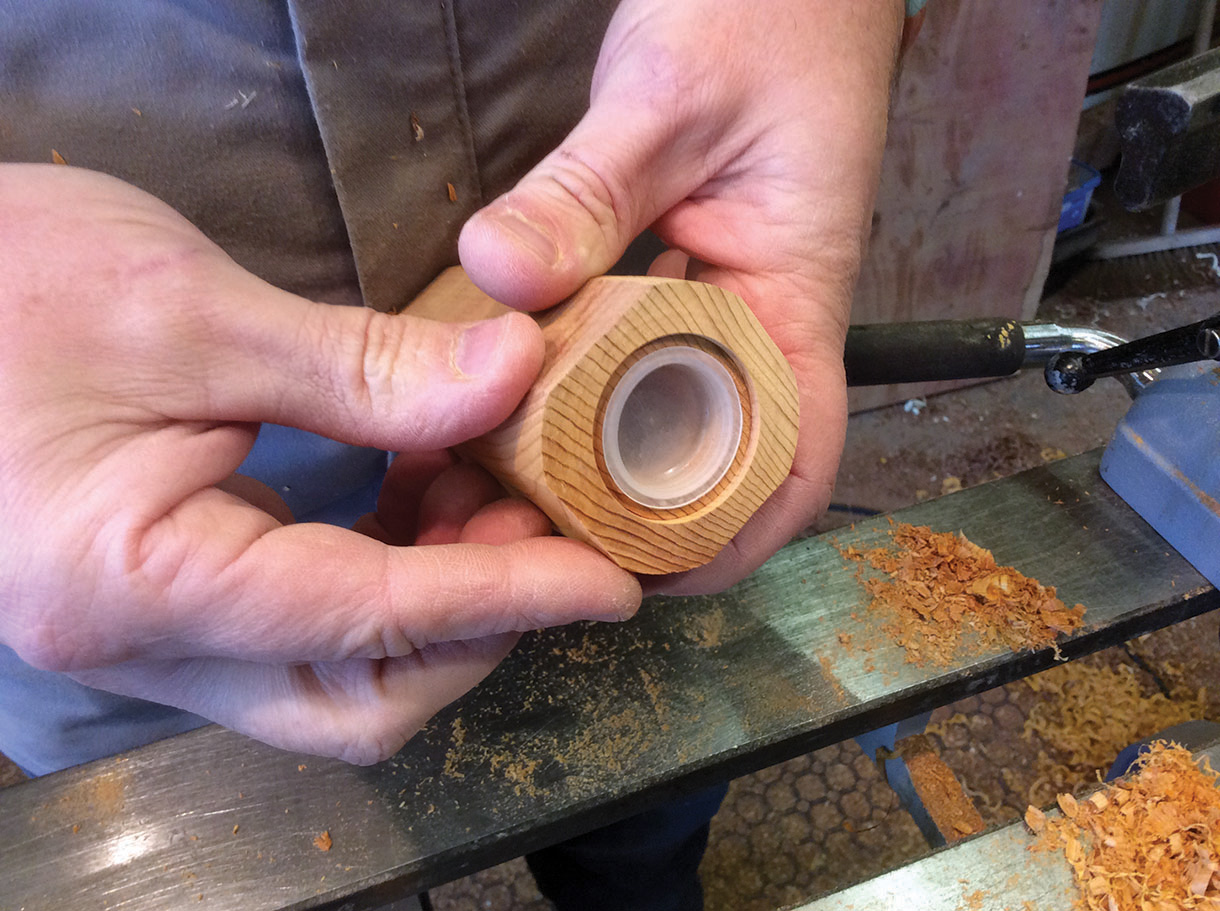
4. Shaker plugs can be difficult to find and my original supply of cork plugs has gone, so I now use these plastic ones which work well. However, if you do want to create your own, wine bottle corks turned to size also work really well
5. To turn the main shape of the shakers use a wooden drive dog; this will need to drive the shaker independently of the shaker towards the end of this shaping process, to allow you to clean up the ends, so a very fine taper is required
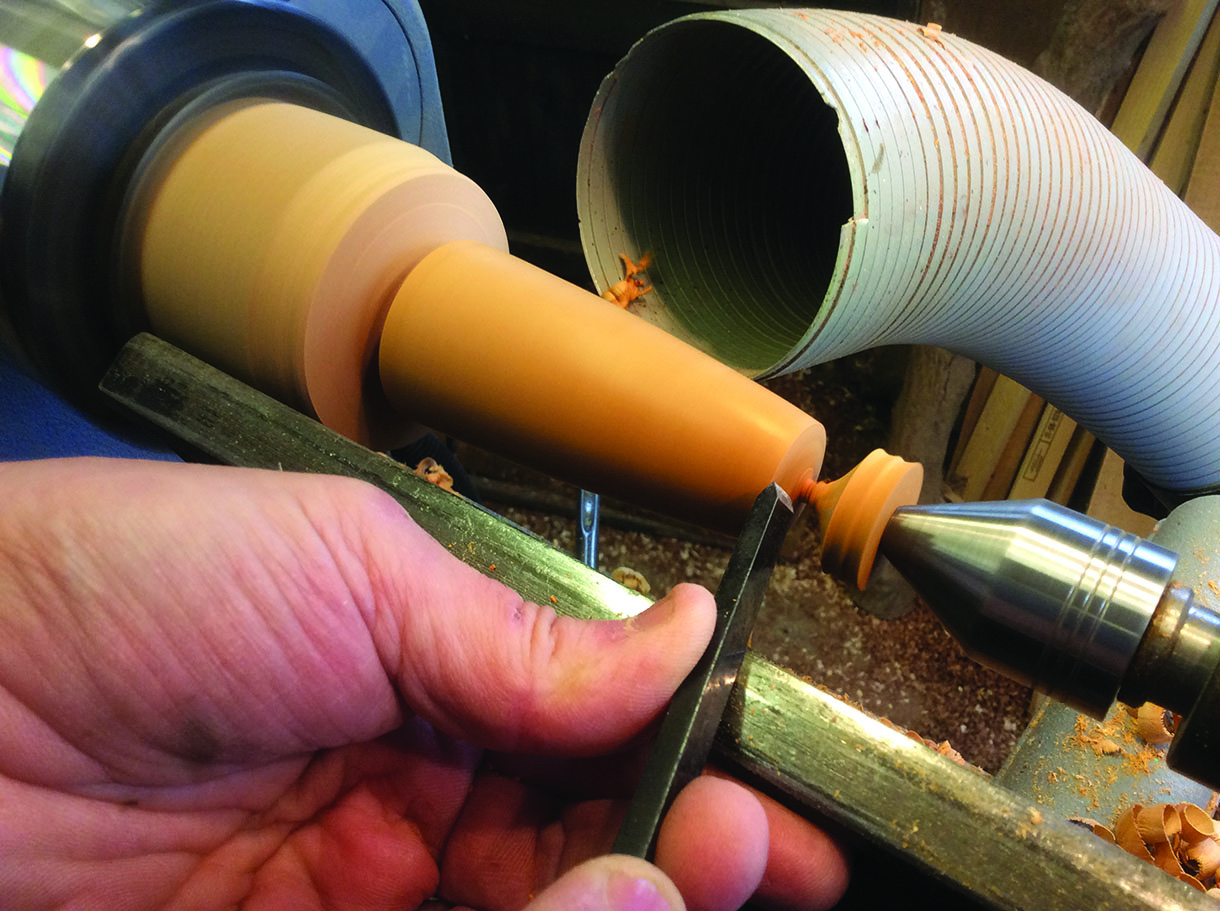
6. Turn a slow convex curve to create a simple shape. Use a 10mm tapered skew to clean up the top of the shaker – an important step as this will be seen constantly and the area we will drill out shortly, to release the salt and pepper. Do as much sanding as you can while the tailstock is in position all the way down to the final grades
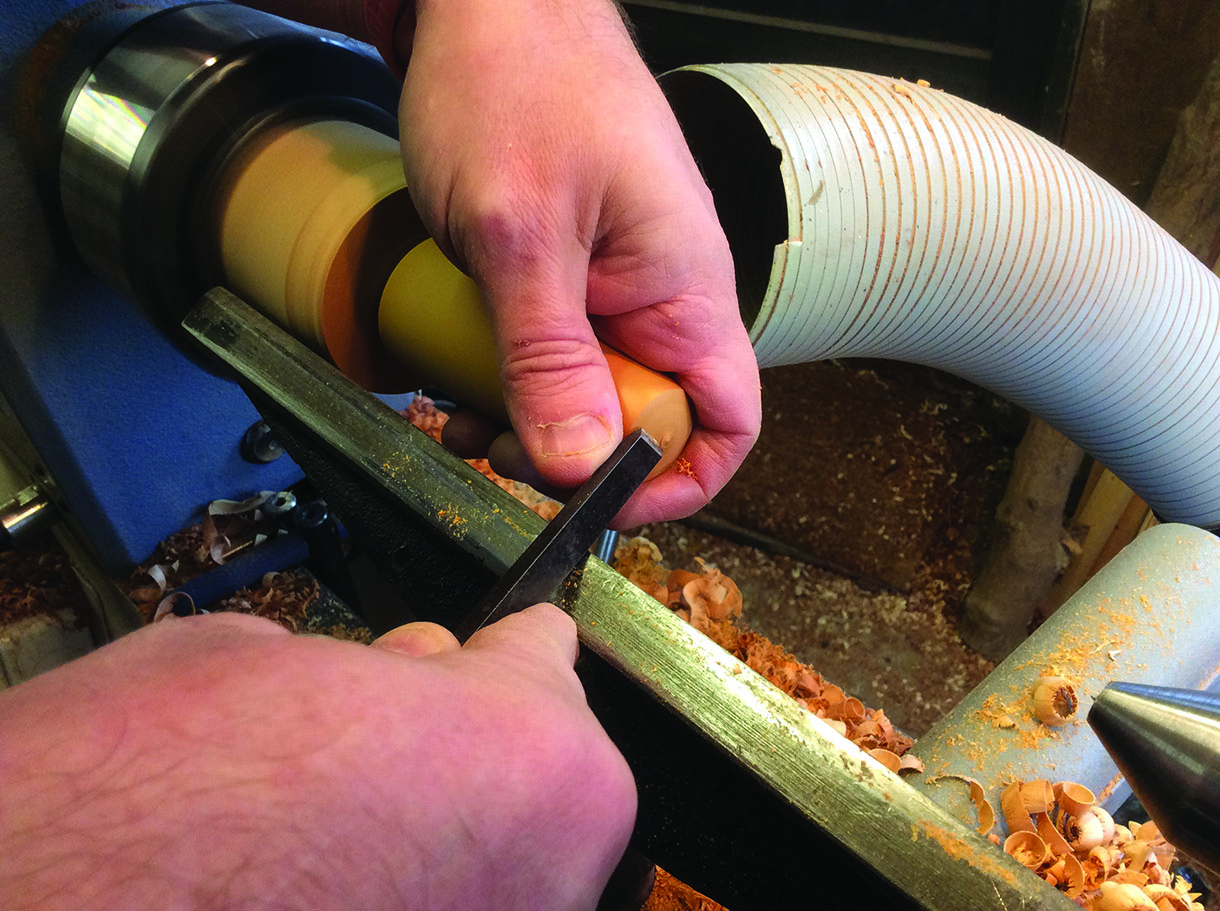
7. With a skew, start to part off waste material gently, until the waste piece next to the tailstock stops moving. If the drive dog was made with a tight enough fit the shaker should stay attached, so you can clean the last bit of waste away unrestricted by the tailstock. Make sure all tears/grain pullouts are gone before sanding
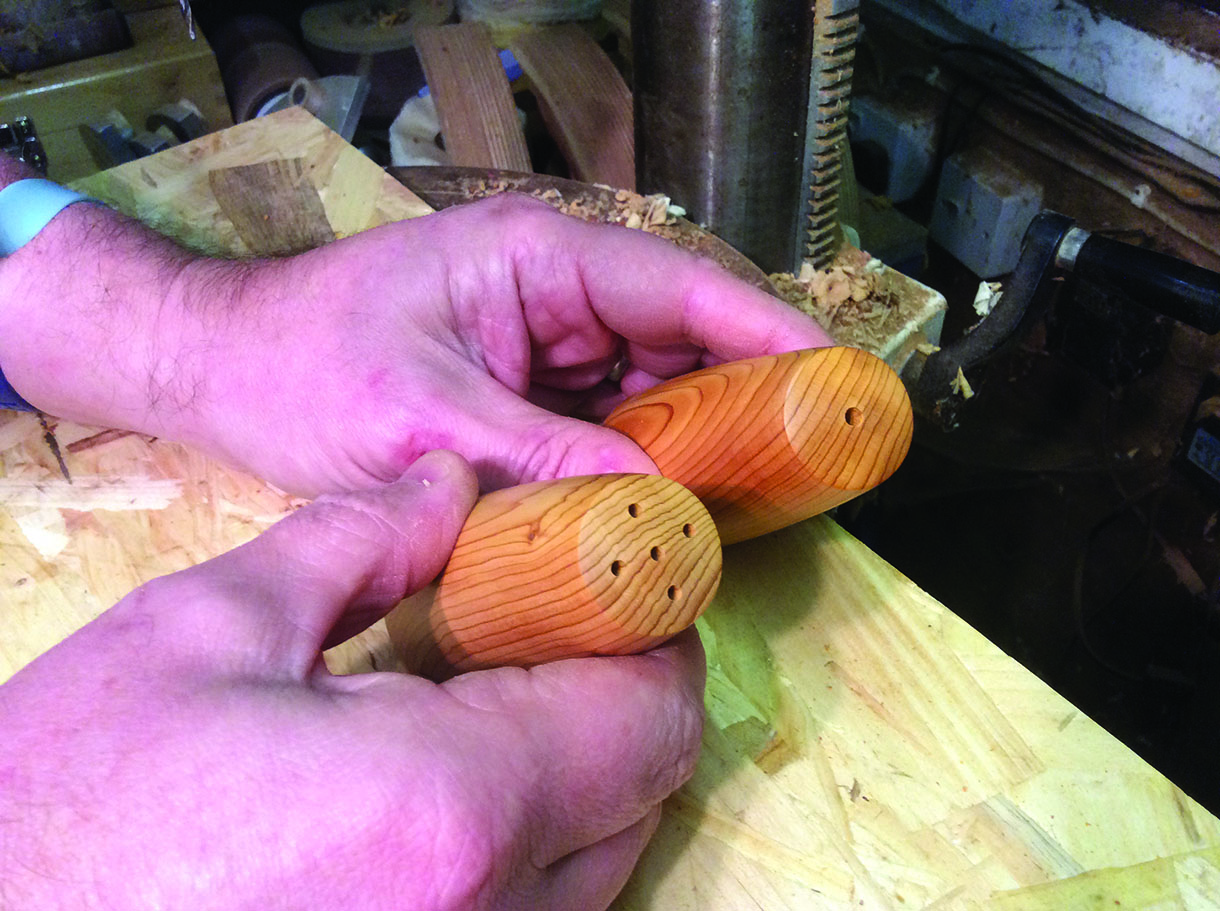
8. Complete the second shaker to match your first, while carefully measuring to keep them identical we can think about drilling our holes. Before you take the shakers off the drive dogs, dot the centre hole with the tip of your skew; this is centre for drilling and lining up all other holes. The salt shaker is the easiest, drill straight through the centre at 3mm, and with the pepper shaker drill five 2mm holes – one in the centre and four drilled equally around the centre hole
Mustard dish
1. Turning the mustard dish is a straightforward task and again involves the use of the screw chuck. This time, however, use a smaller set of jaws to create a smaller contact surface for the smaller piece of timber. This piece of timber should start off at 60 x 50mm and be screwed directly on to the chuck
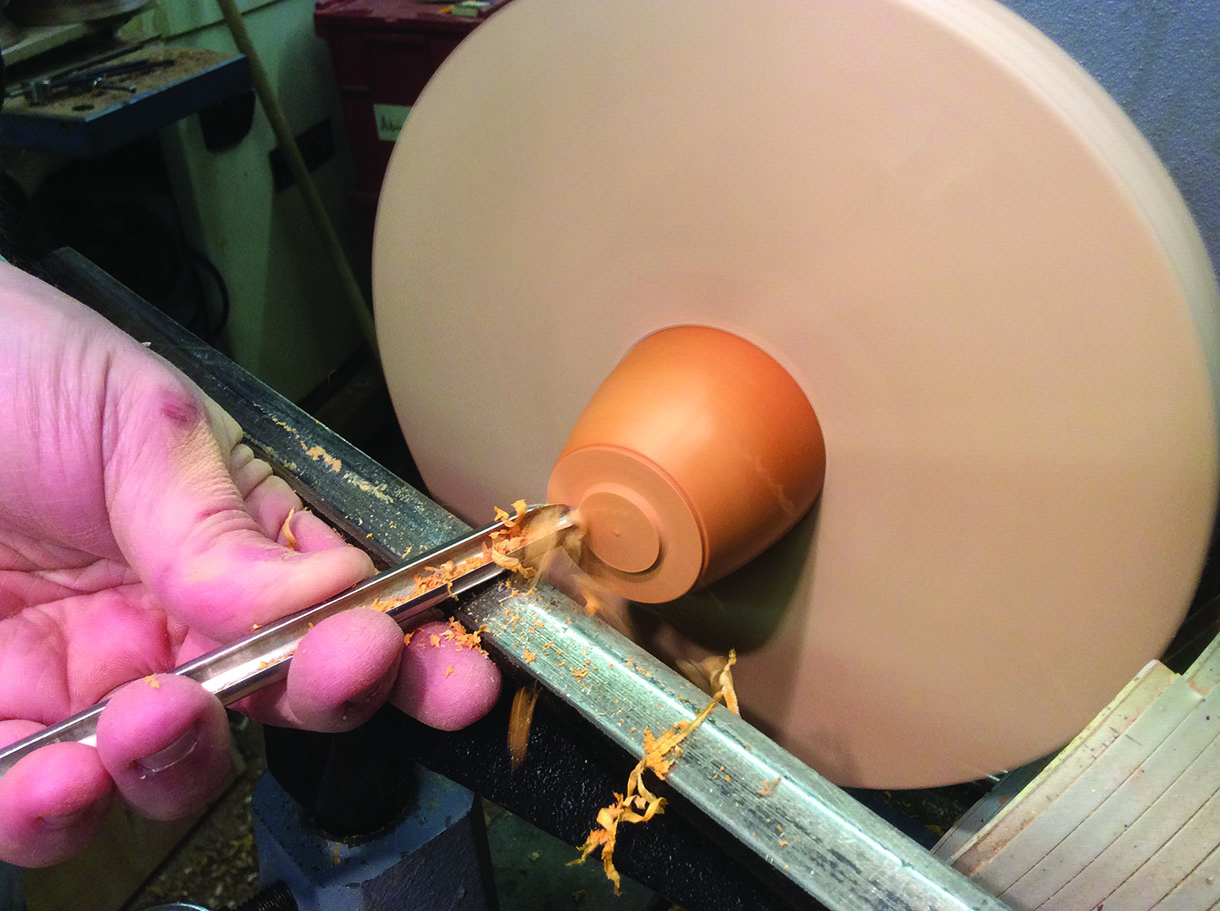
2. Keep the shape of the dish to closely match that of the shakers, a basic convex curve will do. Leave a small flat on the bottom as a hole method to enable you to hollow the dish out. Cut away from the chuck for safety, using the bottom edge of the bowl gouge at 45° to create a nice clean shaving. When you’re happy with this shape gently sand, dropping the lathe speed if needed to avoid overheating
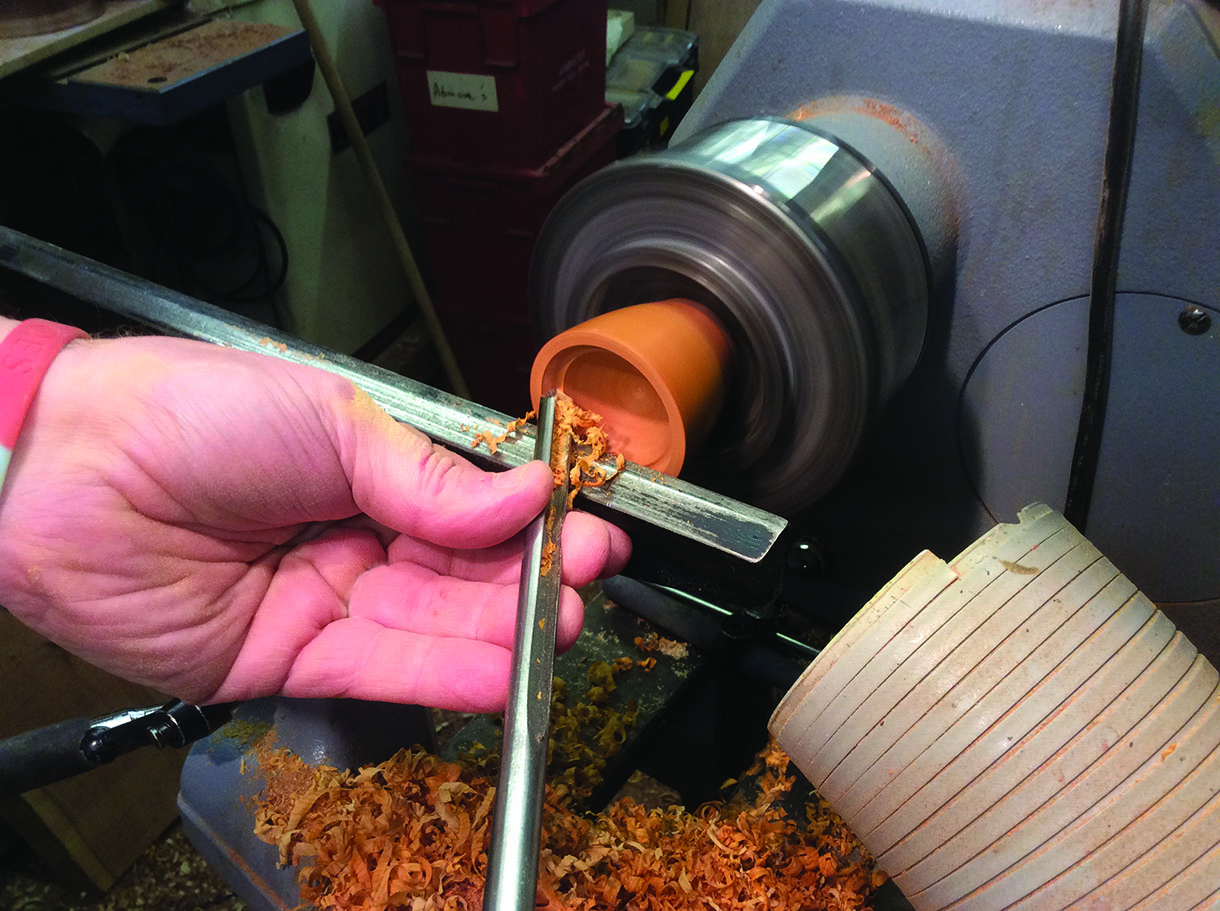
3. Using the foot left on the bowl as a holding method turn, it around and hold it in the chuck. Don’t worry if this marks the bowl slightly as you’re going to take the foot away in a moment after hollowing the bowl out. Start hollowing the bowl by sweeping with your bowl gouge. Using a 6mm bowl gouge with the flute pointing towards 2 o’clock and the handle away, bring the handle towards you to create the concave inner surface, then sand and seal

4. Next, use a small set of wood plate jaws to remove the foot from the small pot. Measure the pot and cut a small dovetail recess to match
5. Holding the pot securely, take off the foot and undercut the base – slightly dish the bowl before sanding and sealing
Mustard spoon
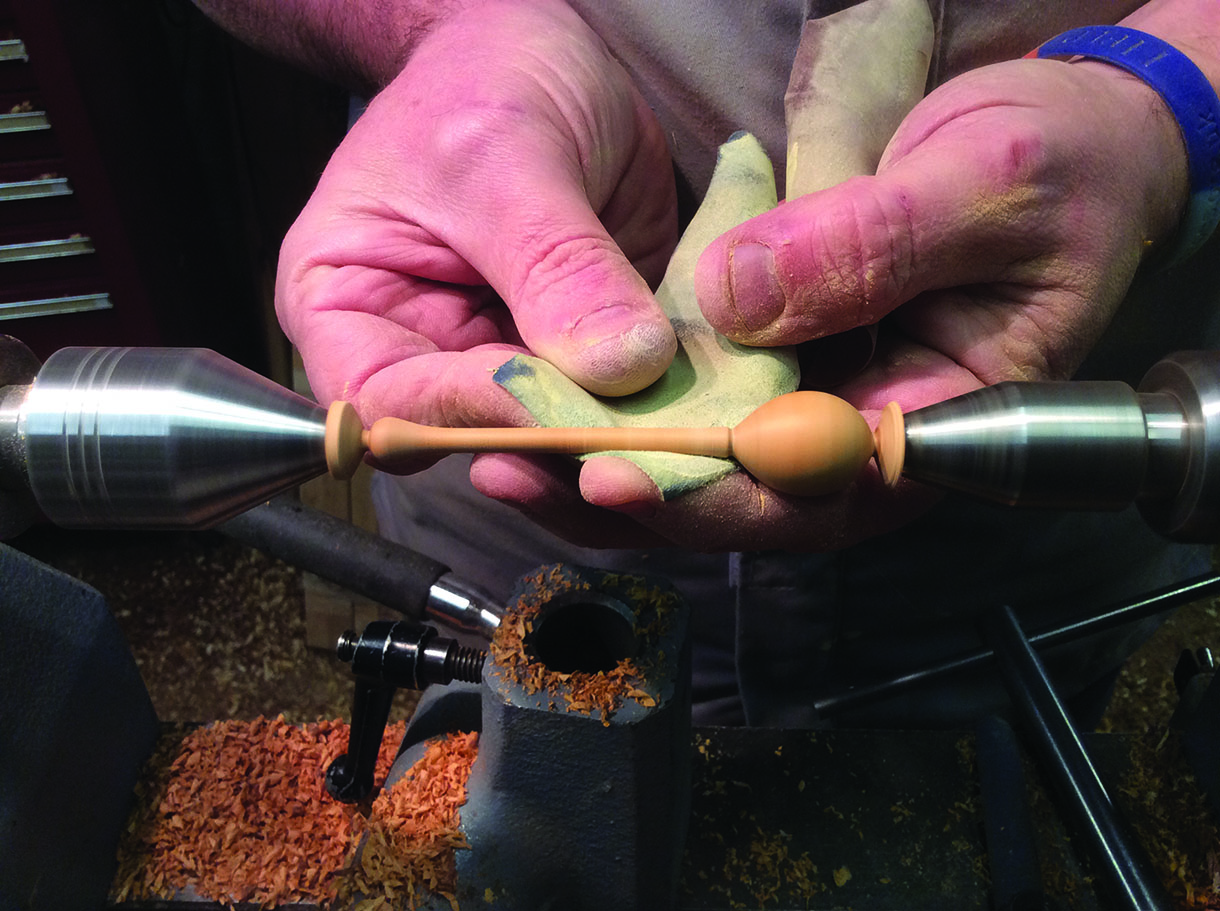
1. This is quite a delicate little spoon and starts off on the lathe. You can see here the type of shape required before you begin sanding. Note the waste areas to be sanded off at the end of the process; without these, you’ll end up leaving a hole from the centres in each end of your spoon
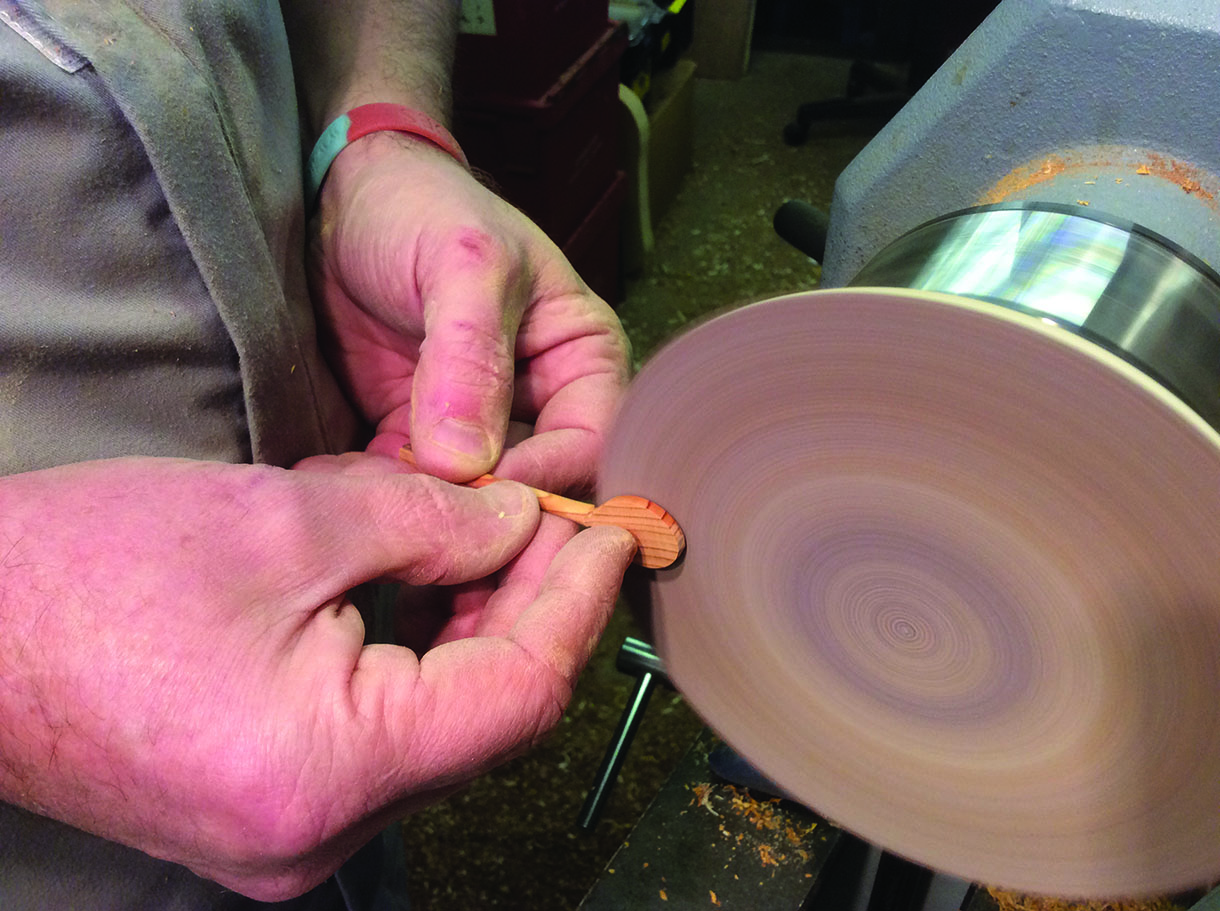
2. Start the sanding by taking off the waste areas left behind by the centres, before flattening the spoon itself. You can shape quite easily on the sanding disc using the slower rotating centre of the disc for finer sanding, but moving to the outer edge for larger bulk removals. Because the disc is velcro-backed you can work your way through the grades easily
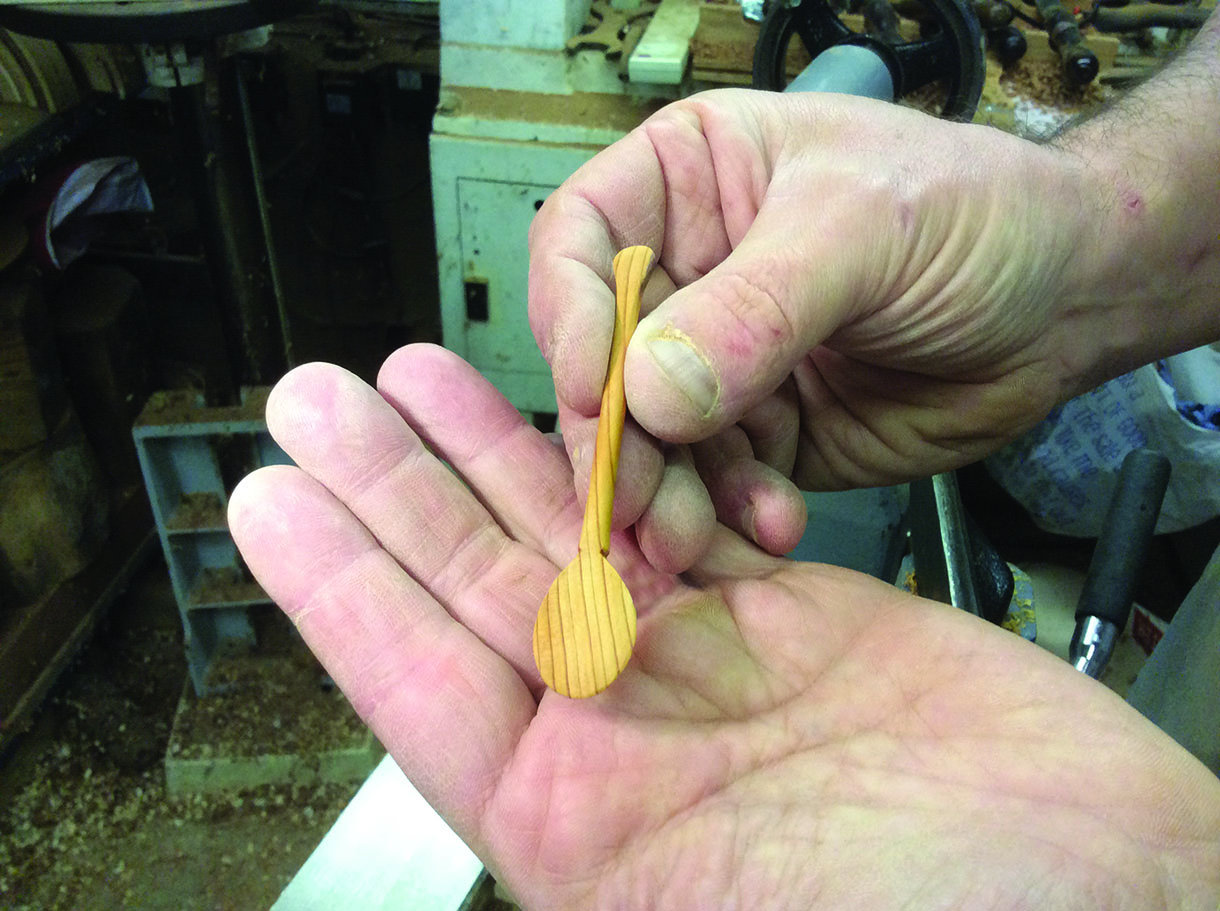
3. When the spoon is finished it should look something like this. The front should be flat and the back curved, but the handle should be slightly arched backwards. Hand sand with the grain before sealing to blend in any angular edges
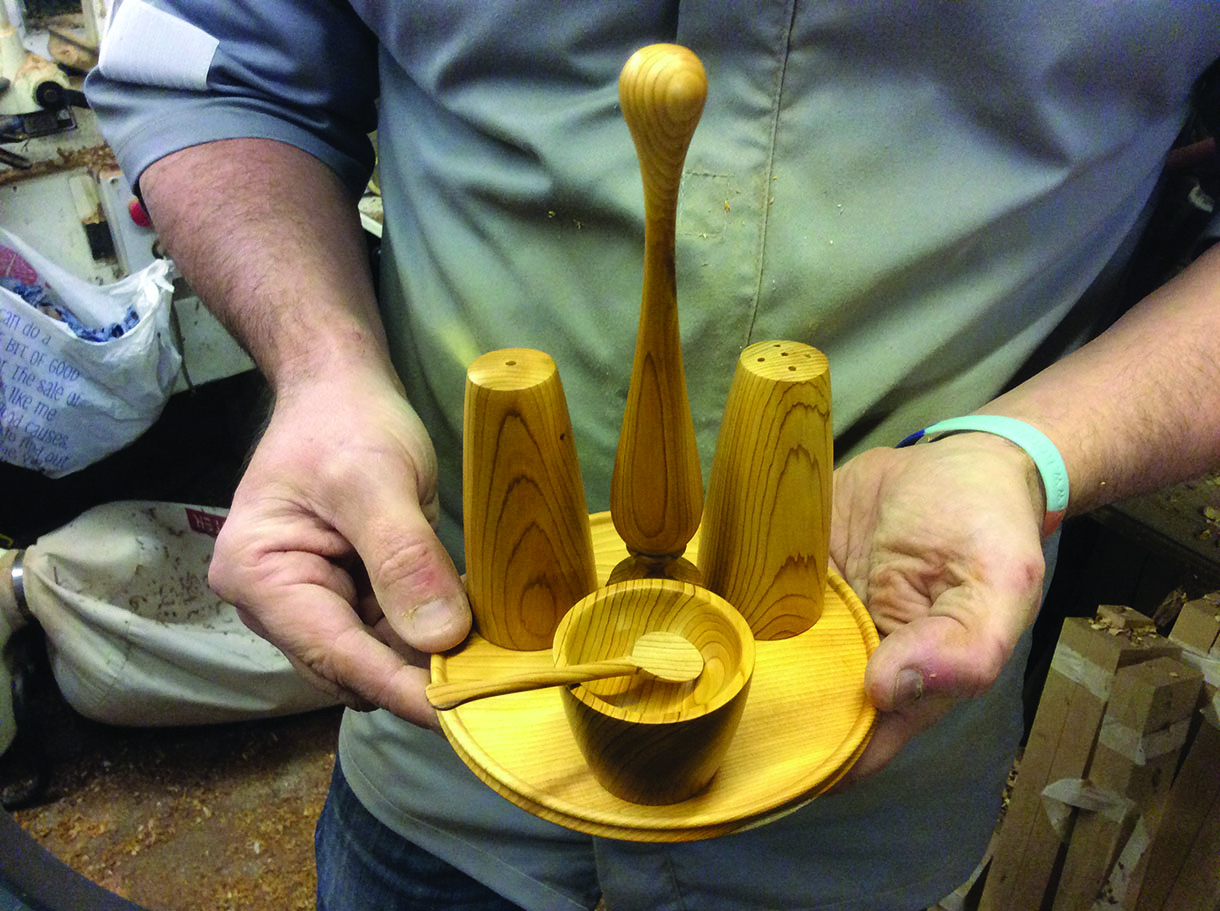
4. Here we are, the finished condiment set consisting of a salt and pepper shaker with a mustard bowl and spoon. Alternatively, you can adapt this project to include other things such as extra dishes and utensils. You can even change the timber to suit what you have in your workshop and the design to suit what you like, but above all enjoy your turning and have fun


