Sleeping Dragon:
Steve Bisco is inspired by a medieval dragon in Christchurch Priory.
Steve Bisco is inspired by a medieval dragon in Christchurch Priory
Christchurch Priory in Dorset, is a cathedral in all but name. It’s one of the largest churches in Britain, reflecting the historical status of Christchurch as an important medieval port on the south coast of England. The Norman core of the building, started in 1094 and finished around 1150, was built in the Romanesque style, with the round arches and heavy columns that preceded the later and lighter Gothic style. It is well worth visiting for its carved stonework and woodcarving.
While on such a visit I was stopped short by a small dragon nestling at the foot of one of the columns in the nave, apparently asleep but with its mouth partly open as if ready to strike if disturbed. It was carved in medium relief on the upper surface of one of the limestone blocks at the base of the column. It was probably carved later than the Norman building phase in reference to the mid-12th-century legend of the Christchurch Dragon. A medieval document records that a visiting party of French monks reported seeing the town of Christchurch consumed in sulphurous flames being breathed by a five-headed dragon. There is no record of what the monks had been drinking, but another French report indicates a lightning storm being the cause of the conflagration – you decide which is most plausible.
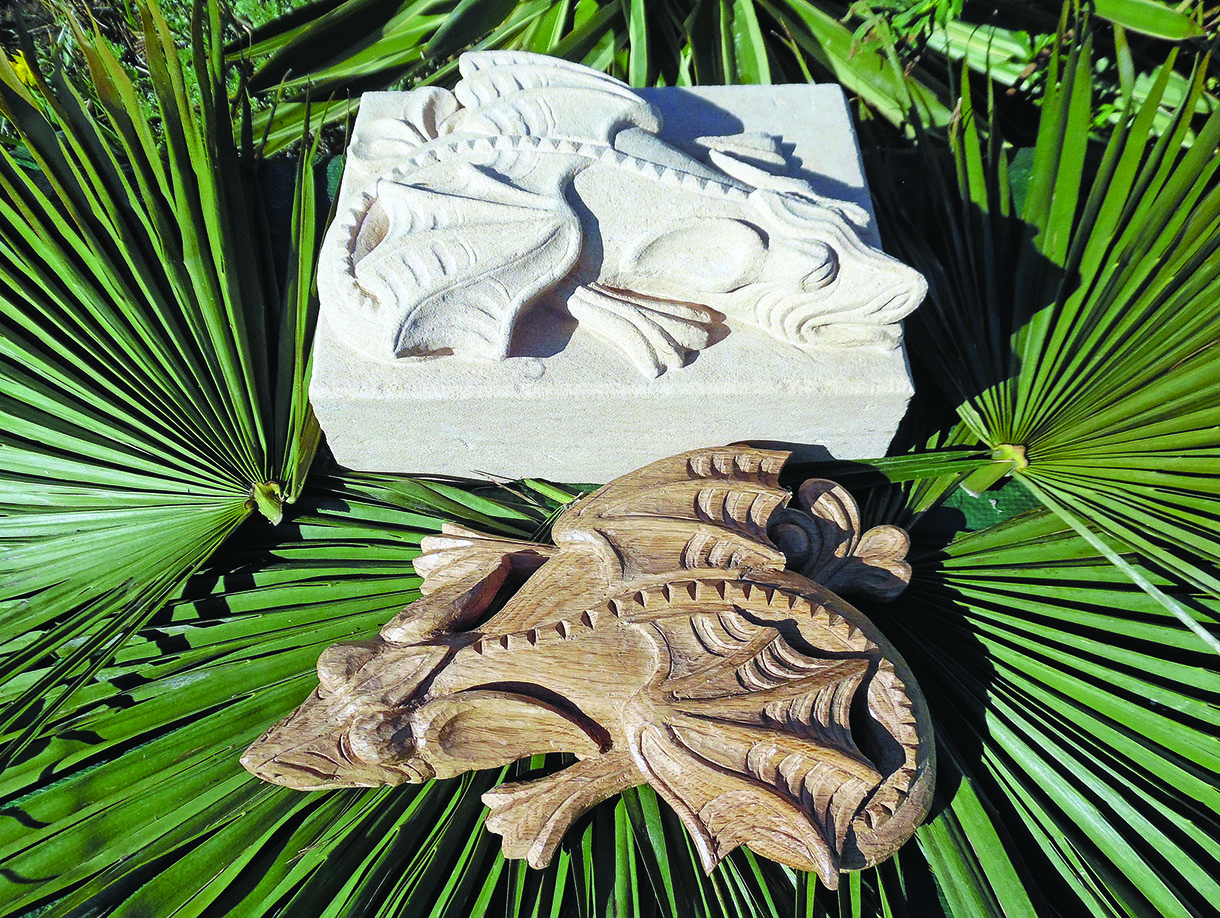
This dragon thankfully has only one head and it provided me with the inspiration for a stone-carving project, with a little adaptation to extract it from its column base and fit it on an oblong block. I have kept to its local provenance by using Portland stone – Christchurch is just a short hop by sea from the Portland limestone quarries – but any suitable limestone will do.
Not wishing to leave woodcarvers out of this project, I have also carved the same design in oak (Quercus robur). By cutting the pattern out of the oak board, the oak dragon is freestanding, or free-laying, and can more easily be displayed in the house. I reversed the tracing on the oak version to make it face the other way, but this is optional.
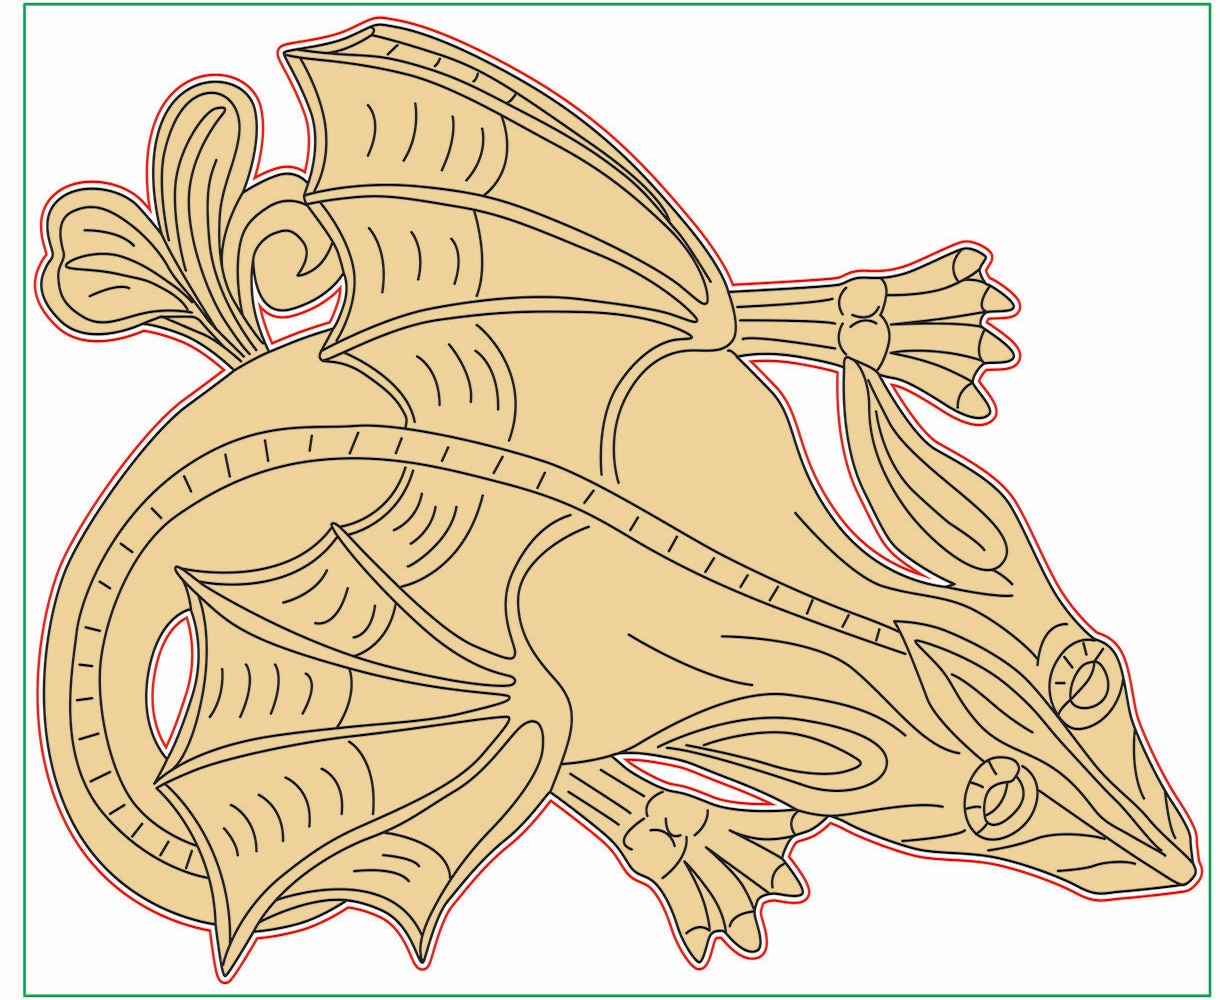 Drawings and how to resize them
To enlarge or reduce the size of drawings right click on the image to download it and then go HERE to watch a video on how to use paper with a grid to do exactly that.
Making the dragon in stone
To make the dragon in stone, you will need a block of a suitable limestone (preferably Portland, Caen, or similar). The size is not critical provided you can fit the pattern on to it without it being too small to carve the details. The best place to look for good quality carving stone is at the yard of an architectural stonemason. Getting stone cut to a specific size is expensive, so work with whatever size of offcut you can get cheaply from your stone supplier. If the block has one or more broken faces, cut and square them off using the basic stonemasonry tools and techniques for ‘dressing’ a stone.
A stonecarver’s toolkit is very simple because the limestone and sandstone ‘freestones’ used for stonecarving have no grain and you can approach a cut from a wider range of angles. This carving requires just a basic set of four stone chisels and three gouges. A few other tools are useful for preparing and shaping a stone: a claw chisel, a bolster and a club hammer are used in the heavier masonry work.
Things you will need
Tools:
• Personal and respiratory equipment
• 4, 6, 13 & 18mm chisels
• 6, 13 & 18mm gouges
• Claw chisel
• Bolster
• Club hammer for roughing out
• Mason’s dummy mallet
Materials:
• Stone: Limestone 270 x 210 x 125mm
Carving Stone Safely
• Wear eye protection when carving stone – flying stone chips are sharp.
• Stone is very heavy. A cubic foot, or 300mm metric cube, of stone will weigh around 70 kilos, so take great care of your back and wear protective footwear. Use lifting gear for heavy pieces.
• Stonecarving creates a lot of dust, so work outdoors if possible. Wear a suitably rated dust mask and safety eye wear, and take particular care if working with sandstone as silica dust can accumulate in the lungs.
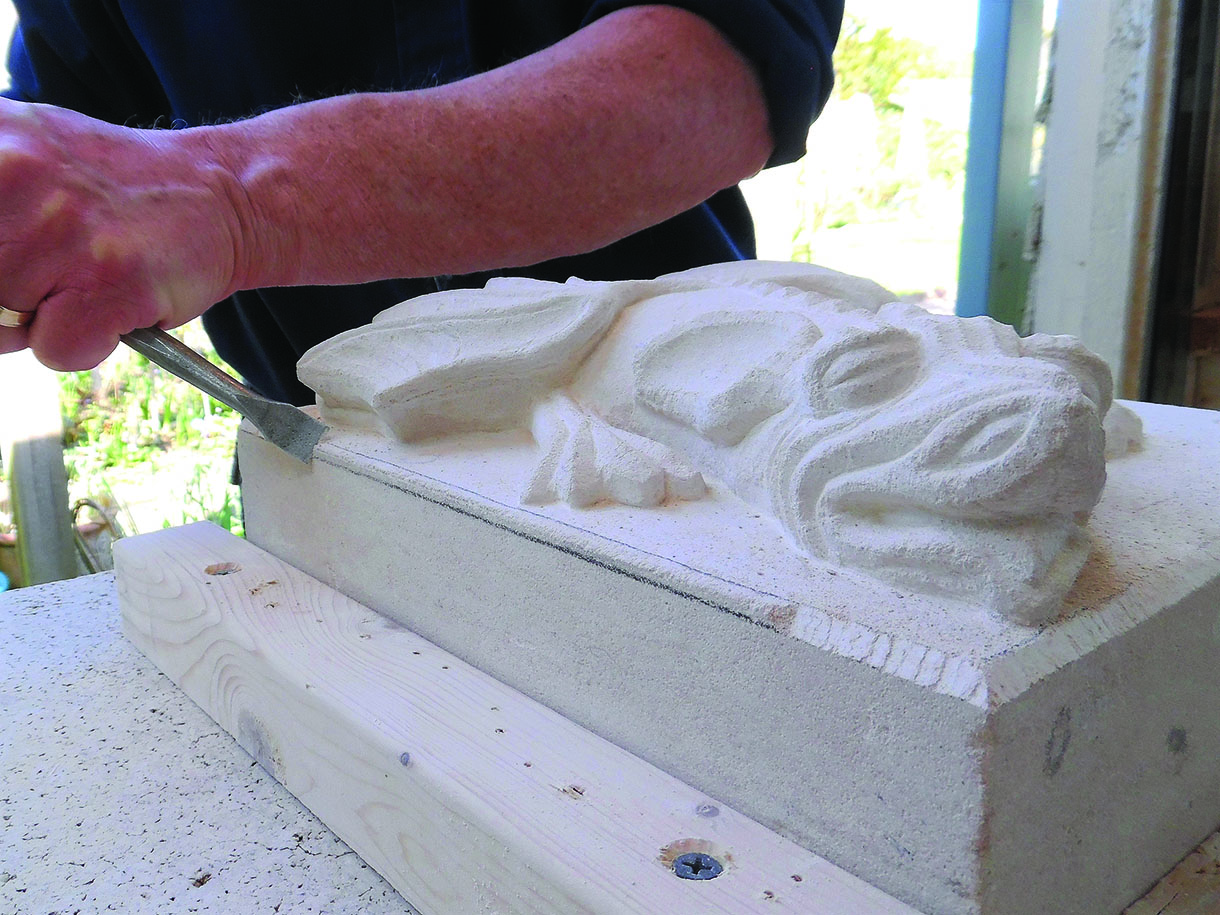
Carving the stone dragon
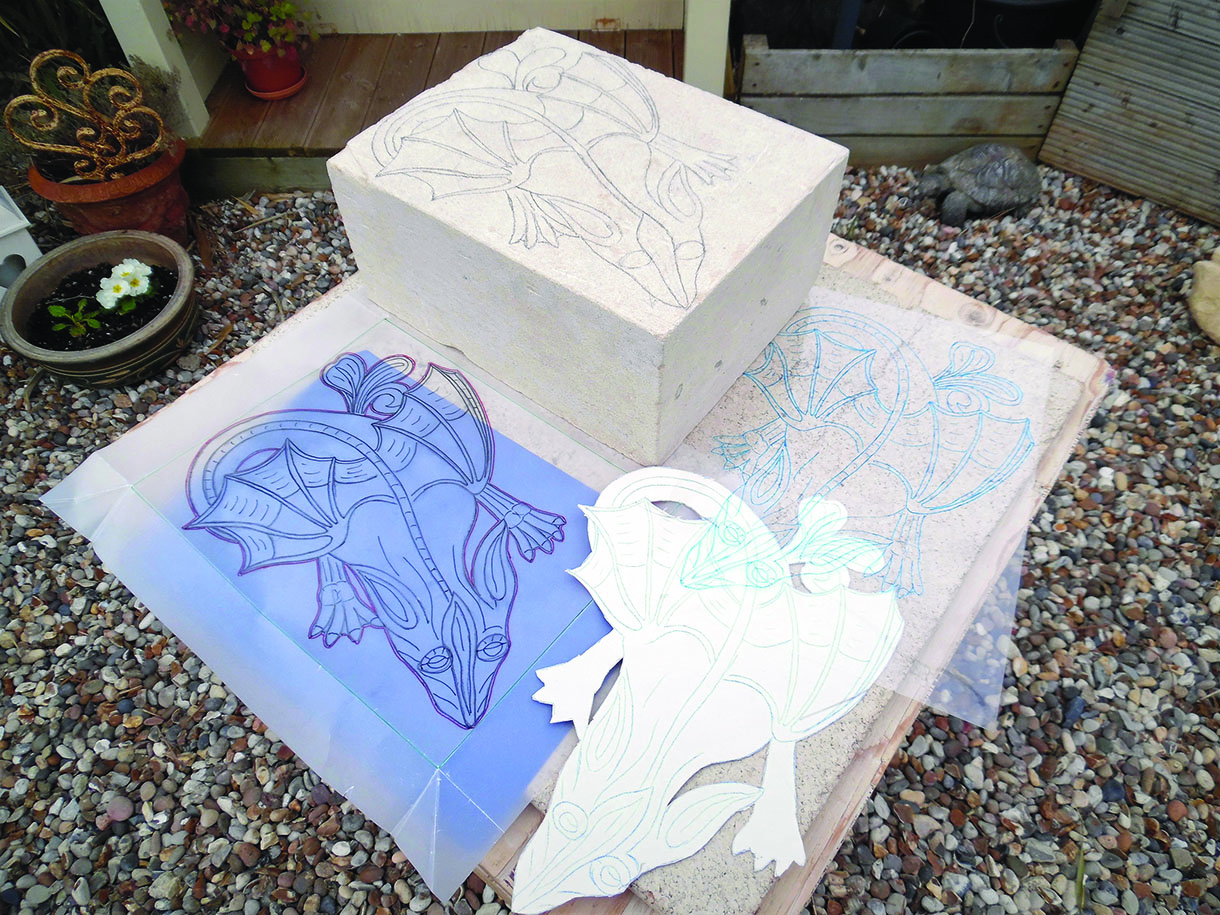
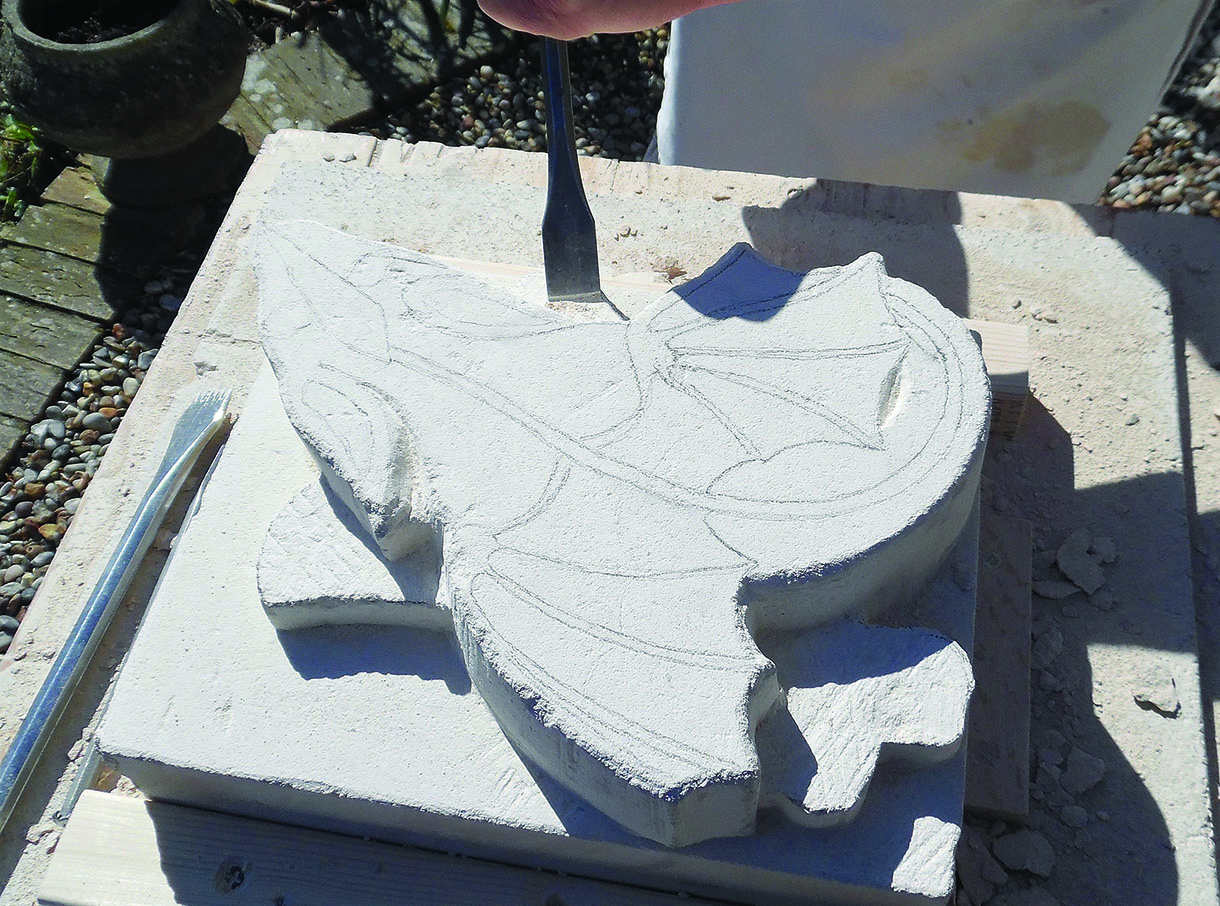
1. Get your block of limestone and make a full-sized copy of the drawing. Trace the pattern on to some transparency film, and also some card to make a template. If the stone is dry and free of dust you should be able to trace the pattern on to it with carbon paper. If not, use the template and transparency to draw it on
Roughing out
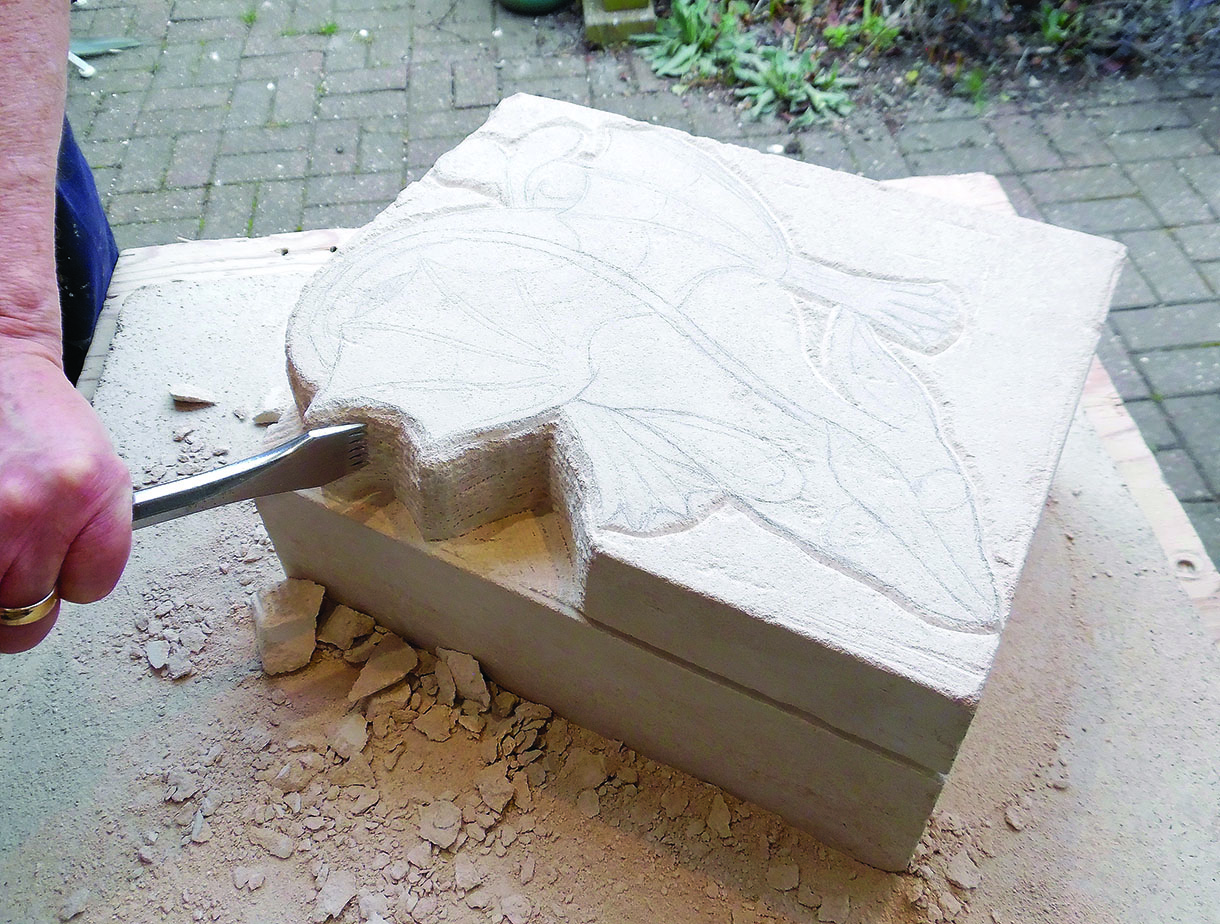
2. Mark a depth line around the sides 45mm below the top surface. Scratch in the pattern and depth line with a point as the pencil lines will soon vanish. First cut around the edges with a 6mm chisel, then cut out the surplus stone outside the pattern with a claw chisel down to the 45mm level
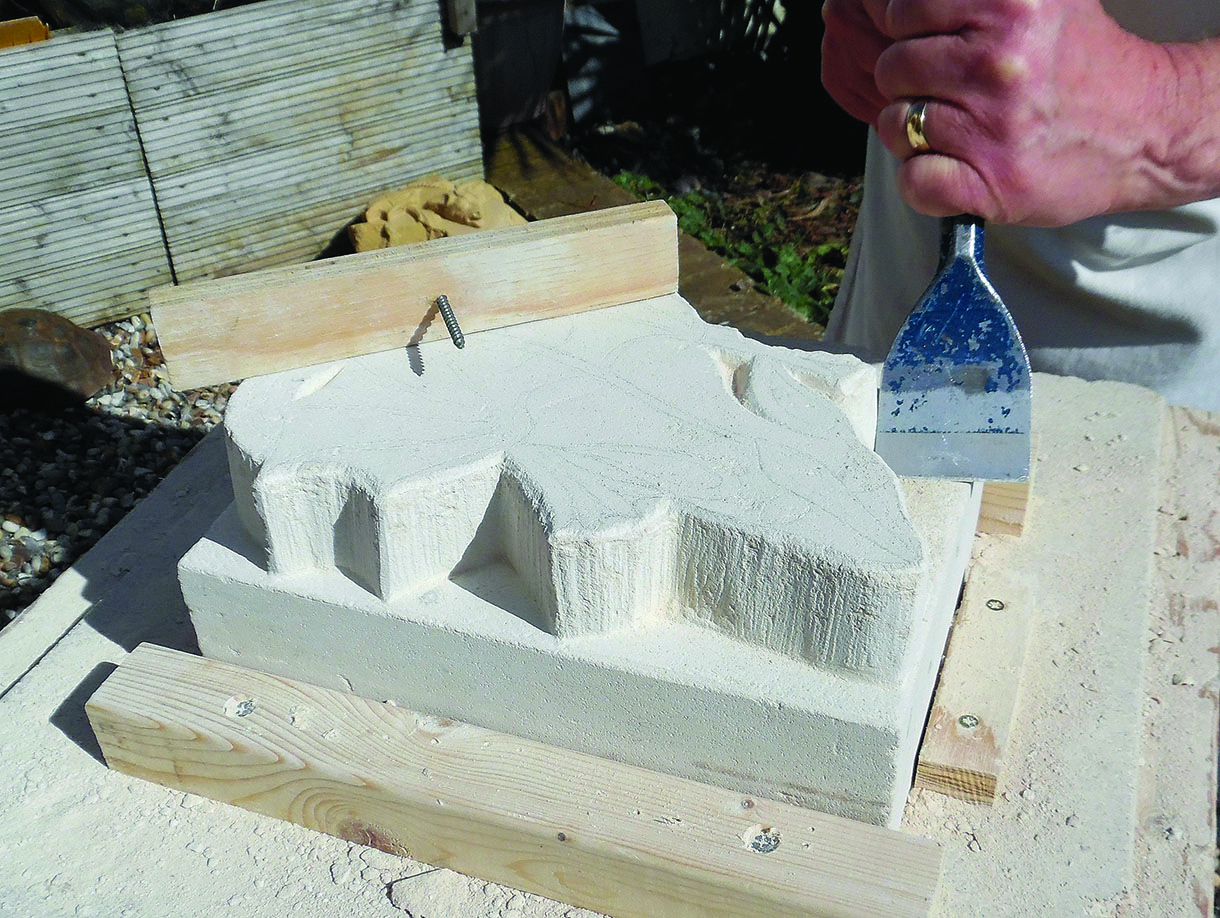
3. Use a bolster to square up the vertical edges, then work the ‘floor’ down to a flat and level surface at the 45mm depth line
4. Chisel down the level of the feet and the swirly end of the tail so they stand 18mm thick above the floor. This helps you to see the main parts of the dragon
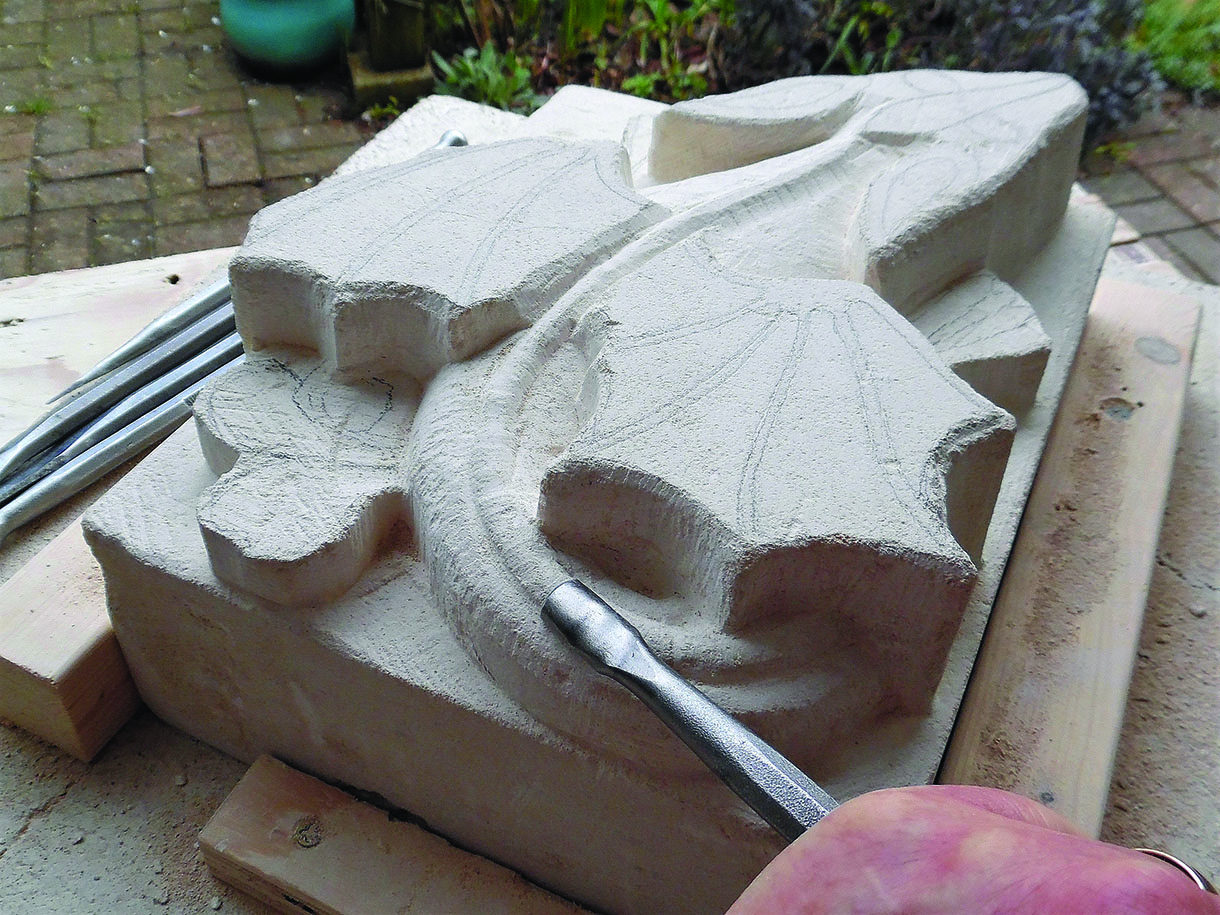
5. Now shape the body and tail. The body in front of the wings spreads out sideways as the dragon is laying on its stomach. Behind the wings it slopes gradually down into the tail. Round over the sides and leave a ridge to form the dorsal scales later
6. Shape the bat-like wings by carving out the hollows between the spines with the gouges. Try to create a recumbent look by lowering the wings towards the edges. To reflect the curve in the dragon’s posture, the left wing curls under at its outer edge. Use the transparency to redraw the spines as you work down
Carving the detail
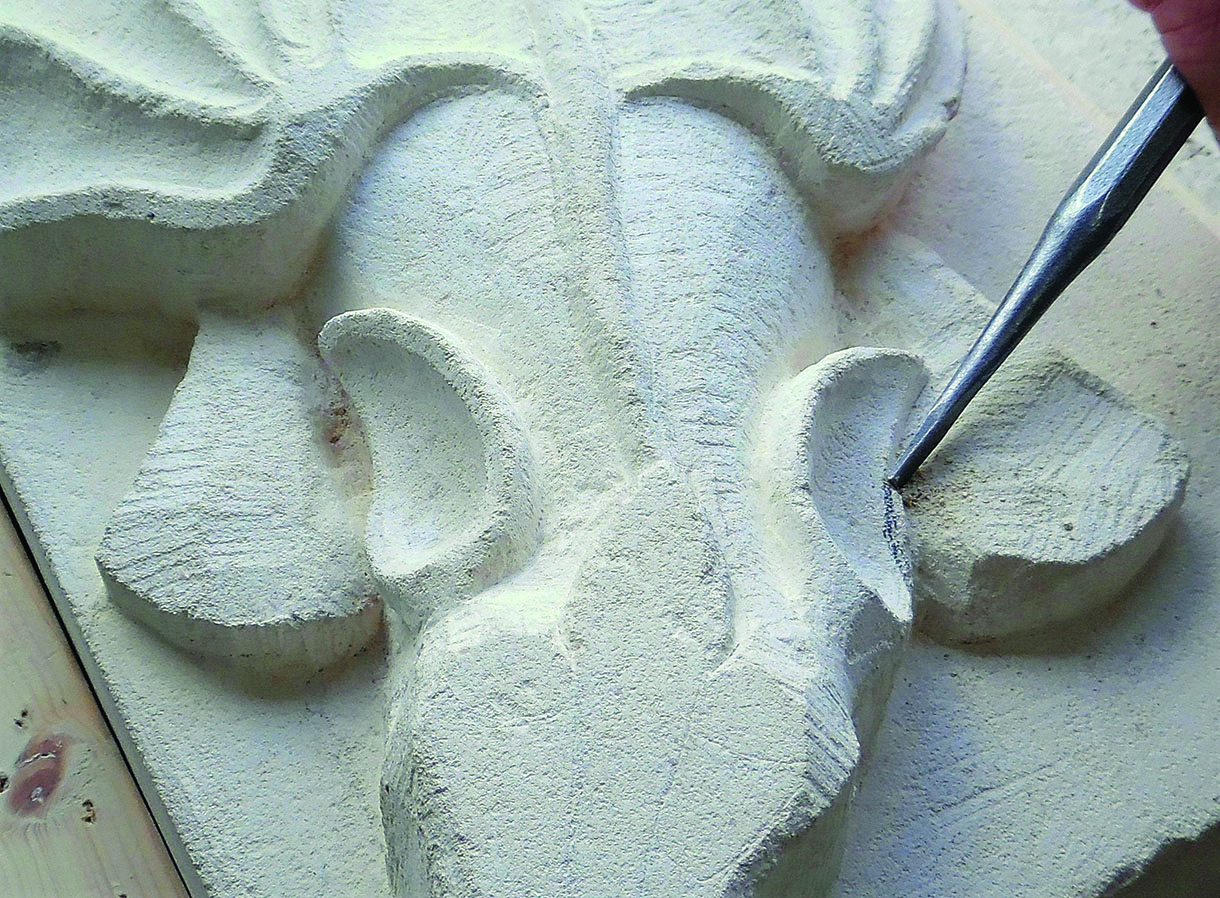
7. Before carving the details, check the position of each element with the transparency and keep redrawing with the pencil. The ears slope downwards and outwards in a floppy sleeping position. Hollow them with gouges and shape the outer edges. The sleeping head lays slightly to the dragon’s left, so the left ear lays slightly lower than the right
8. To form the shape of the head, cut around the bulge of the eyes with the 18mm gouge. Shape the crest scale that runs from between the ears to the tip of the nose and carve two side grooves and a central groove along it with the 6mm gouge. Round over the sides of the nose, and mark the position of the mouth
Did you know
Sightings of dragons were common in medieval times. A report from Bures, Suffolk, in 1405 complains that a huge dragon killed a flock of sheep. A possible explanation for these sightings is a hallucinatory fungus called ergot which could grow on crops of rye, get into the local bread, and cause mass hallucinations.
Top tip: One tool that is essential for stonecarving is the pencil. Before you carve any feature, draw it in carefully first with a hard pencil and check that it is in the right position and looks as you want it. You can then carve with more confidence. It is much harder to correct a bad cut in the stone than it is to rub out and redraw a pencil mark.
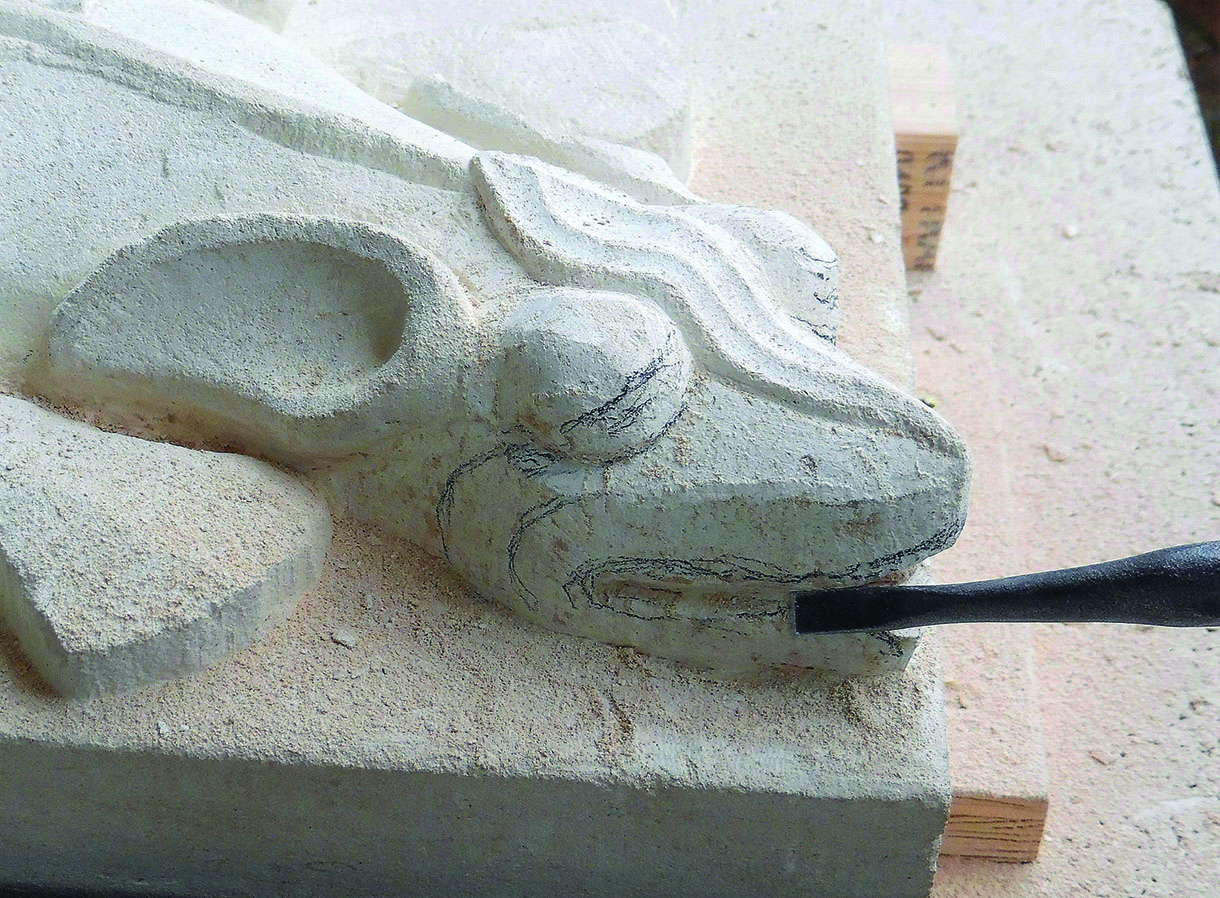
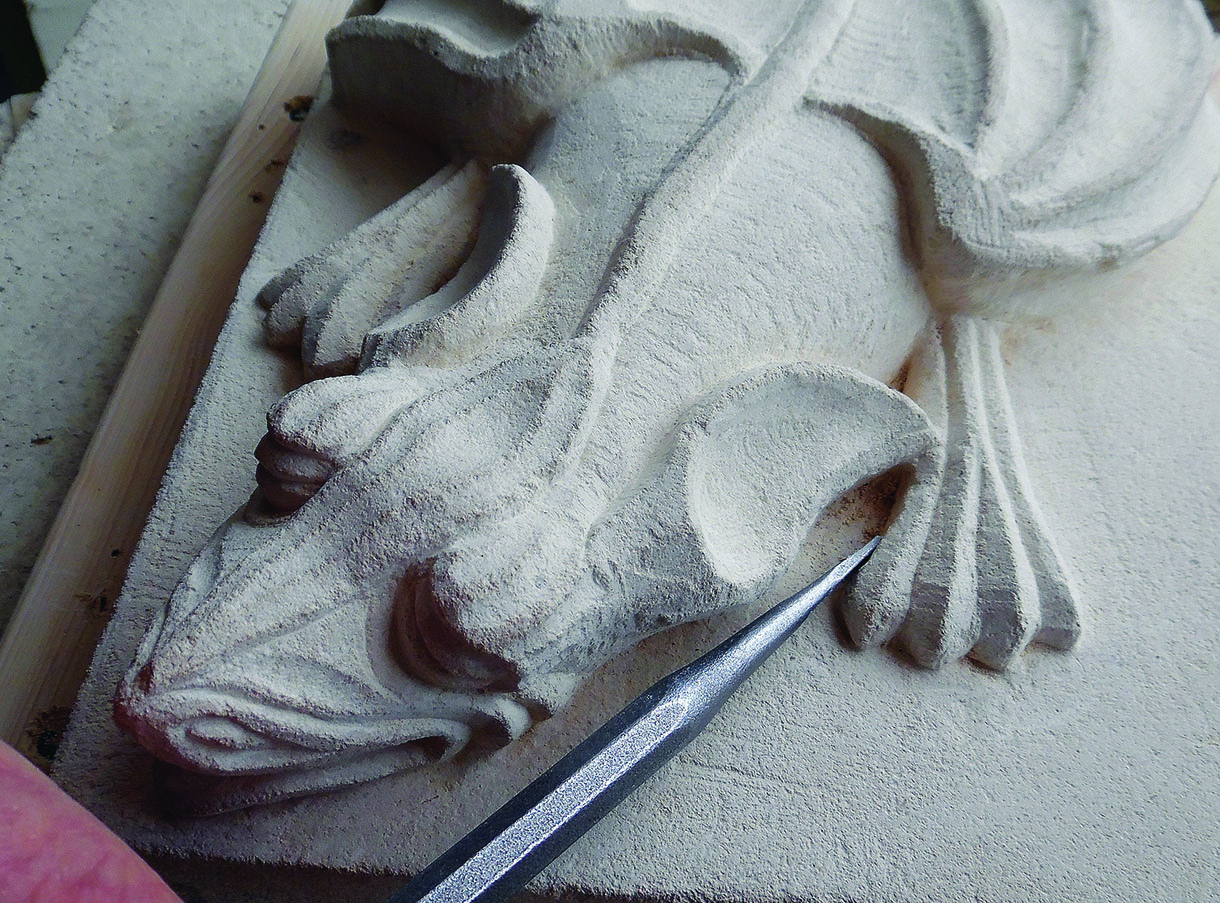
9. Very carefully carve the dragon’s eyes, which have an overhanging brow and upper and lower eyelids separated by a sloping V-cut to show they are closed. Use the corner points of a 6mm chisel to ‘engrave’ the sharp lines, and the 6mm gouge to form grooves from the top of the brow back to the ears
10. Open out the front and sides of the mouth to show a tongue which extends on to the lower lip at the front. Carefully carve the nostrils and the V-grooves which flow from the nose and eyes back around, under, and behind the mouth, looking a bit like gills. Slightly undercut the cheeks and the lower jaw so the head is laying on top of the base
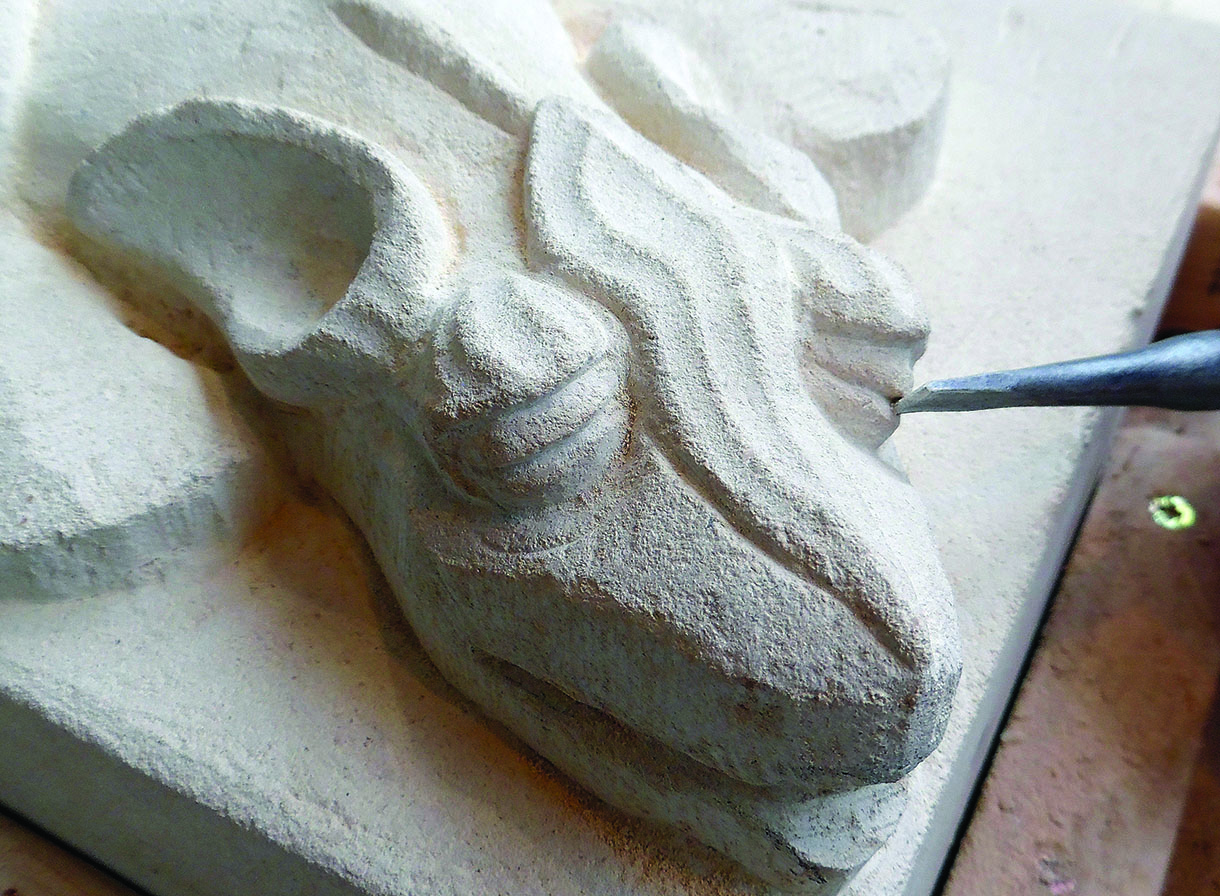
11. Do some more undercutting under the ears to separate the feet from the neck. Carve each foot into four toes, with v-grooves running back along the legs
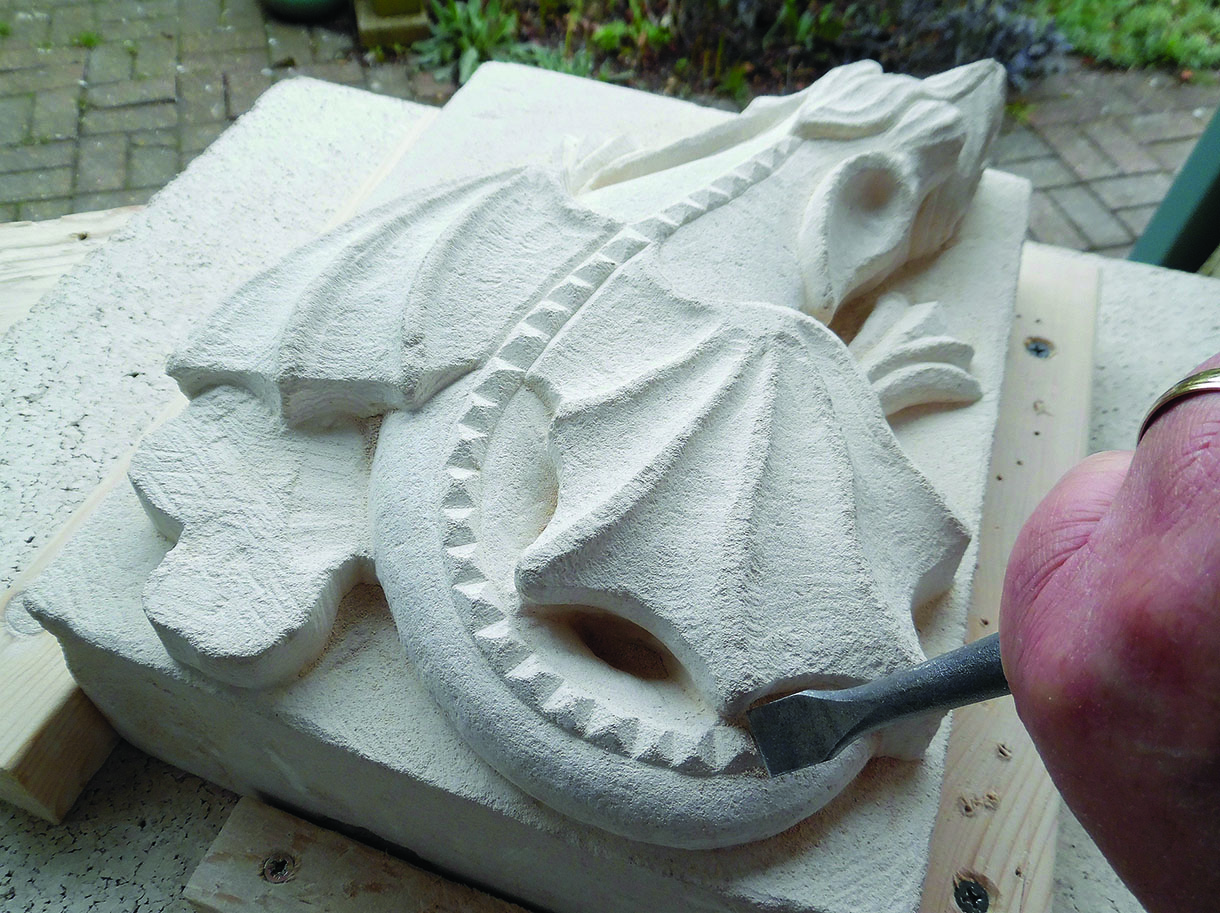
12. Now refine the shape of the body and the thick tail into their final rounded form, undercutting so it looks three-dimensional on top of the base. Carve the inverted V of the dorsal ridge along the back, and make cross-cuts to create pyramid-shaped dorsal scales
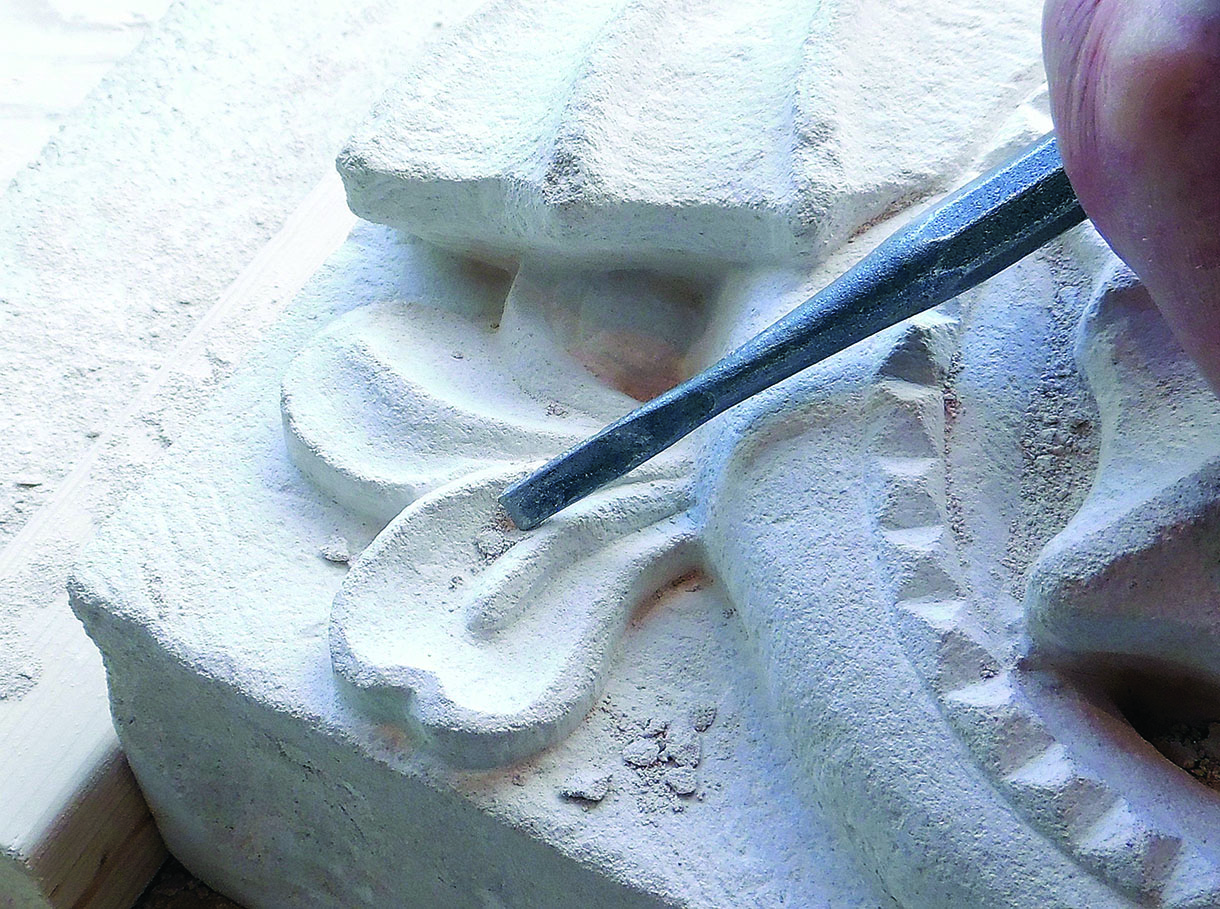
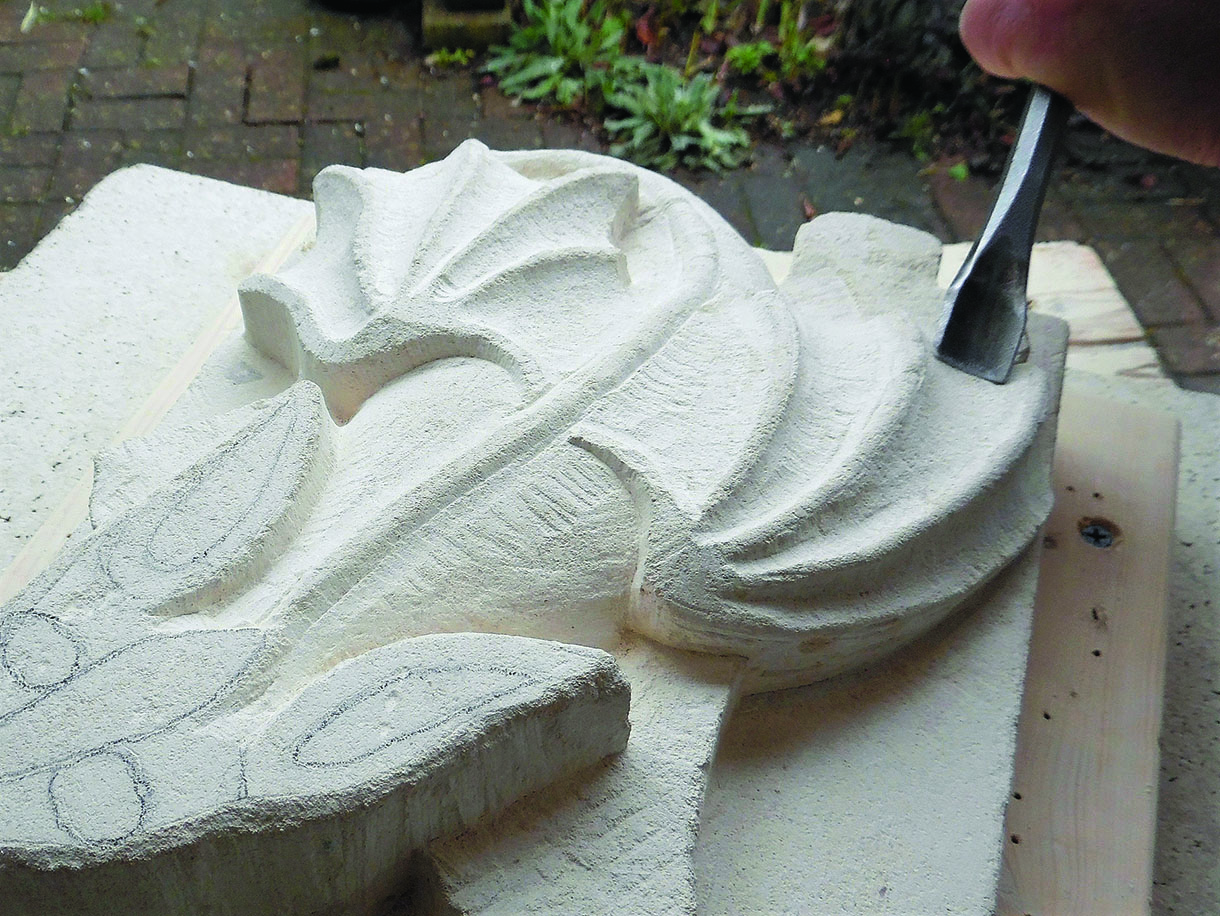
13. The curly end of the tail appears from under the body and wings in low relief and divides into three leaves of the Gothic ‘stiff leaf’ type. Very carefully undercut the edges of the left wing to create the volute shape of the third leaf
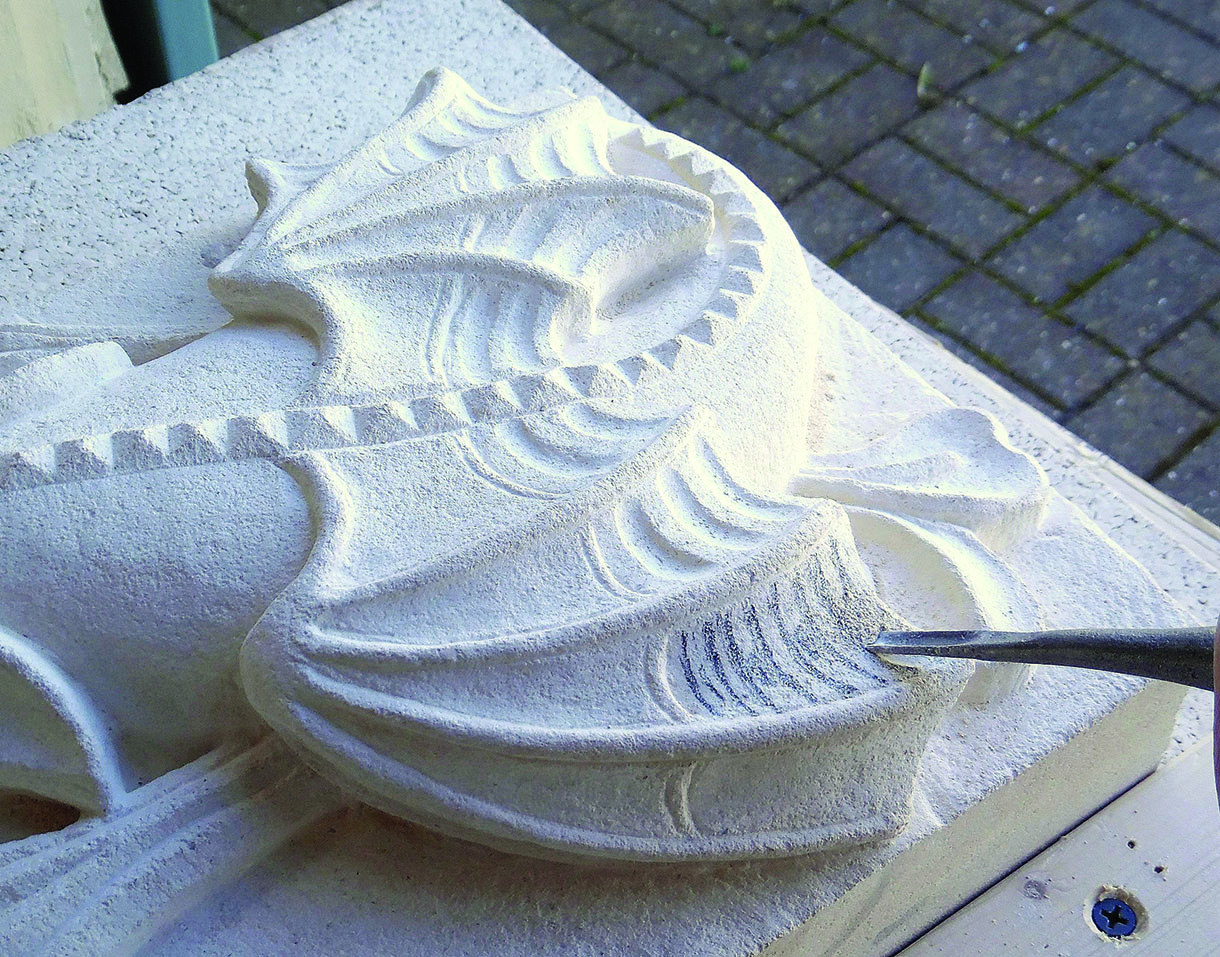
14. Finish the wings by running the 6mm gouge along the sides of the ‘spines’ to make them stand out against the wing membranes. Now carve the cross-bars at the outer ends of each flute with the 6mm gouge. Refine and undercut the curved ends of the wing membranes
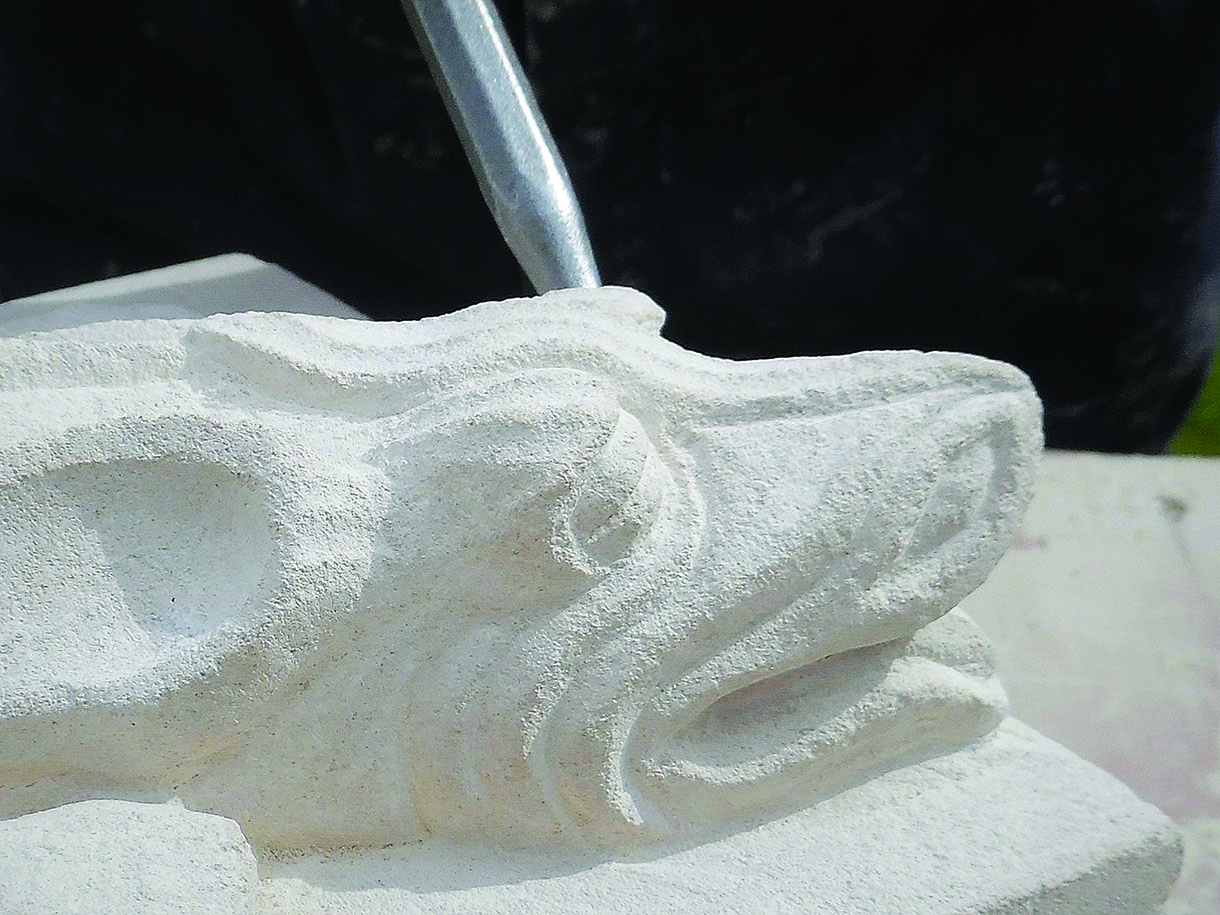
15. To finish off, undercut the lower edge of each element where it meets the base to make it look detached. Very carefully undercut all the edges of the wings so they look natural. Rework the base surface to remove all cut marks and make it smooth and level – you can push the bolster along like a plane for the final smoothing. Finally, cut a 45º chamfer along all four sides of the block to give the base a neat edge

16. The stone sleeping dragon is now finished. Wash off all the dust with a hose and tidy up any rough bits. The stone dragon will live quite happily outdoors in all weathers for hundreds of years, unlike its wooden counterpart
Making the dragon in oak
If you want to make this dragon as a woodcarving, it works well in oak (Quercus robur), although you could use any suitable hardwood. You could also make it as a relief carving on an oak block in the same manner as the stone carving, but I have made it as a freestanding creature cut out from the oak board with a bandsaw or jigsaw. Woodcarving needs more tools than stone carving because of the grain, but you can achieve finer detail with the oak version.
Things you will need
Tools:
• No.3, 10mm gouge
• No.3, 10 & 20mm fishtail gouge
• No.4, 6mm fishtail gouge
• No.5, 5 & 7mm
• No.5, 13mm curved gouge
• No.8, 8mm
• No.8, 8mm curved gouge
• No.9, 3 & 20mm
• No.9, 16mm curved gouge
• 10mm skewed spoon gouges, L&R
• 2 & 6mm straight V-tool
• 3, 6.5 & 20mm flat chisel
• 10mm skew chisel
• Padsaw and either a bandsaw or jigsaw
Materials:
• Oak (Quercus robur) 270 x 210 x 50mm
• Antiquax original wax polish
Carving the dragon in oak
Preparations
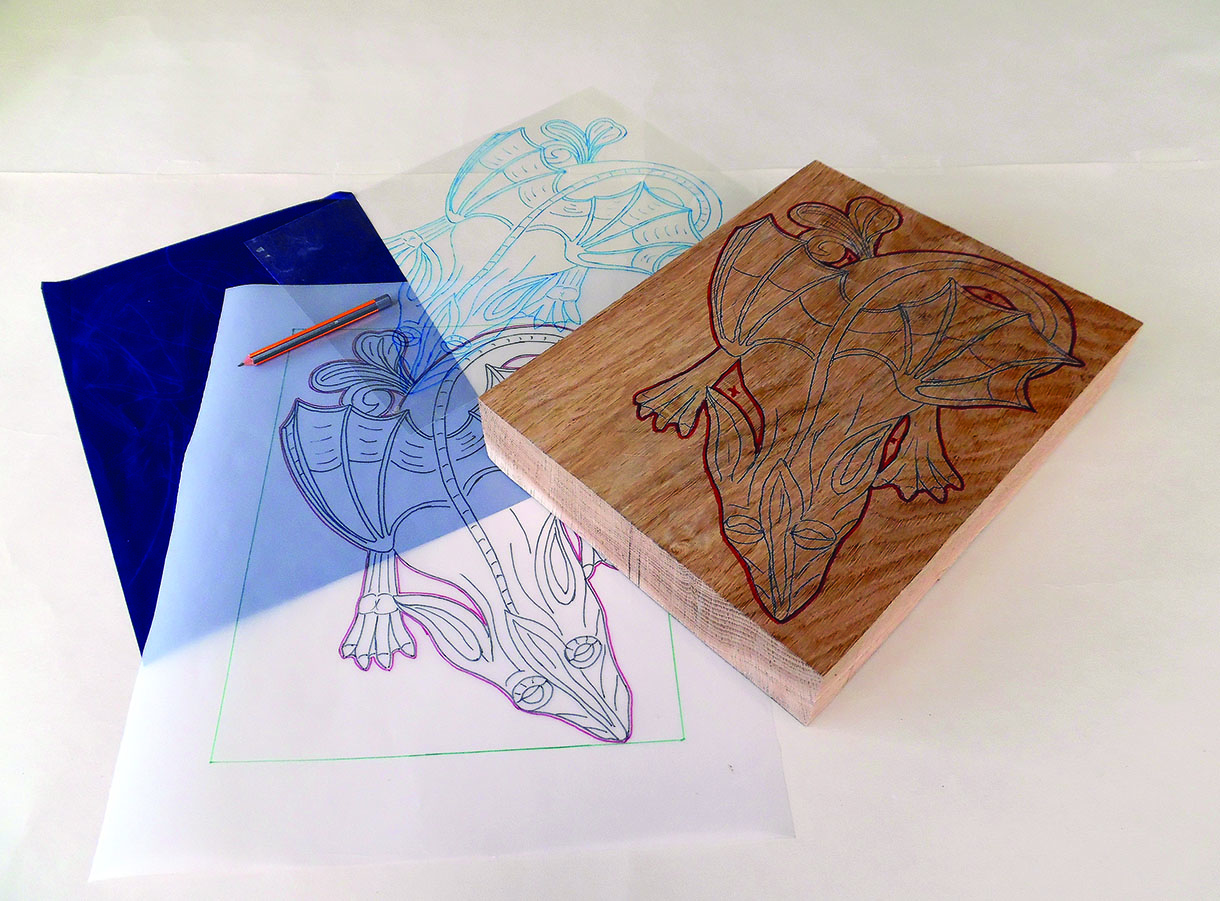
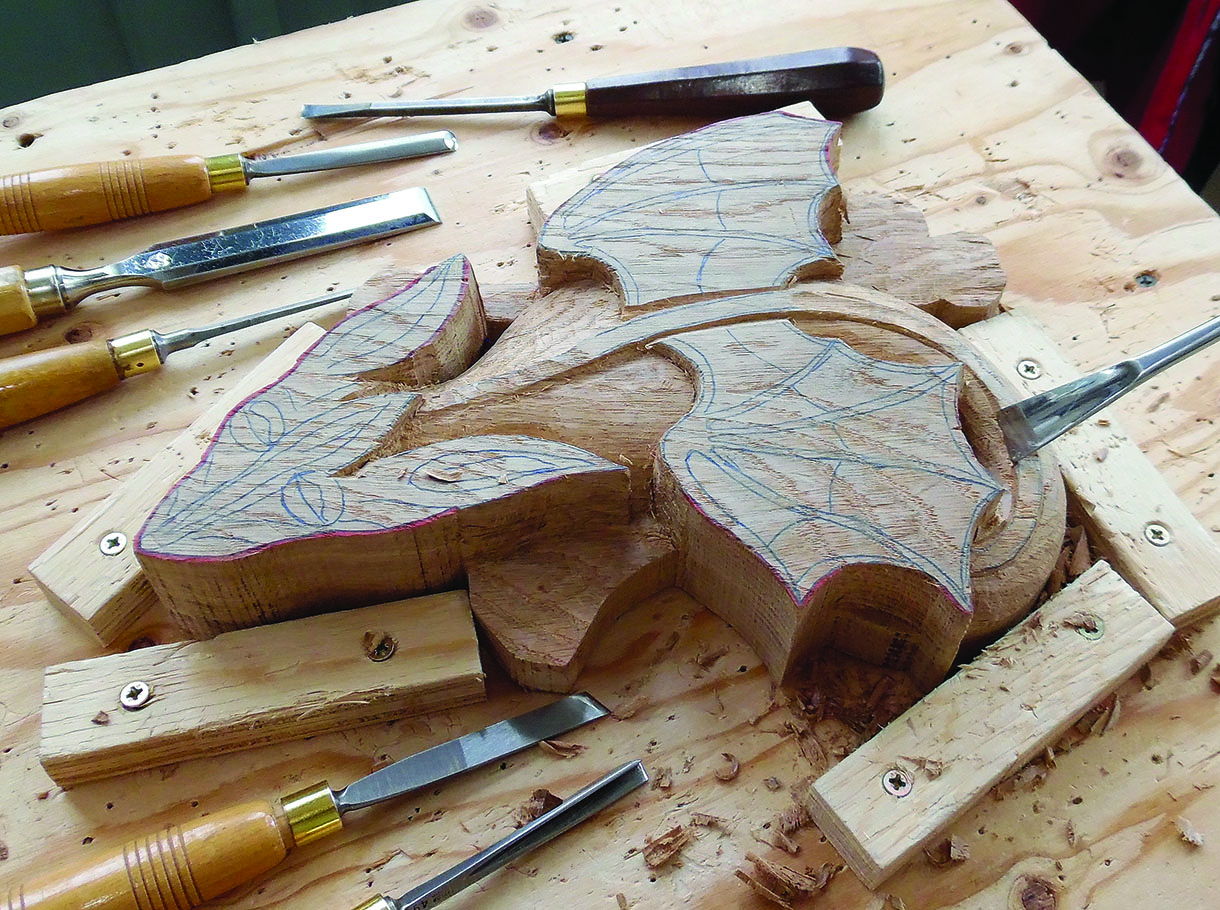
1. Get a piece of oak (Quercus robur) 270 x 210 x 50mm. Make a full-sized copy of the drawing, trace the pattern on to the wood using carbon paper and mark your cutting lines in red. Also, get some transparency film and trace the pattern on to it (it will help preserve the pattern as you carve)
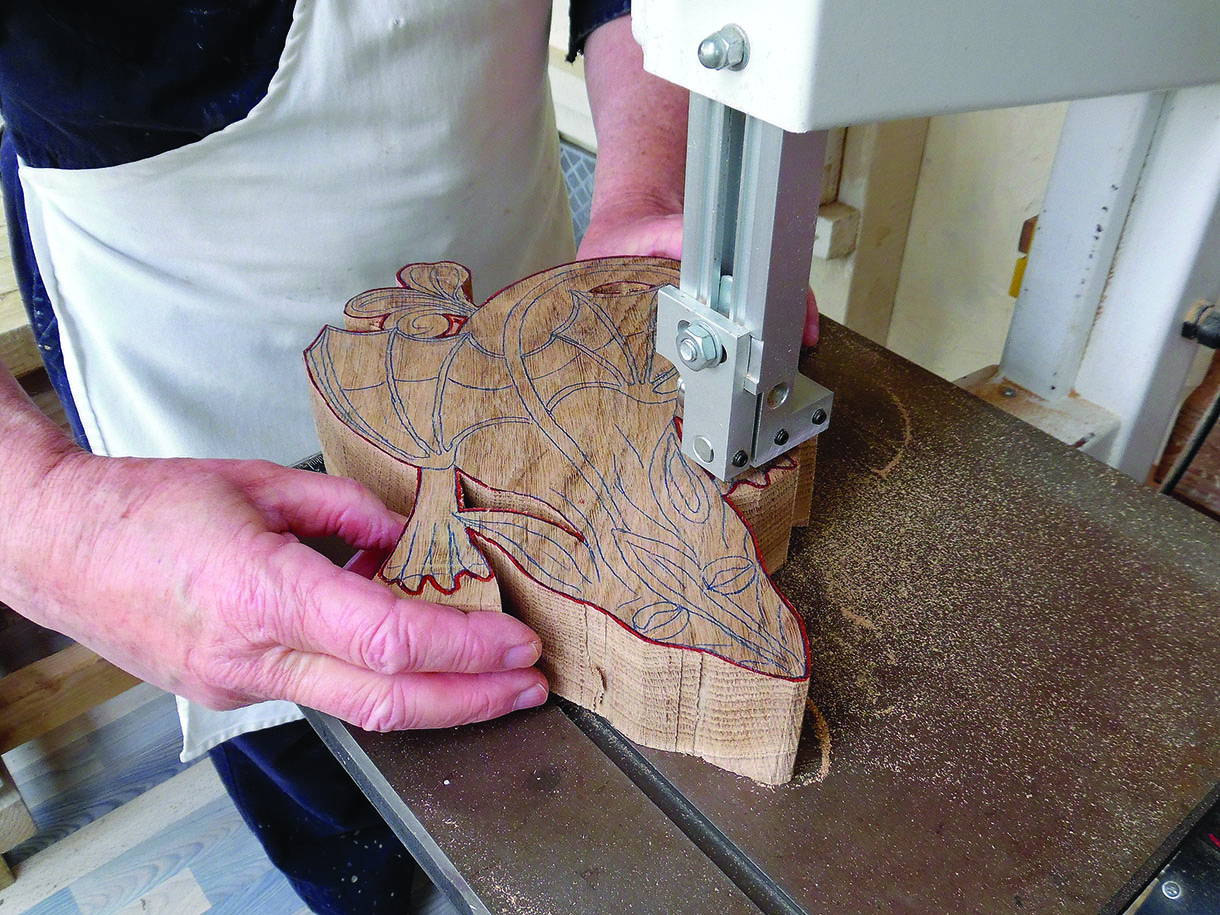
2. Cut the pattern out of the block. First use a drill and jigsaw to cut out the internal voids, but be aware that the jigsaw blade will flex a lot at this thickness. A bandsaw or a scrollsaw, if you have one, is best for cutting round the outside to avoid the flexing problem
Roughing out
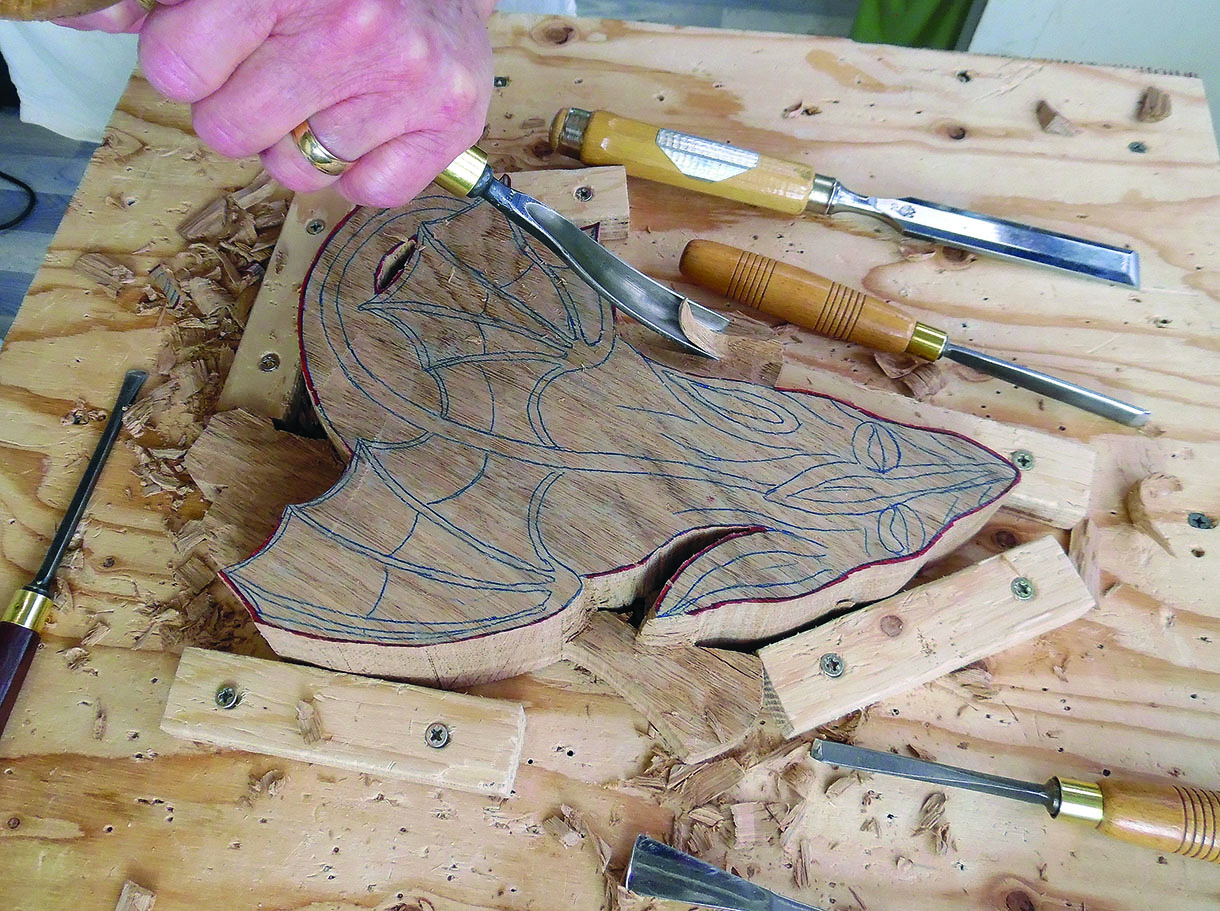
3. Set up the carving on the bench with some blocks to hold it in place. Start roughing out the levels by cutting down the legs and the swirly end of the tail to a thickness of about 18mm
4. Now rough out the rounded shape of the body and tail. The neck is slightly lower than the level of the forehead, and the body in front of the wings spreads out sideways as the dragon is laying on its stomach. Behind the wings it slopes gradually downwards towards the tail. The height of the body and tail is roughly the same as its width at each point. Leave a ridge down the middle for the dorsal scales later
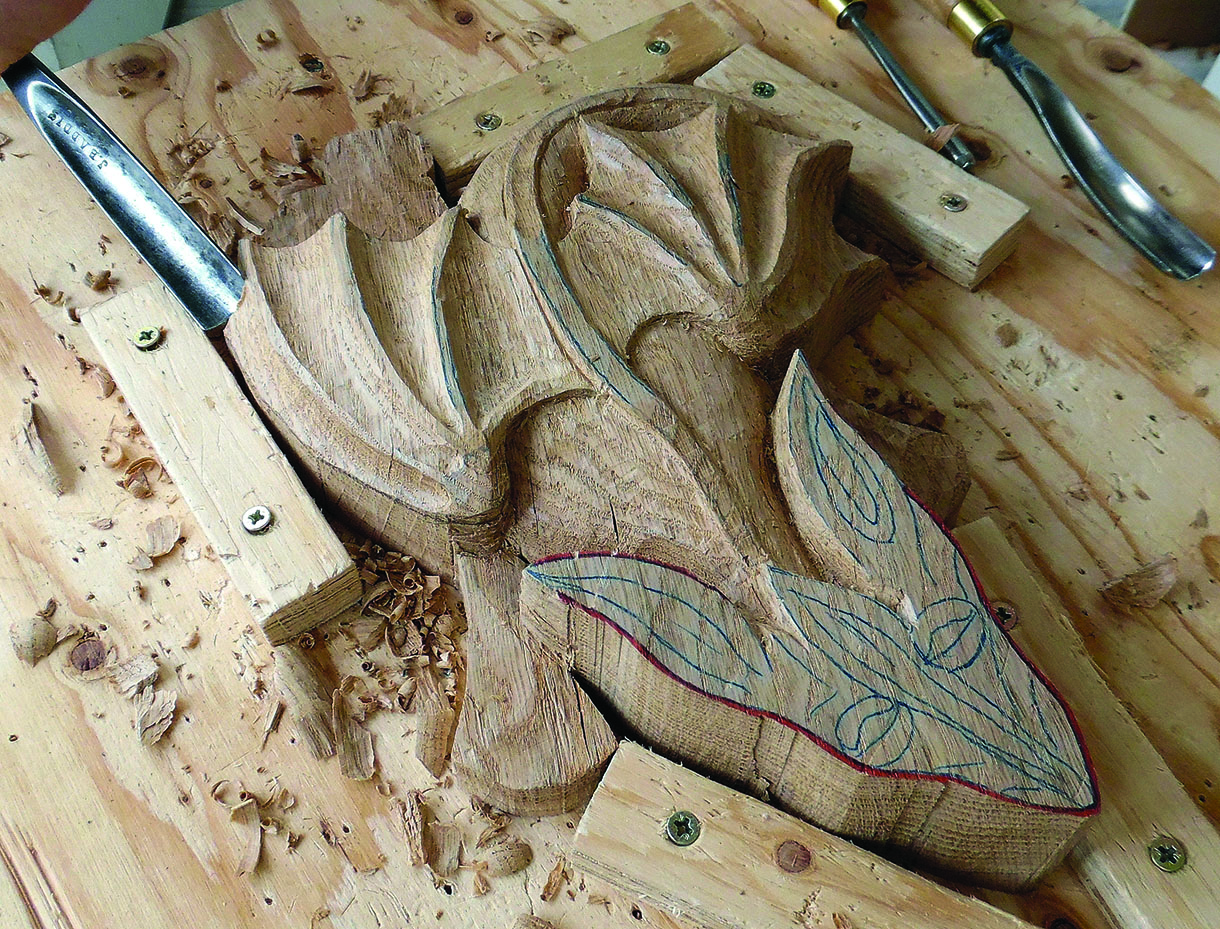
5. Shape the bat-like wings by carving out the hollows between the spines. As the dragon is sleeping, reduce the level of the wings towards the edges so they lay resting on the body and legs. Use the transparency of the pattern to redraw the spines as you work down. The dragon’s right wing curls under at its outer edge
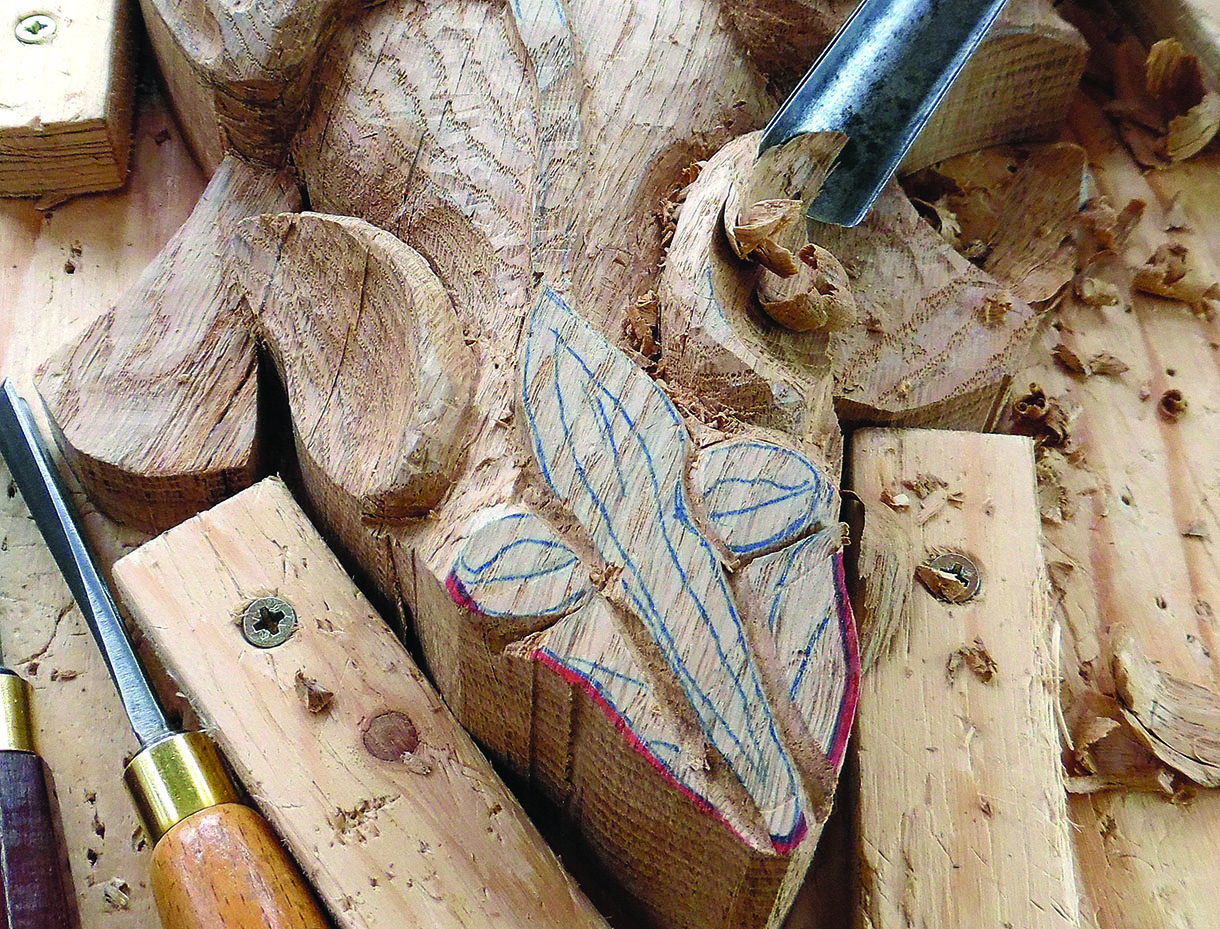
6. Rough out and hollow the shape of the ears, which lay in a relaxed posture against the body, sloping down towards the legs
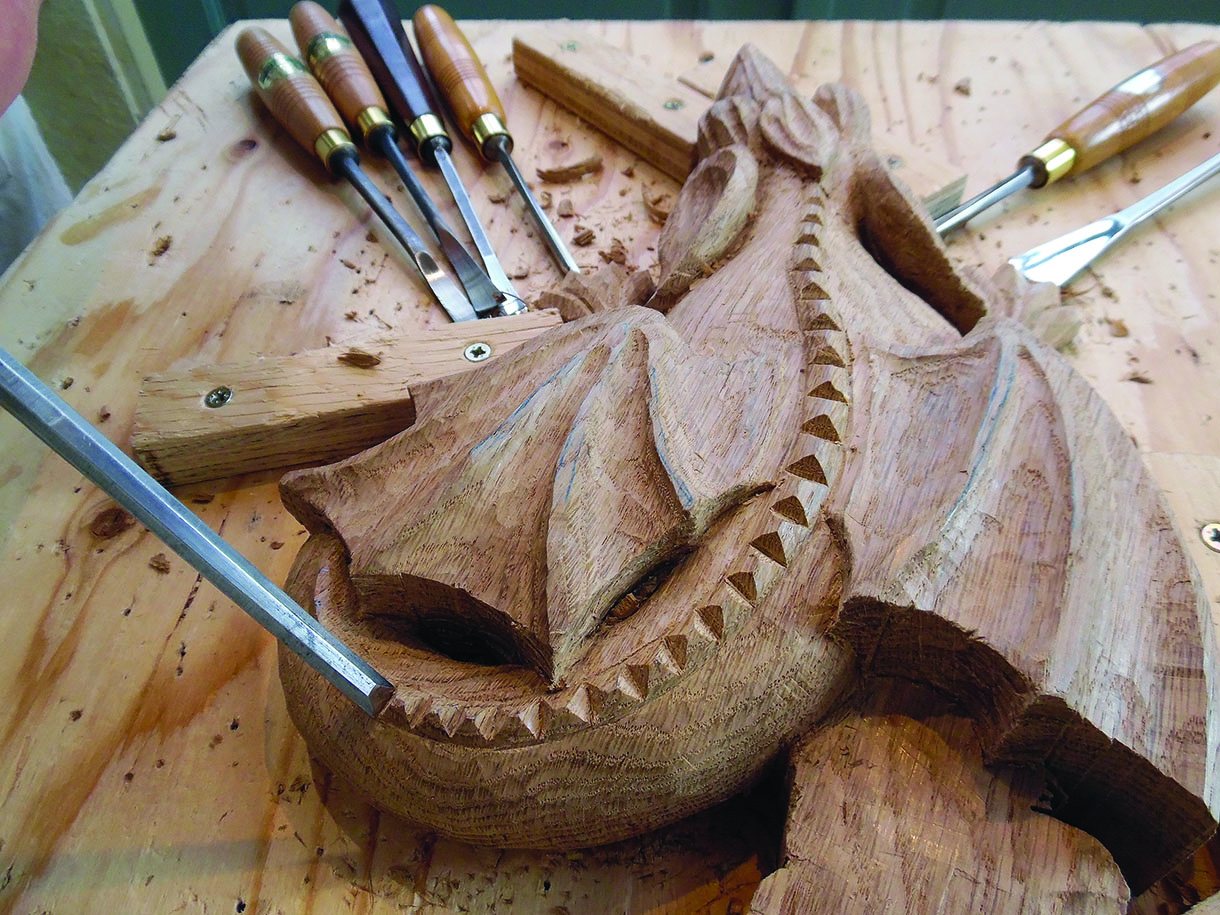
7. To finish the roughing out, cut around the bulge of the eyes and shape the crest scale that runs from between the ears to the tip of the nose. Round over the sides of the nose, and mark the position of the mouth
Carving the detail
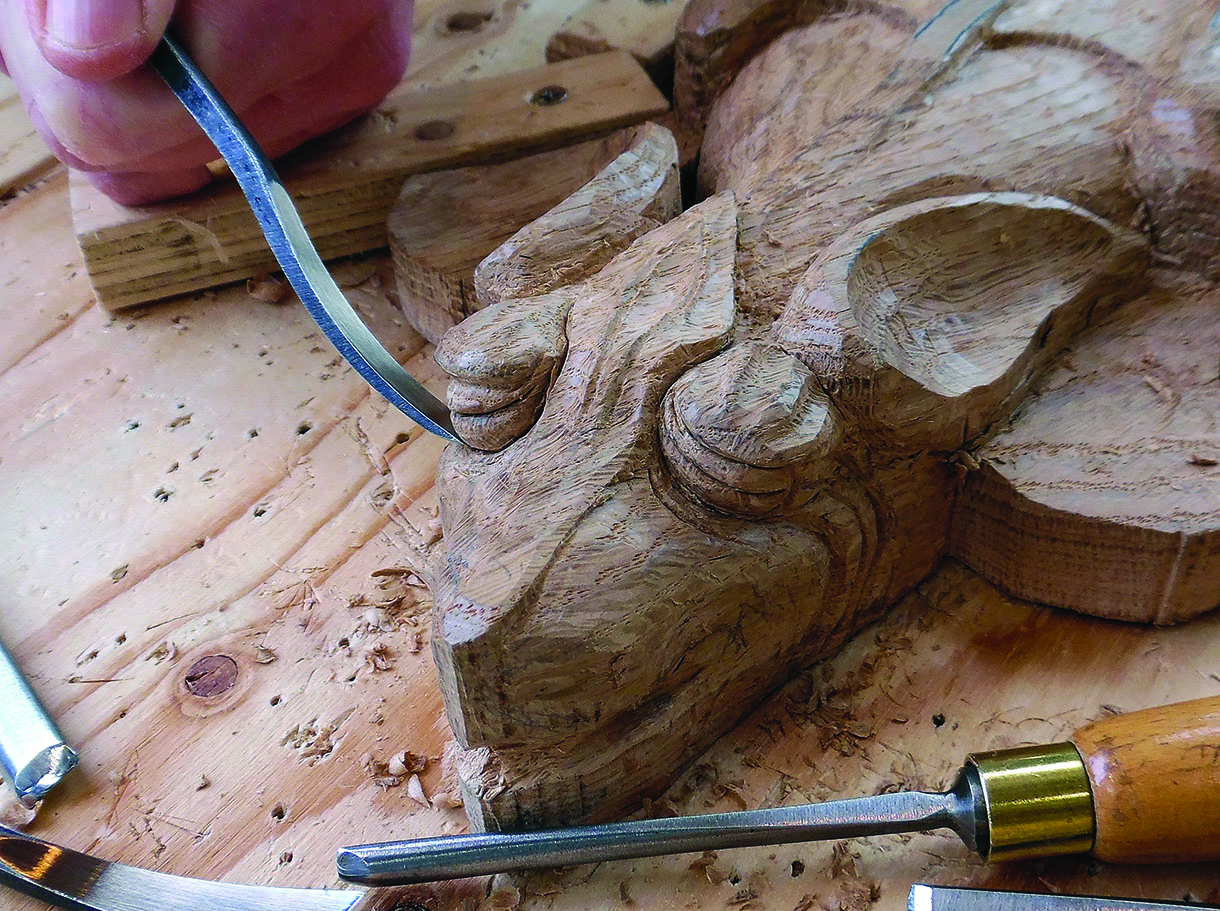
8. Carve the dragon’s eyes and the crest scale between them. The eyes have an overhanging brow, and upper and lower eyelids are separated by a sloping V-cut to show they are closed. You may need to put the carving in a bench vice to access some of the cuts. Detailing is not easy in end grain at this small scale, so define the eyes with bold gouge cuts to make them stand out
Top tip: Some carvers print out the pattern, paste it on to the wood, and carve through the paper. I trace the pattern on to the wood with carbon paper which allows me to see the grain and the pattern at the same time when carving at oblique angles.
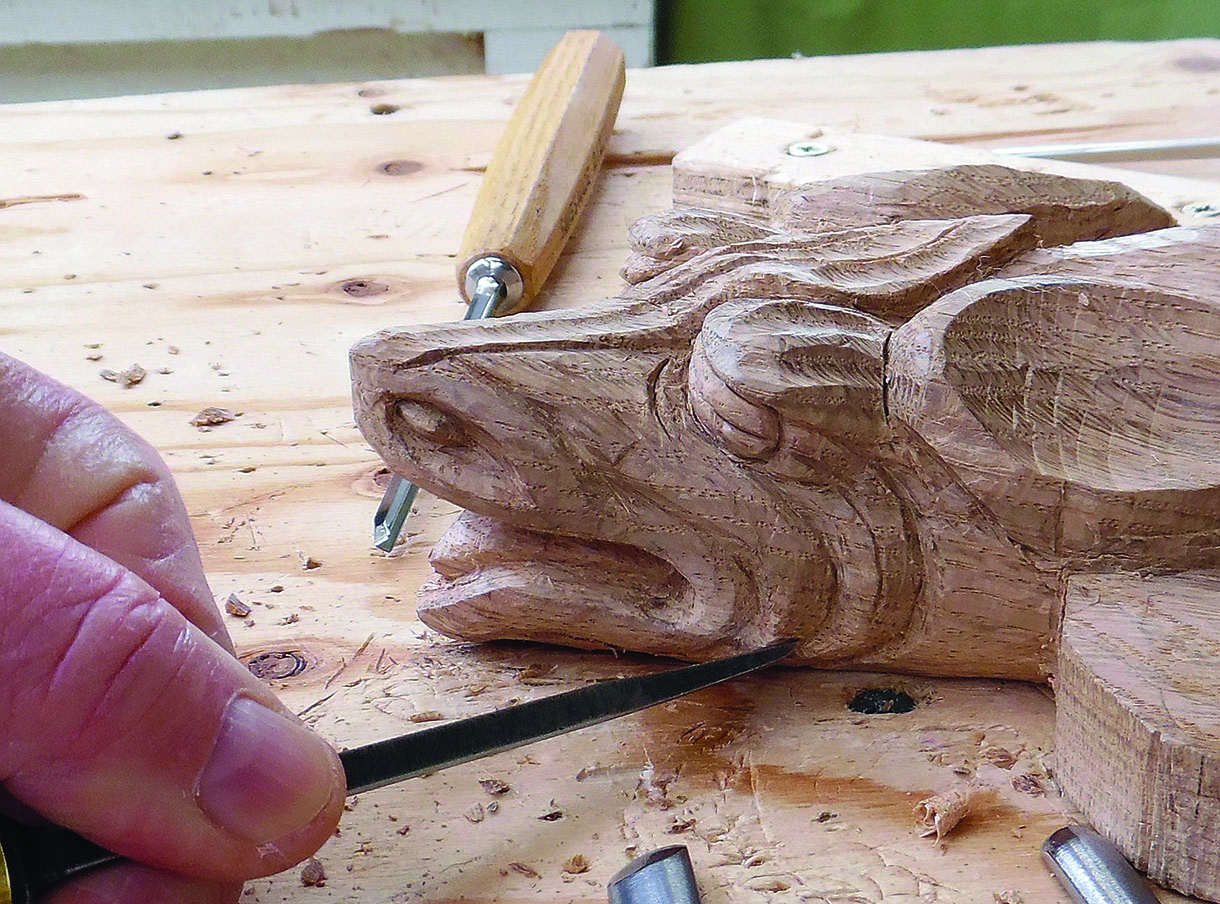
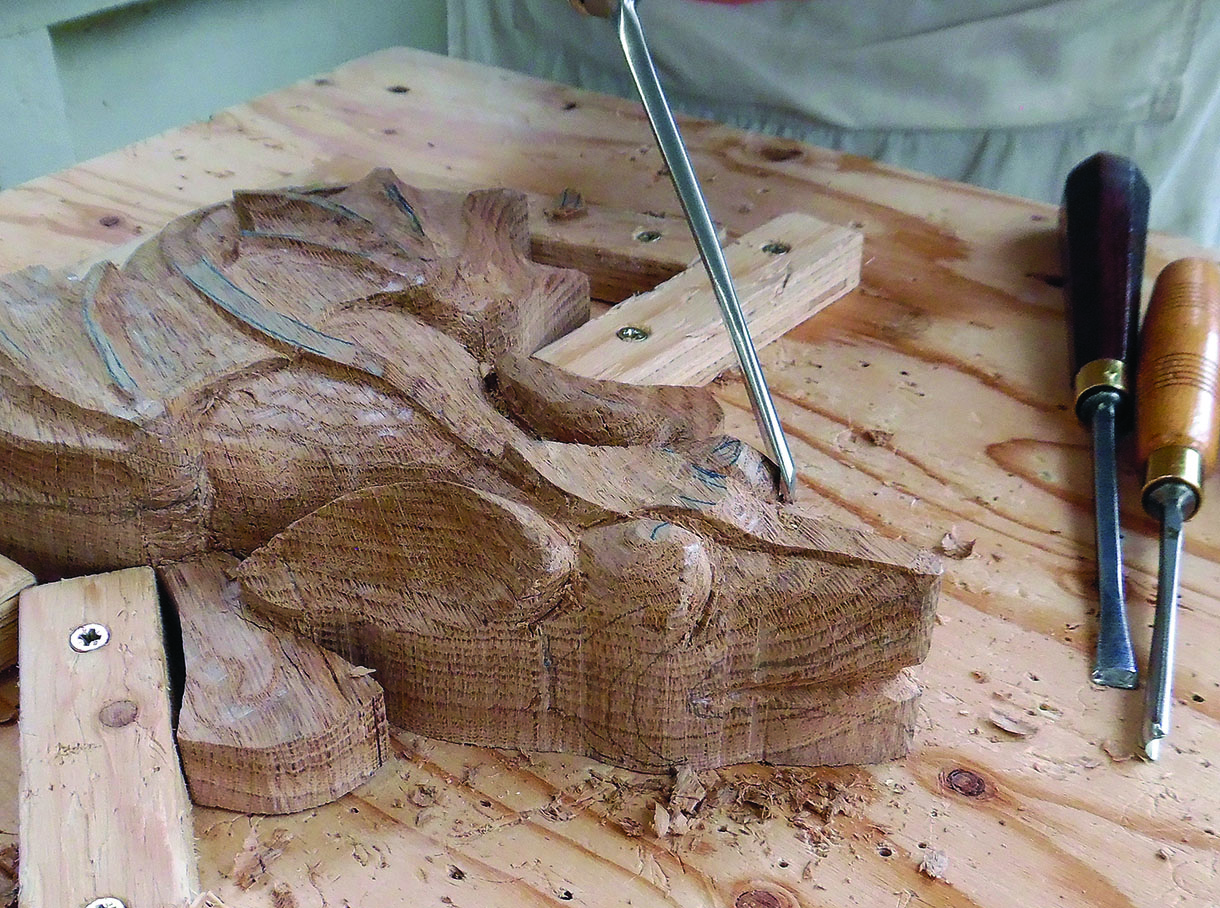
9. Carve the mouth partly open with the tongue inside it, and carve the nostrils in the nose. Cut bold grooves from the nose down and around the mouth, and from the eyes down and under the cheeks, rather like gills. Again, you may need the bench vice to access some cuts
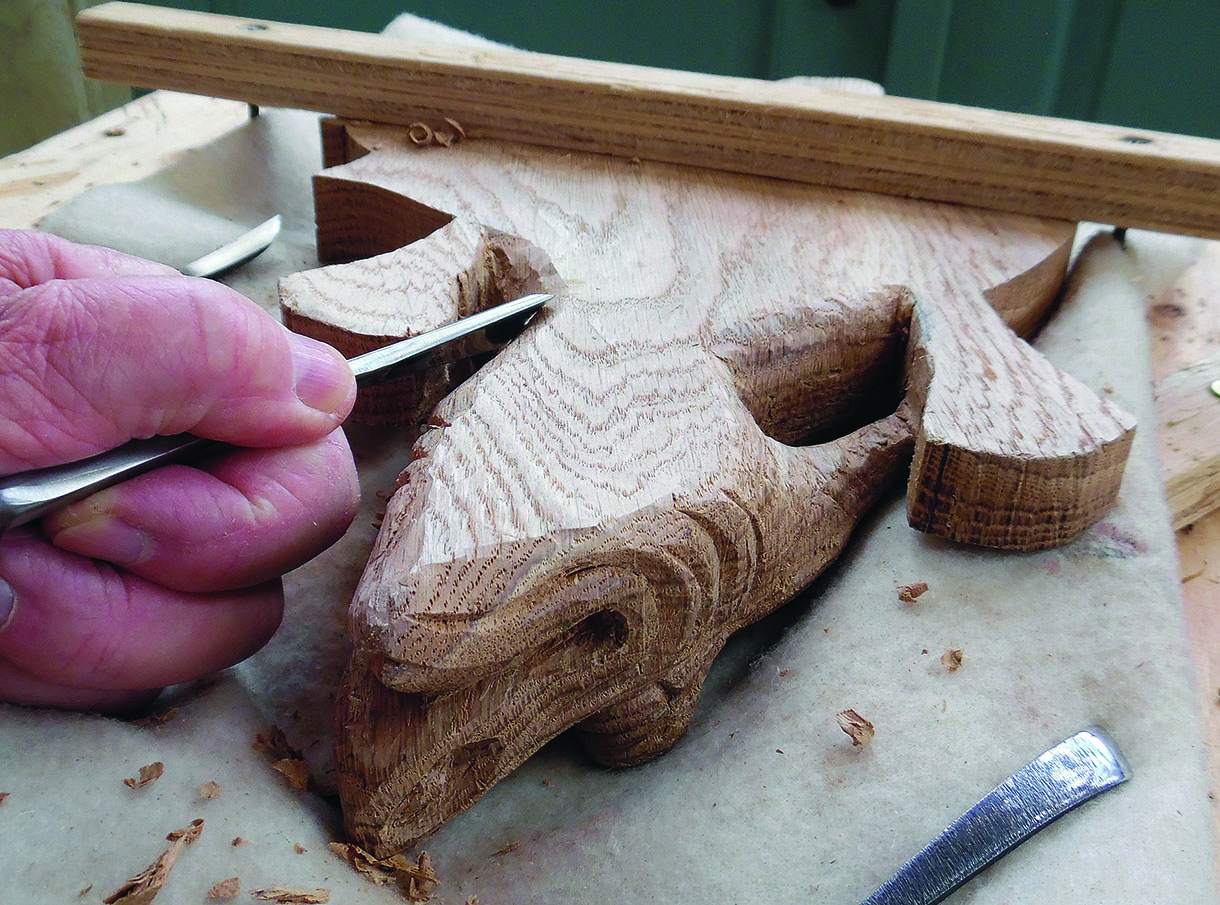
10. To carve the ears and neck, you need to turn the piece upside down on a soft surface and carve away the surplus wood under the ears and between the feet and neck. Round over the underside of the neck and upper body
11. Now carve the final shape of the ears with a hollow scooped out inside them. The tip of the dragon’s right ear rests on the right leg, and there is a gap between the ear and the body. The left ear and leg are now separated. Carve both feet into four toes and undercut the body below the ears on each side
12. Refine the shape of the body and tail so it is nicely rounded. It helps if you round off the underside first so you can get a better idea where the top of the body needs to be. Carve an inverted V all the way along the spine and divide it with crosscuts to form the dorsal scales
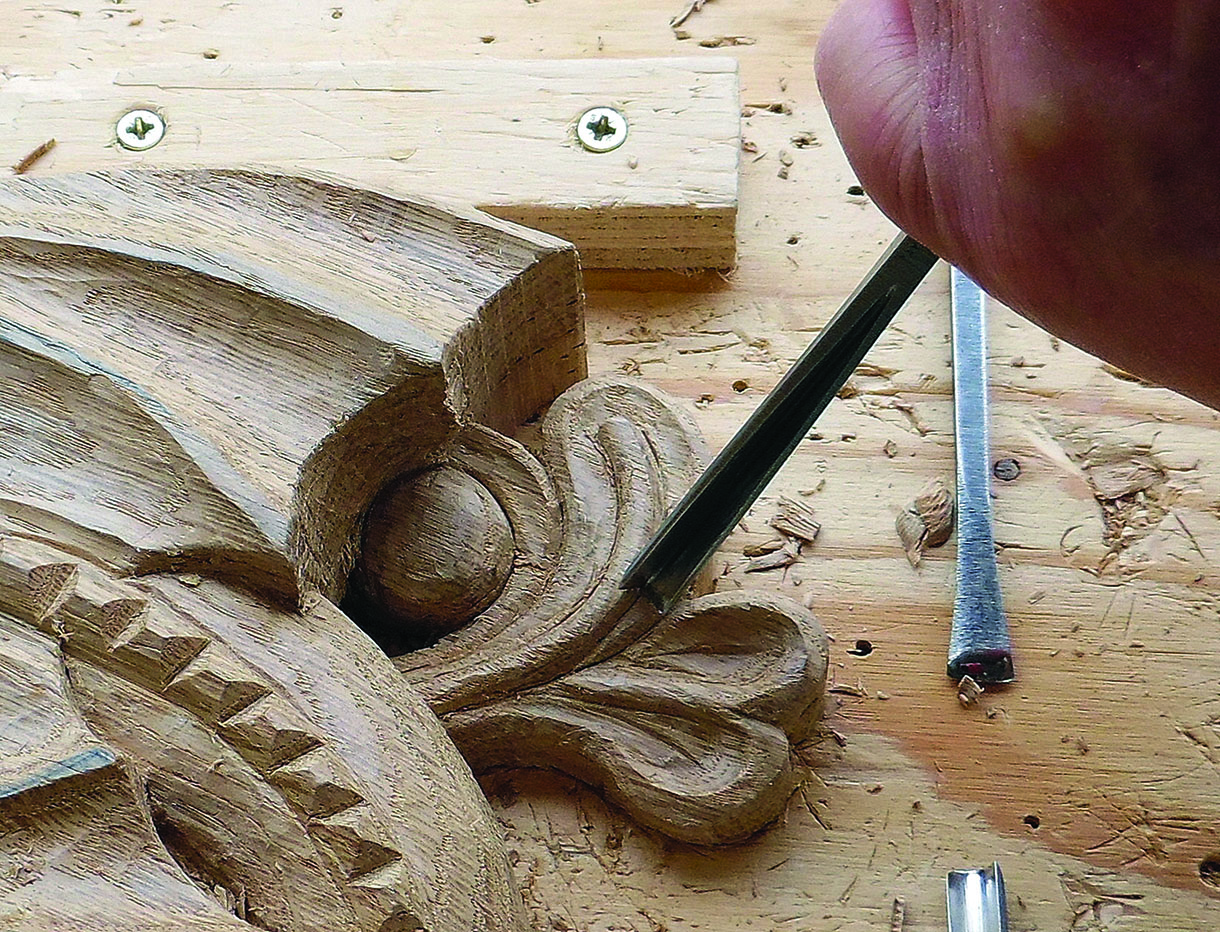
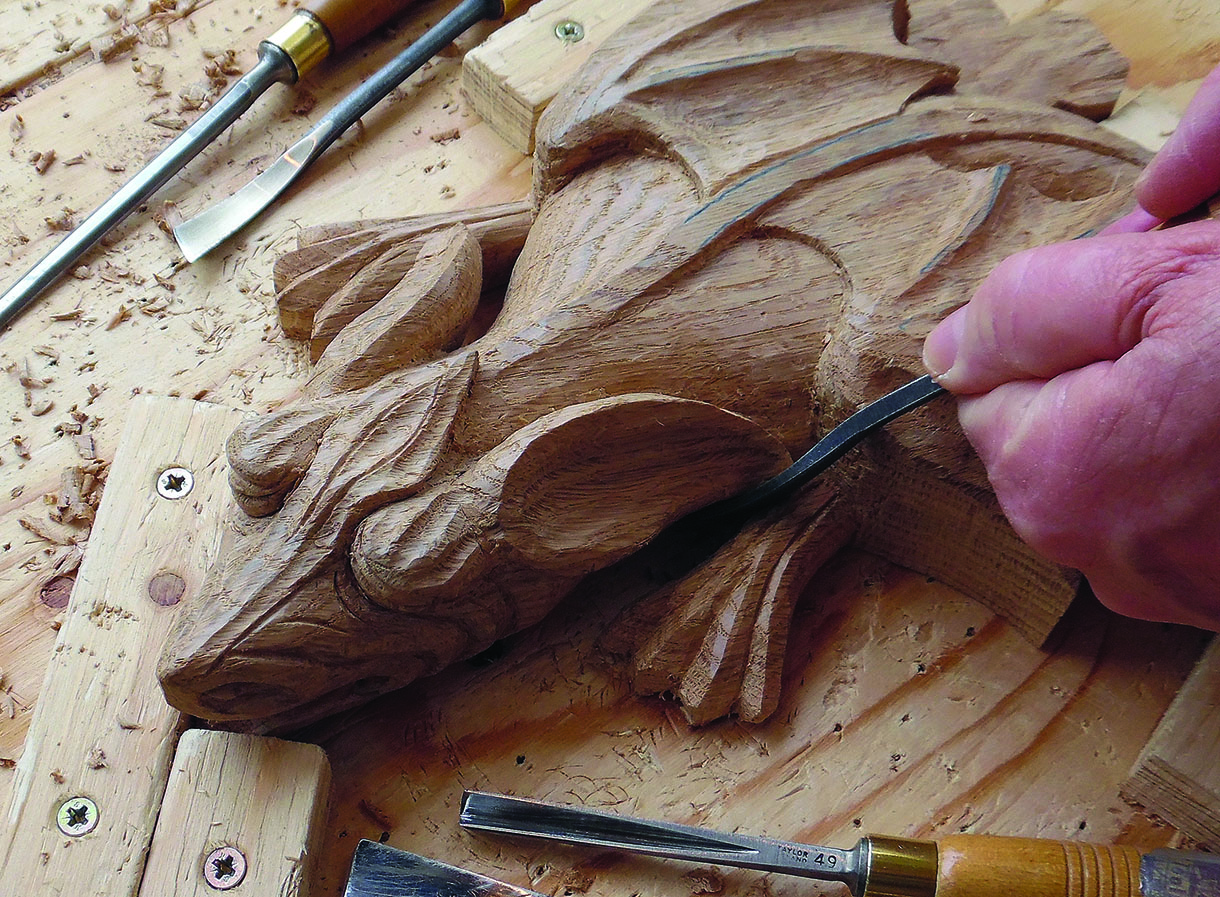
13. Carve the tail swirls, which are in the Gothic ‘stiff leaf’ style. The tail should emerge from under the body and appear to connect to the curl of the tail that disappears under the left wing and flows under the body

14. Carve the ‘spines’ of the wings by running a shallow gouge along the sides of each ridge, then define the edges with a fine V-tool. Now carve the cross-bars at the outer ends of each flute with a No.8, 8mm curved gouge and define their edges with the same V-tool. These cuts run across the grain, so keep the tools sharp and take several shallow cuts for each groove
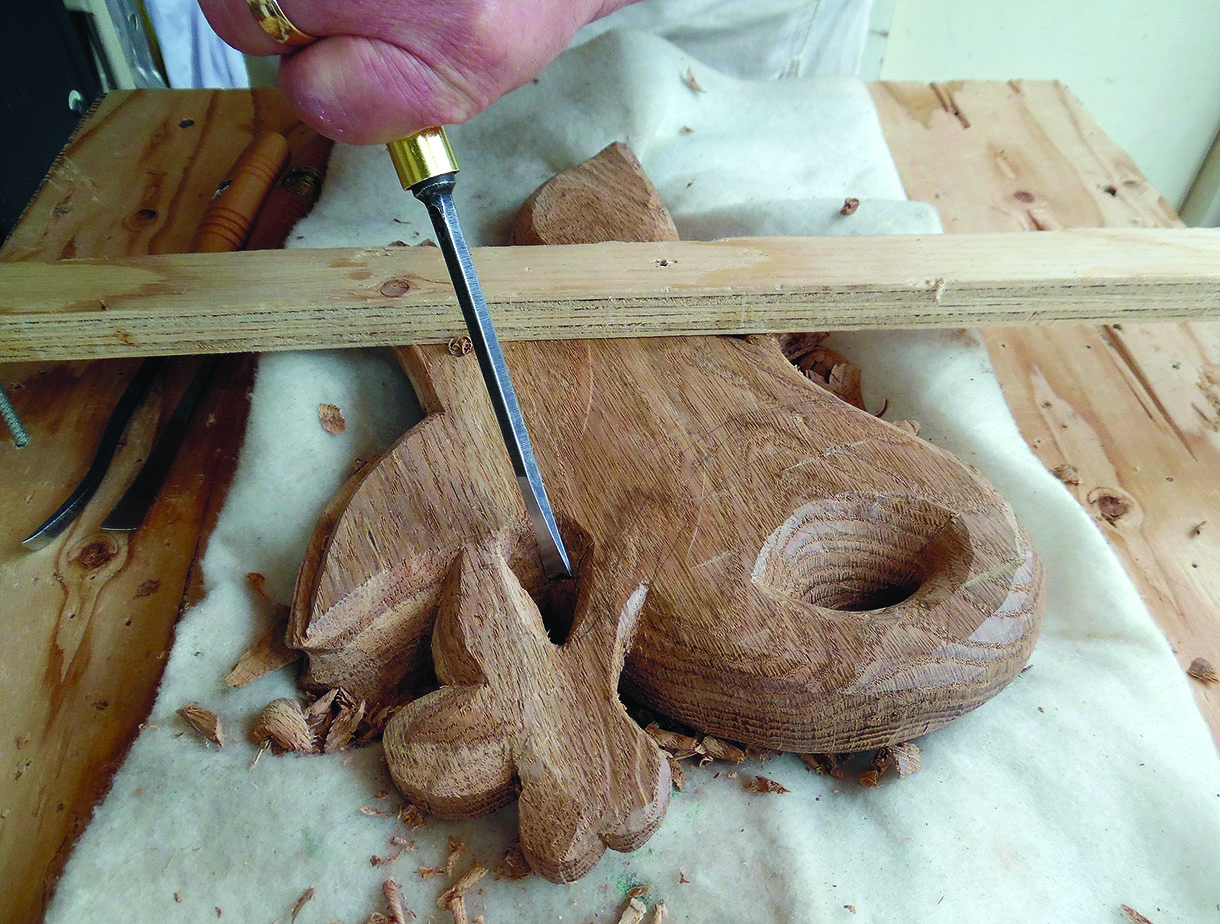
15. Finally, turn the carving over on a soft, non-slip surface and undercut around the edges of the body, wings and tail. Cut back just enough so that everything you see when it is on display is dragon and not surplus wood
Top tip: Undercutting an oak carving is much harder than with limewood (Tilia spp.), so it helps if you place the carving upside down on a soft surface and fix a strip of wood across it, screwed into the bench at each end as in photos 10 and 15, to hold it still while you carefully shave away the unwanted wood.
Finishing
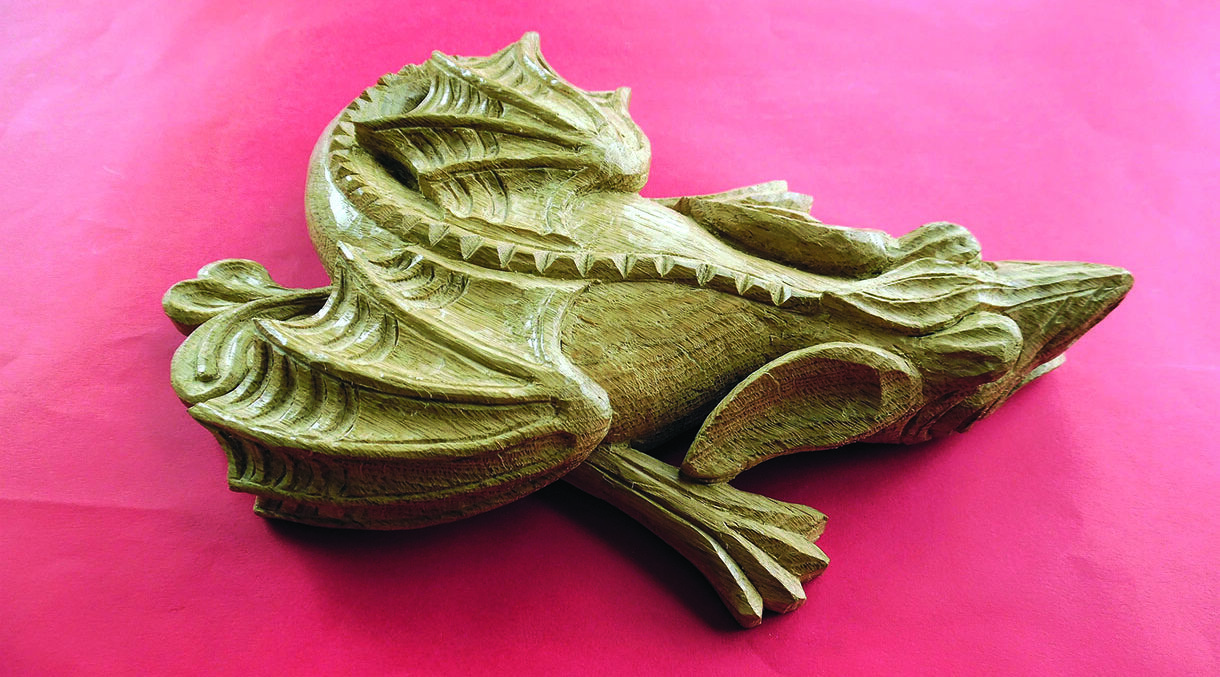
16. With the carving finished, polish the dragon with a pale wax polish. You will need to work the polish into the crevices with a small brush; let the first coat be absorbed into the surface of the wood, then give it another coat later. Finally, buff it up to a soft sheen with a smooth cloth that will not leave fluff attached to the grain. Now find a cosy spot on a cabinet where it can sleep undisturbed


