
Nic Westermann explores two fundamental cuts and the differences between them
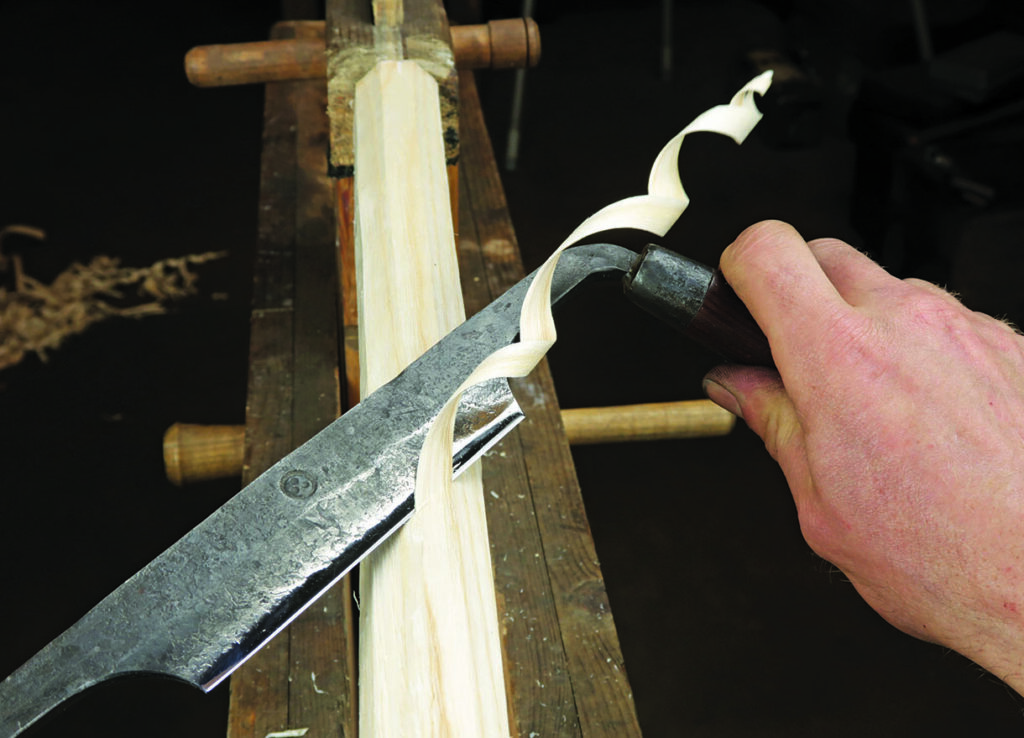
We have completed a series of articles about the theory of sharpening in which we looked in detail at sharpening various families of tools. Next we will look at making effective and safe cuts with these tools. First, though, we will look at a style of cutting, skewing and slicing that can be applied to nearly all the tools we will be covering. I am sure many of you already do this, although you may not be aware of exactly why this works so well.
Efficiency
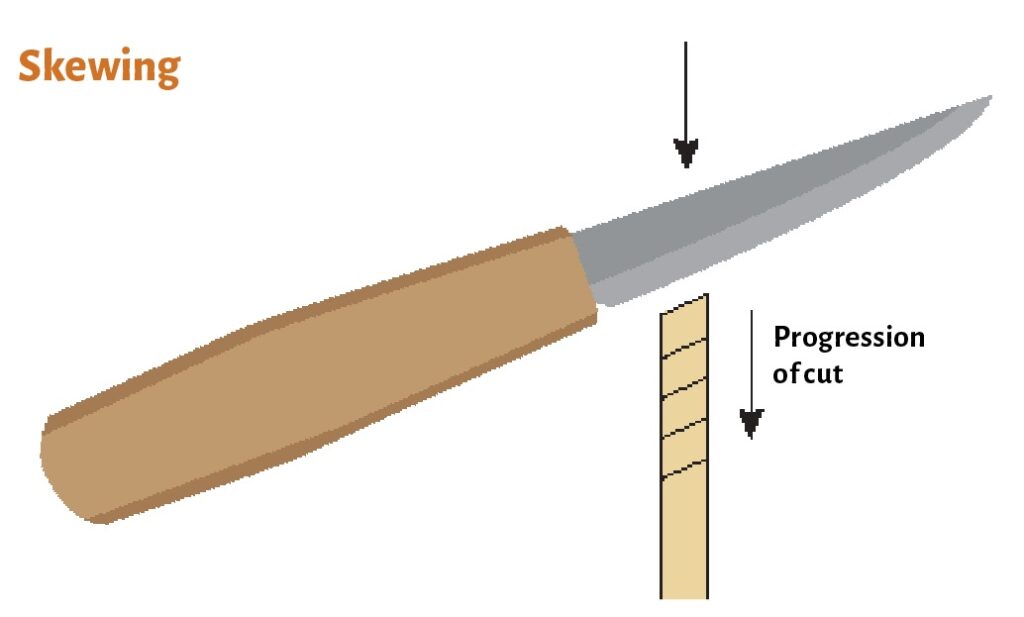
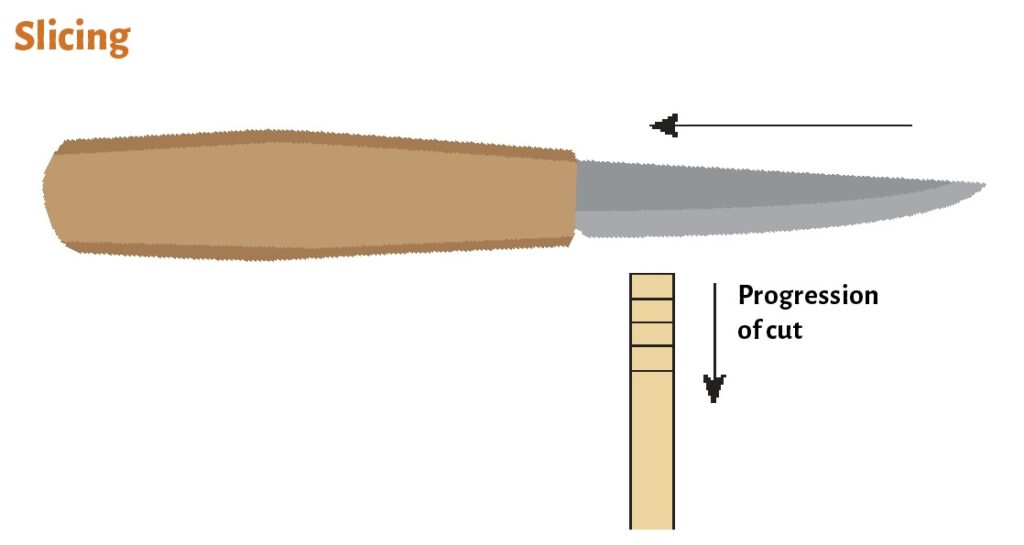
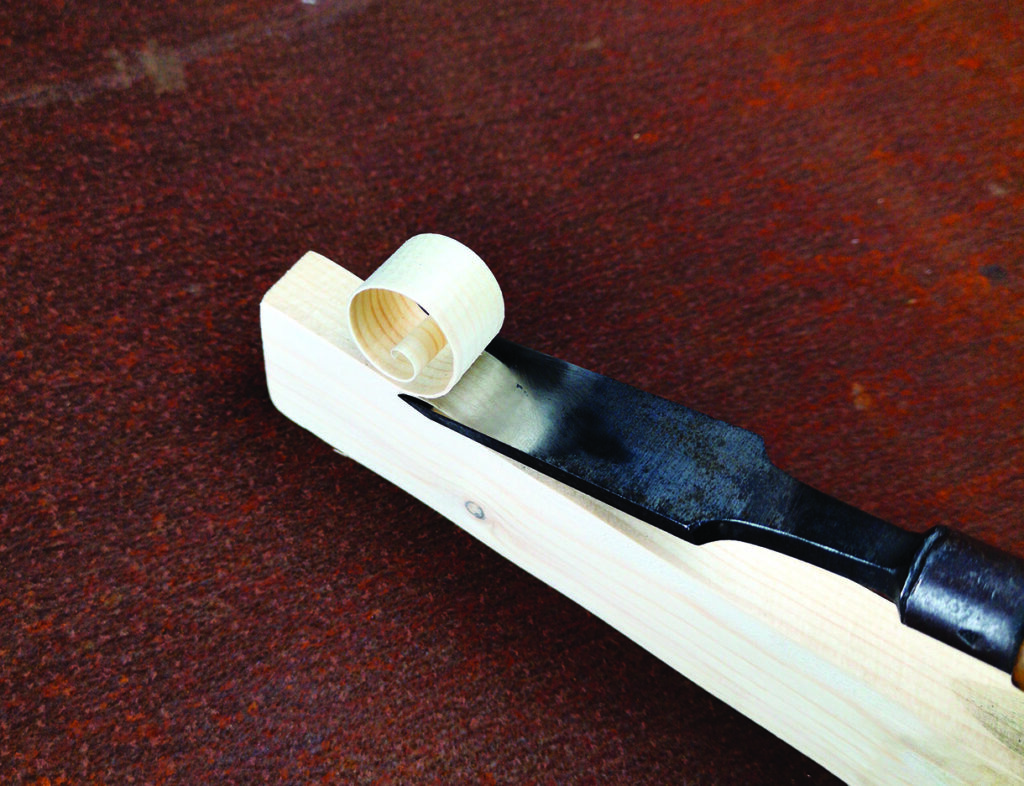
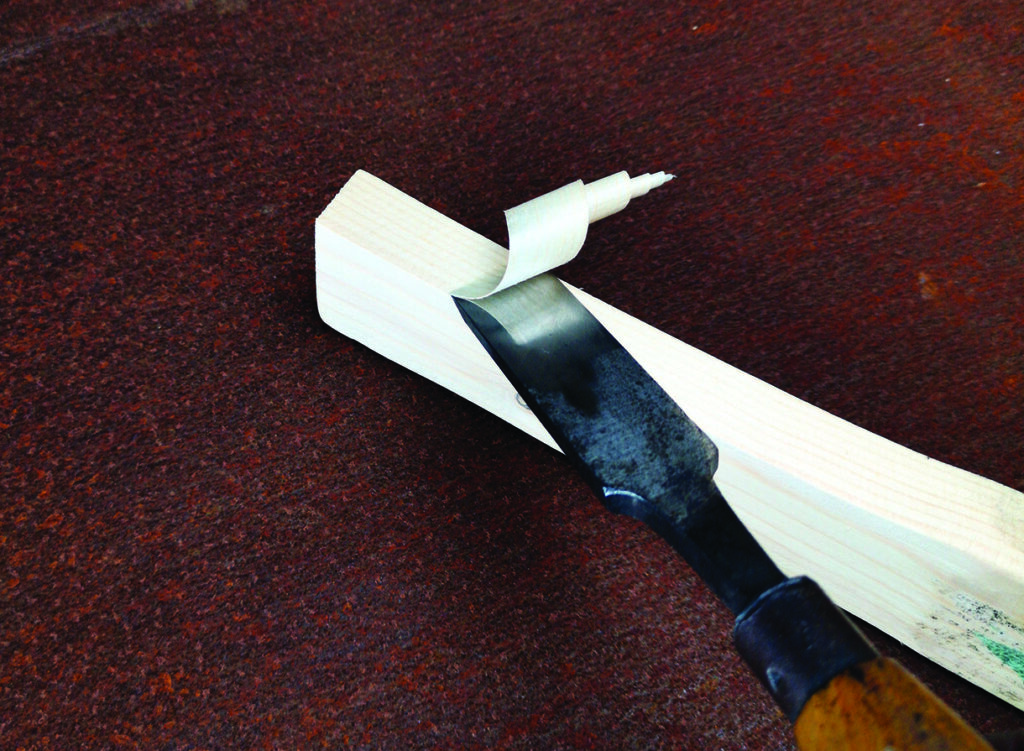
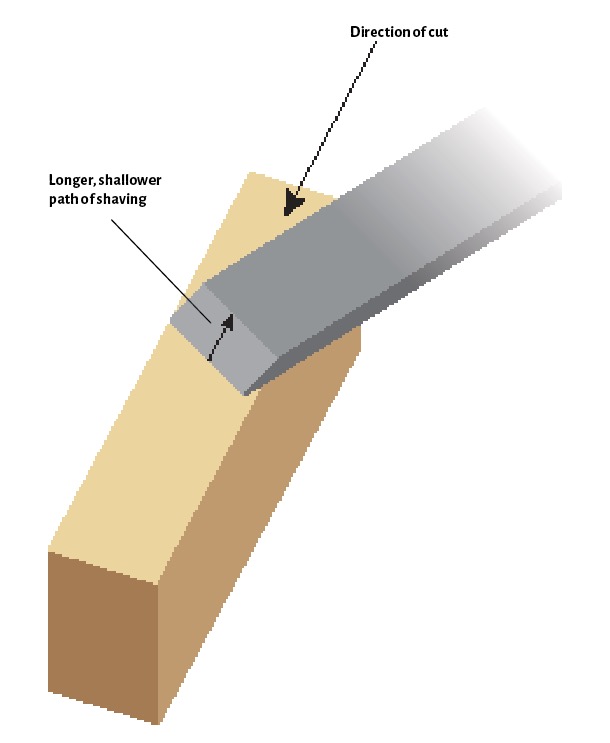
Both skewing and slicing can be used to increase the efficiency of your cuts, and are often combined. Slicing is effective as sharpening tends to leave an edge that comprises tiny teeth, so cutting with a sawing action is very effective. In the kitchen, cutting a soft tomato is difficult with a straight push and will often crush the fruit, but a slicing action makes it much easier – it is the same with wood. Skewing is more complicated. Imagine being faced with a steep hill to drive up. Approaching this at an angle is much easier, although of course the path is much longer and not direct – this is the same for the path a chip of wood takes up the bevel of a skewed blade, it is longer but shallower. This path is known as the effective bevel angle. Skewing does deflect the chip sideways as it rides up the bevel, which creates the characteristic spiral shavings that show you are skewing.
Trade-off
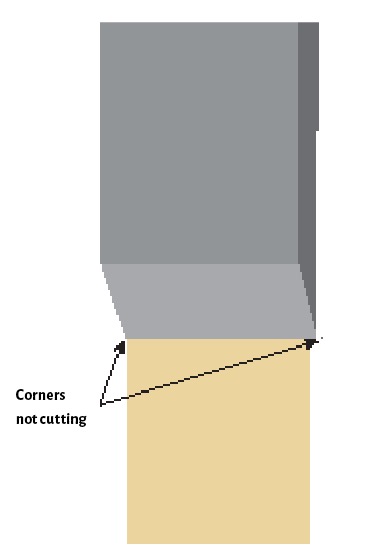
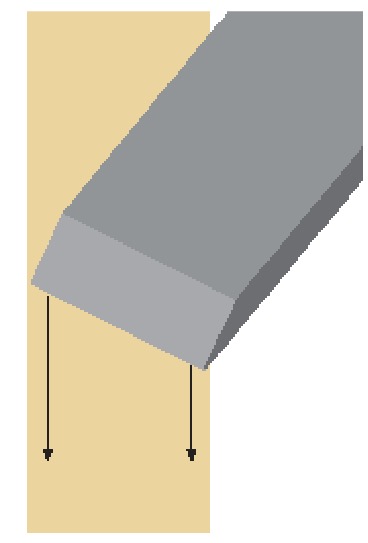
But, as in life, nothing is free. Gains in one direction are offset by issues in others. Skewing with a blade of a set length, i.e. a chisel, actually reduces the width of the cut, so although the force needed to make the cut is undeniably less, you will be removing a narrower shaving. This may make no difference if your blade is longer than the width of your workpiece though, e.g. a drawknife.
In this instance, even though you are making a cut with a blade that is, to all practical purposes, sharper as its effective bevel angle is shallower, as the cut is skewed the cutting edge in contact with the wood will be longer, so the force needed to remove the same amount of wood will be largely equal. Looking at it another way, although your hands will have to apply roughly the same force, the wood will have an easier time.
Despite this skewing it is a highly effective technique and not one to be discounted. If you are experiencing troublesome grain that keeps lifting then try the following: a very shallow but highly skewed cut, maybe even introducing slice, whilst maintaining a lot of downwards pressure will often help. Additionally lubricating the wood with oil or wax can also help to keep wayward fibres in their proper place.
Slicing
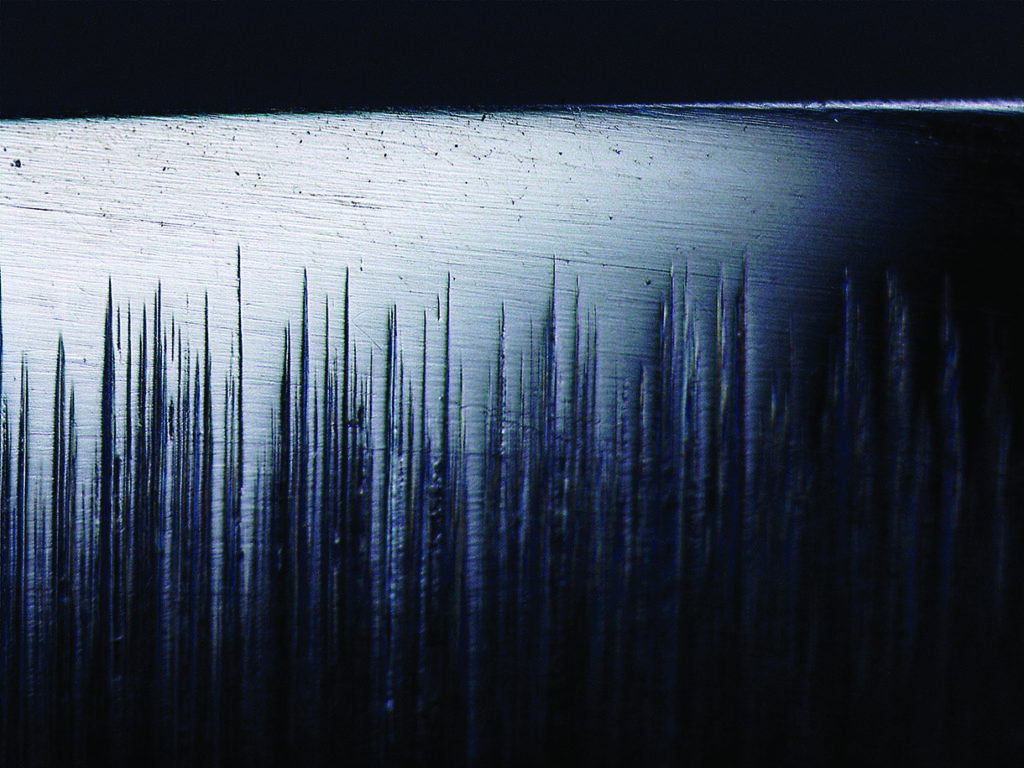
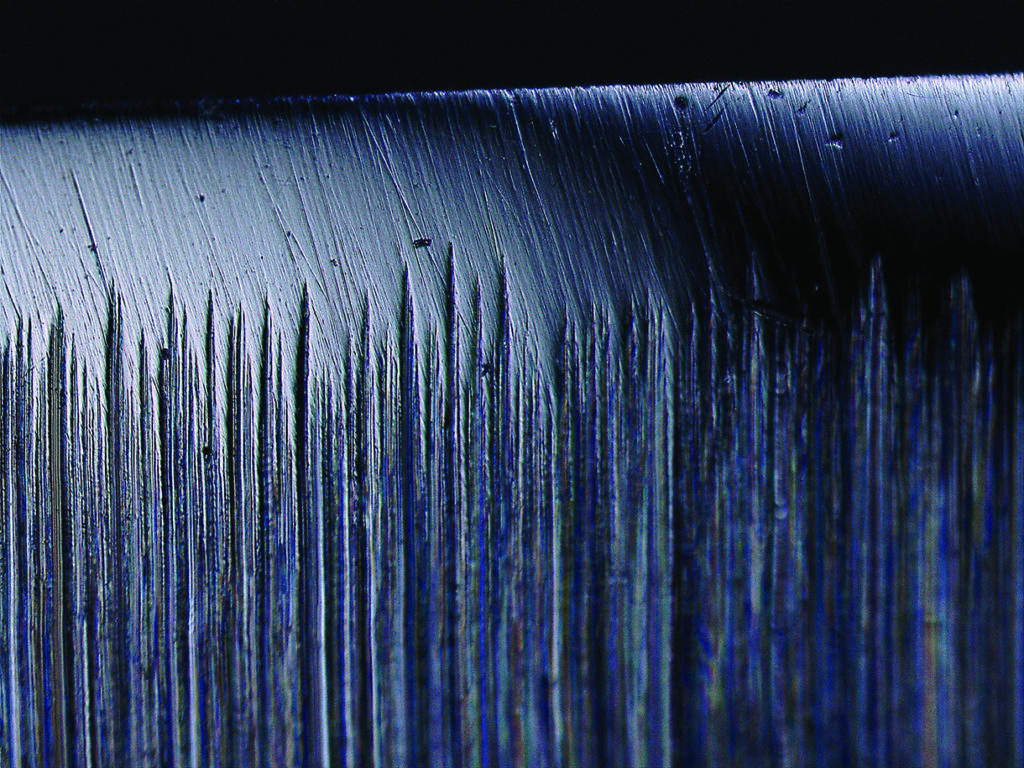
Slicing is more straightforward, and is particularly effective with blades that have a slightly tooth edge. A blade that has been sharpened with a scratch pattern parallel to the edge will have less of a slicing action. The same is true of a blade that has been over-stropped. It can still be very sharp, but will not slice well. It will lack bite – I have in the past described such blades as feeling buttery – meaning that they will slip over wood rather than slice into it.
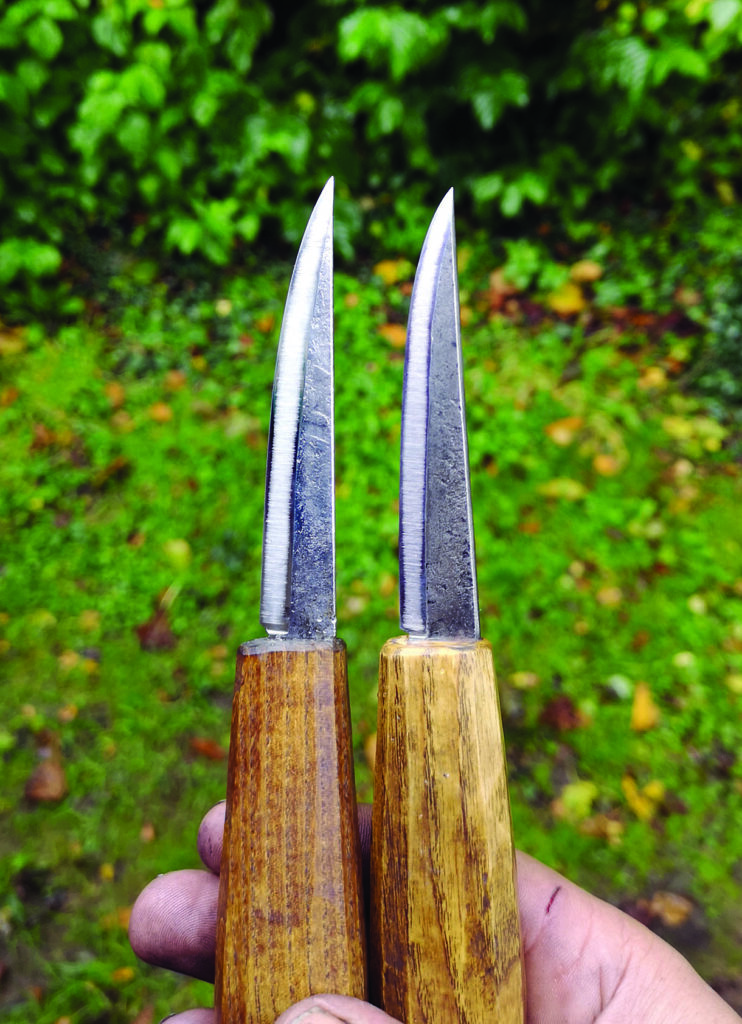
That is the theory, but for this article I performed the following test: I sharpened two knives, they were both hollow ground on our Sloyd jig to identical angles then tramlines put on with self-adhesive sandpaper, first 3000 grit, finished at 7000 grit, one in the usual fashion, with the scratches perpendicular to the edge, producing a set of tiny teeth. The other was sharpened to the same grit, but by stab sharpening, which produces a scratch pattern parallel to the edge.
How effective tool width is lost as you skew
Tests
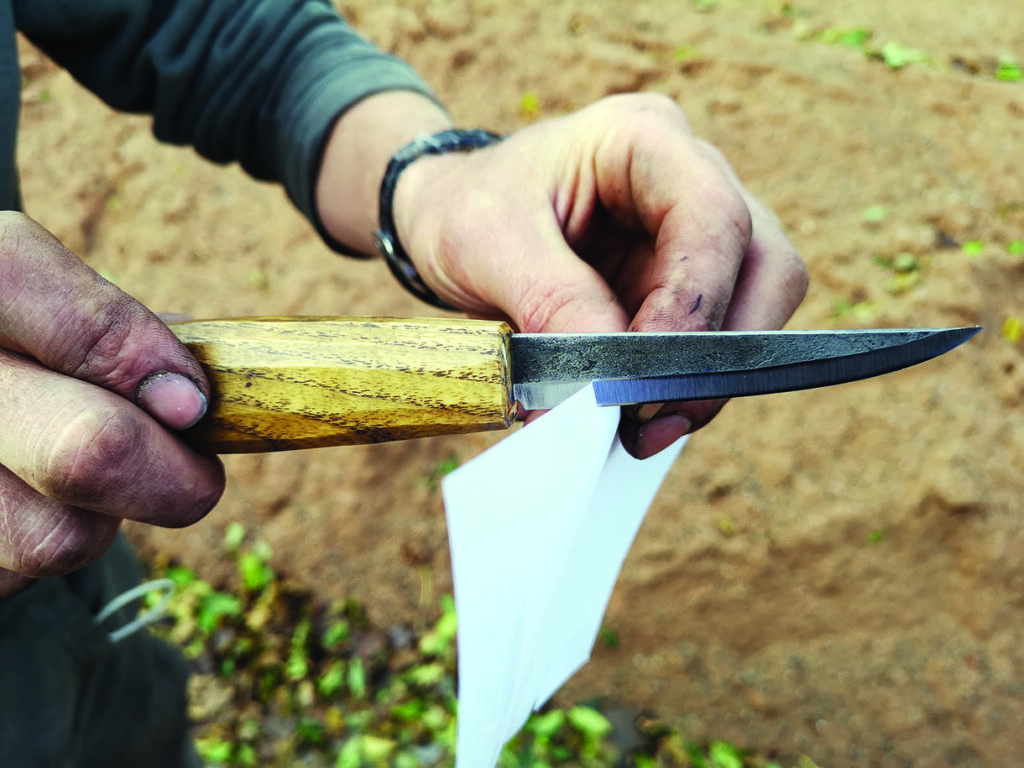
The difference when slicing paper was marked – the blade with teeth cut twice the depth as the other one. When cutting wood, especially endgrain with a slicing cut, it was also noticeable that the blade with teeth engaged and bit much better. In comparison the other felt slippery, so buttery I think stands as a valid descriptor. Cutting the same wood with no slicing action felt identical – if the teeth aren’t slicing then their benefit is lost. It is probable that this effect is fairly short lived, as a blade blunts the teeth right on the edge are the first thing that is worn away.
I have heard the theory that a blade which is skewed, despite presenting a shallower angle to the wood, has much less force on it. This implies that if you know you are going to be skewing then you can actually sharpen to a shallower angle, and then take further advantage of the skewing effect to both protect this fragile edge and to present an even shallower angle. It sounds too good to be true.
Anecdotally, though, it adds up. A good friend came over recently after teaching a course in scything and was bemoaning bad technique and how a straight cut – he described it as bashing or hacking away at bracken – would ruin the fragile edge of a scythe, but slicing cuts would keep them cutting for a long time.
Applying this to wood carving, if you find yourself using some wood that is too tough for the edge angle on your tools and edges start to blunt, chip or roll then skewing (preferably allied with slicing) may well allow you to make the cuts you need rather than going to the trouble of having to regrind to a shallower angle.
As mentioned earlier, skewing and slicing are often combined. Virtually any blade can be used to make a skewed cut, but you need length in the edge to slice effectively.
Conclusions
So it looks like skewing and slicing are the answer to everything – why not do it all the time? Well, one problem is that adding skewing complicates the cut – the edge is not perpendicular to the direction of travel so a flat bottoming cut is more difficult. Secondly the longer, shallower effective bevel will not turn in a cut, so while it is very effective for flat plane cuts it is not so good for concave curves. Slicing, though, can be good for these curves as the sawing action can help to restart a cut that has stalled due to the binding action of the back of a bevel catching in a turning cut.
And finally, slicing can be more dangerous – as the blade moves sideways it is possible to inadvertently cut the work or yourself with a newly exposed section of edge or tip. It is harder to be certain that you are finishing and ending the cut safely with the additional lateral blade movement slicing creates. This, however, can be overcome with correct technique, and we will be showing you a series of basic but safe knife cuts in our next article.

This article is brought to you by the team at Hewn & Hone. The team comprises: Nic Westermann, a blacksmith and creator of carving tools and sharpening accessories; Don Nalezyty, an IT specialist and respected Kolroser and carver; Alex Yerks, an internationally renowned green woodworking teacher and kuksa carver; and Adrian Lloyd, a UK-based full-time craftsman, teacher and toolmaker.
To learn more visit: www.hewnandhone.co.uk