Turning Bracelets:
Kurt Hertzog looks at making bracelets.
Kurt Hertzog looks at making bracelets
Whether one-of-a-kind or production runs, you’ll have plenty of opportunity to explore with bracelets
If you’ve read my article on turning rings, you might ask what is different with turning bracelets? Aren’t they just an oversized ring? In reality they are, but there are many things that can be done differently. Also with some key material issues to be considered, I think they deserve to be their own topic. While the rings are mostly gender indifferent, bracelets are usually for the female wearer. Depending on the material, design
and age group, bracelets might find a following among males but will be far less frequent and likely a far larger size. We have plenty of different aspects to cover this month including design, material needs, sizing, work-holding techniques and some of the creative possibilities you can explore. If you haven’t read turning rings in Woodturning 293, you may wish to take a look. There are ideas there we’ll build on as we turn bracelets. Kits and preforms are available in the marketplace. They allow you to clad a pre-made metal form with wood or cast material to make bracelets. While these certainly work, I will cover the methods of creating bracelets from scratch. If you can successfully create bracelets from scratch, you’ll certainly be able to make them from a kit if you wish. As usual, my plan is to detail the process and the few keys to being successful. That should provide the basics for you to build on to take bracelets as far as you wish.
Safety
You should always be using the appropriate eye and breathing protection whenever you are in the workshop, regardless of which equipment is being used. Some materials, projects or equipment may require additional PPE or other precautions. Casting, for example, will require chemical resistant gloves and plenty of ventilation in addition. The turning portion of the bracelet usually adds nothing special to the common safety practices you should be following. Don’t become complacent because the blanks are relatively small and low mass. Use all of the needed PPE and safe turning practices as a matter of course every time you are at the lathe.
Bracelet sizing
There are sizing standards for bracelets commonly used by those who turn them. Not necessarily an official standard to my knowledge but I think you’ll do well to work with them. That will keep your size callouts comparable with others who make and mark sizes on their wares. The size callout and diameter dimensions for ladies bracelets used by the makers I know are: small – 55mm, medium – 60mm, large – 63mm, X large – 65mm, and XX large 70mm. You certainly can make larger and smaller as needed but you’ll need to label them as you think best. We’ll be designing and turning solid bracelets. Bracelets that have hinges or other methods of splitting the bracelet allowing the wearer to open it to put it on are certainly possible. There is plenty of the necessary hardware available from the jewellery supply houses. It is a pretty easy operation after creating the single piece bracelet.
Your finished bracelet is simply cut in half on a bandsaw. You clean up the saw cut surfaces as needed and install the hinge and clasp based on their design and attachment method. You may wish to consider making some of these hinged bracelets as part of your offerings. One big advantage of bracelets that open and close is that the wearable size can be much smaller, not having to be sized large enough to slide over the hand. I haven’t seen any sizing dimensions for those who will be making bracelets for men. There may be one but I’m not aware of any.
Material concerns
Bracelets can be turned from any material that you can mount and turn on your lathe. This includes wood, plastic, metal and any other material that can be found or created in bracelet size. The key to making a durable bracelet is having sufficient strength to endure the wear and tear of being worn
as well as the stresses of being slid over the hand on to the wrist. With a one-piece bracelet, the wearer must squeeze their hand through the opening so the final size is tight enough to remain on the wrist afterwards. That done, the bracelet must be able to survive the vagaries of worn life being clunked into things, caught on overgarment clothing during dress and undress, and the ongoing stresses taking it on and off over the hand. For woods, with their inherent grain orientation strengths and weaknesses, this presents a bit of a challenge. If we create a wooden bracelet without paying attention to the grain orientation, we are likely to see a failure depending on the size and final cross section.
Making bracelet blanks
Your method for making bracelet blanks will depend on whether it is a one-off gift, a learning project, a marketable product, the price point(s) you are targeting if selling, your familiarity with casting and segmenting and more. Suffice to say that there is enough material contained in that sentence alone for a column in its own right. I’ll show some created blanks in each of three simple methods to get your thoughts started. Much like the ring design in Woodturning 293, bracelets can have a wide variety of widths, thicknesses and cross sectional shapes all having an impact on the strength and durability of the bracelet. All of the suggested cross section shapes offered for rings apply perfectly to bracelets as well.
If you are planning a thicker bracelet, you may be able to use a wood blank and it will have sufficient strength as turned with no special reinforcing to the grain orientation.
My suggestion is that you always be aware of the limitations of the grain strength and plan accordingly. I suggest you consider strengthening the grain if you use wood. Whether sandwiching non-grained material, cross graining wood material, stabilisation or other grain strengthening method, you’ll be helping yourself be successful. Any added strengthening will allow you to turn the finished wall thickness thin if you wish and still be confident in the end use durability. Be certain to design and turn to the material strength of your final dimensions. The end user and expected type of use should also be factored in. A ladies bracelet to be worn with more formal attire will usually see far less stress in its life than that of a teenager in blue jeans wearing it non-stop. Plan accordingly to provide for these end use stresses. For simplicity, I’ll lump creating blanks into three categories knowing there are more. You can cast blanks from any of the castable resins.
I typically use polyester resins for my casting needs but there are other casting materials available. You can make your own moulds or purchase them. With your casting, you can do a simple clear or single colour cast, a swirl multicolour cast, a single cast embedding another material, or an exotic multi-cast with designs and internal ornamentation to be overcast.
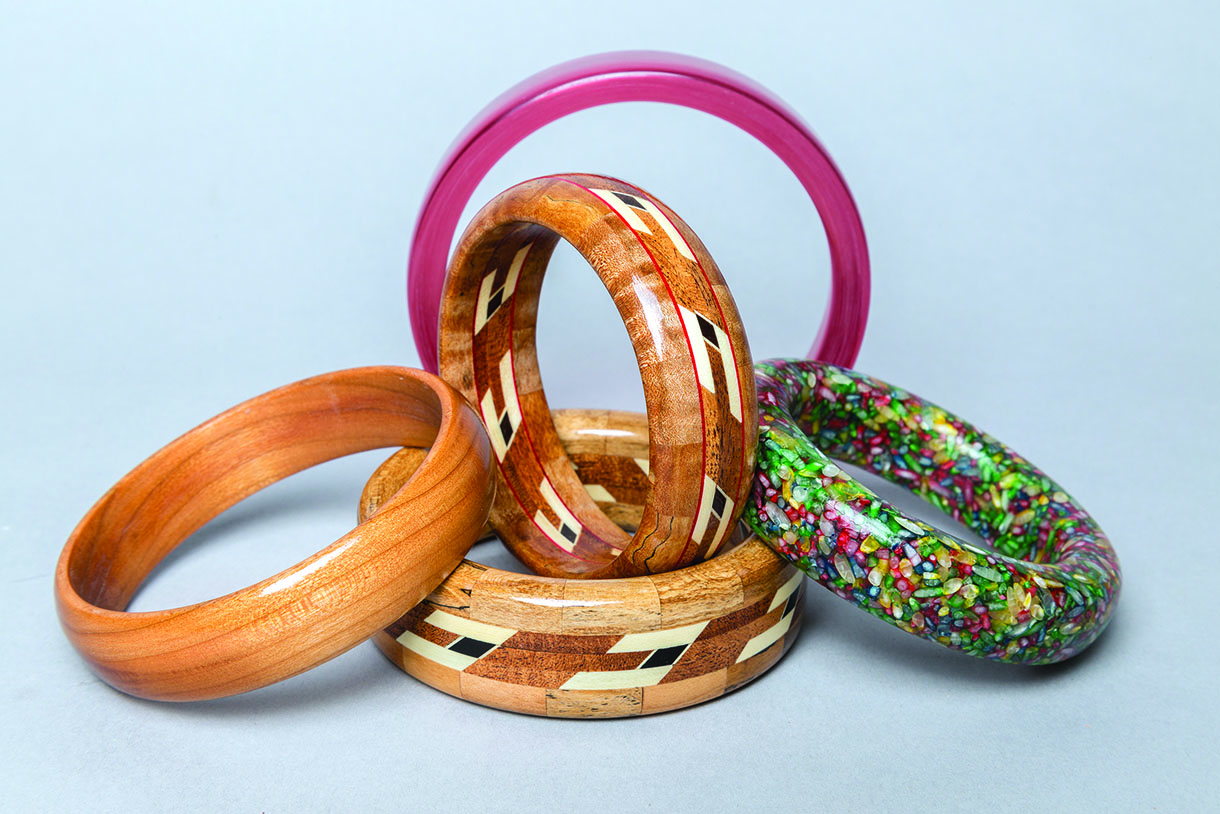
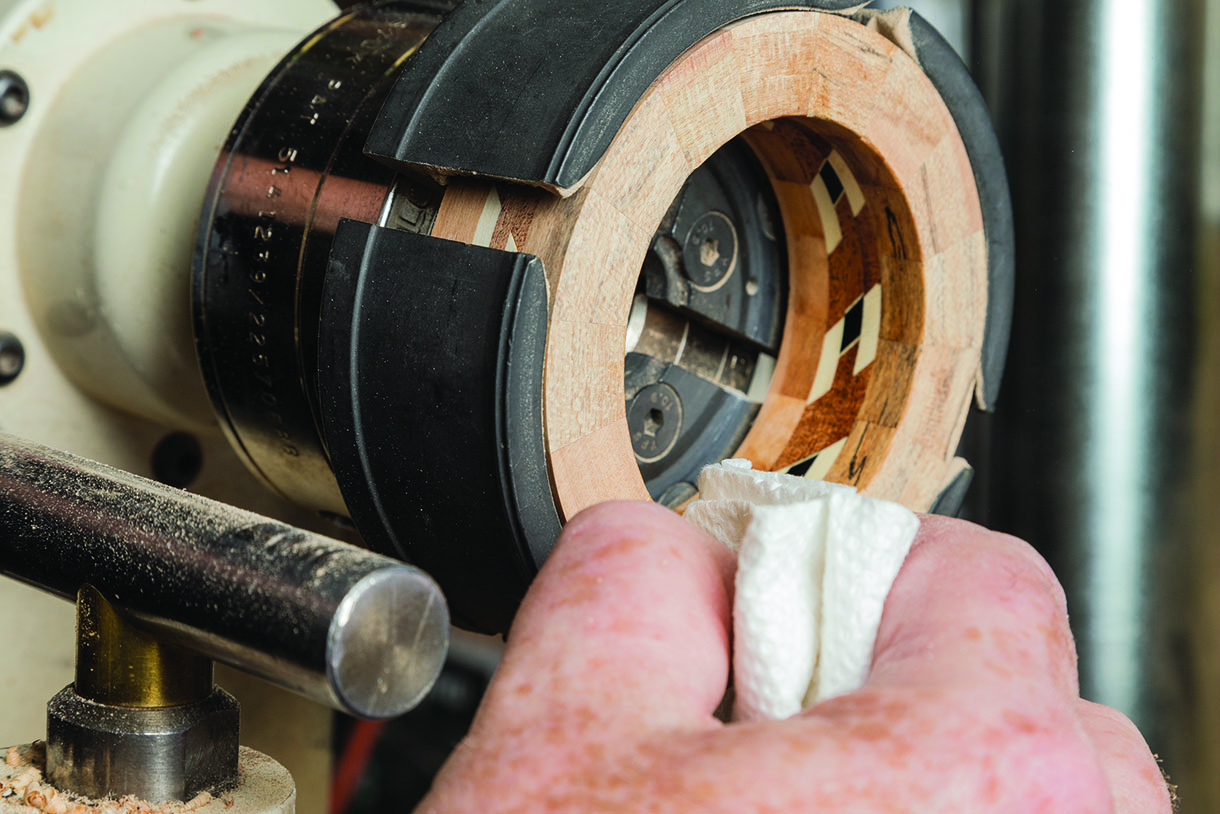
Segmenting is another option allowing for many advantages in blank creation. Your artistic options are limitless as well as enjoying face grain turning and grain orientation strength advantages. The last of the simple blank creations is just cutting and gluing blank material together to gain strength. You can make a two level blank of the same or complementary species by simply rotating the grain orientation 90°
and gluing to gain strength through the plywood crossed grain effect. Another strengthening method is to laminate your blank species with a centre core of thin baltic birch (Betula pendula) plywood. This can create an interesting look and can take dyes nicely to be part of your design.
A fun blank is plywood solely on its own, sandwiched with other materials, or segmented. Segmenting plywood can be a lot of fun especially if you dye or otherwise colour the segments prior to gluing together.
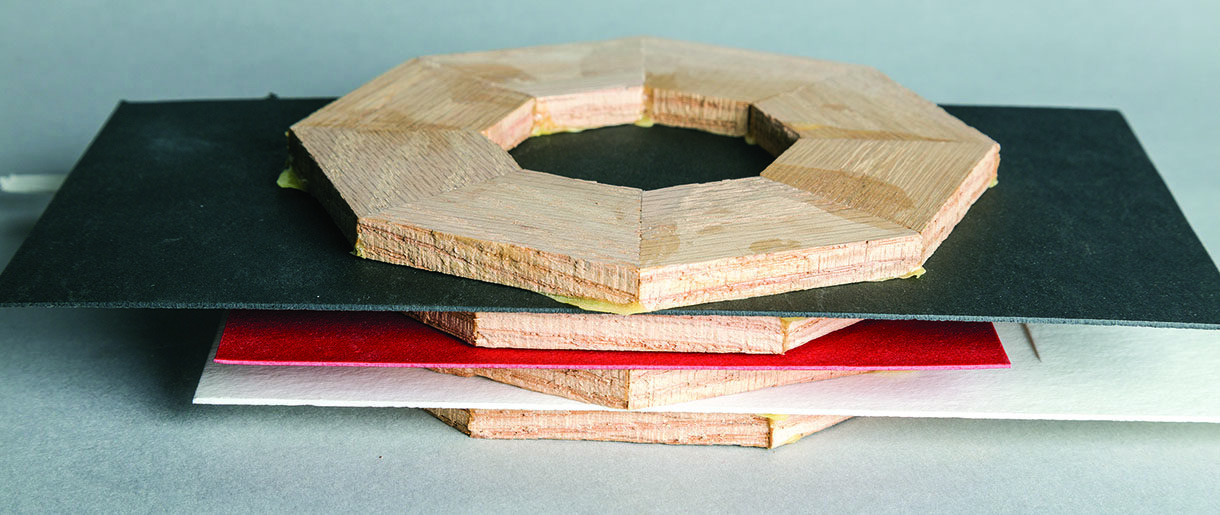
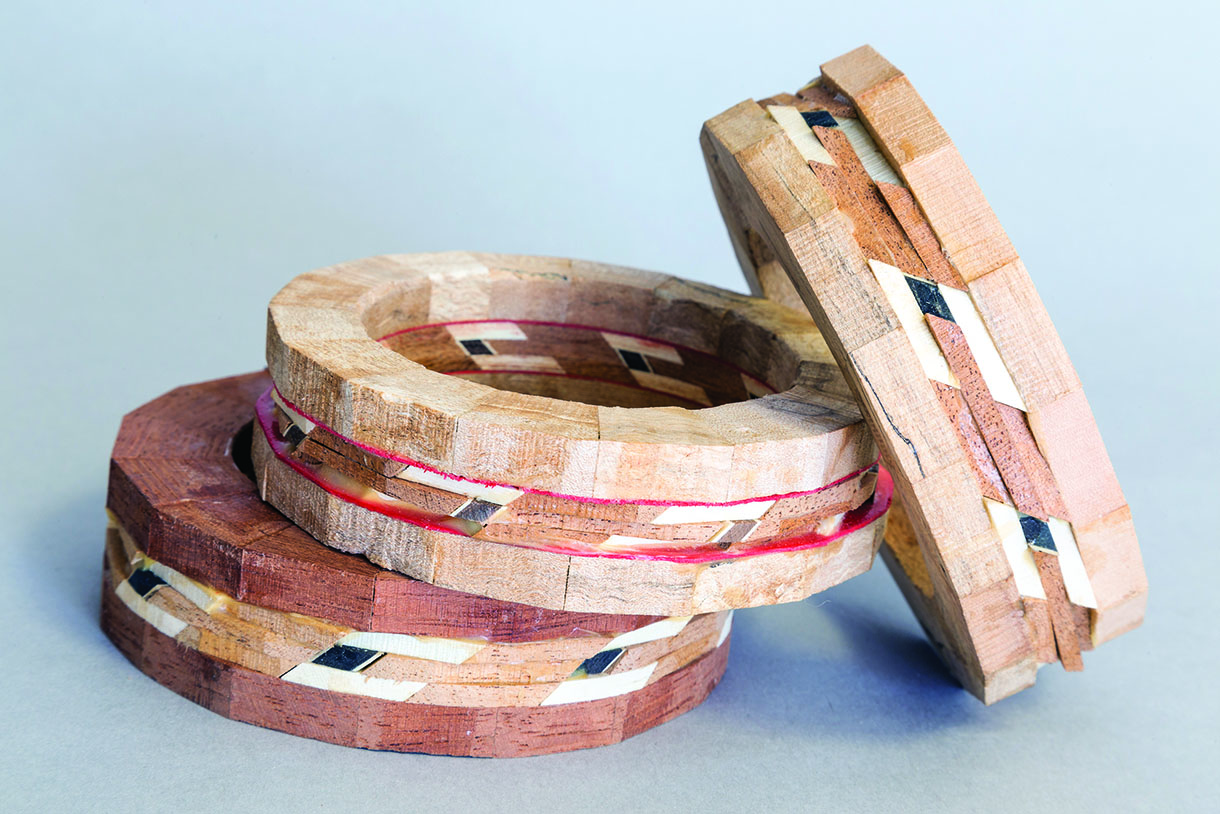
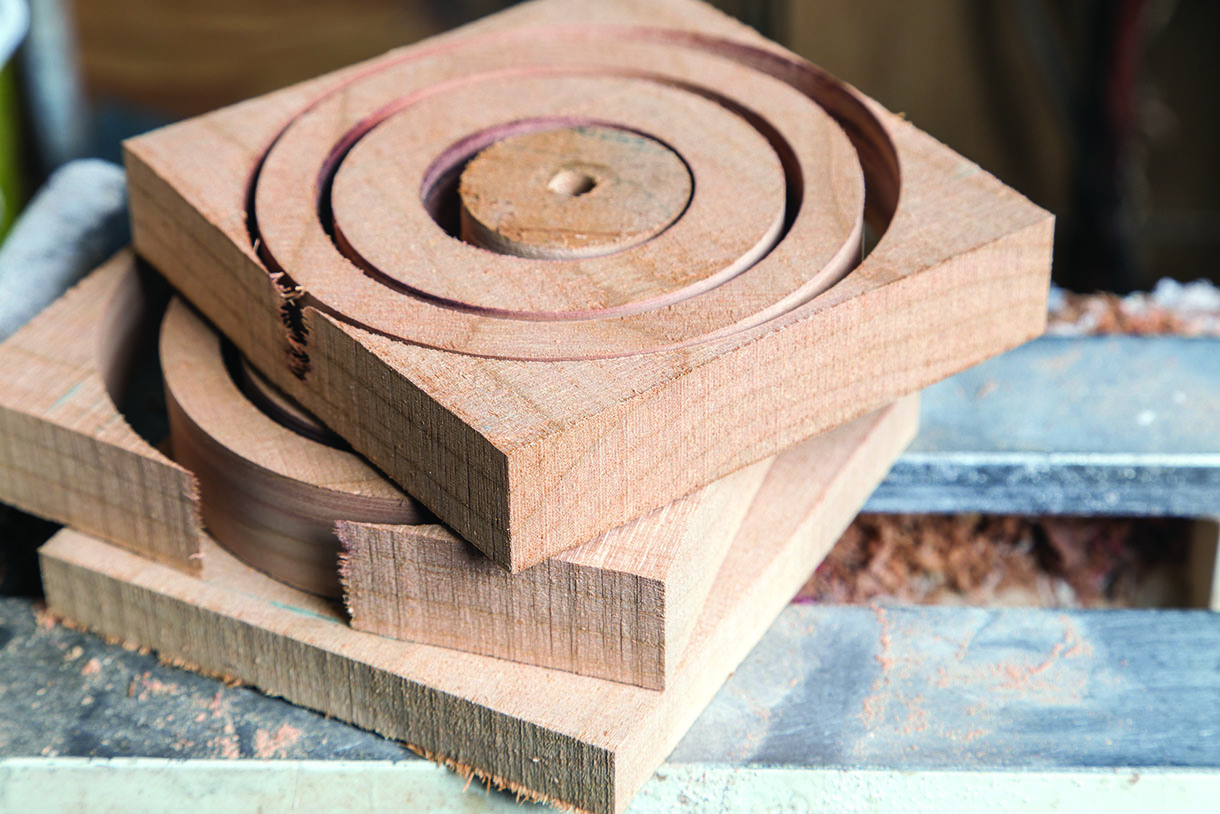
This stack of segmented rings illustrates the strength improvement of staggered seams
You can make your blanks simple or more exotic. The creativity options abound with bracelet blanks
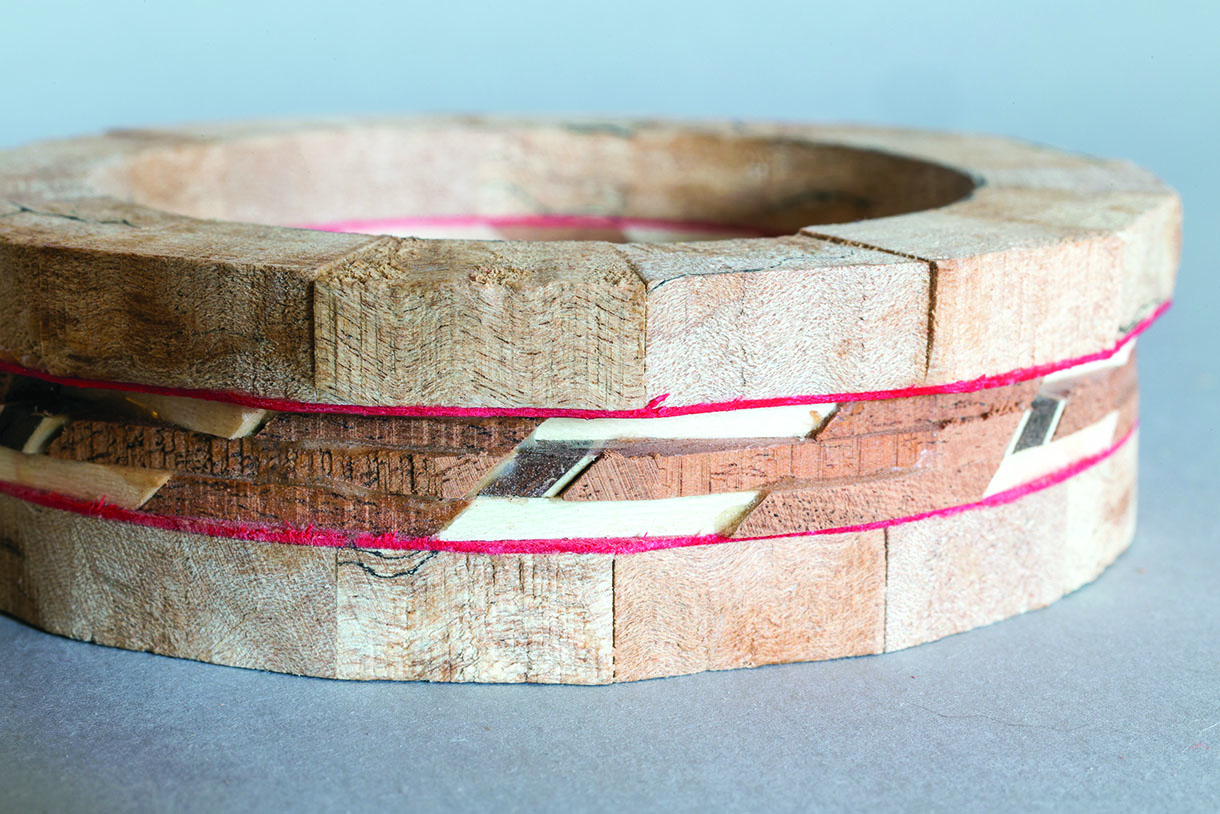
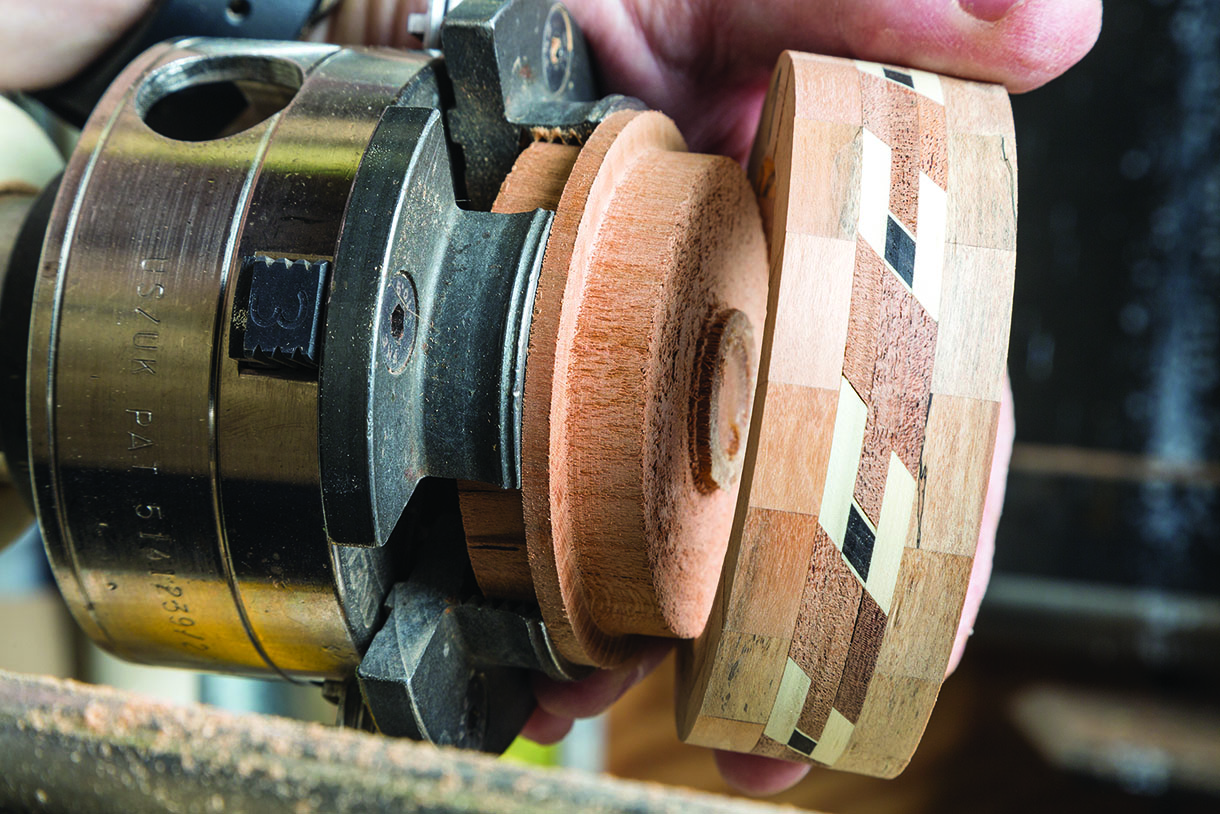
Segmented bracelet blanks taking advantage of the staggered seams. The artistic segmented blanks from my friend Nelson Cassinger
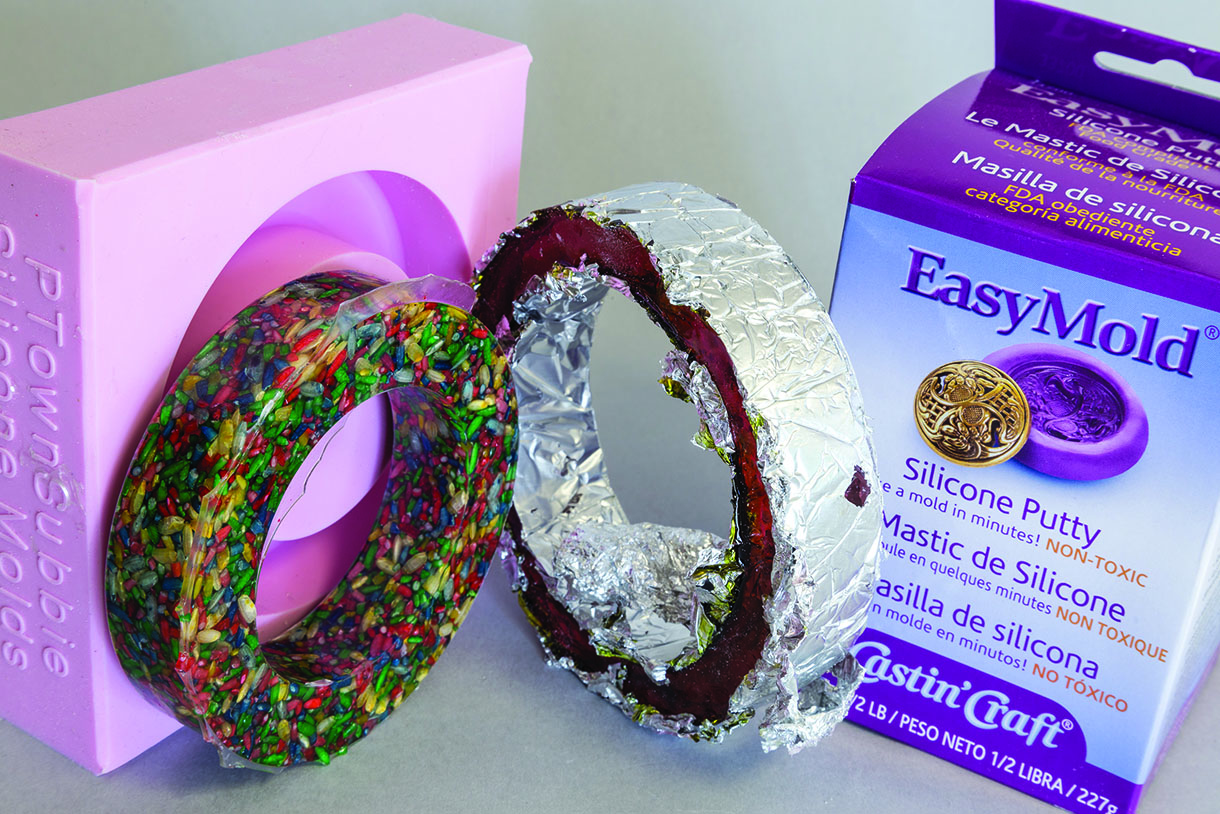
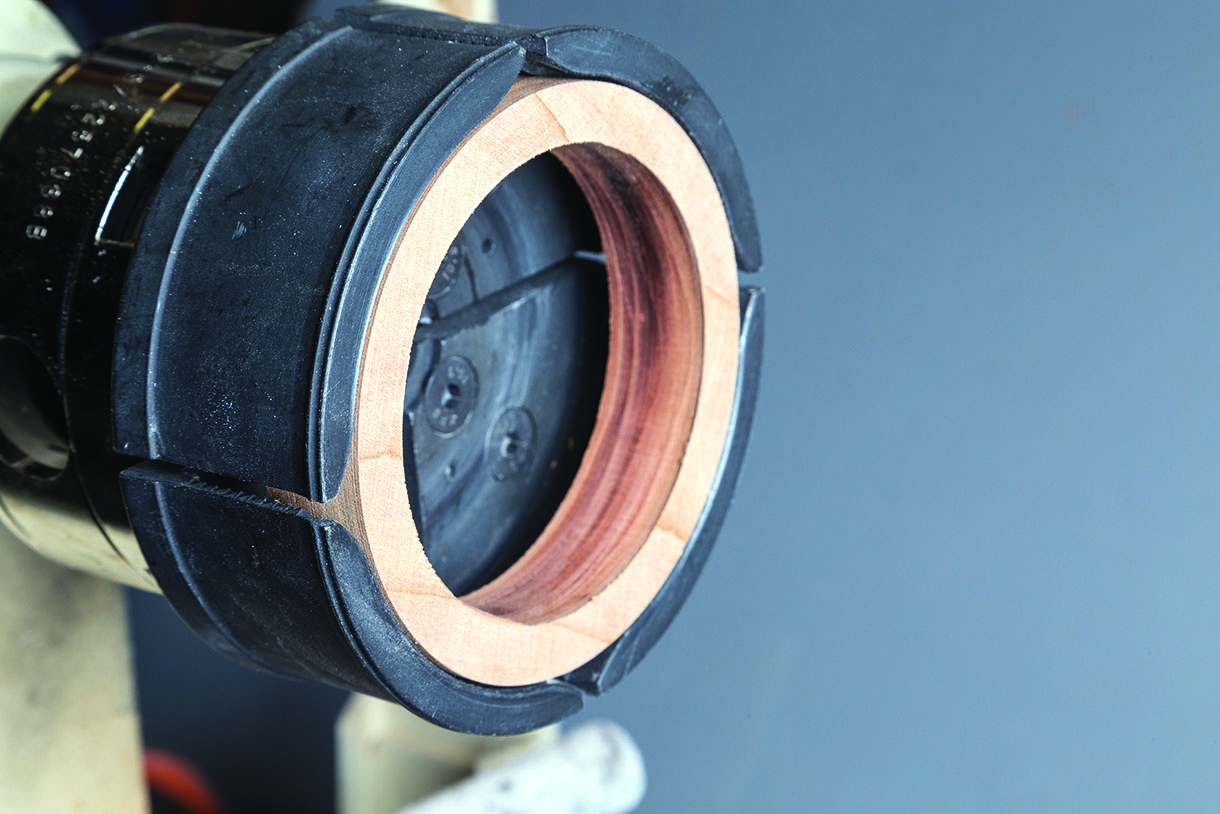
Cast blanks are easily done whether with a purchased mould, homemade mould from a kit or jerry rigged mould
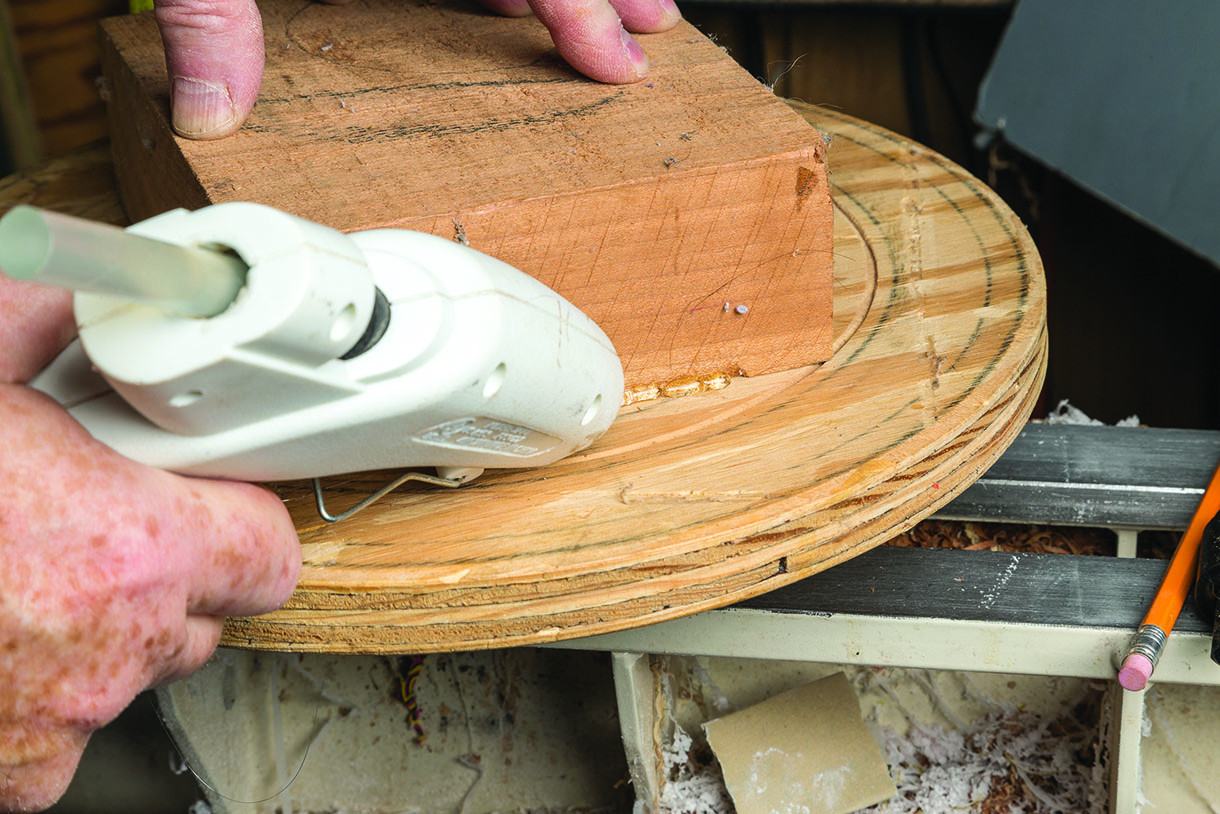
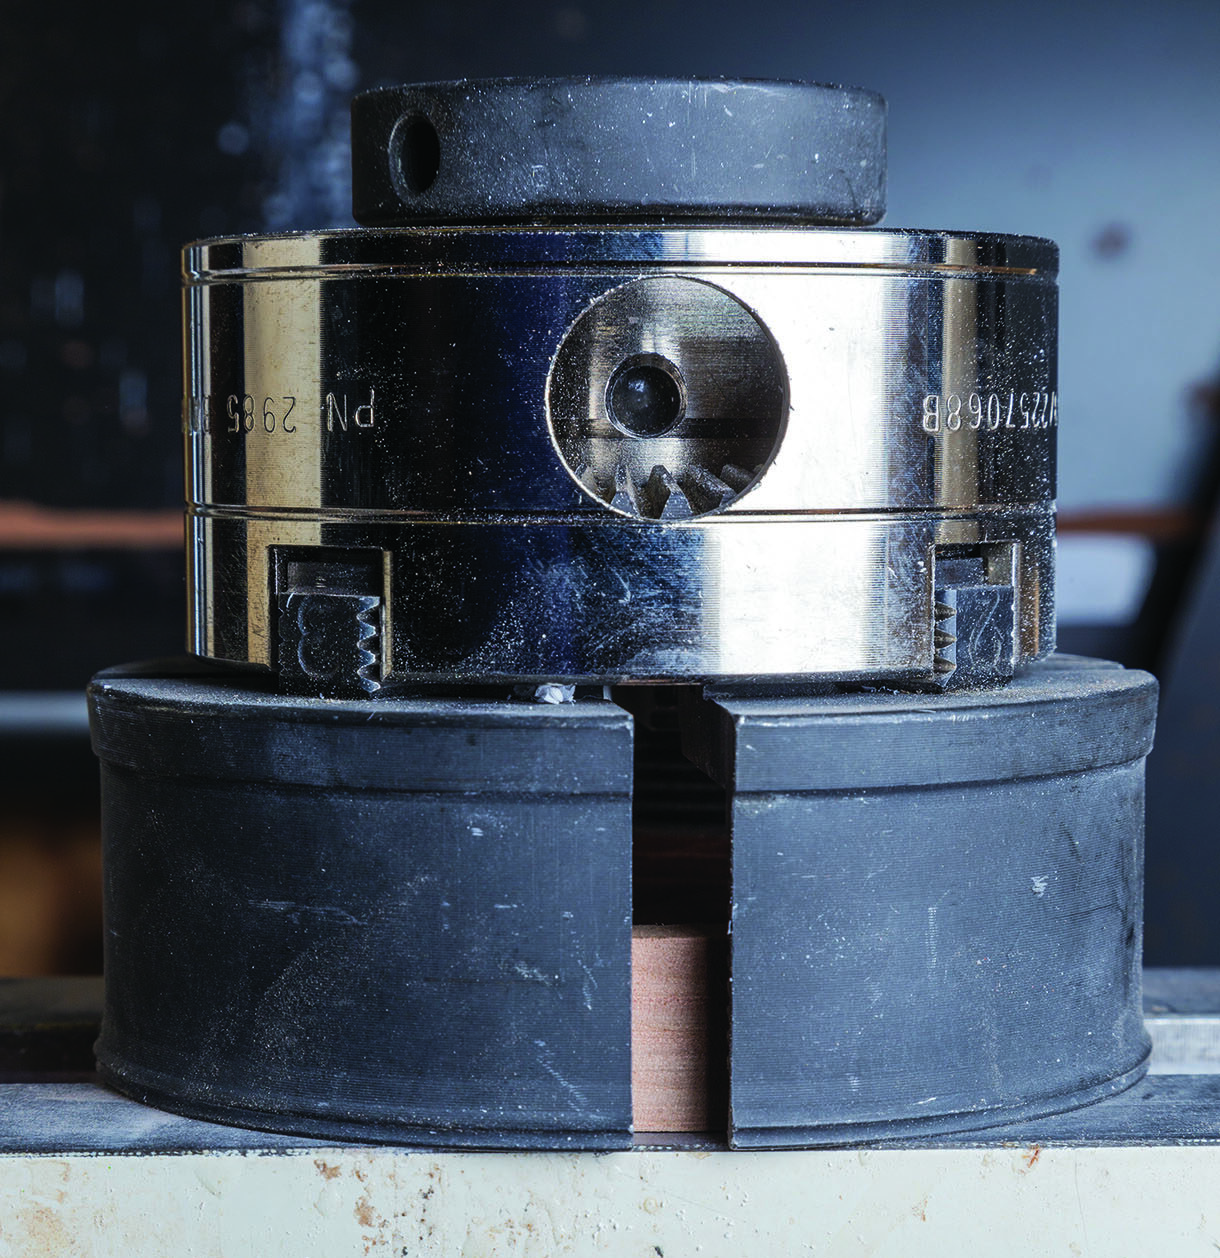
No drill press? Use your lathe. Your stock can be attached to a faceplate with a backer using hot melt adhesive
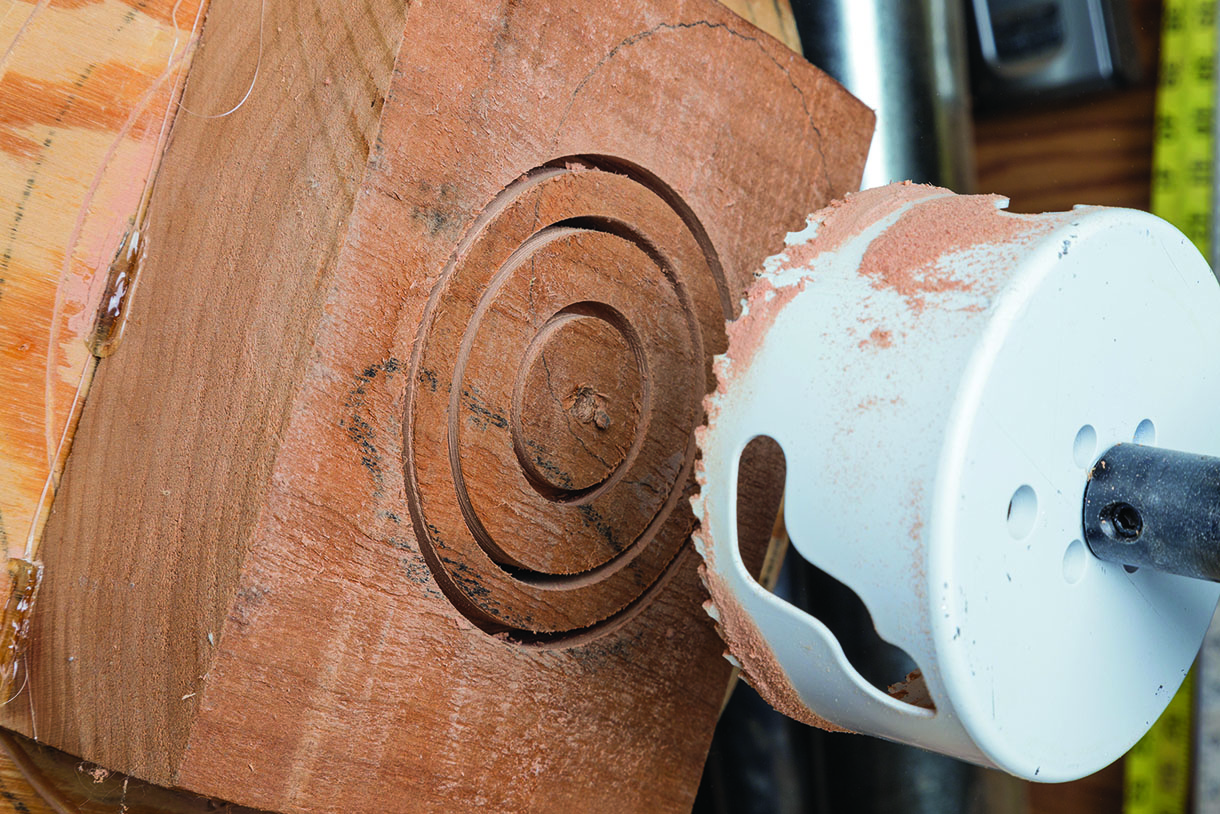
A parting tool or hole saws can be used to create multiple sized bracelet blanks, reducing waste
A trip to the bandsaw to separate the blanks at the desired blank widths in multiples at a time
Process flow
Turning bracelets can be done in a variety of sequences depending on your work-holding methods and favourite process flow. I suggest you consider the same process that I detailed in the rings article. After creation of the blank, mount as needed to cut, size, and finish the inner diameter entirely. Once that is completed, remount the work to centre on that finished inner diameter and process the outside. Of course, you can easily do it the other way and also do the rough turning, final detailing, sanding and finishing in
stages flipping between the inside and outside.
My simple reasoning for the sequence that I suggest is the minimal amount of remounting required. Every time you remount anything on the lathe there is the potential for error. Not only is the mounting suggested simple and easily done, but it let’s you get sized and then create the ‘art’ aspects on a completed size. By the time you begin processing the outside, you’ll know the amount of material left to work with as well as get a good visual of the aspect ratios that will be pleasing. Not to be overlooked but much like cutting a bowl, when the inside meets the outside is when the trouble begins. If you process the inner diameter of the bracelet to completion, any problems that might occur can usually be resolved by simply making the inner diameter a bit larger, providing there is sufficient material thickness. You’ll just be making the next size up. If you process the outside to completion first, any error on the inside usually results in scrap. The work-holding methods shown are gentle but holding the finished outside of the bracelet to process the inside puts the side of the bracelet at risk of visual damage. Any minor flaws created on the inner diameter finish while turning and finishing the outside of the bracelet can be acceptably repaired or ignored.
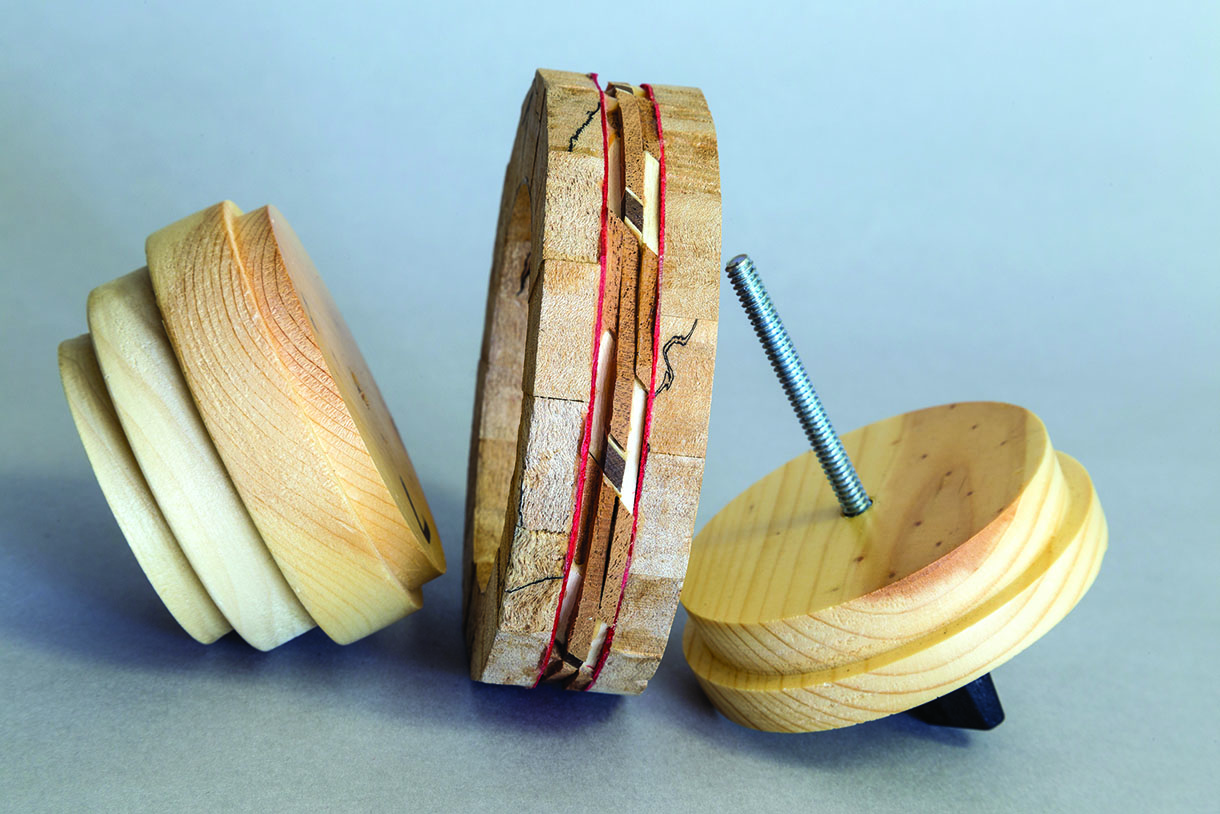
A jamb chuck turned at the moment to fit the occasion. Any scrap works, a shoulder is helpful, and tape adapts within reason
Measuring for the end use is far faster and more accurate than measuring with an instrument
A clever chuck mounted clamp for bracelets Nelson devised and uses with his youth programme students
Tools and equipment for bracelets
The kit for turning bracelets is pretty minimal. Your work-holding can be as simple as a faceplate and two-sided mounting tape or be more exotic using a range including chucks, mandrels and custom designed production fixturing. Your regular turning tools will serve you nicely when making bracelets. A minimal kit for turning would include a spindle gouge and an optional parting tool if available. The items you already use for sanding are, of course, applicable as are most finishes you might use for any durable finish on bowls, pens or other items getting handling.
Turning the inside
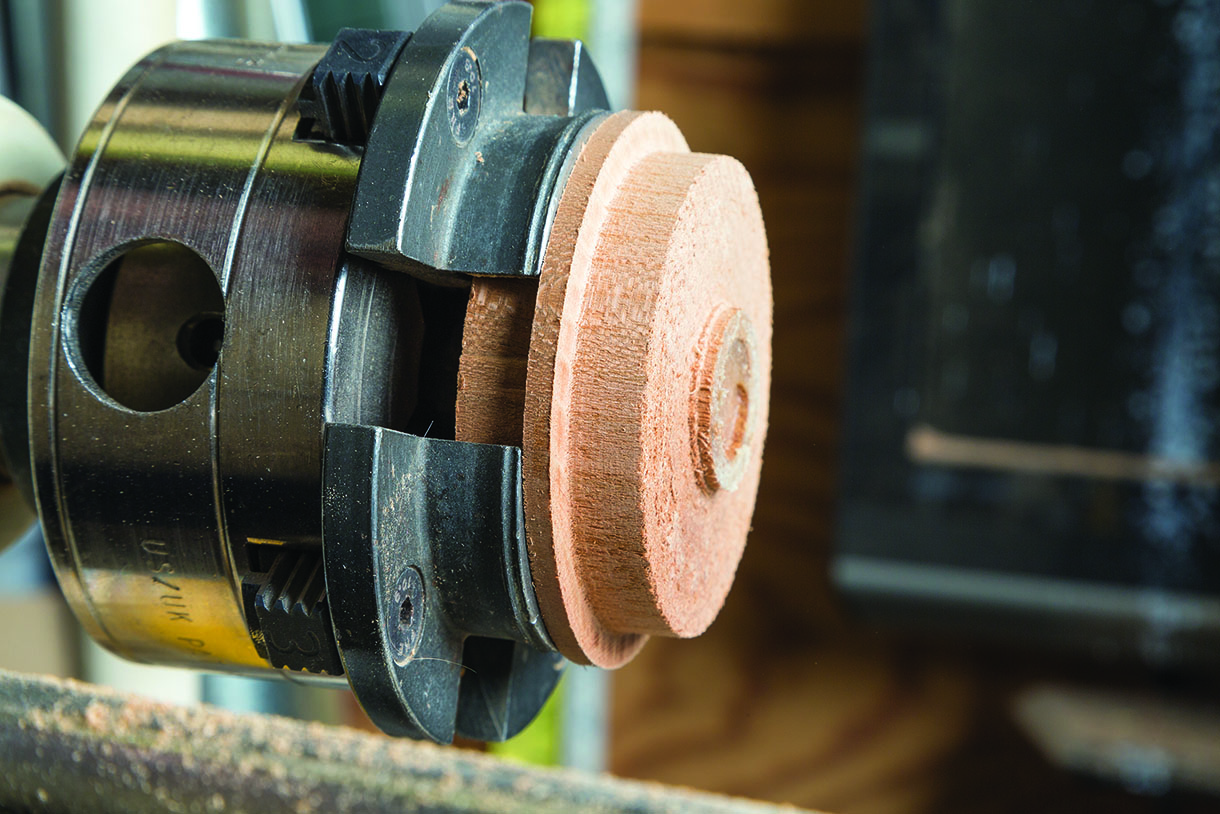
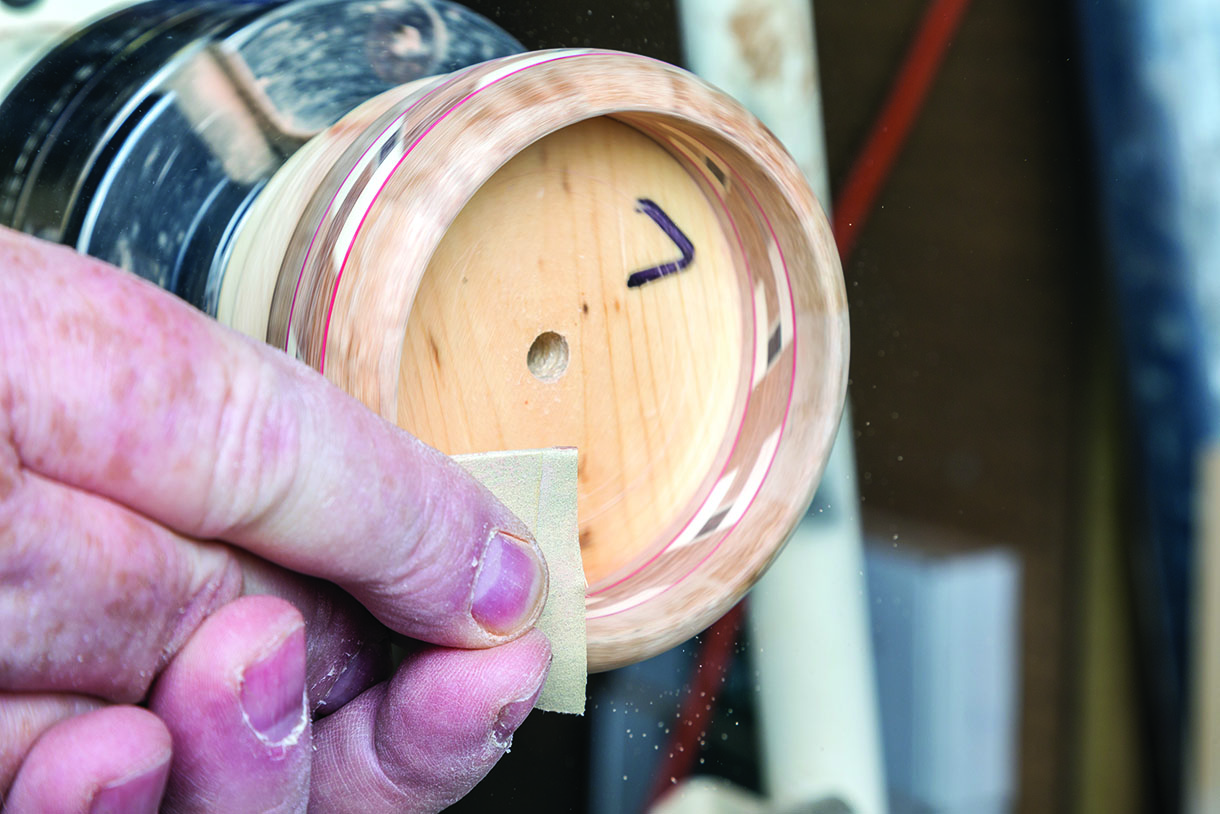
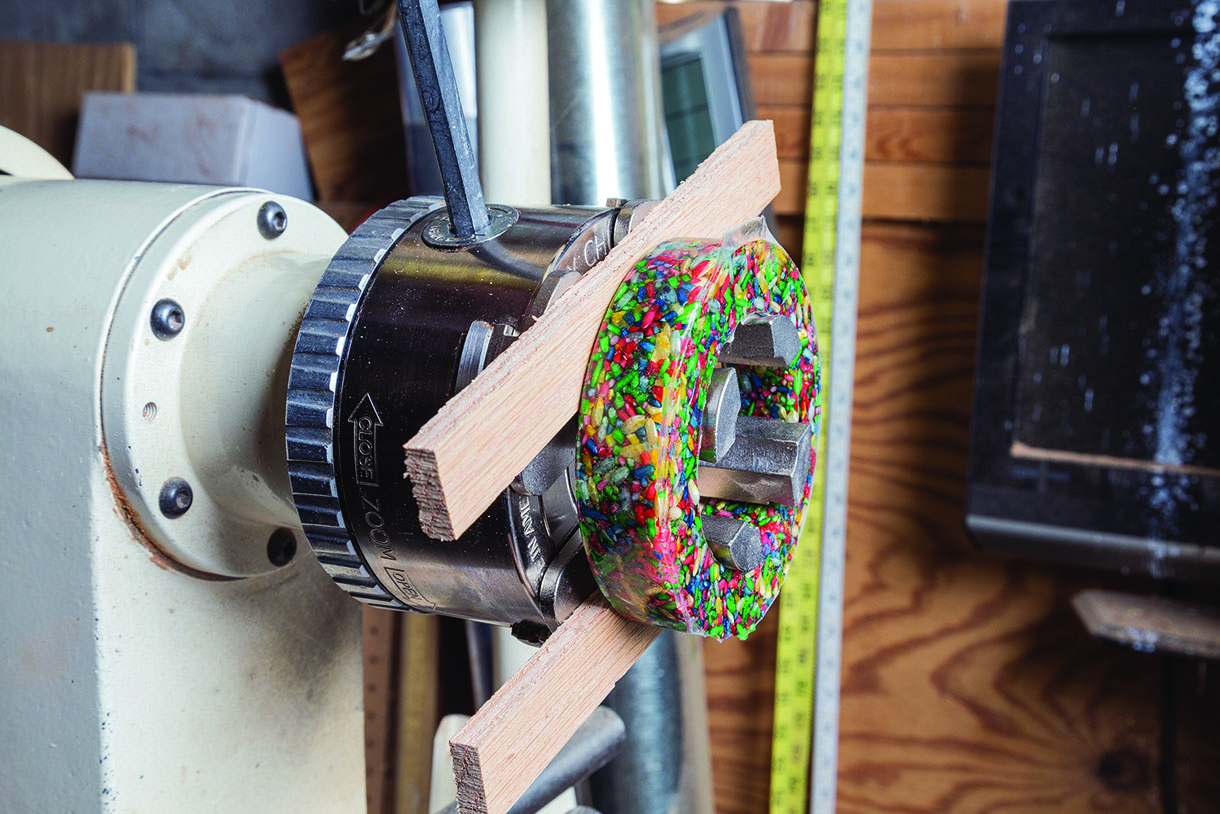
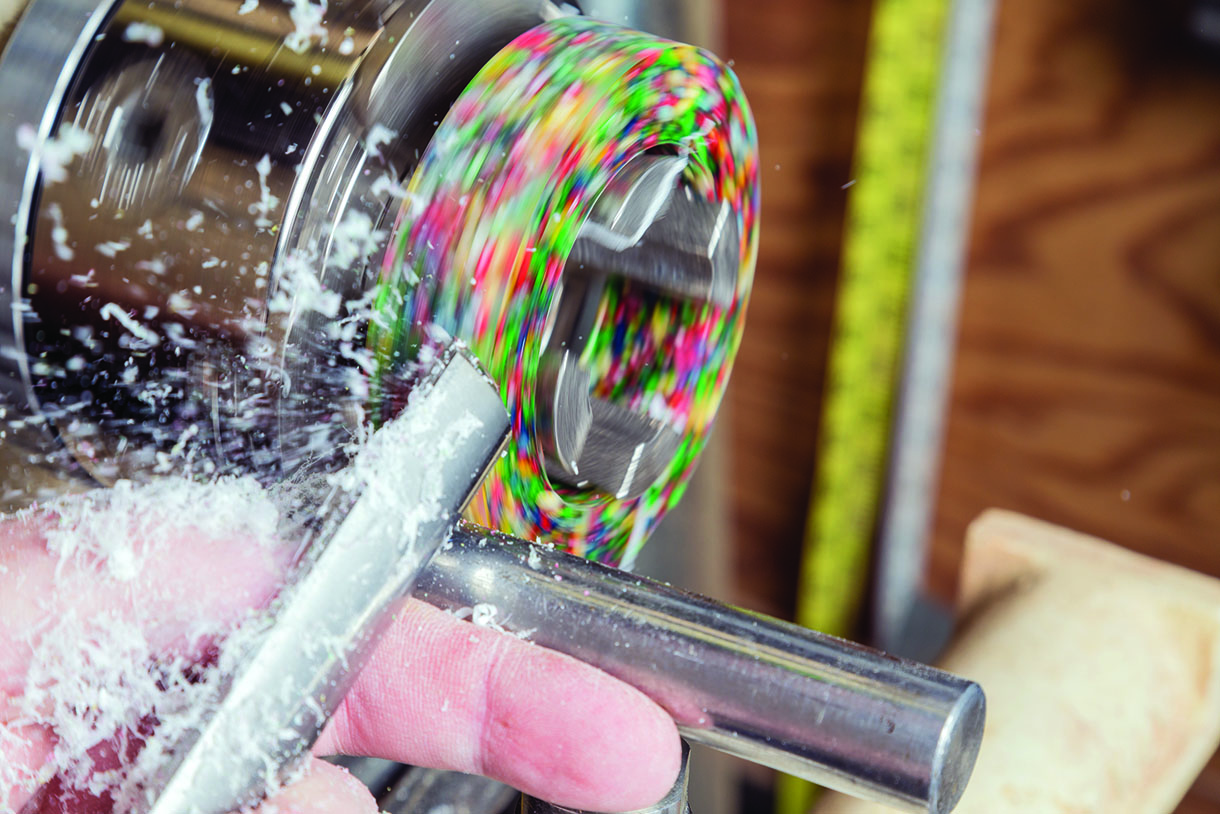
Depending on your blank creation and material, there are many options for the inside processing. You can mount your blank to the lathe, via a faceplate and double-sided tape or in a chuck clamped to the outer diameter. Provided you have clearance or sacrificial material underneath, you can use a hole saw to cut out the inside diameter close enough for sanding and finishing. That hole saw inner diameter cut also works on the outer diameter provided you have a large enough hole saw. You can also simply cut the material away with your turning tools to your desired inner diameter dimension ready for sanding and finishing. Either way, you’ll need to be able to work through the entire inside face if you wish to complete it without a remounting to access the far end of the inner diameter. The turned to size mandrel works well here just as in turning rings. You can reverse mount the bracelet as needed using wraps of tape to control the grip. If you are cutting to your wearer’s size, allow enough material for stock removal with sanding.
The dimensions are never that critical since the wearer will usually be test fitting the bracelet for size, regardless of how it is marked. The inner diameter measurement can be done with a tape measure, small ruler, a pair of callipers or sizing template. If you plan to do many bracelets, you can make a set of sizing gauges or templates from wood, plastic, paper or other material. Once you’ve arrived at your desired size with a bit for sanding, sand through the abrasive grits while spinning at a slow enough speed for effective sanding. Wipe the surface clean between grits and progress to the surface finish you wish prior to applying finish. My suggested finishes are either a spray lacquer or a Ca finish. Both are easily applied and will provide years of protection for the bracelet both inside and out.
A tip to mounting your work flush to the jaw edges providing space behind. Lay the work and the jaws on the bed, then tighten
With space behind the clamped blank, the inner diameter can be reached easily including on both internal edges
The inside can be processed from sizing through finishing. We won’t be coming back to the I.D
A jamb chuck can be used to process the inner diameter if you wish. It will require reversing to process the entire I.D
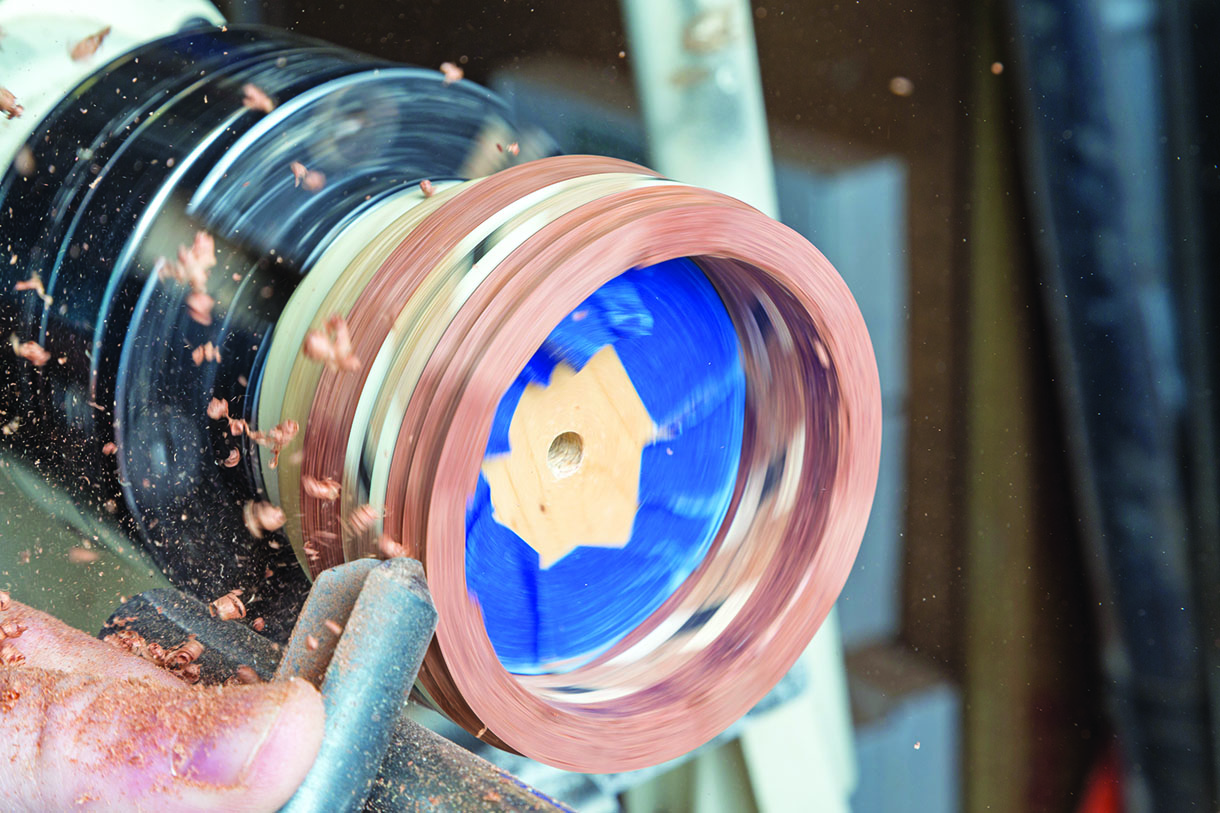
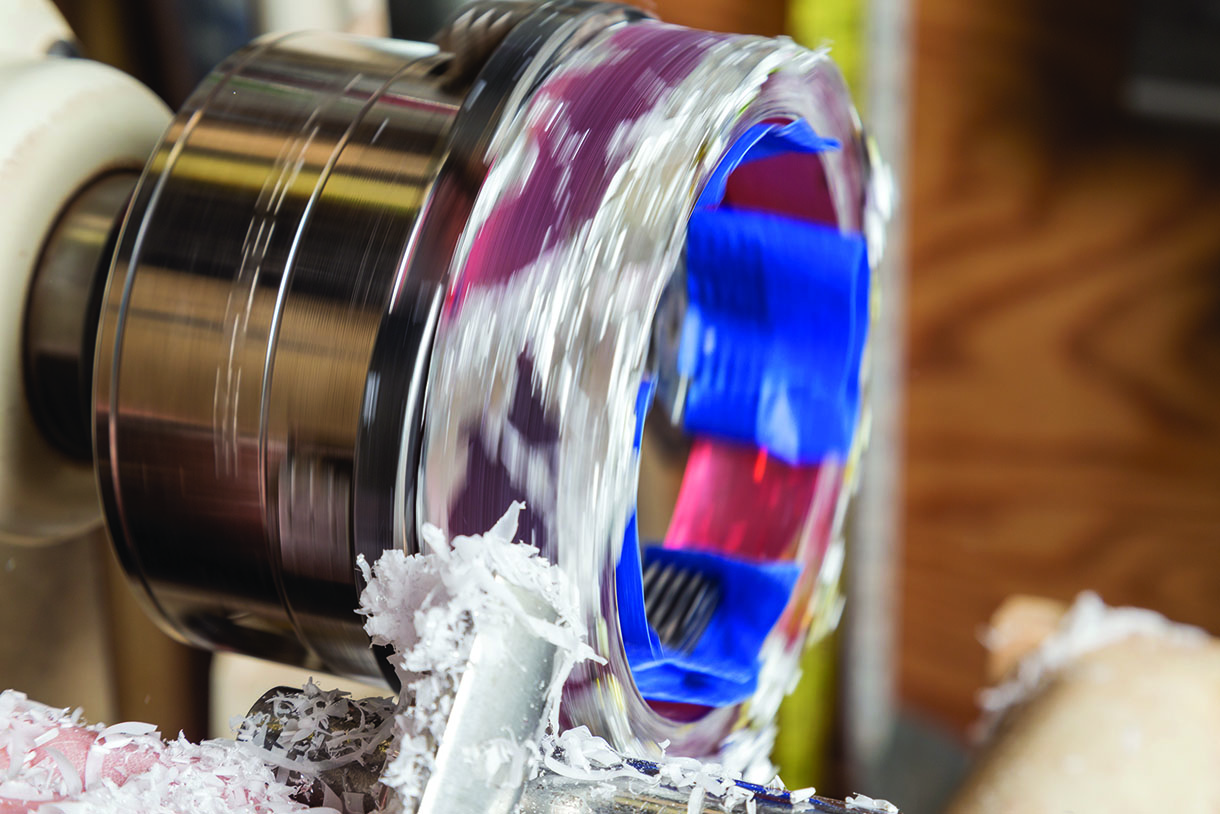
Turning the outside
Once the inside has been completed through the curing of the final finish, turning the outside is where the creativity comes. How wide, how thick, what aspect ratio and what contours or special details will you include in your design. Knowing that the inside is complete, all of the material that remains can be used provided you keep sufficient wall thickness for strength. Your bracelet blank material and method of creating will have a big impact on how thin you can safely make your bracelet and have it durable enough
to survive the rigours of its life. Turn, detail, sand and finish as your design drives you.
You can space your turning away from the back of the chuck by using equal sized shims as you tighten the jaws then remove shims
With the inside completed, you can now work the outer diameter of the bracelet to your liking

Regardless of your mount, chuck or jamb chuck, it is wise to always work towards the headstock
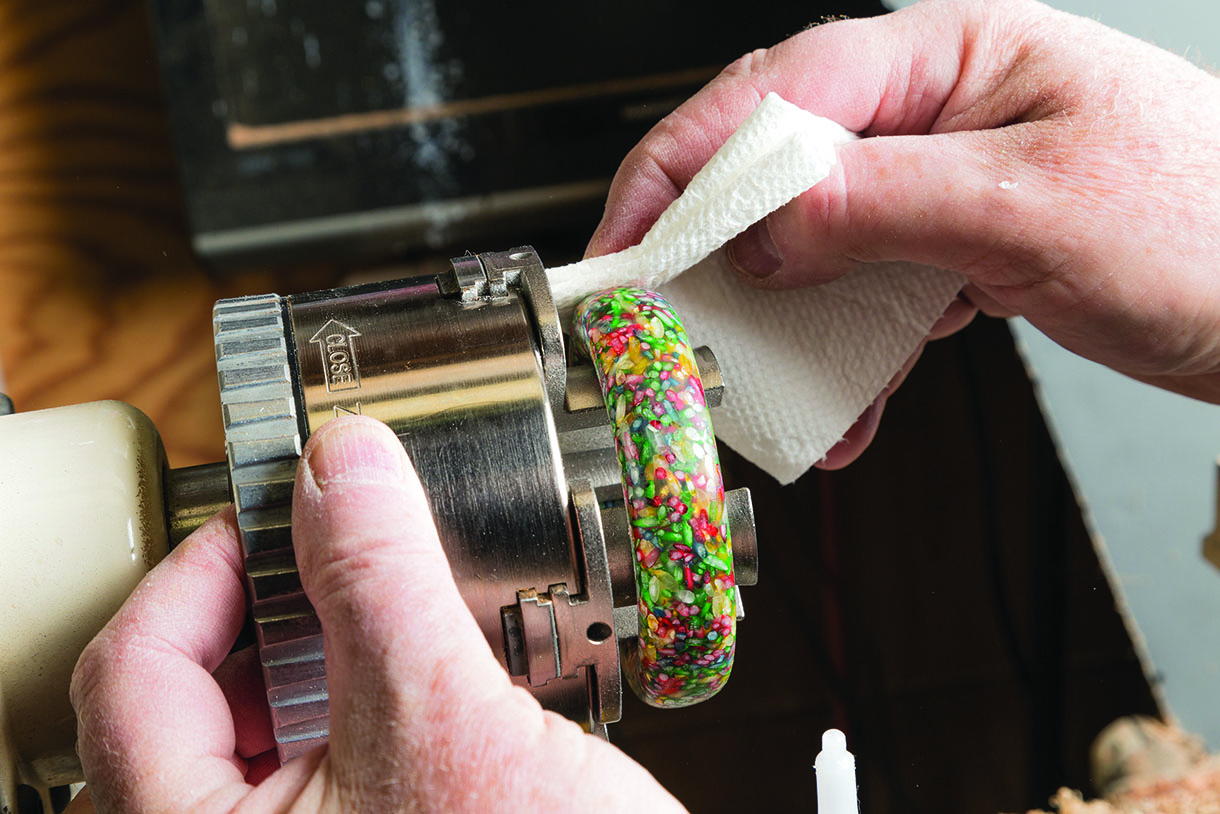
I never remove the homemade casting mould aluminium foil as it turns off easily. Note the tape on the jaws protecting the finished I.D
Finishing
Finishing has been touched on but I want to make some special points about selection and application of finishes. You can use any finish that is your favourite, depending on the material. Plastics, whether bought or cast, rarely need any added finish as they can be brought to any level of surface finish and shine you desire using plastic polishes (abrasives in carrier) or the ultra fine abrasives, such as MicroMesh. For woods, you can use one of the myriad of commercially available finishes or your own home-made concoction, as many woodturners do. The species and design will dictate the appropriate gloss to complement the bracelet. Because bracelets fall into the ‘harsh use’ category, I favour Ca or lacquer finishes for their toughness. Applying Ca adhesive as a finish can be easily learned if you don’t already know how. It essentially creates a plastic shell bonded to the wood. The thickness of that protective plastic shell is of your choosing based on the number of coats of Ca you build. Research and practice to perfection before you commit to using a certain finish on a valuable turning. The only downside to a Ca finish is that it is easily made a gloss finish but not easily controllable back to a matte one.
Another tough finish I use is spray lacquer. Applying lacquer from a rattle can is easily done provided you follow two simple rules. Shake for as long as the instructions indicate, and mixing of the contents is key to obtaining a good finish. Shake again when applying the next coat.
Onto the number of coats, there should be many. There is no easy fix for runs in lacquer from applying too much at once. Letting it cure, stripping it off by sanding or lacquer thinner and then reapplying is the only way I know to fix a poor lacquer finish. That said, lacquer is an easy finish to apply if you shake as specified and mist on many light coats. The lighter and more applications, the better. Applying a light coat will let it cure in minutes allowing for a next coat. Because lacquer chemically cuts into and bonds with the coat beneath, you can build many light coats into any thickness you wish. If you always use gloss lacquer, you can obtain any sheen you like. You can use MicroMesh that cures lacquer finish to an incredible shine or use less fine abrasives to matte it back to whatever level you wish.
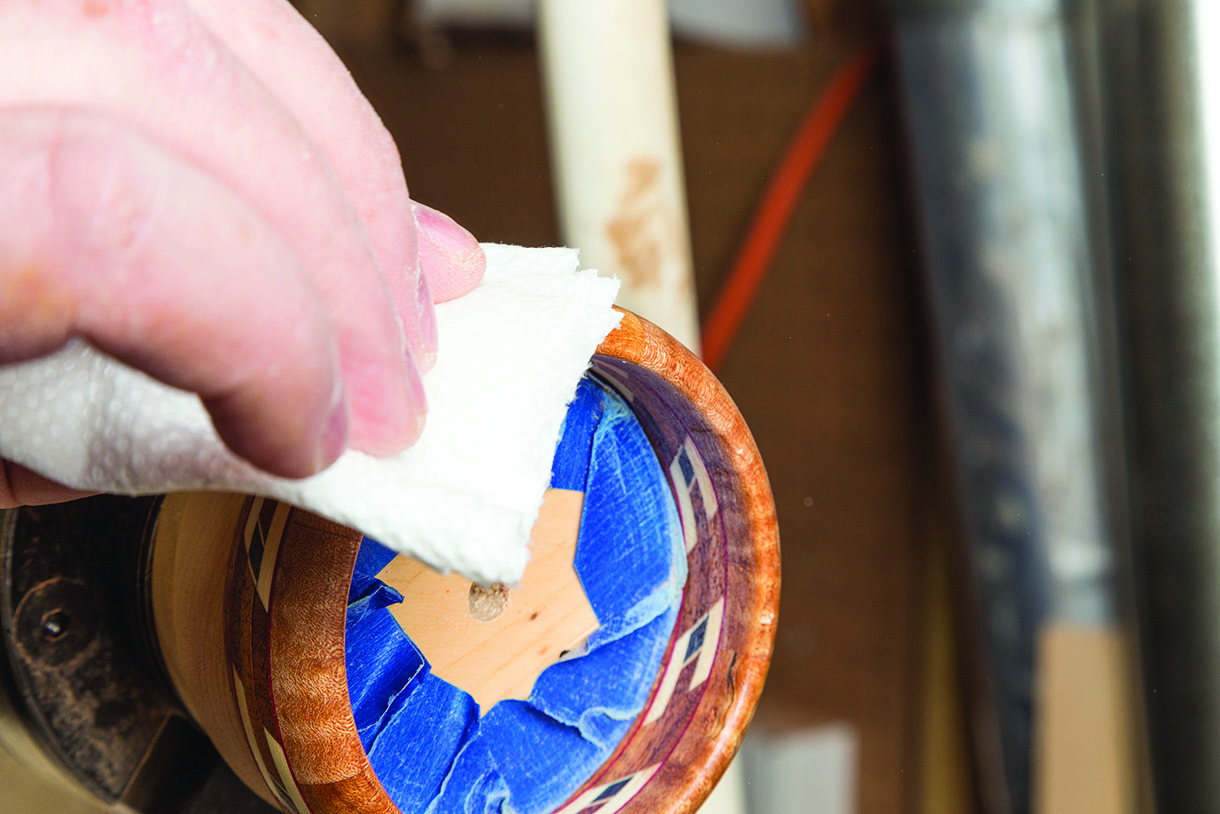
I favour a Ca adhesive finish on my tough life turnings. Use care when applying but worth the effort
I even apply Ca finish to some of my resin cast parts. Here, the Ca seals the cut through and fractured rice grains
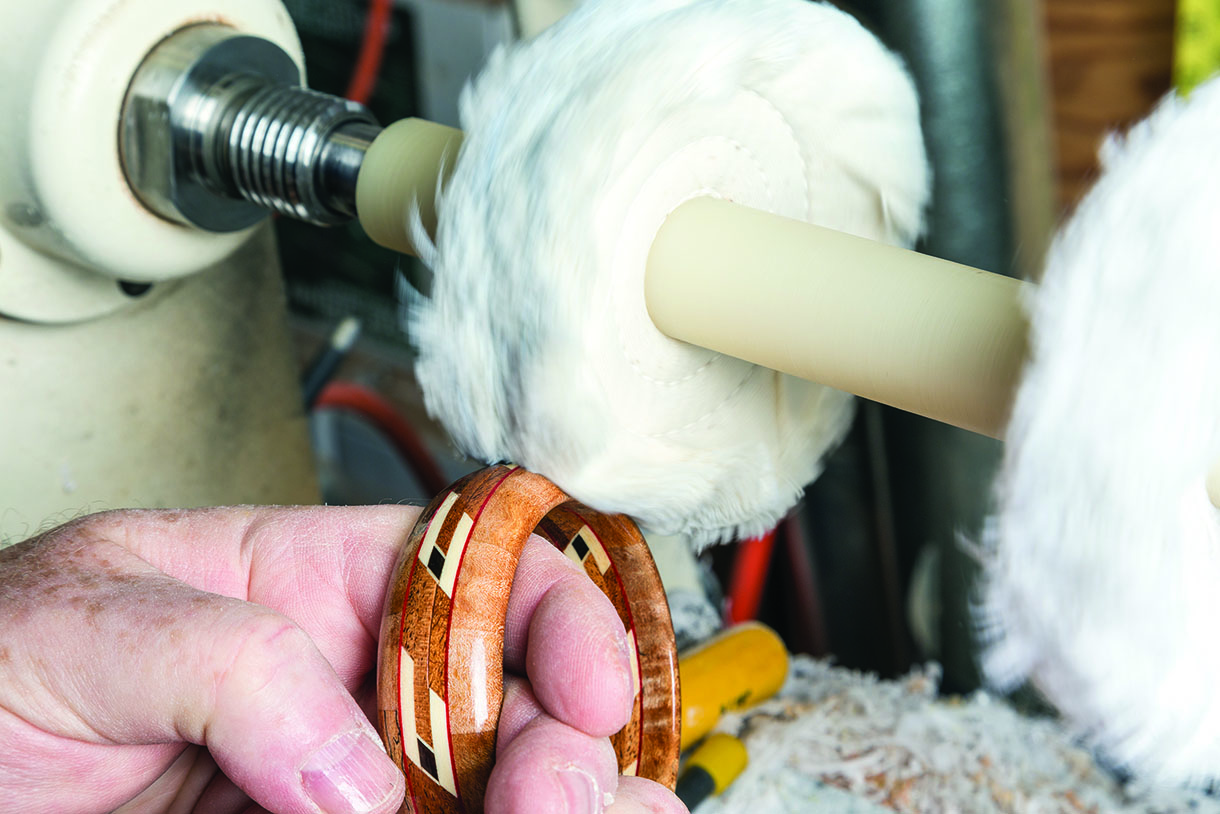
It is rare that any finish doesn’t improve with some buffing. Proper speeds and feeds are important
Conclusions
Bracelets are just one of the many jewellery items you can turn. Regardless of your reason for turning the jewllery, you can certainly learn from the process, have fun and express your creativity. The work-holding is simple and logical as is the turning sequence. Can you deviate from the suggested? Certainly. You can take the rings or bracelets to any complexity or cost level you wish, make a gift, add bracelets to your craft show or gallery offerings. You could also look at the capabilities of multi-cast creations, segmented designs, inlay or polymer clay pattern capabilities. While I didn’t include polymer clay in the blank creation, there is no reason not to. You can create blanks from polymer clay or simply form and fire it around a mandrel. Explore and build on the many ideas presented.
")

