Ramon Valdez makes some custom holding accessories for his new sliding tablesaw
When I finally received my Hammer K3 Winner sliding tablesaw I realised they don’t have the largest sliders, but for my small workshop, it is absolutely ideal. Sliding tablesaws are finally gaining popularity here in the US, and rightly so –they’re extremely versatile, can be very accurate and simply fun and amazing to use! I recently had a project that required some smallish pieces of wood with slight angles. I needed a quick and easy way to hold them down as I made my cuts, with safety as an ever-present concern. Here was my solution.
Hold-down clamps
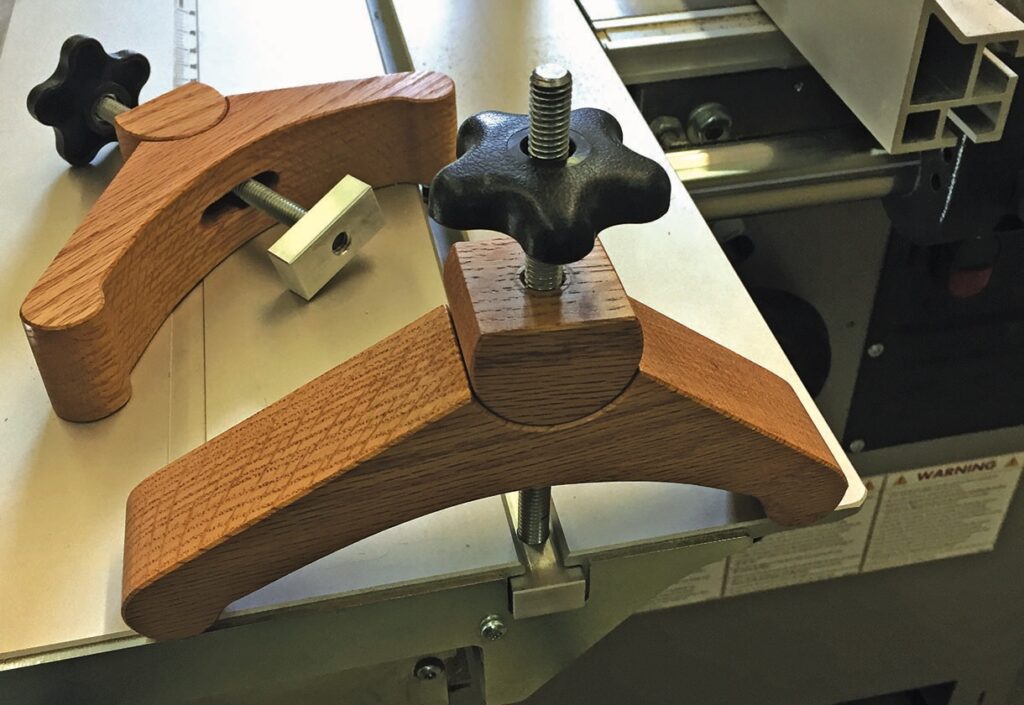
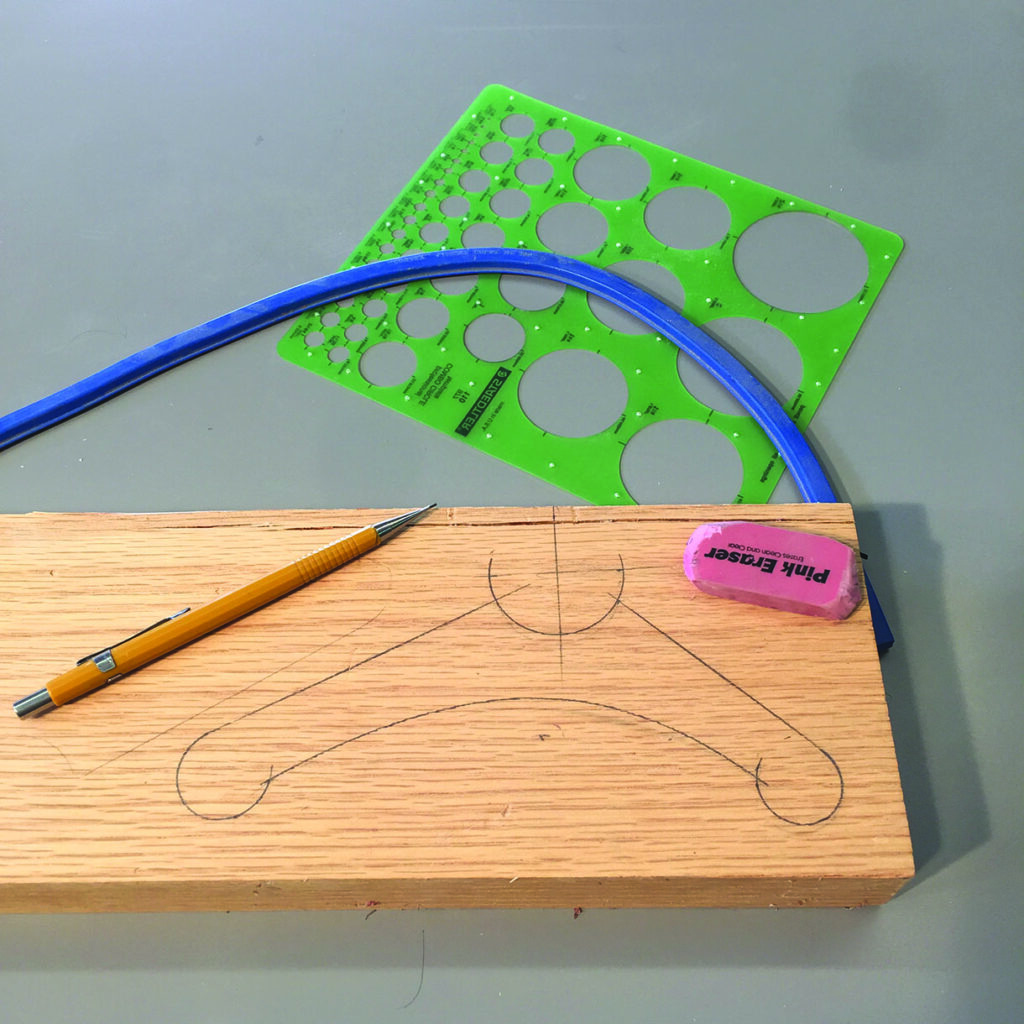
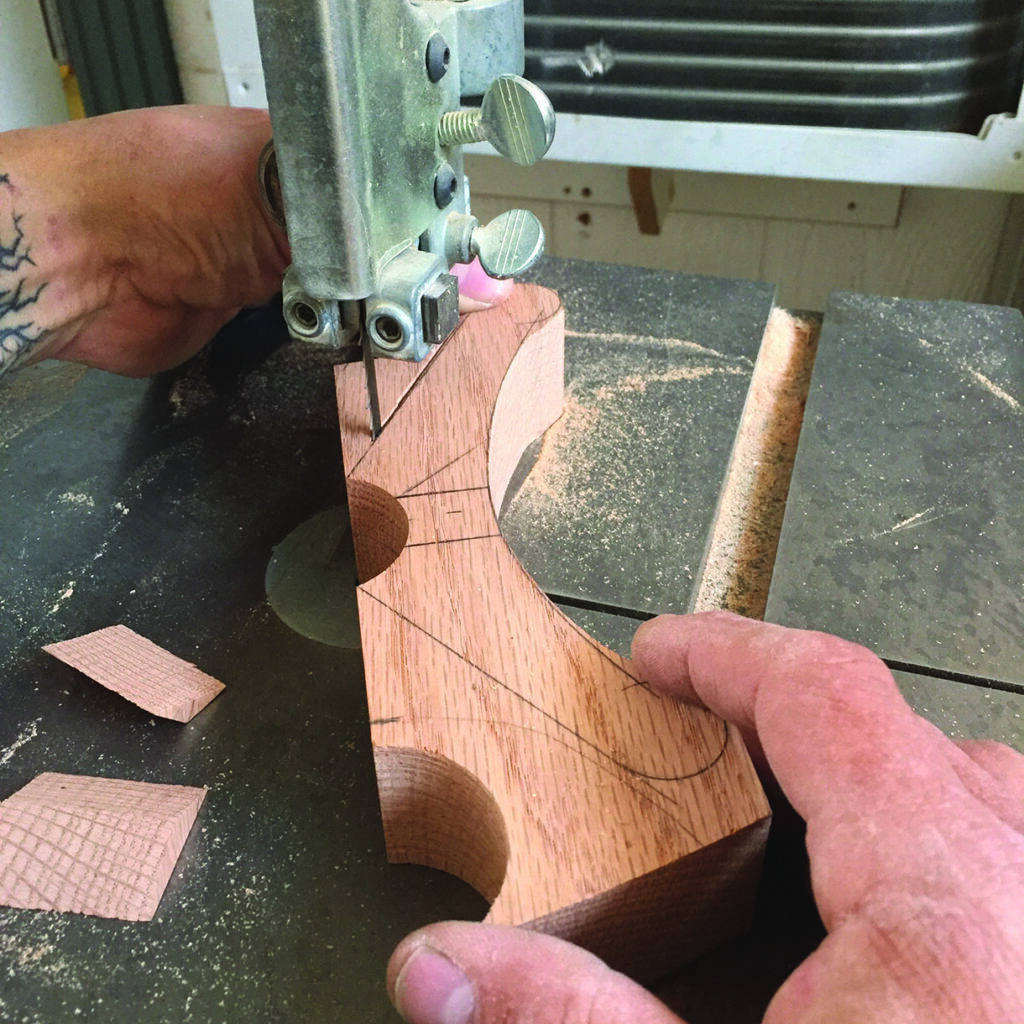
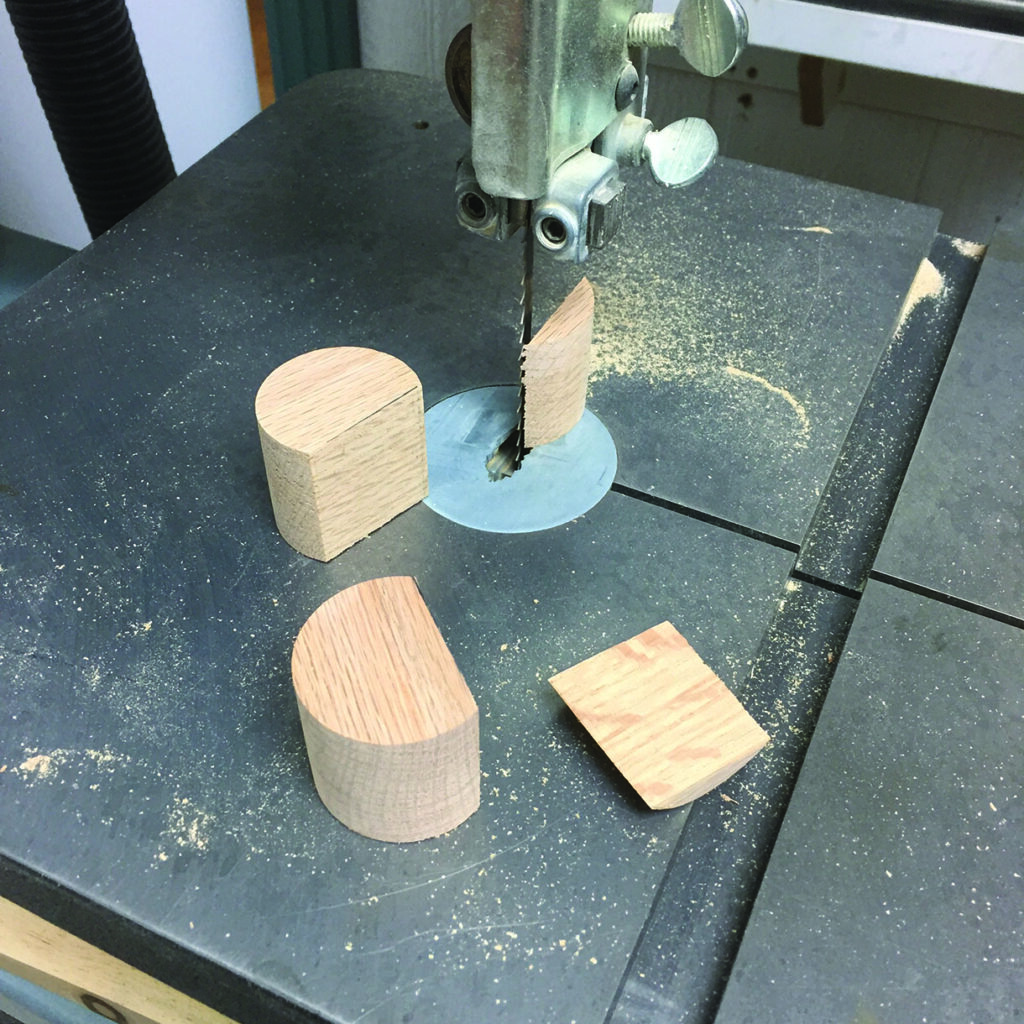
I created a pair of hold-down clamps from some 8/4 (commonly known here in the US and about 113⁄16in or 46mm) oak that utilise a simple ‘star’ knob and a section of ‘all thread’ bolt section. I wanted the clamps to be as versatile as possible in relation to the height or thickness of material that they could clamp down to the sliding part of my Hammer K3. Using a fair curve jig and some drafting templates, I laid out the overall shapes of two identical clamps. The oak clamps consist of the main body or clamp itself and a pivoting (circular) section that engages in a saddle of the clamp body. These are similar to a shop-bought design commonly used at a drill press or a crosscut sled, but I wanted mine to be larger in order to clamp up to about 31⁄2in
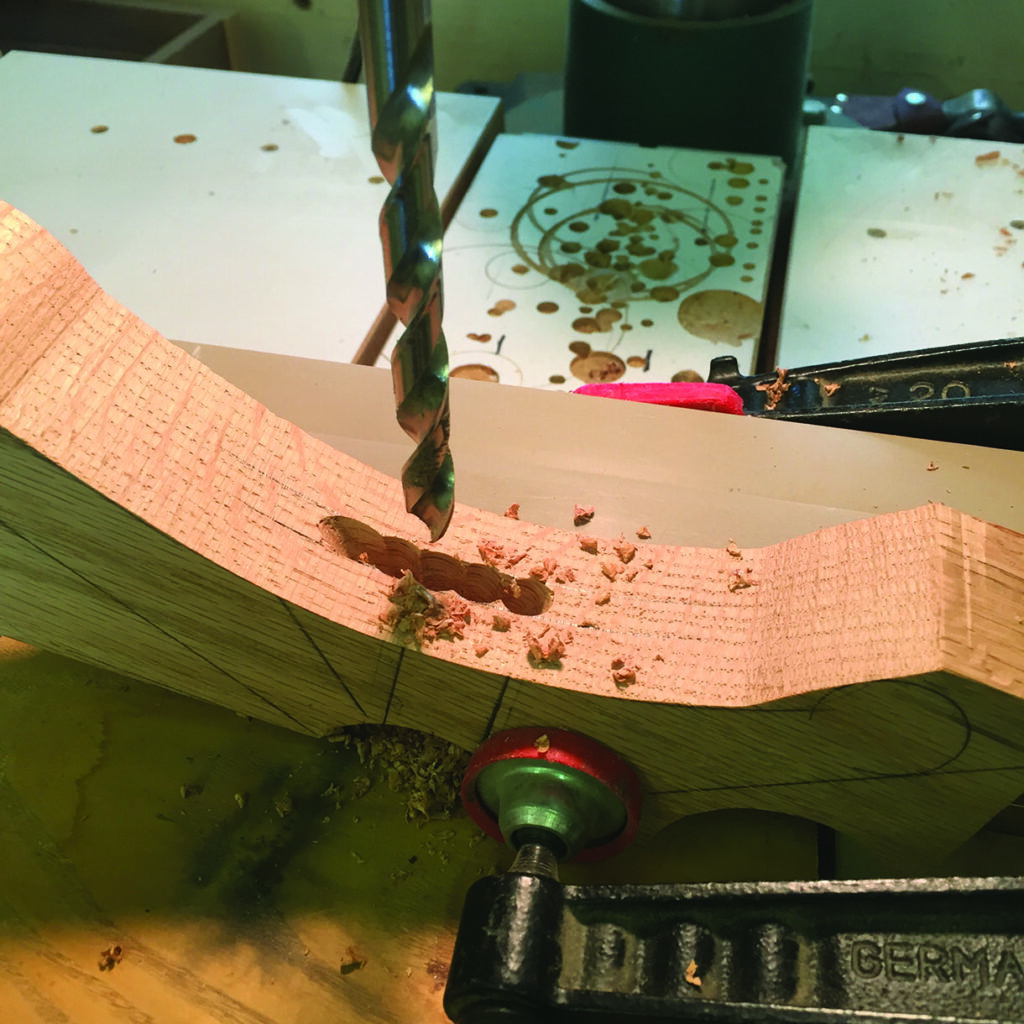
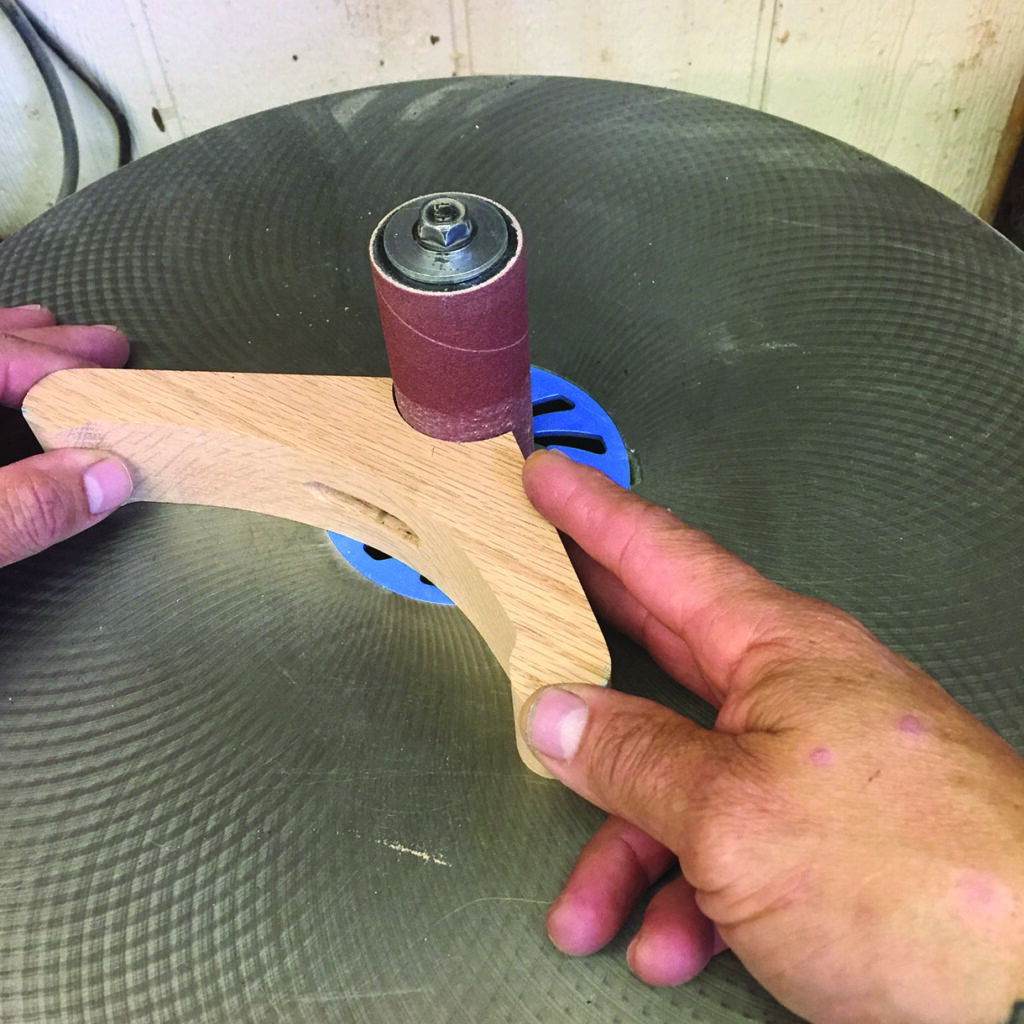
(90mm). To create the circular part without the hole (that usually gets made from the hole saw mandrel drill bit), I made a simple jig or template to guide the hole-saw without the centring drill bit. The main body of the clamp was cut out on the bandsaw after first drilling a one-size-up hole in the body (saddle) to accommodate the circular section. I used my stationary edge sander, an oscillating drum sander and a scraper to clean up the bandsaw marks on all of the pieces. Next, I drilled a hole (25⁄64in or a 64th of an inch larger than a 3⁄8in bit) in the circular sections. The all-thread that I used was 3⁄8in. (Incidentally, I wish the entire world was metric! I find it easier and quicker… but that’s another story.) I secured the pieces that make the main body of the clamps at the drill press fence with spacers underneath for support where needed to drill several overlapping holes. These overlapping and angled holes will allow these shop-made clamps to pivot to accommodate different thickness of materials. I cleaned up the drill bit cuts with a rat-tail file and chamfered the inside edges. I eased all the corners and sanded things smoothly.


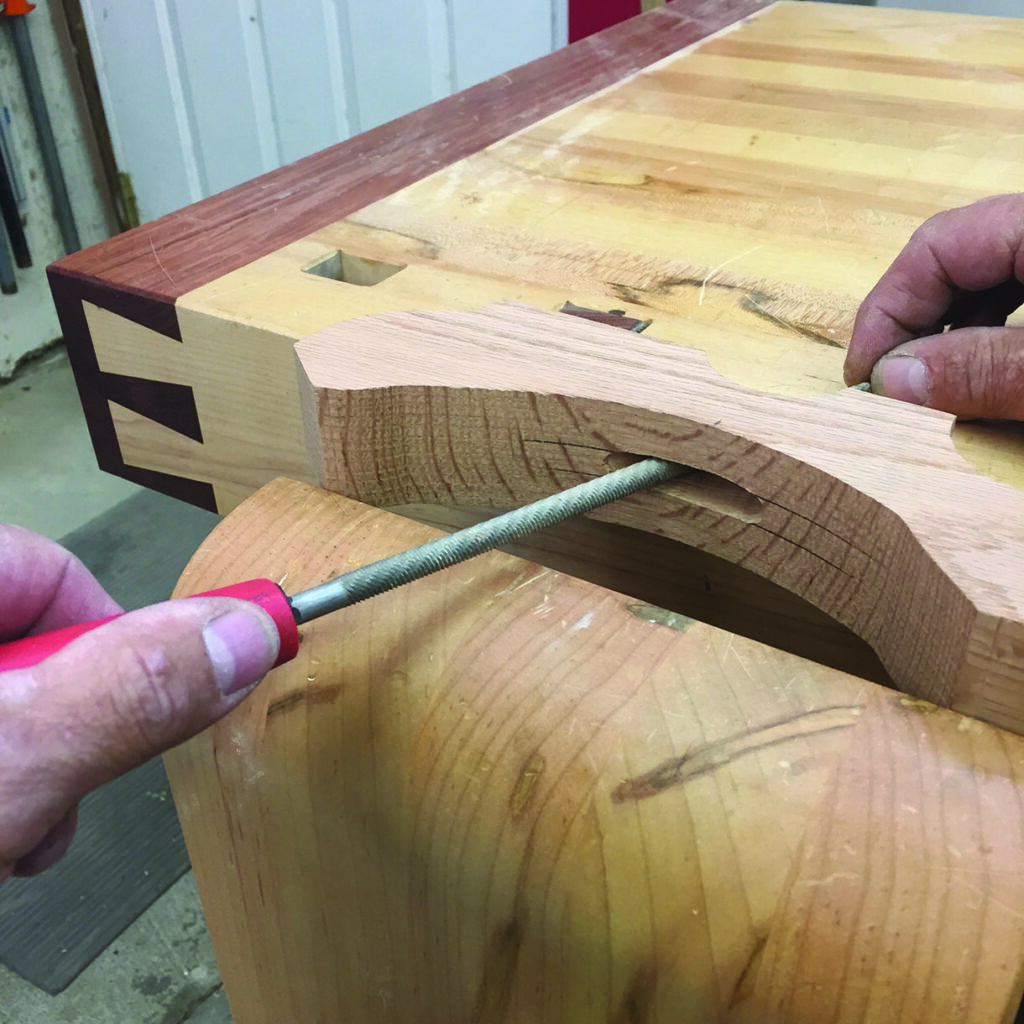

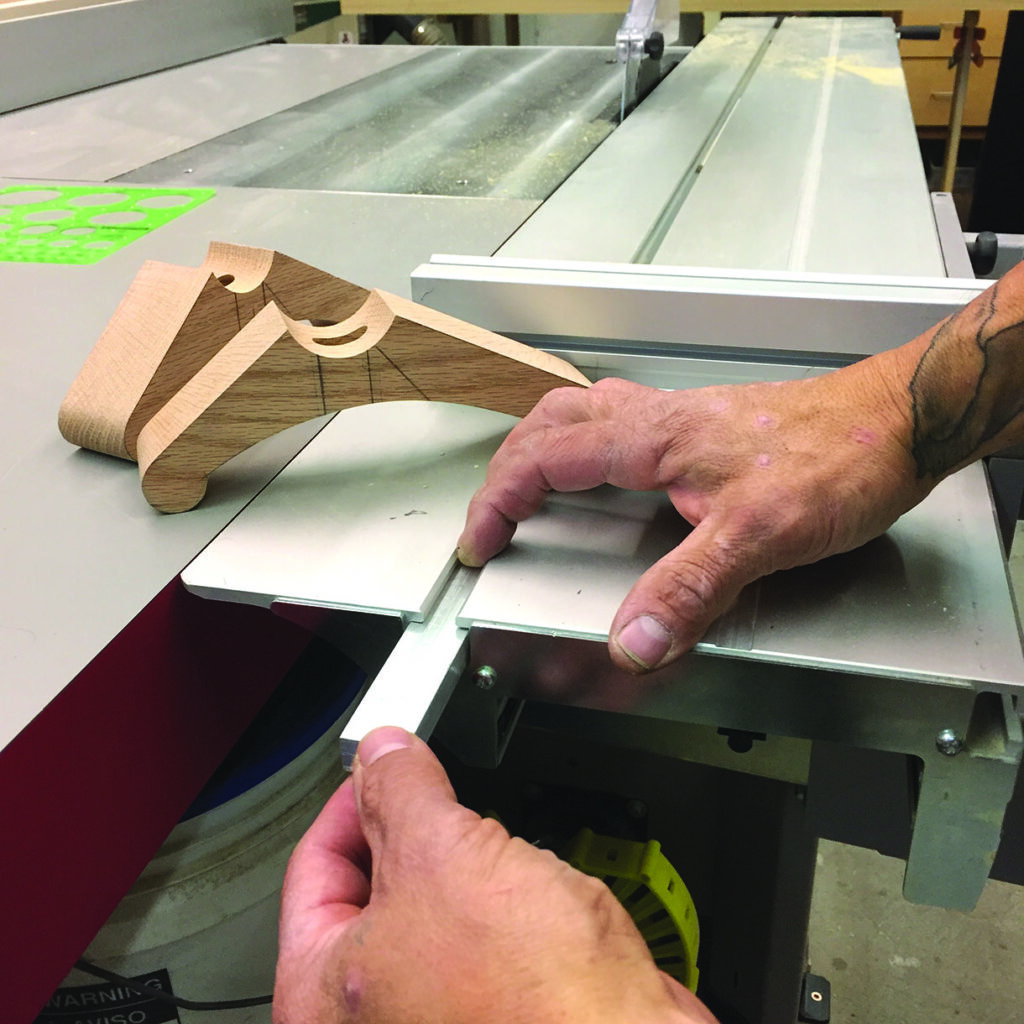
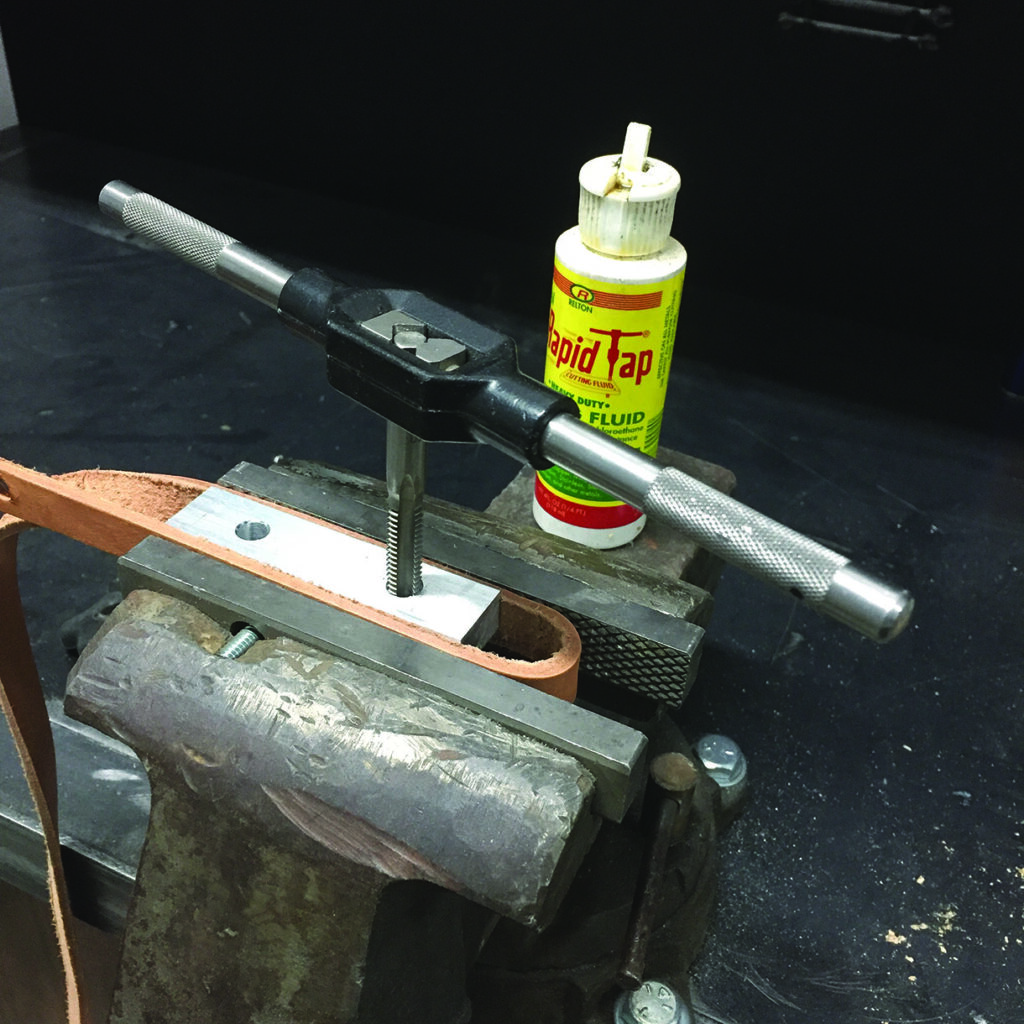

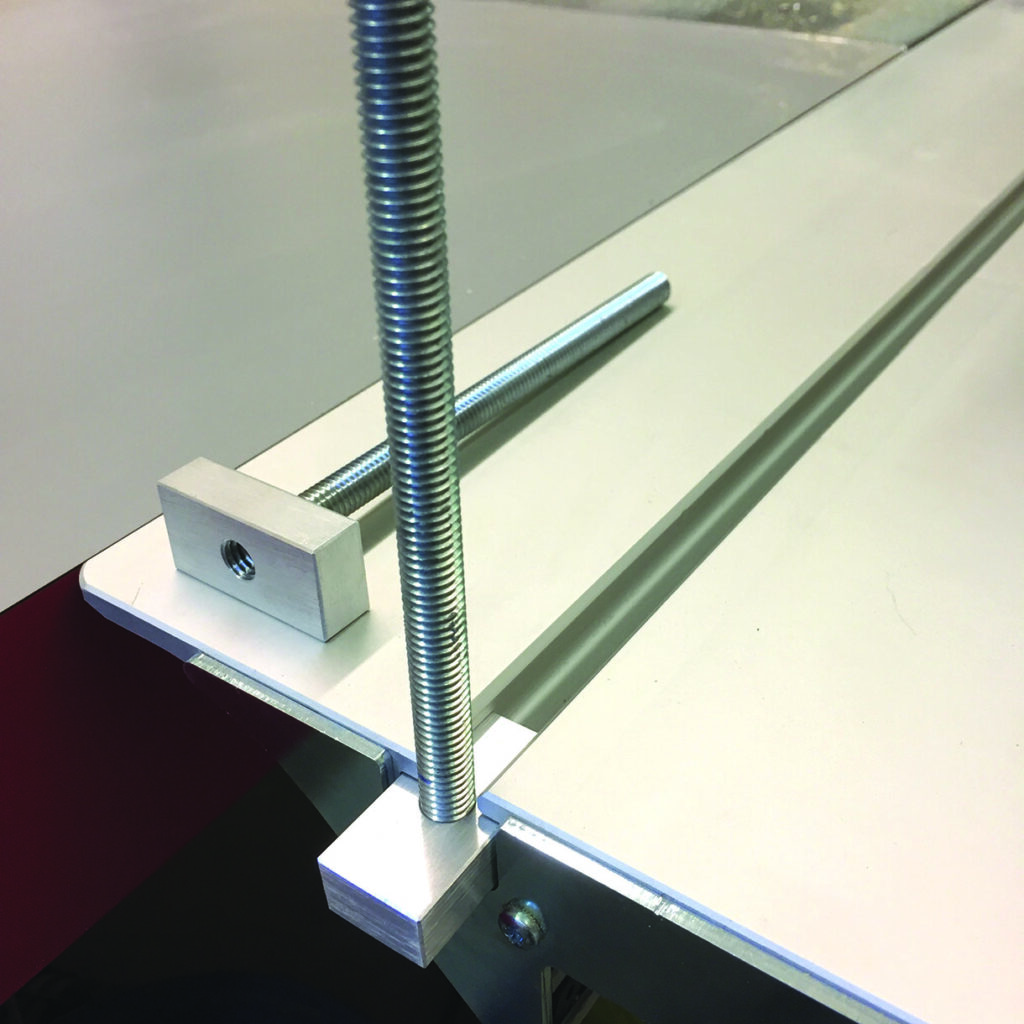
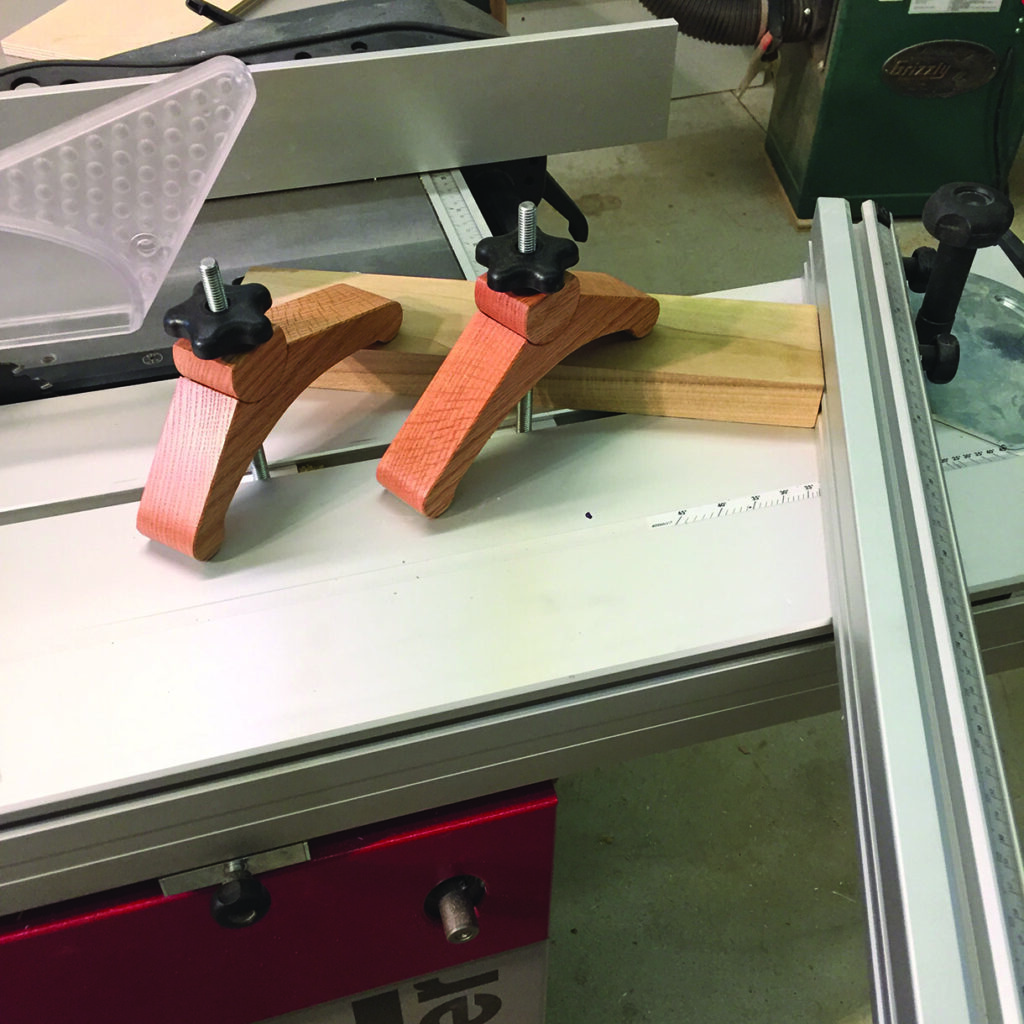

The clamps have an ‘all-thread’ bolt section (about 6in long) that connects to a piece of aluminium with tapped threads. One could use steel bar for this, but I think that the aluminium is plenty strong for this application and is much easier to work with regular woodworking tools. I added a couple of star knobs, although one could easily make these, as well. After adding a couple of coats of an oil/urethane mixture, I let them fully dry. I then added some sandpaper to the points that contact the material and the saw table. This is such an easy way to create a better bite on the clamped timber or sheet goods.
Incidentally, while I was creating these hold-down clamps, an Instagram friend of mine told me about the Fritz & Franz jig. I had never seen these before, they are an excellent addition to any sliding tablesaw and they seem super quick and easy to use. I’ll need to make one of those soon! My clamps, however, will hold small parts a bit more securely than the Fritz & Franz jig. I think a guy (or girl) could use both types of these clamping fixtures. Also, I am aware of the factory type of hold-down clamps for this kind of tablesaw … and they work very well. However, I needed to cut my angled parts quickly so I decided to just make something and I like the fact that I now have two of them. And setup is super quick and easy: I simply leave the aluminium bars in the slots and my shop-made clamps nearby are always ready to go!
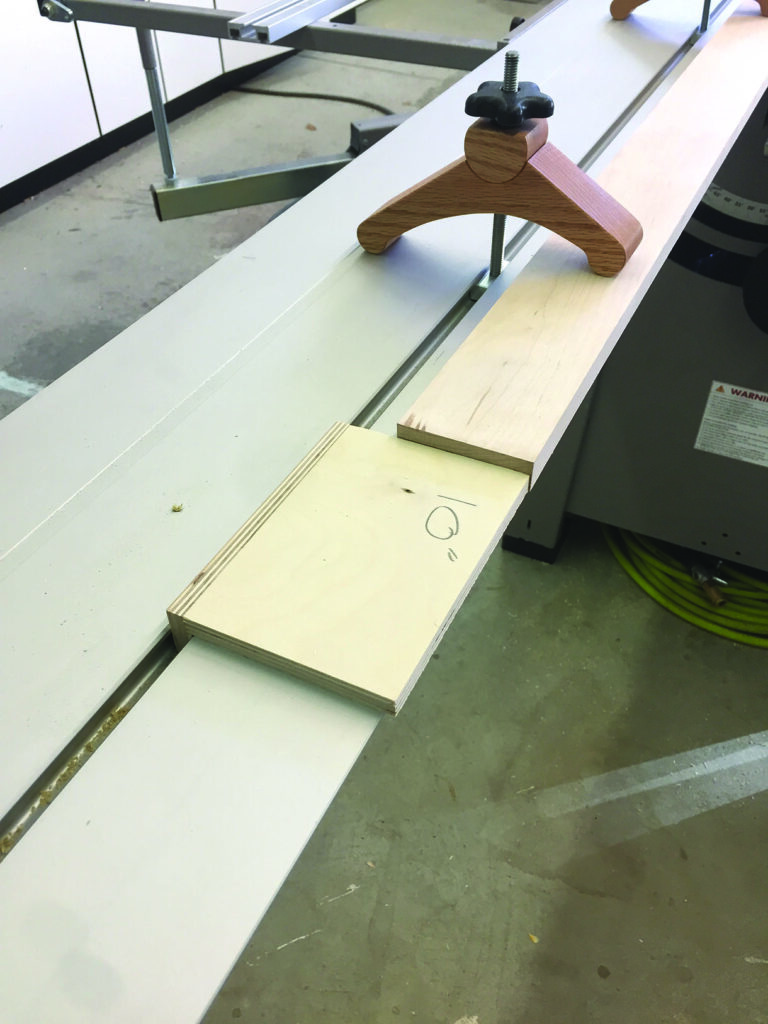
Go-no-go jig
The ‘go-no-go’ jig is a simple chunk of Baltic birch plywood with a glued-on cleat that fits snugly in the slot of the slider part of the tablesaw. Of course, make it oversize, then run it through the saw blade to establish the exact location of the left side of your blade. I made a larger blank that I crosscut, and saved the fall off for later use. Once I have the current blade sharpened, I’ll need to crosscut a new jig. Or if I switch blades, the kerf could be different (more than likely) so I currently have one of these jigs for each of the two different-sized blades that I use on this saw.
I’m actually surprised and pleased as to how well these hold-down clamps work and I find myself reaching for them often. Make yourself a set and you’ll love the added benefits of securely clamped pieces of timber with little to no vibration and your cuts stay safer and more accurate.