The Woodworkers Institute

We bring you the very best of woodworking!

“Make it with us”

Window on the world –suspended vine bowl

Neil Scobie shows us how to make a window bowl design derived from nature
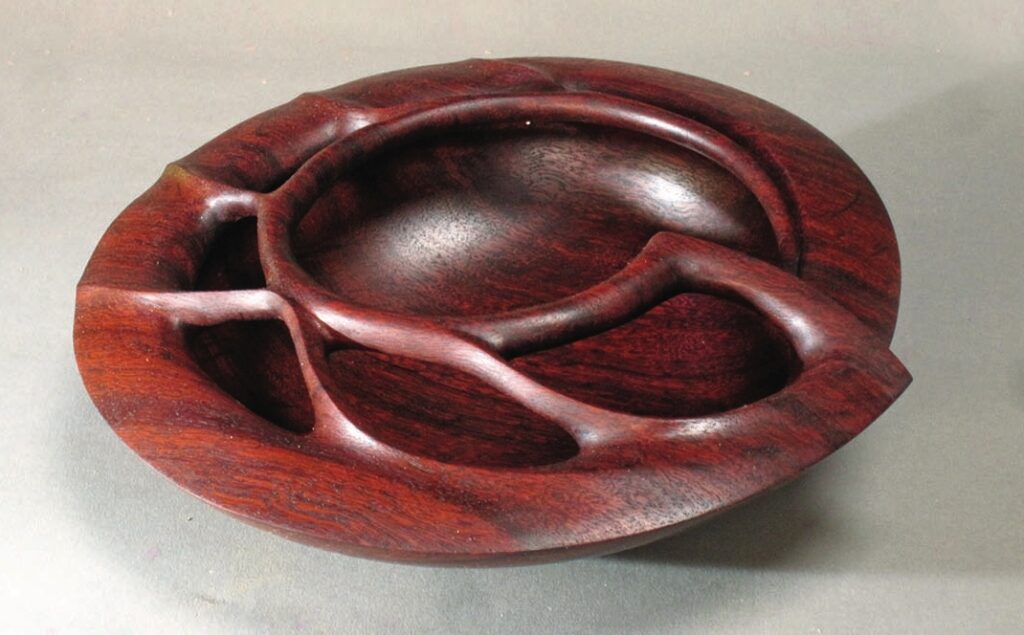
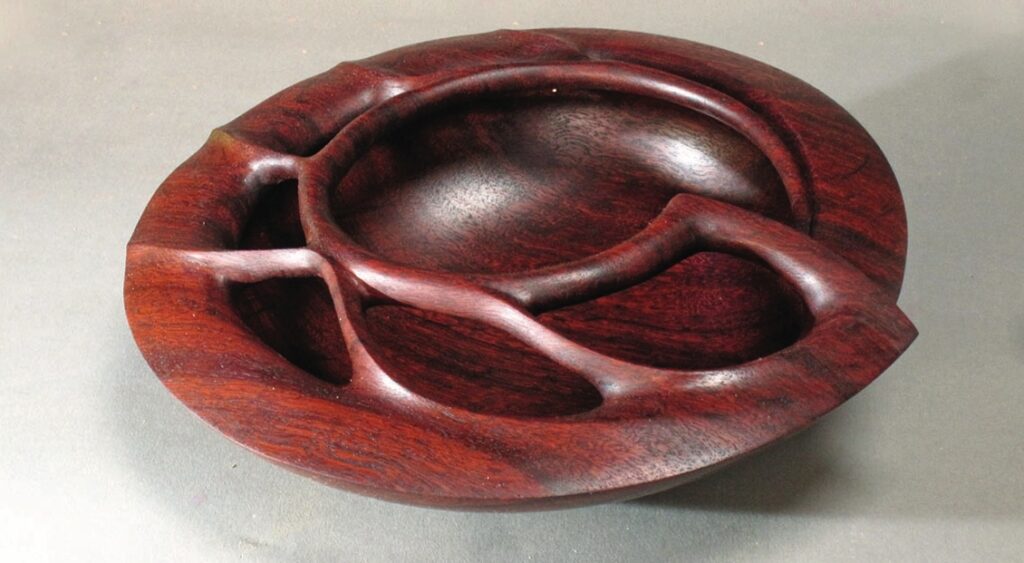
Intricate carved wooden bowl with abstract design.

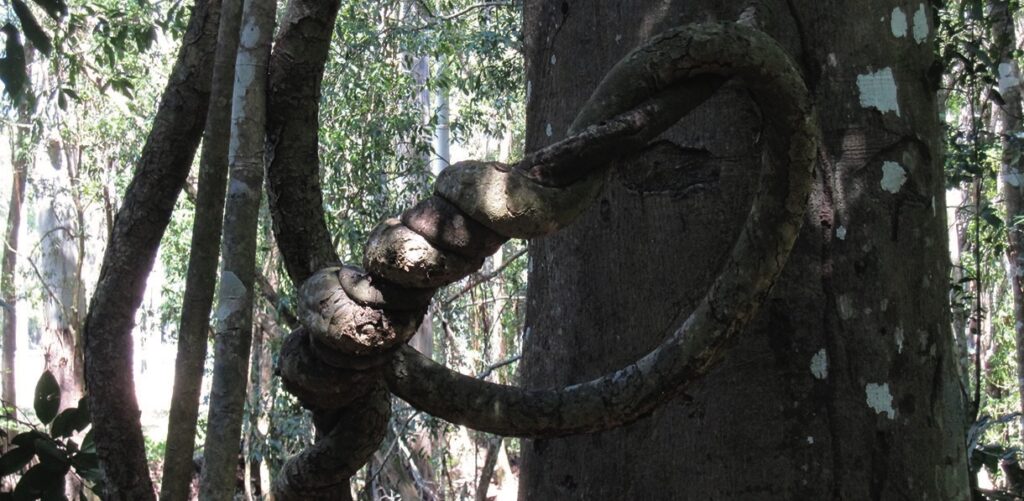
This project is one that has been inspired by nature, as most of my pieces are. On our eight-acre property in northern NSW, Australia, we have predominately trees and some rainforest areas with large strangler fig trees. The strangler fig will attach itself to a host tree, then start wrapping multiple vines around the host, eventually killing it off. In the process of the host dying, little windows are formed that let natural light shine through.

I have used this inspiration to make oval and leaf-shaped mirrors for a number of years, with the windows formed by carving suspended vines on the top and bottom sections. These vines can either sit on the mirror or be suspended above the mirror glass. With this bowl, my thoughts were that I could use the suspended vine idea on a hollow form, with a single vine running around the inner rim supported by smaller carved support branches. I have previously made two other window hollow forms that have both been sold to collectors in the US.

Most timbers would be suitable for this project, but denser, stronger species will enable you to carve the vines and supports much finer. I have chosen to use jarrah (Eucalyptus marginata), which is a rich red colour and very strong in small sections. The size of the pieces is not really important. If you are like me, the size will be determined by the size of the timber blank you have.

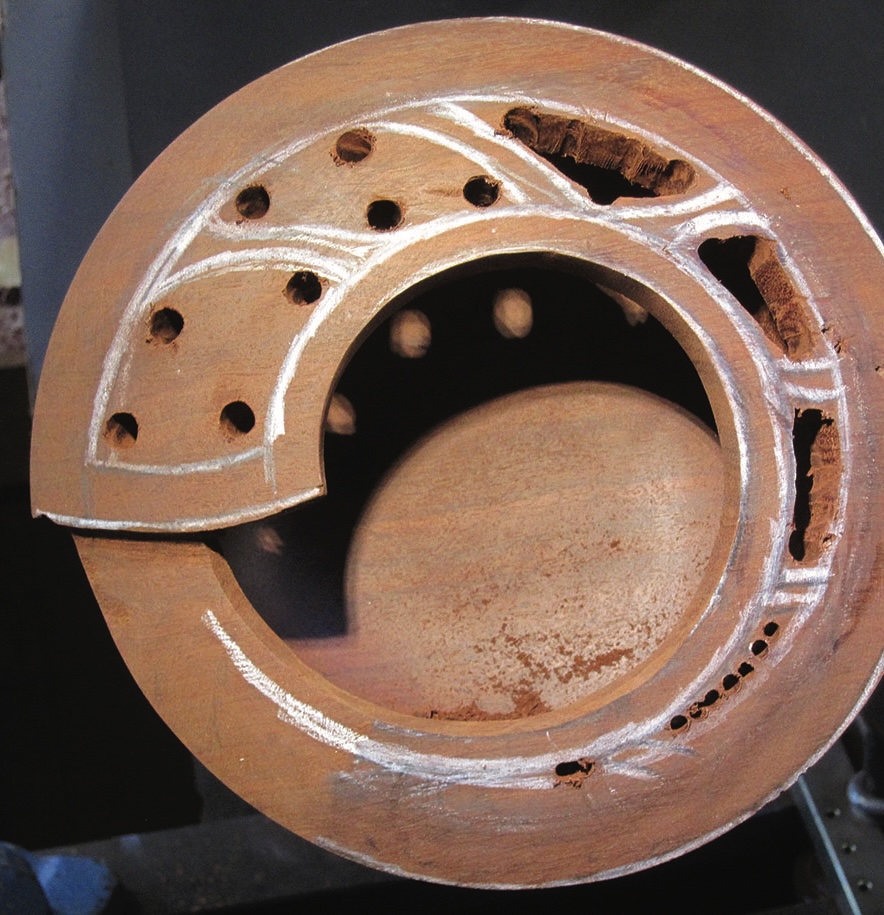
Twisted tree vines in a forest setting.
A complete loop formed in a suspended lawyer vine, forming an inspirational shape. Note the way two vines have twisted themselves around each other
Leaf-shaped mirror with sky reflection
A leaf mirror with suspended
vines was used as a prototype
for this project. Both top and bottom vines are suspended up above the glass

Things you will need

Turning tools:
• 12mm bowl gouge
• Round skew chisel
• Trimming tool 
• Hollowing tools

Carving tools:
• Jigsaw
• Rotary tool
• Burrs
• Soft sanding discs
• V-tool for hand carving

Materials:
• Jarrah (Eucalyptus marginata)

Drawing
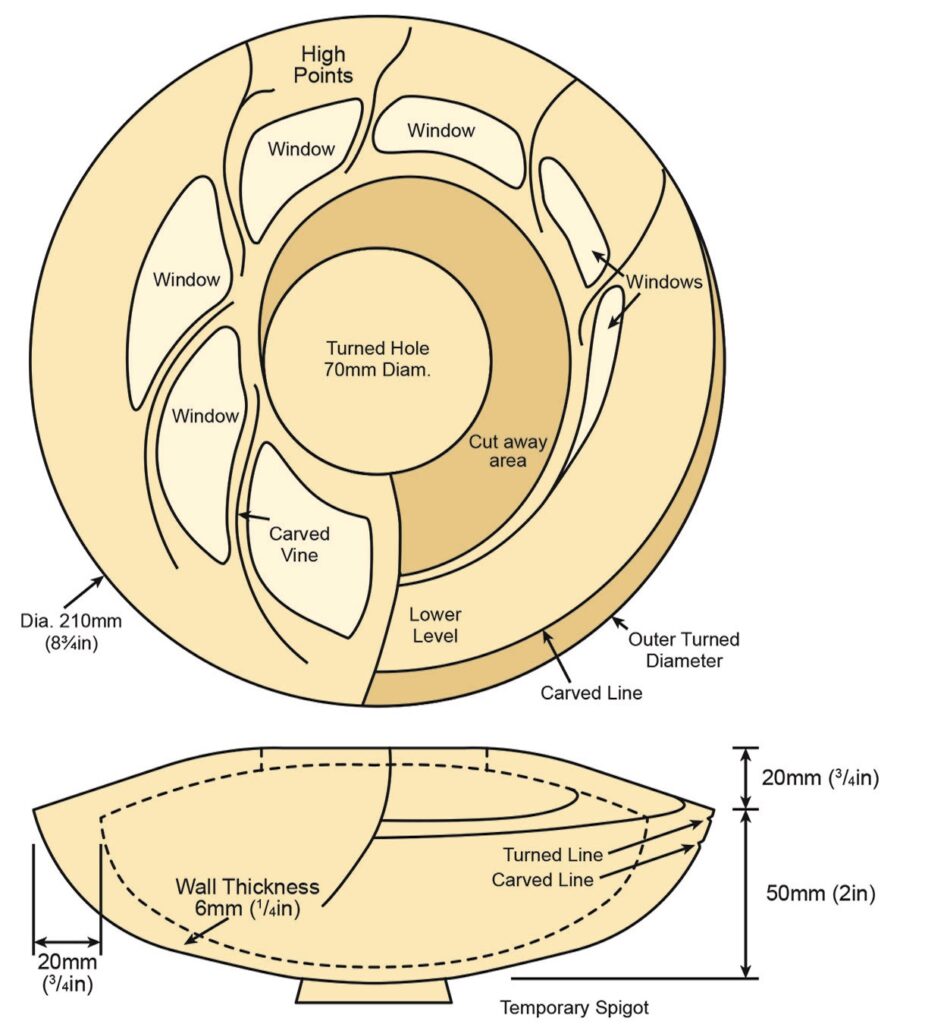
Diagram of a carved bowl design
Hand holding wooden block on a lathe
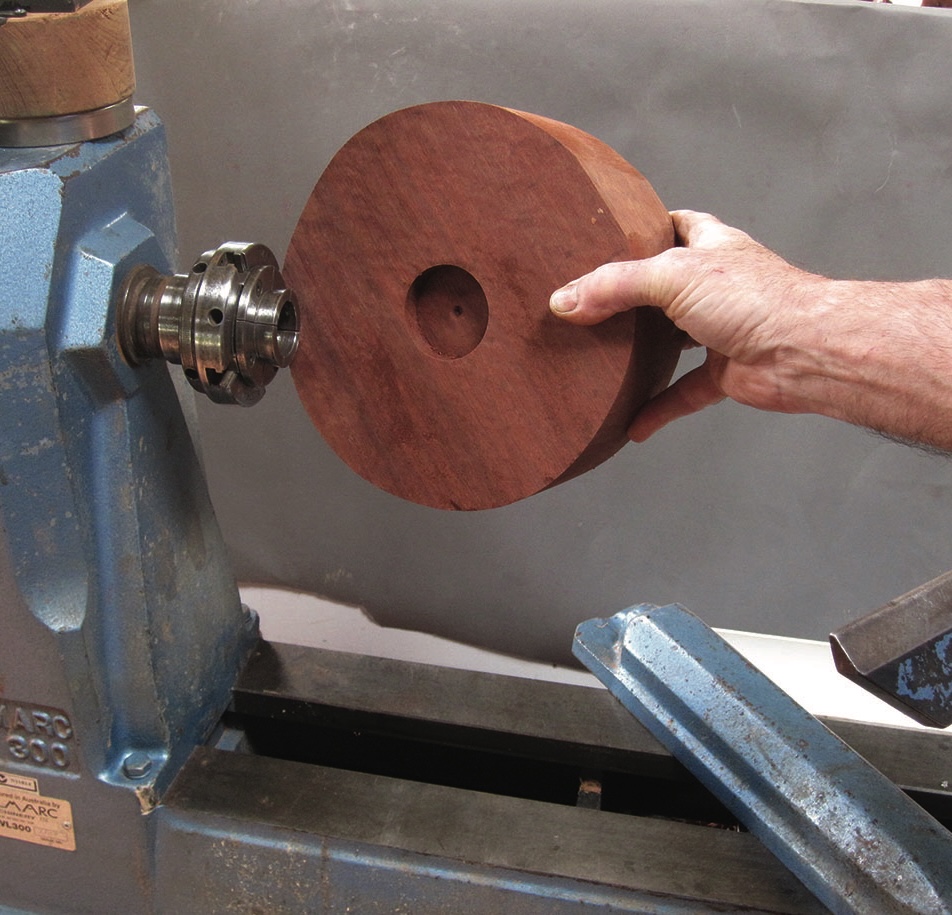
1. Fix your blank to a screw chuck. Alternatively,  the easiest way of holding a bowl blank is to drill a hole to suit your chuck jaws
Woodturning on a lathe with hands crafting.
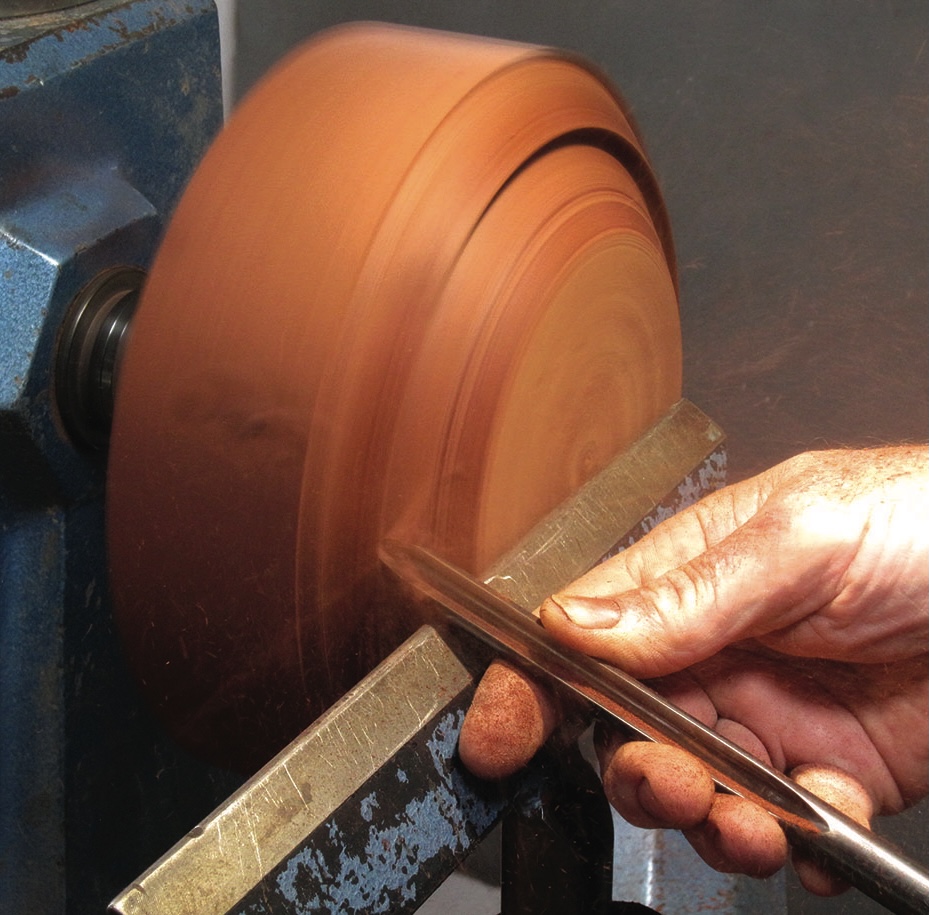
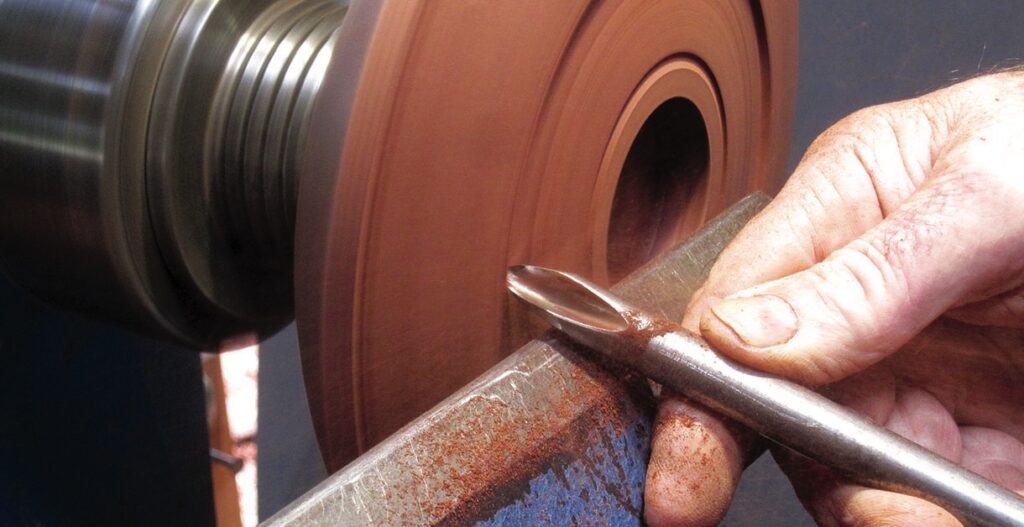
2. Using a bowl gouge, shape the outside of the bowl by cutting from the base towards the rim. Use the bottom half of the gouge with the flute also pointing towards the outside. The intersection between the top and bottom sections should be about three-quarters up from the base
Woodturning on a lathe with carving tool.
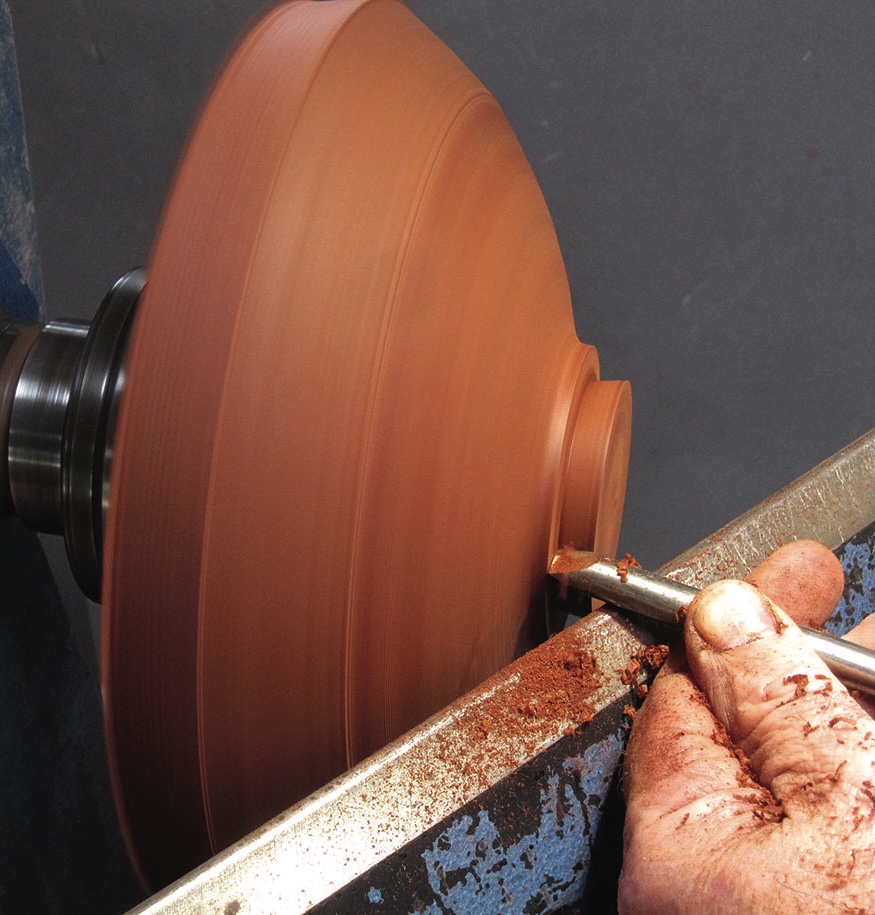
3. Use a round skew or parting tool to shape the spigot to suit the scroll chuck you will be using. Think about the shape of the bottom of the bowl once the spigot has been turned away, as it will become a round or rocking base. Make the spigot too short and the curve of the rocking base could be lost. Now indent the centre of the spigot so you can locate a revolving centre into it later when turning off the spigot
Woodturning with a lathe tool and spinning wood.
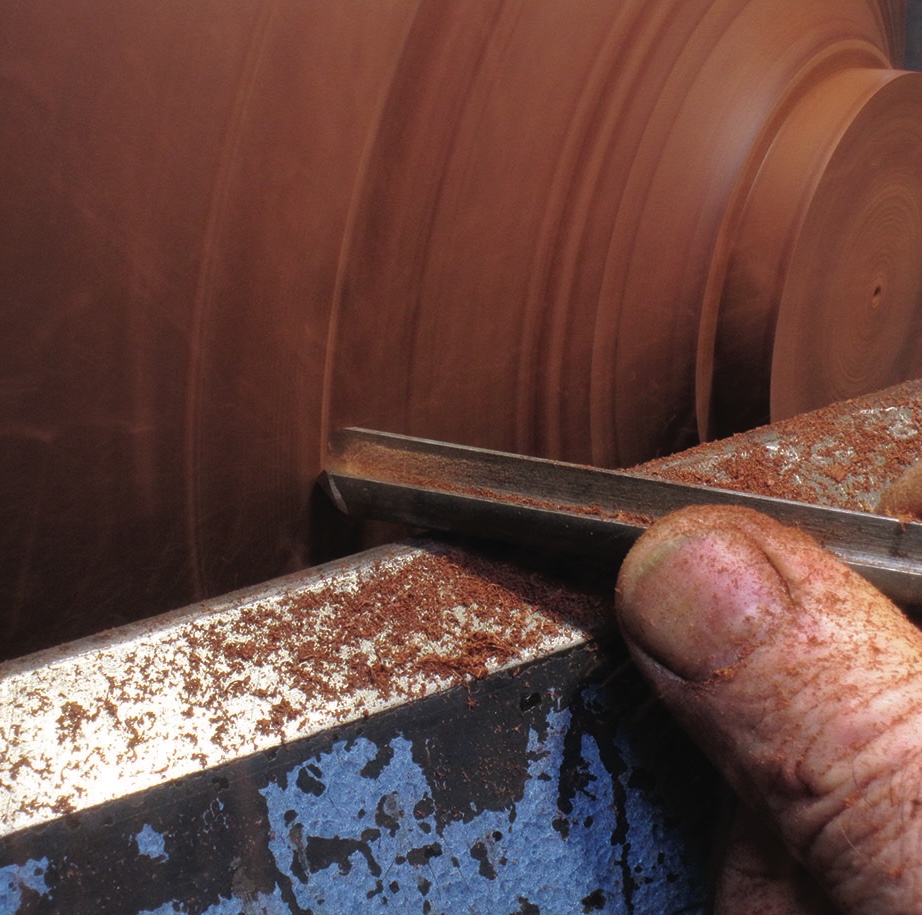
4. Use a trimming gouge to take a final shear cut, removing any torn grain that may have appeared during the shaping process. Sand the outer surface to about 180 grit at this stage
Woodturning on lathe with hand tool.
5. Start turning the rim of the bowl to match the drawing. The process is the same as you used for turning the bottom section. The middle hole should be less than one-third of the outer rim – refer to the drawing for proportions. As this surface will all be carved, there is no need for any sanding
Craftsman using lathe to shape wood bowl
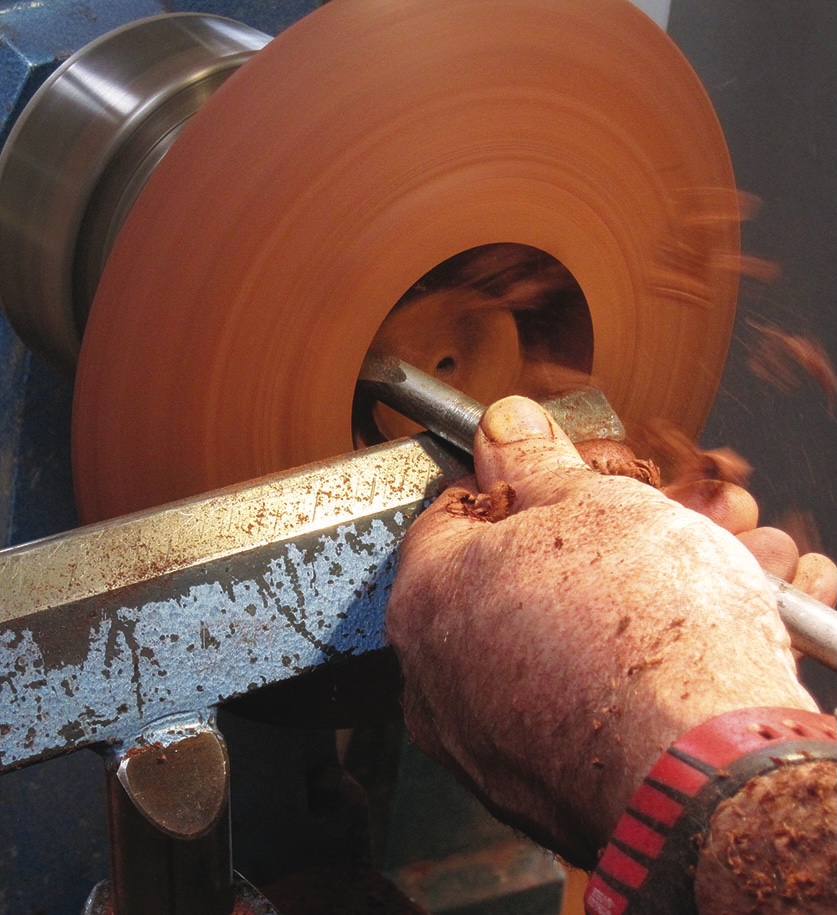
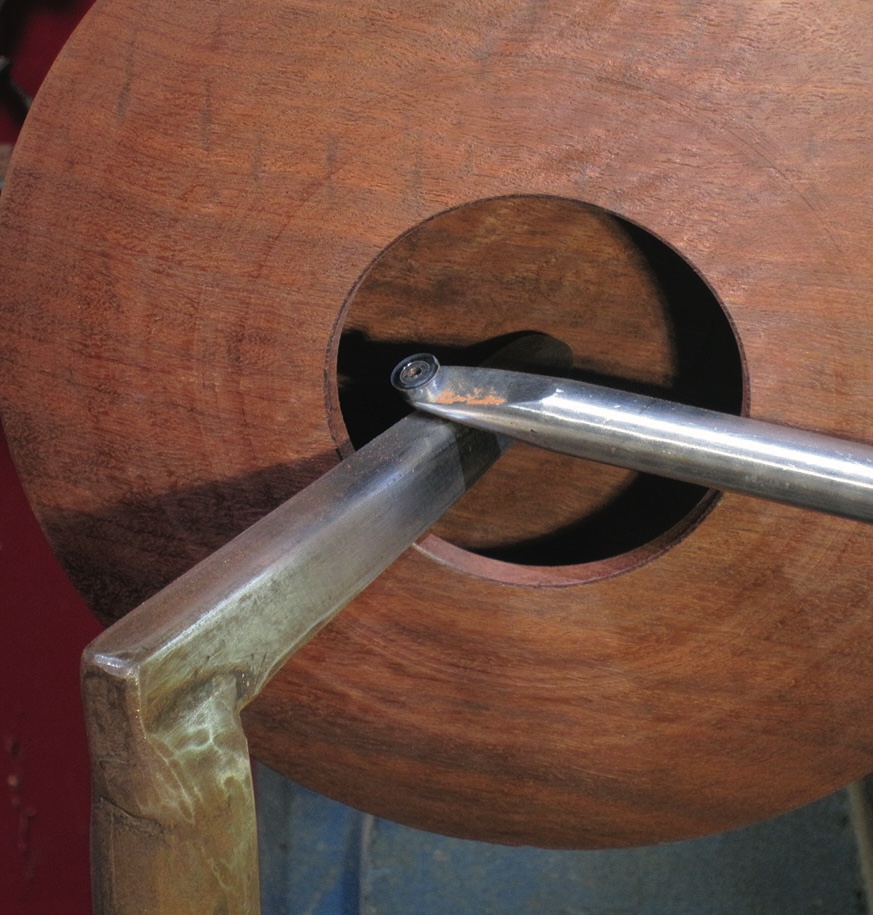
6. Use the bowl gouge to hollow out most of the centre section, pointing the flute towards the middle and cutting with the bottom edge of the gouge. You should be able to cut out about 80% of the centre with this gouge. To cut under the rim, place the toolrest into the opening so you have better support for the gouge. You should still try to cut with the point and bottom edge of the gouge and avoid catching under the rim by holding the flute too upright. Cut in as deep as you can before swapping to a different tool
Woodturning tool carving wooden bowl interior.
7. There are many different hollowing tools with various types of cutting tip that you could use for this process. I chose a tool with a cup-type cutter presented at a shear-cut angle to cut away the waste and refine the surface. The wall thickness should be around 5-6mm on the bottom section and about 7mm on the top under the rim. The thickness on the corner between the top and bottom sections should be about 20mm to allow for shaping the outer rim
Drilling a large hole in wooden bowl
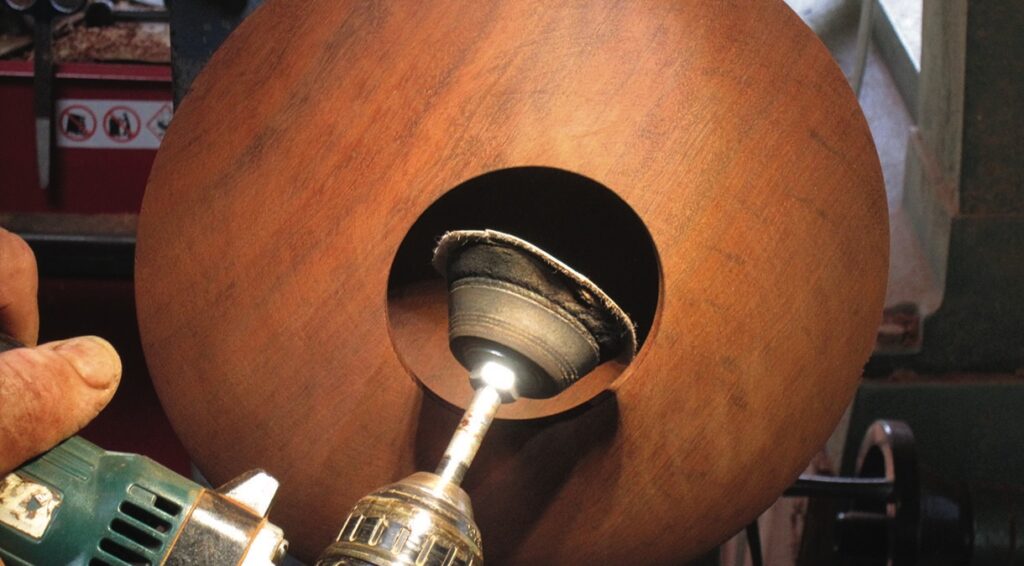
8. To sand the inside, use a soft sanding arbor on an electric drill, working through the grits up to 400. It is best to fully sand the inside at this stage as it is not easy after the carving is complete. Slow the speed of the lathe so you do not get any heat cracks forming
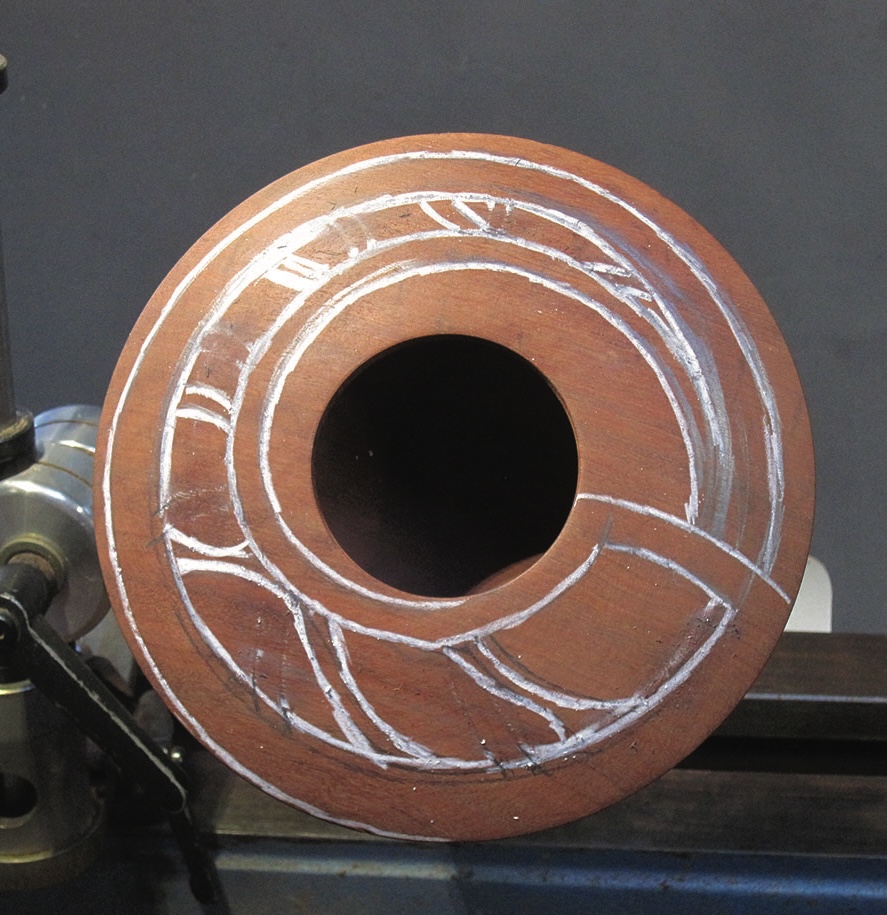
Wood on lathe with white carved lines
9. Use a soft lead pencil to sketch on the shape for carving, using an eraser to remove unwanted lines, and redraw until you are happy with the shape. Make sure you check the shape from all angles to make sure it looks in proportion before making any cuts. I have used a white crayon pencil so the lines photograph better. For carving, you will need to keep the chuck fastened on the lathe or, if you have one, use a dedicated carving jig
Woodturning with a lathe and power tool
10. Start the shaping by removing the section shown on right-hand side of the drawing. You can use any suitable power carving or hand carving tools. My tool of choice for fast waste removal is a mini carver. It is safe to use as long as the bowl is securely held in the chuck


Top tips:

1. Design – draw it, look at it and change if necessary. Maybe even look at it over a few days before you start carving.

2. Keep the carved lines flowing in gentle curves. Do not be afraid to add your own shapes to the design.
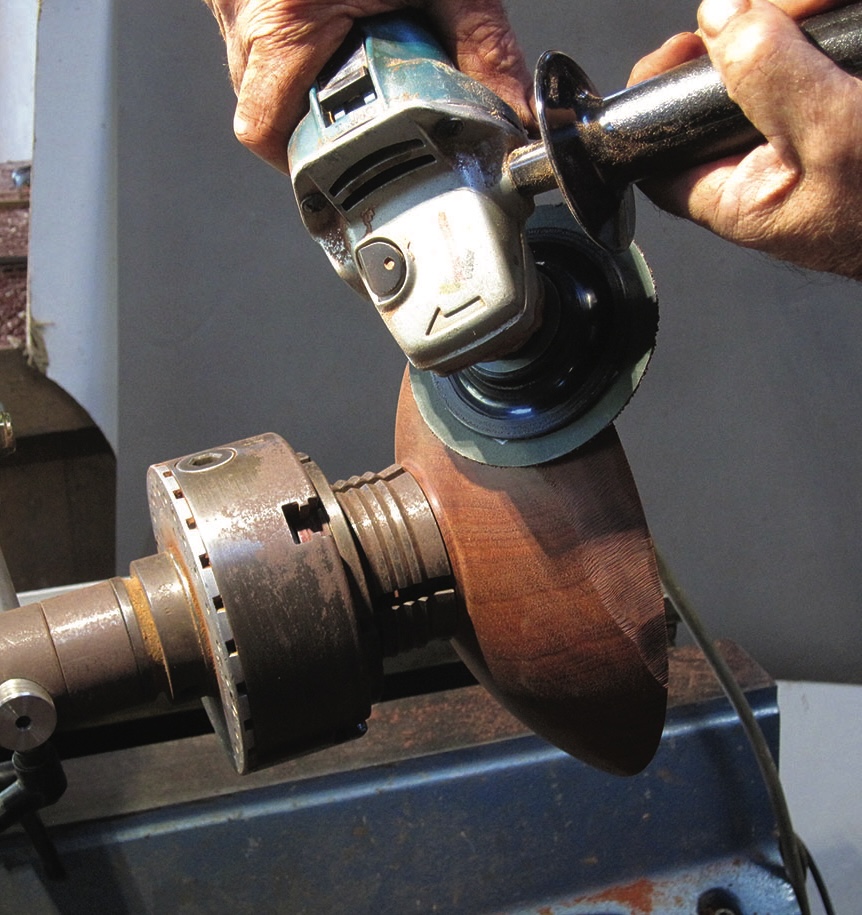
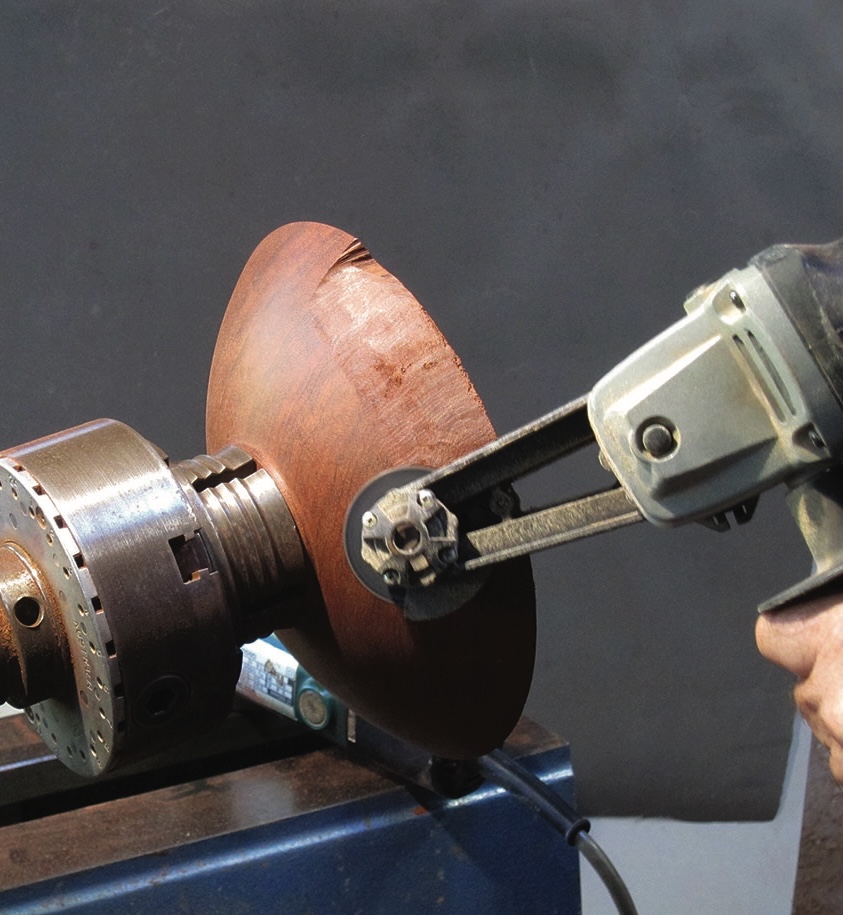
Woodturning with grinder on lathe machine.
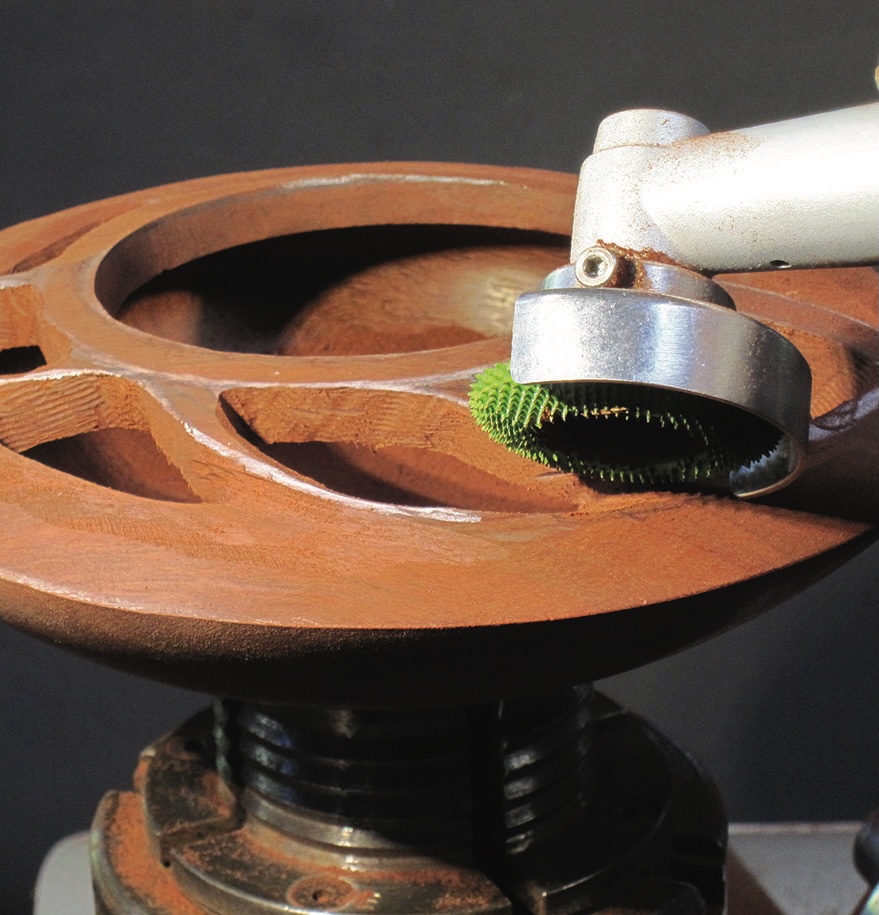
11. To smooth out the bumps left by the mini carver, an angle grinder with a 36-grit disc does a good job. It sounds really aggressive but, because of the high speed, it removes the high spots quickly. Smoother sanding can be carried out with a soft sander as shown in step 8
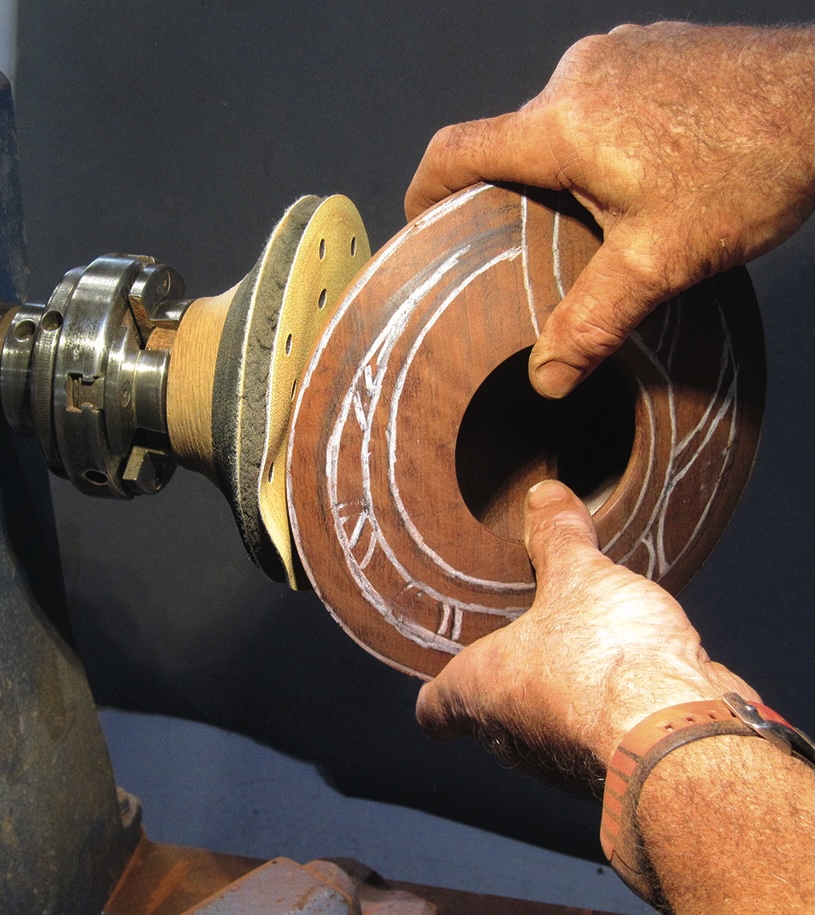
Craftsman shaping wooden bowl on lathe
12. Another method of sanding the underside is to use a soft sanding pad held securely in the chuck on the lathe. If you have a soft interface pad between the sanding pad and the abrasive disc, it will hug the curves of the bowl much better
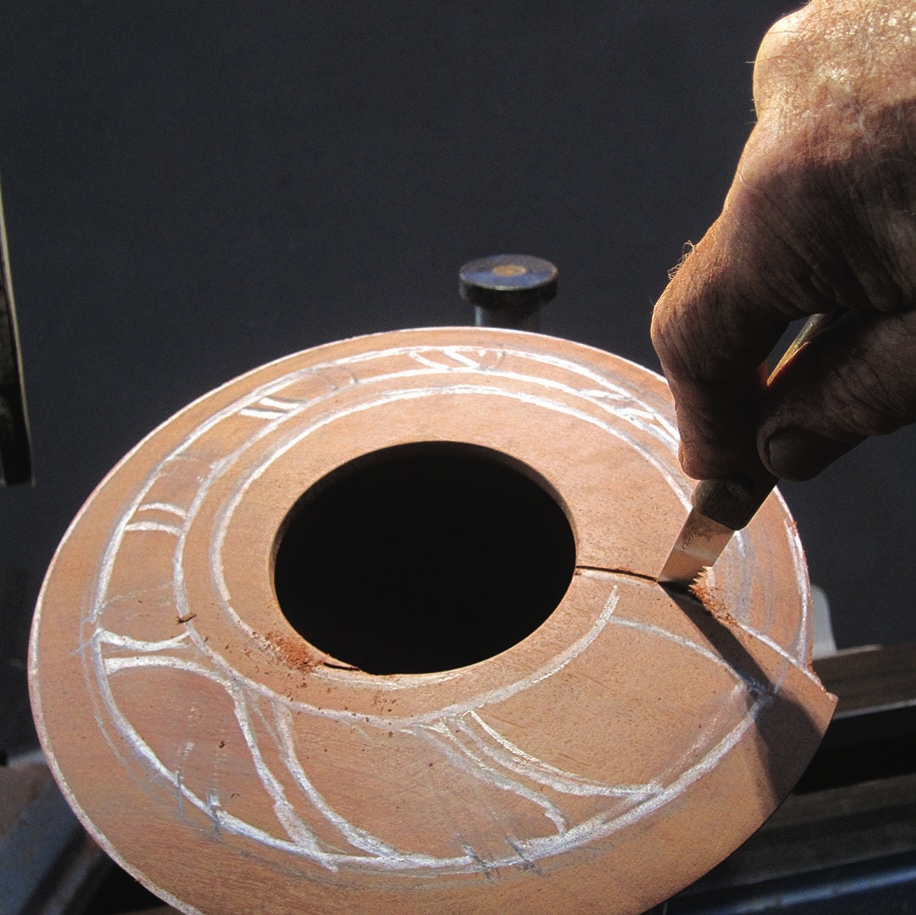
Hand carving intricate design on pottery wheel
13. To cut the inner shape out, a small keyhole saw will do the job okay but it is a little slow. You will need to watch that you do not hit the inside bottom of the bowl with the point of the saw
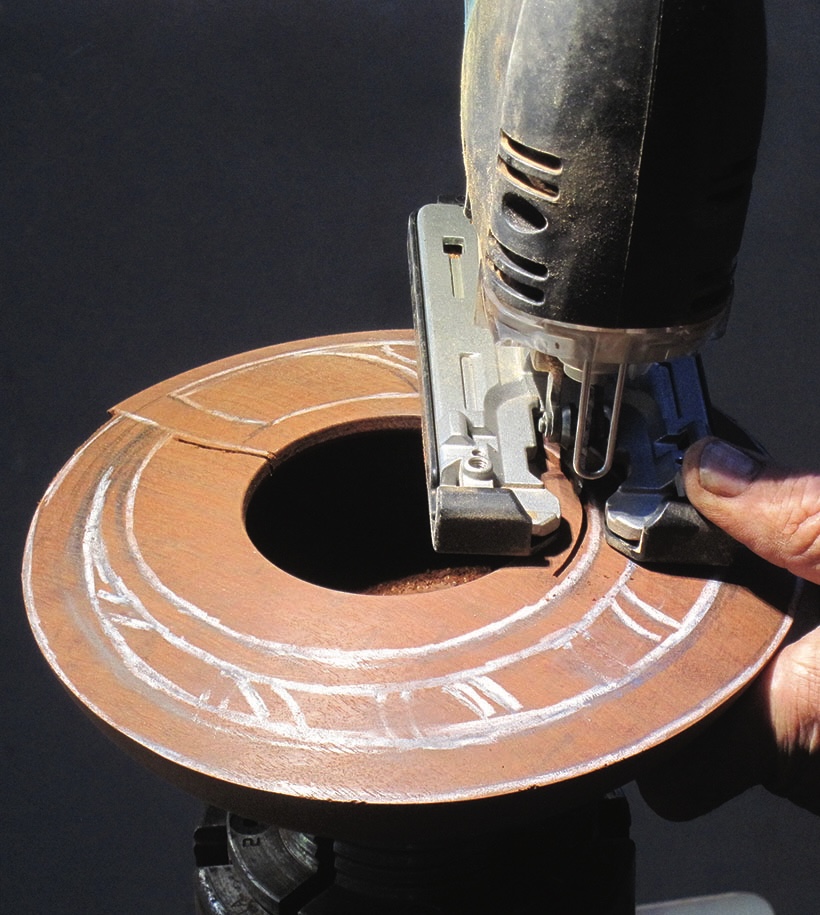
Jigsaw cutting circular wooden piece precisely.
14. Alternatively, you can use a jigsaw with a short blade. I actually cut the end of a blade just to make sure it would not hit the bottom on the down stroke. A narrow 6mm blade will get around the curves much easier than a standard blade
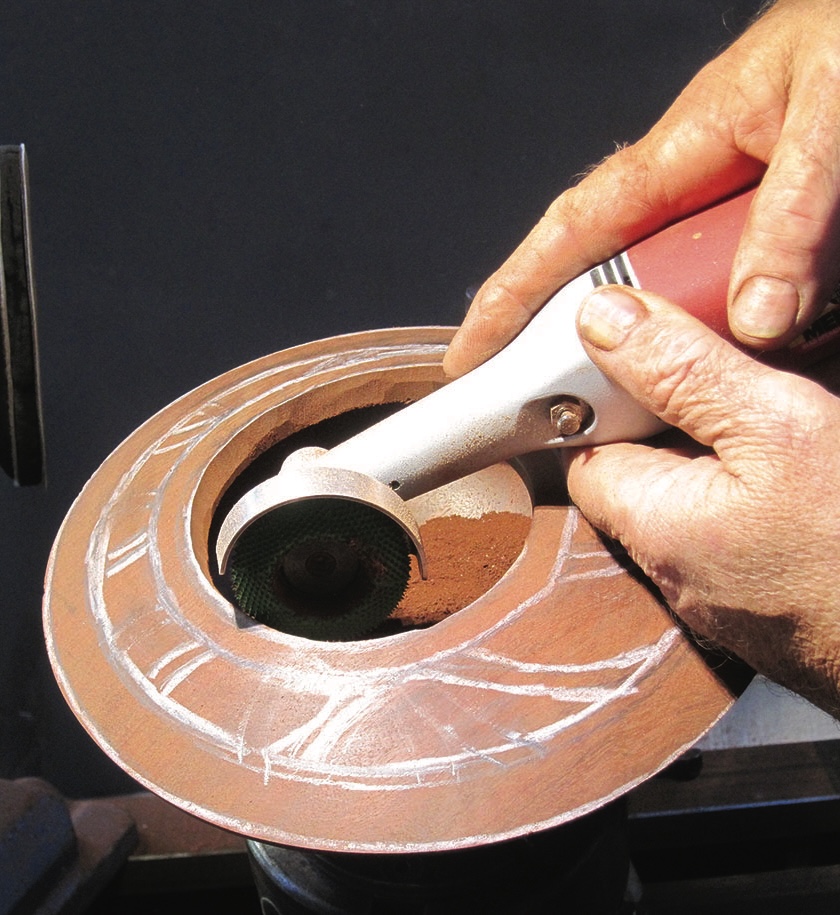
Hands using angle grinder on wooden bowl
15. To clean up the sawn inner surface, use a small sanding disc on a rotary tool. At this stage all you need is a smooth curve all the way around the inner surface. Hand sanding with 120 grit on a curved sanding block will also work well
Woodturned bowl with intricate carved design.
16. To cut out the windows, drill holes in the corners of each window so you can get the jigsaw blade in place and cut between the holes. Where the windows are narrow, just drill a series of smaller holes and use a rotary tool to meet up the drill holes. It is really important not to over-cut the corners with the jigsaw – better to pull up a bit short than to have a cut that is too wide in the corners. When using the jigsaw, make sure you hold it at a slight angle pointing towards the centre
Hands carving intricate wooden bowl design
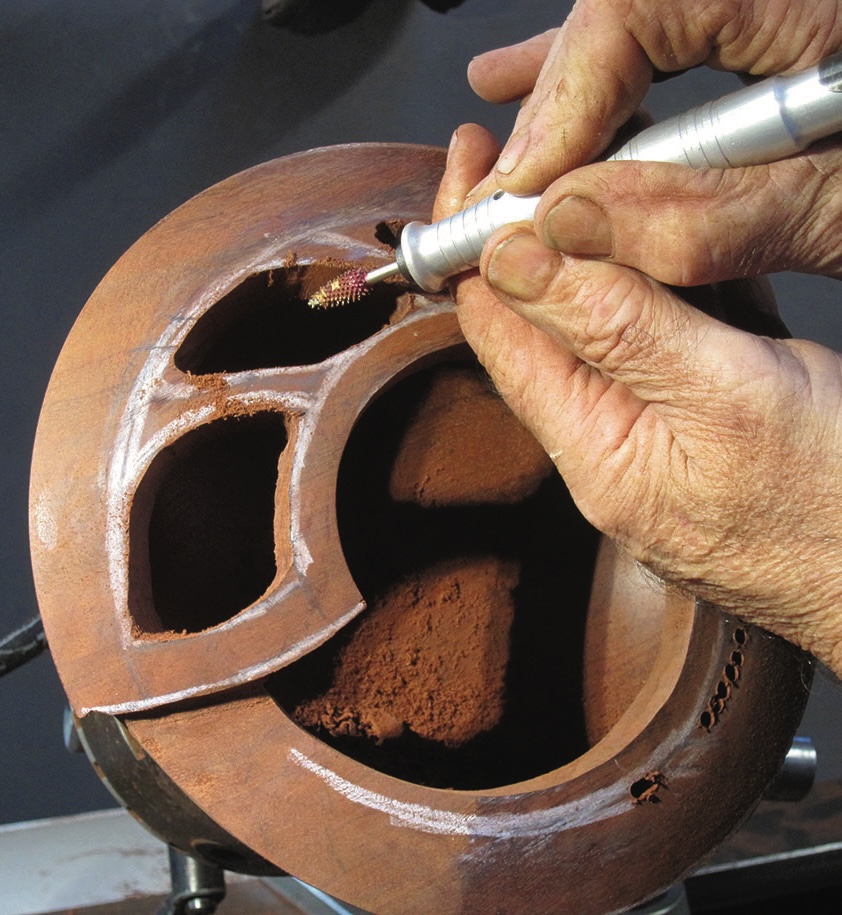
17. To trim the jigsaw cuts, use a series of burrs held in a rotary tool. I find a flame-shaped burr really good for this process. Use small diameter burrs in the smaller windows
Robot arm cleaning wooden surface with brush
18. For shaping the outside of where the windows meet the rim, a 50mm-diameter rotary disc is a good choice for shaping. I like to have the supports meeting the rim, a bit like a buttress root on a tree. The buttress section carries out to the outer side of the rim, so you will need to reduce the height of the rim between each buttress. The shapes of the buttress can be curved towards the outside, or even split in two if you like. Just remember, curved, flowing lines will match the design better than straight lines
Hand carving detailed wooden bowl with power tool.
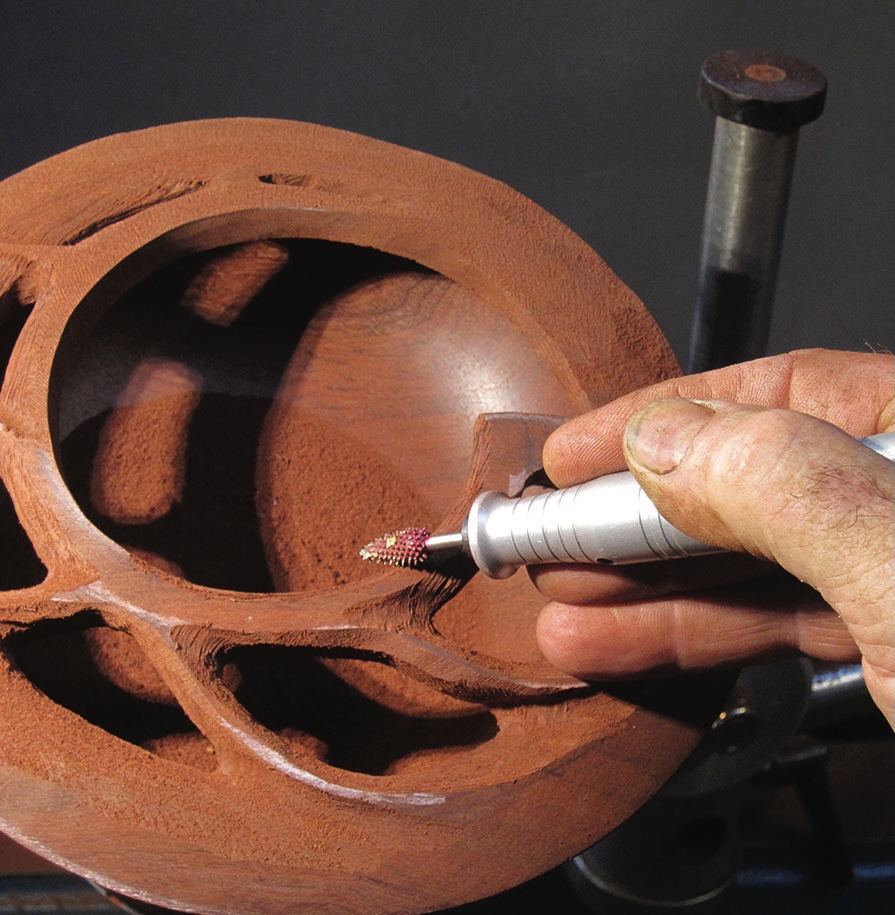
19. Where the supports meet the centre vine, the intersection shape should also be a bit like where a branch meets the trunk of a tree, in a curved, hollow join. The flame-shaped burr is also great for this job. We are almost ready to start rounding the vine and supports so they look more like those in nature. You can use the burr on the underside of the vine as well as the top sections
Hand carving intricate designs into wooden sculpture.
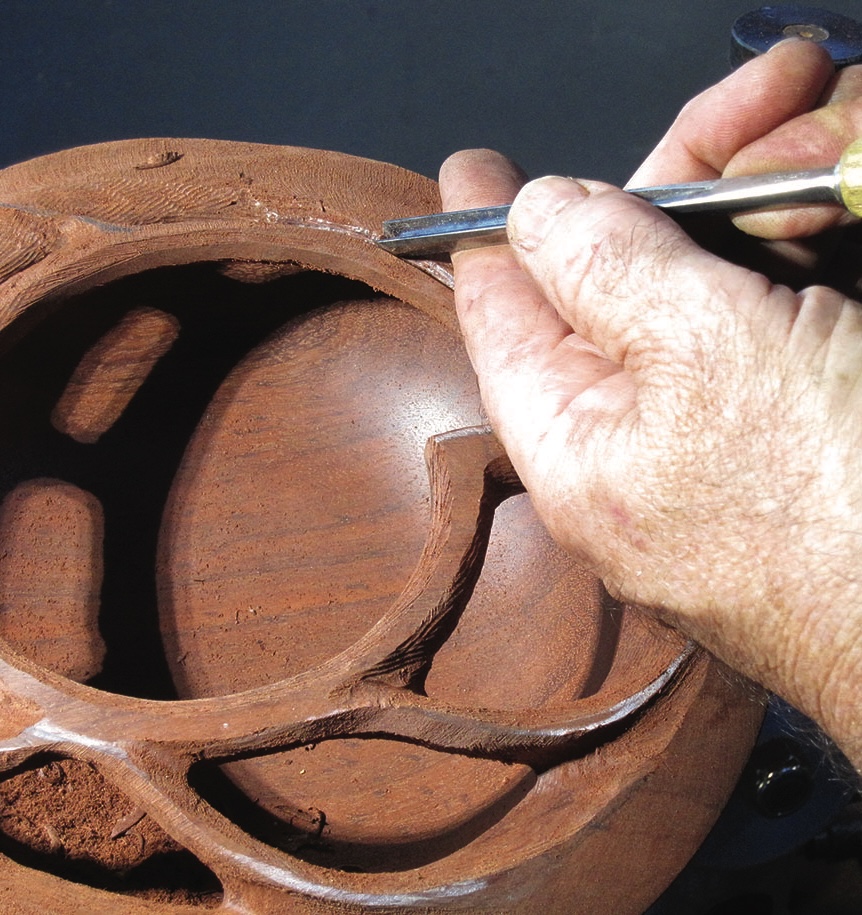
20. Where the vine is smallest meeting the rim, use a V hand carving tool to carve a V-shaped channel, wider next to the last window and getting smaller towards the narrowest part of the rim
Carving a wooden bowl with rotary tool.
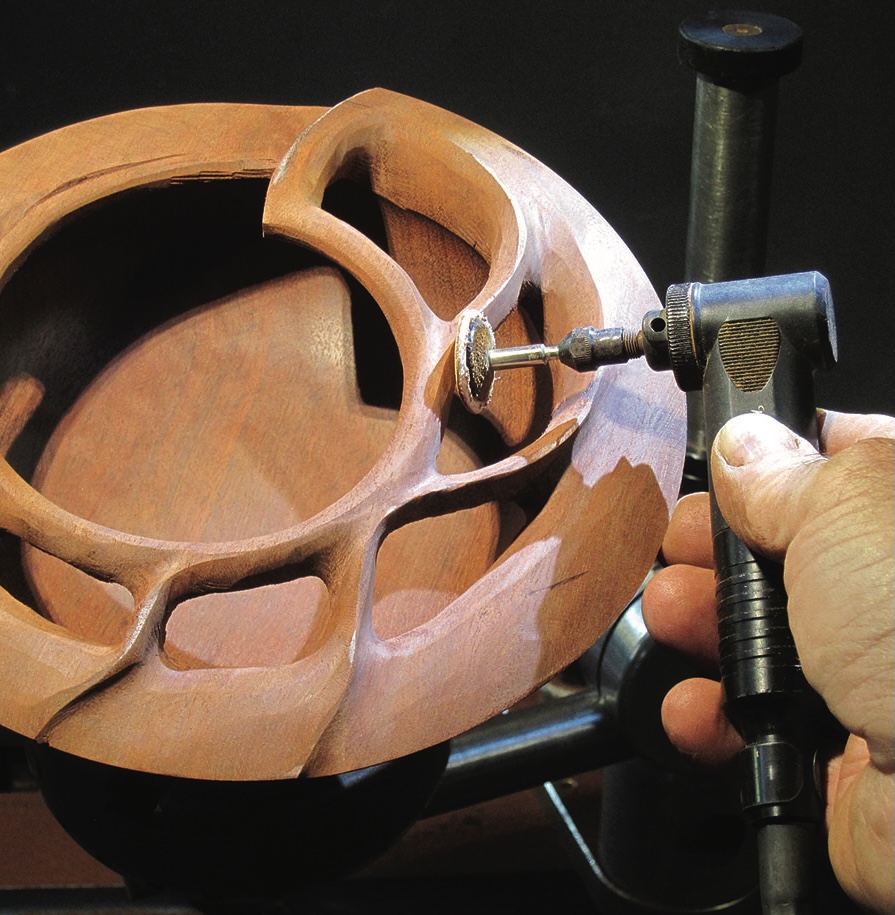
21. For sanding, there are many gadgets that you can use. I find a small, round sanding disc about 20mm in diameter powered by a small angle hand piece is best. Rather than use hook and loop material on small diameter discs I use thick, double-sided tape as it holds on much better. I would start with 120 grit abrasive and progress up to 400 grit. You can get into many of the corners with this sander, but not the smaller sections or on the underside of the supports and vine
Person shaping wood on a lathe.
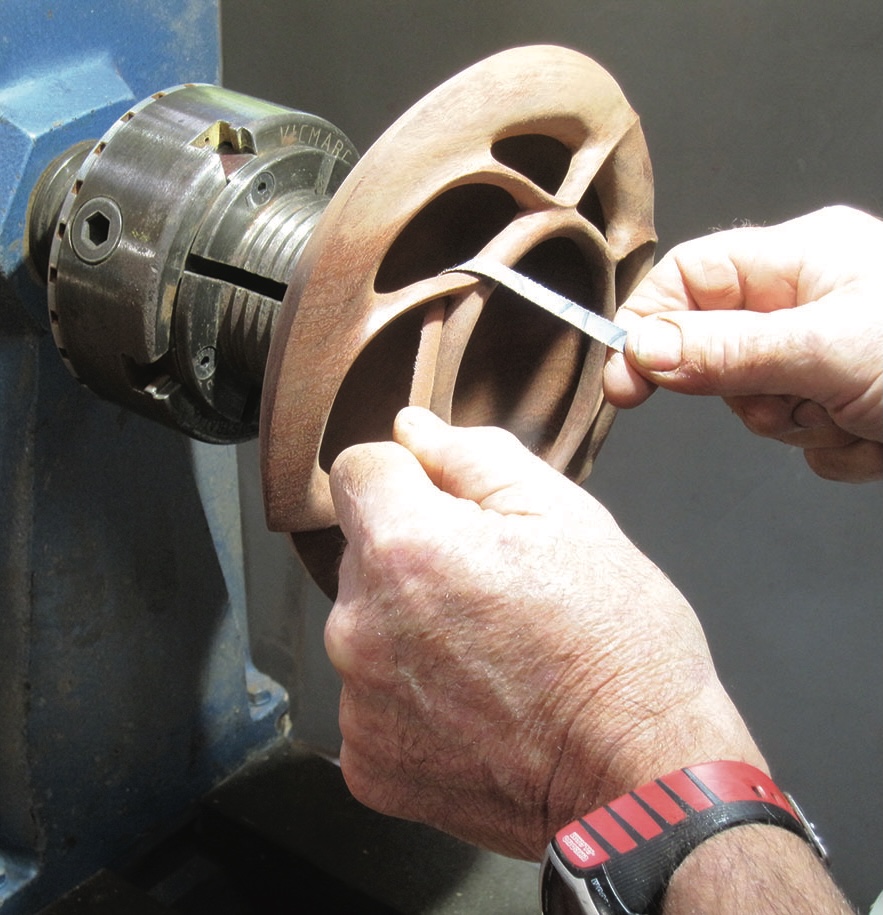
22. For those areas that the round sander cannot reach, use thin strips of cloth-backed abrasive. Start with 120 grit and work your way up. When you are happy with your shaping and sanding, use 600 grit or 0000 steel wool for a final sand with the grain
Handcrafted wood bowl lathe turning.
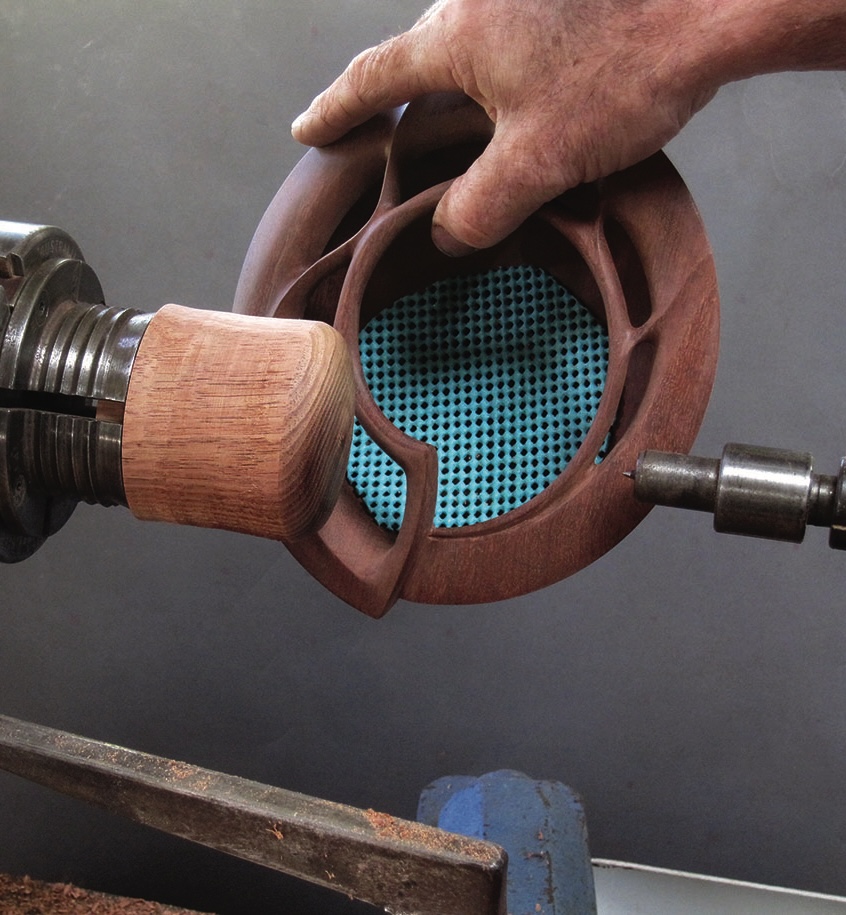
23. To set up for turning off the chuck spigot, place a mandrel in the chuck and turn it to fit inside the centre section of the bowl. Turn a curved shape similar to the inside of the bowl and place a protective layer between the bowl and mandrel. Non-slip place mats are good for this job. Place the tailstock centre in the  V in the middle of the spigot that you turned at the start and tighten the tailstock so that the bowl is tightly held. Turn off most of the spigot with either a spindle or small bowl gouge. Sand this area to blend in with the curve of the bowl bottom
Woodturning with cutting tool on lathe machine
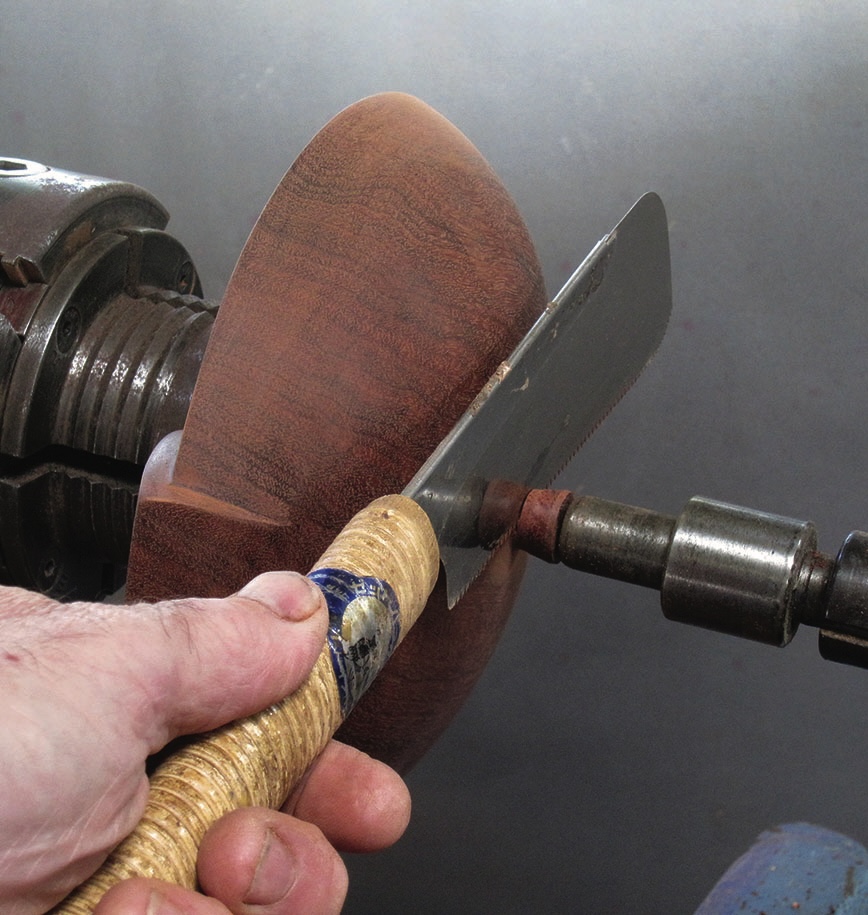
24. Use a small pull saw to remove the small spigot left behind. Undo the pressure on the tailstock spindle so that the saw will not jamb. A soft sanding pad with fine abrasive can now be used to blend in the round bottom of the bowl. Hand sand with 600 grit to prepare the grain for oiling. Before applying a finish, take the piece out into the sunlight to check that you have got rid of all the scratches
Intricate carved wooden bowl with natural design.
25. Your finished bowl might look something like this. You can use artistic licence and change any of the shown shapes and sizes, remembering that in nature not all trees and shapes are the same

Leave a Reply

Your email address will not be published. Required fields are marked *