Walnut Fire Surround:
Louise Biggs shows us how she made a fancy fire surround when there is no fire…
Louise Biggs shows us how she made a fancy fire surround when there is no fire…
I show you the specific techniques involved in completing the fire surround, the focus is on the shaped sections on the two side columns and how to construct the shapes before veneering them.
Tools used
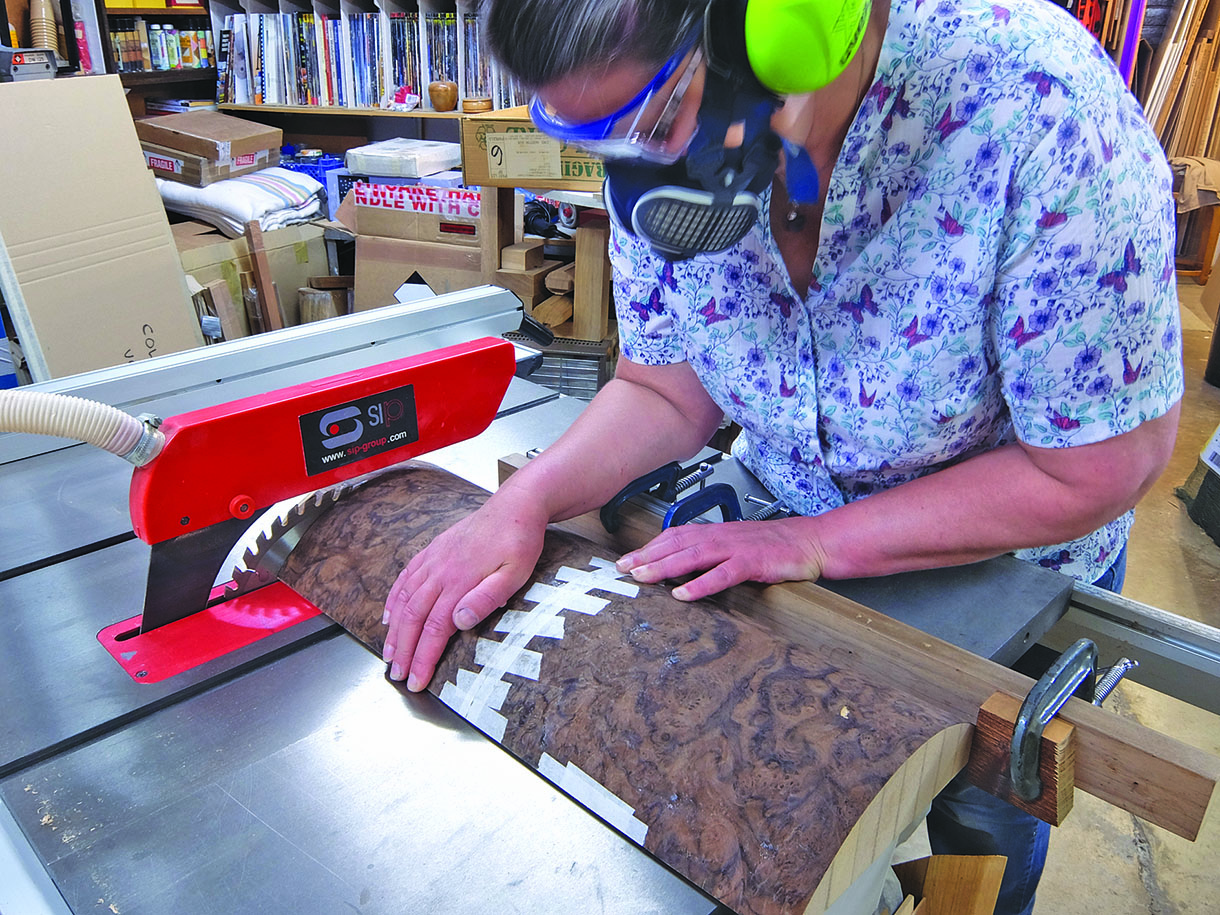
• Compass
• Flexi curve
• Utility knife
• Straight edge and veneer cutter
• Vacuum bag press
• Plane
• Spokeshave
• Router and router table
• Various router cutters
• Drill and drill bits, plus countersink
• Tablesaw or panel saw
• Bandsaw
• Sash cramps
• Nail gun and suitable nails
• Veneer tape
• Personal protection equipment
Wood
• Black walnut (Juglans nigra)
 CONSTRUCTION
Veneer preparation
Before any veneering can take place, the burr veneers need to be flattened, so keeping the sheets in consecutive order, coat them with a thin solution of wallpaper paste and lay between newspapers and clamp between two stout pieces of board. Change the paper frequently to aid drying and prevent it sticking to the veneers.

1. There are several ways to construct the columns depending on the equipment available. One way is to create a framework and use thin plywood to form the curve, then hand veneer with animal hide glue or contact adhesive. If weight is a factor this will be the lightest option. Alternatively use a male and female former to press the veneers between, but this leads to wasted material in the discarded half of the former and has to be very accurate with the fit between the two to obtain even pressure over the veneer to prevent air pockets and blisters forming. I am fortunate to have a vacuum bag press in the workshop. Although it is not cheap to purchase these, in my professional workshop it has paid for itself several times over. The one thing I learnt at the beginning, and yes it was a costly mistake, was that any formers/components have to be made from a solid block, any air gaps, however small, will lead very quickly to a distorted former, or a component part, which does not return to shape once the vacuum is released, as the glue has already set
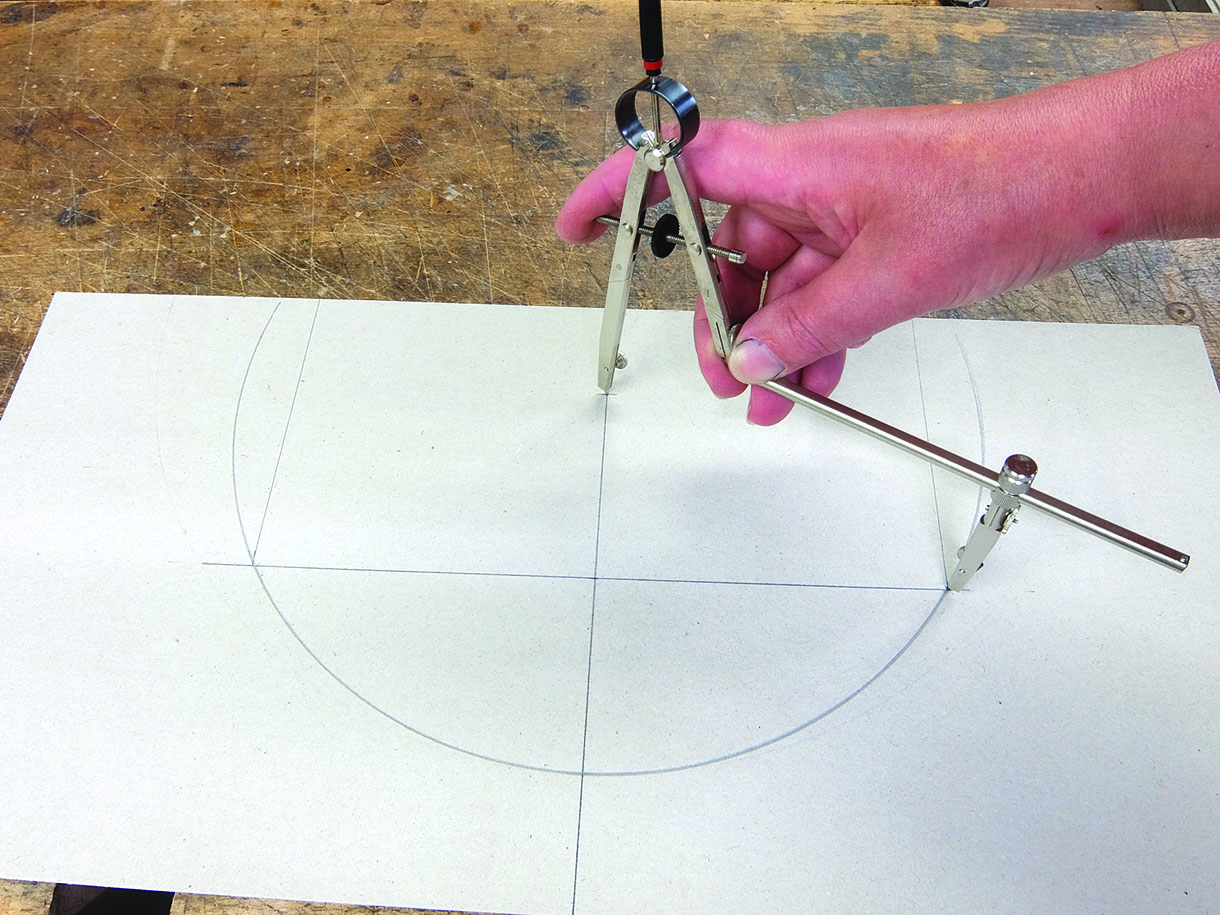
2. The first stage is to work out the exact shape of the curve. From the drawing I knew how wide it had to be and how far the curve would protrude so I drew these measurements on a full size piece of card. Use a compass to find the centre point of a circle that will pass through the three key points
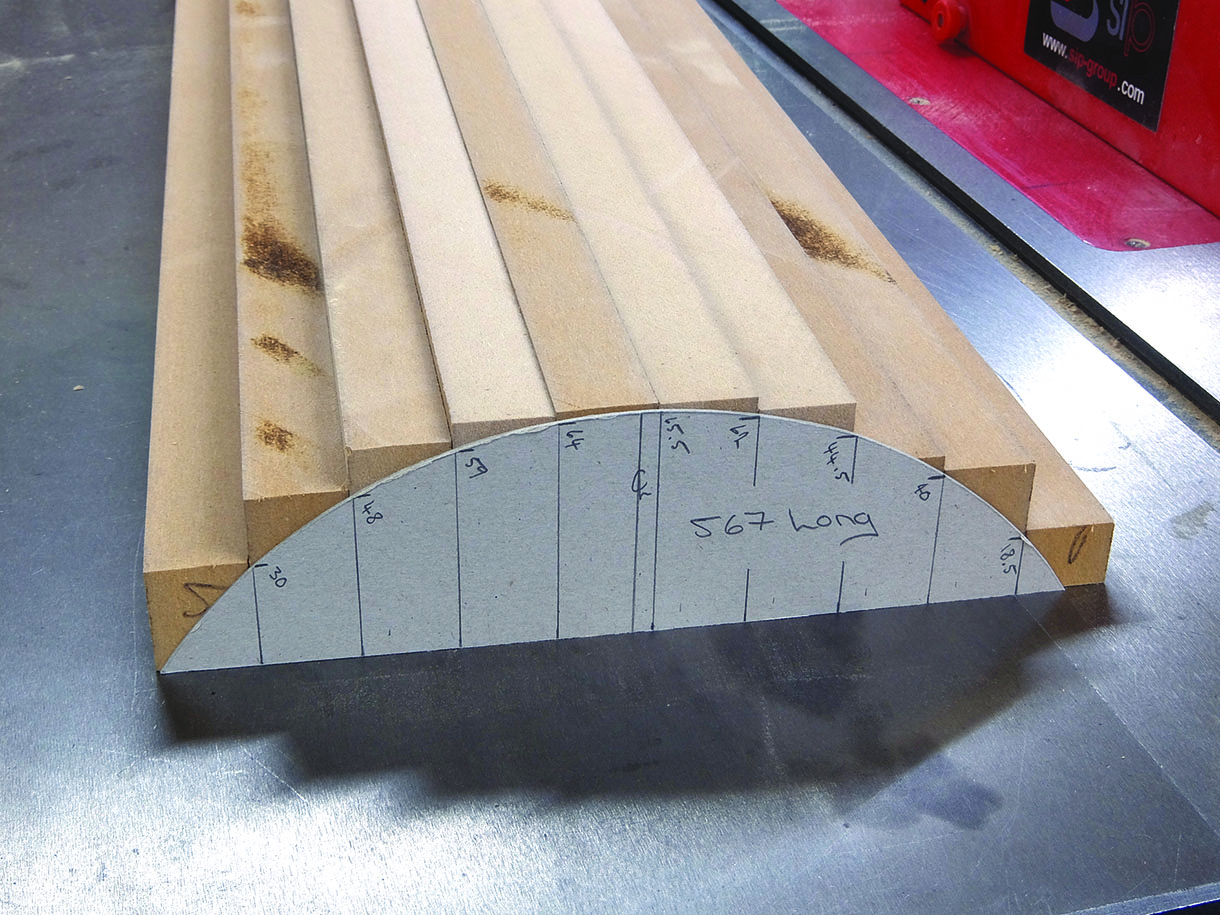
3. With the shape established, cut the template out with a utility knife then mark the thickness of the MDF strips that will be used and mark the height measurements
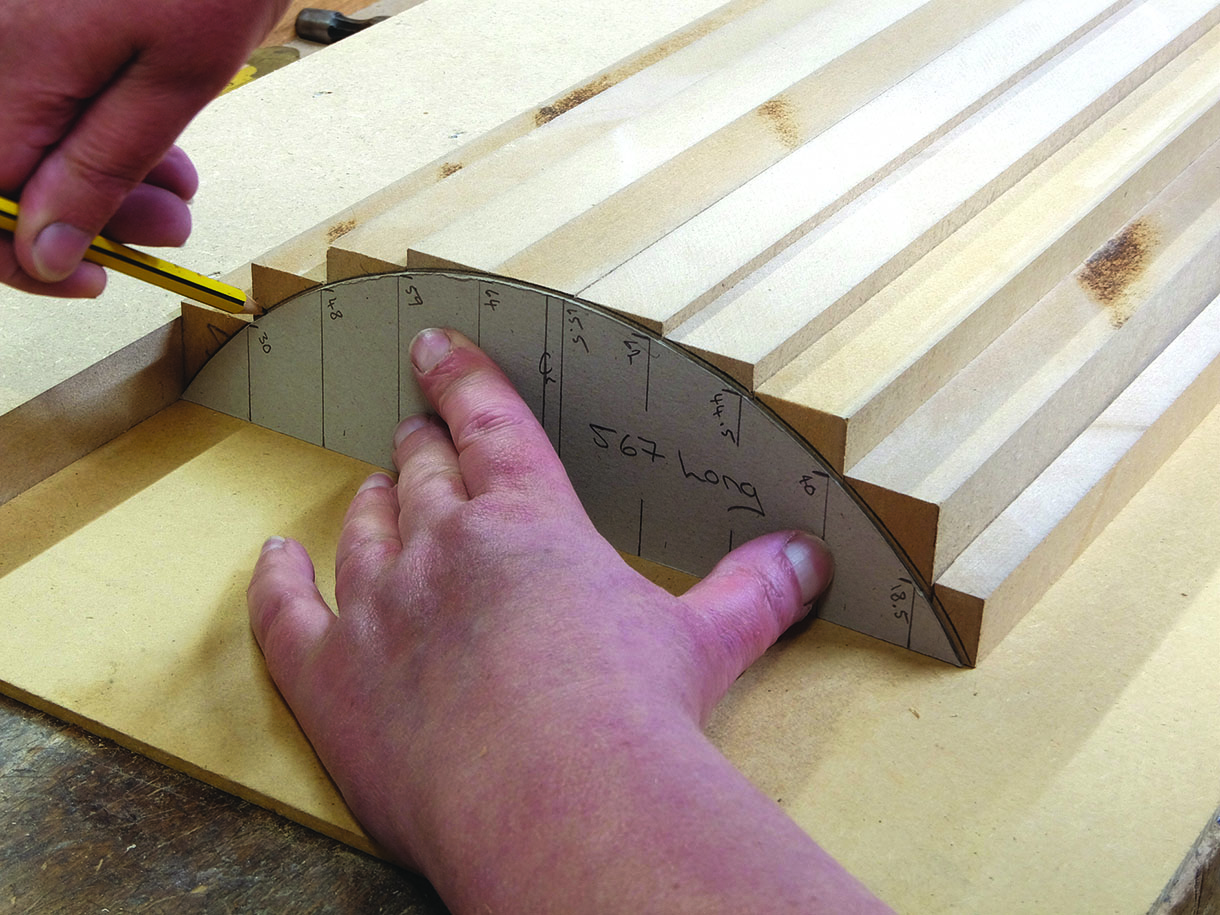
4. Next, cut the strips longer than required and align them so that the shape of the template can be drawn on both ends
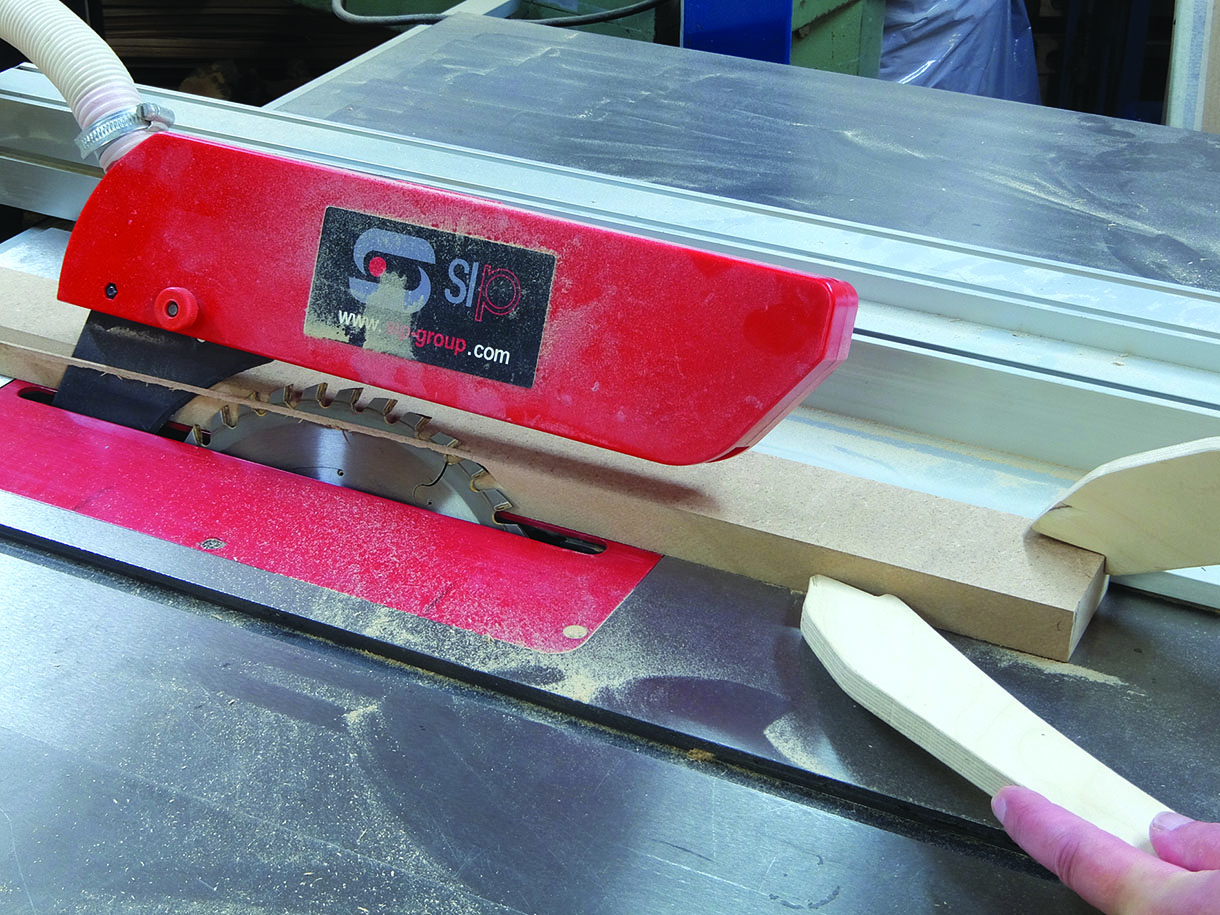
5. To limit the amount of shaping by hand as the MDF will very quickly blunt the tool edges, and having had an internal debate on the pros and cons of removing much of the waste before or after gluing the curved block together, I decided to use the tilt action on the tablesaw and, by adjusting the angle for each piece, cut off as much of the waste section on each strip as possible
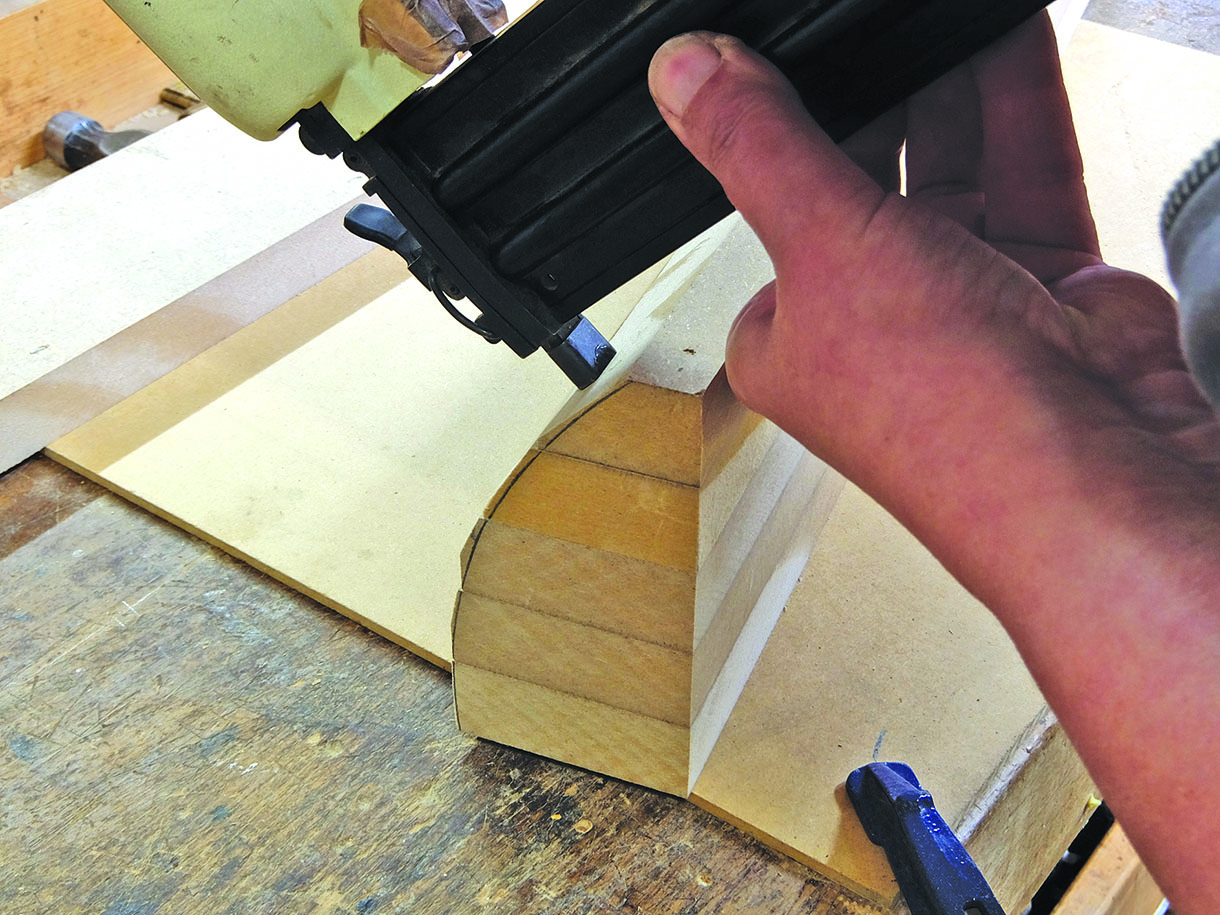
6. With the shape now difficult to clamp, but concluding that I had taken the safer route for removing the waste, I glued and pinned the sections together starting with the two centre pieces and work out to either side
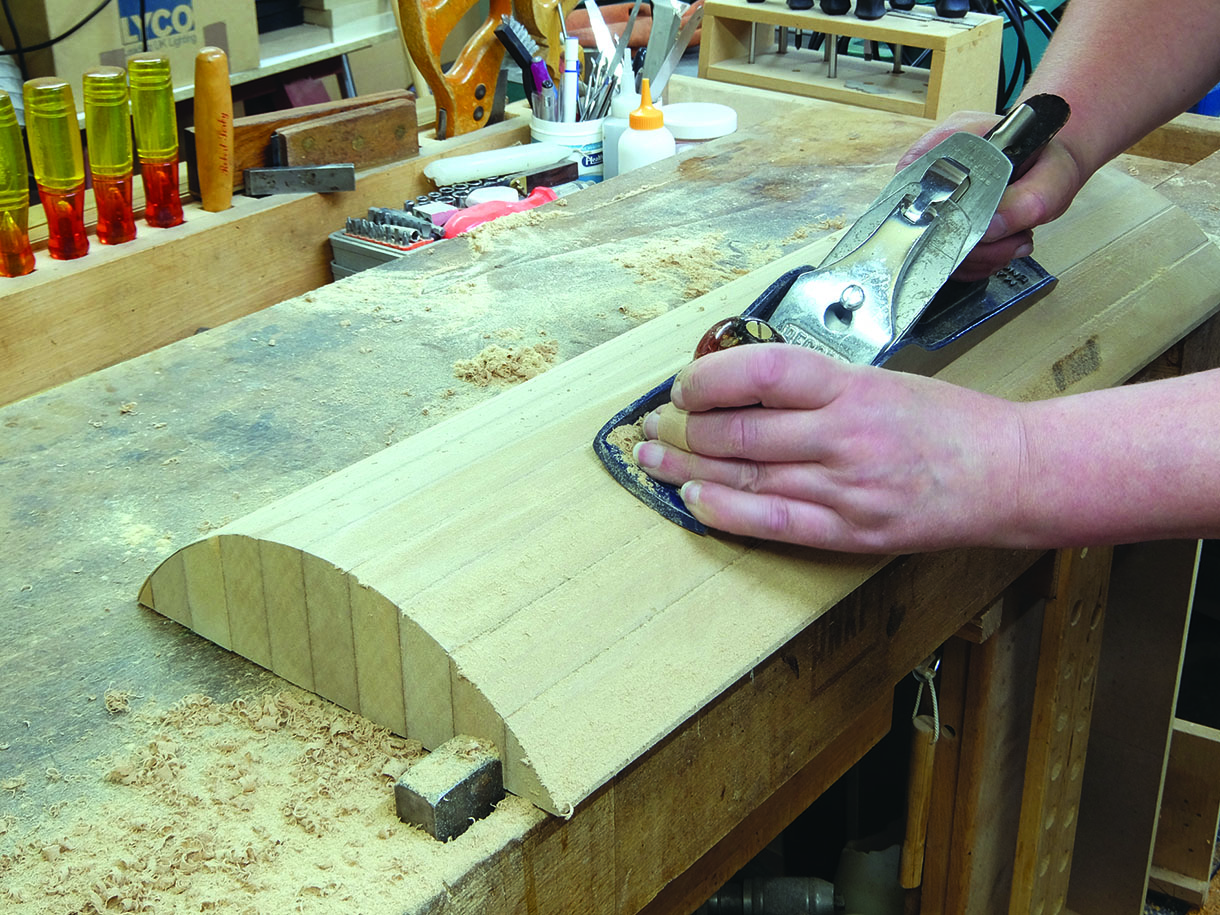
7. A word of caution, if you use a nail gun please make sure that when holding the sections in position your fingers are well out of the way. In the absence of a nail gun, standard pins, nails or screws can be used. Once the glue has set the final shape is achieved by planing away the remaining waste before being completed with a coarse abrasive
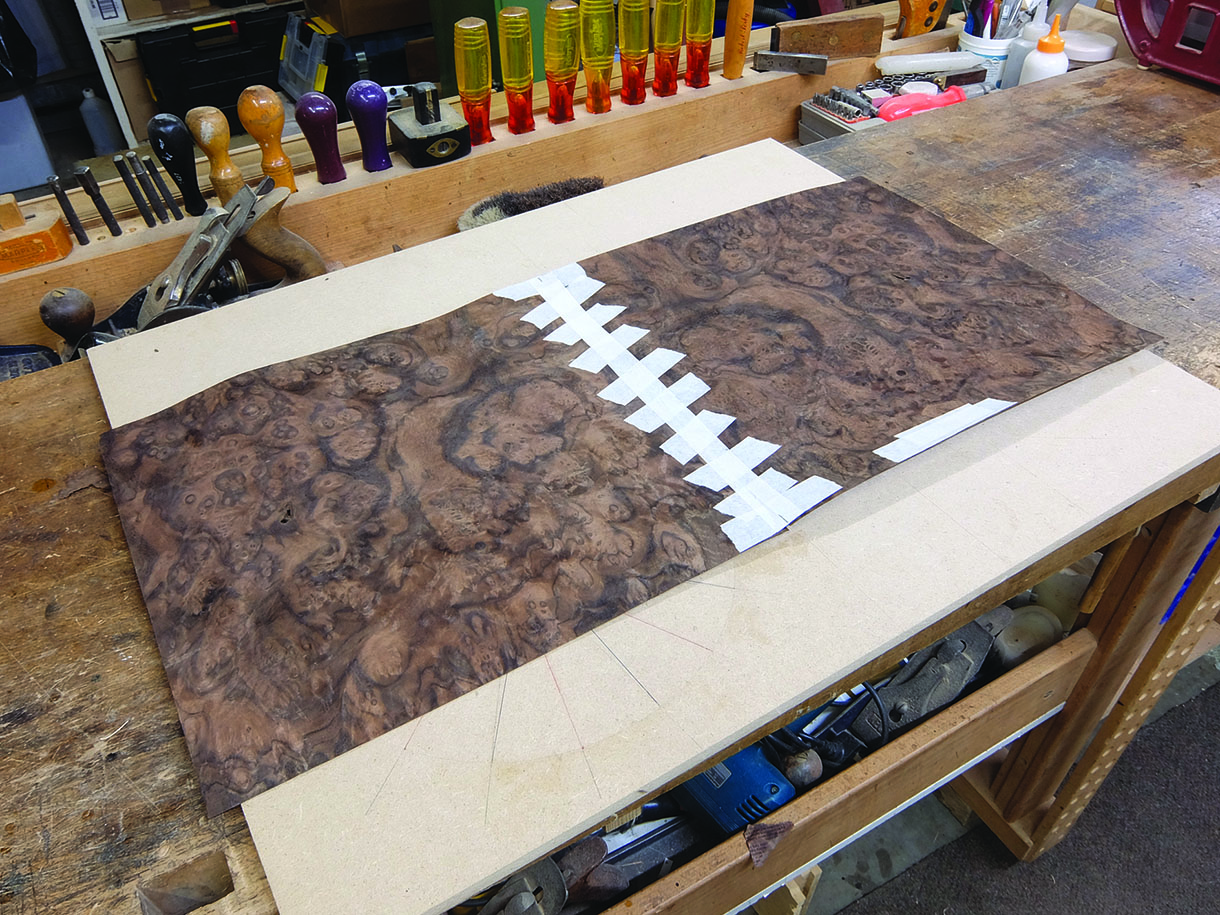
8. Coat the columns with thinned glue and leave to dry, as sealing the surface will prevent the next lot of glue being rapidly absorbed when it comes to veneering the columns. Veneer the columns with a neutral veneer and cut to size. Each column will have two pieces of burr veneer, cut and taped to form a book-match pattern
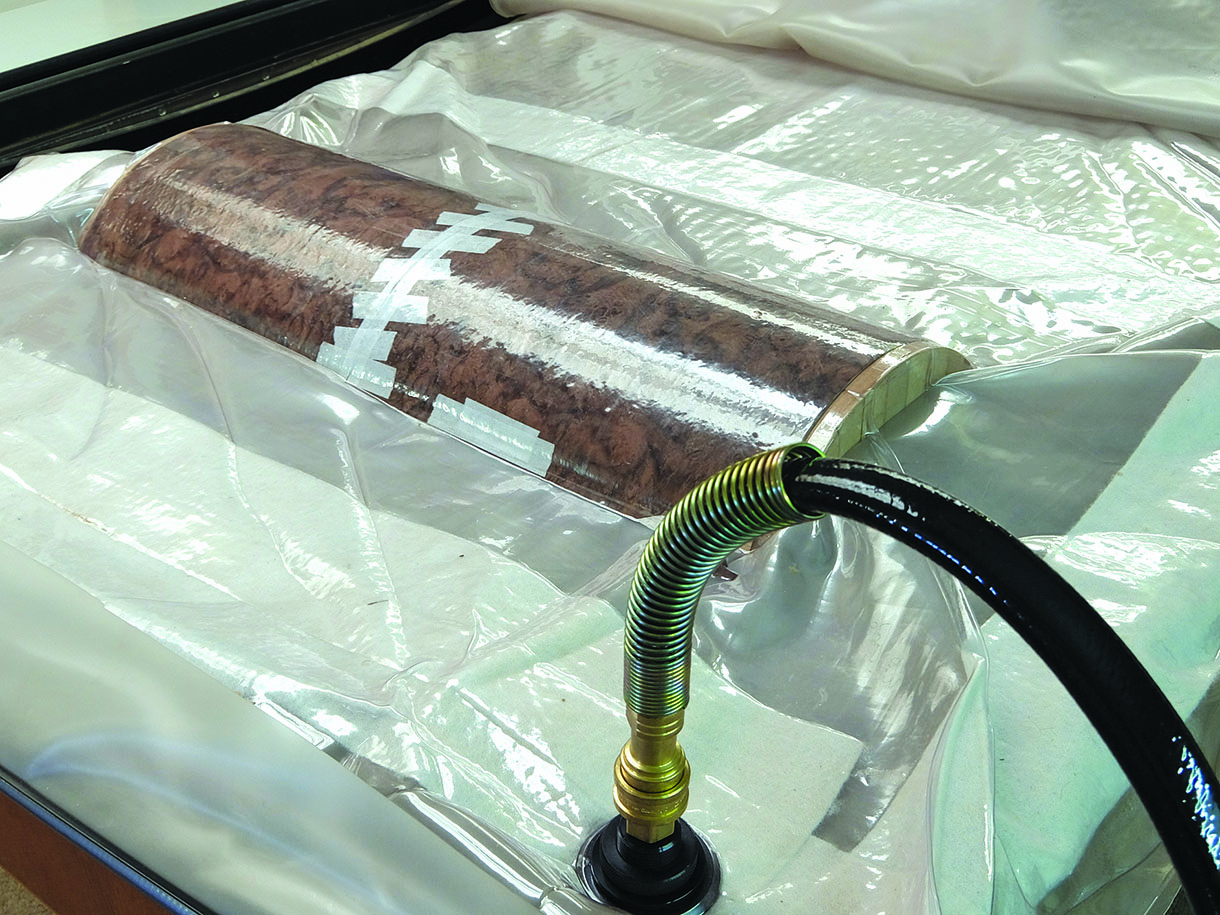
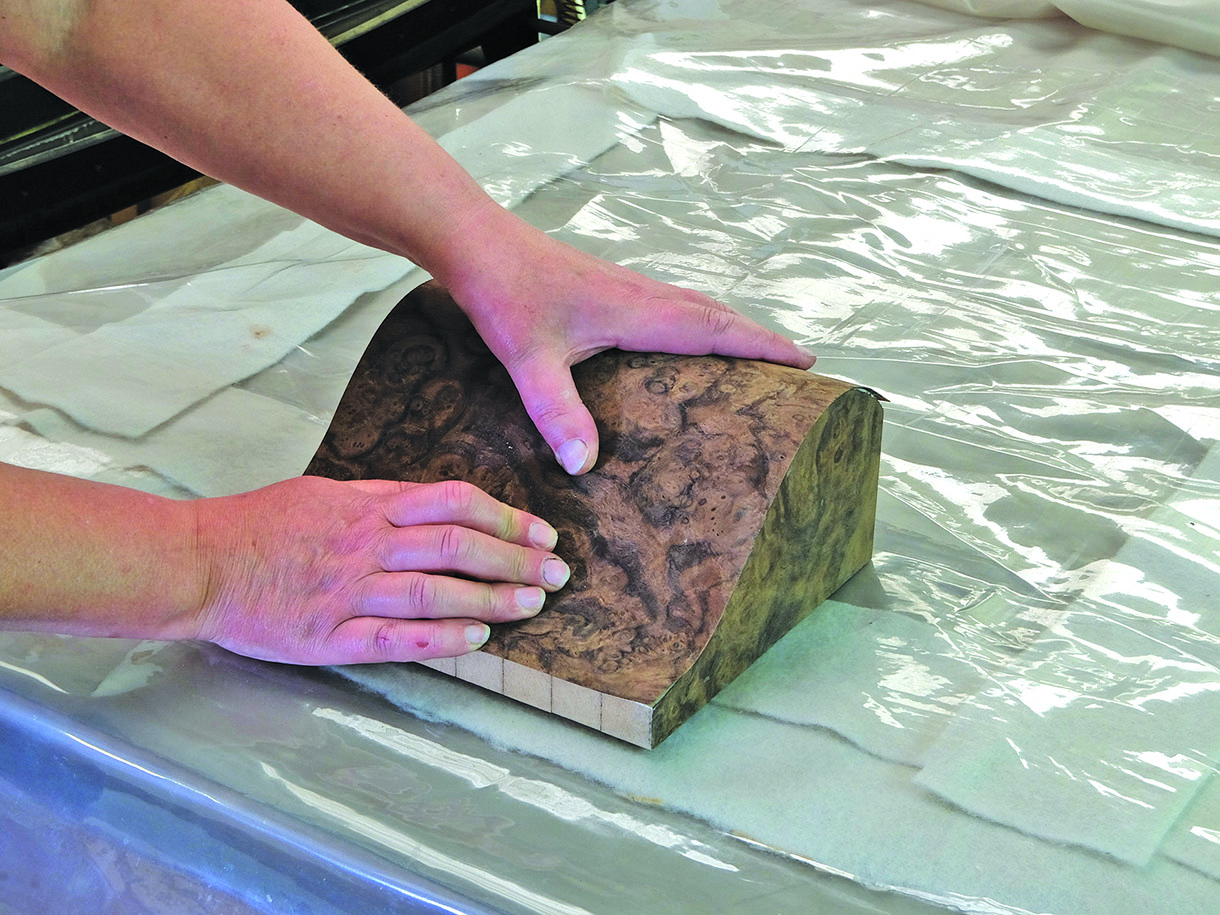
9. Now, with the glue applied, press down by hand on the burr veneers before placing them in the bag. Seal the bag before extracting with the vacuum pump
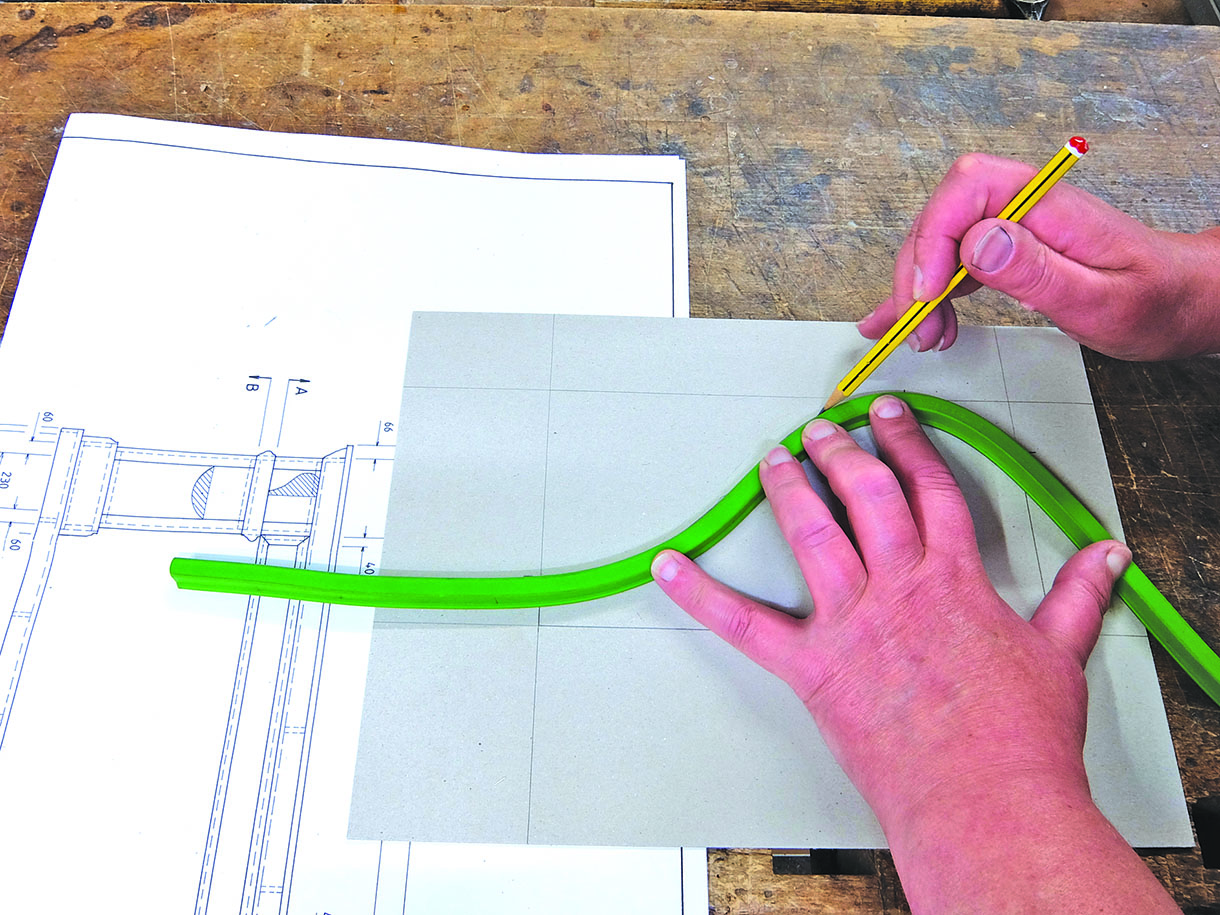
10. The former block for the corbels is approached in a slightly different way to those for the columns. Marking the overall sizes on a piece of card, use a flexi curve to form the concave/convex shape on the front
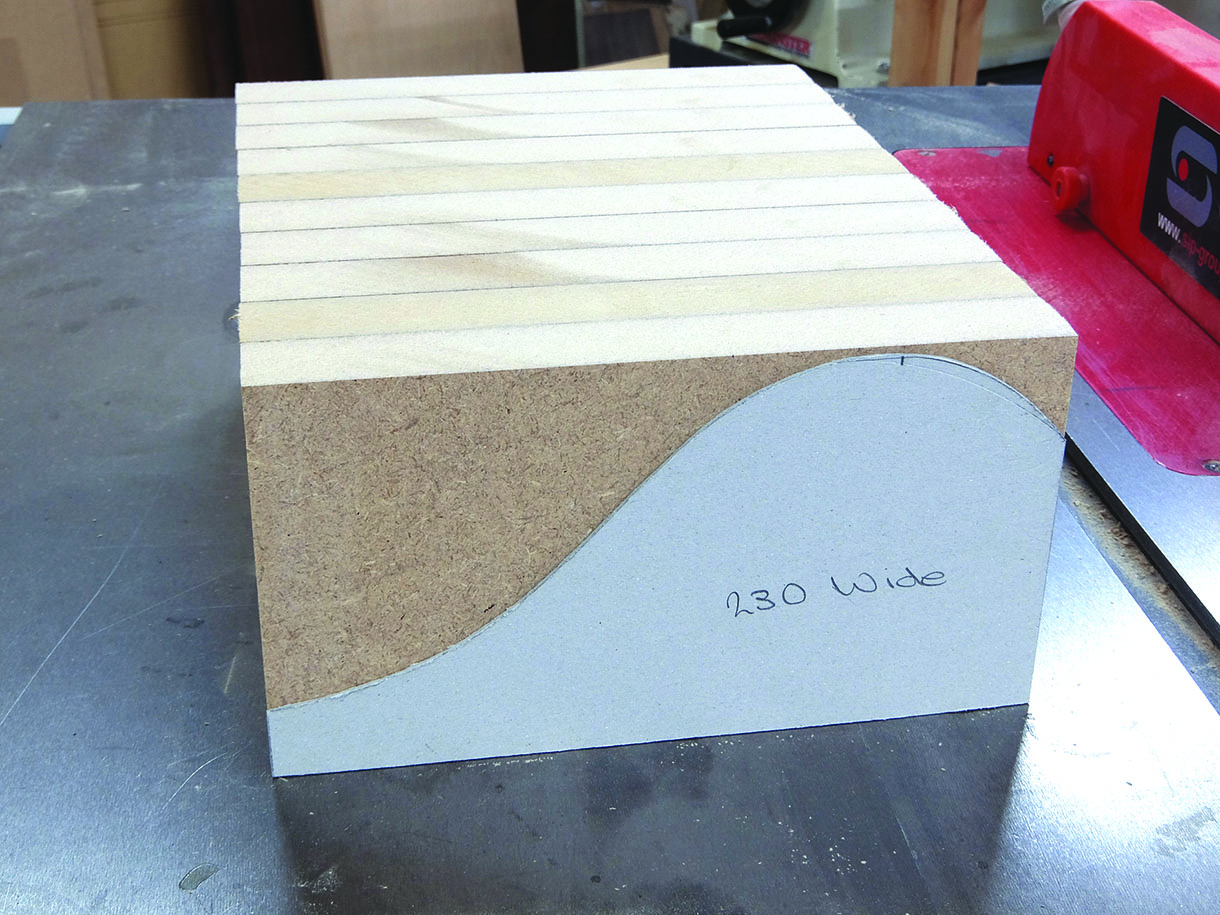
11. With the template cut out, cut blocks of MDF to the required number to build up the width of the corbels. Mark out the template on each piece
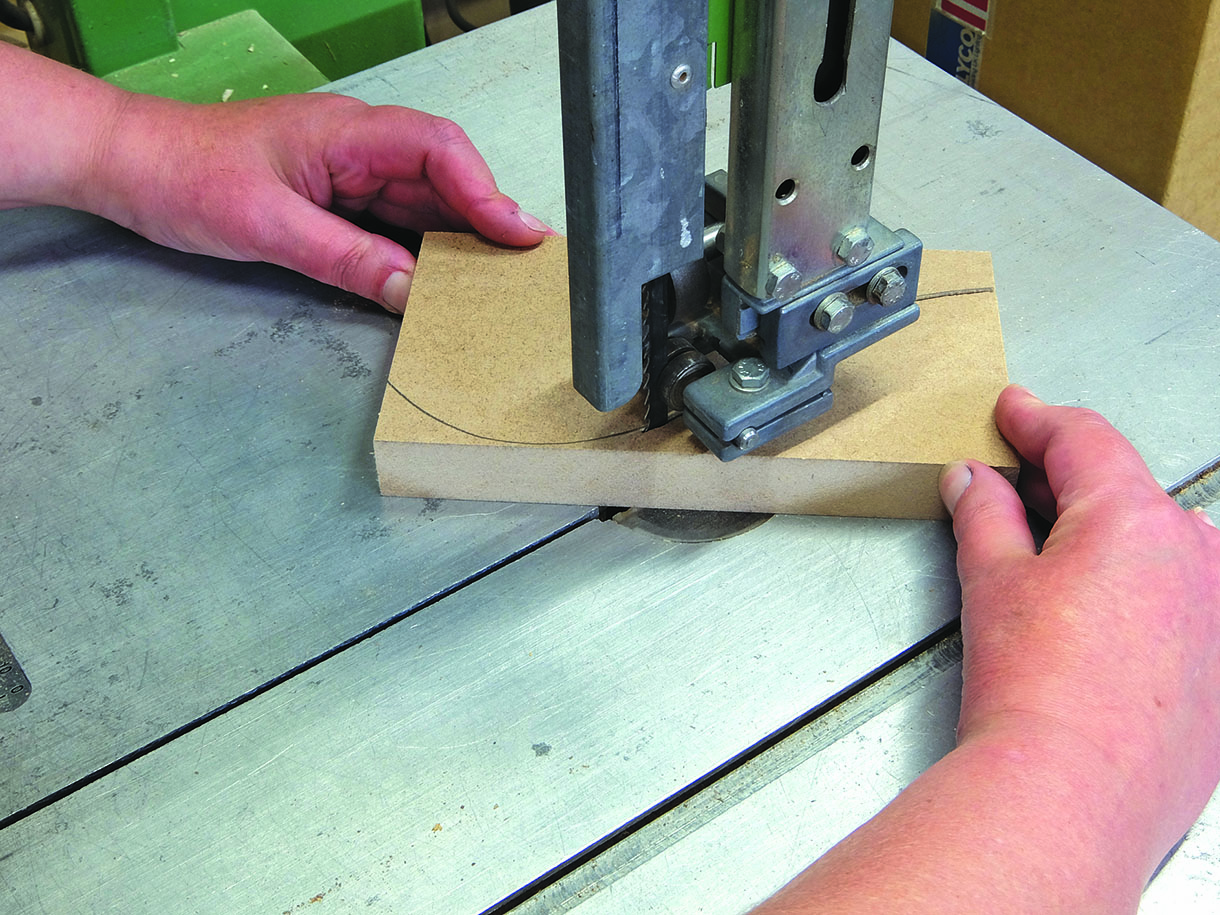
12. Now, using the resulting nine segments, cut out on the waste side of the line using a bandsaw to allow the block to be cleaned up to the final shape
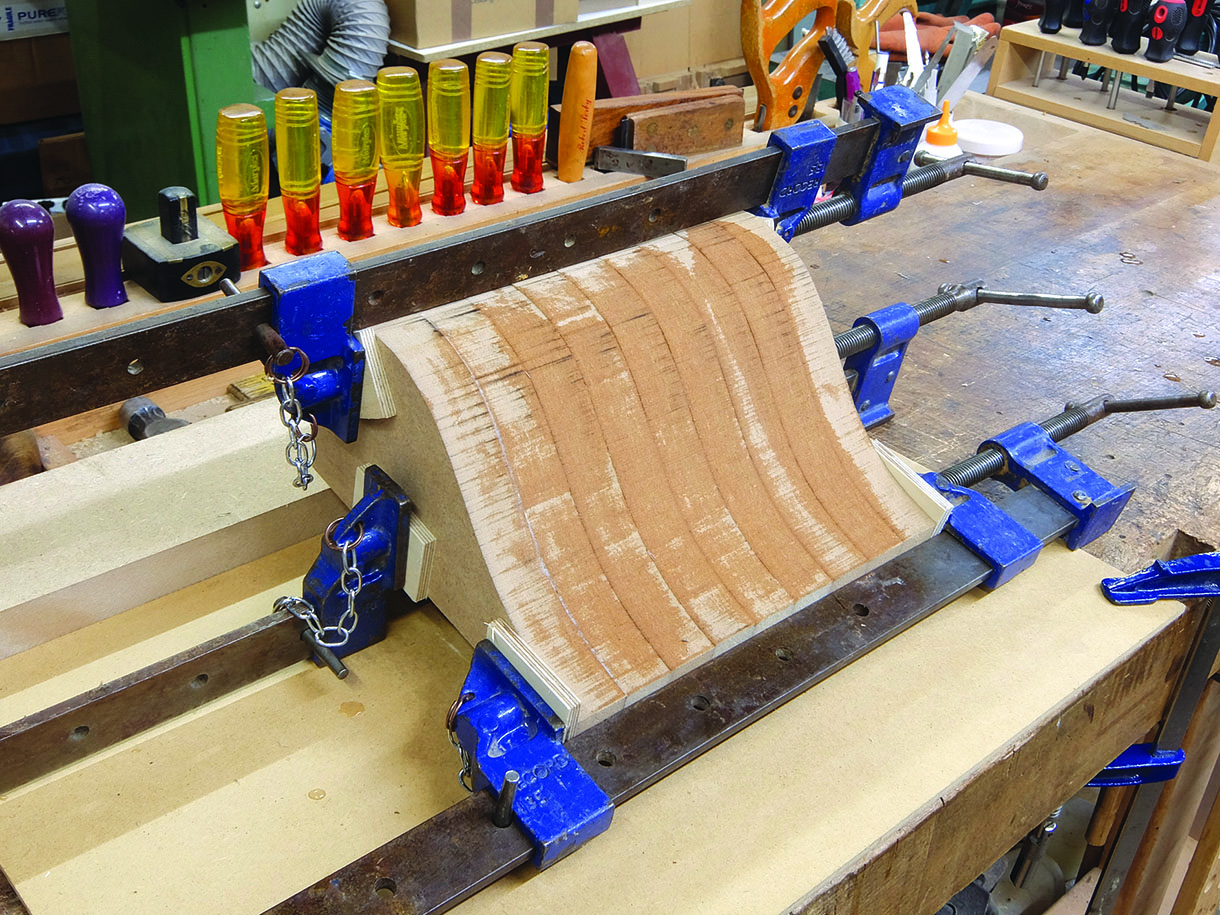
13. While gluing the corbel former sections together, insert a couple of nails to keep the sections in line working from the centre pieces outwards before clamping them and allowing them to dry
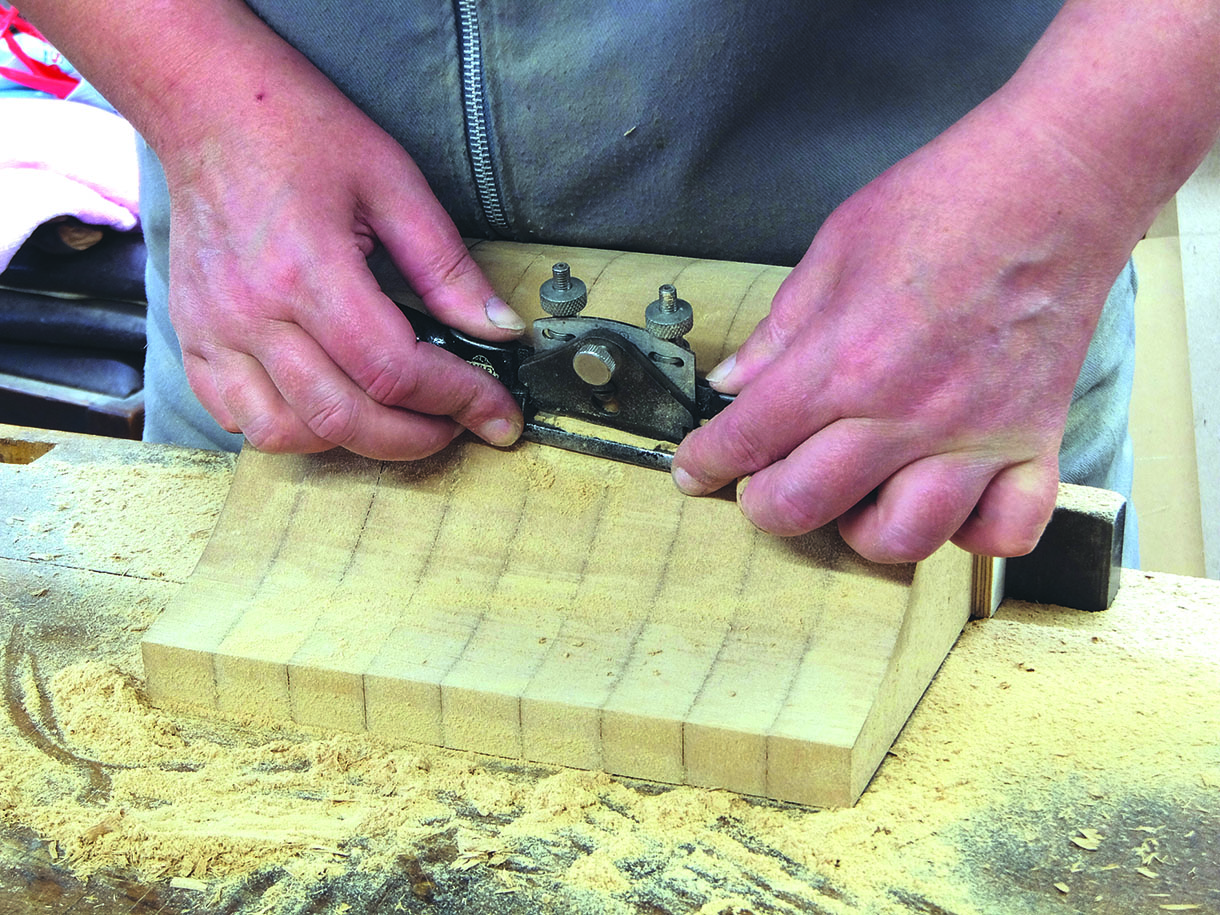
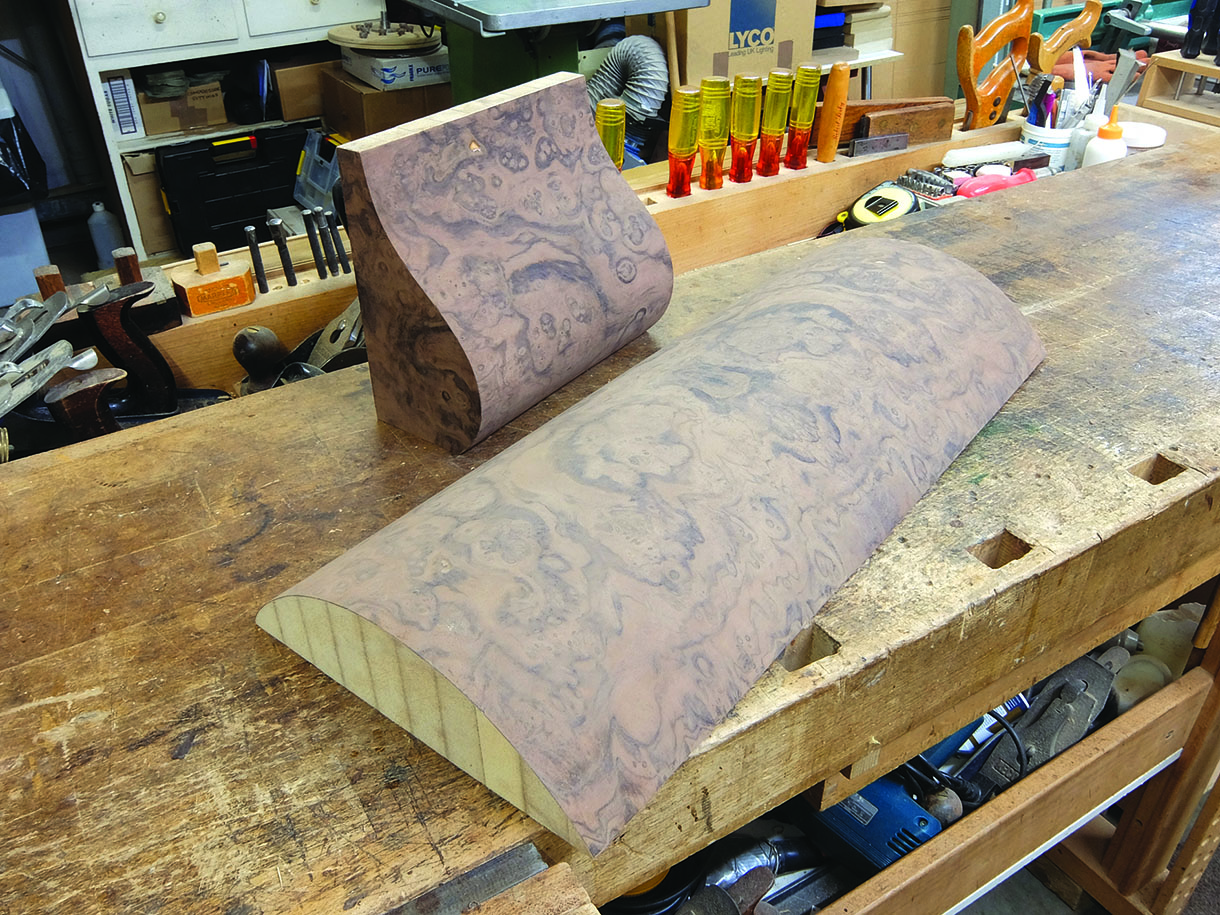
14. Using a plane, true the convex shape. Use a spokeshave to complete the concave shape before finishing with a coarse abrasive on both square and shaped sanding blocks
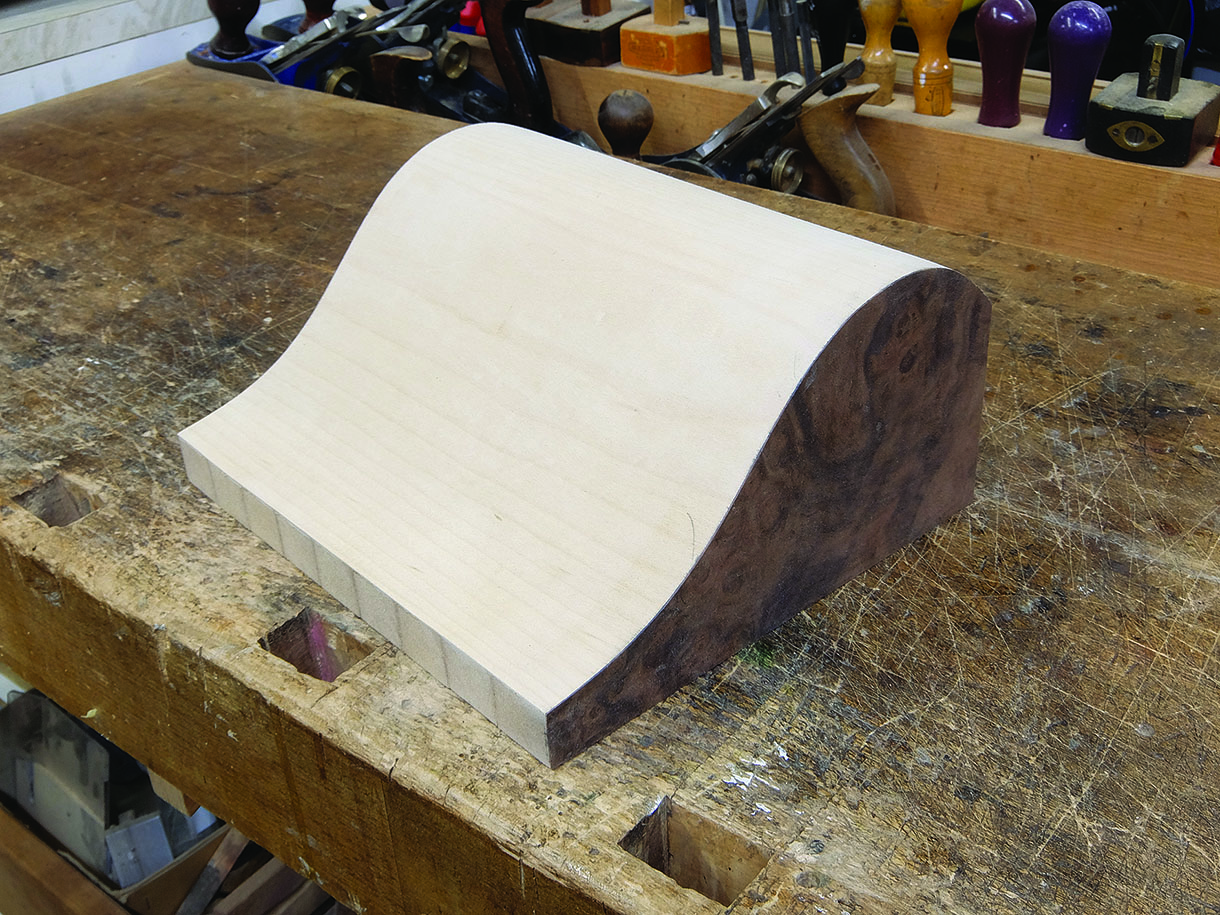
15. Using the same process as sealing the columns, glue a neutral veneer over the front shape. While this is drying in the bag press, cut out four matching pieces of veneer for the sides of the corbels. Glue both sides at the same time, and put the corbels back in the bag press
16. Once they’re dry, and you’ve trimmed the veneer edges, glue the main veneers and press in the bag as before, pressing down on the veneer by hand to position it
17. Next, with the corbels and columns formed and veneered, the main structure of the fire surround can be made
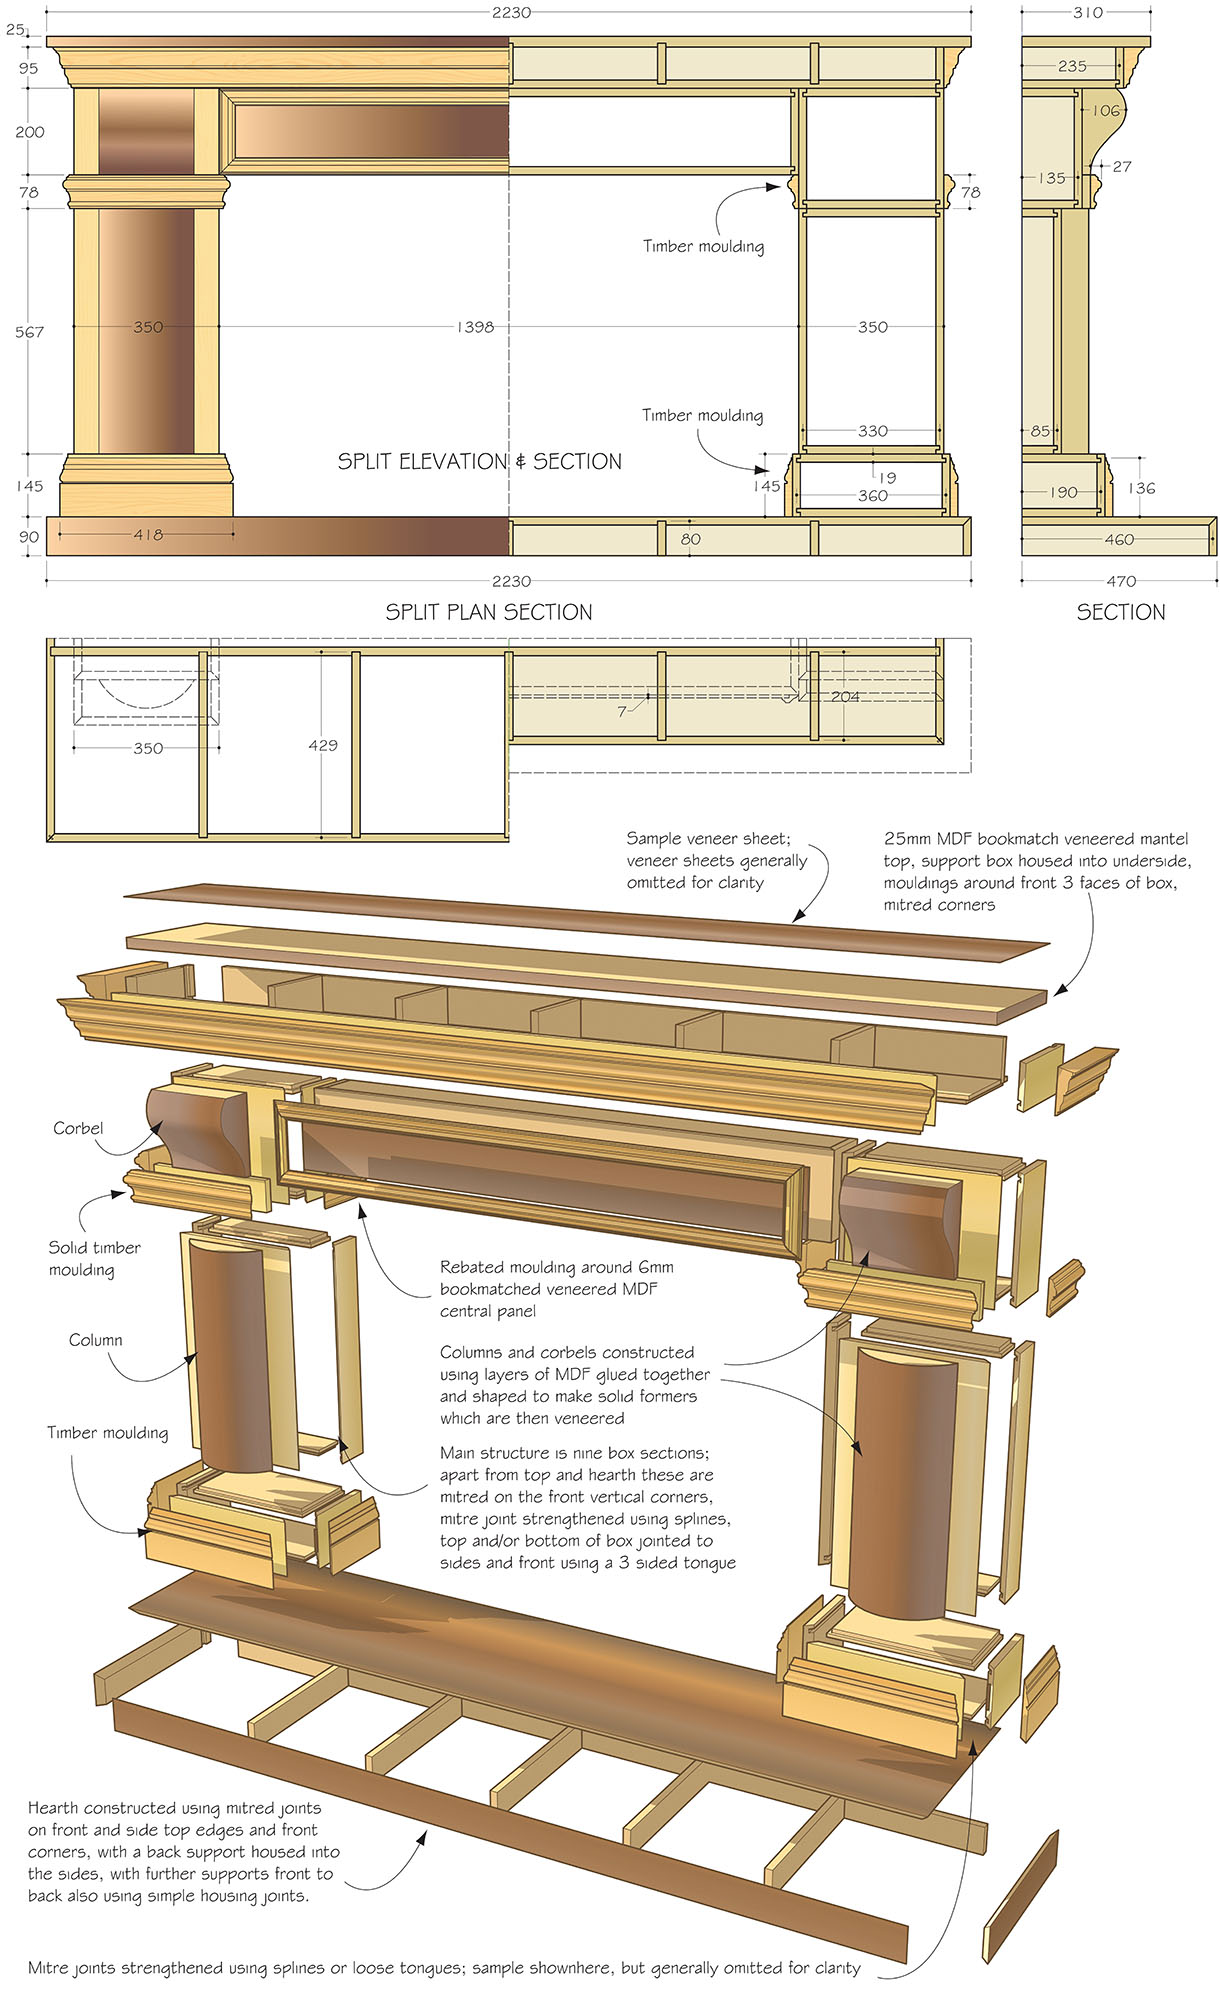
18. The surround is made up of nine separate box sections, which are joined together. Using pre-veneered MDF, ensure the box sections behind the corbels and columns are made to the correct size. If they extend past the shaped sections, mitre the front corners with the additional support of a loose tongue. Rebate and glue the tops and bottoms into the sides and fronts
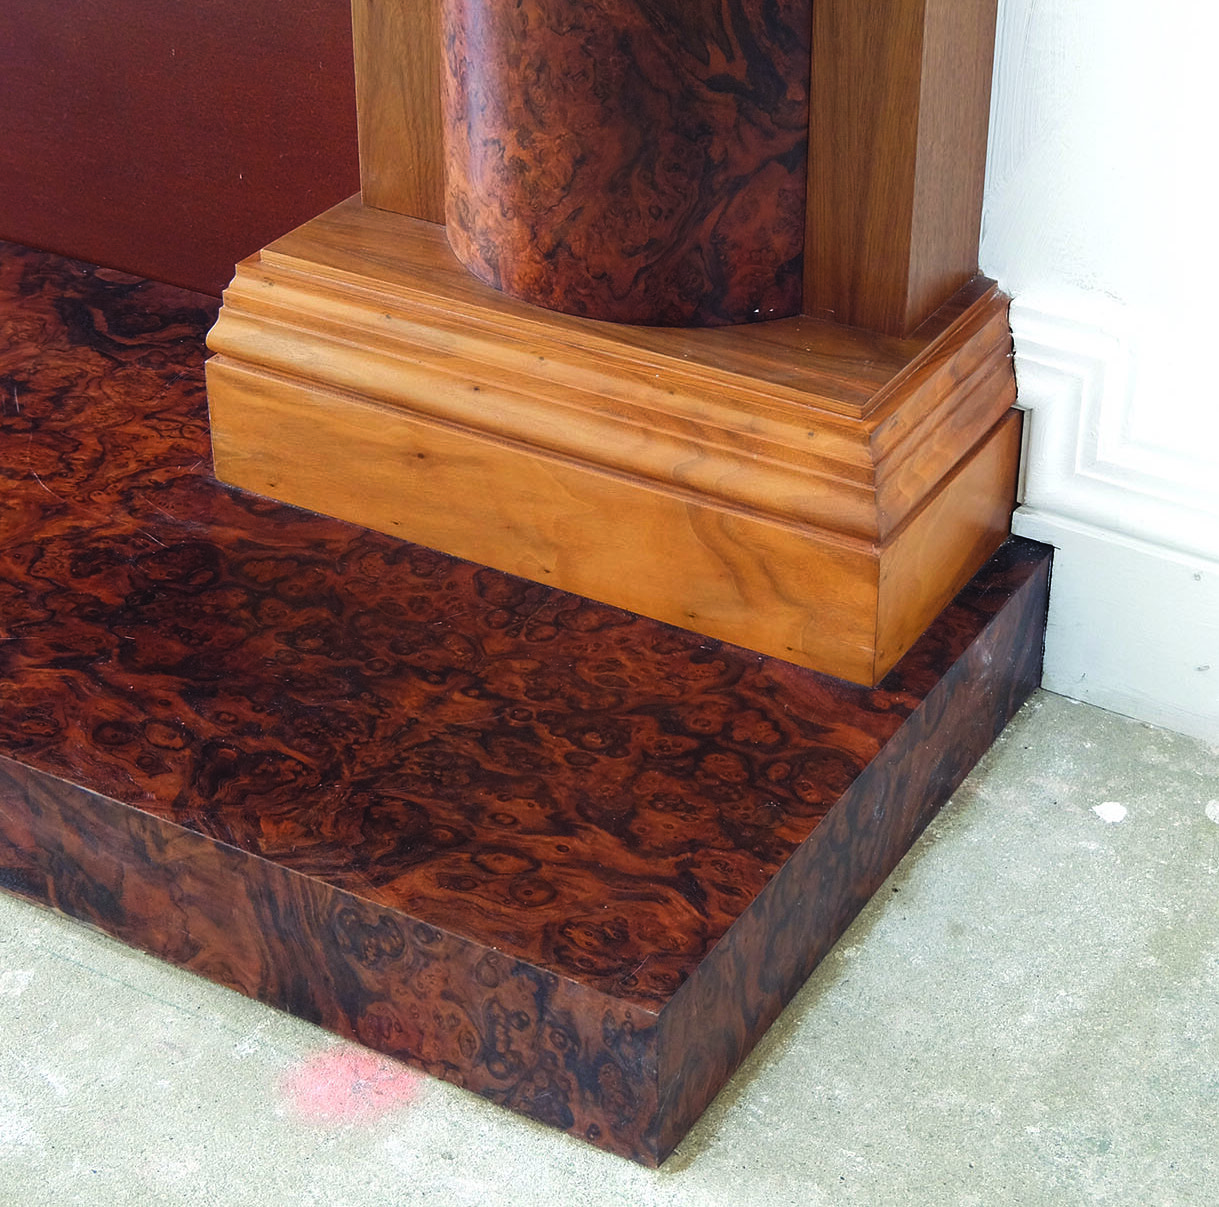
19. Book-match and tape the burr veneers before pressing onto an 18mm board for the hearth along with edge pieces 90mm high. Mitre the back edges of the board, along with the edge pieces, on a router. Rout a loose tongue across the mitre. Use softwood to support underneath, to support the weight of people standing on the hearth, this also allows the hearth to be levelled easily
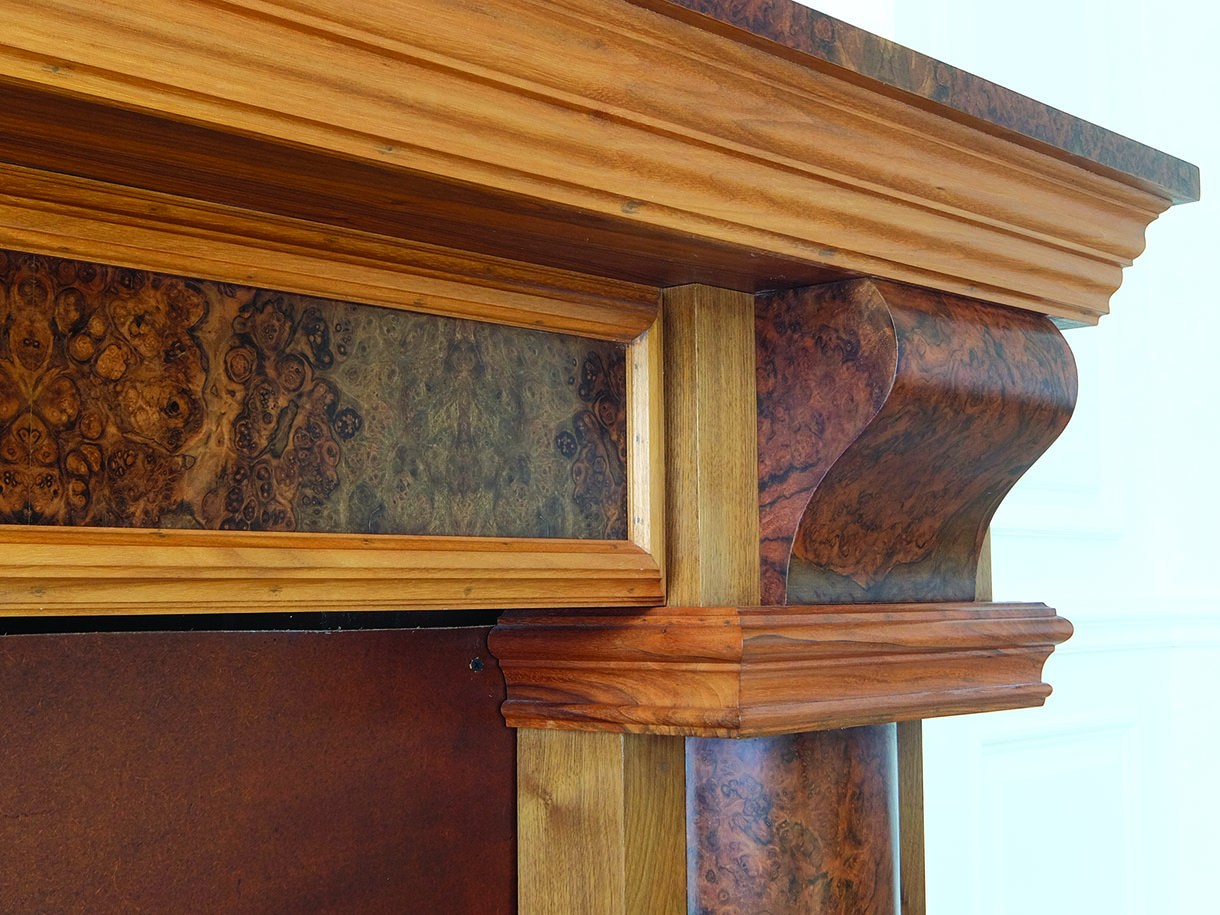
20. Use crown cut veneers on the underside of the central box panel spanning between two corbels. The moulding, which was to go around this section, should match the plaster panel mouldings on the walls and have a rebate on the inside edge. Plant on the front of the box within the rebate of the moulding a 6mm MDF panel veneered with book-matching burrs. Create the 25mm mantel top using book-matching veneer in the bag press after veneering the edges. Form the rebates on the edge sections and grooves by cutting into the edges of the veneered bottom boards. Glue the internal support into housing joints in the top and bottom to keep them in position. Join the underframe with housing joints with the burr veneered top. Glue the whole unit together
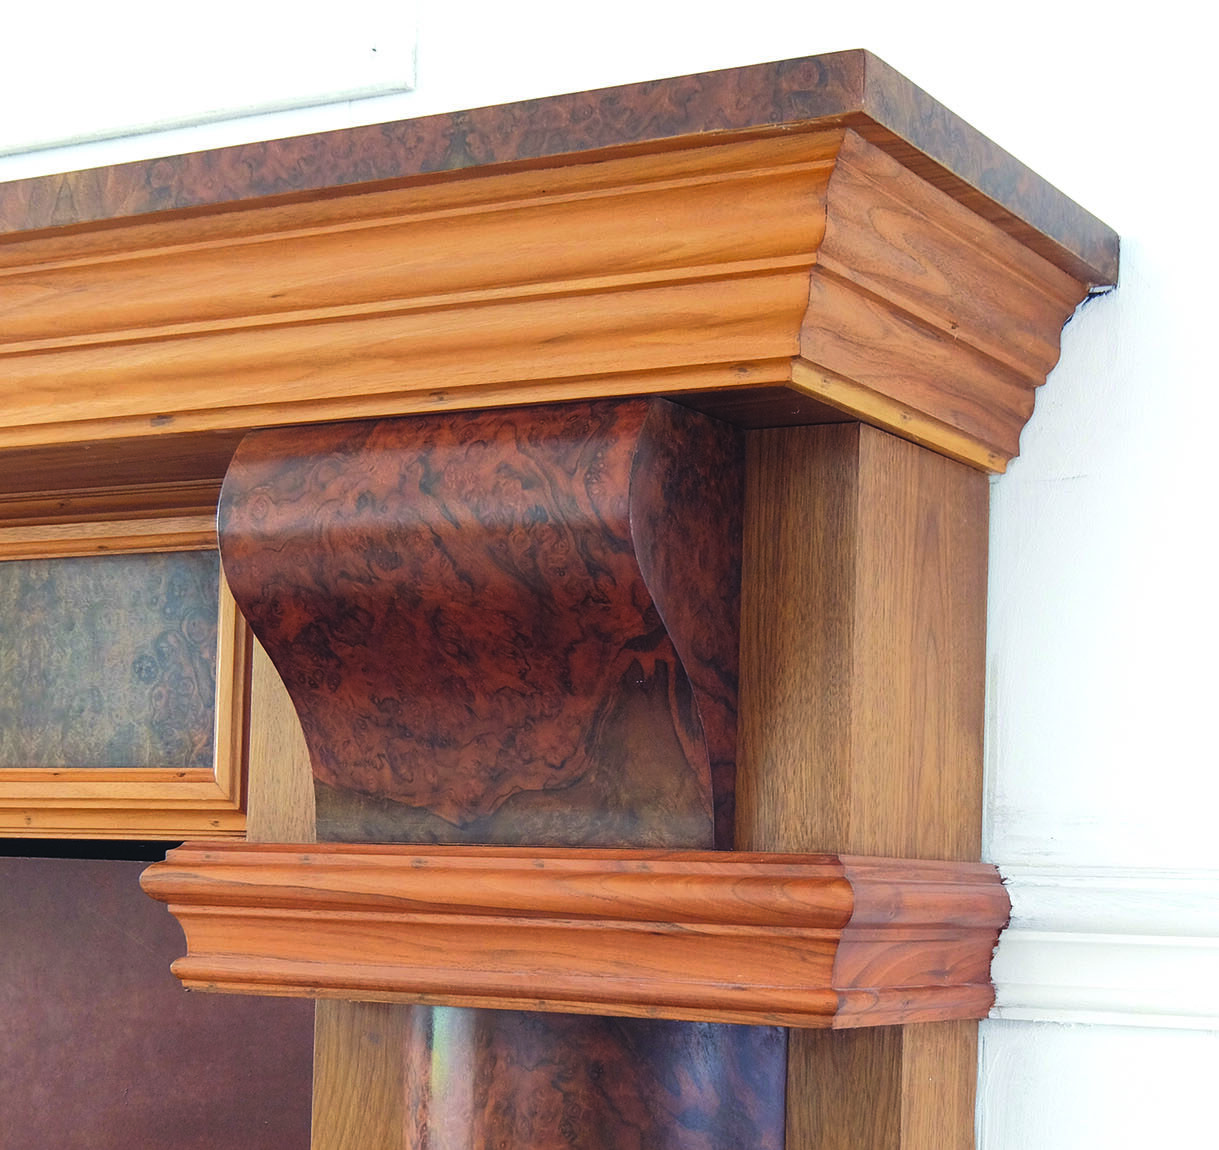
21. With the various box sections screwed together from behind within the boxes, cut and mitre the various mouldings to fit. Fit the corbels, and screw them into place from behind. Cut the curved columns to length and fit into place
Installation
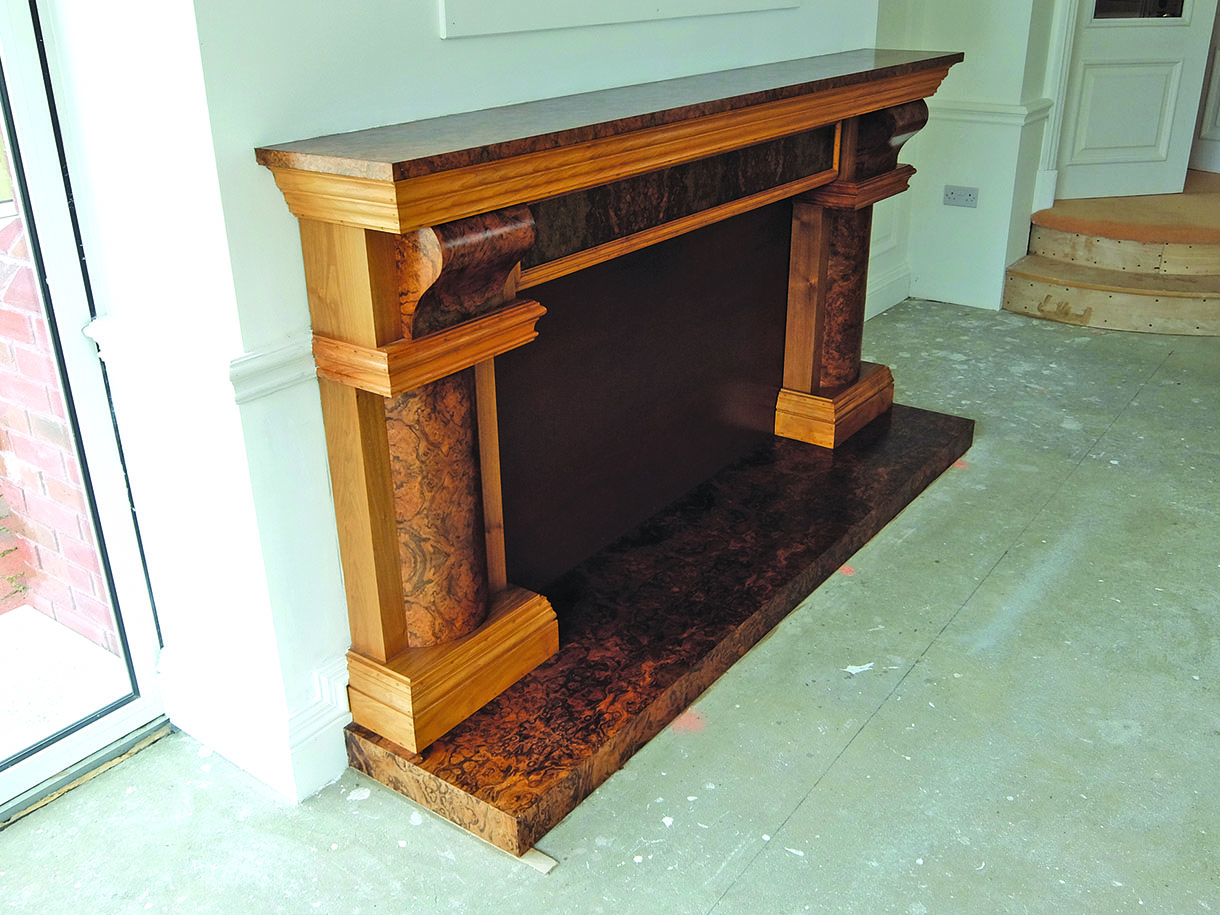
22. The assembled fire surround was fitted on site by the client’s builders in front of the brickwork fireplace before being sealed with shellac sealer and waxed. Once the remaining building work had been carried out above the fire surround the wall was plastered up to the edges
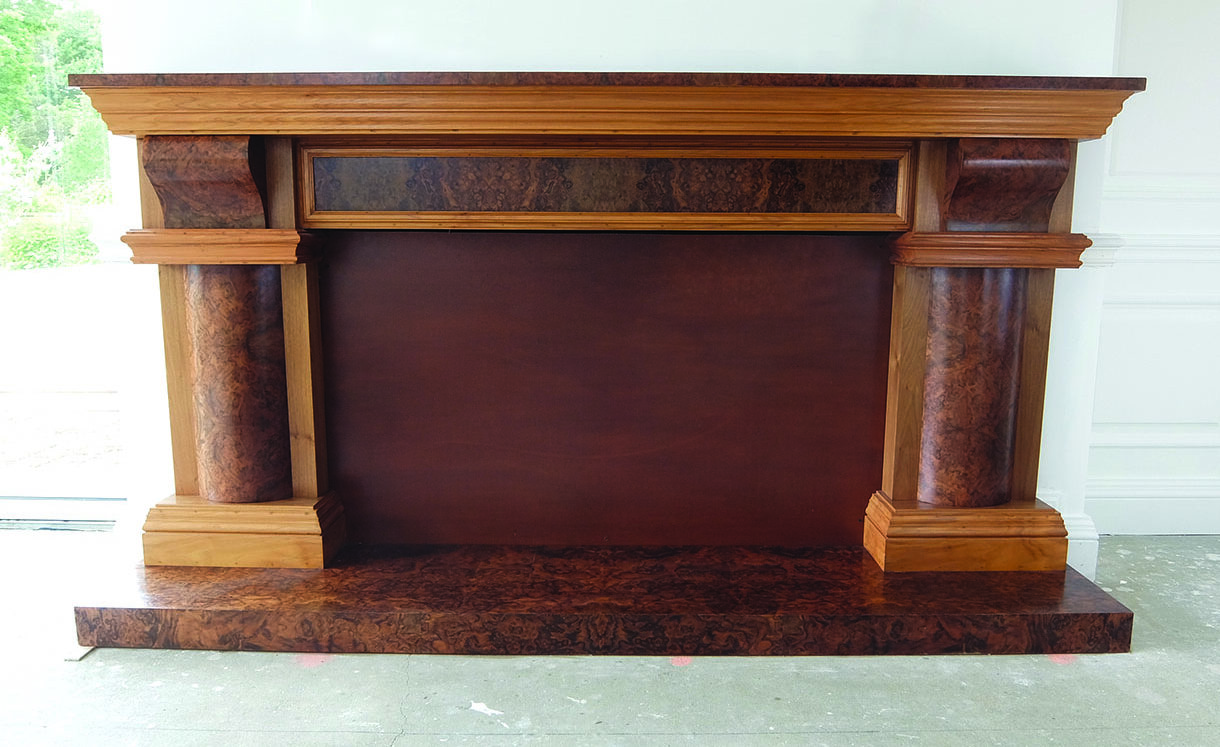
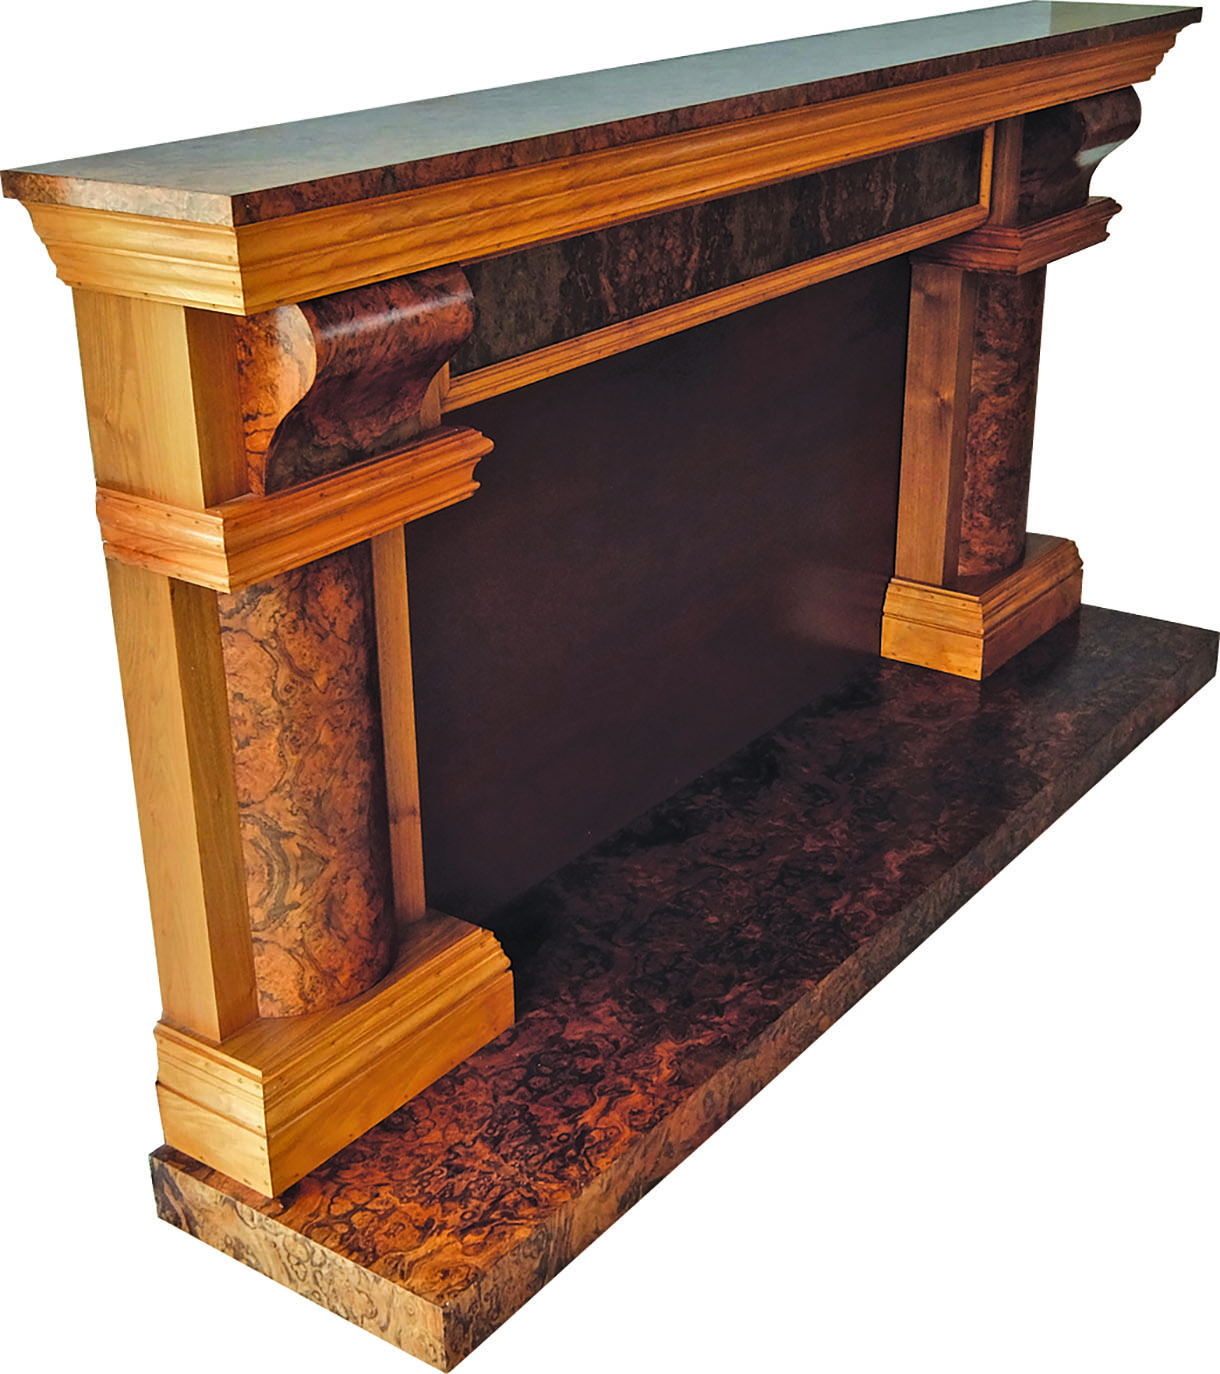
23. A temporary board was placed within the framework of the surround to protect the brickwork pending a decision on the type of fire. The result is a very grand fireplace indeed!
")

