Ben’s Bubble Cabinet:
Peter Sefton talks about his student’s latest creation, Ben’s ‘bubble’ cabinet.
Peter Sefton talks about his student’s latest creation, Ben’s ‘bubble’ cabinet
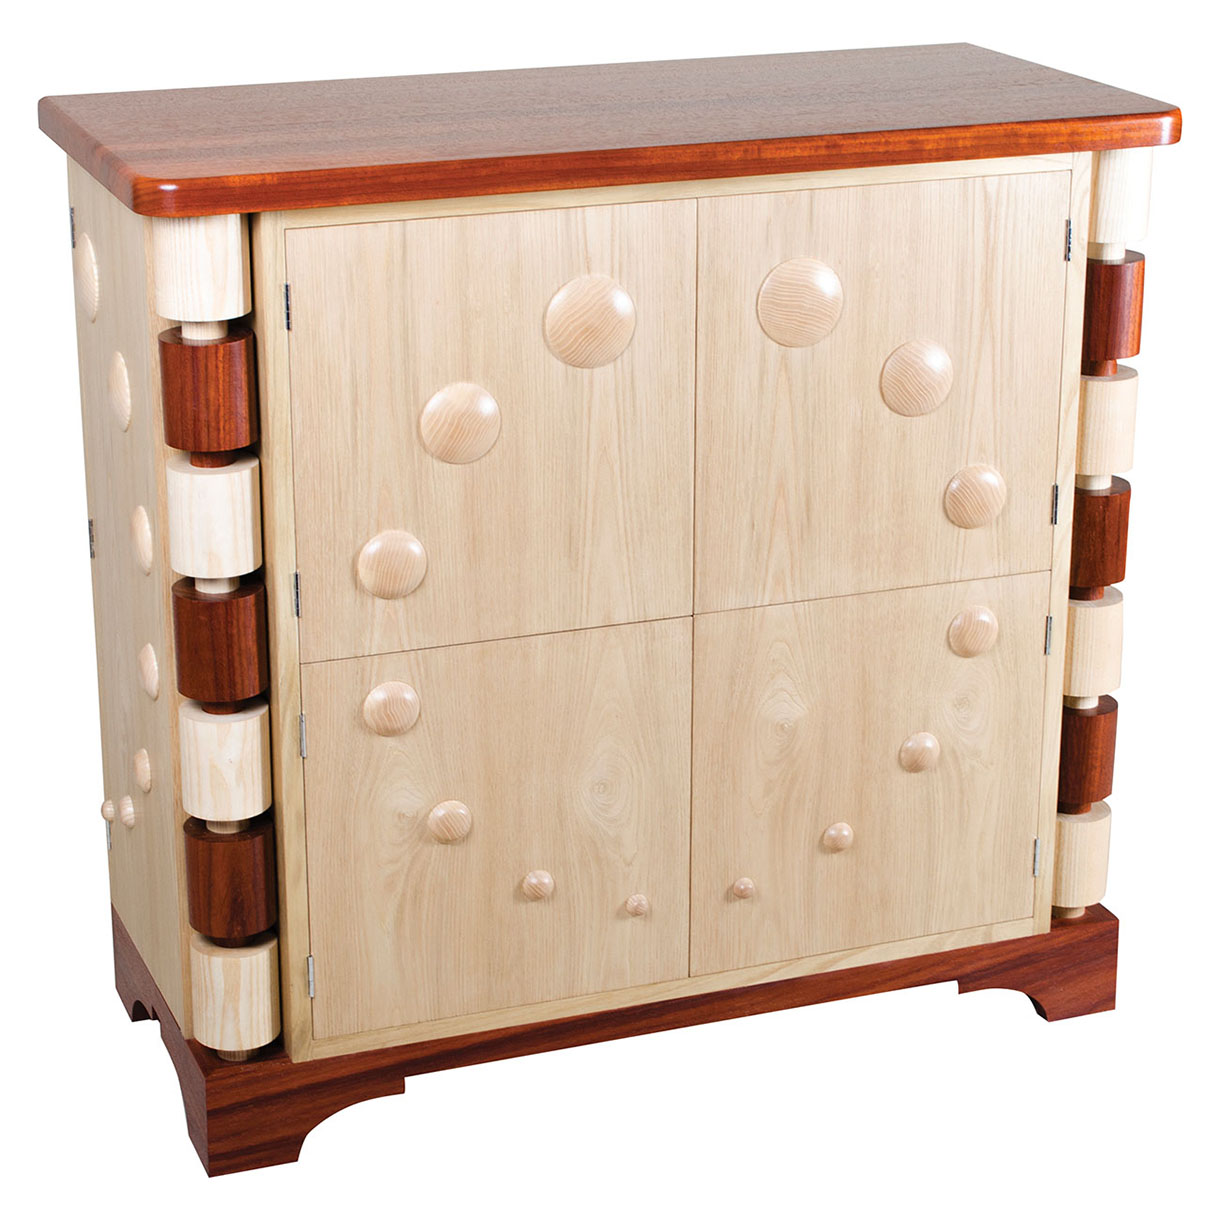
My youngest student on this year’s long course came up with a refreshing design; his ‘bubble’ cabinet. Benjamin designed the piece of furniture as a storage unit with four push-to-open doors, concealing an internal drawer. The two end doors give access to magazine storage, behind the turned ash and padauk columns. One of the main features of the design is the ash turned ‘bubbles’.
Benjamin had to turn 28 domes in seven different sizes to form a design featuring a circle of ‘bubbles’ for the doors of his cabinet; they also needed to be attached to the doors accurately to keep the bubble looking balanced.
Method
A plan was required to achieve this in order to keep the uniformity of size while holding them on the lathe, and positioning each ‘bubble’ on the doors. We decided to machine long square sections off the ash and then cut them off at 10mm long on the tablesaw. We then drilled and glued in brass-threaded inserts to form a centre fixing point, for both attaching to the faceplate and also to the doors. Each ‘bubble’ was cut on the bandsaw and spun on the disc sander to the desired diameter; we used a MicroJig Zero Play guide bar in a slot to form a sliding centre on the disc sander. The discs were then mounted on the faceplate and turned using an Easy Wood Tools Easy Finisher, before sanding the end grain with Abranet on an extracted hand block.
When all the ‘bubbles’ were turned and sanded, the doors were laid out and the centre points marked and drilled with 4mm holes, in readiness for threaded locating dowels. The ‘bubbles’ were all glued in place with Titebond III in the vacuum press, this was great and pulled all the discs down tightly; even in the middle of the door – G-cramps wouldn’t have reached or may have cracked the delicate end grain if not placed absolutely centrally.
As the discs were positioned all the ‘bubbles’ were lined up so the end grain pattern formed the circle, before the vacuum bag held them as the glue cured. Once the doors were fitted and the cabinet then
finished, the full effect of the ‘bubbles’ could be seen and brought the piece to life.
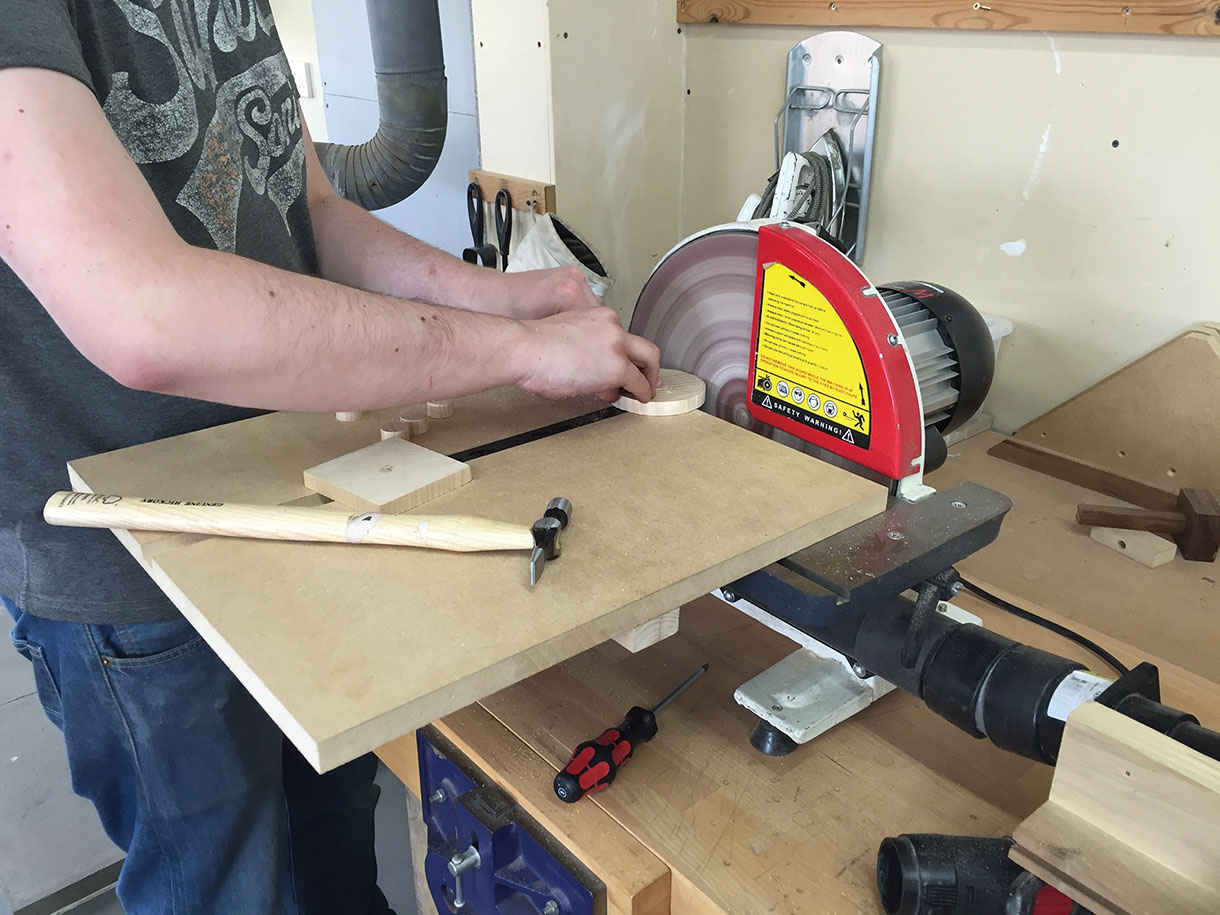
Disc sanding to the required diameter
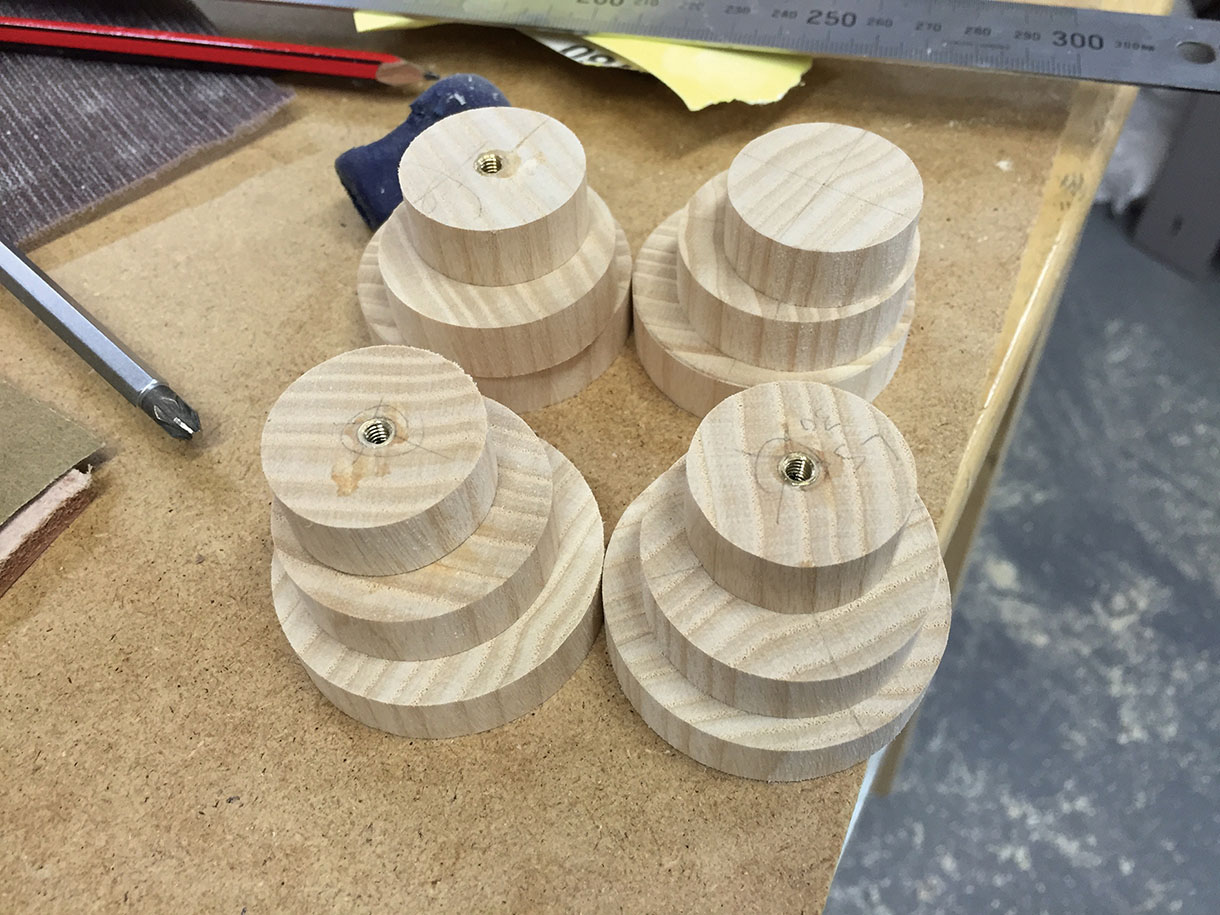
Threaded inserts to form centre fixings
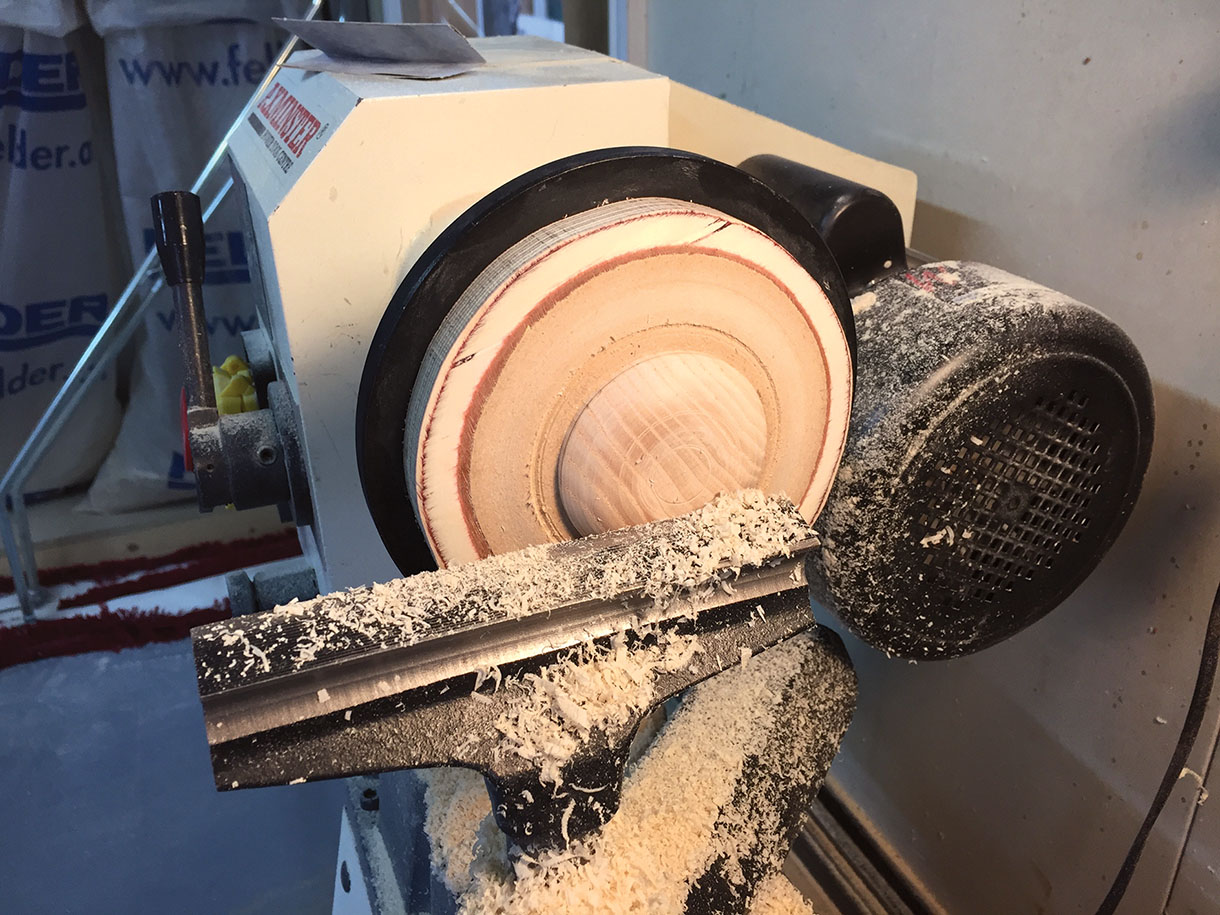
Each bubble was turned on a faceplate
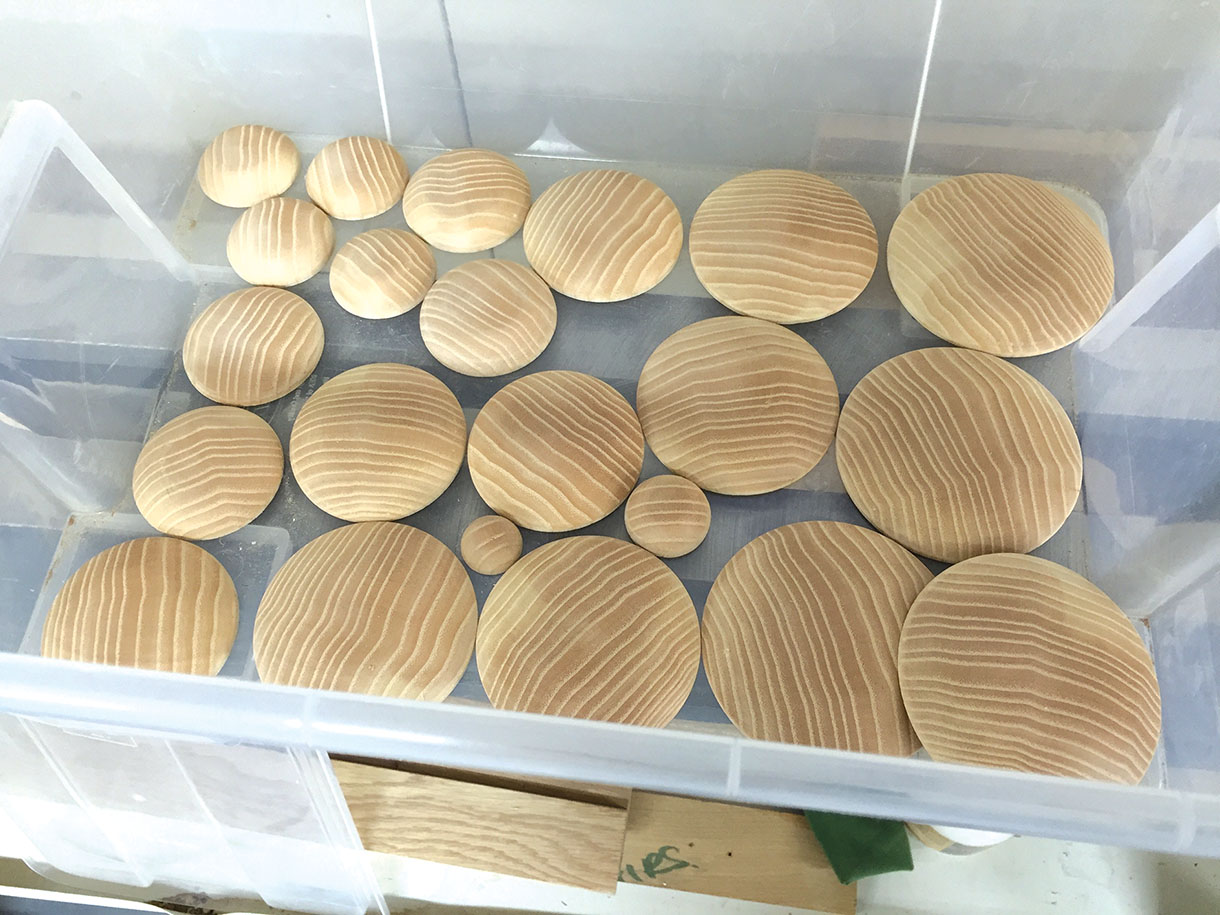
Beautiful end grain ash bubble cookies


