The Cabinetmakers’ Flexible Friend:
Jim Hooker takes a fresh look at sharpening the humble scraper and suggests a way to keep them in tip top condition.
Jim Hooker takes a fresh look at sharpening the humble scraper and suggests a way to keep them in tip top condition
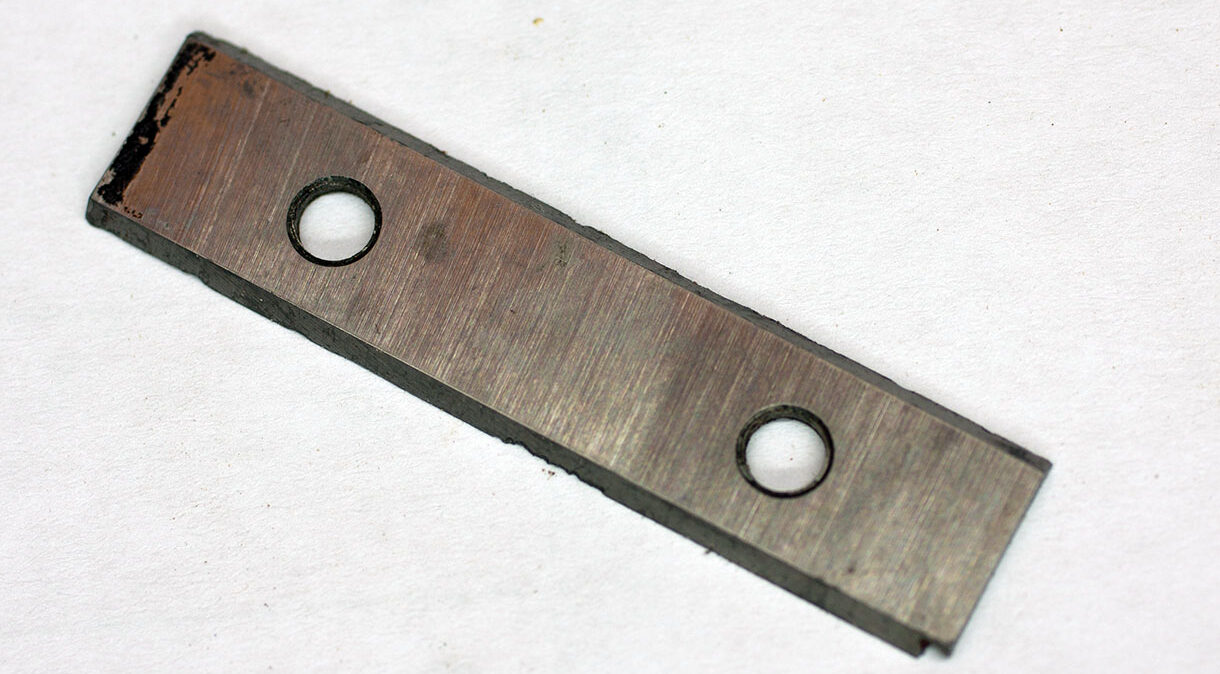
In the UK we call them cabinet scrapers; in the US they are card scrapers. Of course, their use is not confined to cabinets and they don’t have much to do with cards, so I’ll stick to plain ‘scrapers’. Whatever you call them, they are one of the most useful, versatile and simple tools in the furniture maker’s armoury and on a price-to-usefulness ratio I can’t think of anything else that comes close. Find yourself a worn-out western or Japanese sawplate and you can even make your own with little or no compromise on quality.
However, an effective scraper needs a sharp and continuous hook along its working edge. This is something that many woodworkers struggle to achieve using the traditional method involving a mill file and
a hardened cylindrical steel burnishing tool, sometimes known as a ticketer. A worn-out or failed hook will produce only dust rather than the shavings produced by a well-prepared scraper. When I first started making furniture I attended a course with professional cabinetmaker and inspirational teacher, Bernard Allen, at West Dean College, where I learnt a somewhat different and highly effective technique for creating the perfect scraping hook. Nearly 20 years on, I’m still attending Bernard’s courses and using the scraper preparation method he invented out of necessity when his burnisher went AWOL. I’ll call it the Allen method. It isn’t fundamentally different from other methods but differs in some important details and the tools used. What’s more, it’s cheap, reliable and easily mastered.
The basics
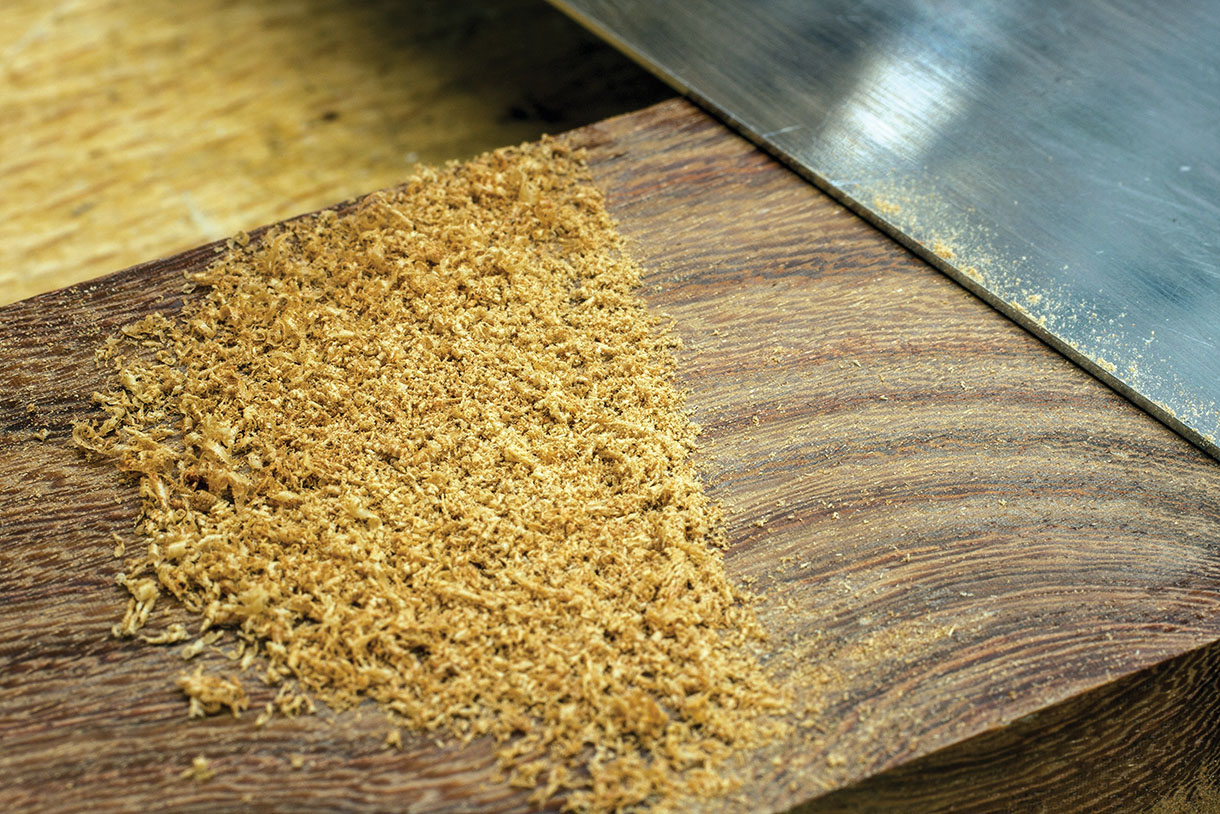
Before exploring the Allen method it’s worth having a look at the basics of scraper preparation. Fundamentally, a scraper is an edge tool like any other. It depends on having two finely worked faces meeting at a consistent angle. Just as with a chisel or plane iron, the finer the meeting surfaces – back and bevel or, in the case of a scraper, face and edge – the sharper the resulting edge will be. For this reason, the Allen method does not involve the use of a file. A file won’t work on a chisel because the steel is harder than that of a scraper, but even if it would work you wouldn’t use anything so coarse on a chisel because you would then need to get rid of the deep grooves it would leave in the surface, so why use a file on a scraper? The tools used in the initial stages of the Allen method are exactly the same as those used for sharpening any other edge tool – water, oil or diamond stones, abrasive film – whatever you normally use.
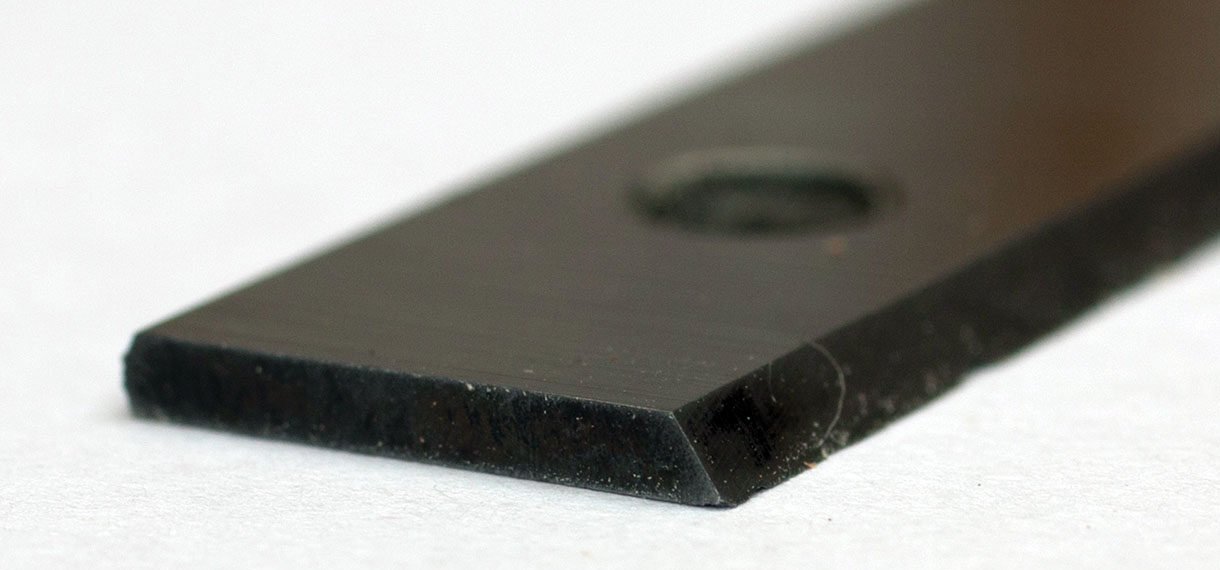
Not quite dust but the scraper edge was definitely past its best
The Allen method
Stage 1
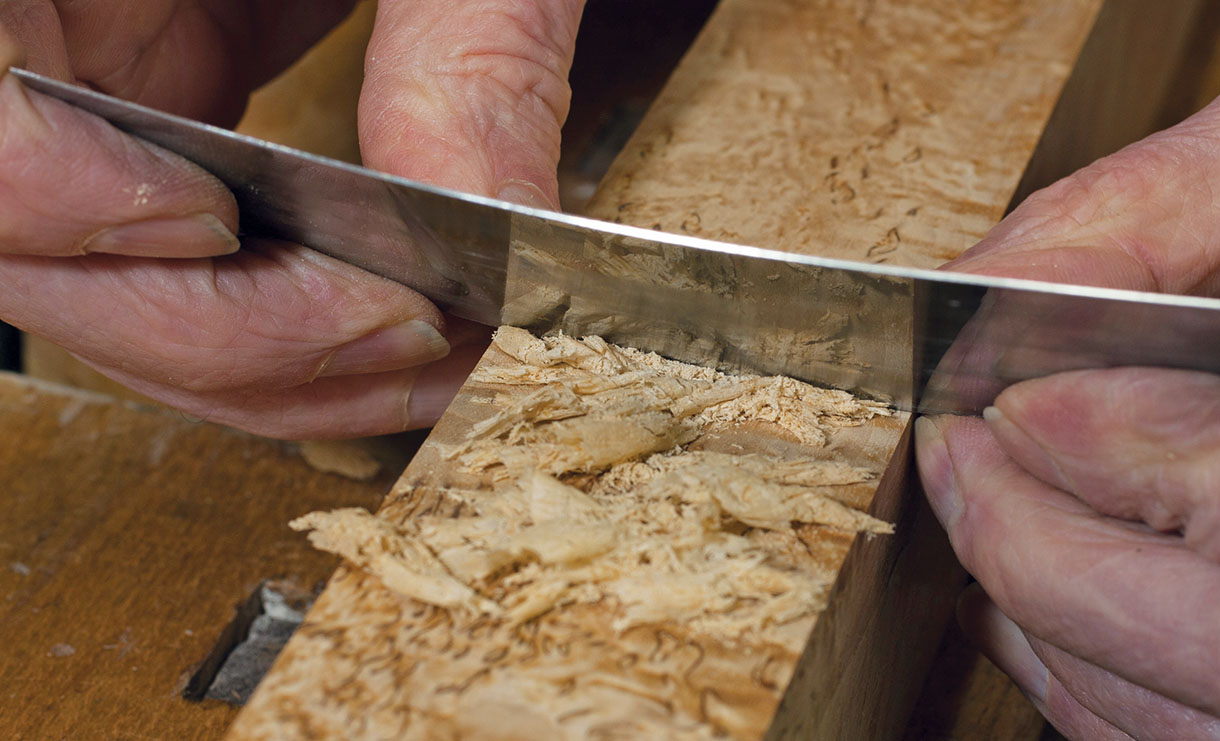
The first step is to remove all trace of the old hook or, in the case of a new scraper, machining marks, from the area of the face adjacent to the edge, with the scraper placed flat on the stone. It’s up to you how fine you go with this step – I often stop with a worn fine (red) DMT diamond stone or, if I’m feeling particularly fastidious, I may finish with a 6000 or 8000 grit waterstone. The flexibility of scrapers makes it difficult and time-consuming to obtain an evenly fine finish along the whole length of a scraper face using finger pressure alone, but applying pressure to the scraper with a flat faced block of wood greatly speeds this process. Although it takes longer, it’s worth preparing the faces on both sides of the scraper because it is entirely practical to have effective hooks on both sides of an edge, thereby doubling the time between sharpenings. The next step is to square the edge and remove any defects it may have. This is easily and
quickly done using your block of wood to hold the scraper at 90° to the abrasive medium. Diamond stones are ideal for this; water or oil stones can also be used but be sure to continuously change the path of the scraper as you work its edge and use only light pressure so as to avoid creating deep grooves in the stone.
Applying pressure with a wooden block helps to achieve a flat, even face adjacent to the scraper’s edge
A fine diamond stone is ideal for honing the edge, the wooden block helps maintain the edge at 90°
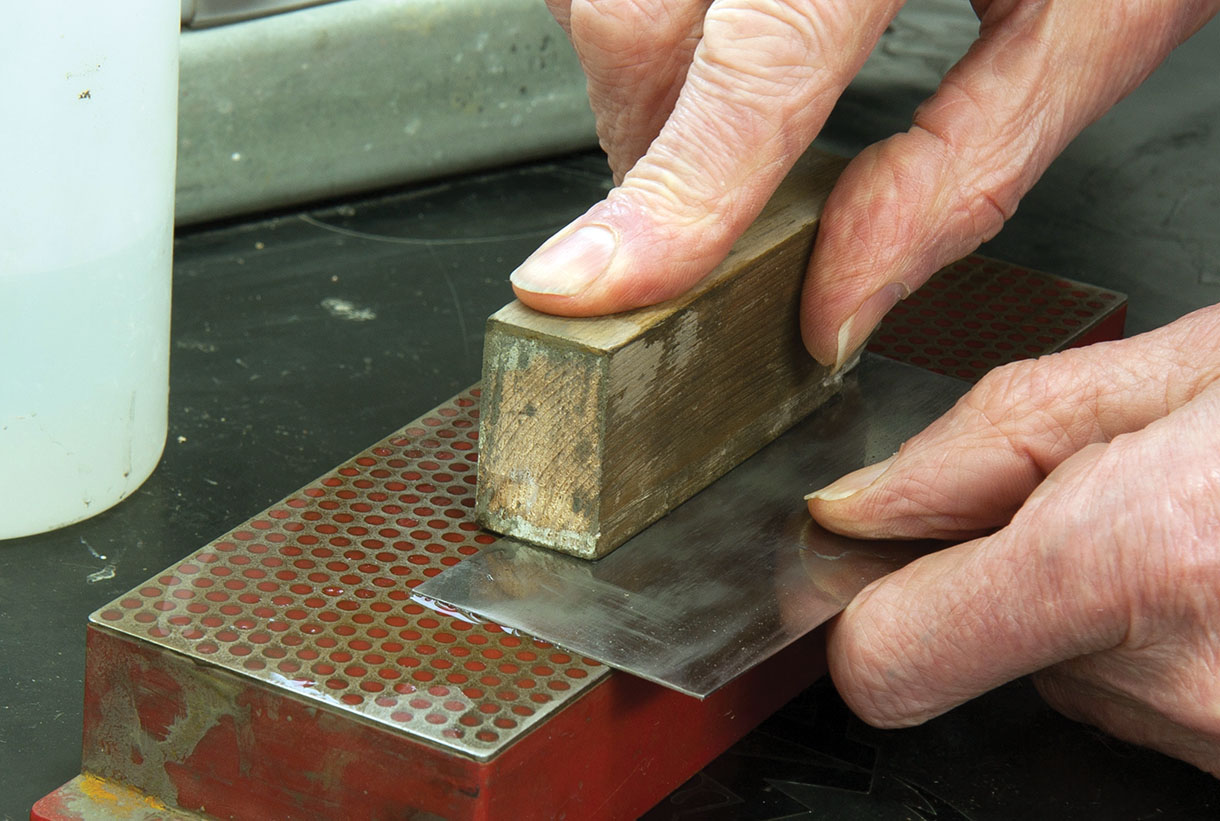
The perfect burnisher – a 50mm tungsten carbide blade used in spindle moulders and decorators’ scrapers
Only the obtuse angle between the bevel and the front of the blade is used, so blunt the cutting edges for safety
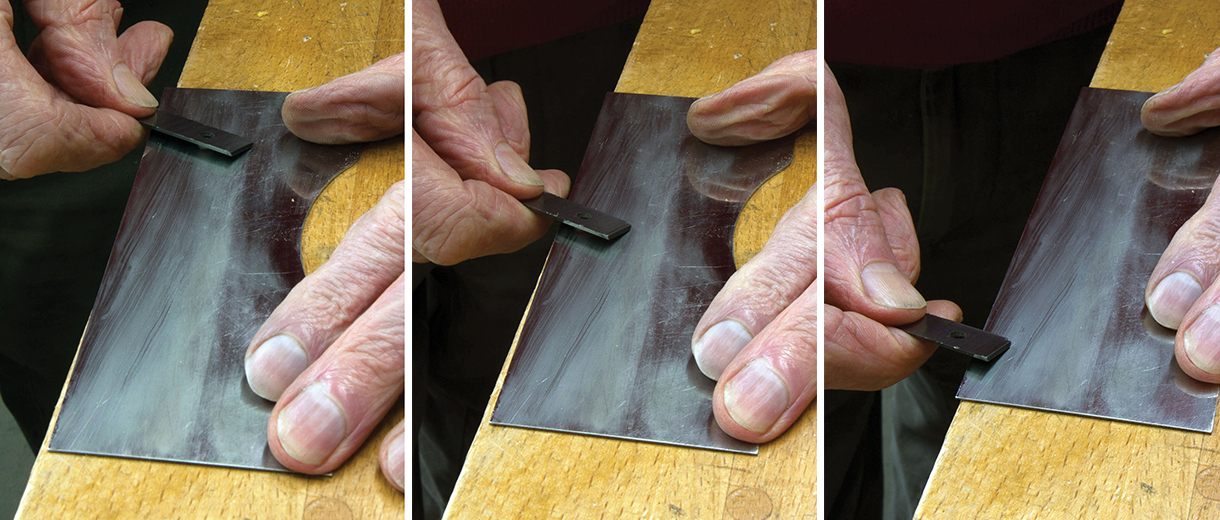
The blade is held at a small angle to the edge and moved outwards over the length of the stroke. Firm pressure combined with this diagonal action draws the metal out from the edge
The next step again uses a different tool, in this case a 50mm-long tungsten carbide blade. It was originally developed as spindle moulder tooling but is now also widely used in decorator’s scrapers of the Linbide type. These blades can be bought for as little as £2 or £3 – much cheaper than a good quality burnisher – and will last forever. Better still, if you know a professional decorator, scrounge a chipped or worn-out one which will be free and save you the trouble of blunting the sharp edges because you will have no use for these other than to cut yourself. The part of the blade used is the obtuse angled edge between the bevel and the top surface. This edge is pulled or pushed along the surface to be worked at an angle so that the stroke uses the whole or most of the length of the blade to pull the scraper metal in the required direction. If you run out of tool edge before completing the full length of the scraper, just restart where you left off. Moderate pressure is required – the aim is for a smooth fluid stroke, not a heavy stuttering one. Scrapers vary in hardness so the number of strokes may vary accordingly, but you should not need more than two or three for any part of the process and one may suffice.
Scraper preparation works by moving small amounts of metal adjacent to its square edge. This is often done by working just the edge itself to create a burr but, in the Allen method both the face and the edge are worked for reasons I will explain. The first surface to be worked is the face of the scraper adjacent to the edge that you have already polished. The object is to pull metal upwards parallel to the face so that it stands proud at the side of the narrow edge of the scraper. This modifies the square edge so that it resembles that shown, in exaggerated form, in figure 1 and should be easily detectable by passing a finger across the edge; if you can’t feel it, it needs more work. Besides moving metal, this process work hardens the surface of what will be the underside of the hook by dislocating the crystalline structure of the steel. This won’t happen if only the narrow edge is worked.

Figure 1: Exaggerated impression of the raised edge created by working the scraper’s face
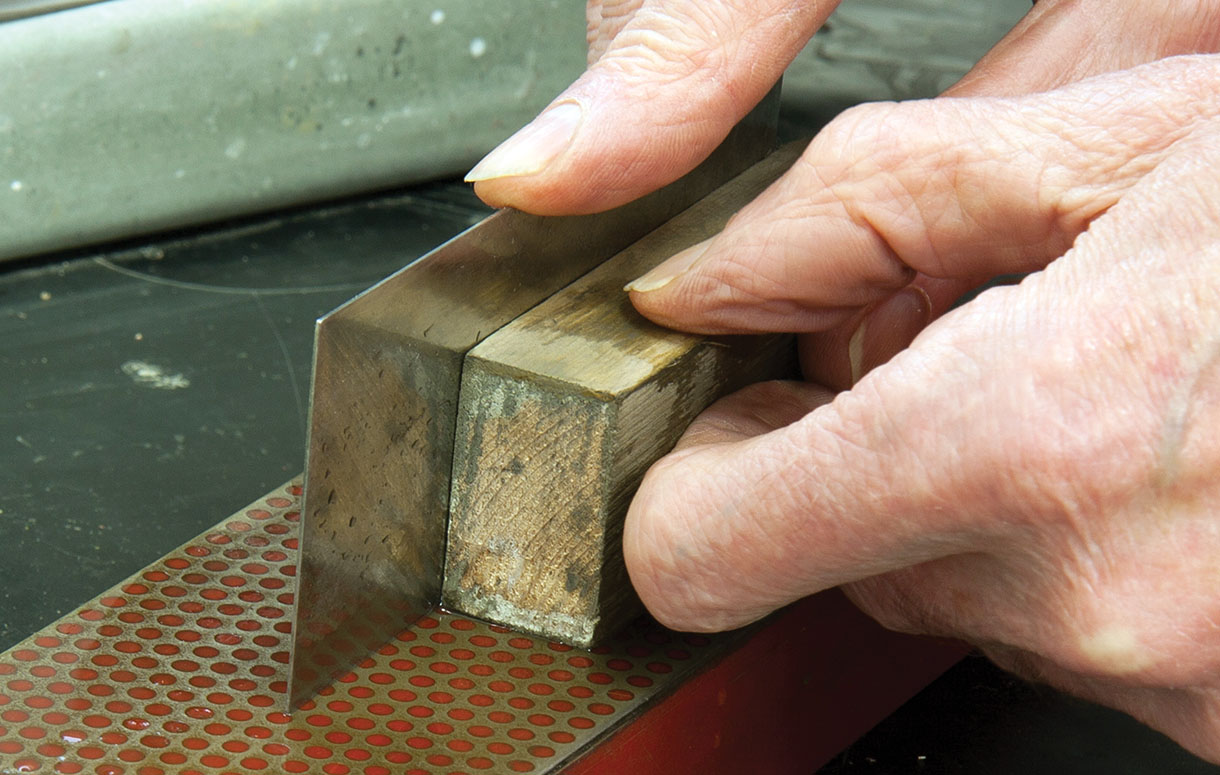
Stage 2
The second stage is to place the scraper in the vice and use the tool in a similar manner to draw the previously raised metal over and outwards so that it projects out from the edge at a little more than 90° to the face from which it was raised (figure 2). For this the tool needs to be angled a degree or two away from
the worked face. Finally, the tool is used tilted at an angle of about 5° in the opposite direction to draw the raised steel down to form the hook (figure 3). The working of the edge in these last two stages work hardens the upper face of the hook for a longer lasting edge. Now turn your scraper over and repeat
the process to give yourself a perfect hook on both sides of the edge. Job done.
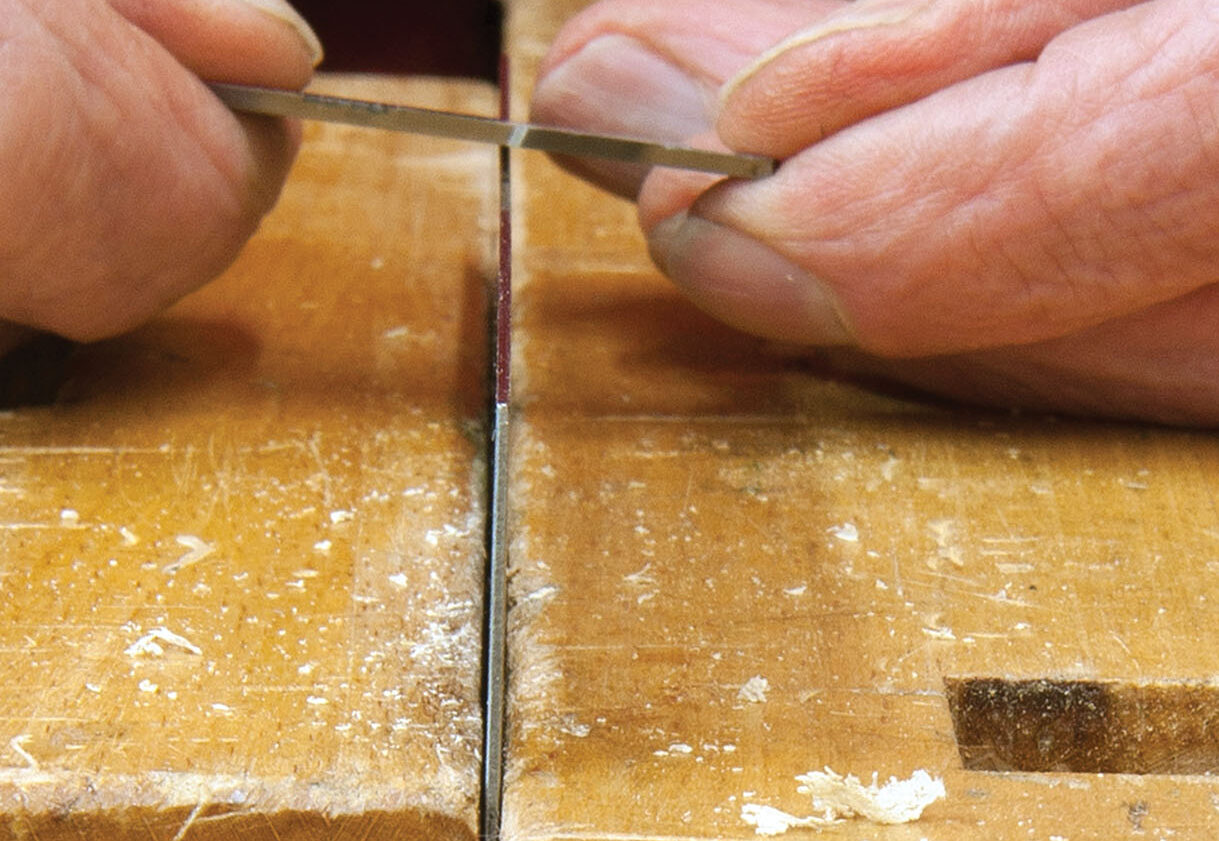
Stage 2 turns the metal raised in stage 1 so that it projects at almost 90° to the face

Figure 2: Exaggerated impression of raised metal turned outwards

Finally, tilting the tool at about 5° towards the worked face creates the finished hook

Figure 3: Exaggerated impression of the finished hook
Scraper variations
In addition to the standard rectangular scraper, commercially made shaped scrapers are available in various profiles. These are prepared in exactly the same way as a standard scraper. One of the commonest and most useful is circular with ‘bites’ of various radii out of its circumference. These are useful for scraping homemade dowels but, if you use them to scrape a rounded over edge on a board beware, it is all too easy to find the pointed end of a ‘bite’ making a deep groove in the work. To avoid this, it’s worth taking a few minutes to remove these corners on a grinder but take care not to overheat the scraper which may prevent it from holding a sharp edge. Useful though commercial profiled scrapers can be, making your own to the exact profile required is easy enough. A standard rectangular scraper or other suitable steel is easily shaped with a hacksaw or jeweller’s saw, files and grinder. For complex profiles a small grinding wheel or diamond burr in a Dremel type machine is perfect. When it comes to scraping external curves it is also worth remembering that while a standard scraper is about 1mm thick, they are also available in thicknesses down to 0.4mm. Thinner section scrapers are a lot more flexible and will easily bend to scrape more gently curved surfaces.
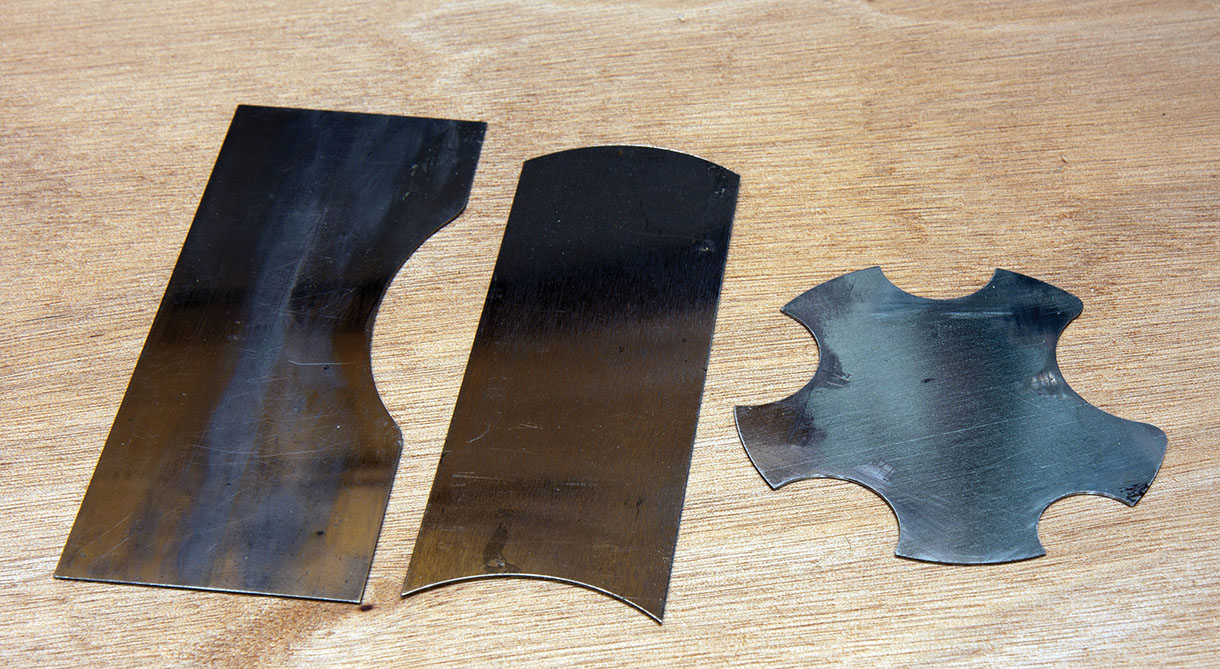
A workshop-made profiled scraper on the left with two commercial examples. Note that some of the transitions between curved and straight edges have been rounded to prevent them scoring the workpiece
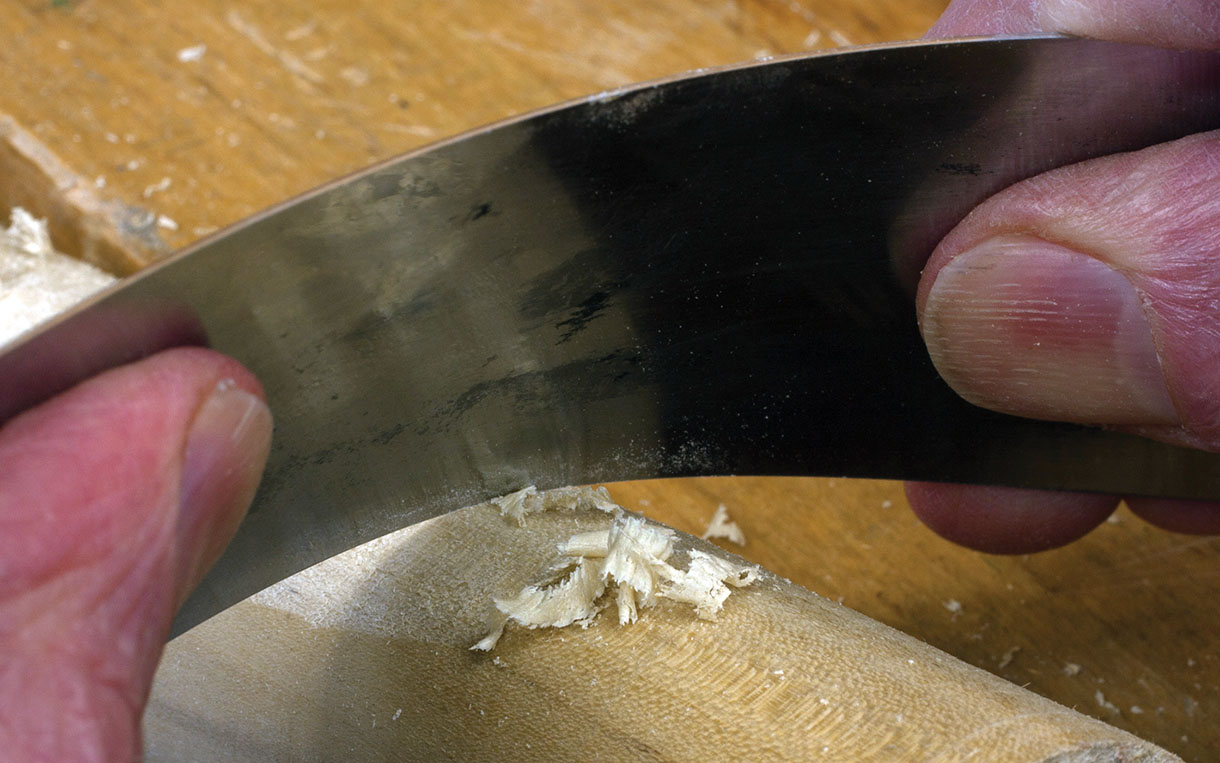
A thin, flexible scraper can be a good alternative to a profiled one if the curve to be scraped is gentle
Storage
So, you now have a nice collection of scrapers with beautifully sharp hooks, but how do you store them? Scrapers look robust and unprepossessing; what’s more, they don’t have an obvious razor-sharp edge which could do serious damage to you or to other objects, so the temptation is to treat them rather casually and without the care such a useful tool deserves. For far too long I stored mine in a plastic bag and just assumed that the often blunt scraper that emerged from the bag must already have been extensively used. The penny eventually dropped and I realised that bumping scrapers together is a sure-fire recipe for blunting them. Scrapers are often supplied with plastic guards but these have a tendency to fall off and get lost, so a better long-term solution is needed.
I concluded that the best answer was a wooden storage box with spacers that would keep the scrapers apart and accommodate a variety of shapes and sizes. A look round my wood store revealed a short board of 9mm-thick American black walnut (Juglans nigra) left over from the creation of bandsawn veneers for another project. It’s thin stuff like this that always seems too good to throw away but rarely gets used, so it was perfect for a scraper box. Of course, like most of us, I also have plenty of scraps of ply that would have been perfectly suitable, but I just can’t resist the temptation to make workshop objects look nice, so walnut it was and, at just 175mm long, 70mm wide and 100mm tall, it doesn’t take a lot of material.
Construction could hardly be simpler. The sides are rebated and glued together and the top and bottom panels sit flush, glued into rebates. I was tempted to use solid wood for the top and bottom panels and, at only 55mm wide, could probably have got away with the differential expansion of long grain sides and a cross grain panel, but decided not to risk it. The base, which would not be seen, was easy – a piece of 6mm ply – but for the top the temptation to beautify was too much to ignore – a lovely little scrap of heavily rippled sycamore (Acer pseudoplatanus) would contrast nicely with the walnut. A 2mm slice was bandsawn off this and glued to some 3mm birch ply and the basic ensemble was complete.
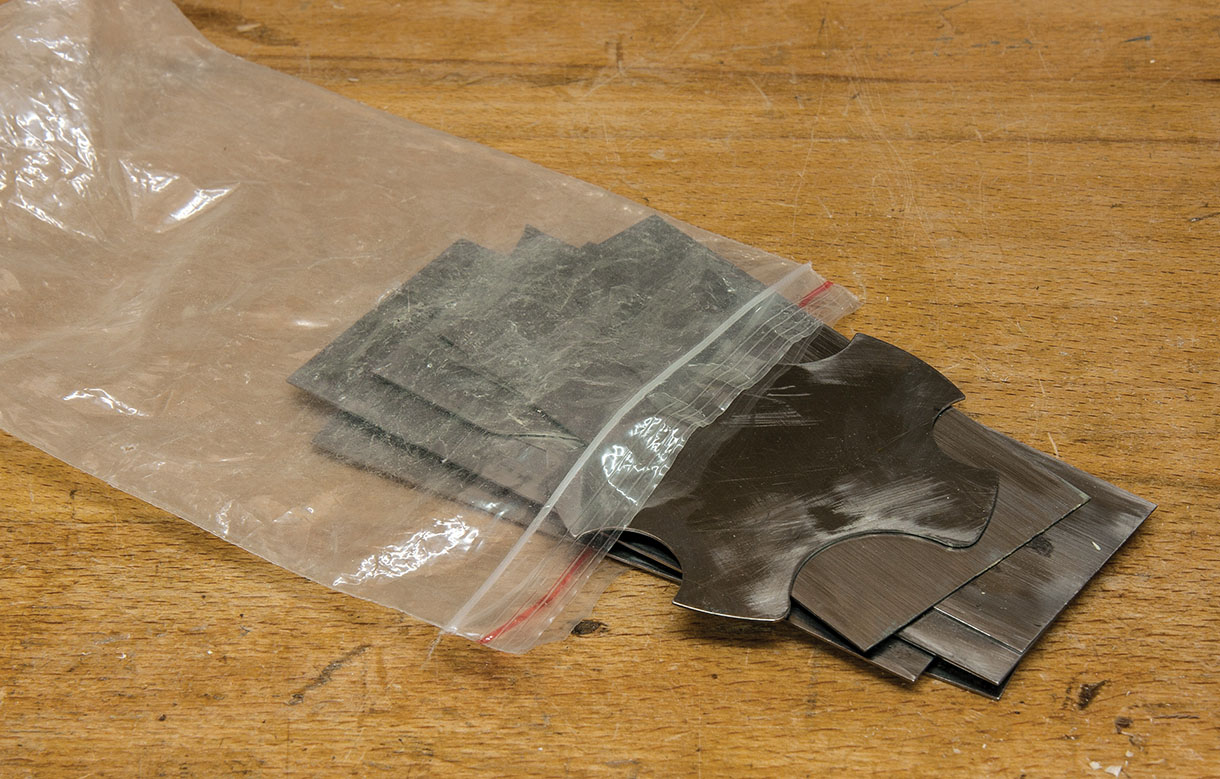
Not a good way to store your scrapers – bumping the hooks together soon blunts them
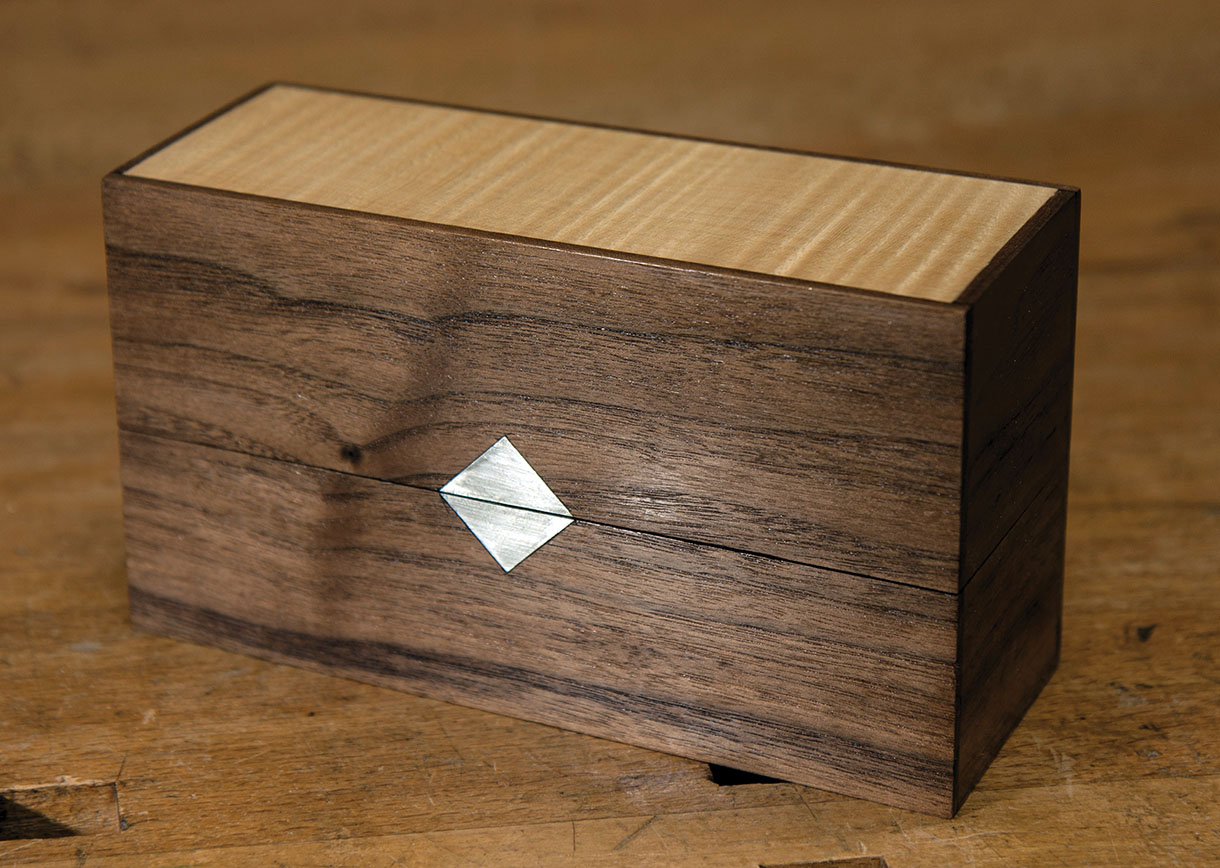
A scraper box doesn’t need to be this posh – birch ply would be fine – but if you’re tempted to beautify, then why not?
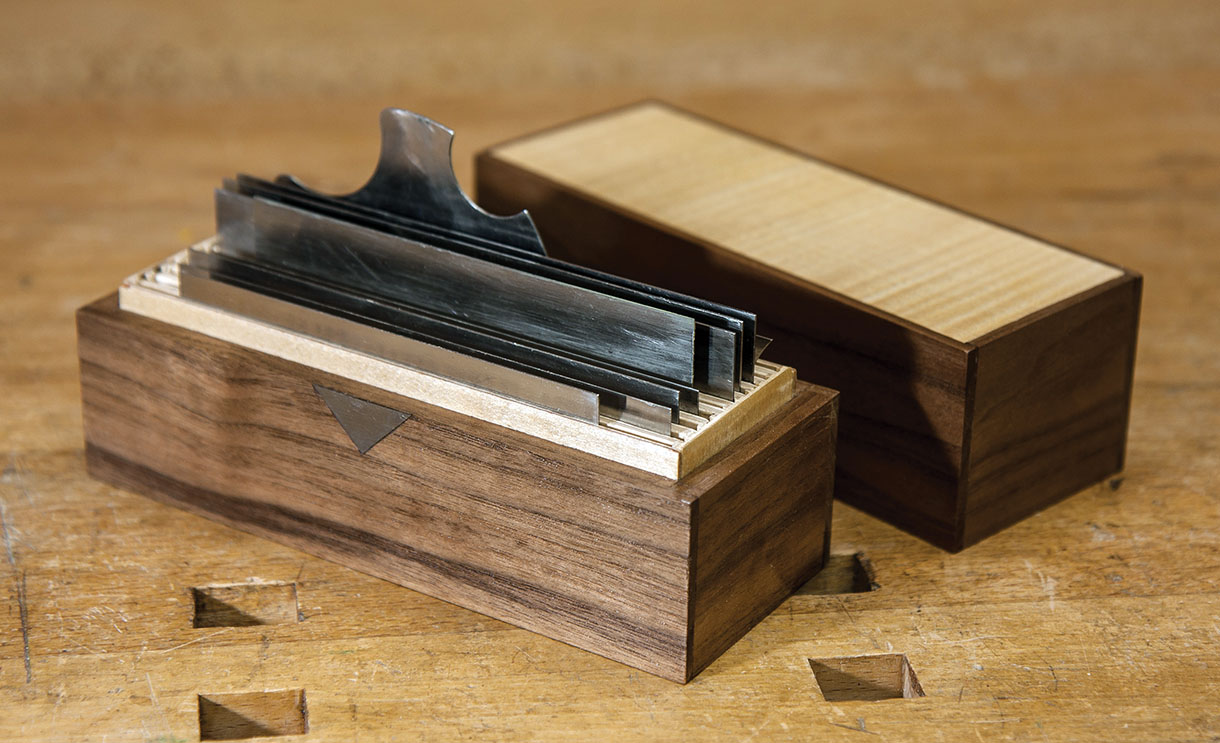
Safe storage for 10 scrapers
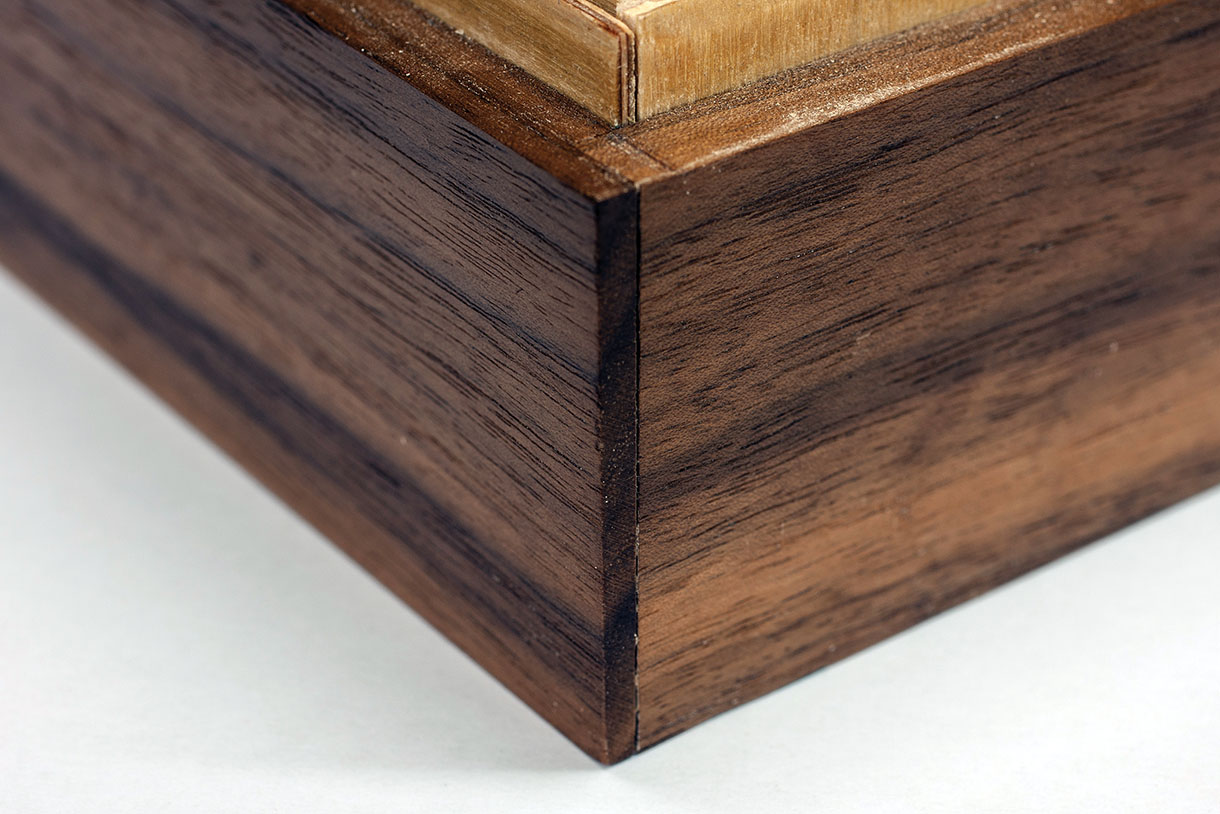
A simple rebated construction with glued-in top and bottom ply panels is perfectly adequate for a small box
Fitting out the box
With the box glued up it was time to decide on the depth of the lid and separate it on the bandsaw – the deciding factor here is the width of the narrowest scraper to be accommodated, which must protrude enough above the spacers to be easily grasped and removed. The ply linings project above the top of the base so as to provide positive location for the lid. The front and back linings are 1.5mm birch ply and are glued in place. The end linings and spacers are 3mm birch ply and simply an unglued interference fit, so it would be an easy matter to re-purpose the box at a later date if required. This is all entirely straightforward apart from the end linings, which are grooved to take the spacers. To maximise the number of scrapers that can be accommodated the space between grooves is only 2mm – groove walls this thin are very easily broken away so this process demands care. The original plan had been to rout the grooves with a 3mm cutter in a plunge base-mounted Dremel, but my somewhat elderly but not ill-used Dremel proved to be incapable of producing a groove less than 4mm wide due to runout in the spindle or chuck, so it was back to hand tools. Fortunately my trusty old Record No 044 plough plane came to the rescue and the necessary grooving was satisfyingly completed by hand. With the 3mm ply spacers cut to size it all fits together very snugly and securely.
I’m pleased to say that the lid fits very nicely either way round but, call me a bit OCD if you like, I do like to see the grain matching when the lid is on, so a small inlay on the joint line of one side to make the correct orientation obvious seemed like a nice idea. Casting around for something to use it occurred to me that prepared scraper steel would be fitting and a nice contrast. After some careful marking out, that plunge base mounted Dremel really did come into its own for cutting the recesses, followed by just a little cleaning up with a chisel. A little superglue and the metal was snugly fitted. Finally, a few coats of shellac saw the whole ensemble finished.
Sharp scrapers safely housed in a posh box; what more could you ask for? As a fellow woodworker kindly observed, “Totally unrequired fabness, but why shouldn’t a functional object for the workshop look good?” How could I disagree; what’s more, I had fun making it and I find I reach for a scraper more often now that a nice sharp one is always so conveniently to hand.
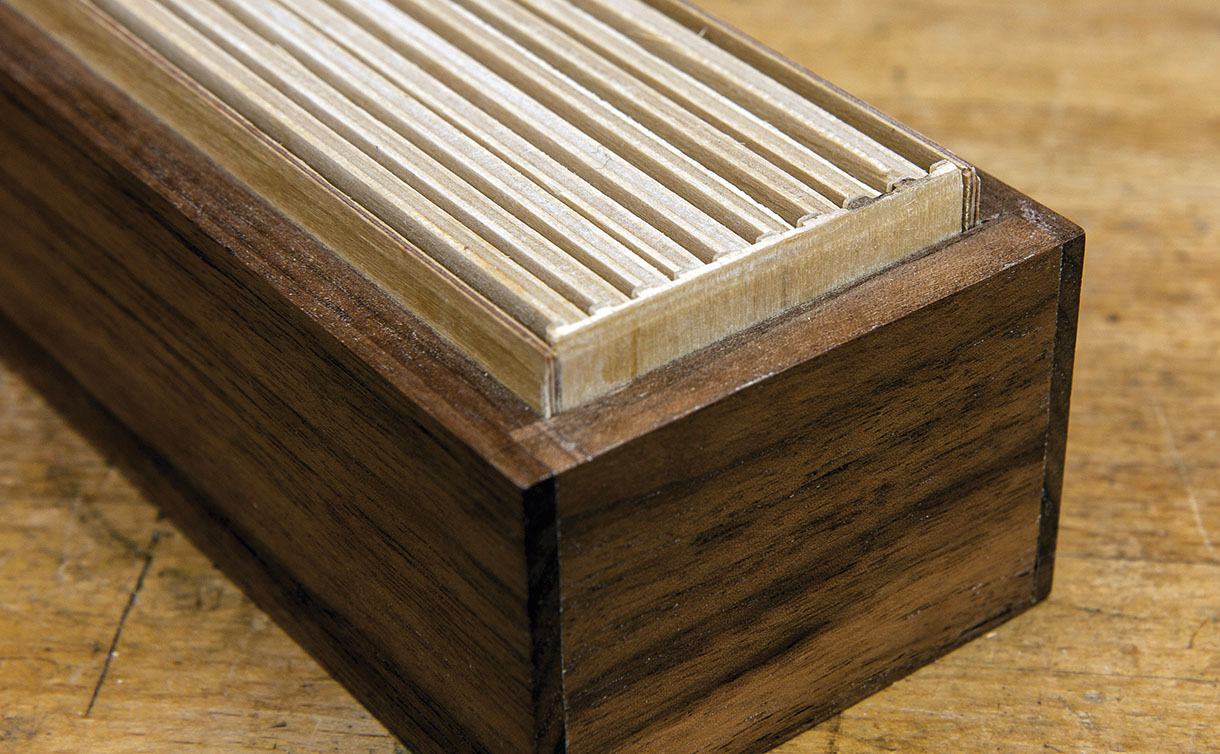
Thin ply liners project to provide location for the lid. Spacers are only 2mm apart to maximise capacity
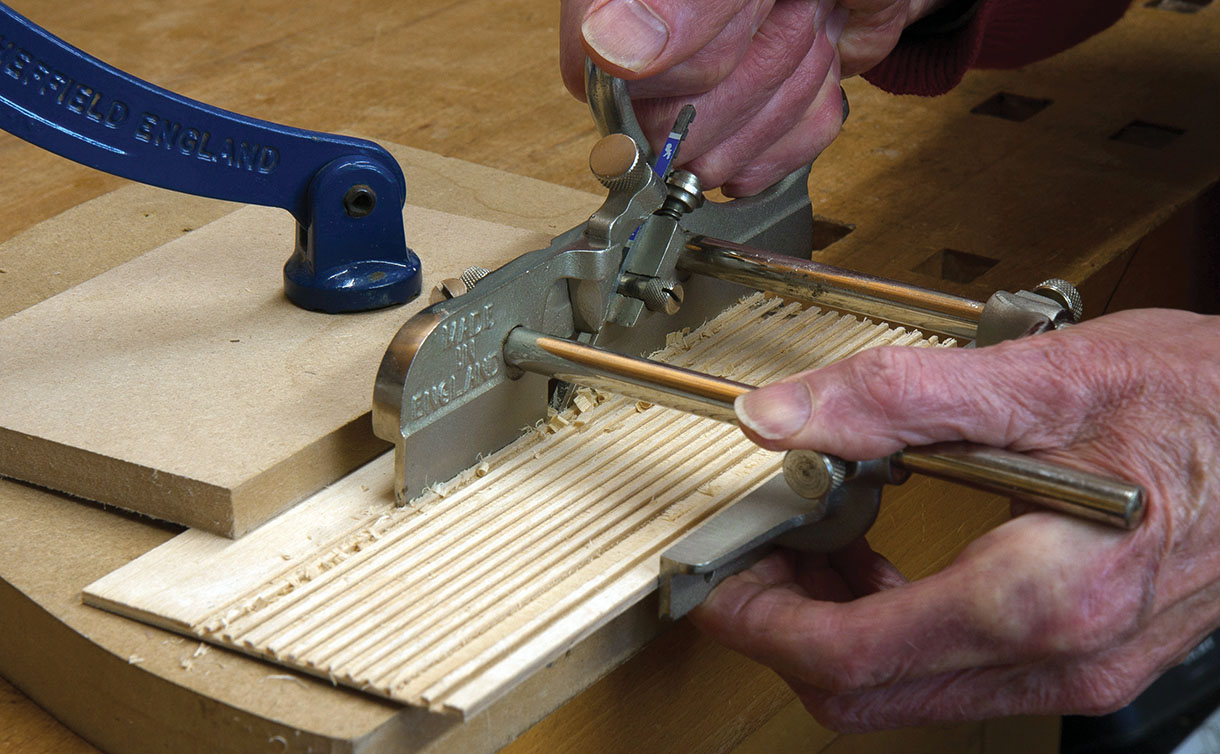
A Record 044 plough plane proved ideal for cutting the closely grooved end linings – in a quietly satisfying way too

Inlaid scraper steel helps orientation of the lid and is a nice – if not strictly necessary – finishing touch


