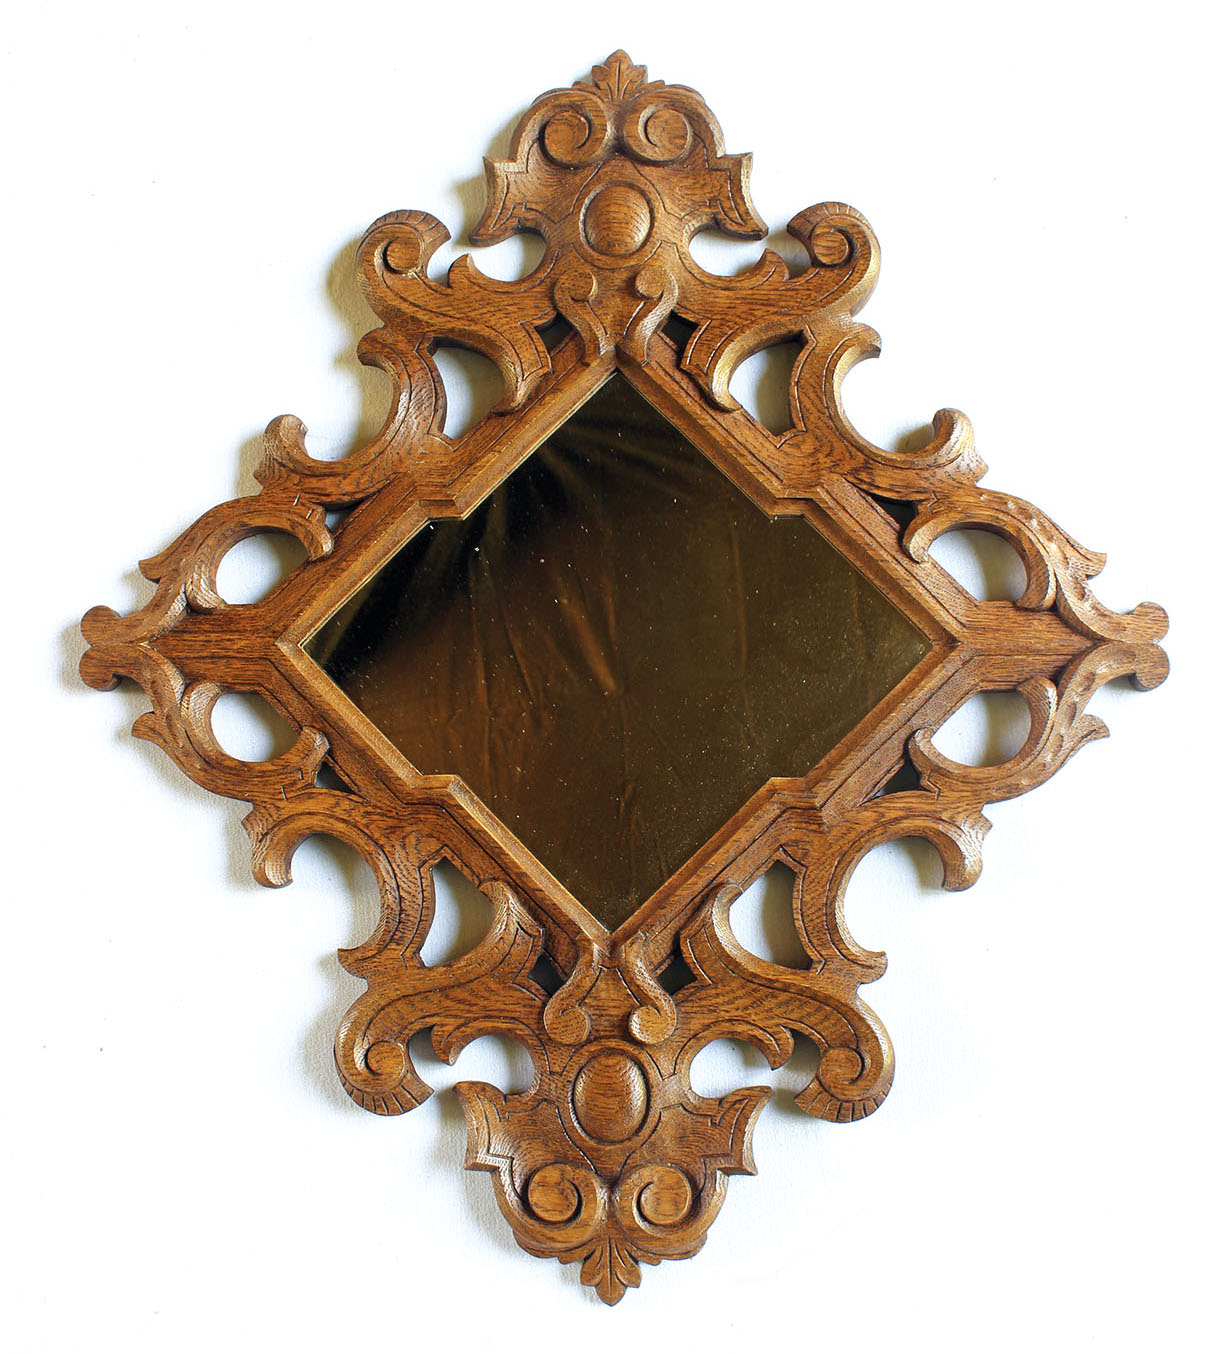
Neo-Renaissance Mirror Frame:
Exploring the styles of ornament.
Exploring the styles of ornament
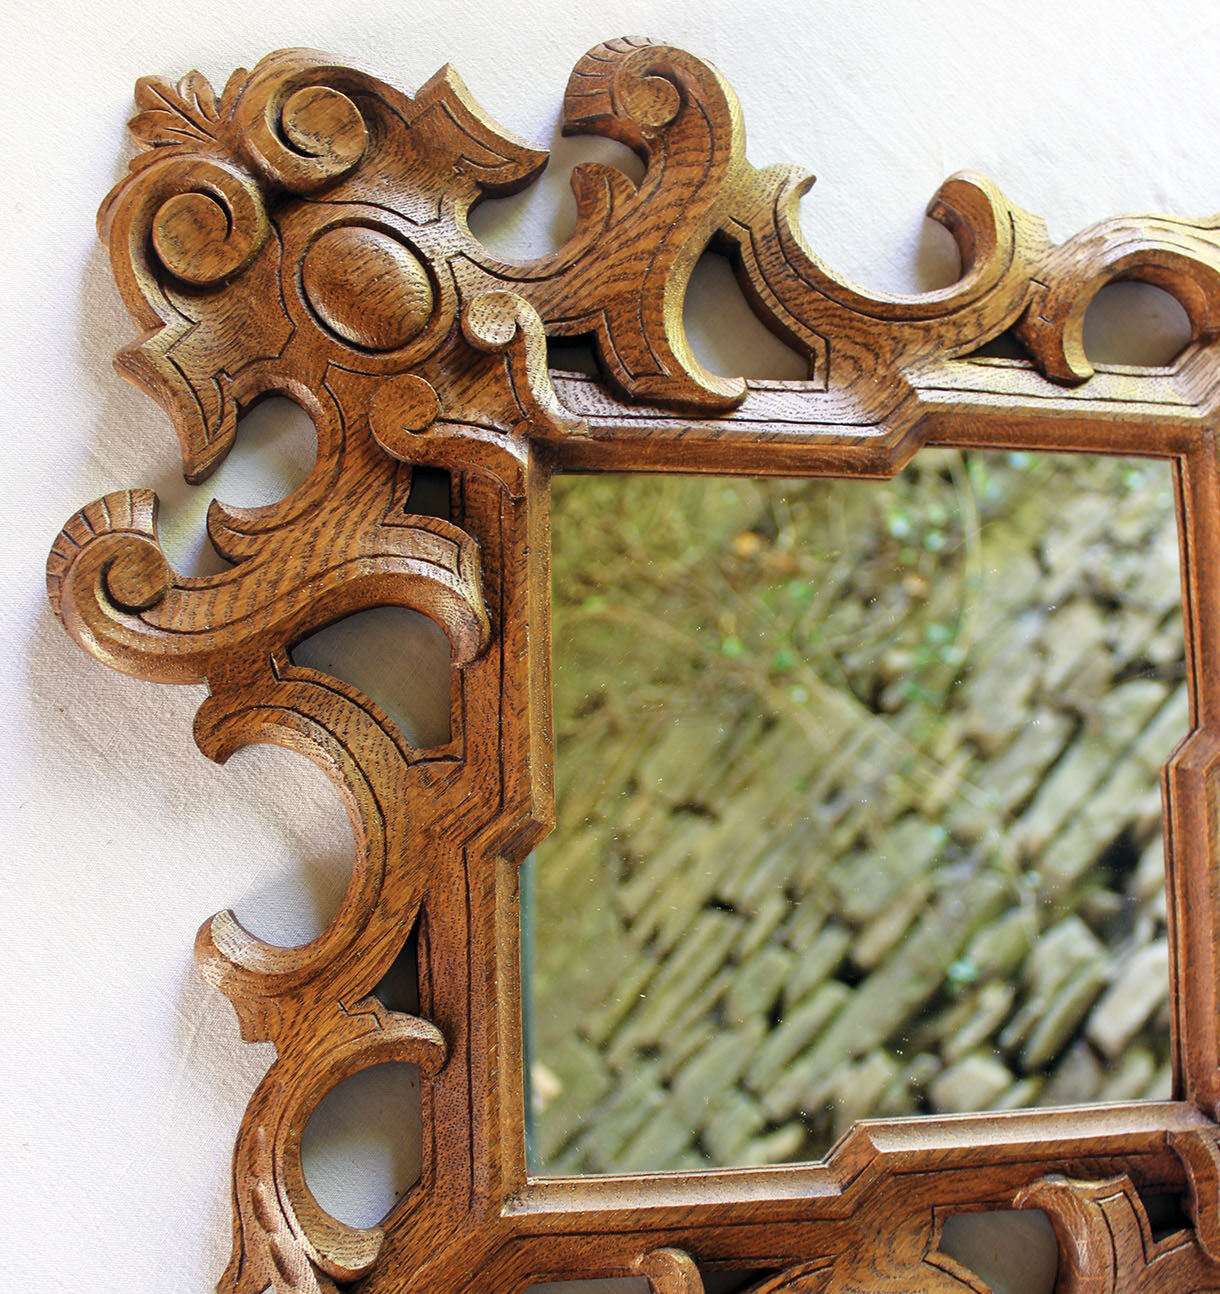
If there were some workshops producing high quality carving and furniture in the 19th century, ornaments also met the changes induced by the rise of the Industrial era. This mirror frame is a good example of some carvings of this period. By the second half of the century, oak was often used in Neo-Classicism, and it was fashionable to imitate old styles such as Renaissance or Gothic.
Probably designed to be manufactured in series, we can see there a concern for economy and efficiency. The most obvious is there is almost no scrap : the top of the frame fits perfectly in the central cut-out. The rather simple shapes and light details are abundantly outlined with the V-tool, and accented by this dramatic pattern of cartouche and scrolls. Except at the top and bottom, the leaves are only suggested by the outline or a simple cut.
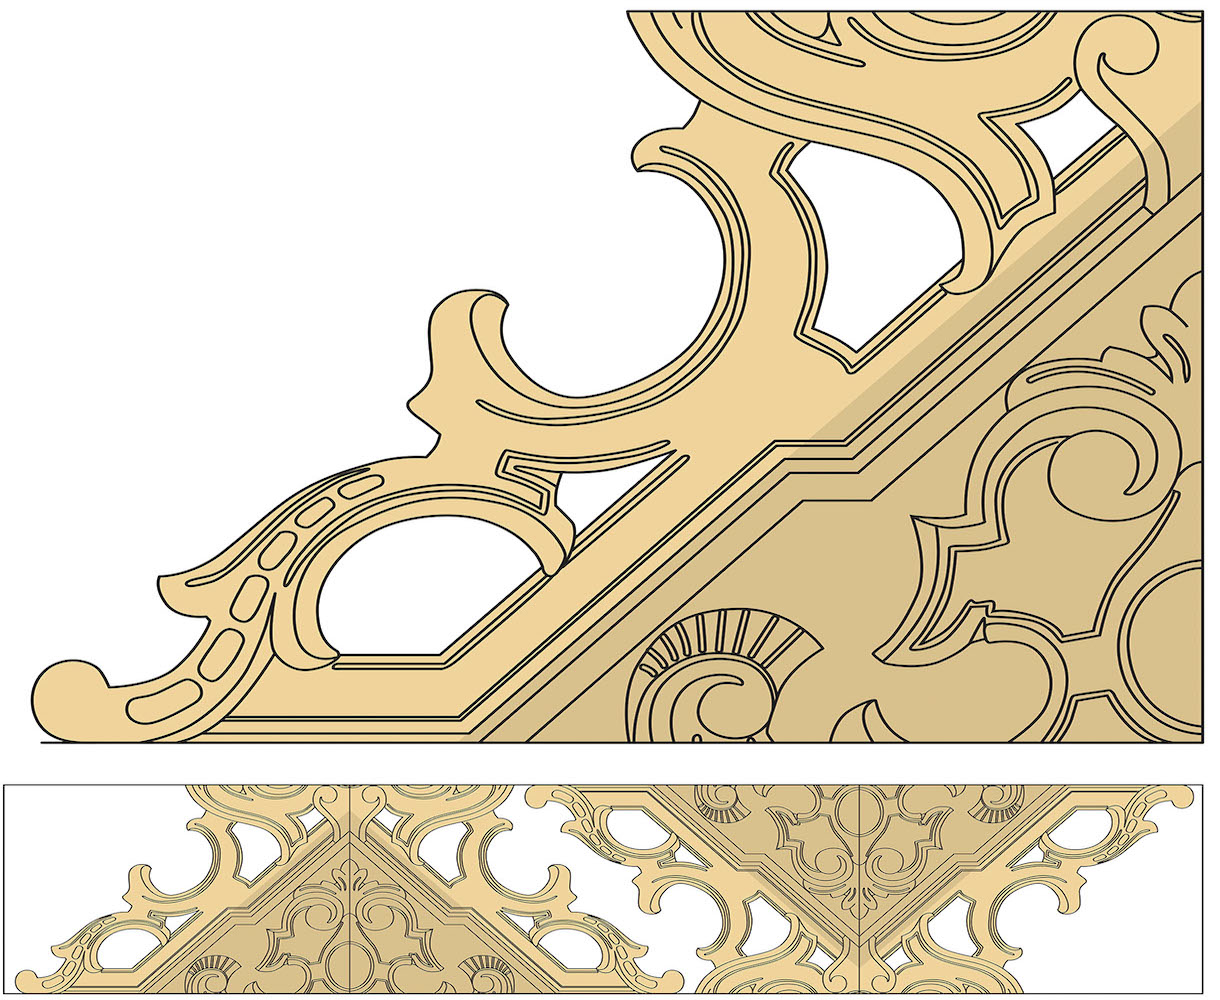
The pattern only shows a quarter of the frame. It has to be reversed and reported twice to get the full frame. The darker area represents the size of the mirror, so you can adapt the size of the design to your convenience.
Thinking ahead
It’s easier to carve both halves separately and glue them up afterwards. Straight cuts across the waste will help to clamp the frame firmly. The connection will only be carved when joining is completed.
Things you will need
Tools:
• No.3, 6mm & 16mm
• No.5, 6mm & 16mm
• No.6, 12mm &16mm
• No.7, 20mm
• No.8, 8mm & 10mm
• No.11, 2mm & 5mm
• No.39, 10mm V_tool
Materials:
• Oak (Quercus robur): 810 x 165 x 20mm
• Scrollsaw
• Router
• 10mm straight router bit
• 6mm radius cove router bit
Drawings and how to resize them
To enlarge or reduce the size of drawings right click on the image to download it and then go HERE to watch a video on how to use paper with a grid to do exactly that.
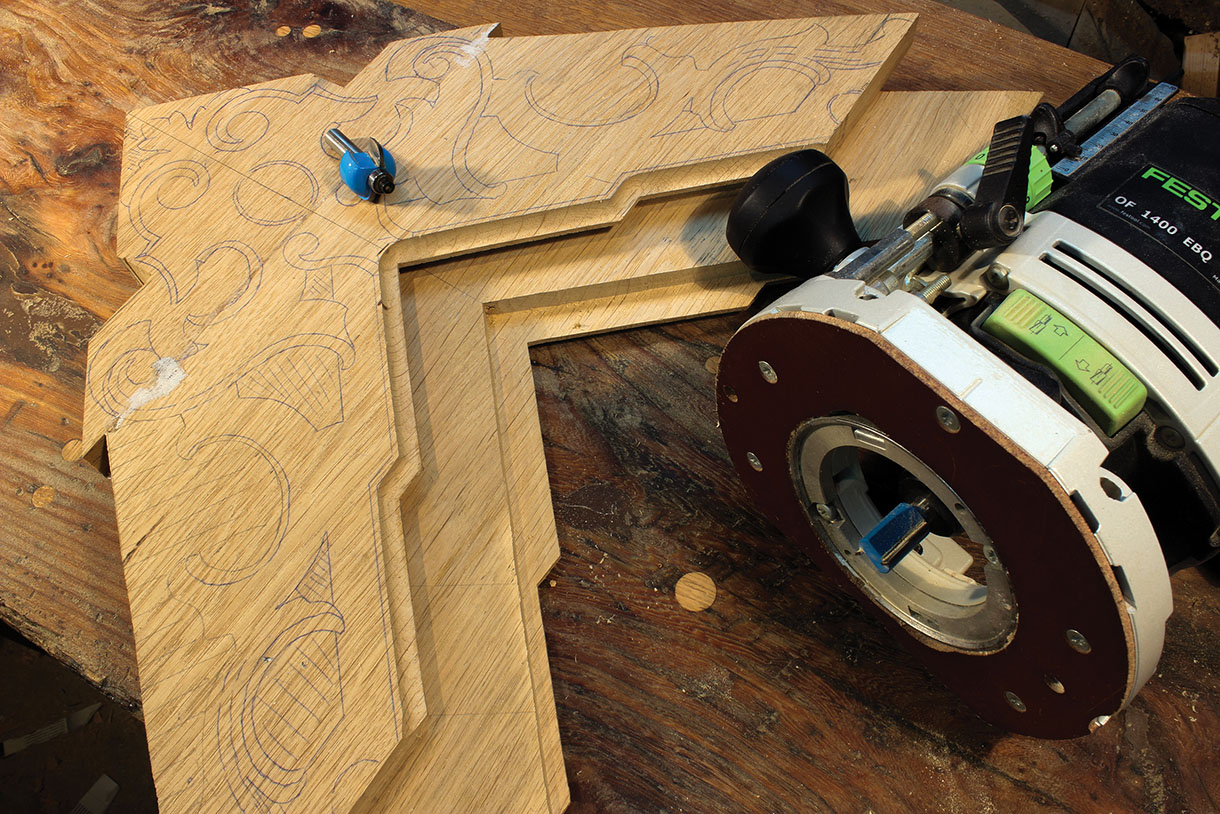
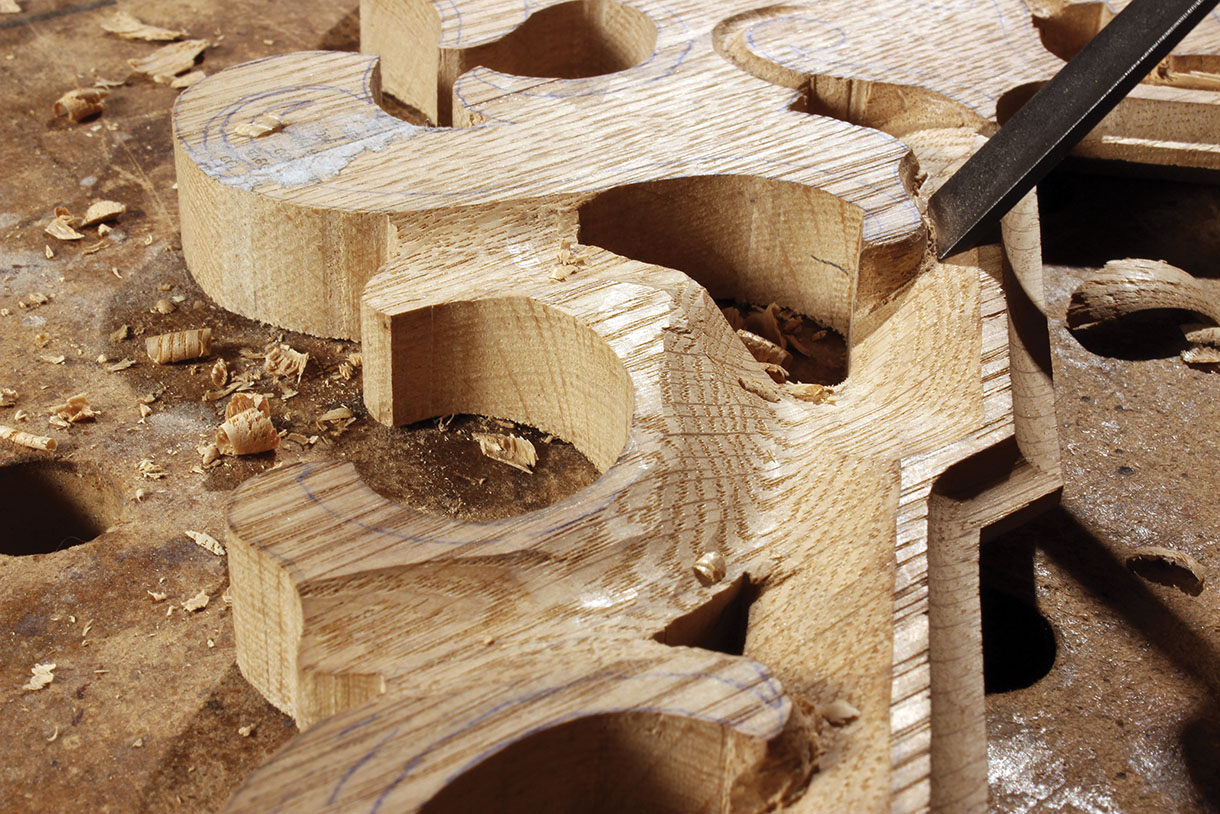
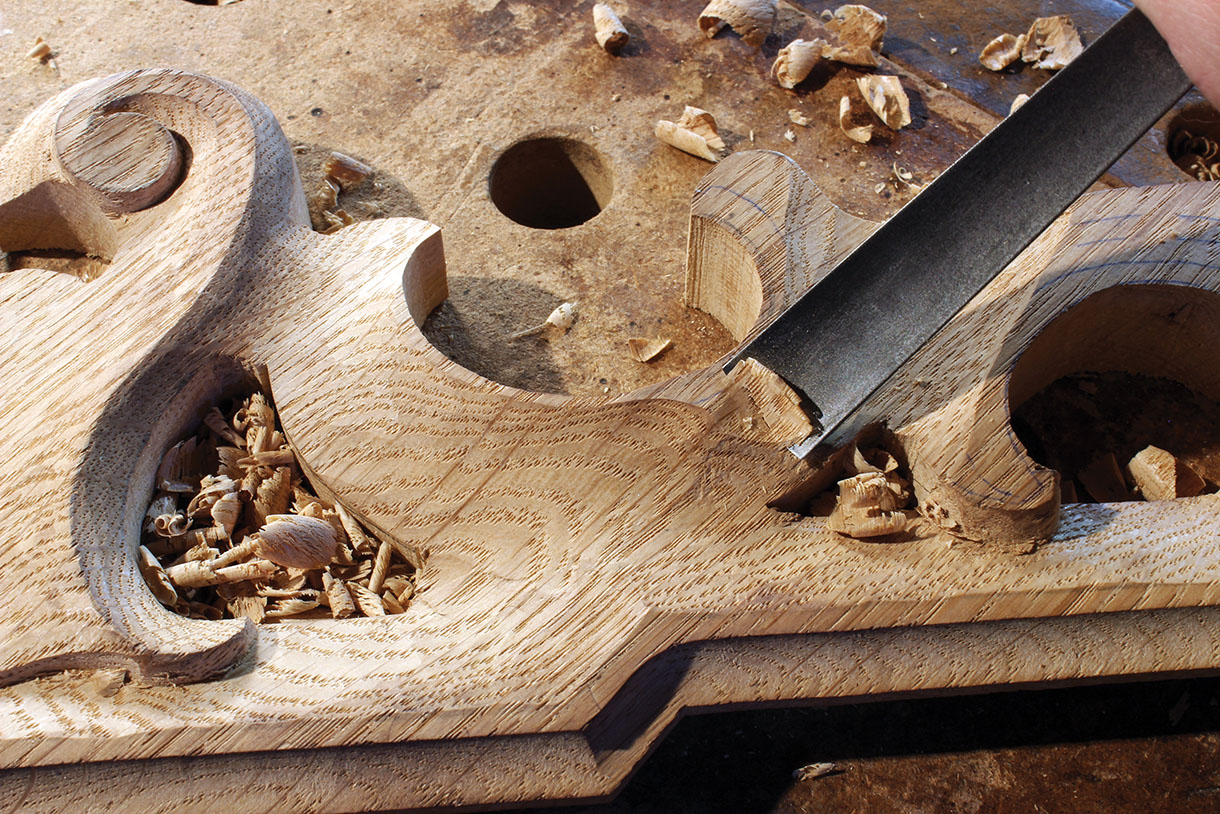
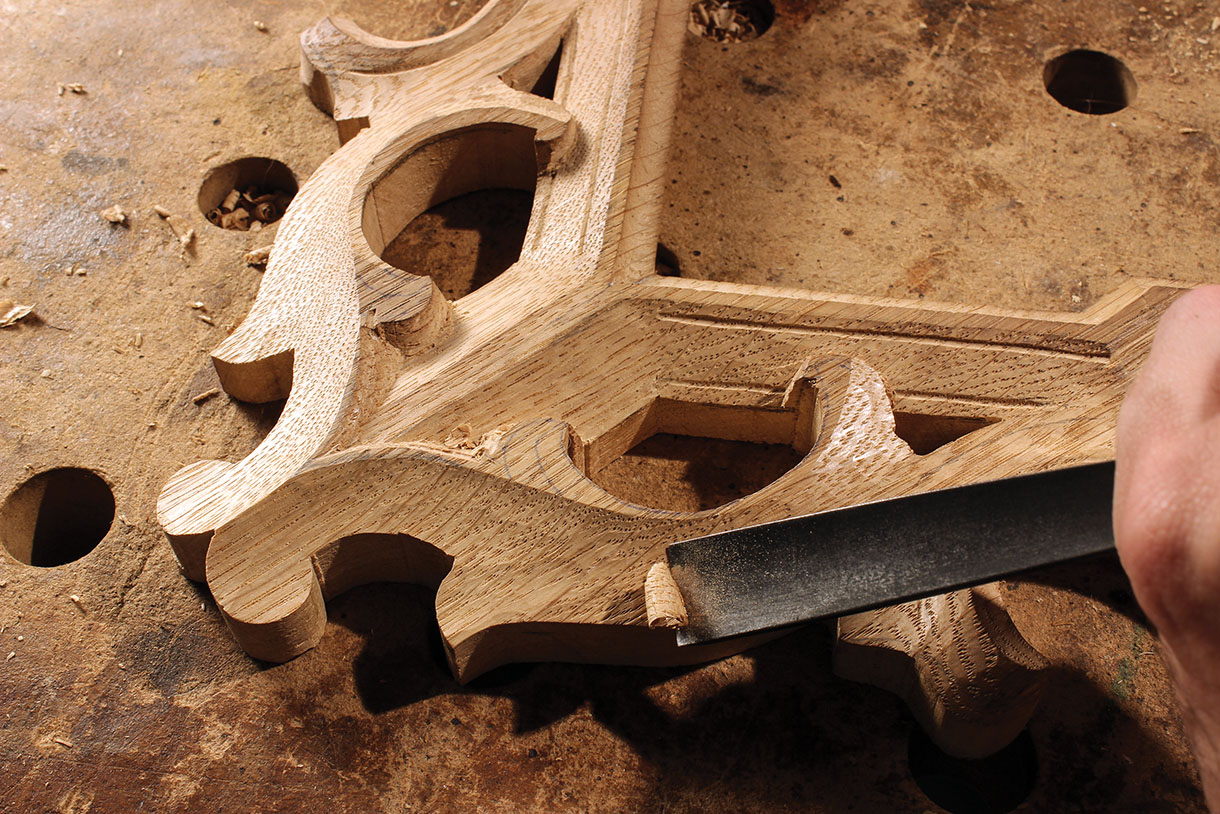
1. Repeat the design on the wood. Use the scrollsaw to separate the two halves and the central triangle. Glue it up on the top. Clean the inner moulding edges and use the router to cut a cove on the front side, and a 1cm deep rabbet cut on the underside where the mirror will fit. On the front side, remove 2mm on the moulding, above the cove, saving the top corner and the curls of the scrolls. Cut the design with the scrollsaw
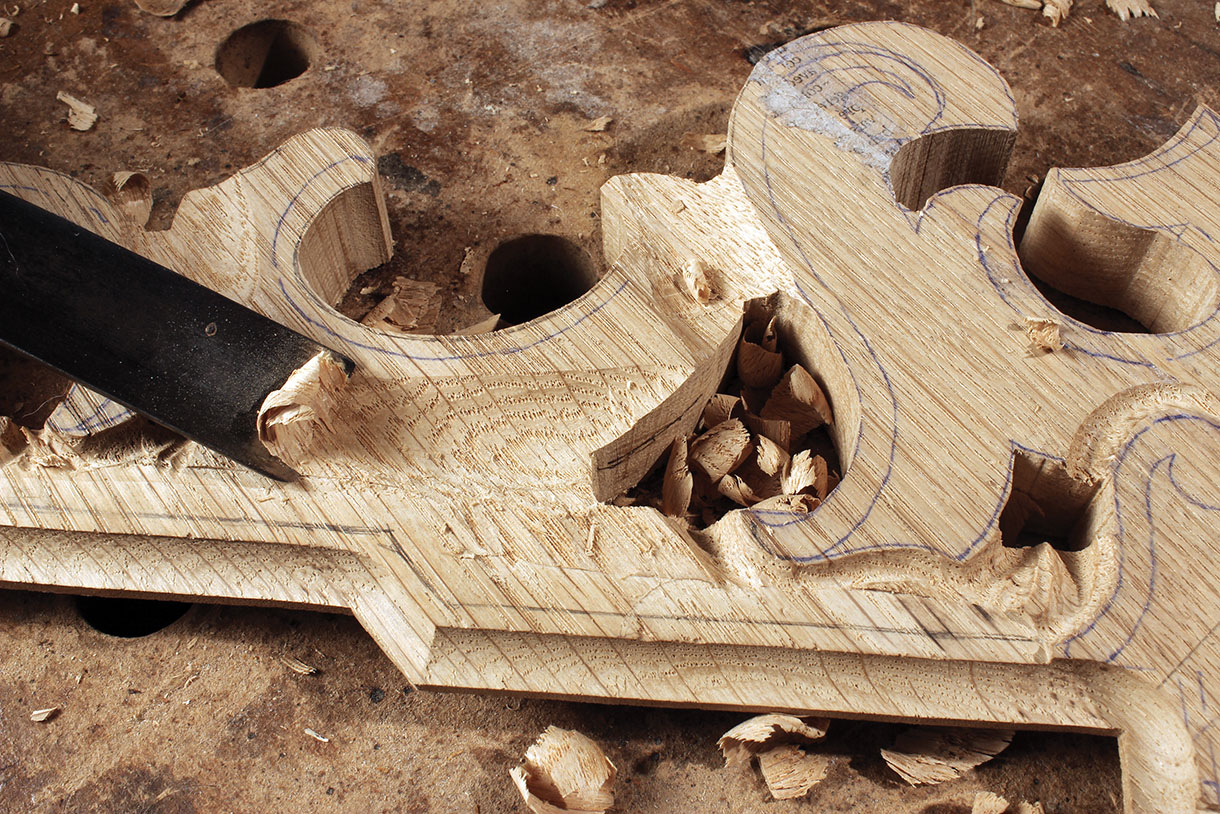
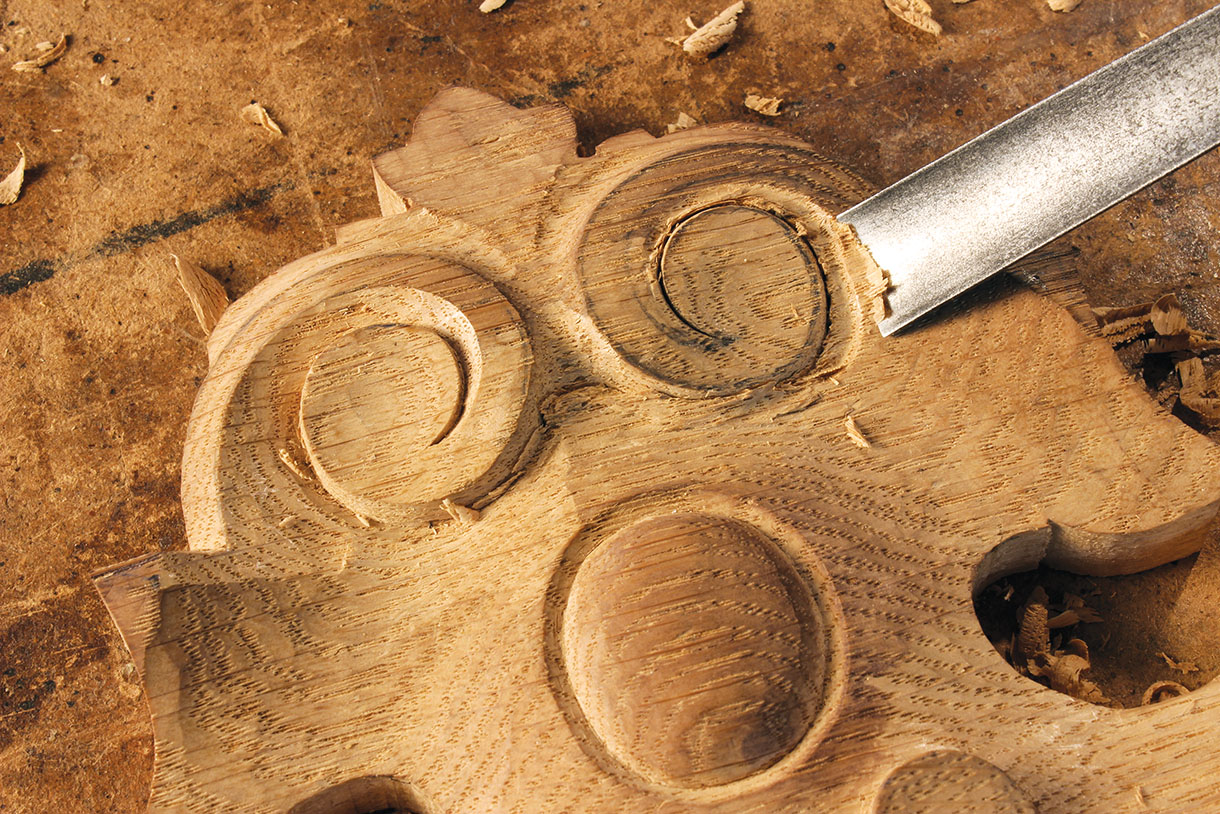
2. Separate the scrolls from the frame using the No.11, 5mm gouge. Then carve a groove with the No.7, 16mm gouge to separate the C-scroll from the other scrolls and from the moulding
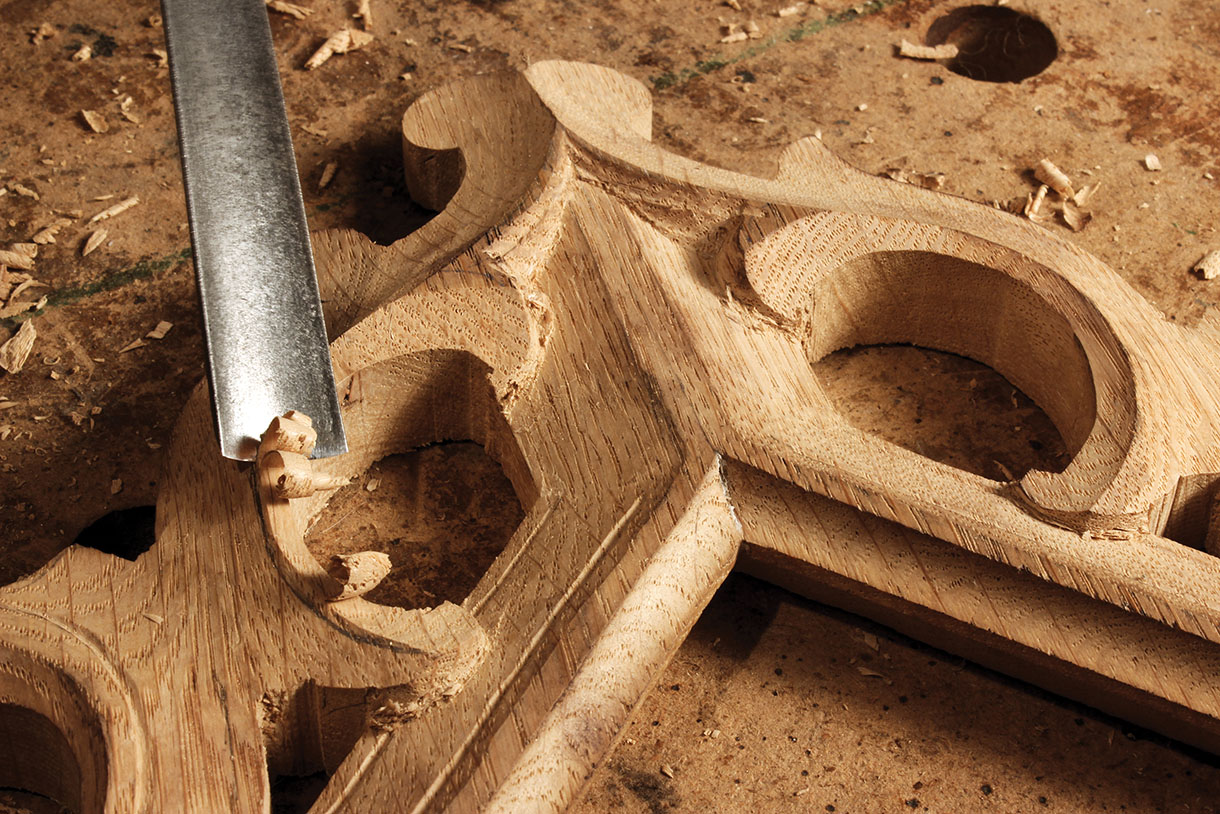
3. Redraw the moulding edge a couple of mm from the edge of the cove and carve 1cm deep the angled recess of the moulding with the No.3, 16mm gouge. Use the No.5, 16mm to carve a smooth transition where the moulding makes a step and meets the C-scroll
4. On the S-scroll above, use the No.6, 16mm gouge to carve the chamfer on the outer edge, following the drawn line. Switch to flatter gouges when you get to the convex part, and connect it smoothly with the C-scroll. Carve a groove with the No.6, 12mm on the crest on the top of the volute
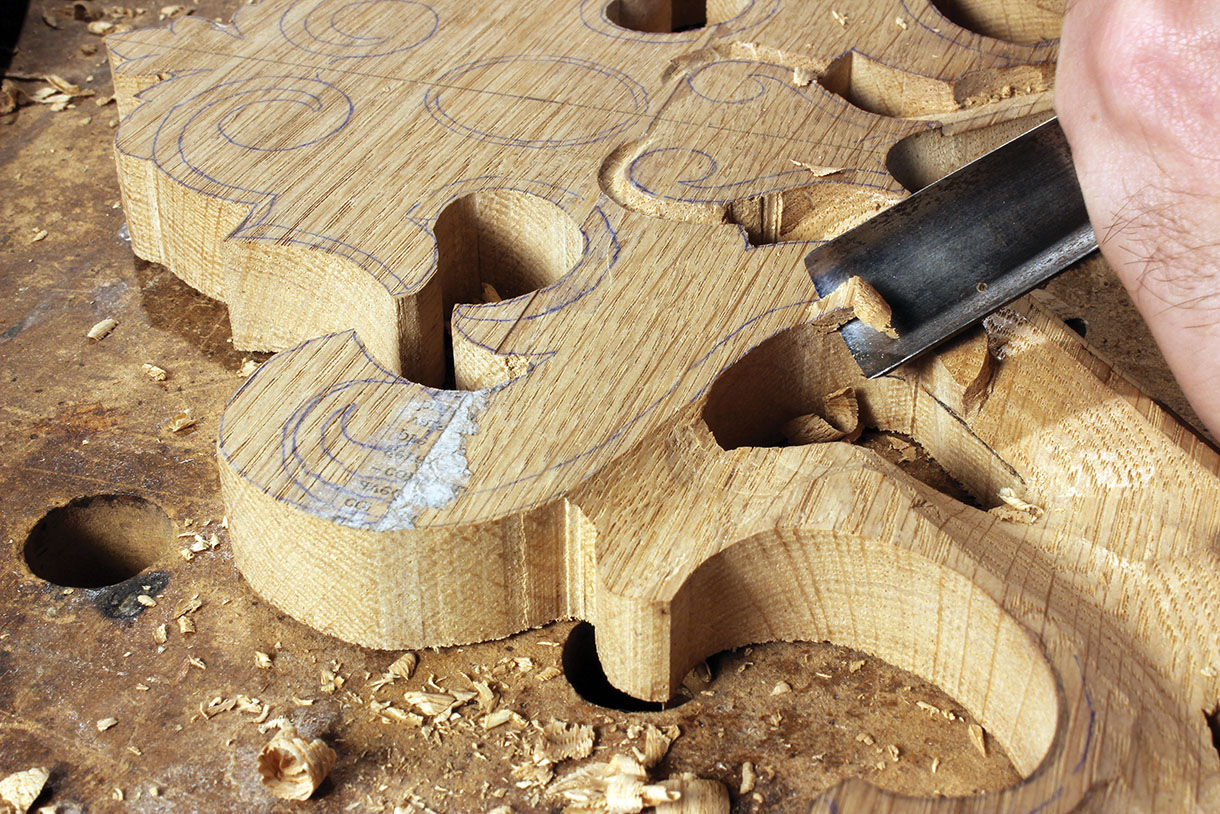
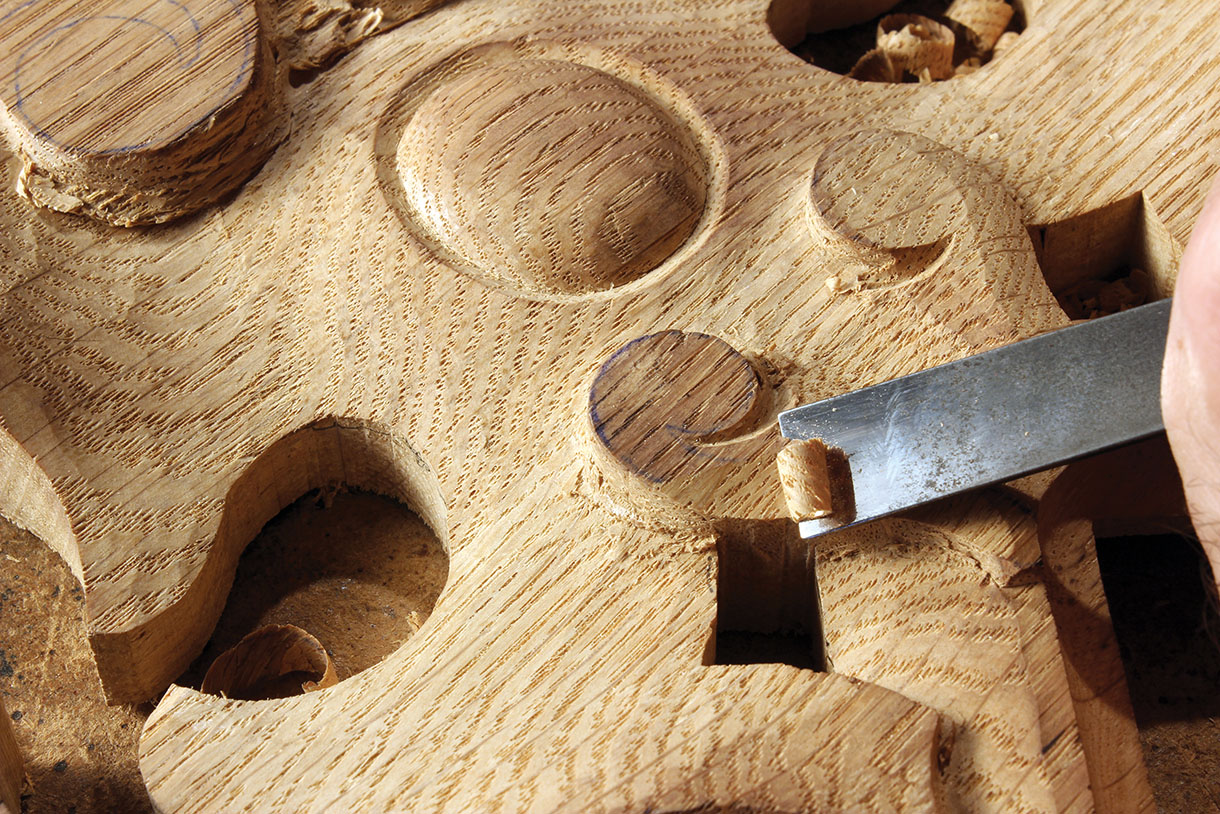
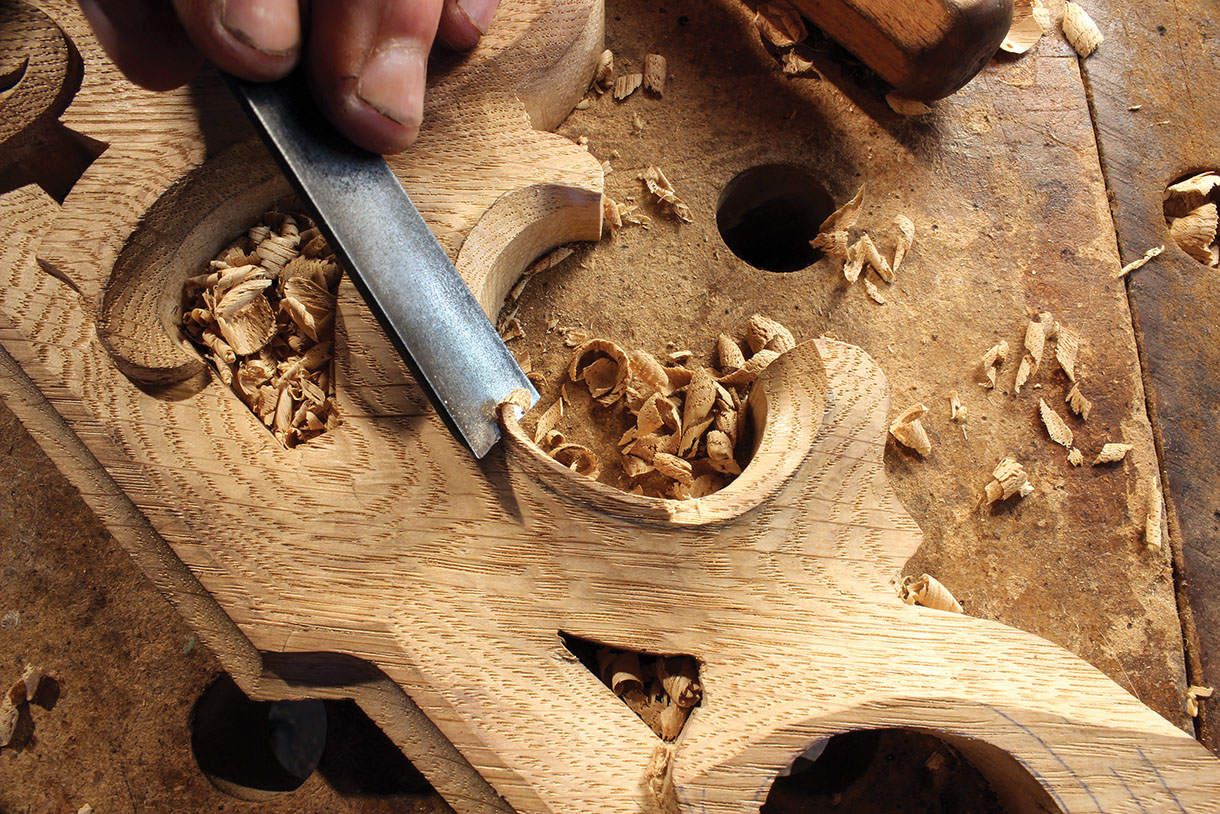
5. Separate the volutes from the background using the No.11, 5mm gouge, and draw the oval with the V-tool, about 5mm deep. On the S-scrolls, run the No.6, 16mm gouge all along the edge of the chamfer. Use the No.5, 16mm gouge to lower the area and get an even surface. The edge should be reduced down to 1cm thick. On the cartouche, carve a groove with the No.7, 20mm gouge towards the volute, and shape both sides of the groove with the No.6, 16mm gouge. Work around the oval and the spared top corner of the cartouche to get a nice hollow
6. Use the No.5, 16mm and No. 6, 16mm backward to carefully round the oval. Set it in with the gouges, matching best the curve and clean the chamfer all around with the same tools
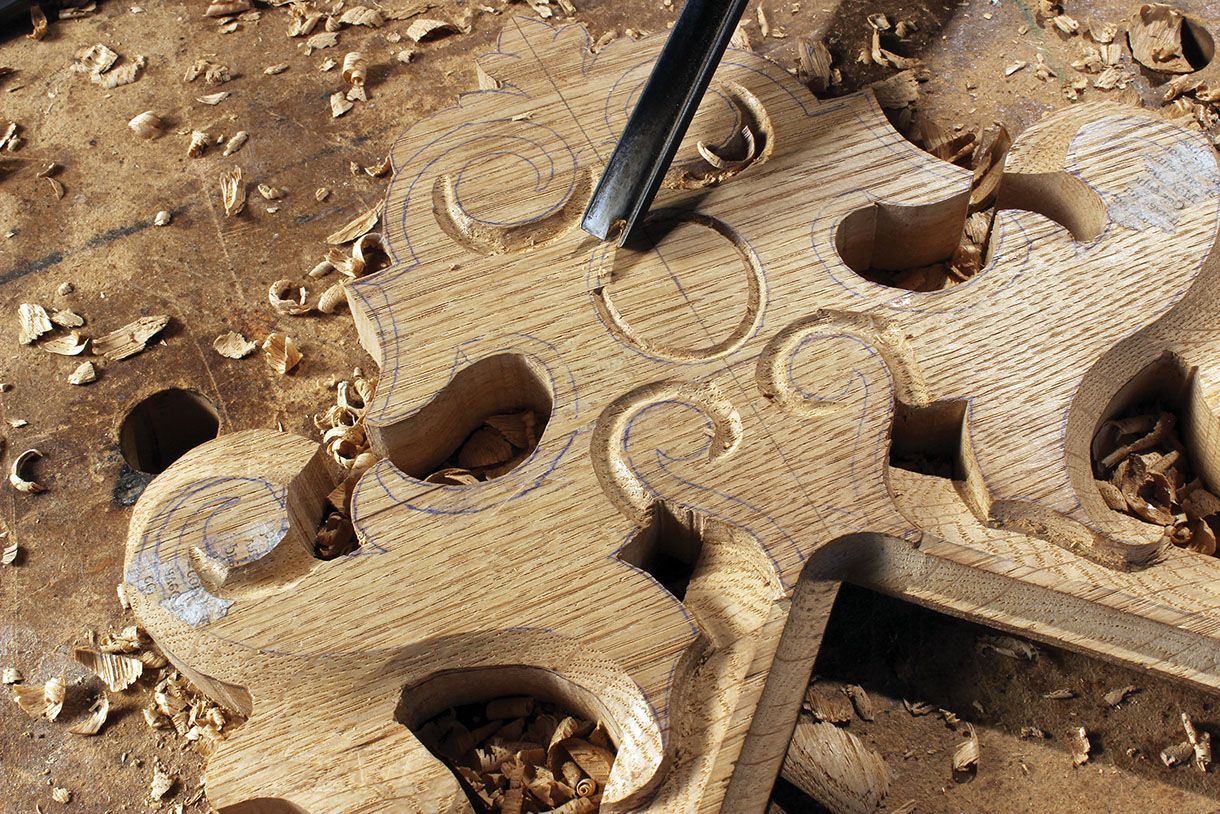
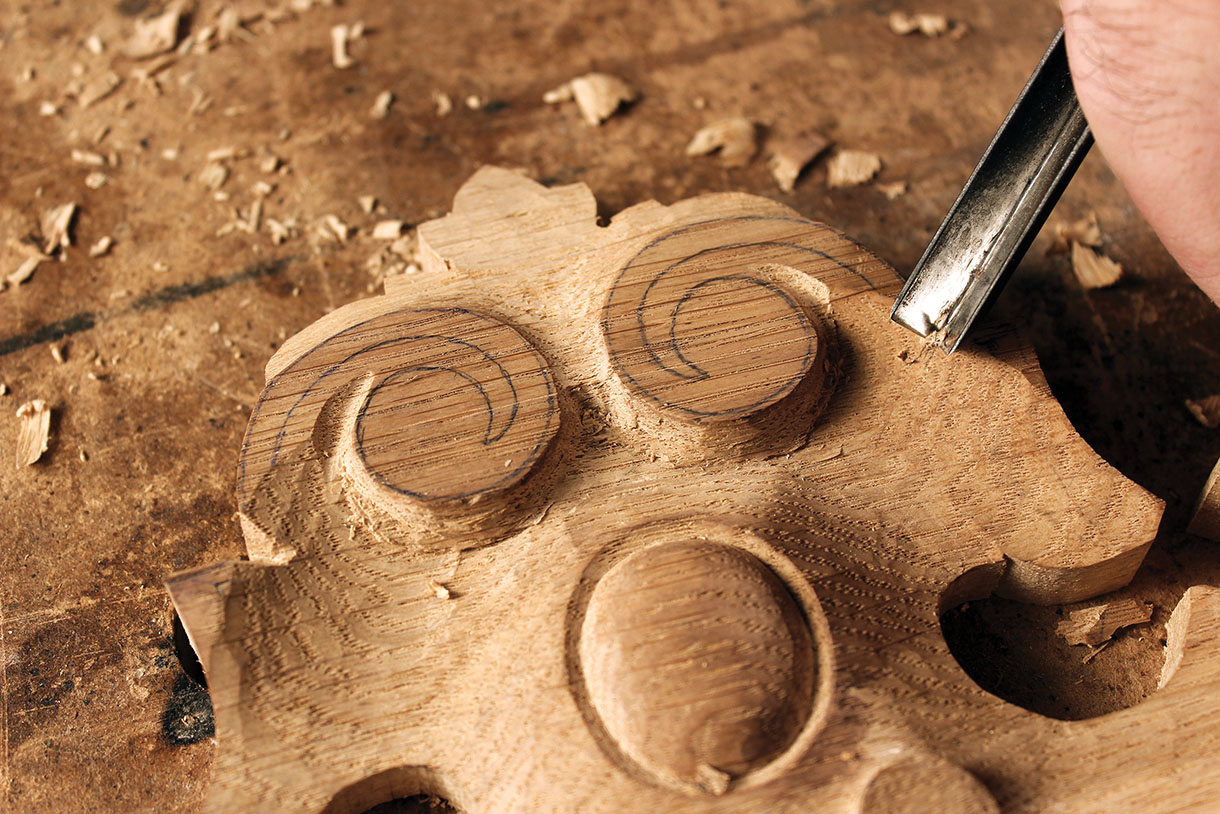
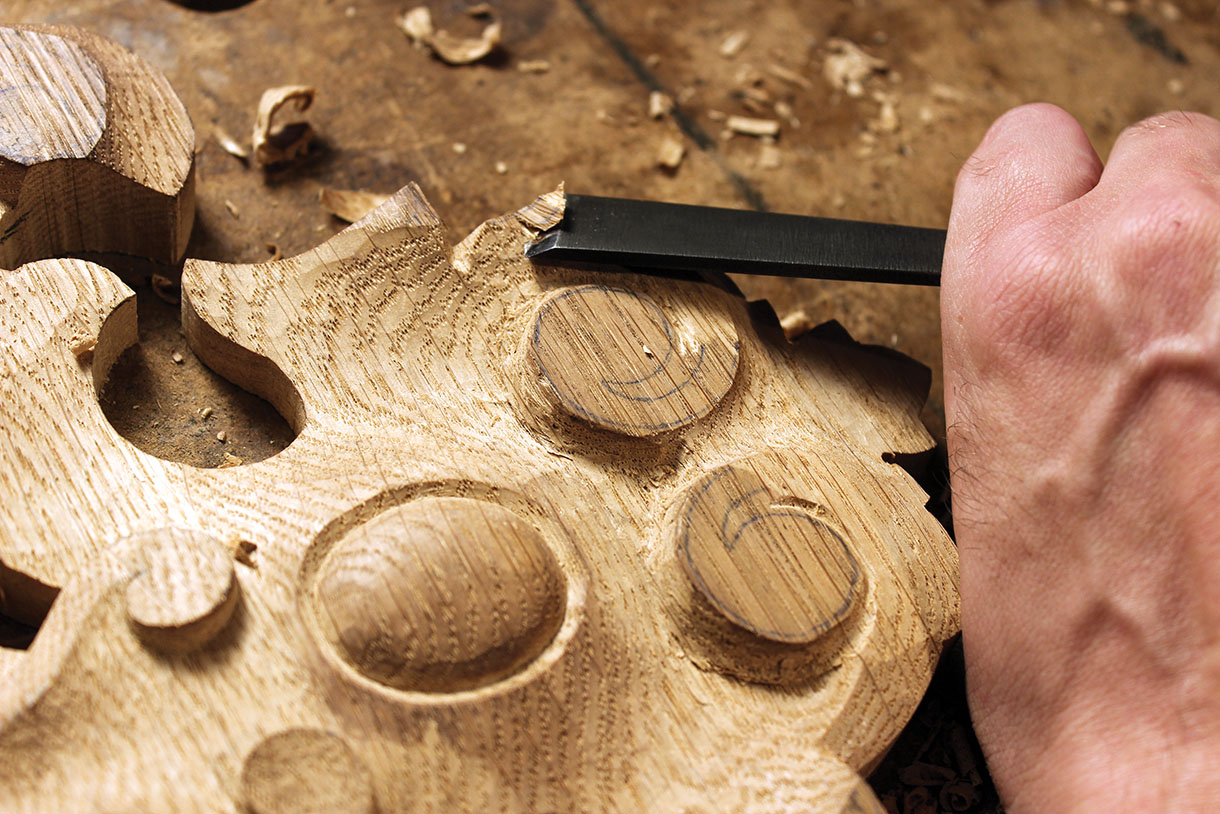
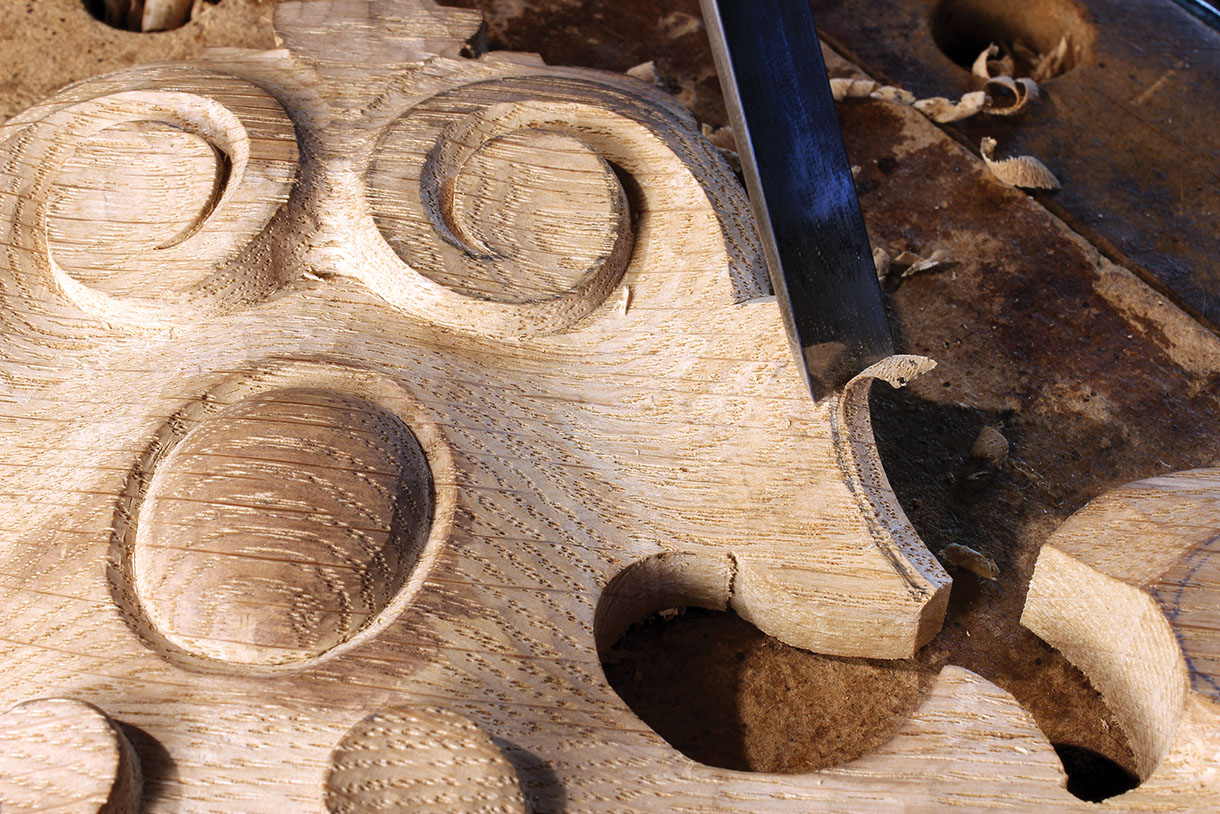
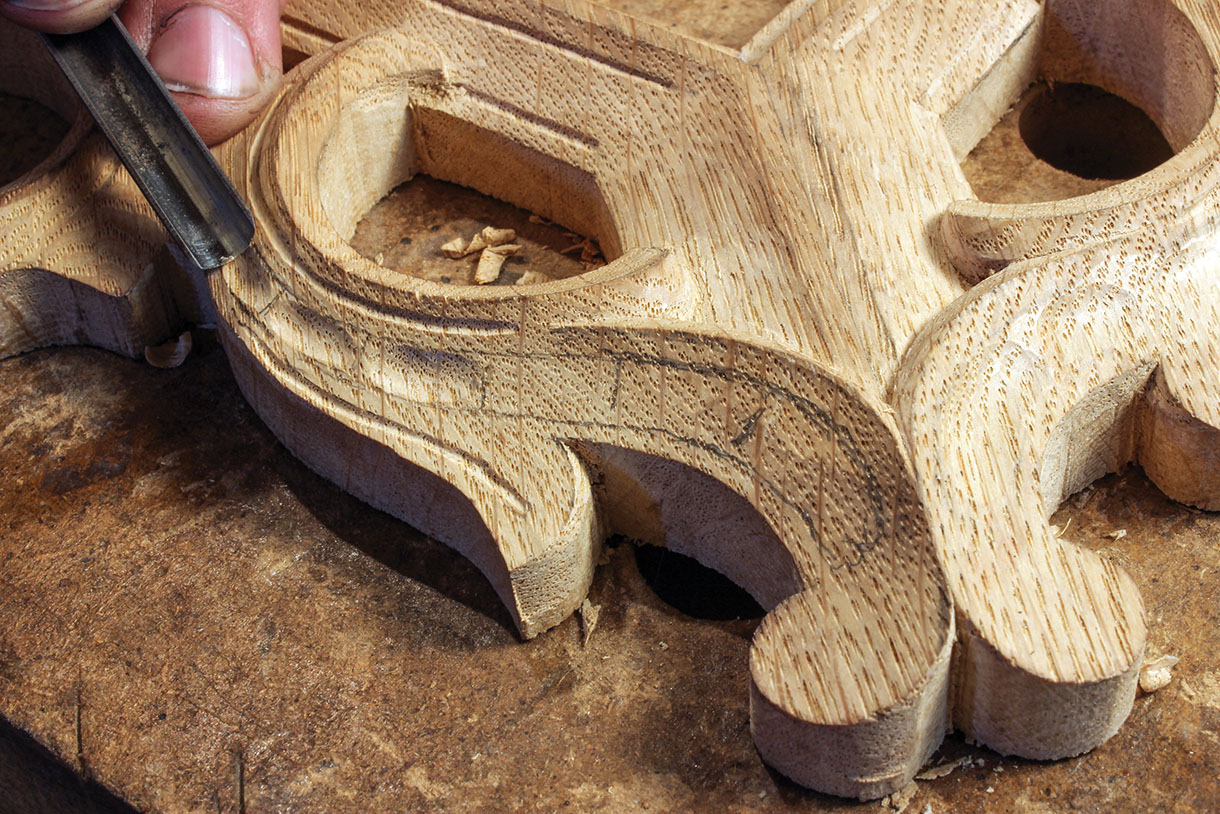
7. Carve a groove at the inner side of the small scrolls at the corner with the No.6, 12mm gouge and smooth the background in between with a No.4, 8mm gouge. Give a slight angle to the scrolls with the No.5, 16mm. Only the top and bottom ends are left untouched. Once happy with the shape, redraw the scrolls, hollow the eye of the volute using the No.6, 16mm gouge and set in the outside edge to its definitive shape. The inside edge has not to be set in
8. Move to the top of the cartouche. Use the No.8, 10mm to carve a groove above the volutes, combining in the middle. Remove some wood on the top leaf with a flat gouge to get an even surface, lowering the tip. Then make a stop cut across the angle where the volutes melt in the cartouche edges using the V-tool
9. Use the No.3, 16mm backwards to round the top, twisting progressively towards the stop cut at the angle
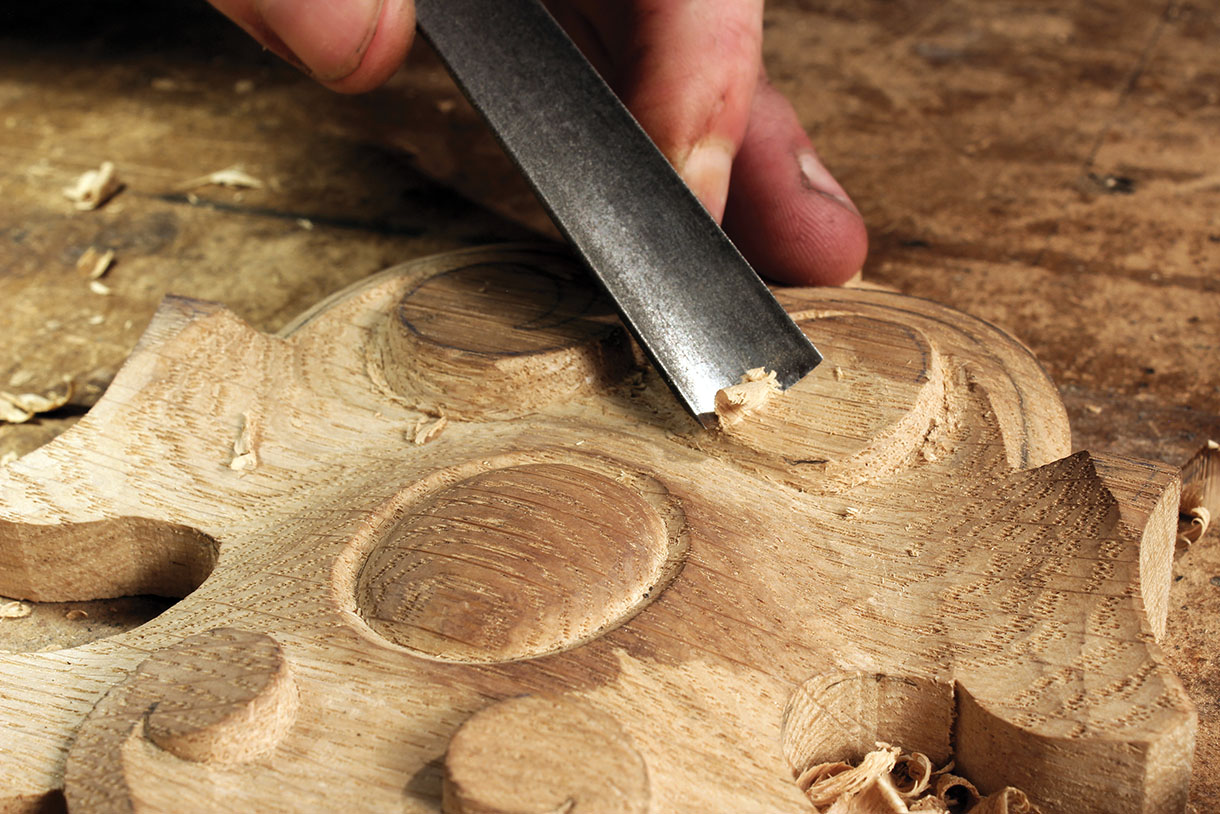
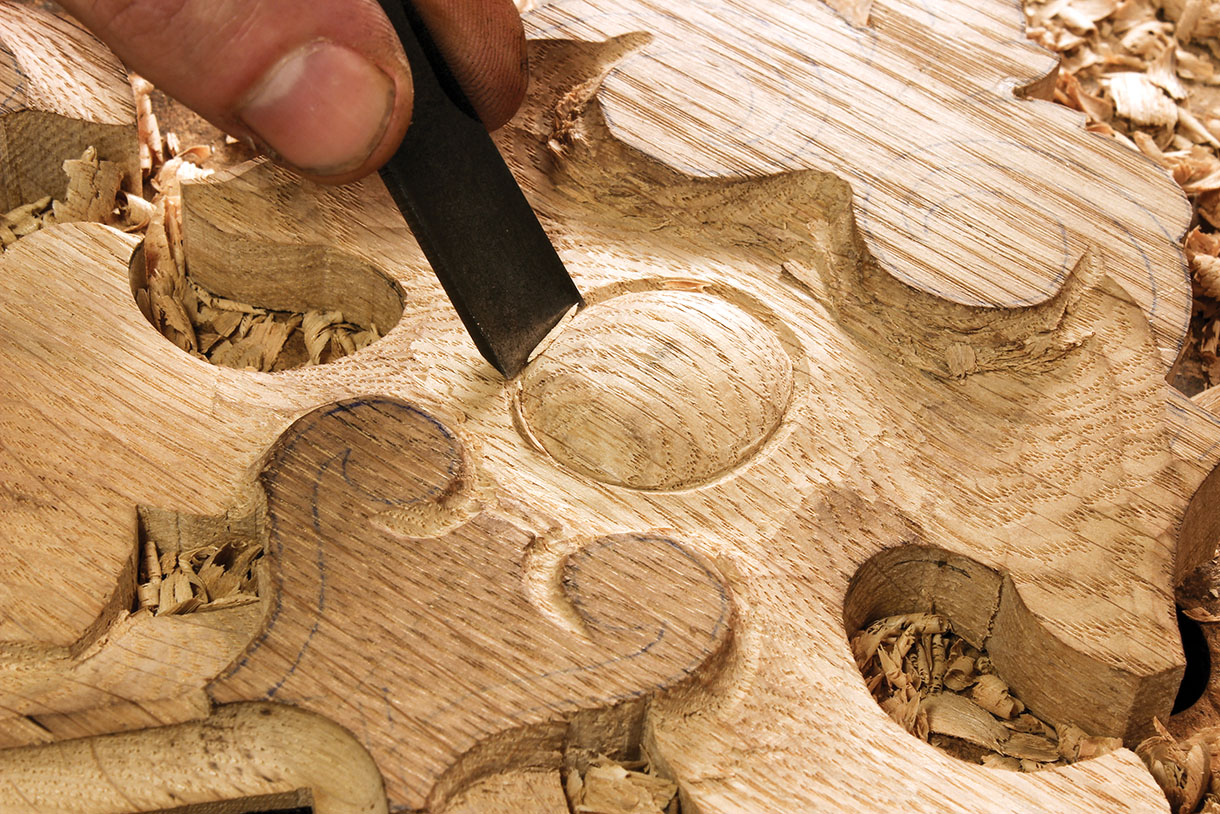
10. Hollow deeply the eye of the volute with the No.6, 16mm gouge. The highest spots should be at the top of the circle and where the volutes meet
Top tip: Hollowing or lowering the volutes tends to distort their shape. Carve them before making any slab cut to get the best result.
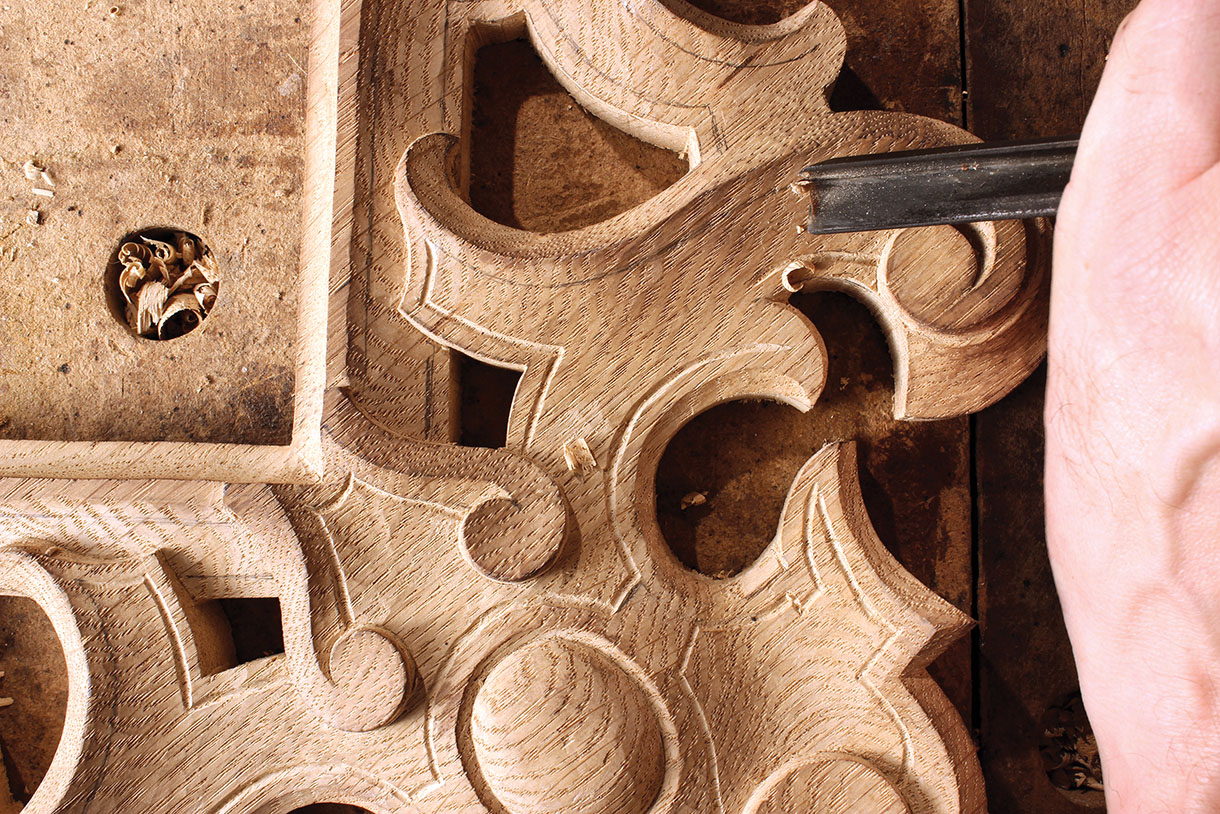
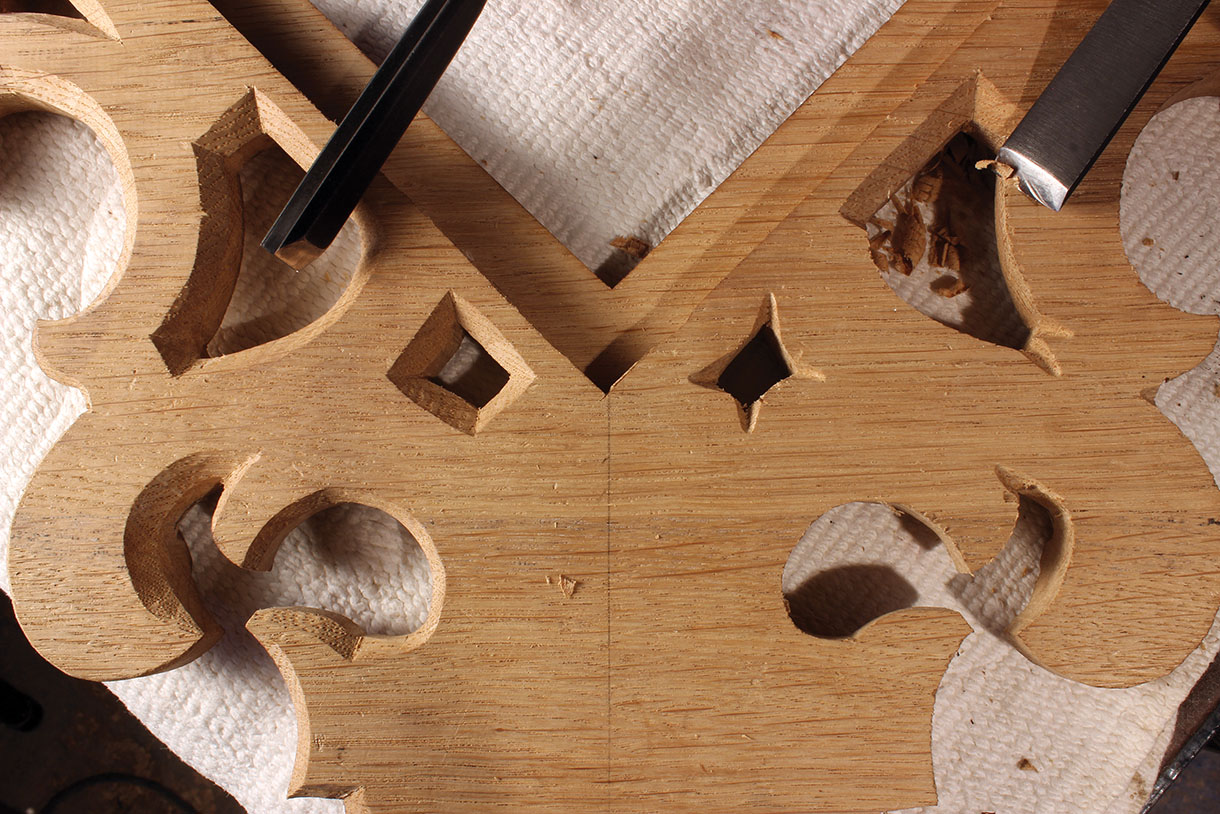
11. Redraw the volutes and repeat step 9 to mark the upper edge. Round the bottom of the groove in the middle towards the background. Set in the eyes of the volutes with gouges best matching the curve, and clear the recess with No.6, 16mm gouge
12. Redraw the edges of the cartouche and carve them. Twist your tool to keep a constant angle compared to the curved surface. Use the No.6, 16mm gouge for the side and a flatter gouge for the small step on the top
13. Lower by 4-5mm the volutes on the S-scrolls as well. Use the No.5, 16mm to shape them, fading into the scroll surface. Redraw and hollow the eye of the volute with the No.6, 16mm gouge
14. Set in the volute and clear the recess with the No.6, 16mm and No.6, 12mm gouge in the tight curve. The top is set in with No.5, 16mm as a continuation of the chamfer, ending progressively vertical as you approach the eye. Clean the connection to the crest and hollow it again with the No.6, 12mm gouge, 1mm away from the volute’s wall. Be careful of the grain direction

15. Shape the leaf at the top. Set in the secondary leaves with the N0.6, 16mm gouge and hollow them with the No.6, 12mm gouge. Round the top leaf with the No.3, 8mm gouge and refine the outline of the whole leaf using the No.6, 16mm gouge. Refine the shape of the leaves running along the volutes if necessary
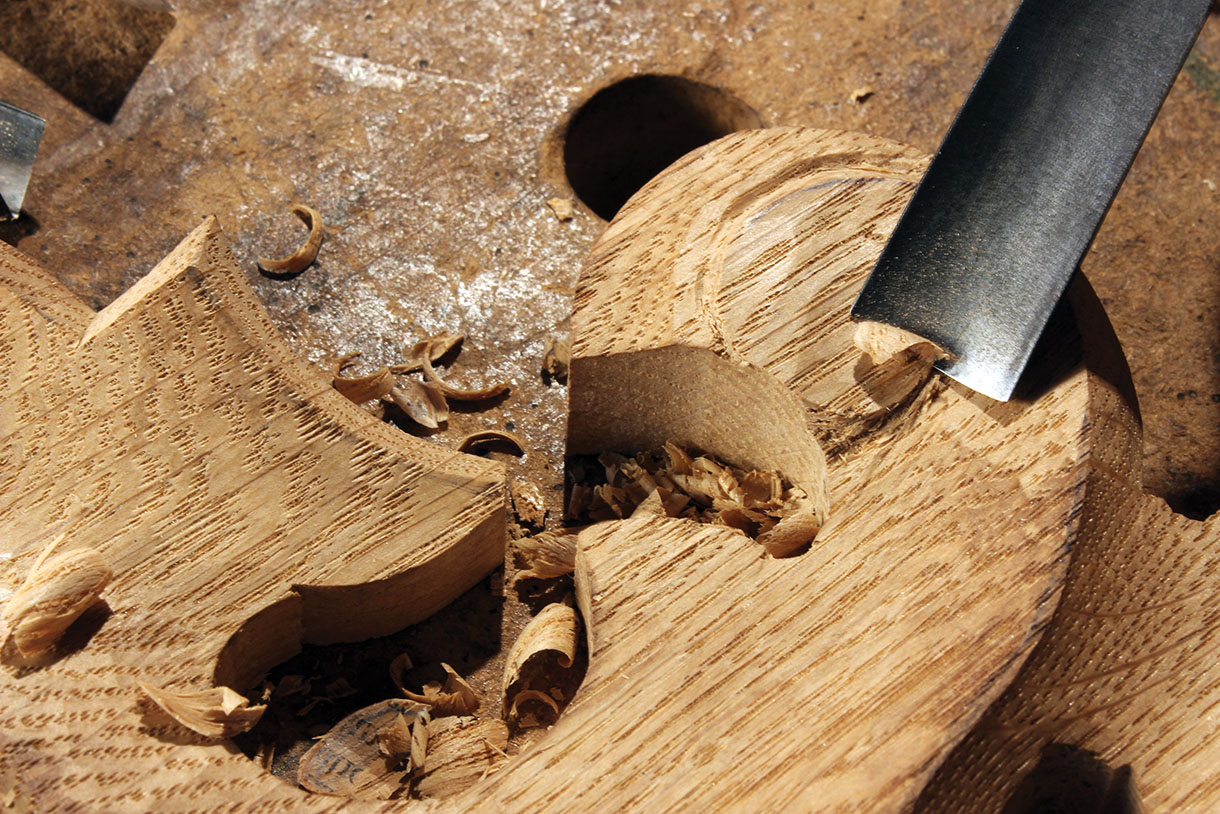
16. Go back to the C-scroll. Run the No.6, 16mm gouge along the edge of the scroll and use No.5, 16mm gouge to get an even surface, connecting smoothly with the moulding of the frame. You can remove some wood on the scroll below, as it will be carved the same way. Hollow deeper at the ends to reach about 1cm thick
17. Redraw the angled edge of the scroll and carve it using No.6, 16mm gouge. Be careful of the grain direction and don’t pay attention to the drawing at the bottom end – cut straight along the curve. Redraw and round the bottom end using the No.6, 16mm gouge, fading into the hollowed surface of the scroll. Above, carve the chamfer between the cartouche and the S-scroll the same way, making a stop cut with the V-tool beside the little horn of the cartouche. Use a deeper gouge like No.6, 12mm in the tight curve
18. Redraw the lines running along the scrolls and moulding and carve them with the V-tool, all the way down to the last scroll at the base. Use the veiner in tight areas. Don’t forget the veins on the leaves and at the top or the crests. Clean and complete as much detail as possible – join the cove moulding at the corners with a No.5, 6mm gouge, set in the curly end of the upper S-scrolls, refine the outlines
Top tip: If there are little hollows and bumps on the scrolls, the lines and veins made with the V-tool won’t look nice. Make sure that the surface is even to get a good result.
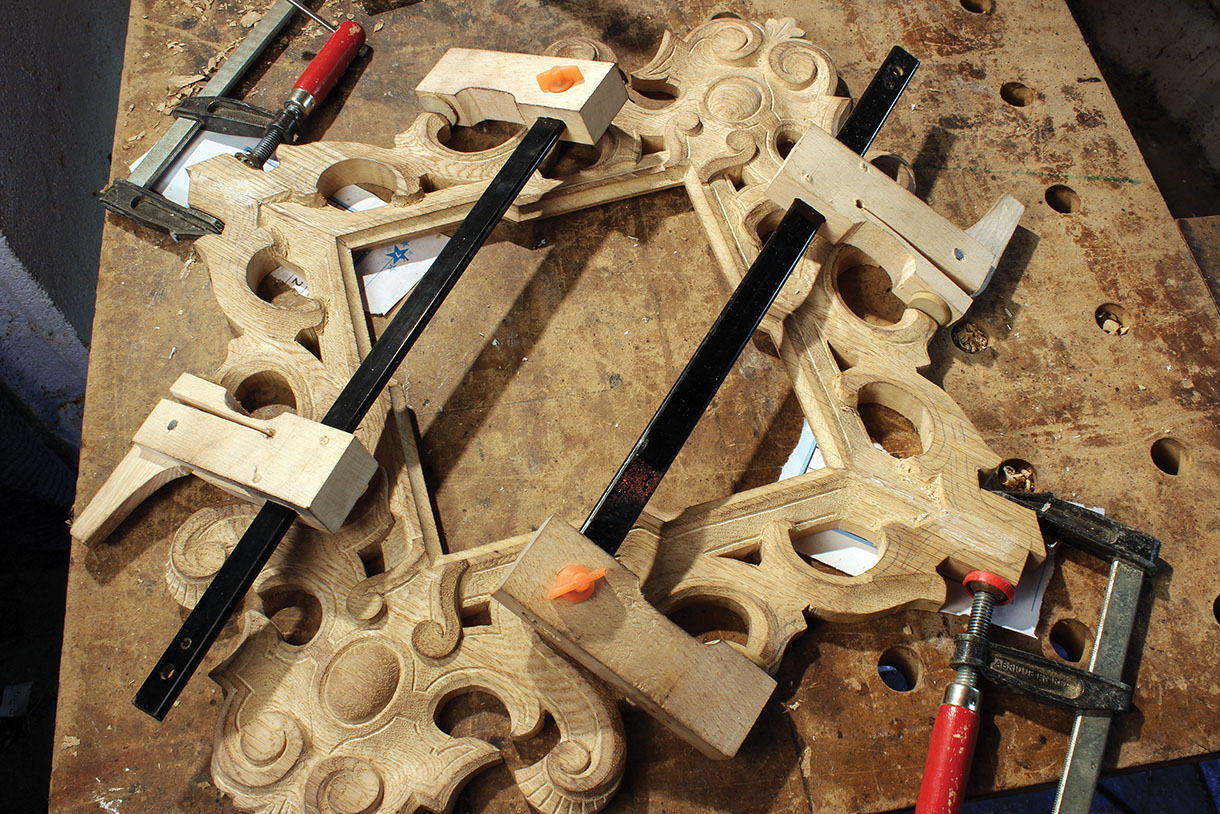
19. Glue up the two parts together. Check alignment of the cove on the moulding when setting the clamps. Once dry, complete the cut of the lower scrolls with the scrollsaw
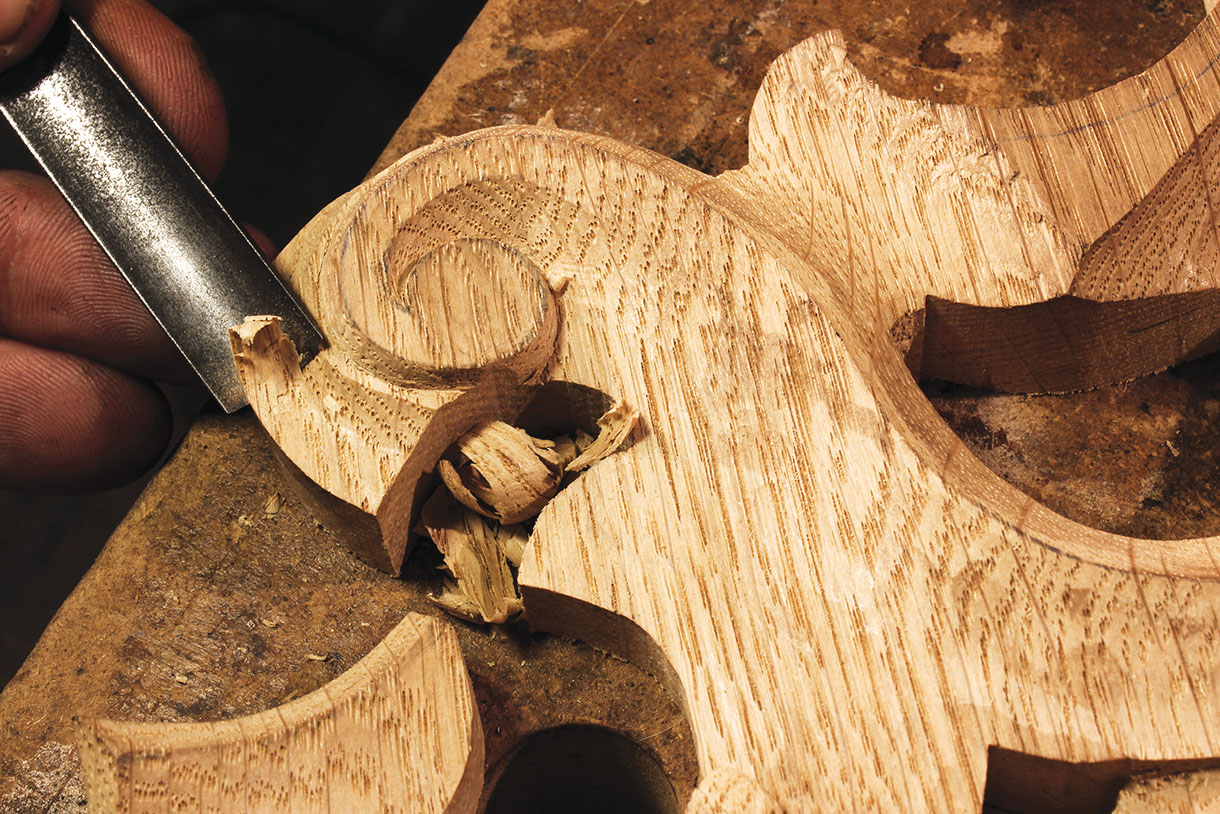
20. Clear the corner between the remaining scrolls and complete the moulding of the frame. Using No.5, 16mm gouge, lower the outer edge of the scrolls just like you carved the C-scrolls. Draw a nice ‘S’ shape, without paying attention on the drawing
21. Redraw and carve the edge with the No.6, 16mm gouge. Like the C-scroll, the curls at the ends of the chamfer are carved straight and shaped afterwards. To avoid breaking the edges, separate the curly end from the scroll with a small cut with the V-tool. Using the No.3, 8mm and 3, 16mm gouge shape the walls at a 90° angle on both sides alternatively until they meet. Set in the back of the scroll and the curl and clean the corner
22. Complete all the missing lines and veins with the V-tool and refine the round shape at the tip if necessary. Carve a series of flutes on the scroll with the No.8, 8mm gouge. Swap to a No.8, 10mm gouge for the last ones as their size increases
23. Reverse the carving on a piece of cloth to make the undercutting. Use The V-tool to remove some wood in the corners. A No.3 gouge is then used on convex edges and the N°6, 16mm on concave edges. Try to give an even thickness to the moulding of the frame
24. Apply stain and finish. I chose a homemade walnut stain and a coat of dark wax. Set the mirror in the frame and cover it with a piece of 2-3mm thick cardboard. Use nails to secure the mirror. Drive the hammer flat on the cardboard to avoid any breakage


