Compound Angled Dovetail Box:
David Barron uses two simple jigs to put a whole new slant on your dovetailing.
David Barron uses two simple jigs to put a whole new slant on your dovetailing
I decided to tackle a box with four sloping sides and compound dovetails. The actual saw cuts themselves aren’t that much harder to execute than normal dovetails but it’s the preparation and layout that needs close attention. As with the last project, making both horizontal and vertical support boards is recommended; this time I chose to go with a 9° angle. When considering the angles and dimensions, it’s worth remembering that compound angles reduce the area of the base on all four sides, so it can end up being much smaller than you may think. Also the visual effect makes the angles appear greater than they actually are, so choosing a smaller angle is a good idea, somewhere between 6 and 9° is about right.
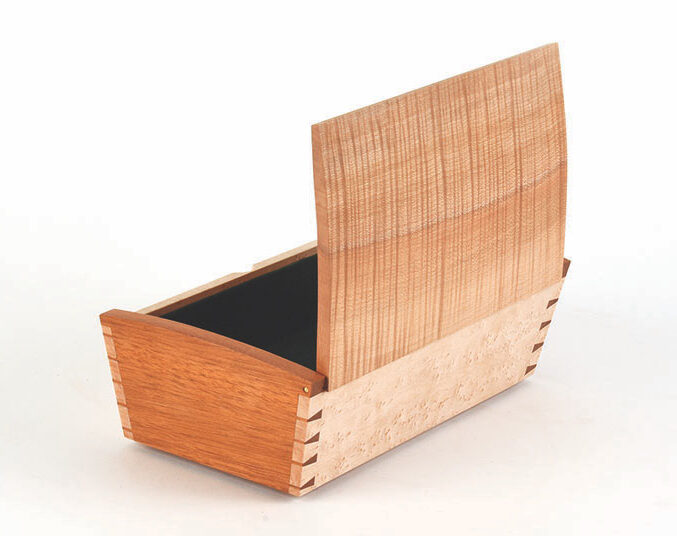
With this box I’ve produced a tapered, curved lid with sides to match, and a simple pivot hinge. The woods chosen are bird’s eye maple (Acer saccharum) for the sides and Brazilian mahogany (Swietenia macrophylla) for the ends. The lid is rippled sycamore (Acer pseudoplatanus) with some colour running through it. Often rejected by instrument makers, this wood is much cheaper than the pure white variety and in
my view far more interesting.
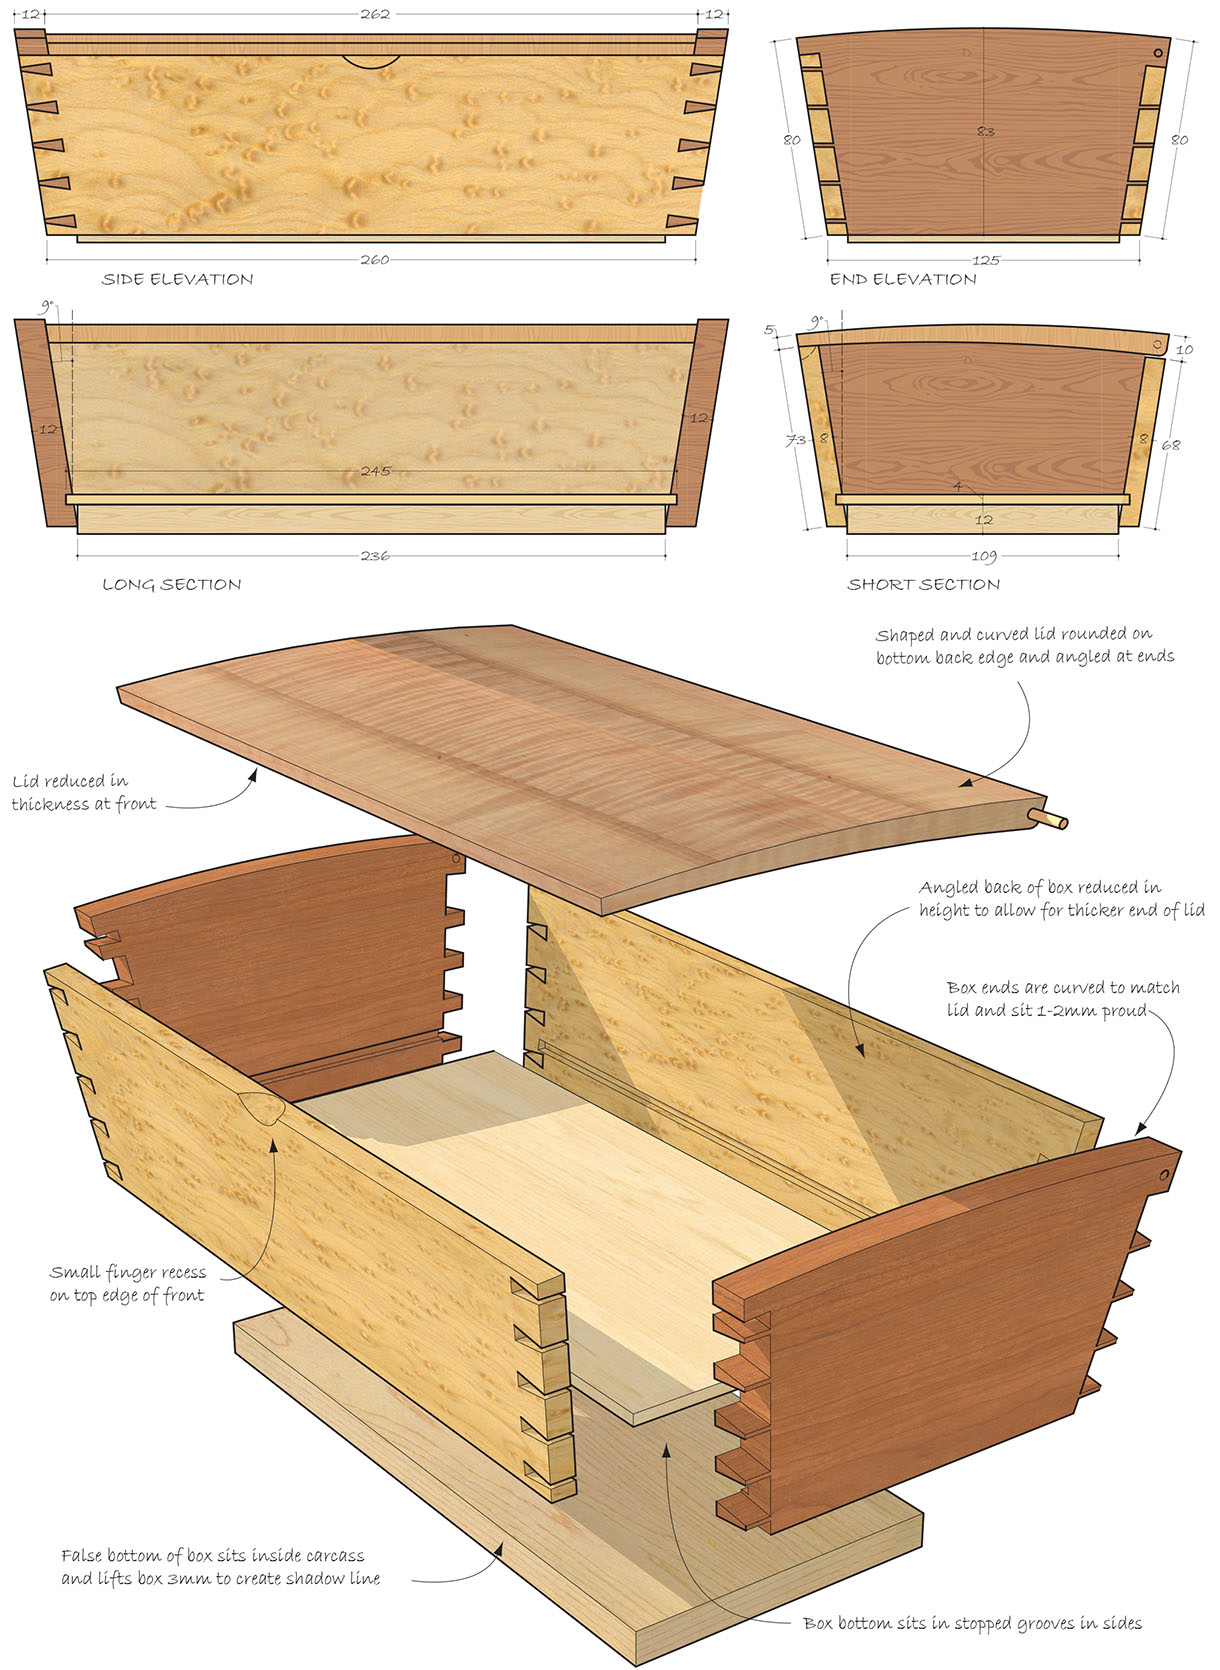
The sides are left taller to be shaped later and the front and back are different heights to accommodate the tapering lid. This variation in heights is not a problem as all the measuring and marking will be done from the bottom of all four sides. Rather than have a half pin top and bottom, as is usual, I decided to have full pins. This meant they could all line up and match, although there are five pins at the front and only four at the shorter back.
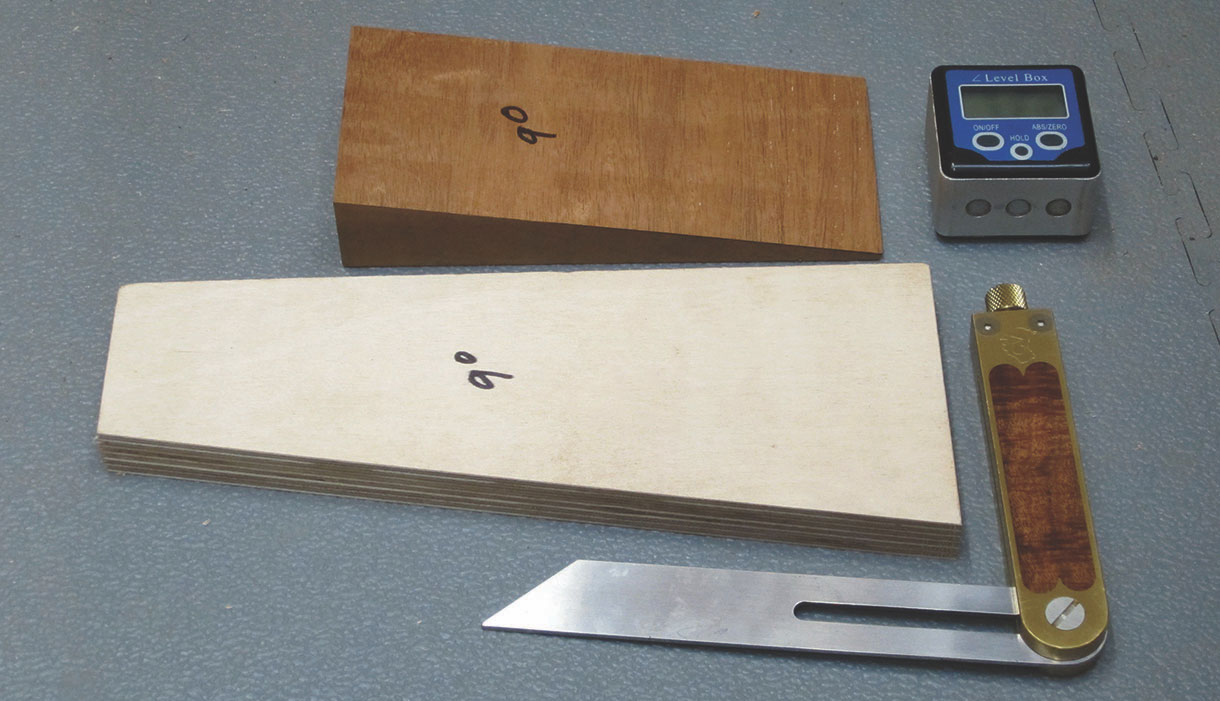
To successfully complete all the joinery for this project you will need to make a pair of matching 9° supports, a flat one for trimming the ends of the boards and a wedged-shaped one to help create the top and bottom edges
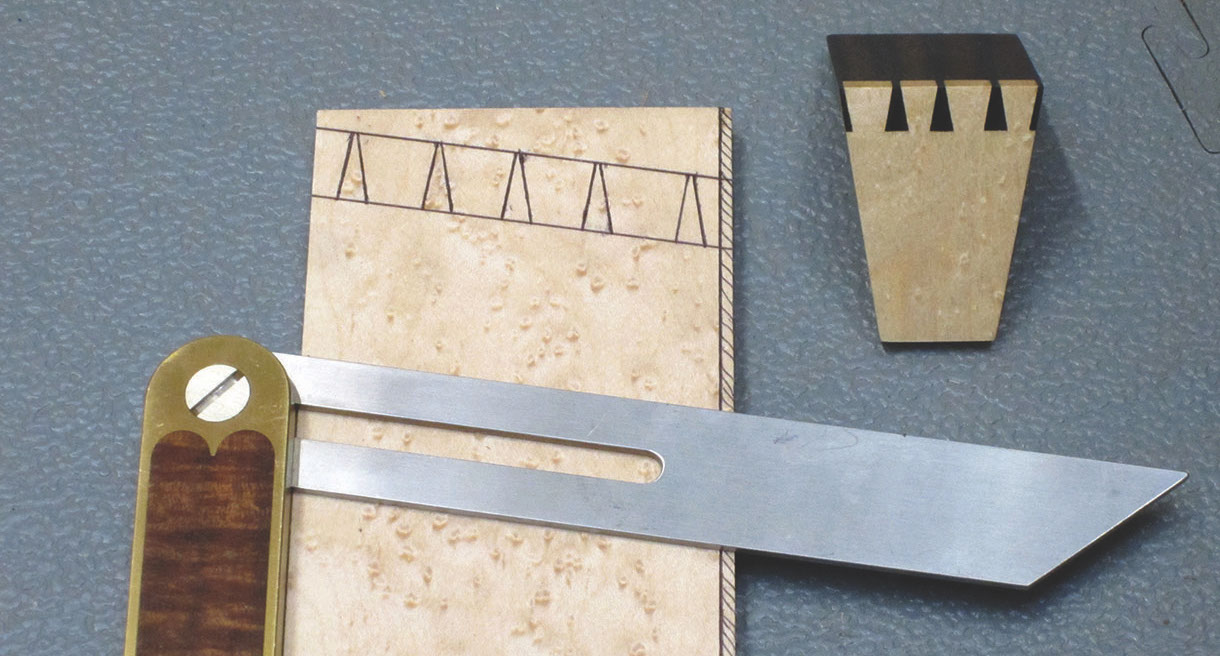
Instead of cutting all the angles at the beginning, I find it much easier to layout when the tail boards are cut to length but left with square edges and ends. After the angle and baseline have been marked in pen, a conventional dovetail square can be used to mark out the tails. Note the allowance at the bottom for the material that will be lost when the 9° angle is planed
Before assembly
The holes for the pivot pins in the side pieces were made on the drill press using the vertical support board to keep them horizontal. The holes need accurate marking so that they line up and the lid pivots freely and evenly. The finished lid thickness at the back is 8mm so the holes were marked 4mm in from the rear and 4.5mm up from the top of the back. The extra 0.5mm provides a small clearance so that the lid doesn’t bind in the closed position. I find the Incra T square with 0.25mm increment holes very useful for the marking. I used a (3mm) lip and spur bit to mark the intersection by hand, before using the same bit in the drill press. This gives the best chance of the bit centring.
Before gluing up I like to enter all the dovetails a small amount just to be sure all four corners are going to engage; don’t forget to include the base! Then glue can be added and the dovetails can be knocked home.
The lid needs to be tapered by 9° on all four sides and this is done on the shooting board with the vertical support placed beneath the workpiece. I leave the lid over width and plane the two sides until a tight, even fit is achieved. The back is then planed flush leaving the front edge until the hinges have been installed.

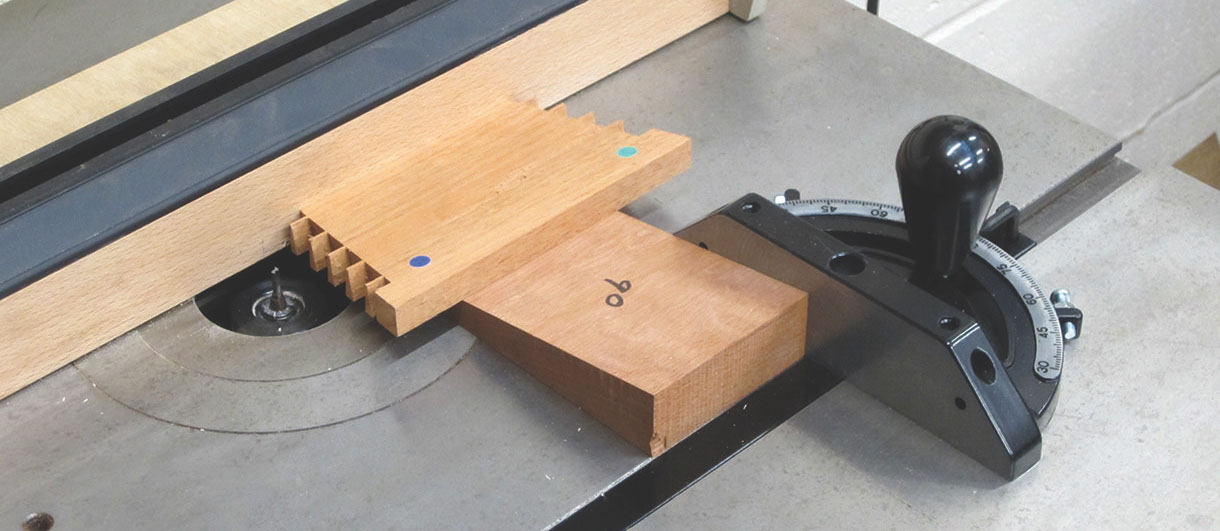
The sides of all pieces are cut to the line on the tablesaw using the horizontal support board
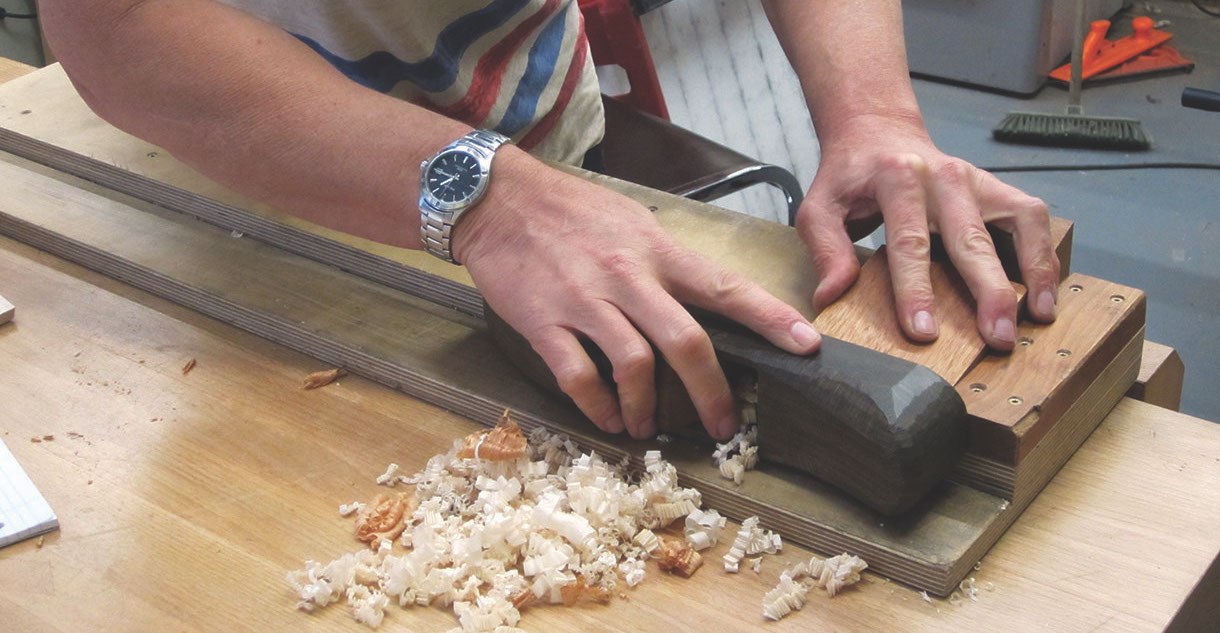
The top and bottom of each piece are angled at 9° (using the vertical support) on the shooting board. Check and double check here as it’s easy to plane the angle the wrong way!
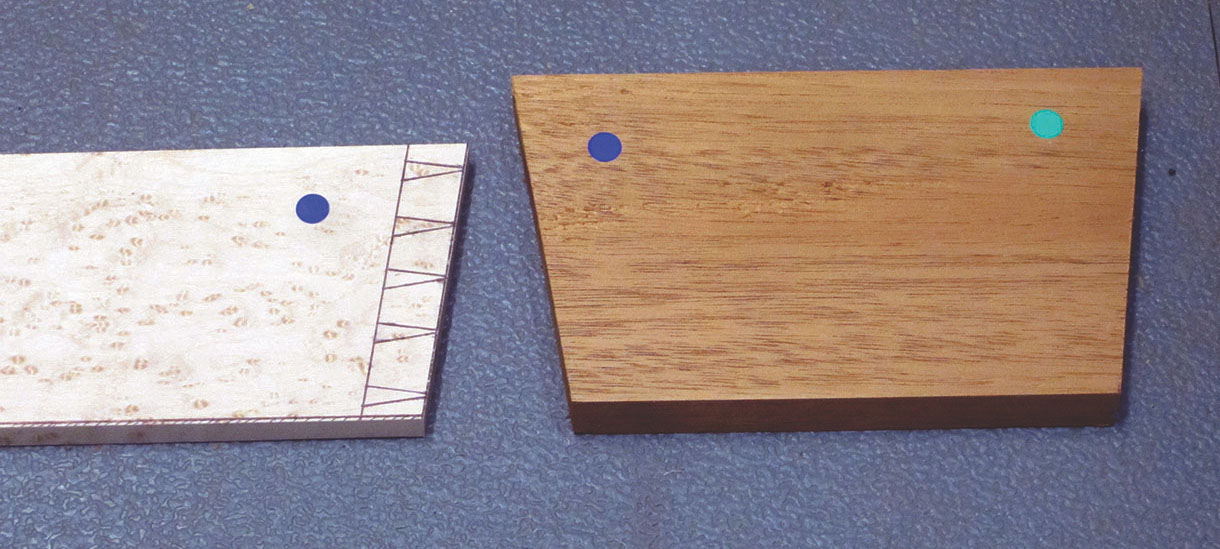
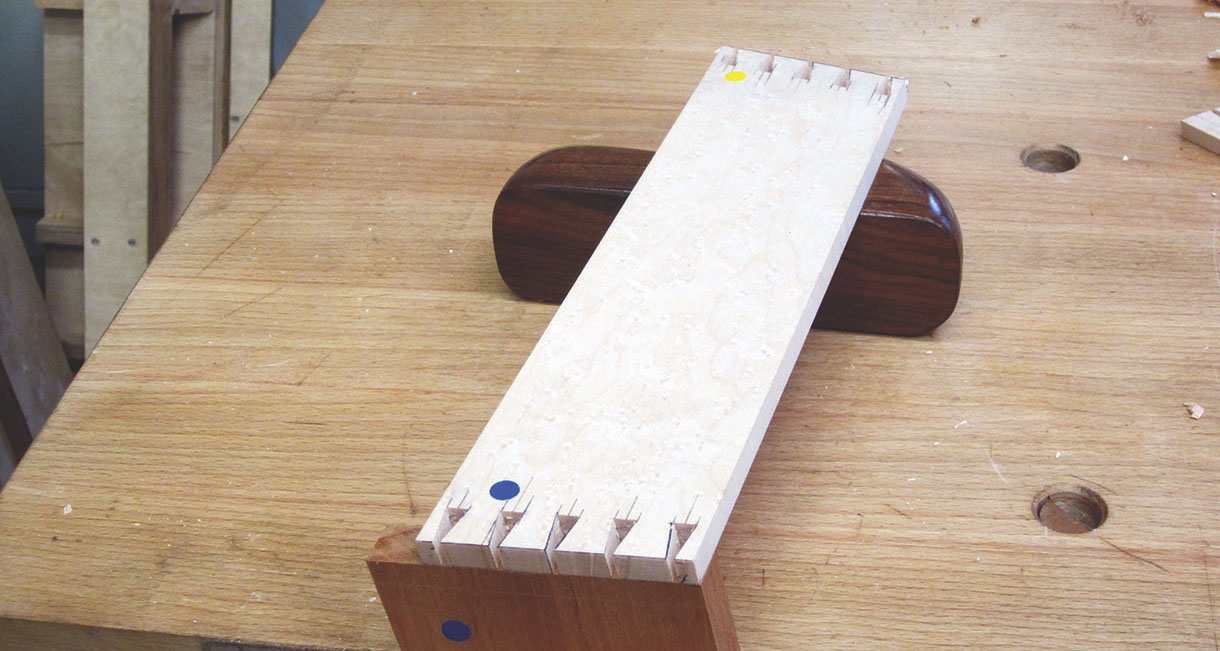
With the angles cut it’s a good idea to mark the components with coloured dots that correspond with their mating part. Be consistent with your labelling and apply the dots to the same face for each piece
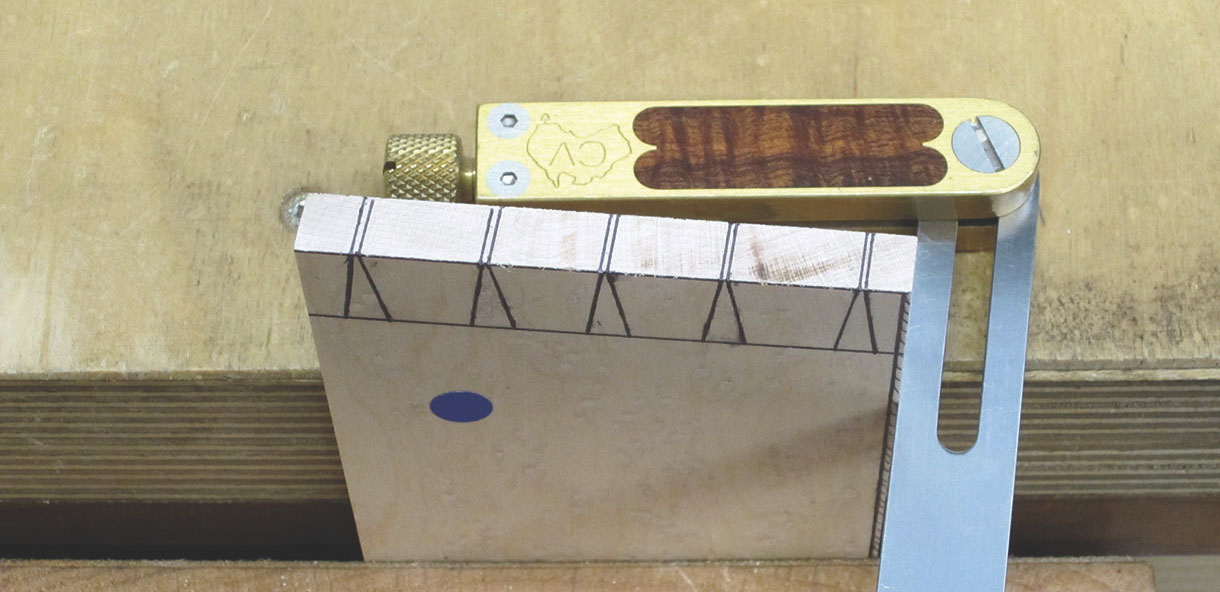
The end grain saw cuts are marked at 9° parallel with the bevelled edges. Setting a bevel gauge using the vertical support board is the easiest way to translate these lines. The base lines are scribed in the normal way using a cutting gauge or wheel marker
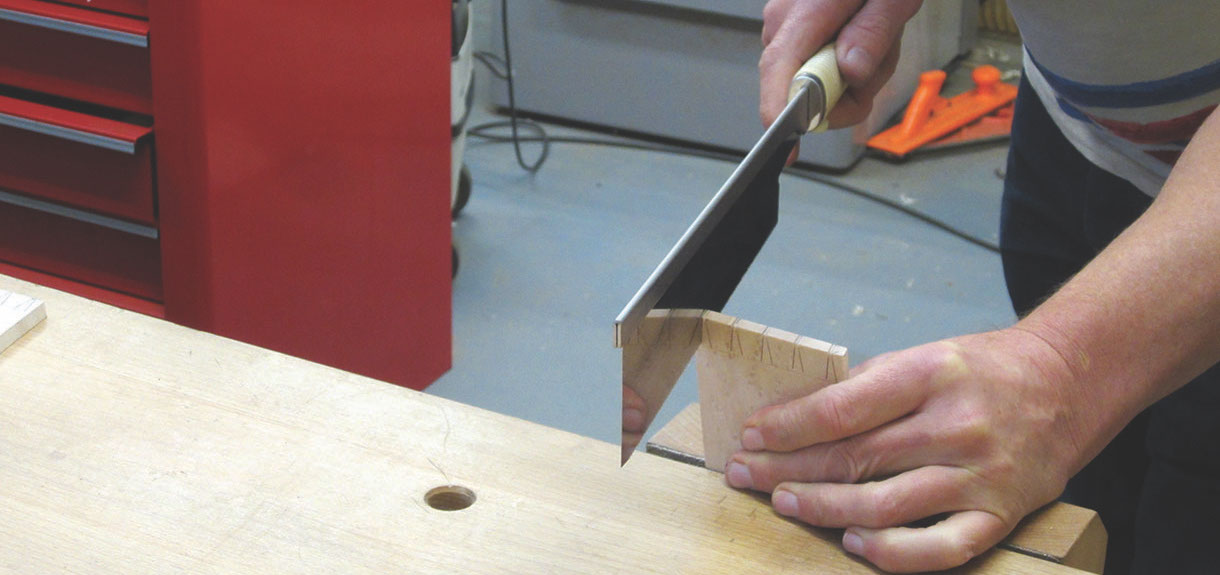
For a good fit the tails must be cut exactly to the 9° marked on the end grain. In order to concentrate on this I like to angle the board so that the actual cut follows the line down in a vertical plane. Tilt the board one way for one side of the tails and then tilt it the other way to create vertical for the other side
With the tails all cut and cleaned out it’s time to mark the pins. Although it’s a compound angle, the two boards are actually at right angles to each other so the setup in the vice is quite straightforward. The only thing to take care with, is aligning the bottom two edges exactly, so that when the grooves for the bottom are cut (using the same edge), they all line up
Installing the pivot hinge
Before clamping up the lid I slide a strip of veneer along the back edge, which represents the 0.5mm clearance that was allowed for in the marking. With the back of the lid flush with the rear edge and the
lid held firmly in place the hole in the lid can be made using the hole in the side as a guide. Insert an overlength pin in the first hole for registration before drilling the hole on the other side.
A small amount of rounding on the bottom back edge of the lid should allow it to pivot freely. Material is removed carefully from the back edge until the lid tilts 9° past 90 and lines up with the back edge in the open position.
The lid is removed for the curved shaping to be done. Start with the concave inside and finish the topside after, that way the lid supports itself for both operations. I used a curved bottom plane for the inside and a flat one for the outside curve, finishing through the grits with sandpaper until a smooth, fine, tear out free finish is achieved.
The grooves are cut on the router table using the vertical support board with the bottom edge against the fence. Using a mitre guide keeps things square and safe. Use stops to limit the travel and thus create stopped cuts on the tail board to prevent the groove from showing on the finished box
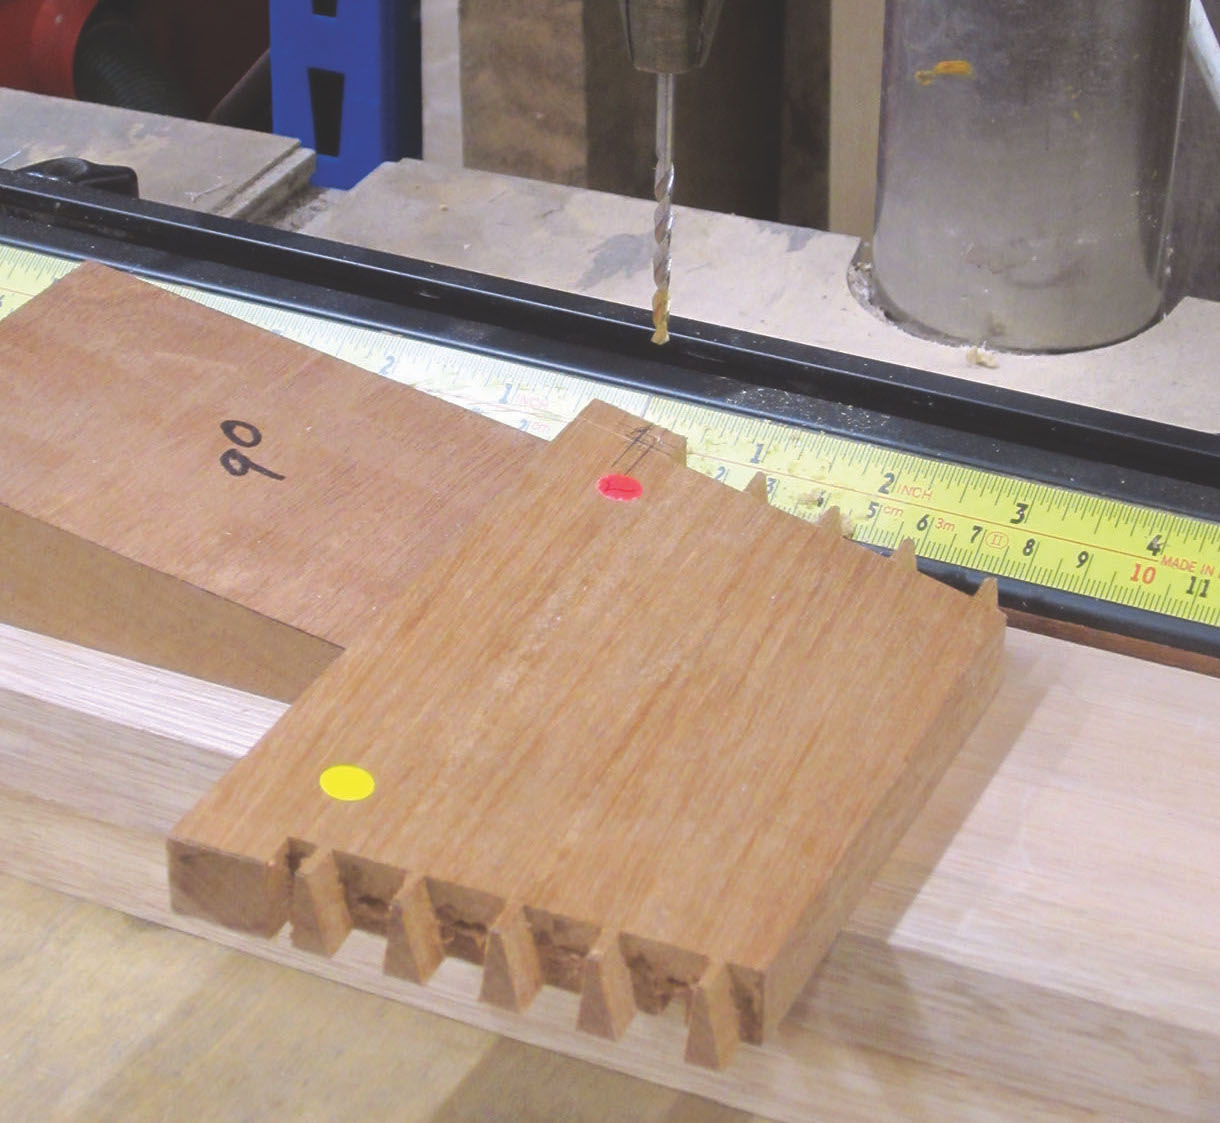
Holes for the pivot pin are bored on the pillar drill using the 9° vertical angle block. Position the bottom of the box side 90° to the fence
Plane the inside of the lid with a curved bottom plane
Finishing touches
Using the over-long pins the lid can be fine-tuned for an even fit across the front edge and then the curve on the sides can be marked. I marked it so that the sides stood about 1mm higher than the lid. This was sanded down to the line on the disc sander, using the vertical support board to hold the box at the right angle, changing to 240 grit for the final fitting. I added an extra base to create a small shadow line below the sides while adding weight to counteract the lid. Everything was sanded to 320 grit and finished with four rubbed coats of quick drying melamine lacquer. An hour later it was cut back with 600 grit Abralon pads to a smooth matt sheen.
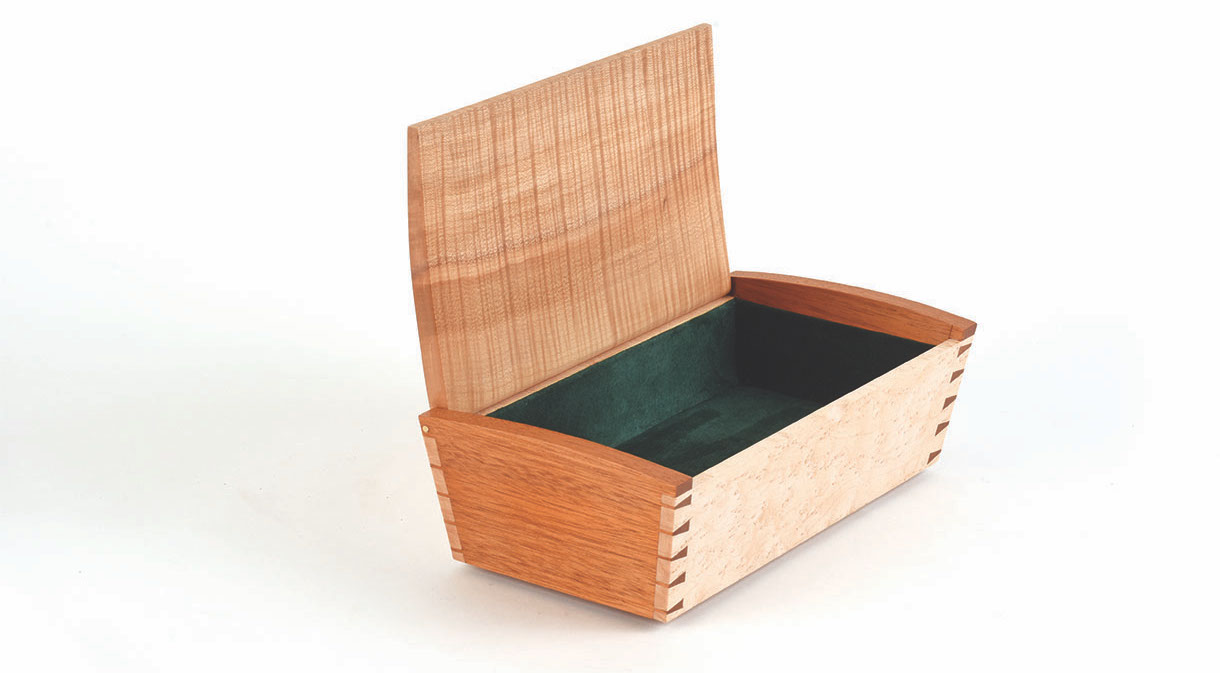
With the messy stuff done it was time to line the box. I chose bottle green pig suede which is my default colour as it seems to go with everything. The base was padded using 5mm-thick foam, cut on the bandsaw and stuck onto card. The angled sides were folded over thin 200 gsm card and stuck down with double-sided tape.
The last job was to cut the pivot pins to length so they could be slightly recessed in the sides. The ends that showed were sanded using 240 grit on the disc sander for a nice sheen. I added a dab of superglue into the holes in the lid which retain the pins leaving them to pivot freely in the sides.
All the angles and curves meant this project took a lot longer than a normal square-sided box and it needed my full attention throughout. The result is pleasing and I feel it was worth the extra effort.