Carving a Swan, part 2:
Andrew Thomas finishes carving the swan – See part 1 here
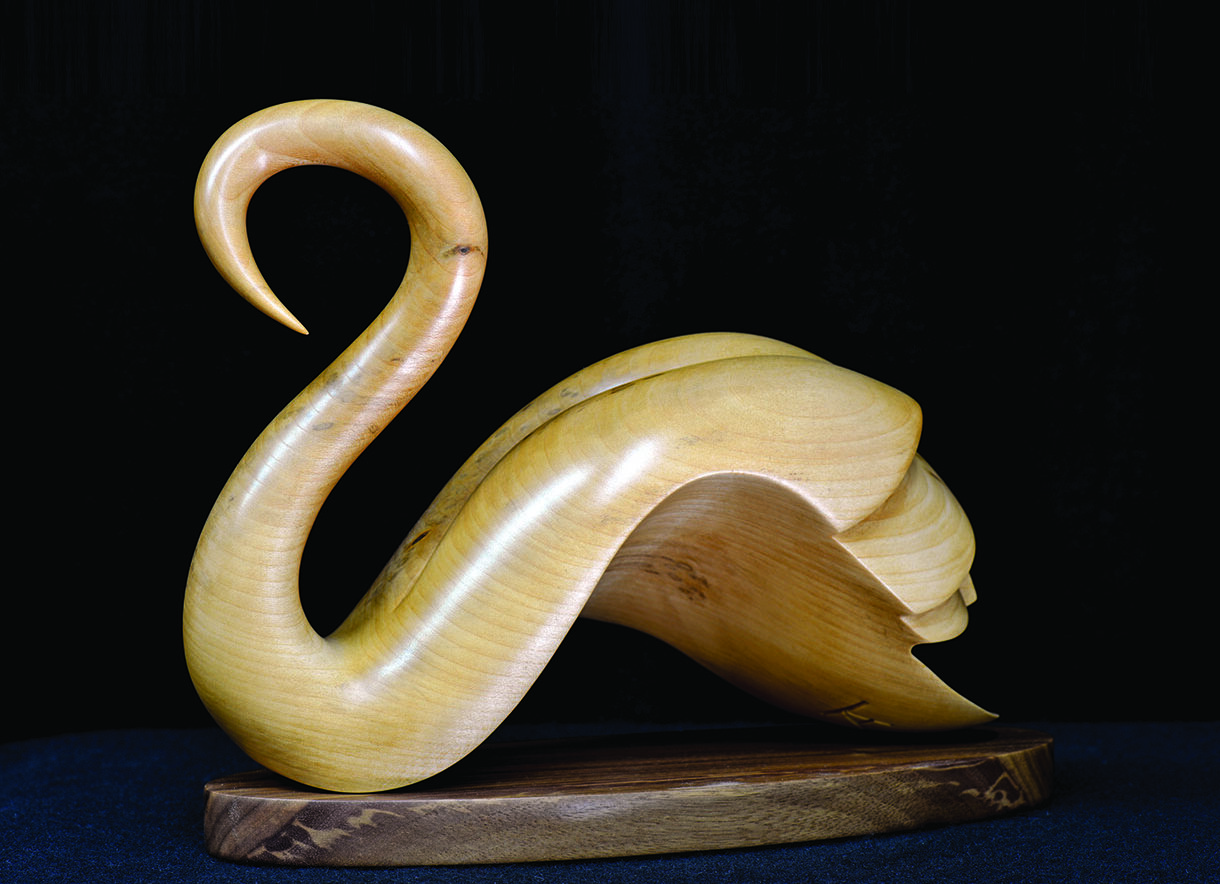
Andrew Thomas finishes carving the swan
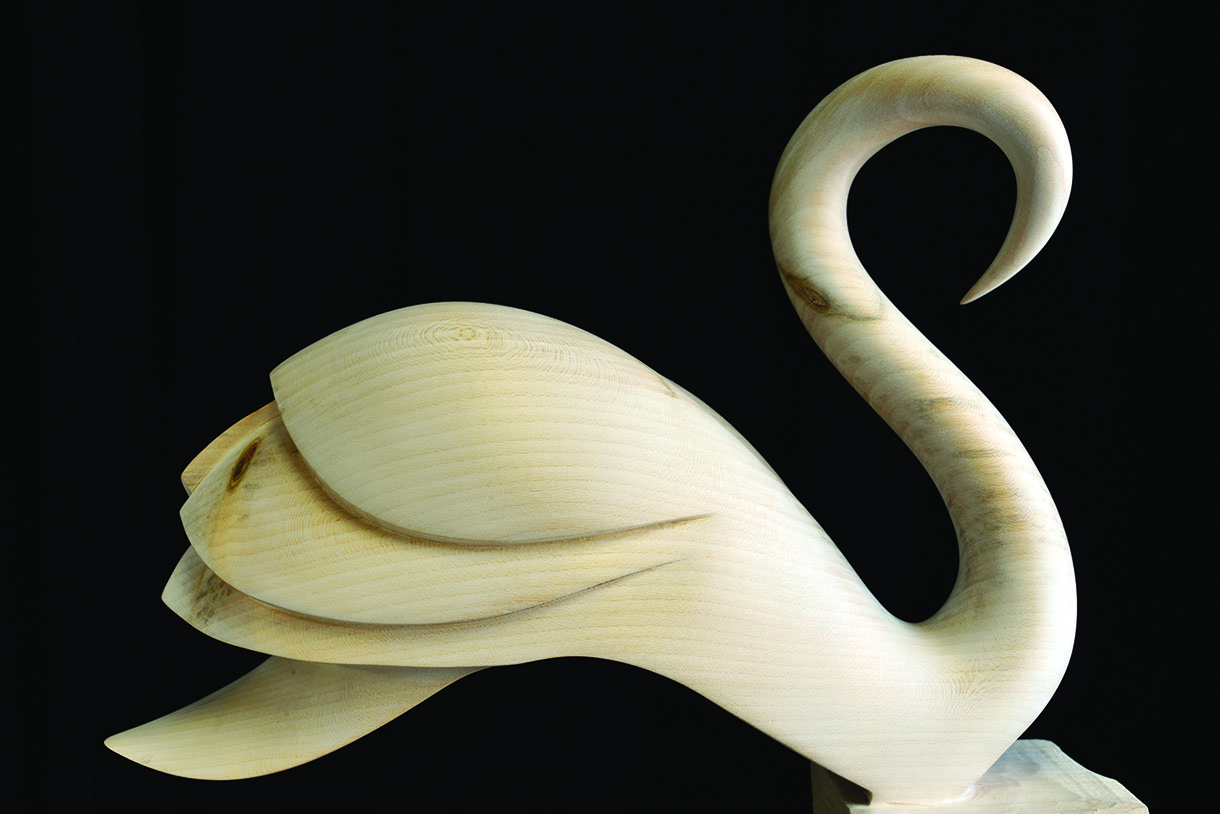
In the last part I described the techniques on how to carve the first details of the swan, including the head, neck, body and sides of the wings. We continue now with part two of the project: how to carve the undercut across the body, shape the tail and the wing tips. Before you start working on the project, please read through the complete step-by-step guide and study the stages and finished images to see how the carving develops.
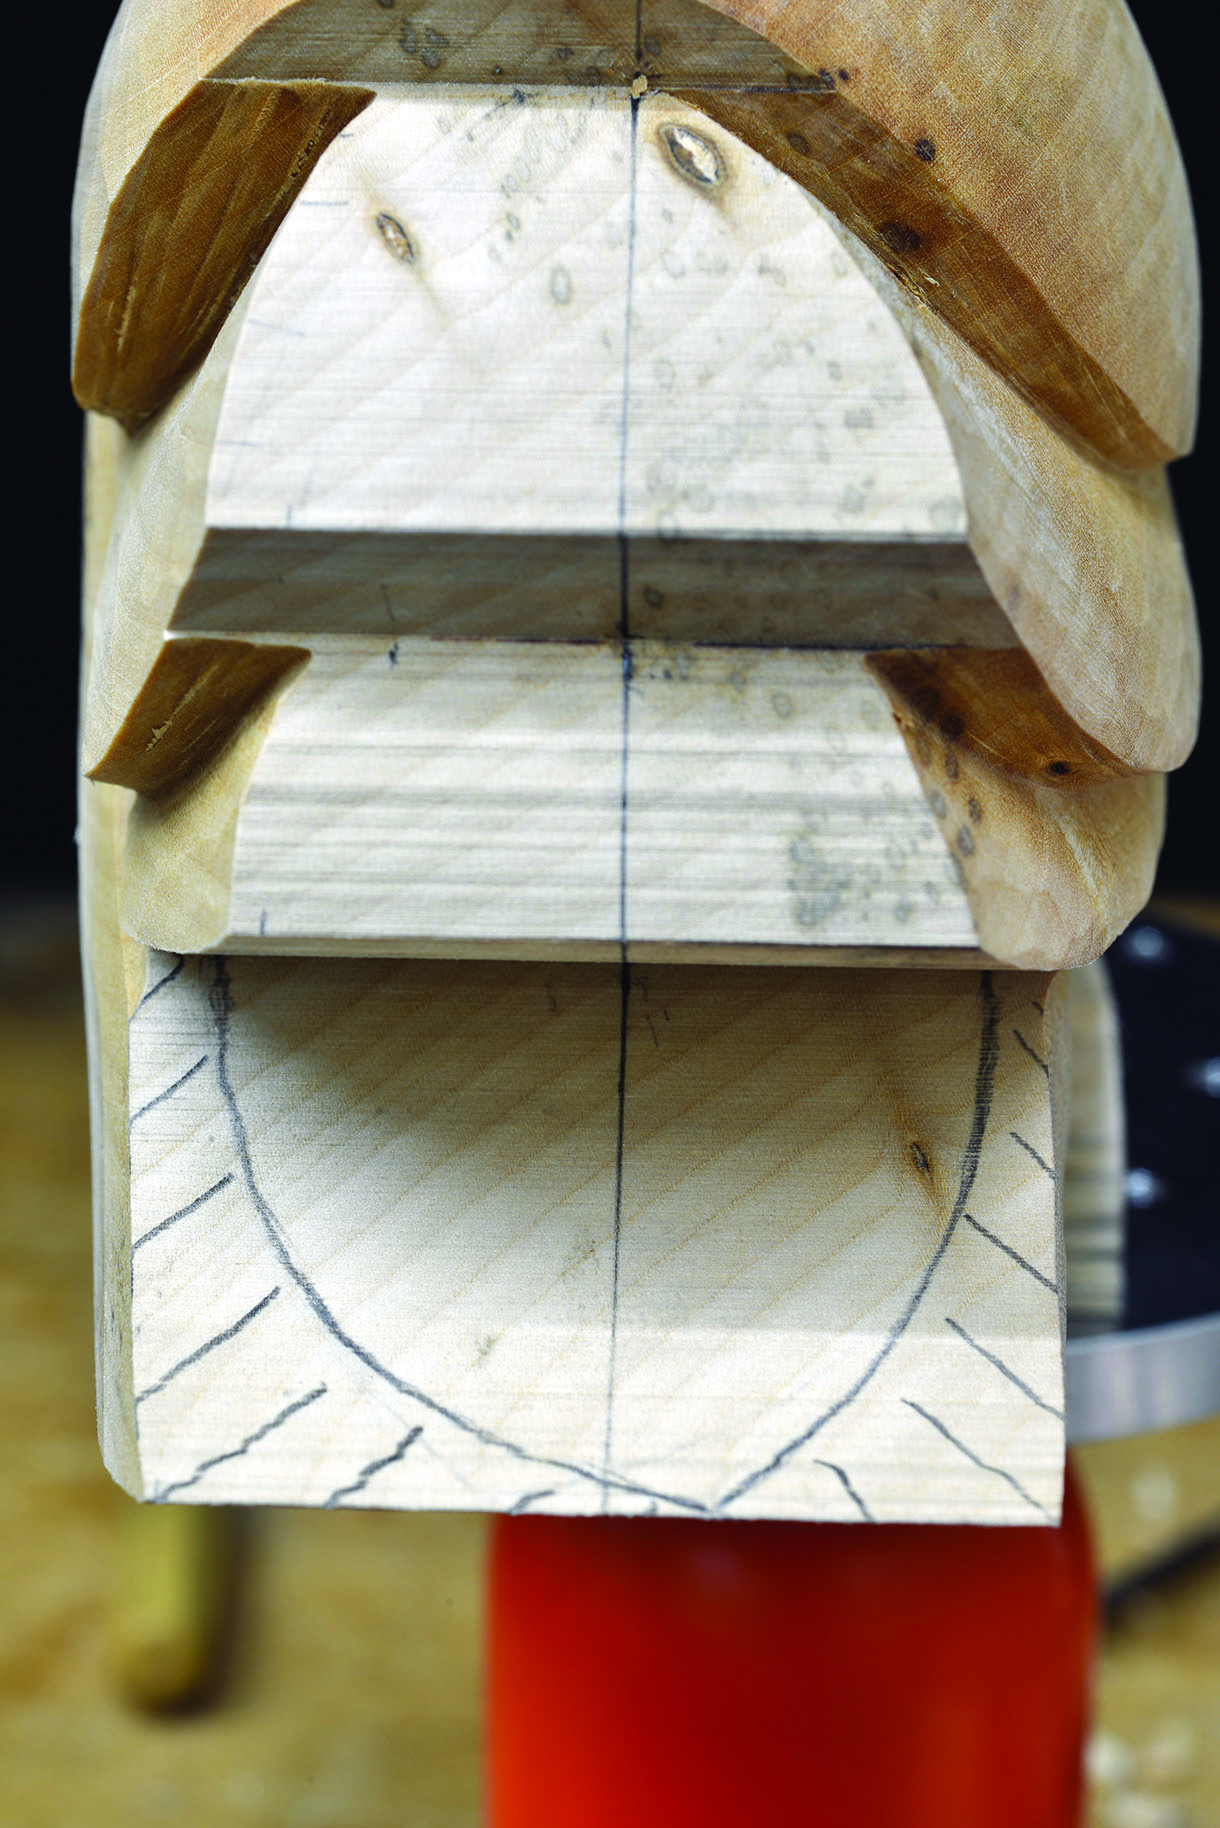
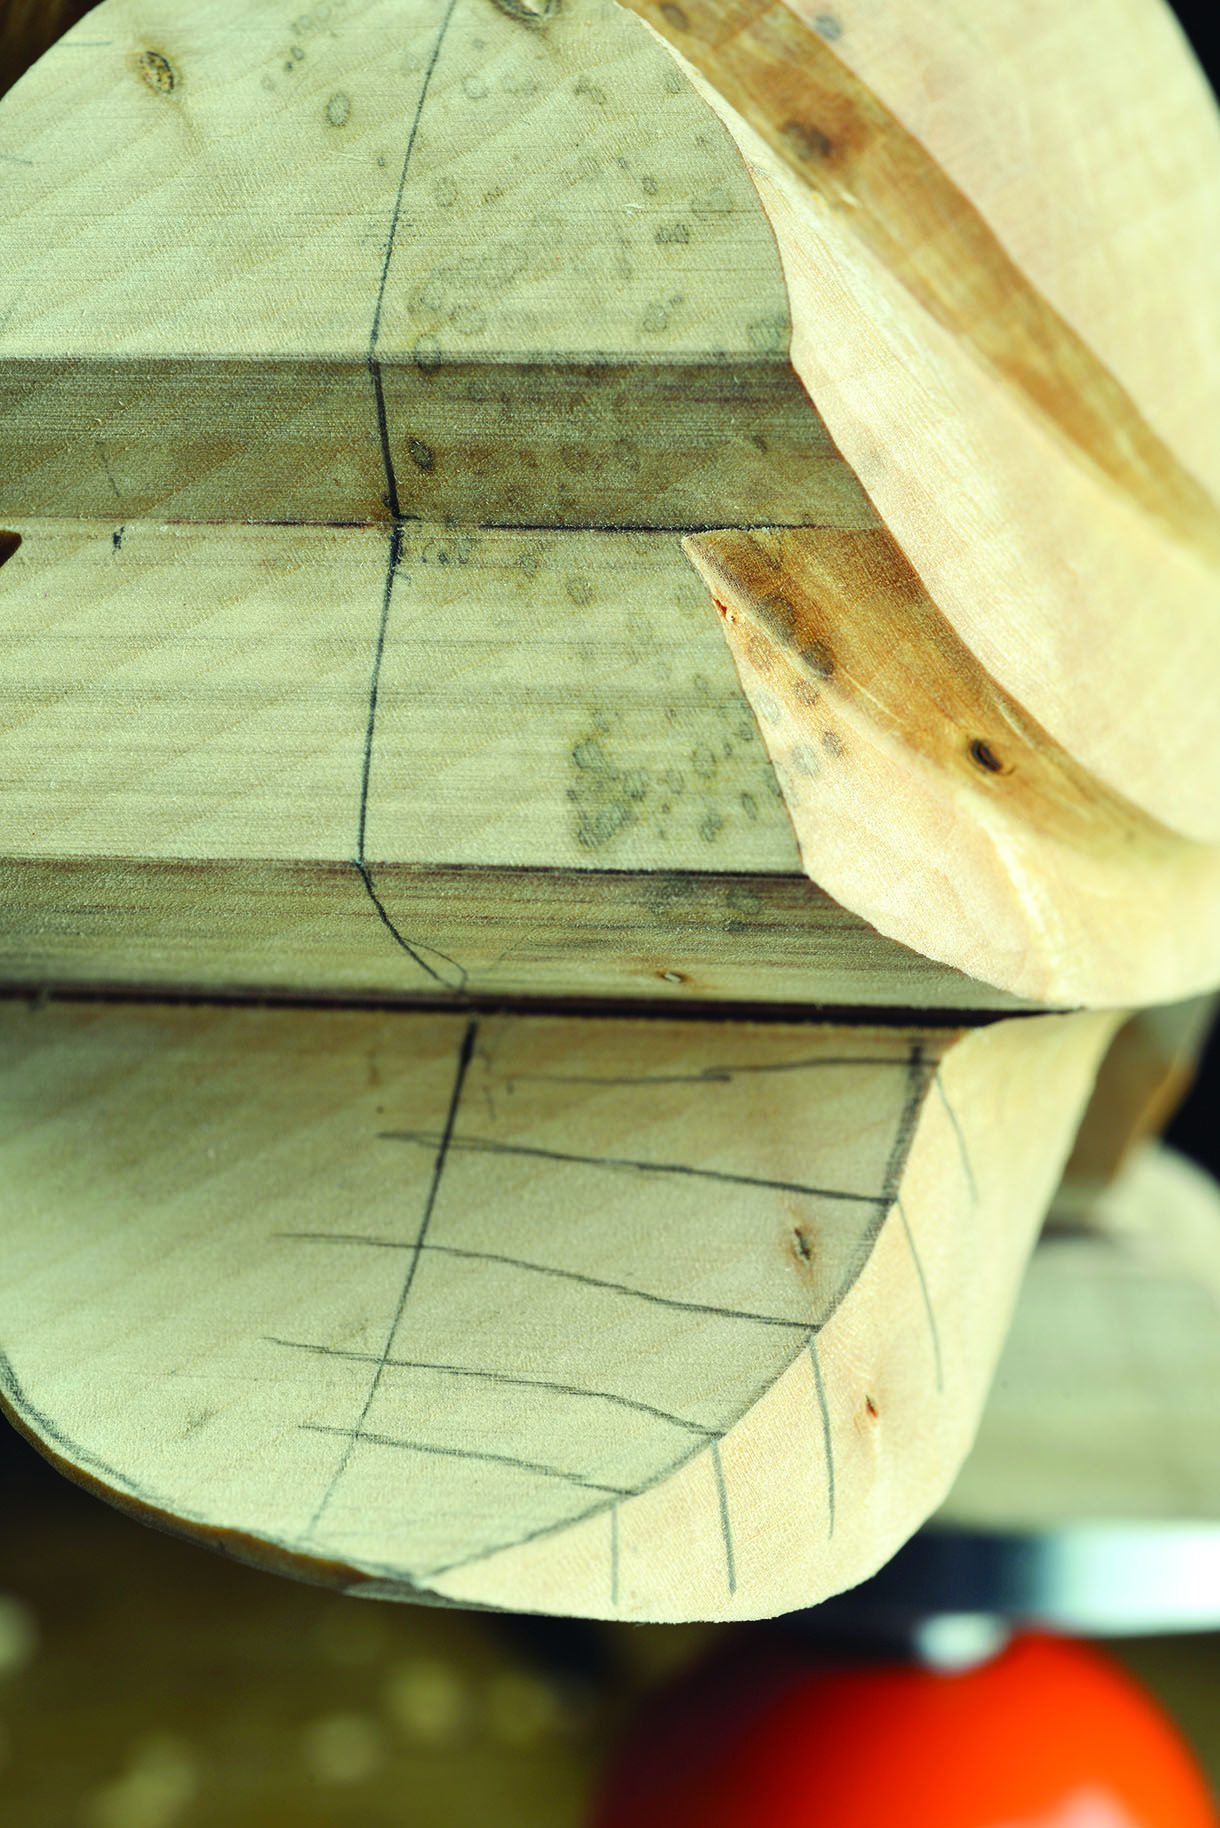
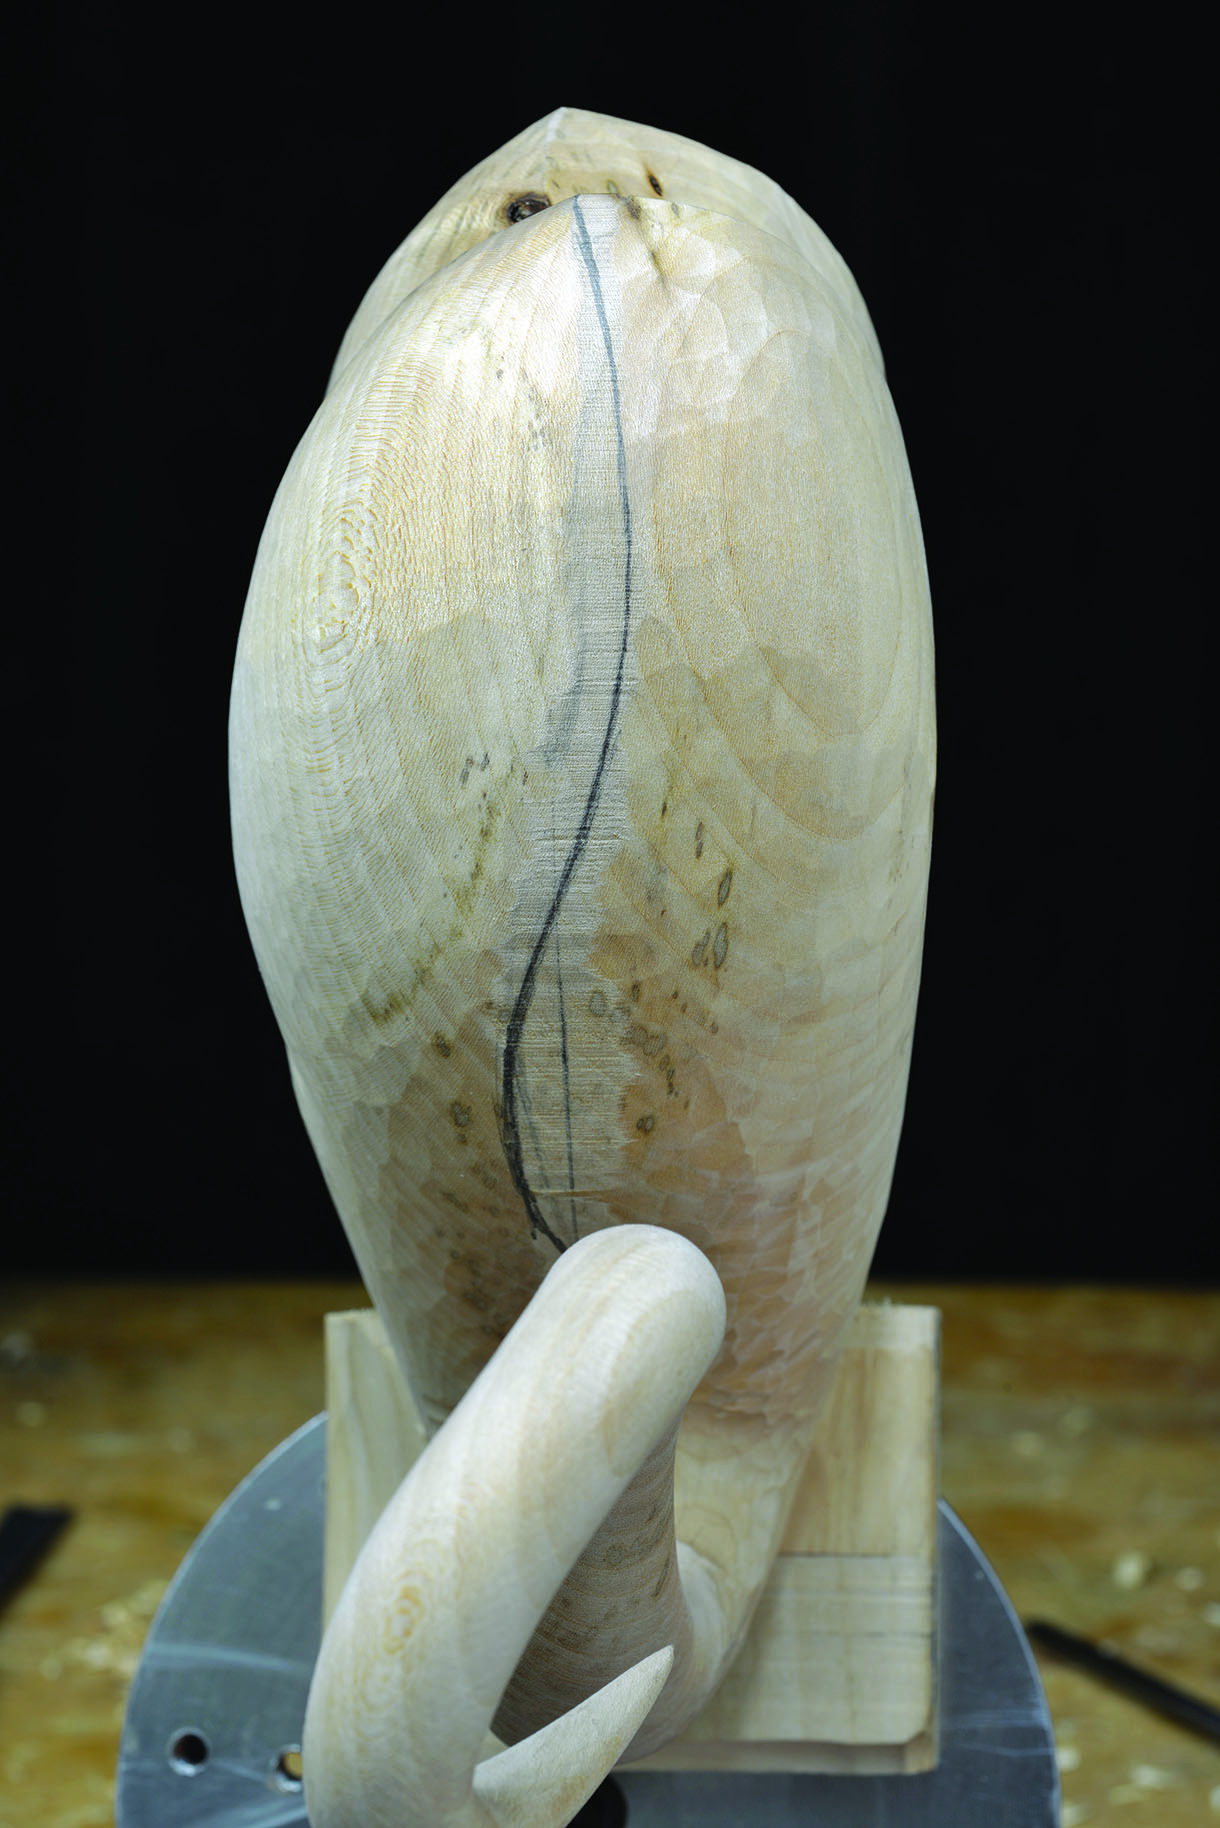
1. Begin with the tail. Form the tail asymmetrically with the tip justified to either right or left of the centre line. Draw your preferred design line onto your wood
2. Use the No.2, 20mm to pare the waste wood back to the edge of the tail’s design line. Leave this area square for now as it will be shaped across its surface later

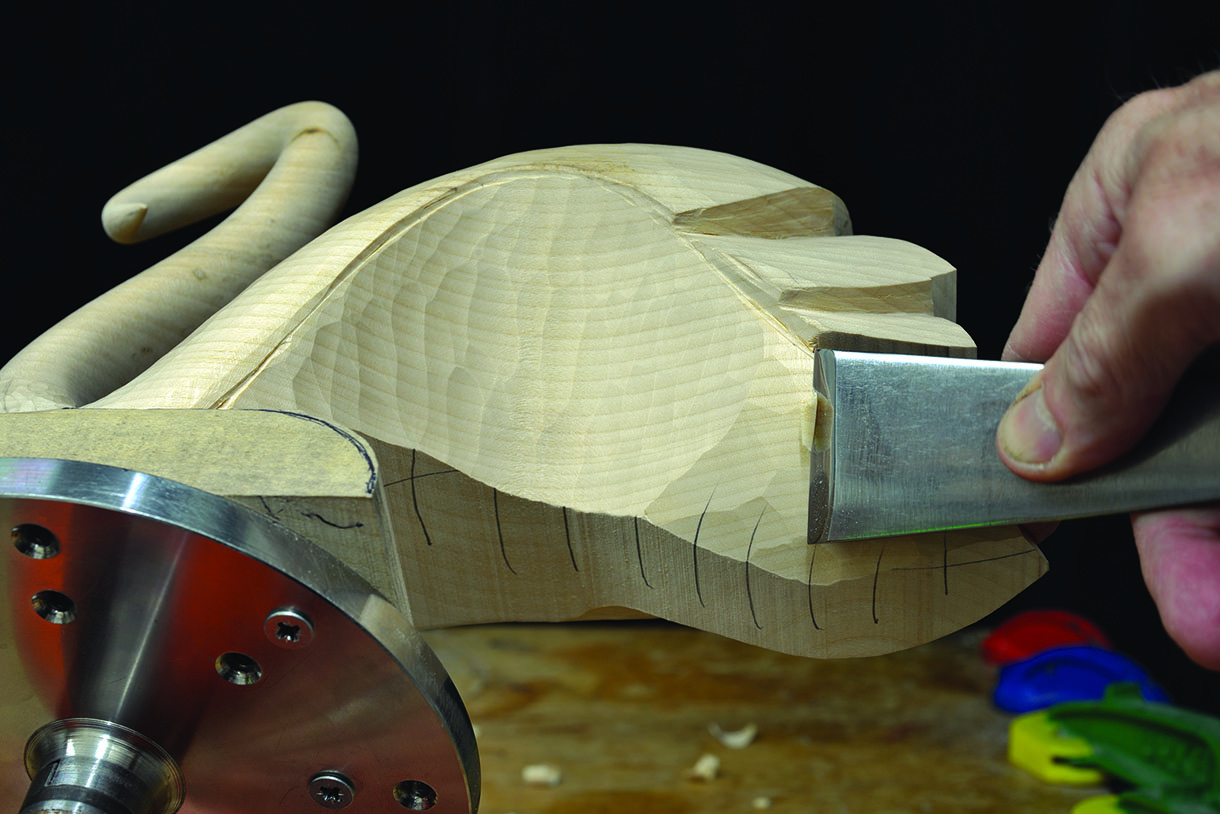
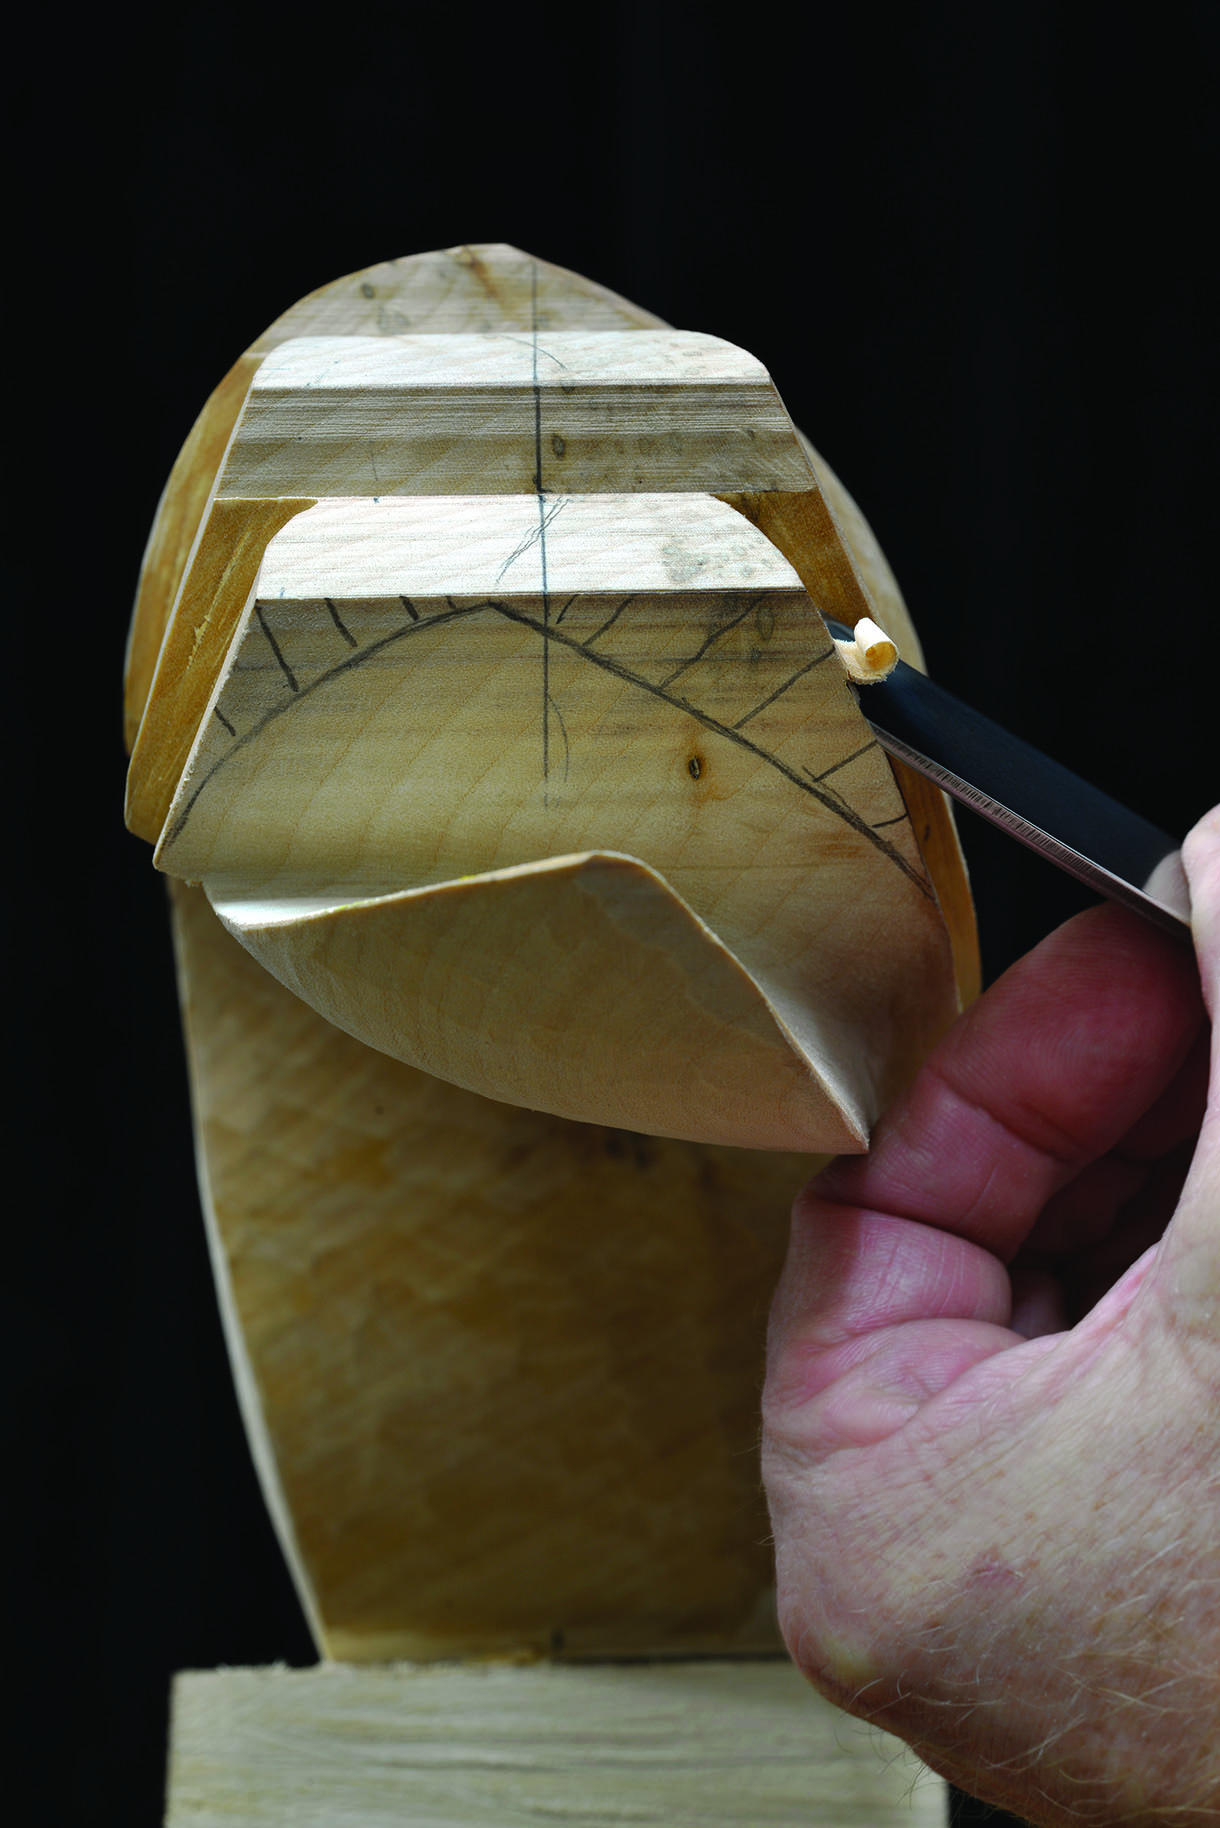
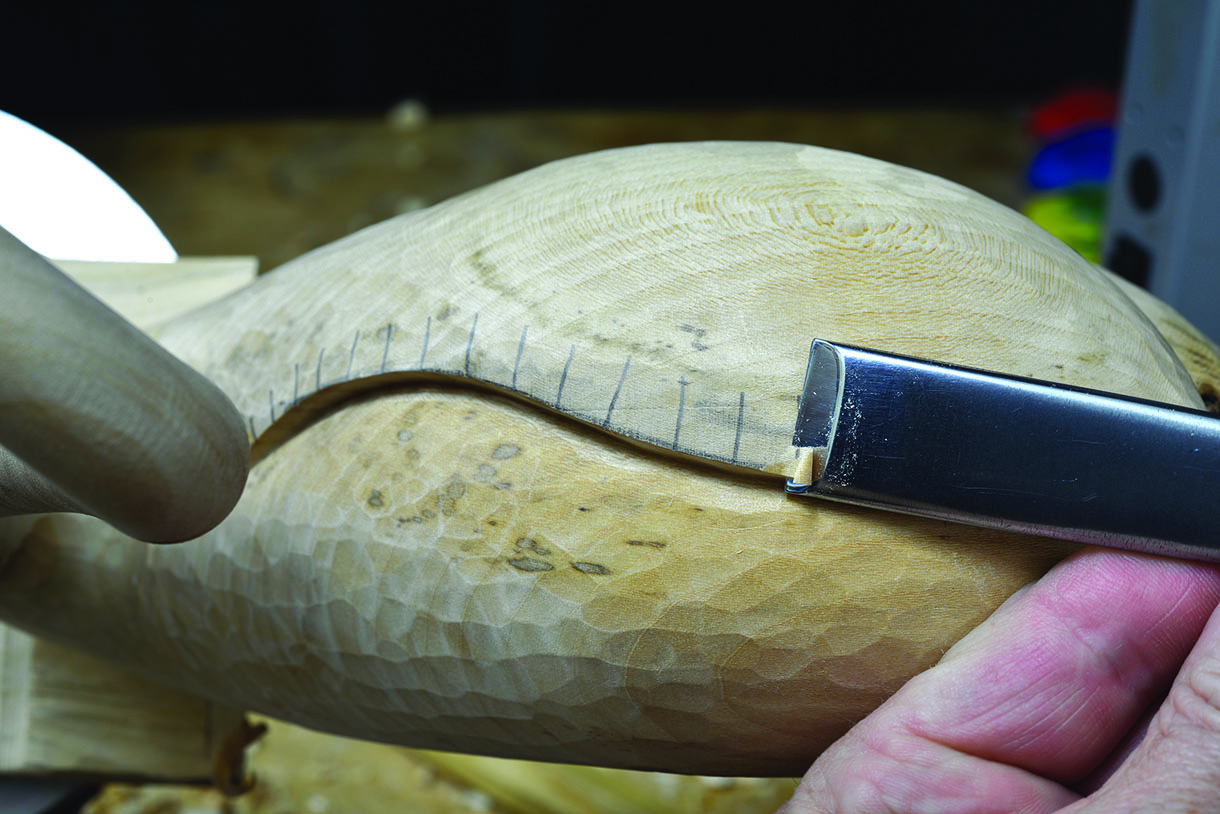
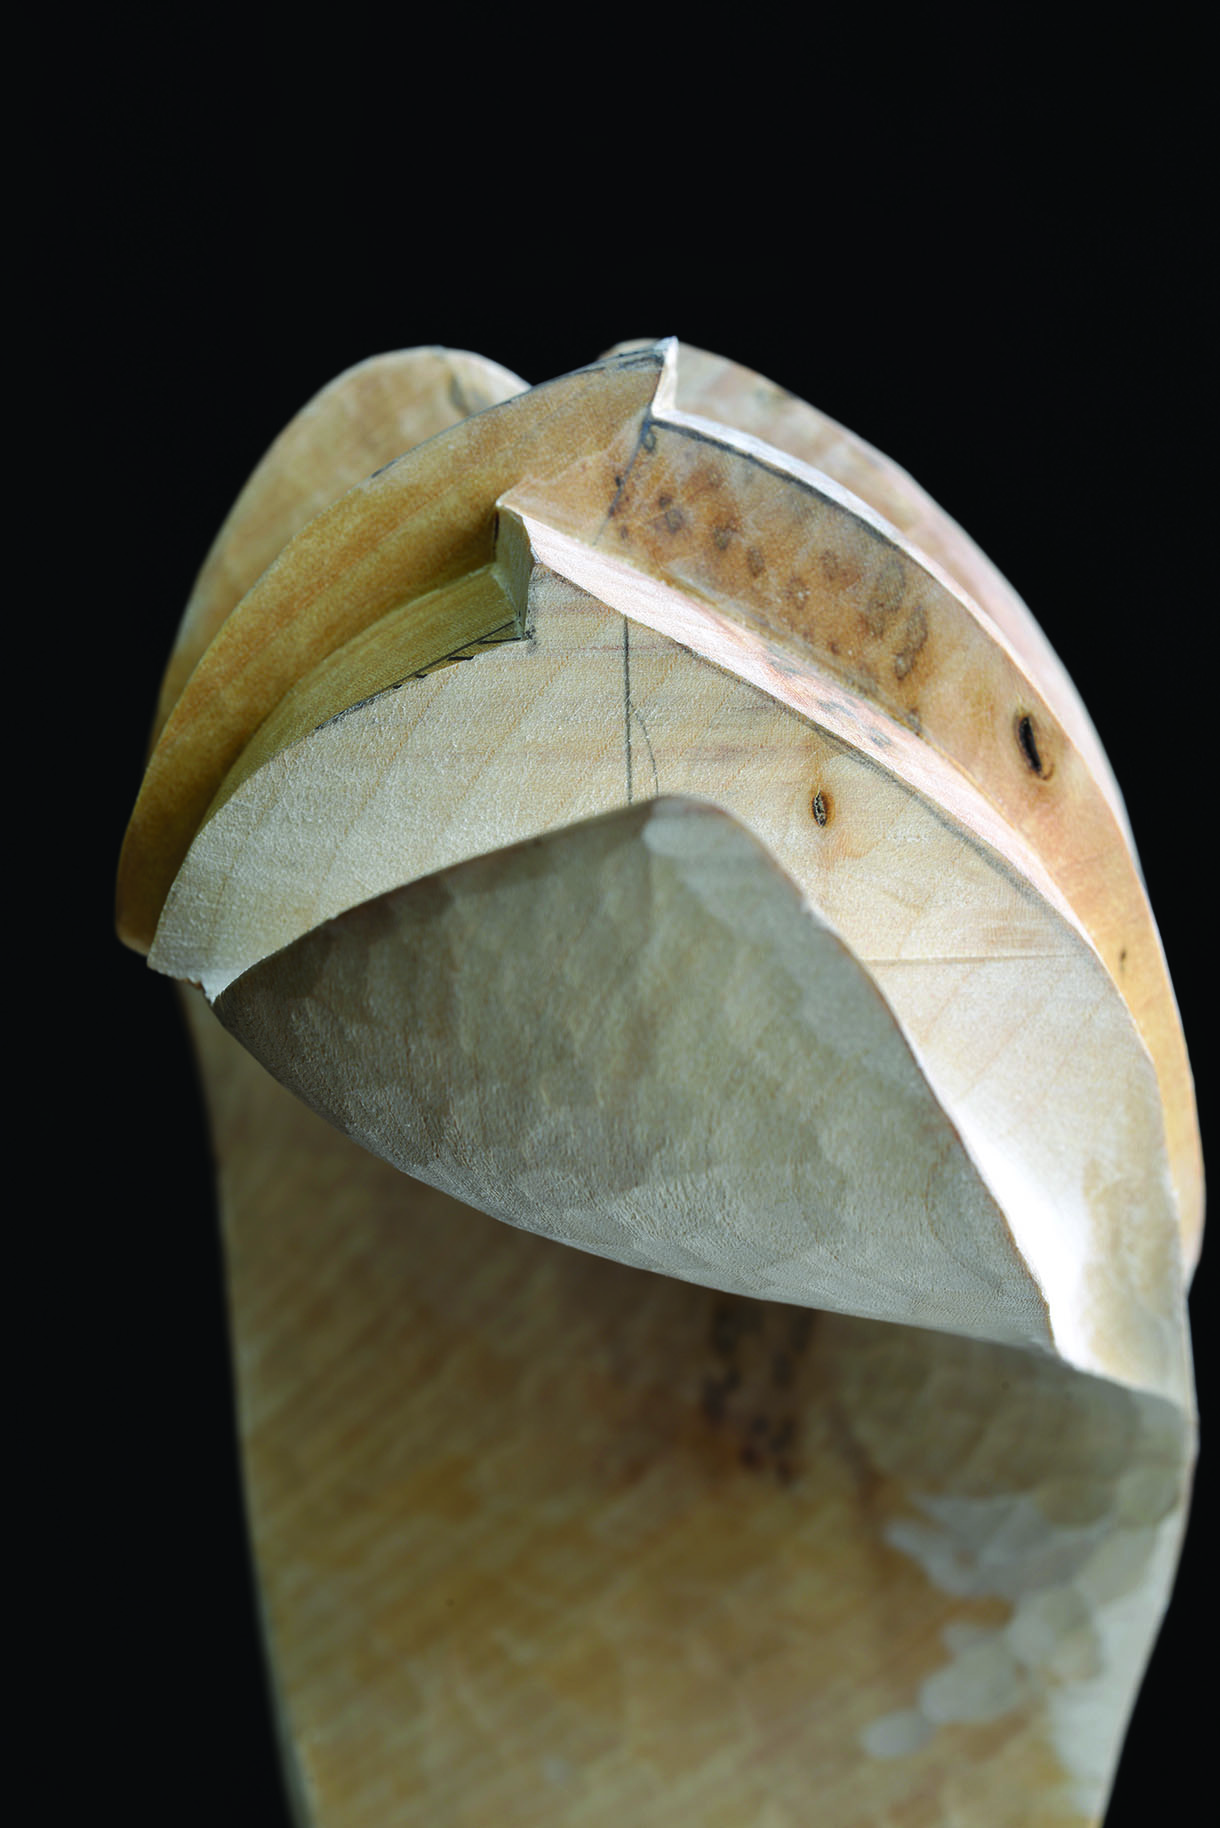
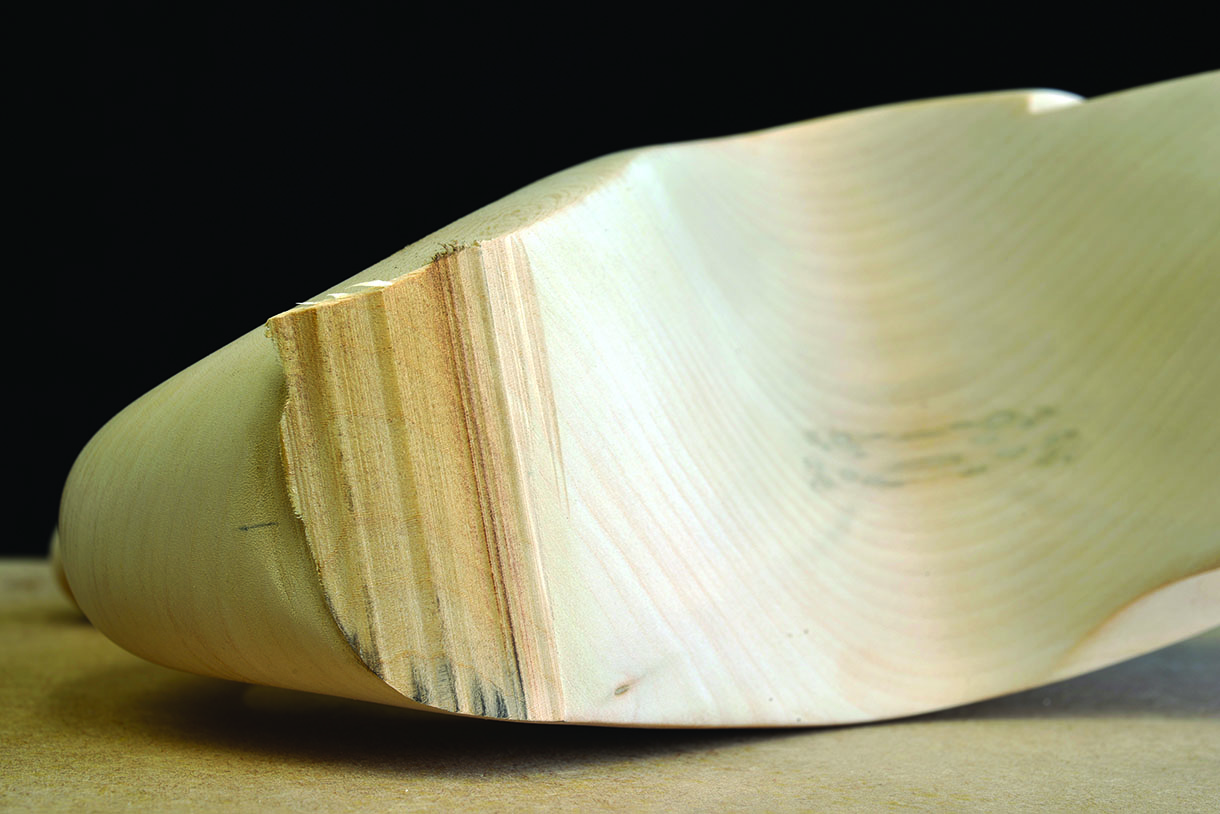
3. Now turn your attention to the tapered undercut, which originates from the flat area at the base of the swan’s neck at the front and gradually becomes more acute in its angle as it travels up to the highest position in the middle of the body. From this position the angle becomes less again as it flows down over the tail. You will need to use several gouges to produce this detail. Starting with a No.7, 20mm work from the highest position in the middle of the body, down to the lower edge on the side
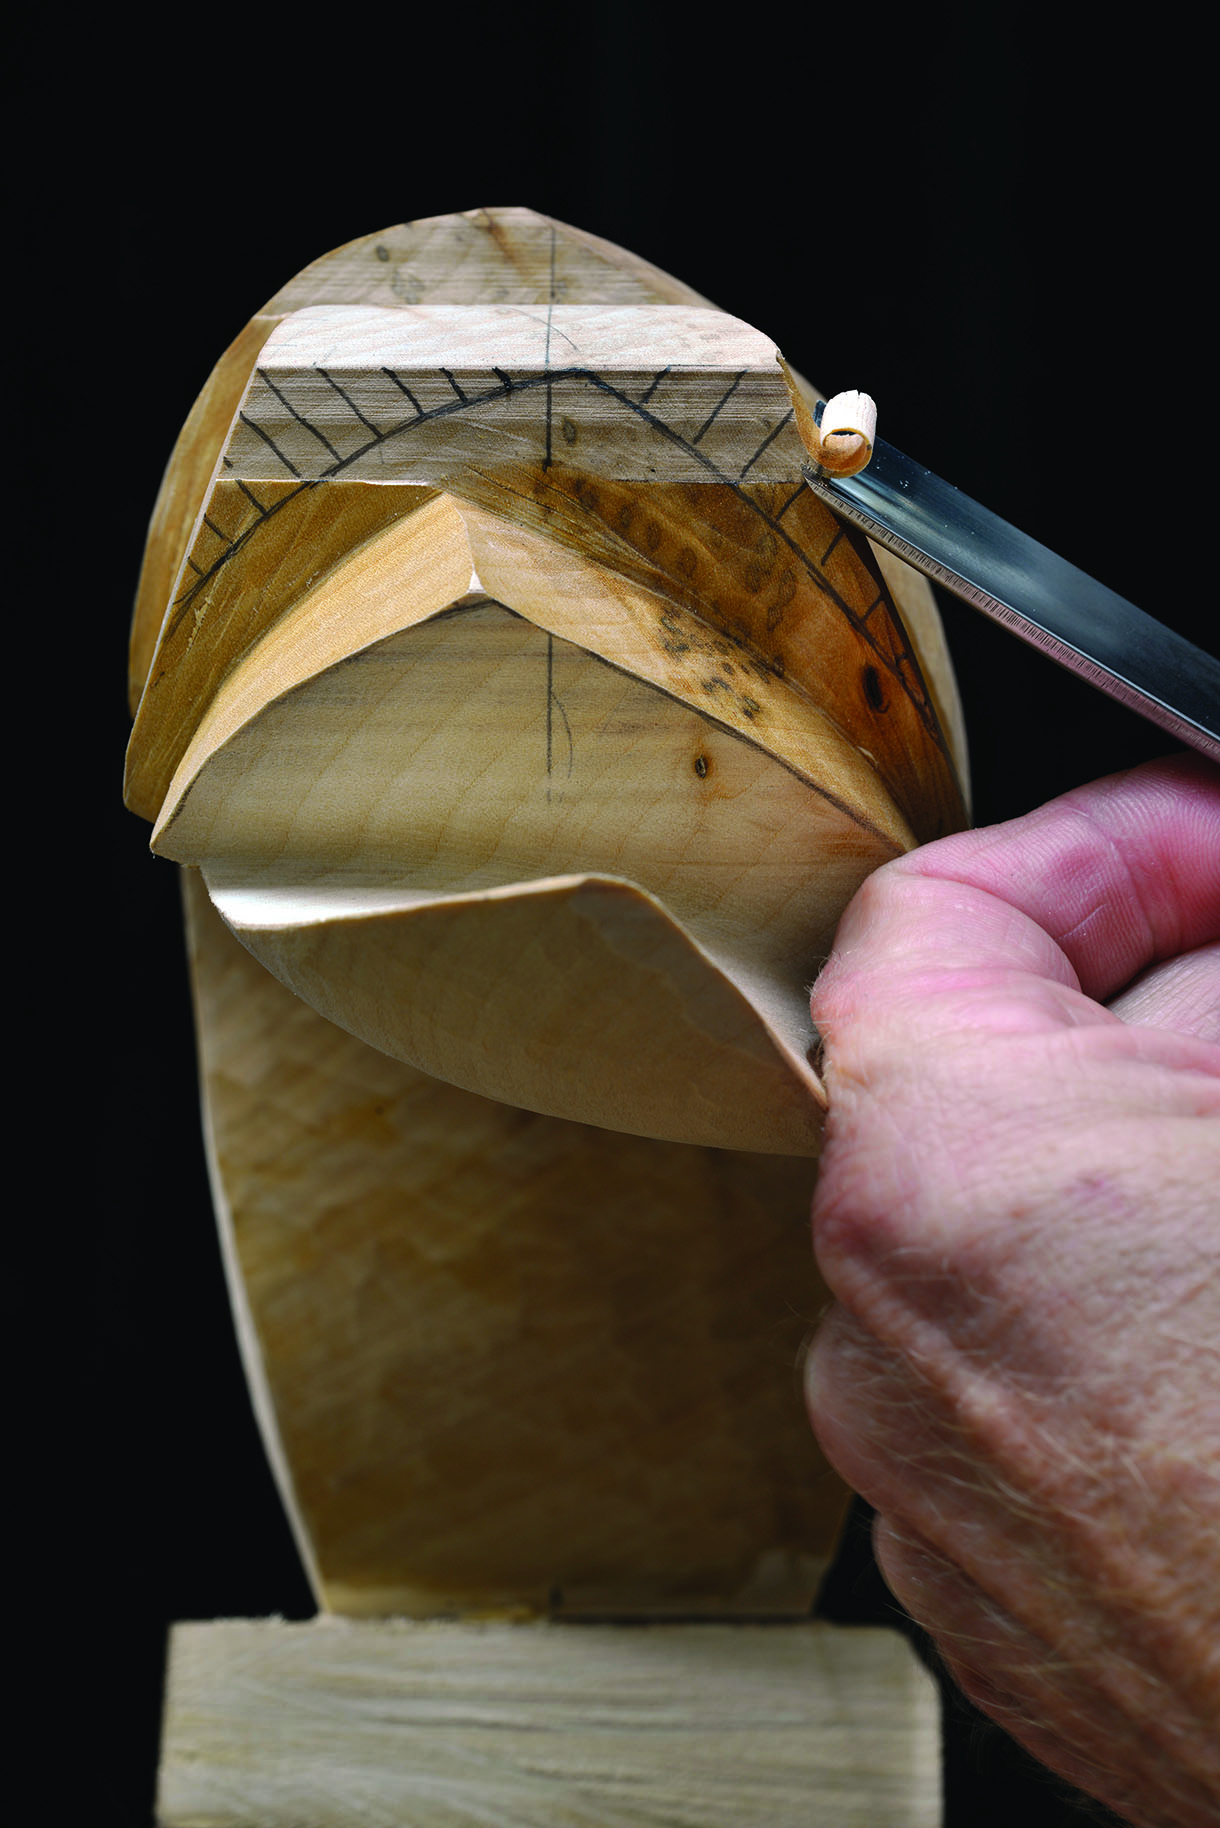
4. Continue to pare the wood away, gradually working underneath the body of the swan towards the opposite side
5. As the undercut develops you will need to start working outwards towards the neck and tail, while blending the depths evenly into these areas. As the angle of the undercut reduces as it flows to these areas, you will need to swap the No.7, 20mm for a No.5, 20mm, No.3, 20mm and eventually a No.2, 20mm
6. When you have worked past the centre line of the swan, you may find it easier to switch direction and carve from the opposite side, in towards the centre to meet the cuts you have already made
7. The finished angle of the tail is naturally determined by following the original V-tool cut on the side of the body as it flows downwards from the deeper undercut in the centre of the body
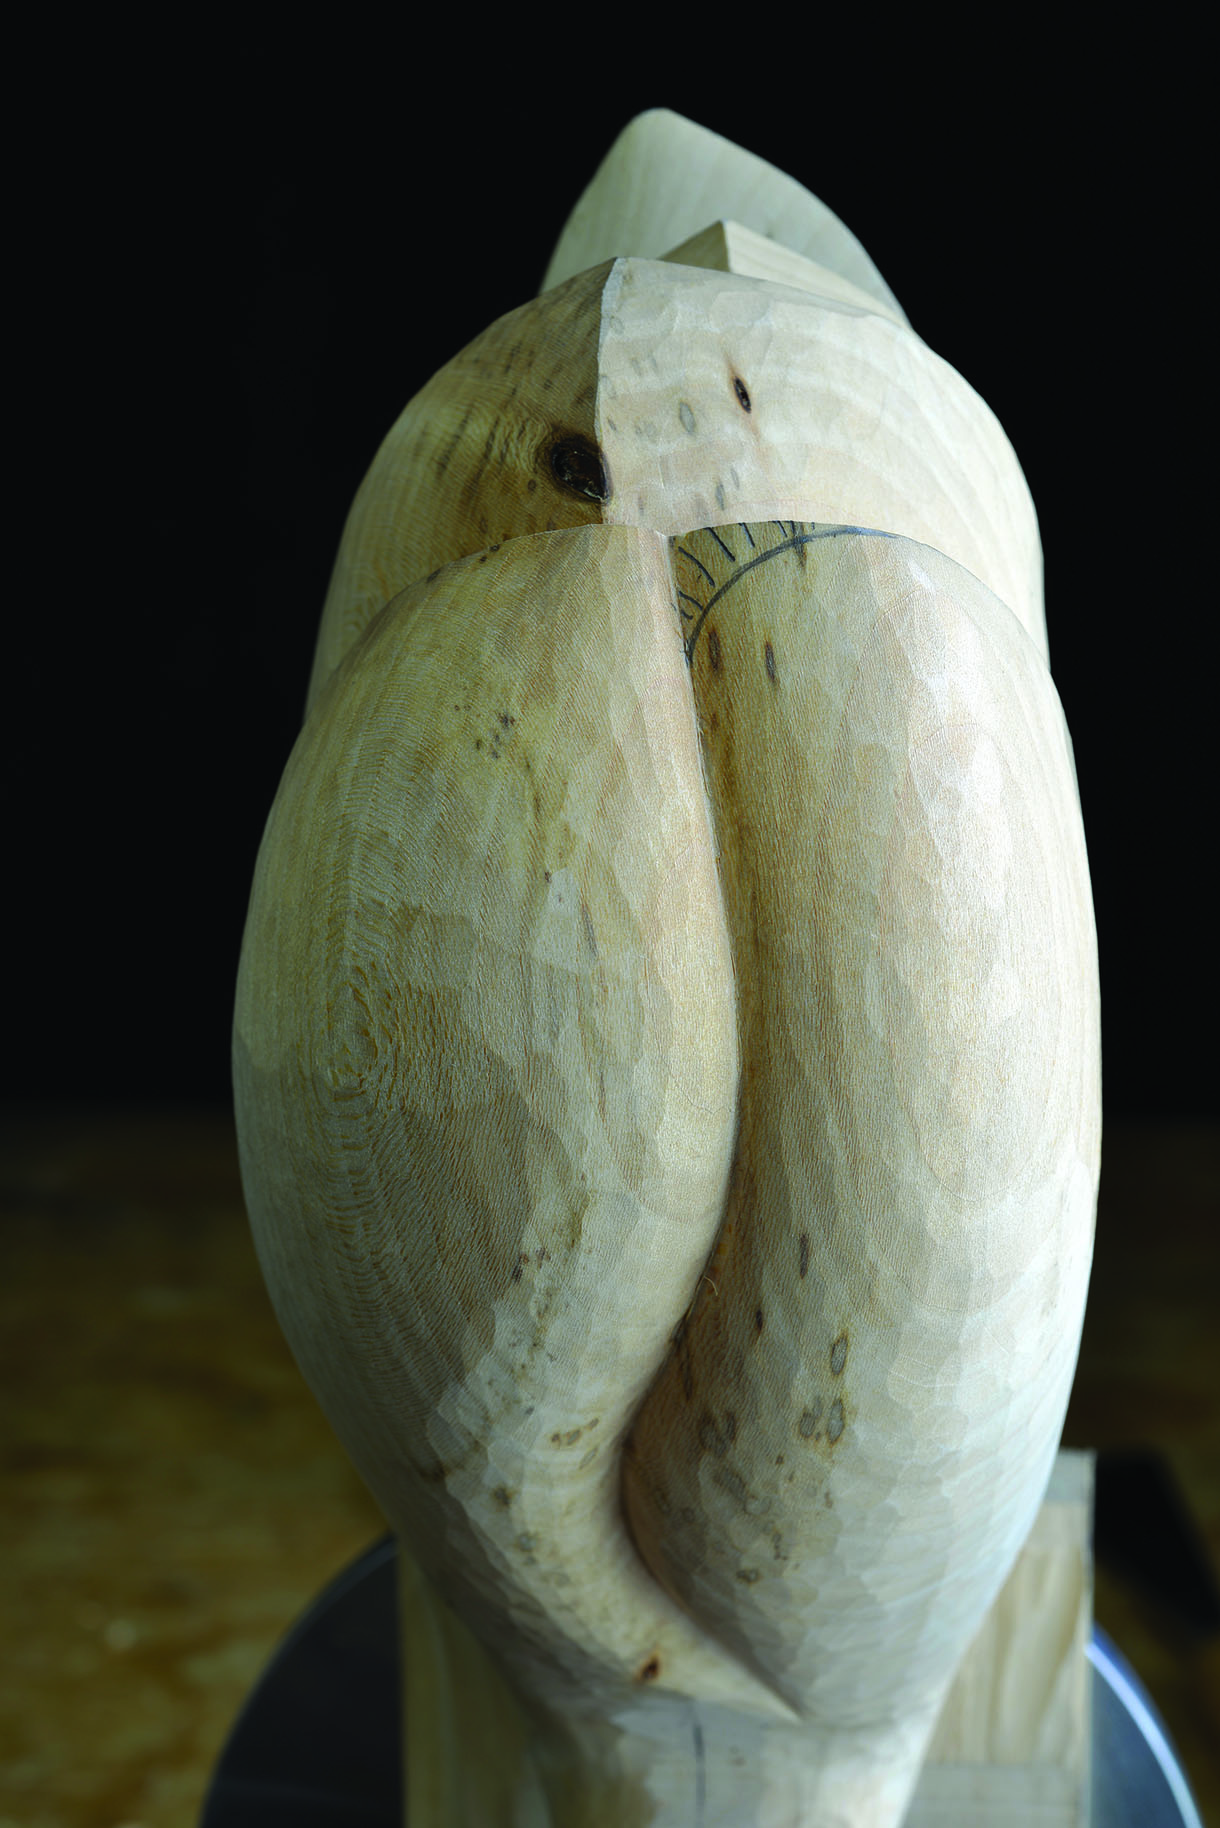
8. When you have worked across the complete area underneath the body from front to rear, study the surface closely to ensure the gouge work is even and has no sign of bumps or hollows. If you do find any areas that need further work, then make sure that you correct them before you sand the piece, as any irregularities on the surface will show themselves beautifully when the piece is eventually finished and polished
Top tip:
An effective technique to visually detect any undulations or other irregularities on the surface of your work is to take the project outdoors or somewhere with natural sunlight, and slowly move it around to examine the surface as the shadows strike across it. The shadows will fall in to any undulations and show up any uneven areas or deep gouge marks that may need addressing, making them far more obvious to the naked eye.
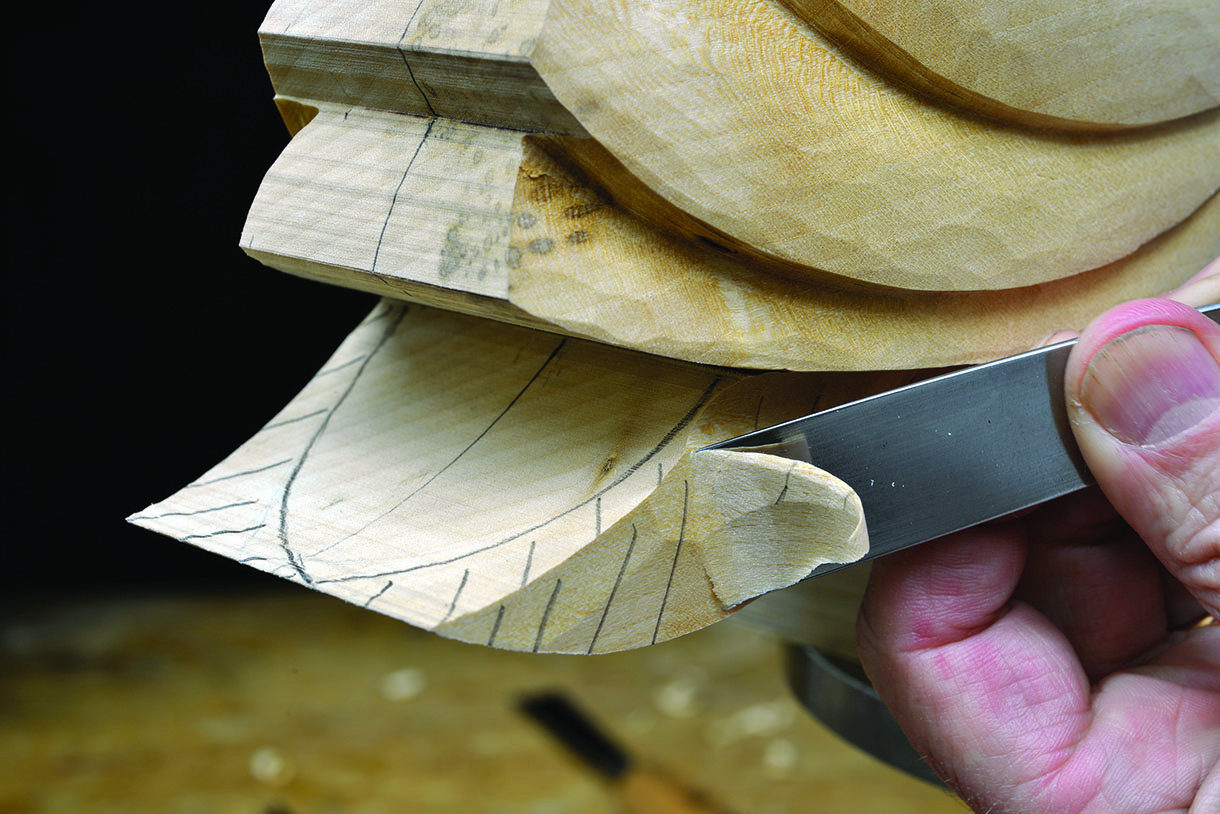
9. Now the angle of the underside of the tail has been established, shape the upper side in relation to the tail. The left side edge of the tail is already formed at the correct height position. From here, the surface tapers down to the lowest a on the right hand side
10. The following technique requires a degree of determination as it becomes more awkward to gain an effective gouge cut as you work deeper in to the inner edge underneath the wing. This is essential, so you must persevere to shape the flat square inner edge to produce the correct angle. Start by using a No.9, 7mm to carve along the line of the tail on the side view and across the inner edge, towards the left side
11. Use the No.2, 20mm gouge to remove the mass along the square right edge, and shape the surface angle over the top of the tail in relation to the underside. Repeat steps 10 and 11 until the No.9, 7mm gouge no longer fits into the tight inner edge then swap to the No.11, 4mm gouge and continue working in this area
12. When you reach approximately two thirds of the way across the tail from the right side to the left, you can then swap the No.11, 4mm gouge for 100 grit abrasive. Fold or roll up the abrasive to form a 2–3mm round edge and work this back and forth into the inner edge to continue creating the necessary angle. When you are sure that you have achieved a good result, sand over the entire tail to evenly smooth the surface
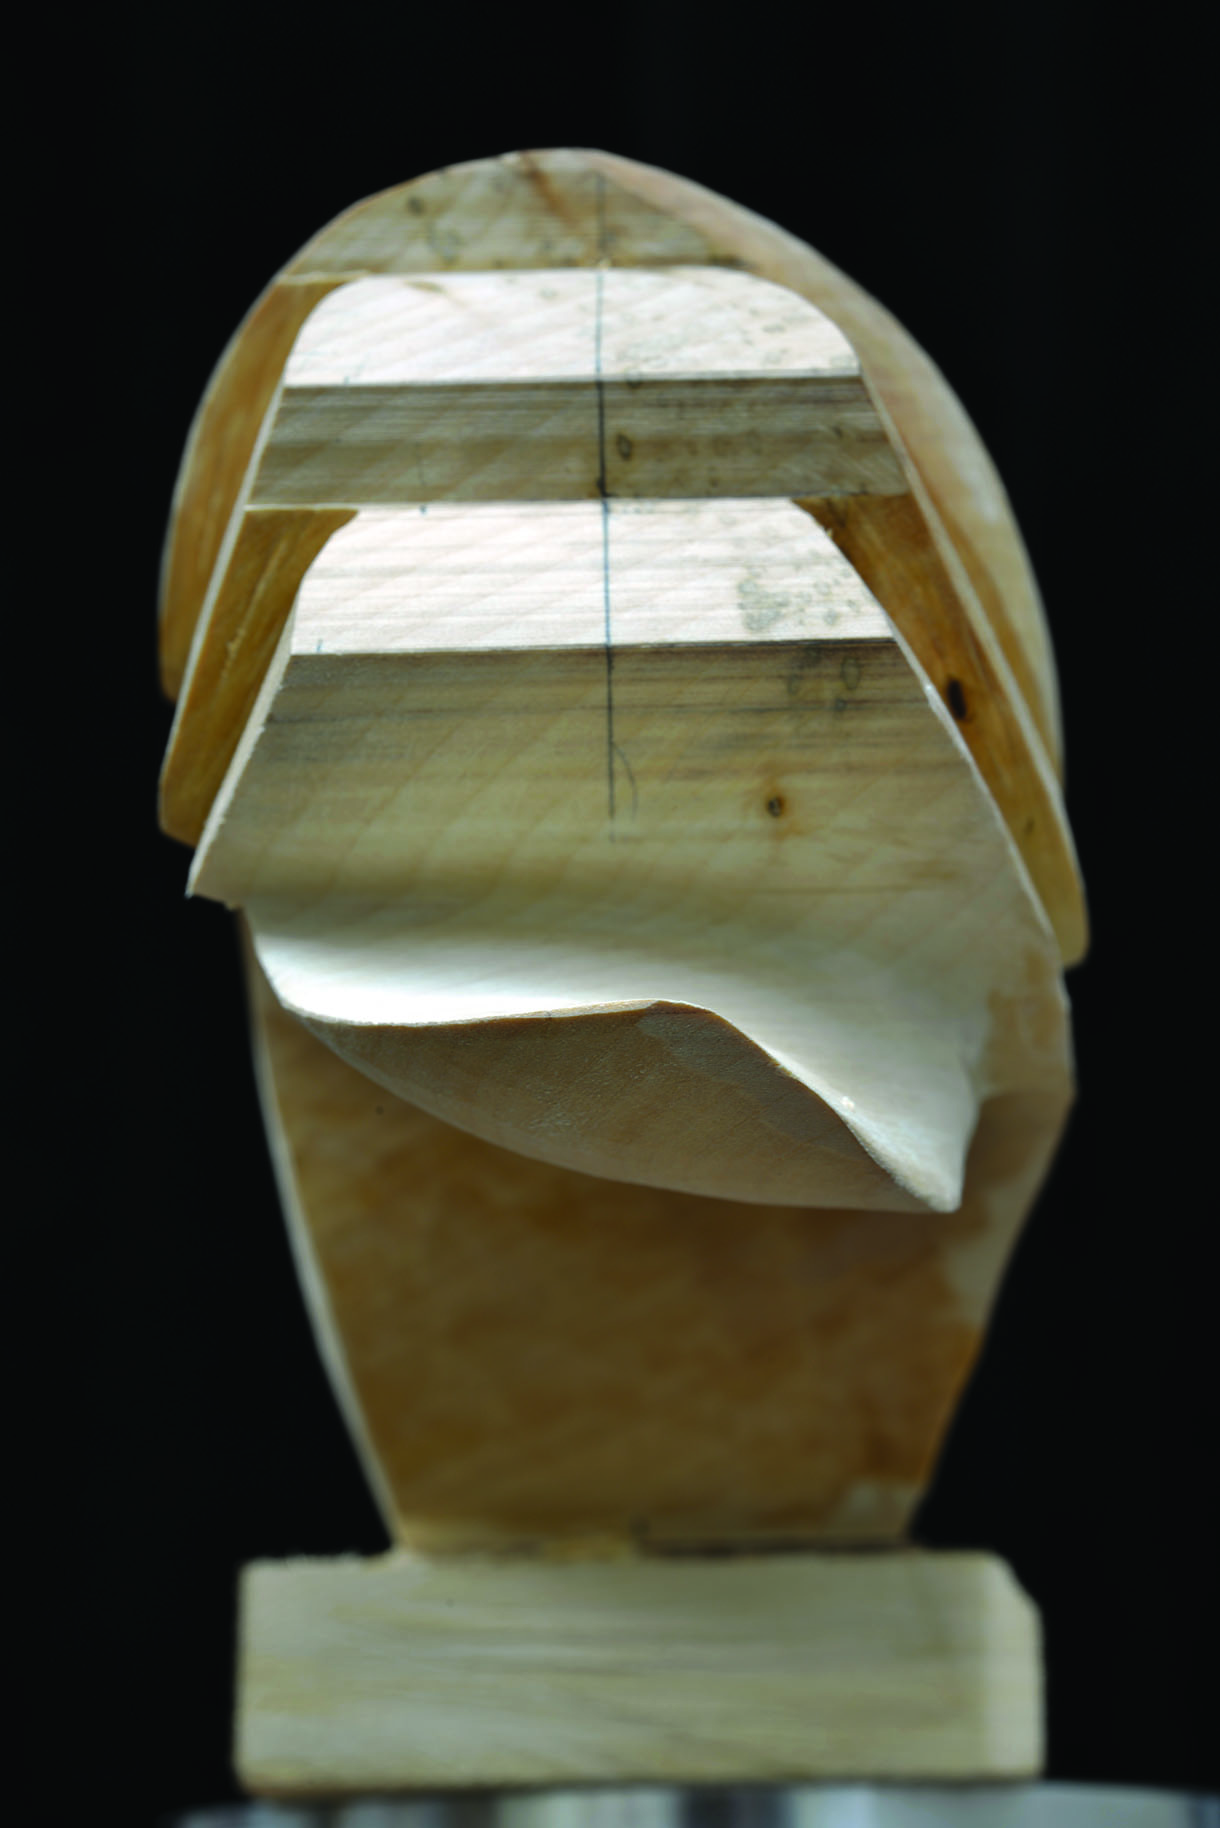
13. Moving upwards now to the layers of feathers above the tail. Draw the feathers in position asymmetrically from the centre line and stagger up through the three different layers to produce a more realistic representation and to add interest around the carving. Use the V-tool to part the layers of feathering around the rear edge and use the No.2, 20mm gouge to carve the mass away, down to the design line
14. Draw the second line of the wing feathers on the opposite side of the lower layer that has just been carved. Repeat the technique from step 13 to create the form of this detail
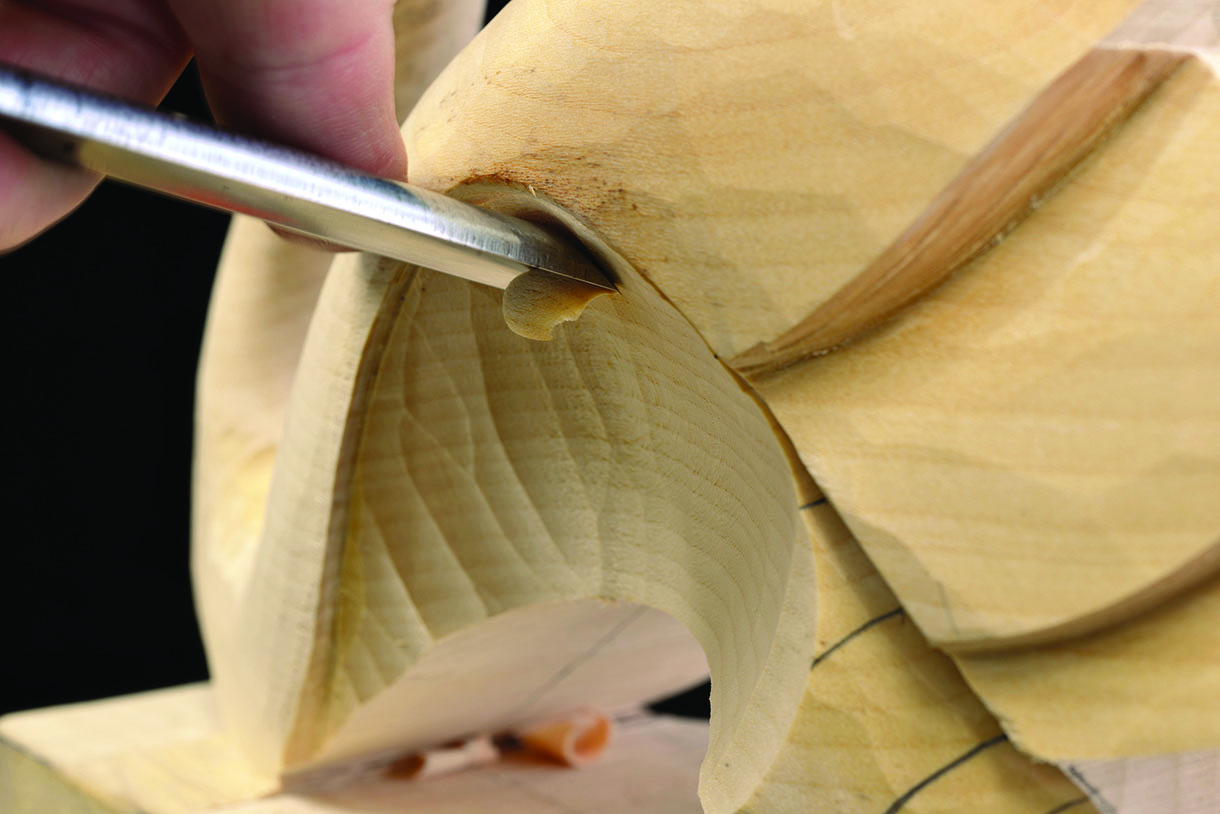
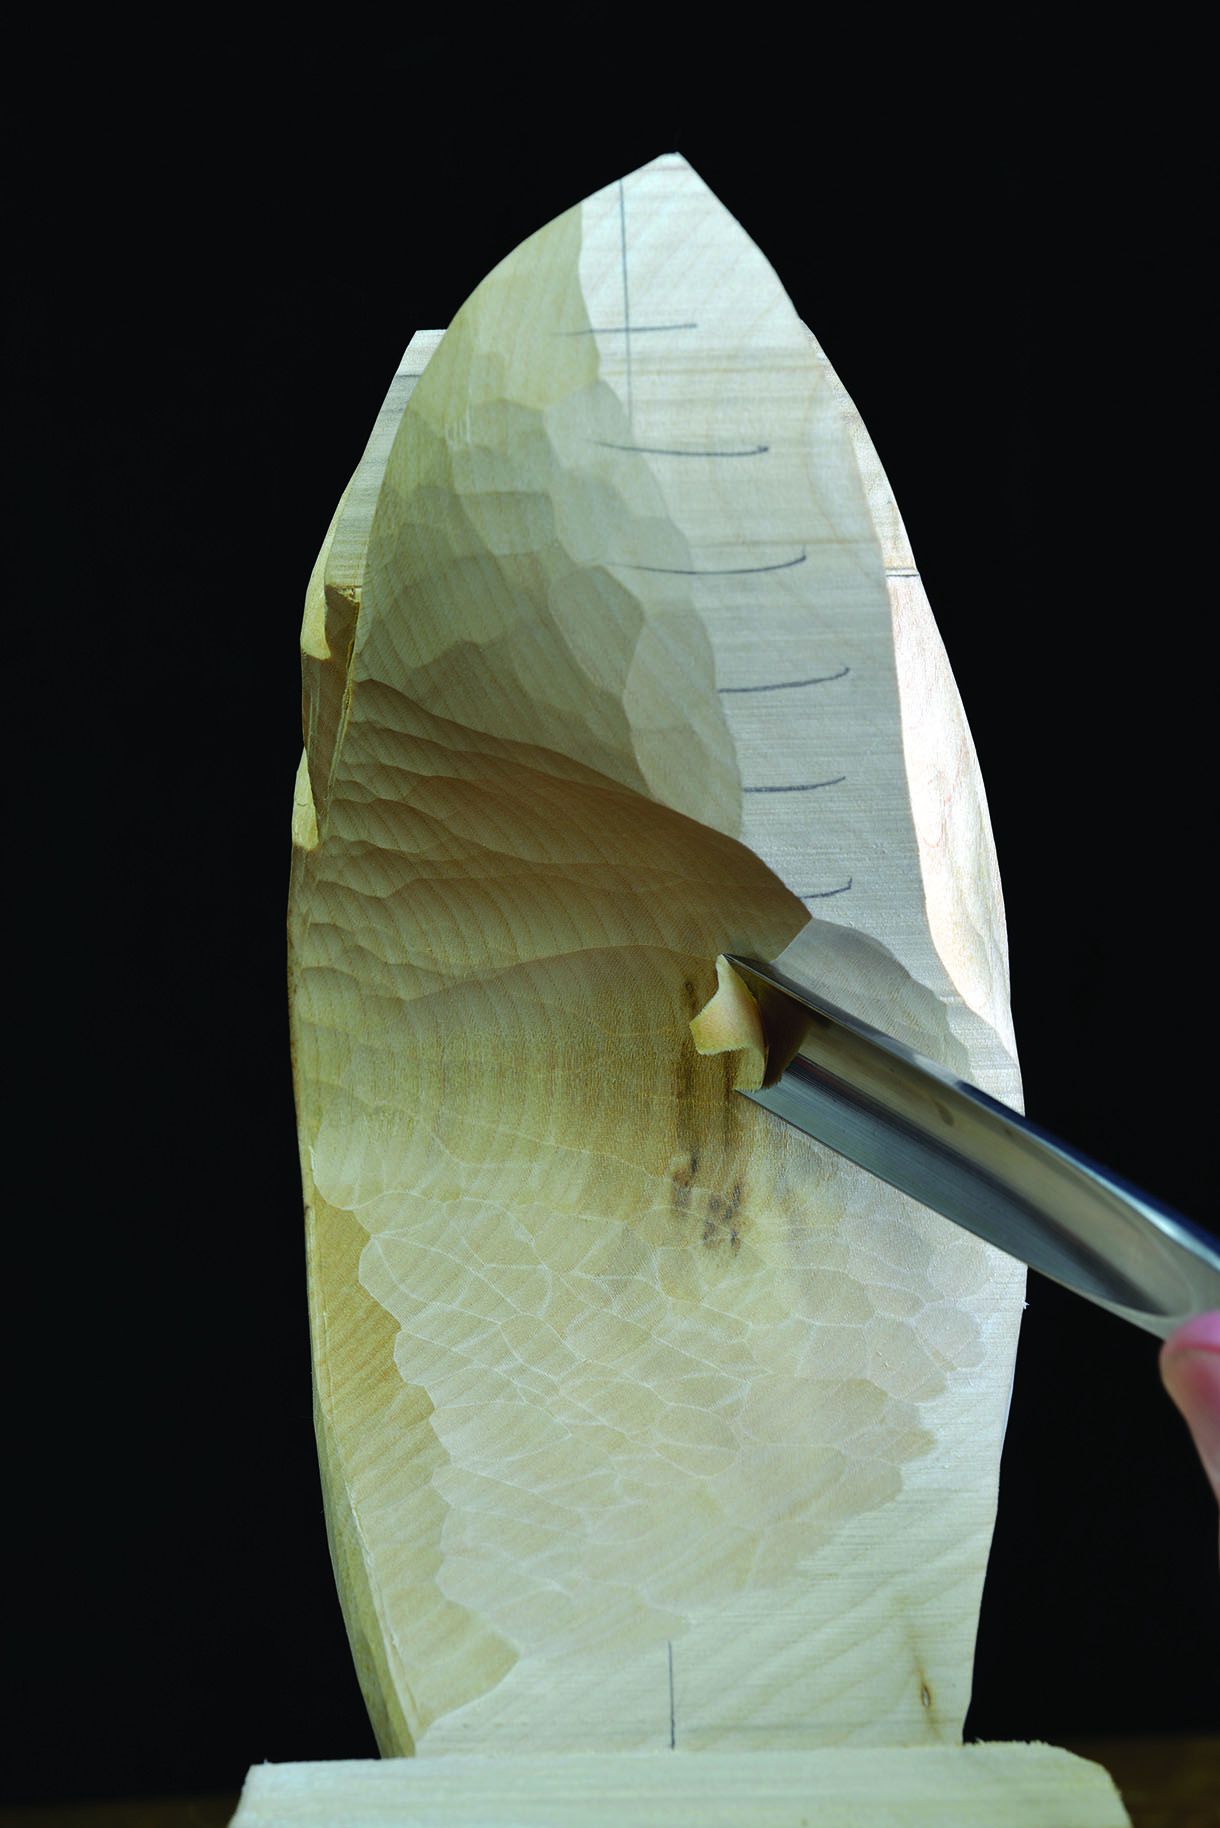
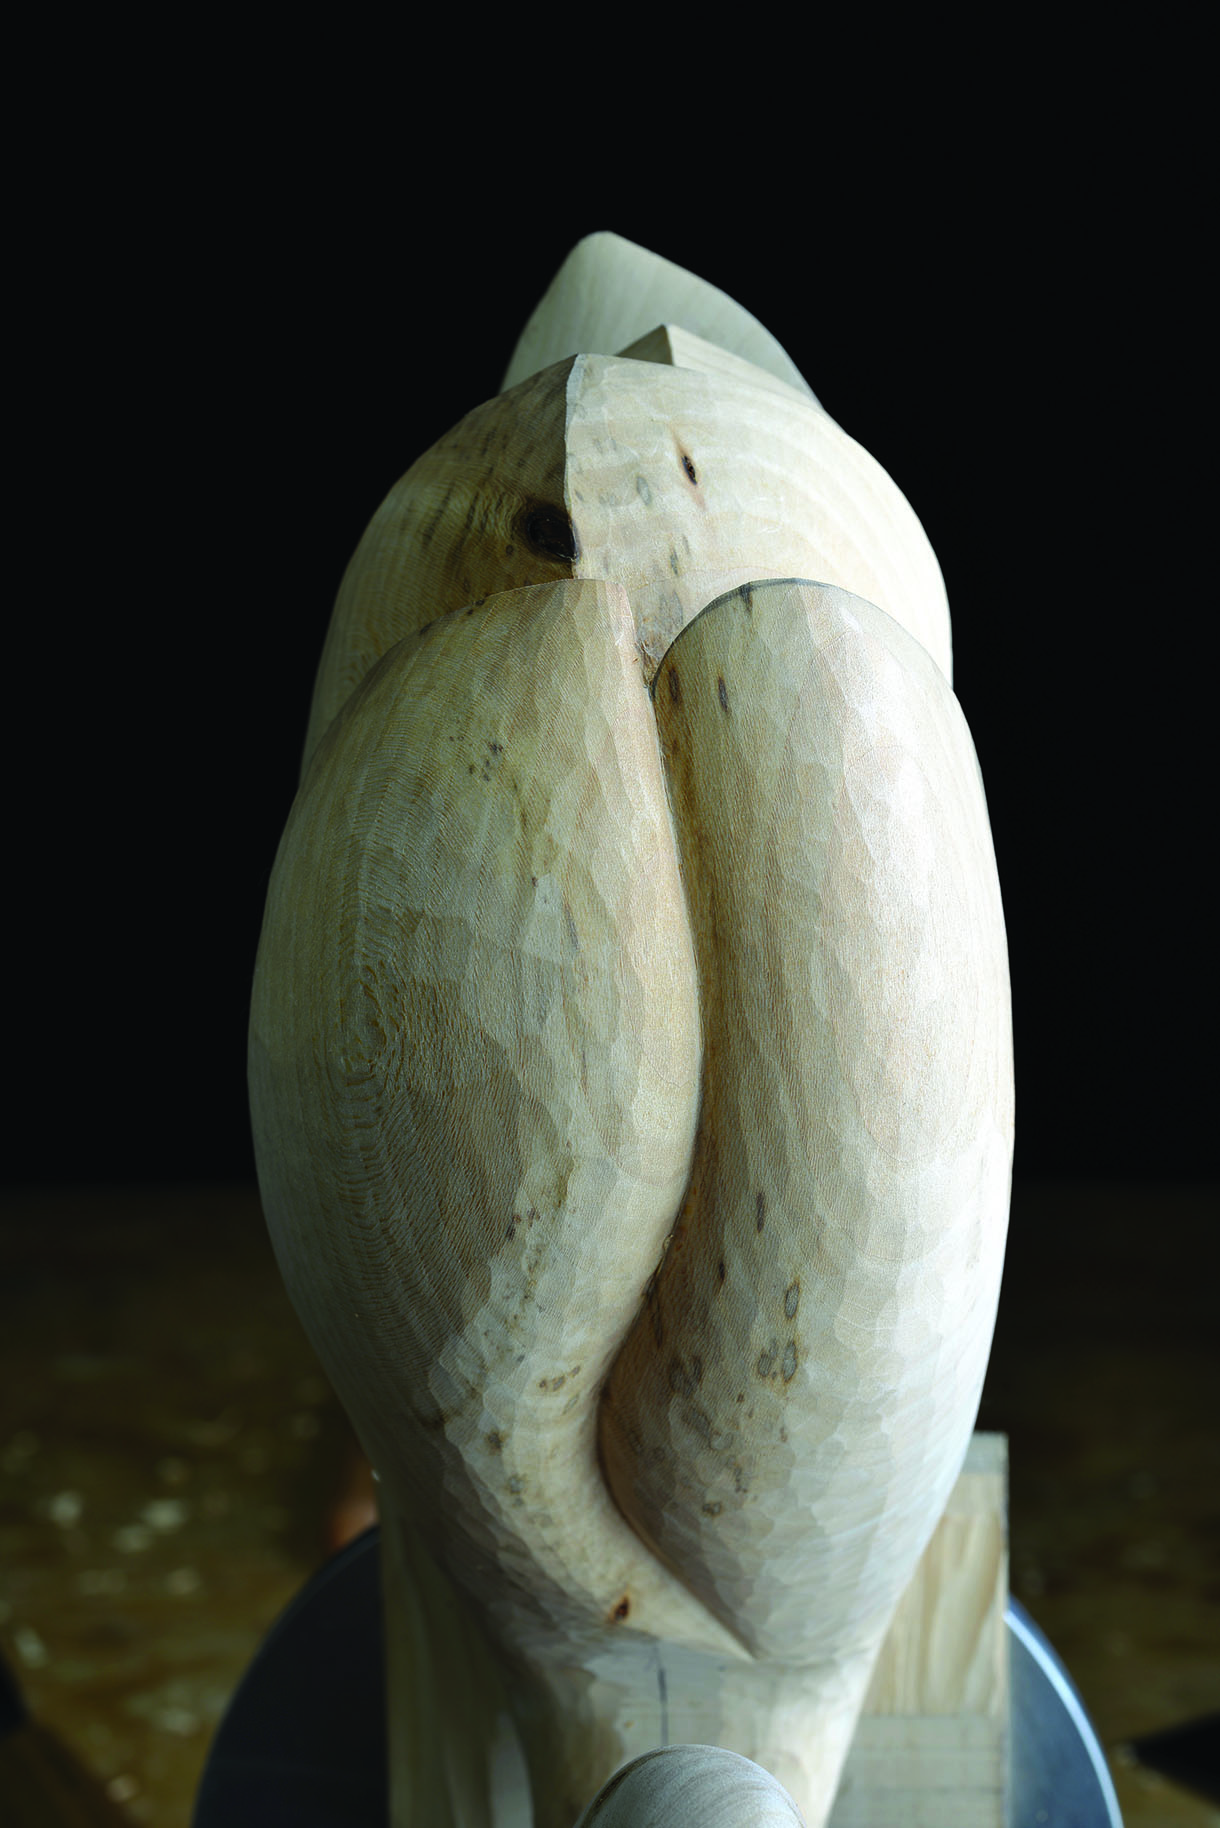
15. Move on to the upper most position of the swan’s back to where the wings will be separated. If you have followed the previous steps closely, the upper area of the wings should be delicately curving around the body and upwards to meet each other uniformly at the top. The separation line should be made as a flowing contour, asymmetrically across the body, from one side to the other, terminating at the tip
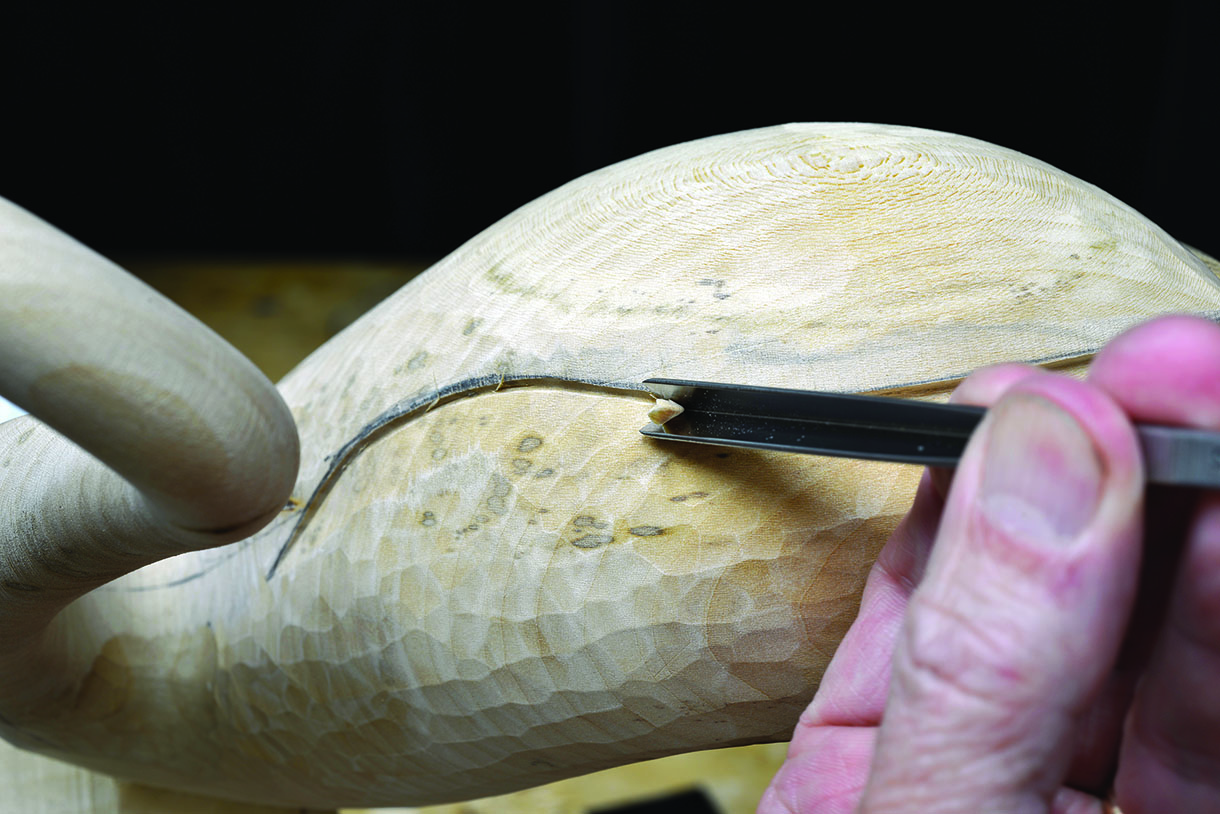
16. Sketch carefully along this line with the V-tool while tapering the cut out in a natural angle as you reach the position near the swan’s neck
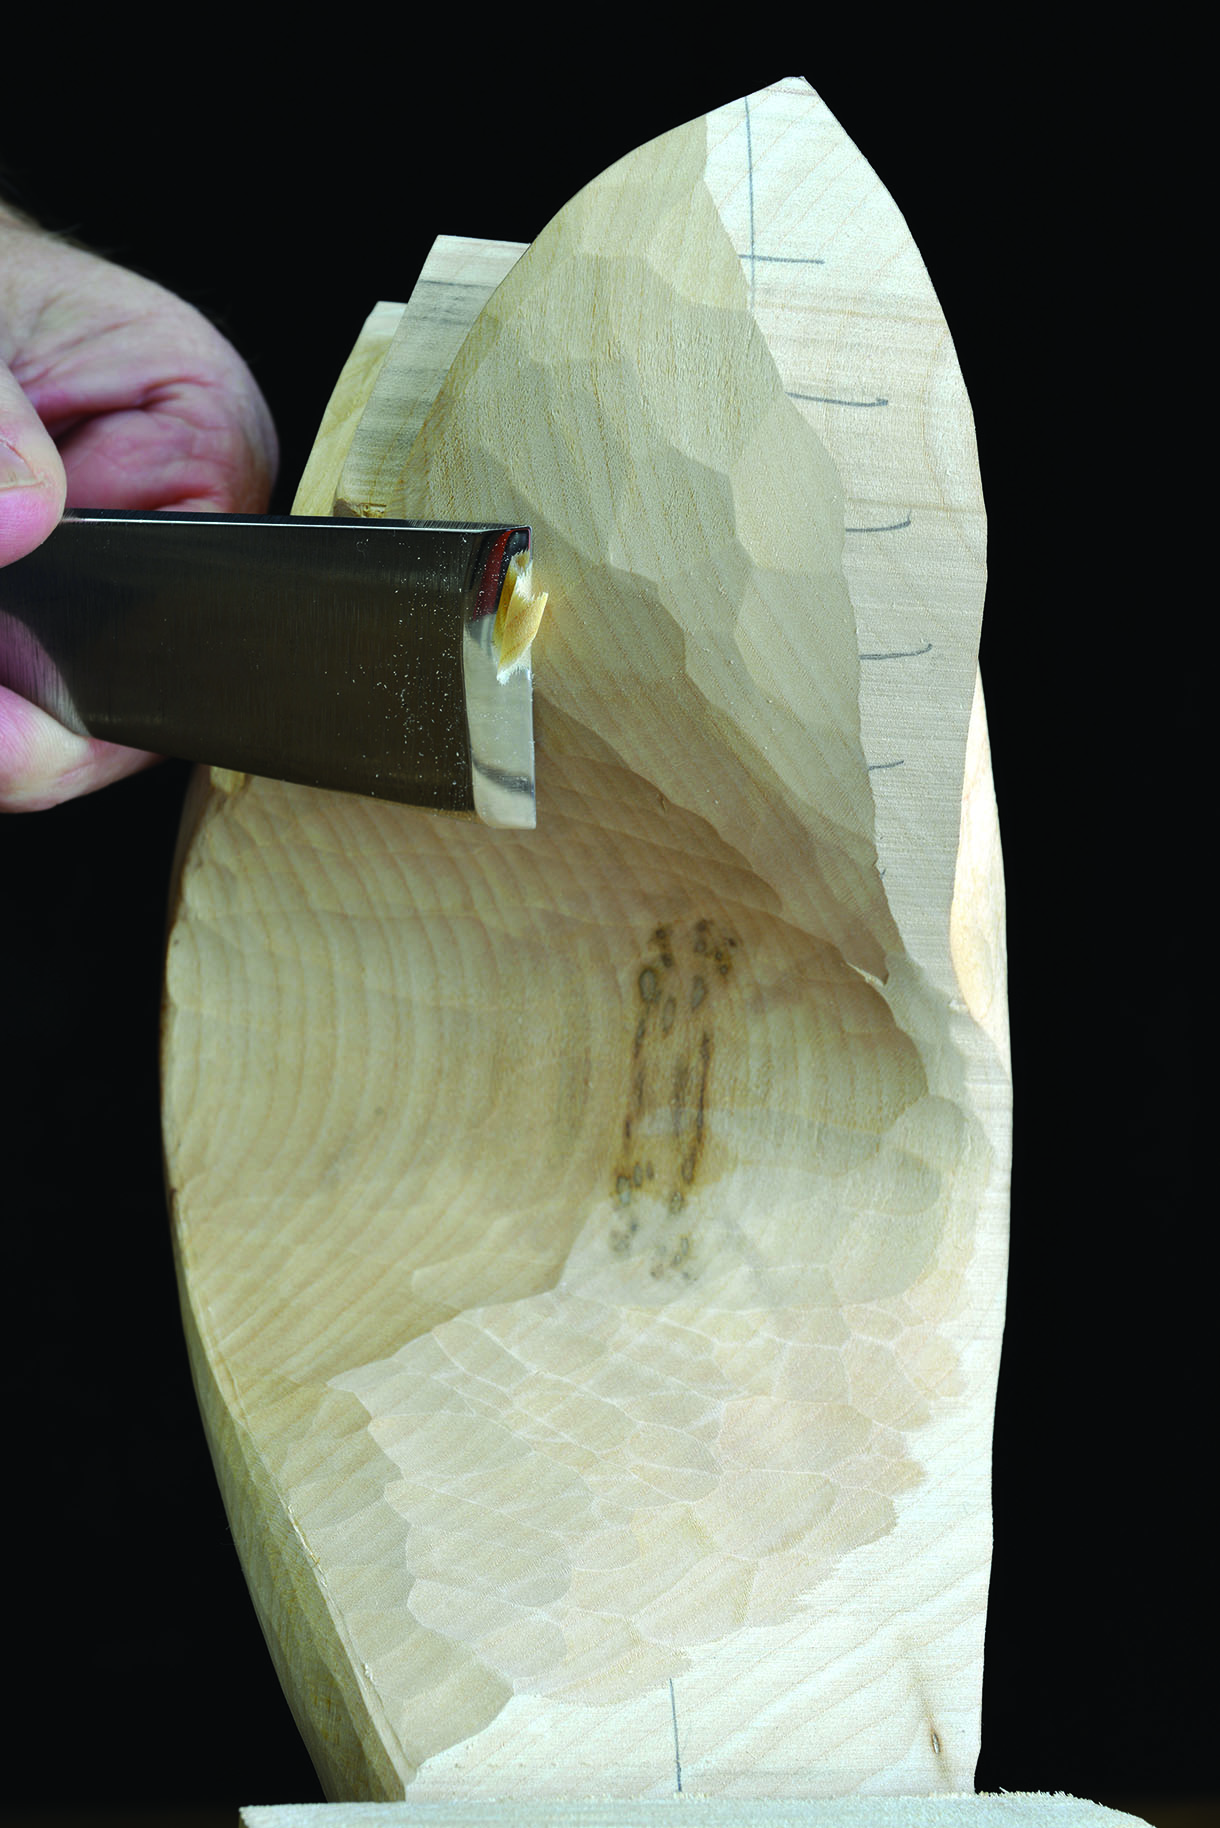
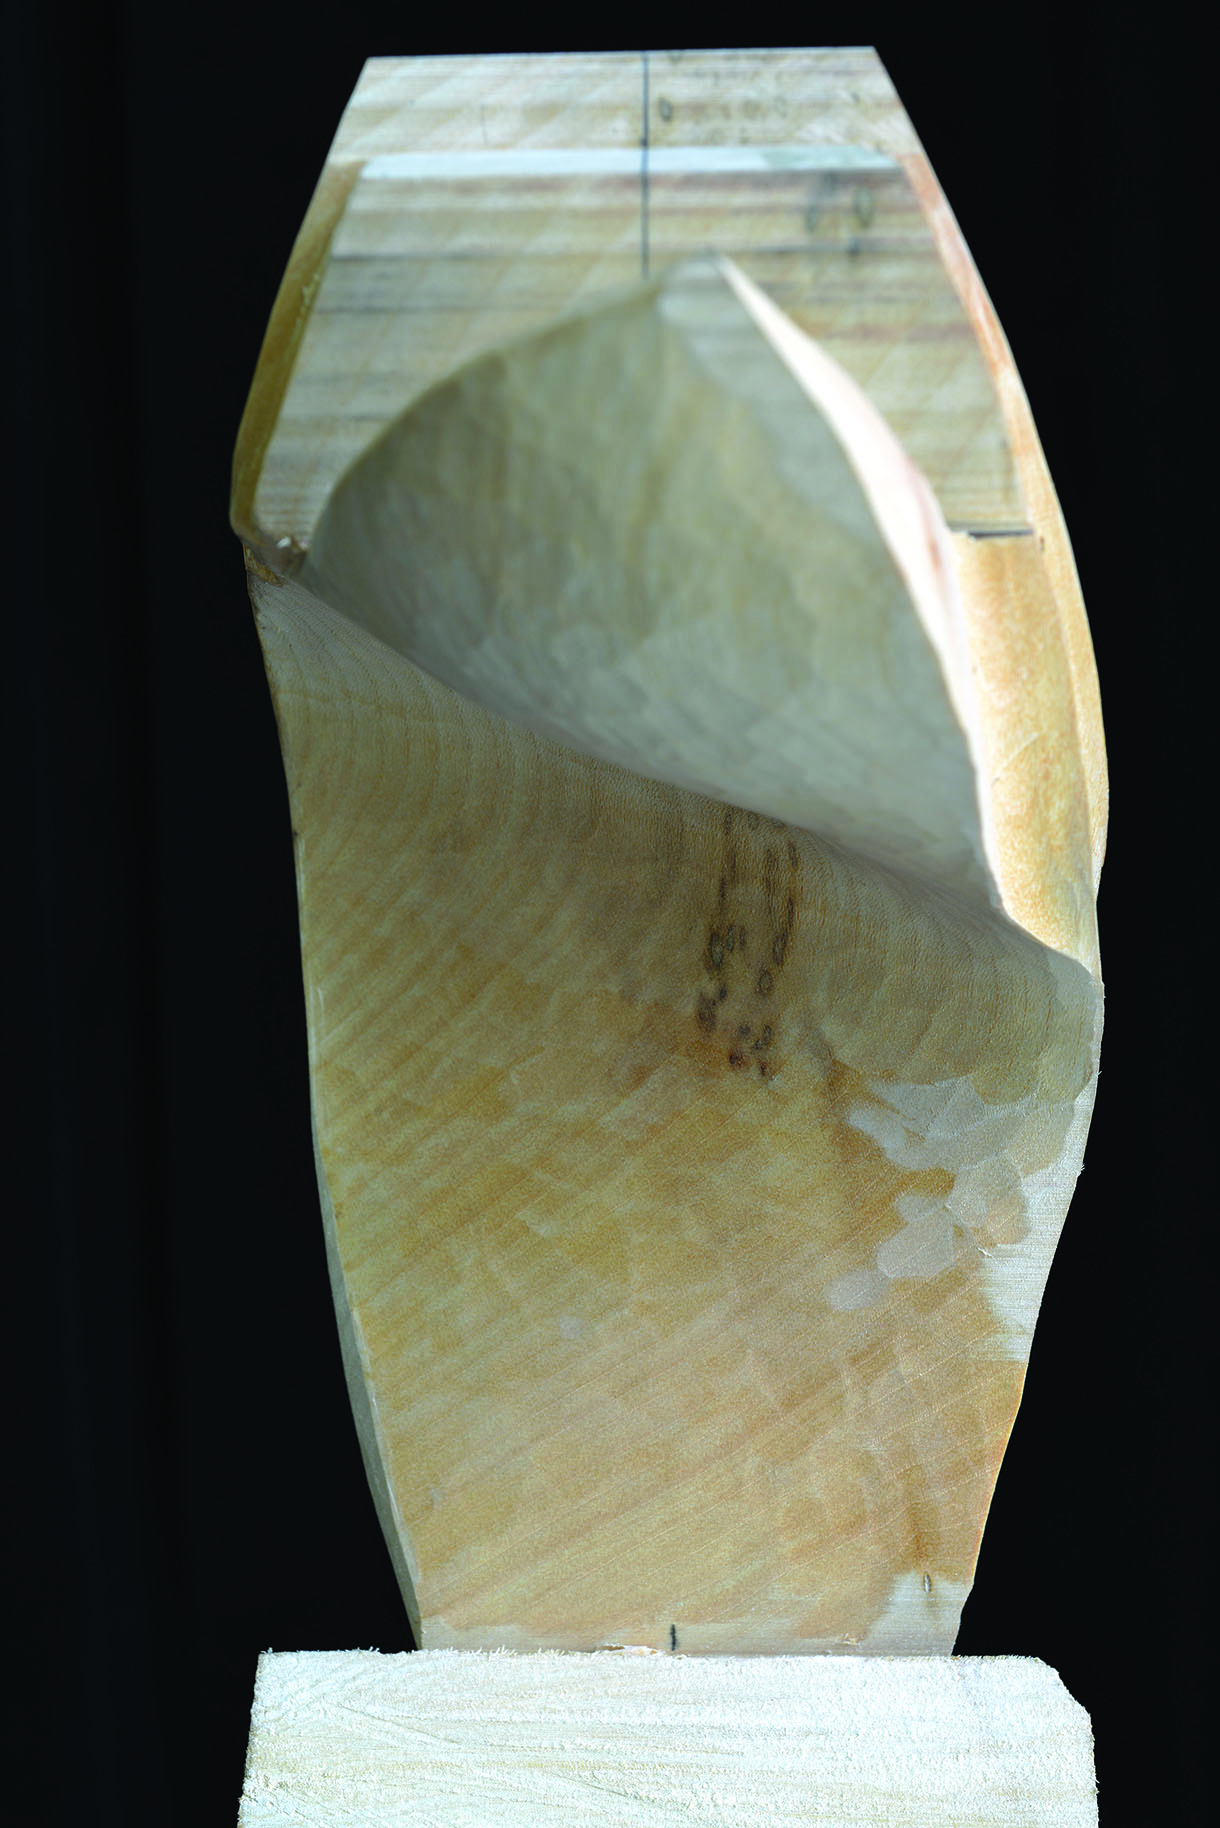
17. Blend the adjacent areas on both sides of the V-tool into the crease line, then work across all of the surrounding areas to create a naturally delicate flowing body contour. Repeat step 16 and this current step until you reach a good depth of separation between the wings producing an effective visual result
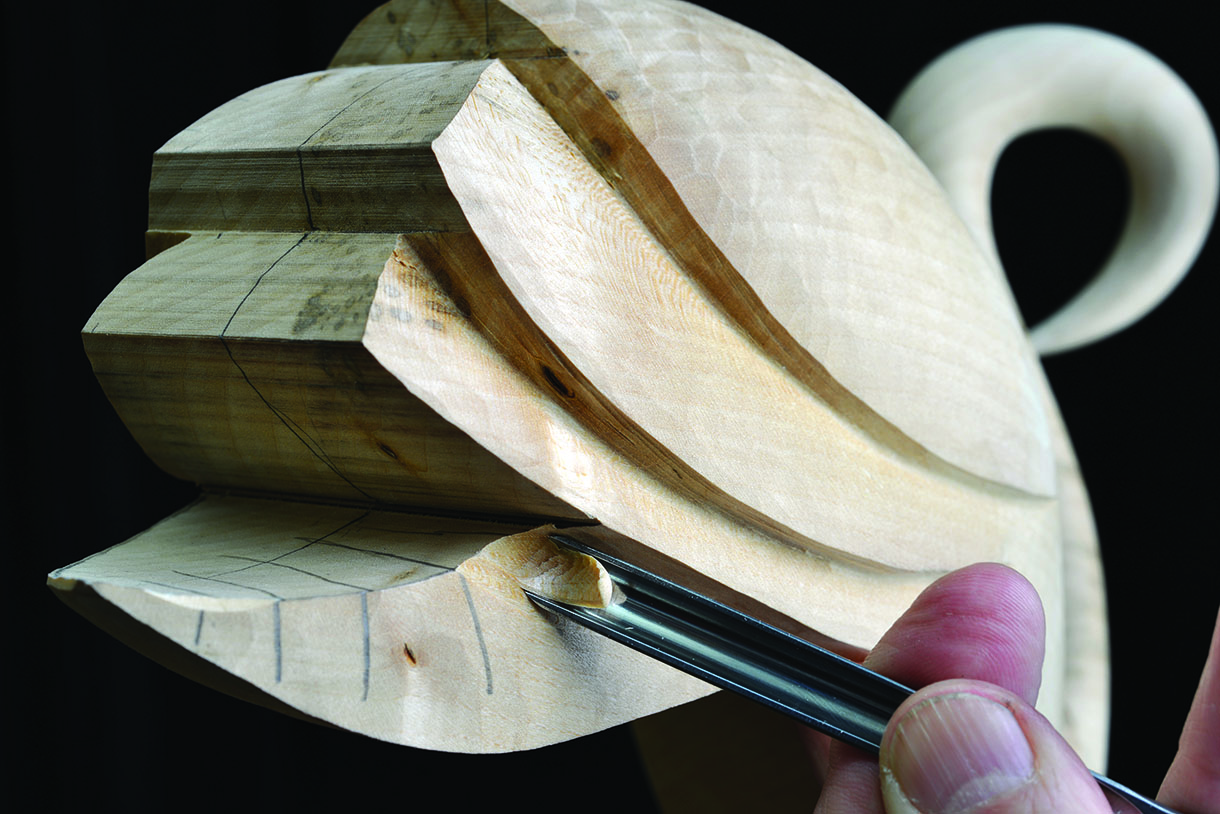
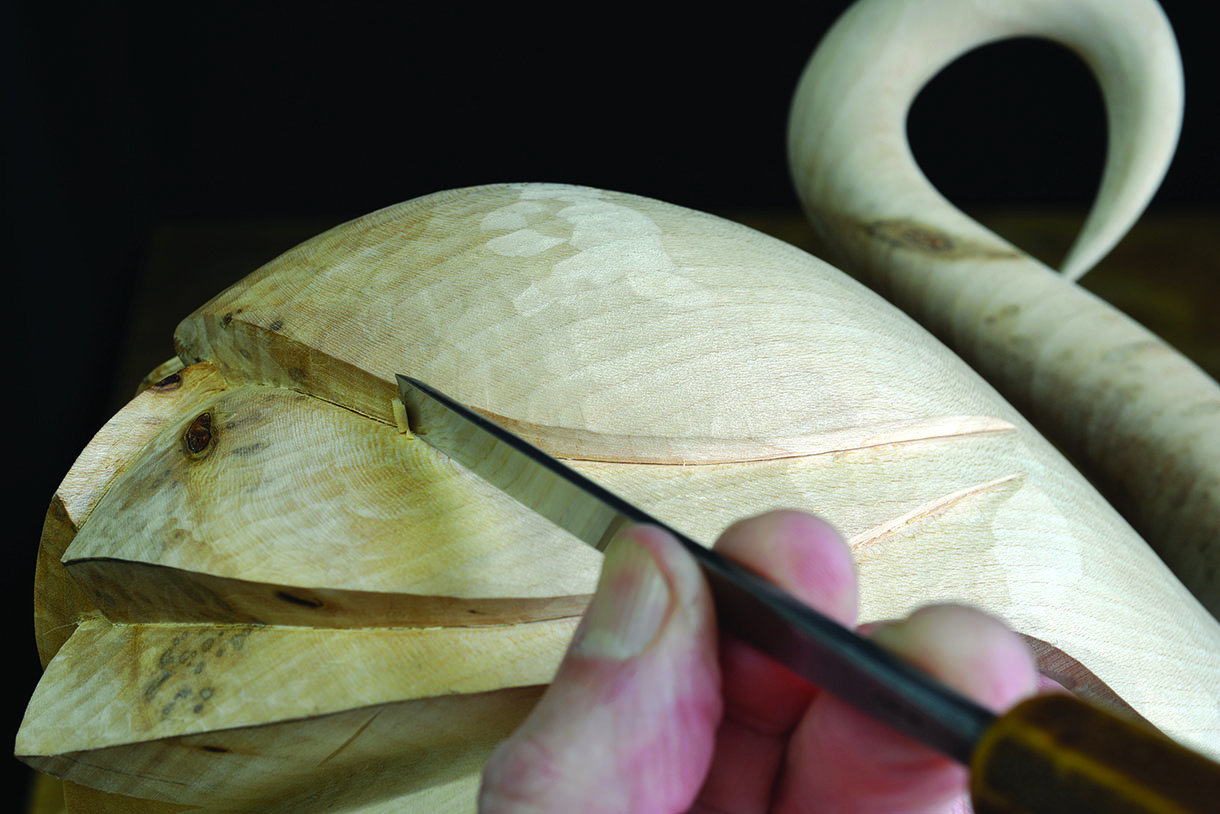
18. The wings tip can be separated and will be formed slightly different from each other. Draw the shape you would like the wing to represent in its correct position. Use a knife to cut a deep slice in between the wing tips
19. Use the No.2 gouge to shape the tip of the wing into the knife cut. Repeat step 18 and this current step until you reach your design line
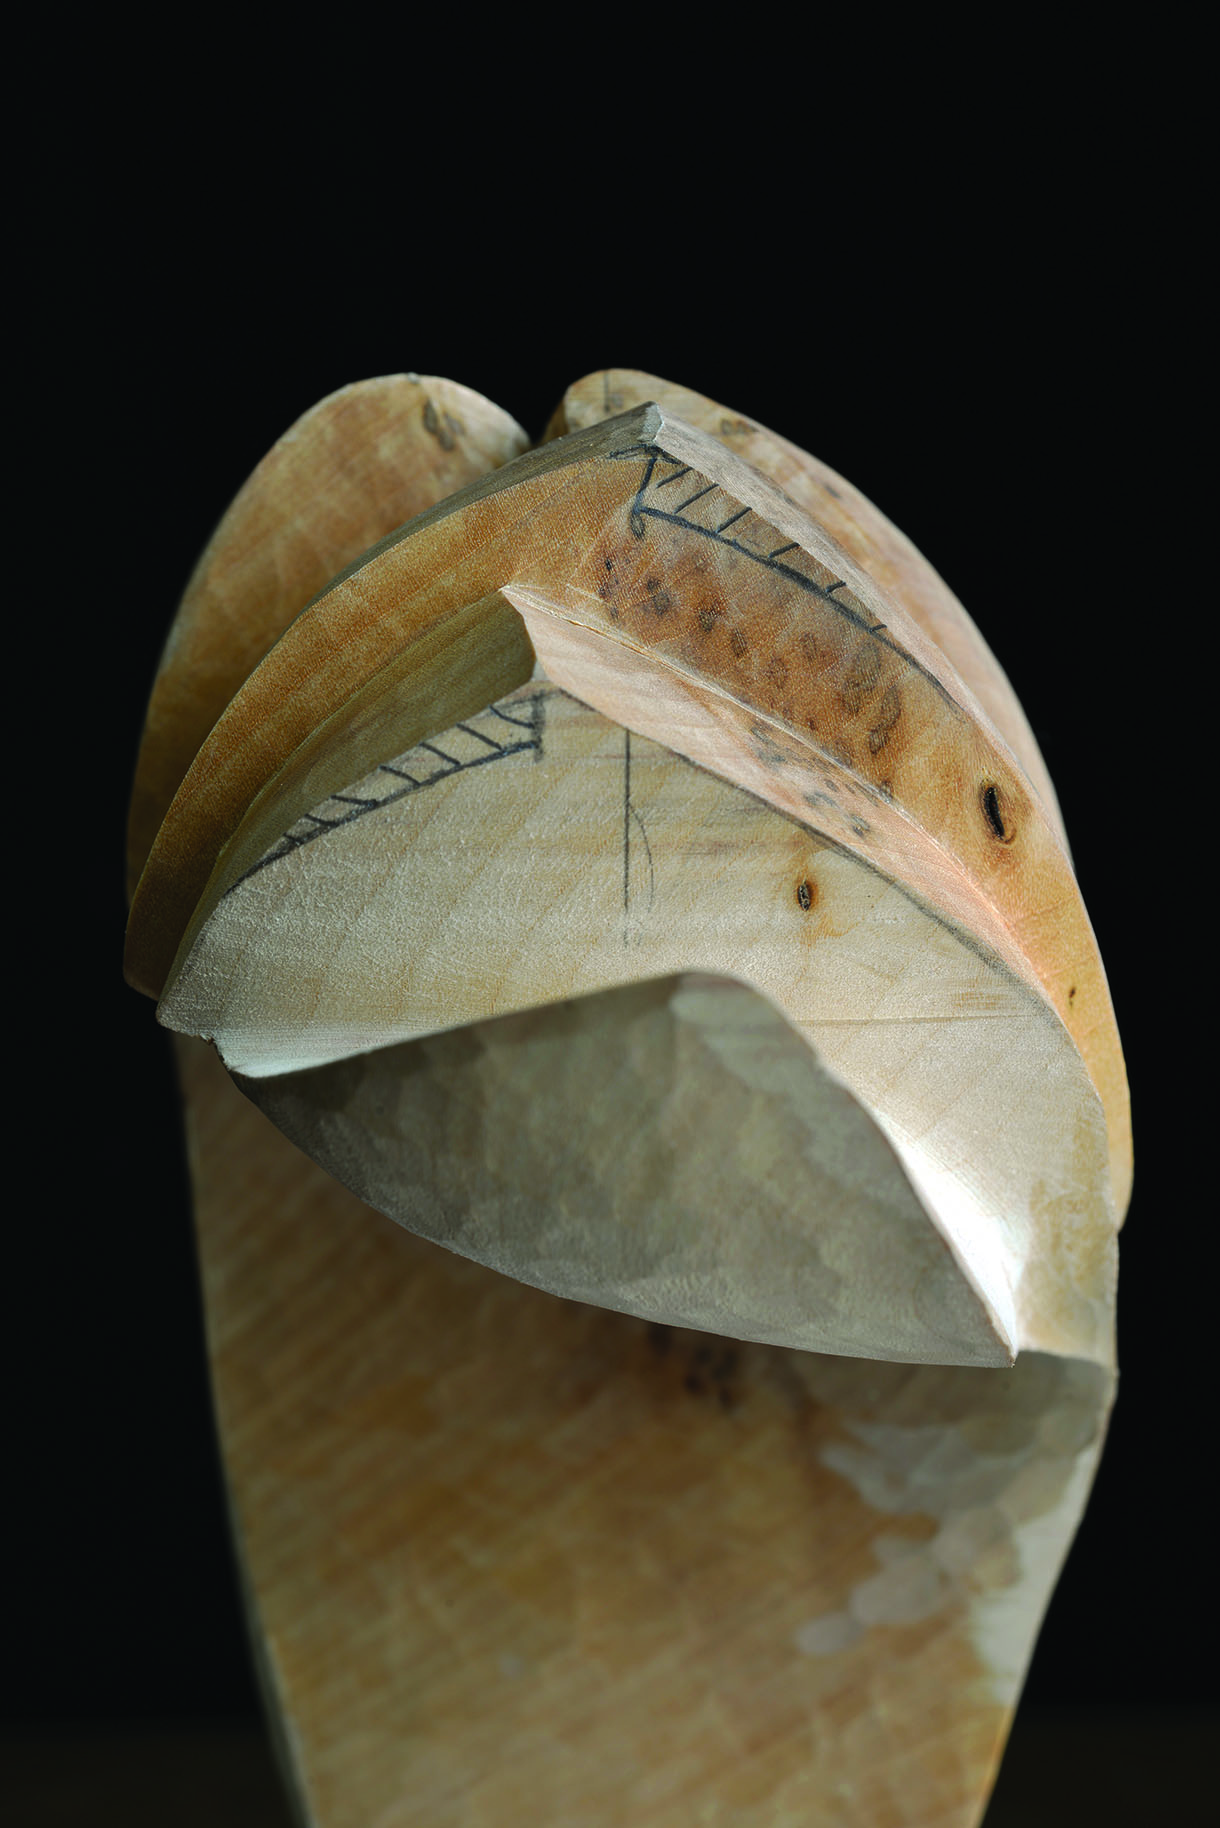
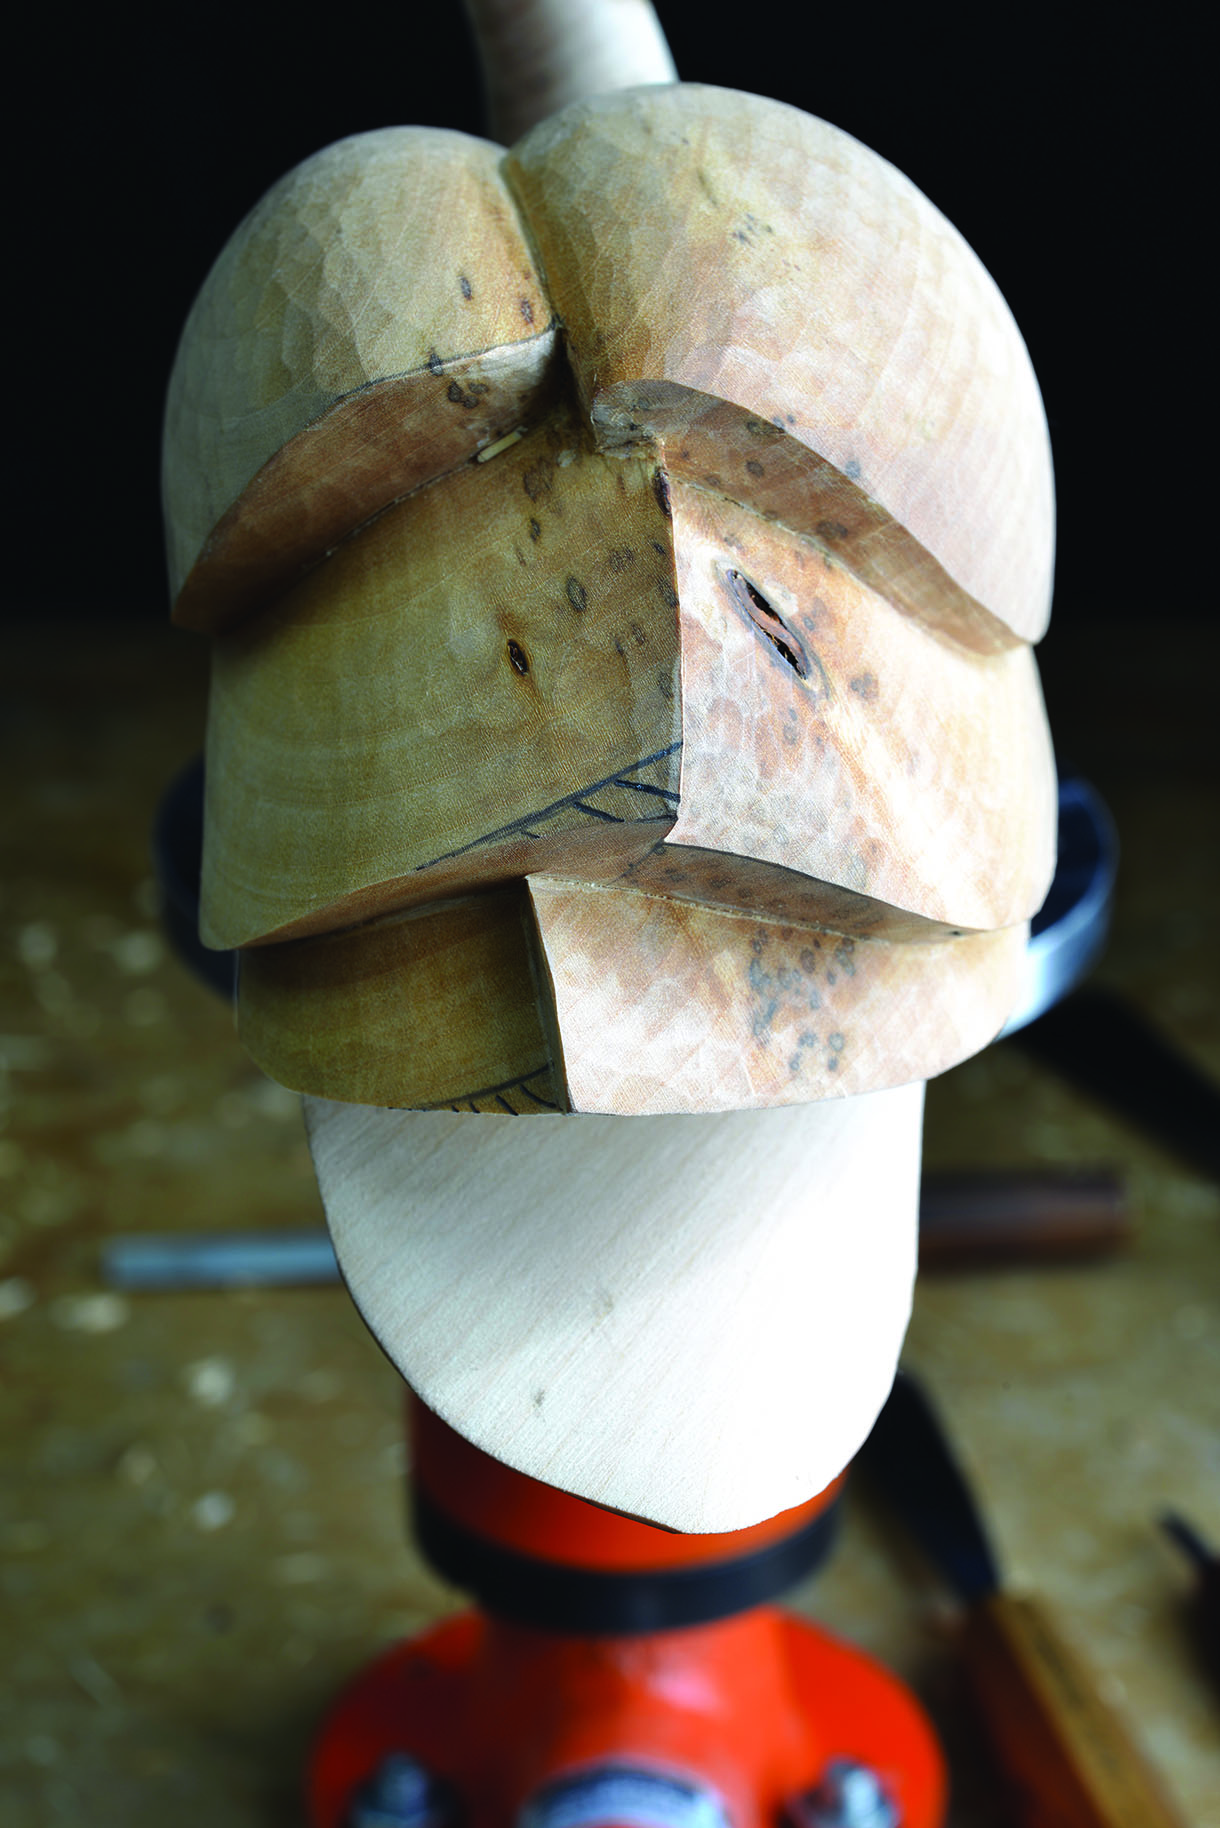
20. We move down again to the two lower wing tips. The pencil hatchings show the two small areas of the tips that need to be removed, which are approximately 6mm in depth down from the tip
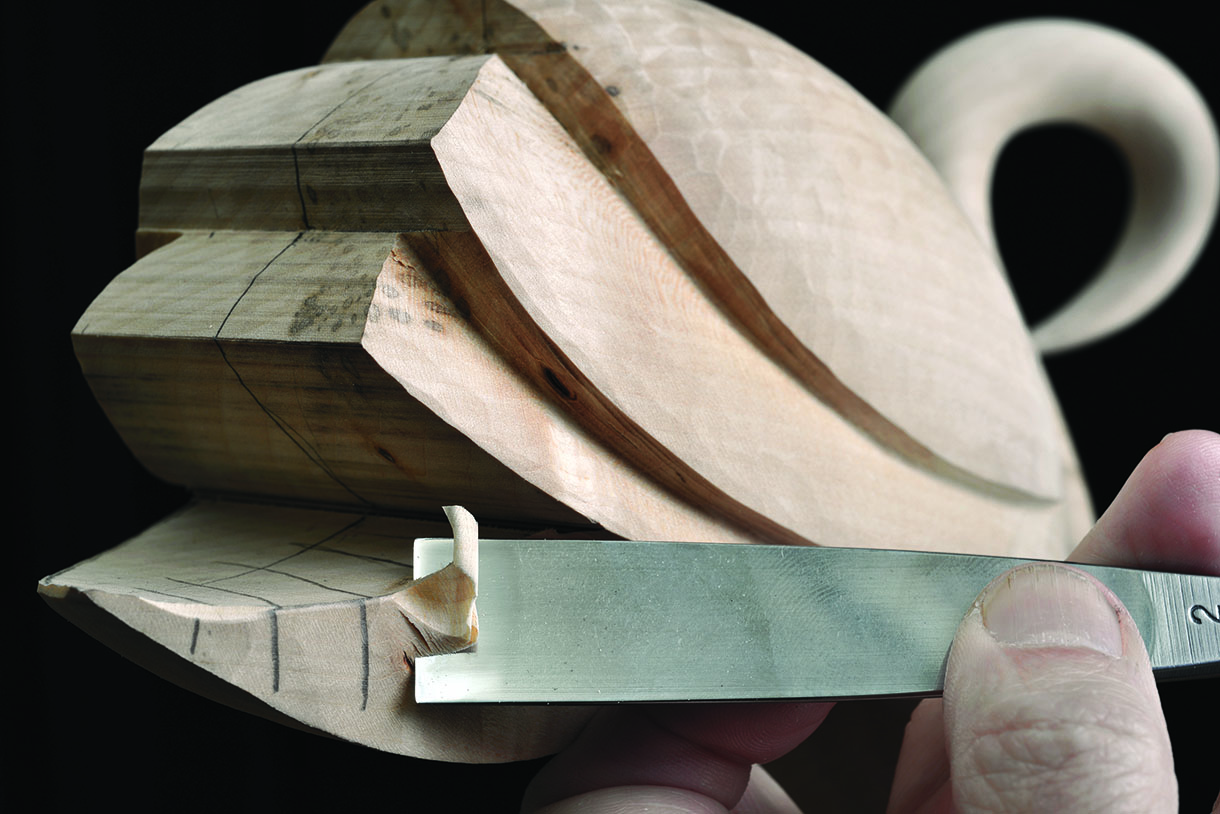
21. Use the V-tool to cut horizontally underneath the line of the wing above and vertically along the tips, down to the depth of the design line. Use the No.2 to pare the wood away across the surface of the wings to the tips and down to the design line. Use a knife to create the sharp inner edge of each vertical tip
22. The next job to do is to break the vertical level of the wing tips. The hatched areas show the small sections that need to be removed to produce the staggered visual arrangement of the wings. Make these approximately 6mm up from the tip, but you can make them higher if you wish to
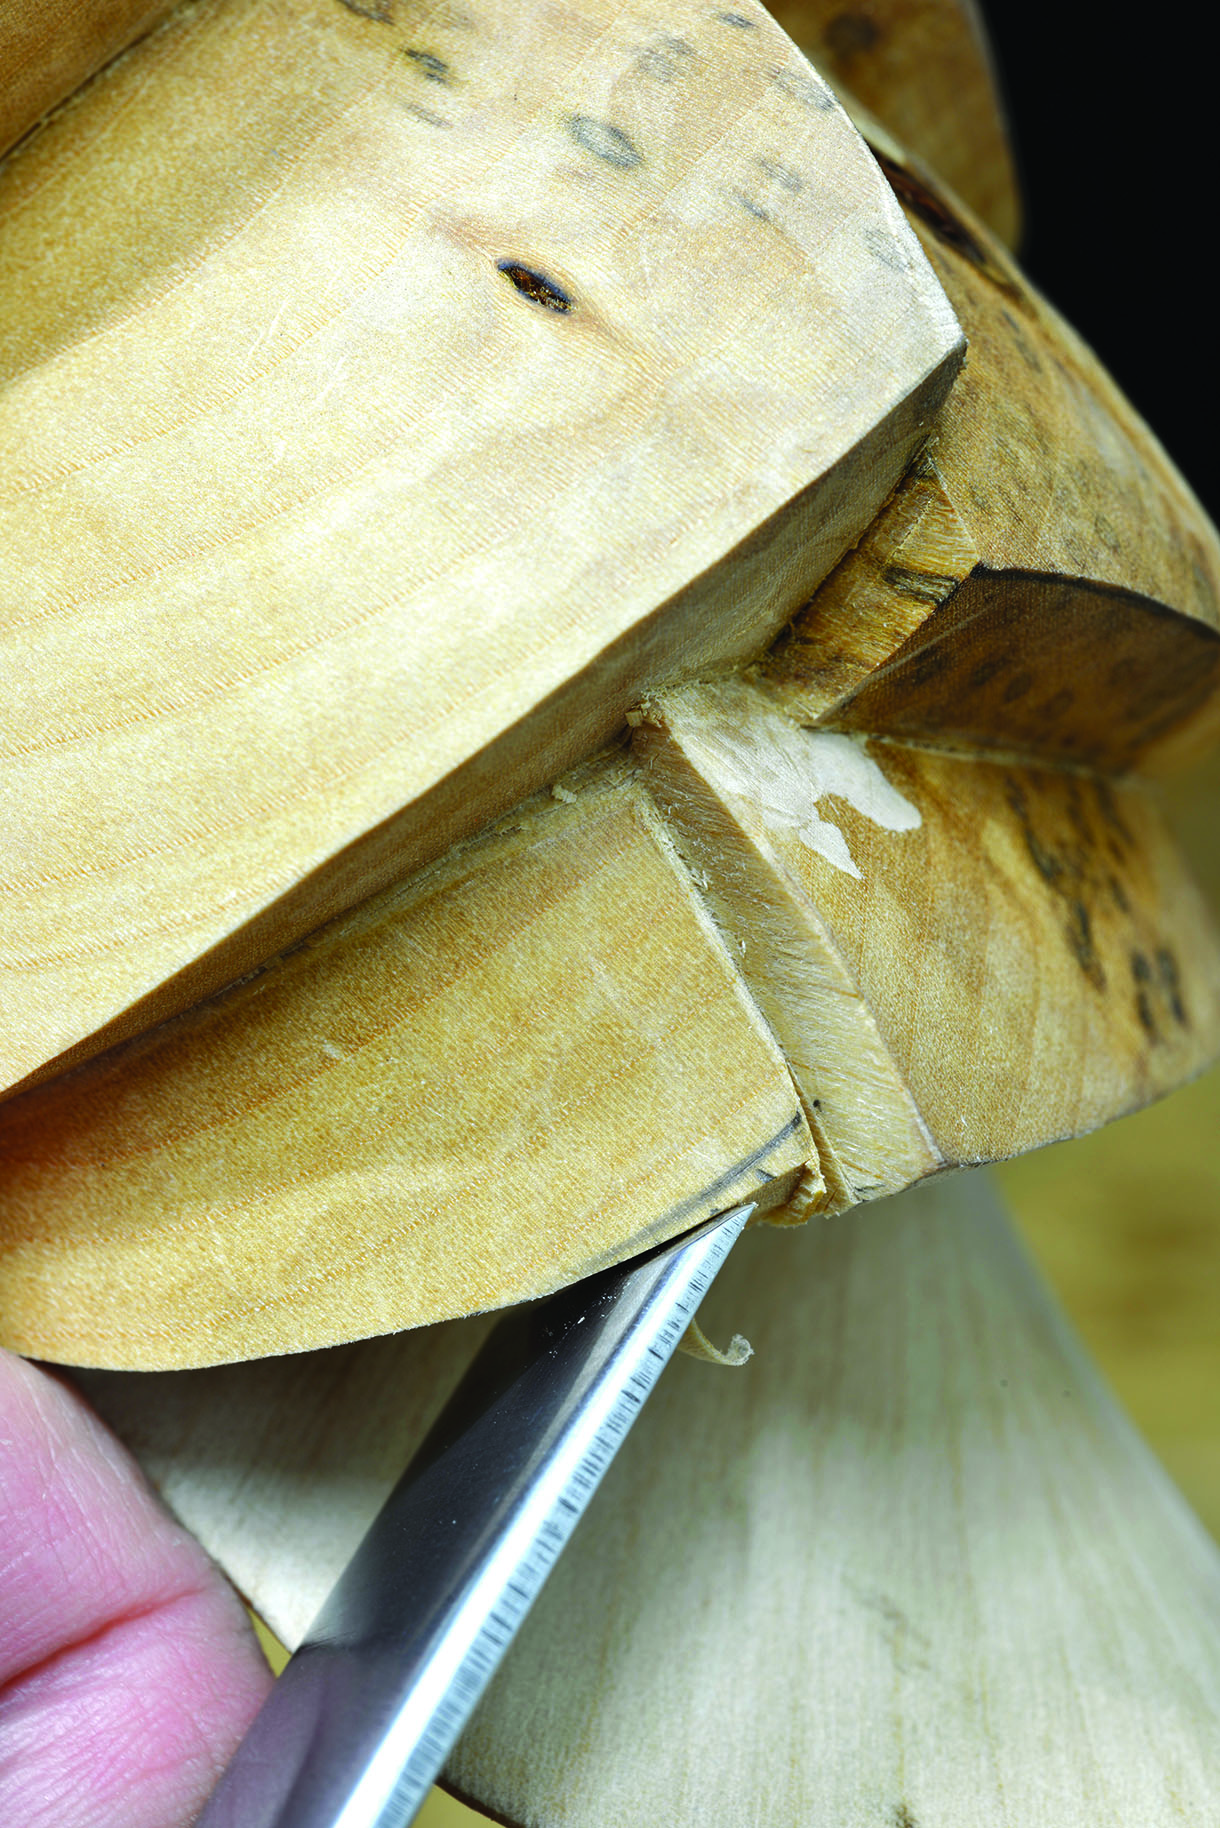
23. Use a knife to carve a deep slice along the vertical edge and use the No.2 gouge to pare the wood back into this deep cut. Repeat this technique until you have reached the correct depth
24. Before sanding, tidy up any uneven lines or areas left from the previous work along their flat edges. These can also be slightly undercut if you wish to. When you are sure that all of the edges and surfaces are even, then you can move onto the sanding procedure
25. Start with 100 grit and work over the complete surface of the sculpture, following the line of the grain wherever possible, to remove every tool mark and smooth the surfaces of each section. When you are sure the surface is perfectly smooth clean the saw dust off all of the surfaces, and then brush or pour hot water over the complete sculpture and leave it to dry, thus raising the grain and allowing the following grits to be worked through more easily and effectively. Next, work through grits 150, 240 and 400, removing all of the scratches from each previous grit, repeating the hot water process in between
26. Cut off the swan’s faceplate base and tidy up the lower edge and sand it through the grits mentioned in step 25
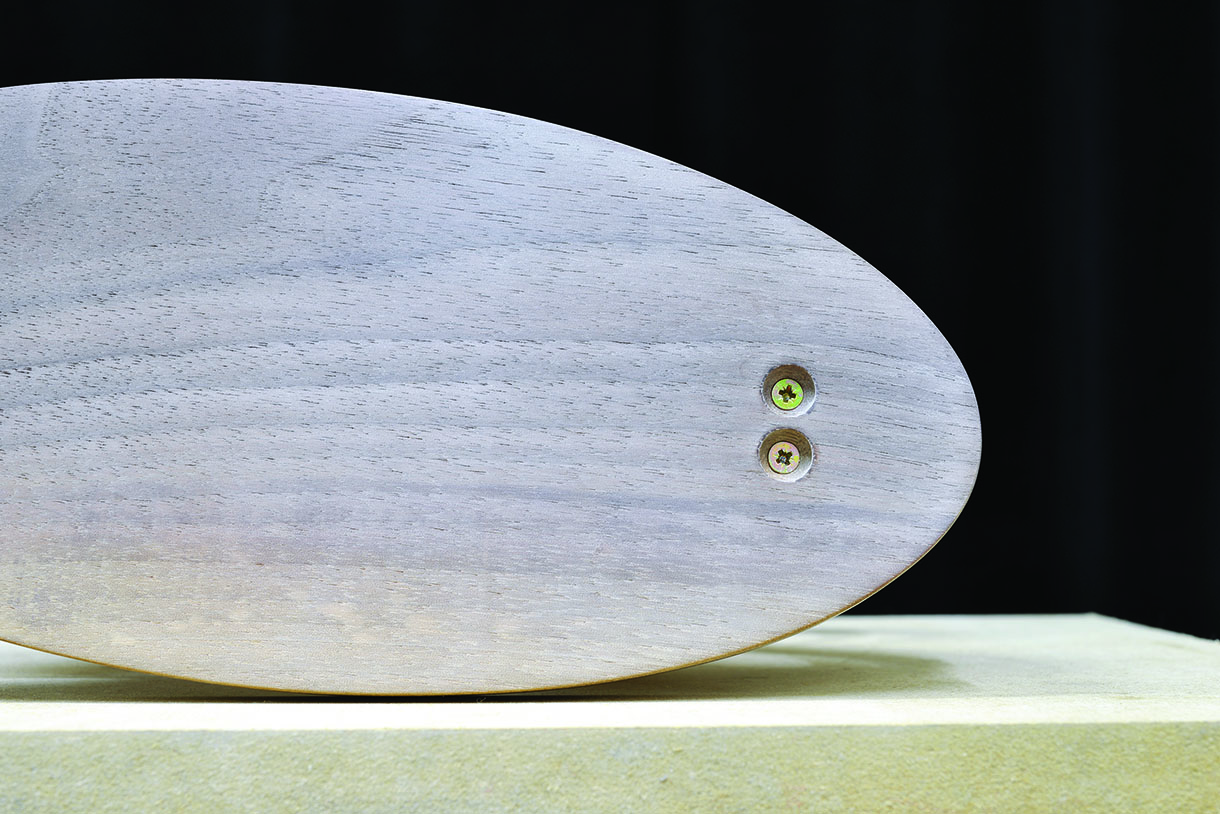
27. I have provided a template for the simple elliptical base that the example is mounted on, which you can use if you like or design your own. To fix the swan to the base without any visible sign of the securing screws, it should first be placed centrally on the base. View the precise location where the underside makes contact with the base from both the front and side views. Mark these two positions on the base, remove the swan and join the lines together to produce the accurate fixing point. Mark two drilling positions, side-by-side along the fixing point, approximately 15mm apart and drill two 4mm countersunk holes. Place the swan back in position and secure the base to the swan
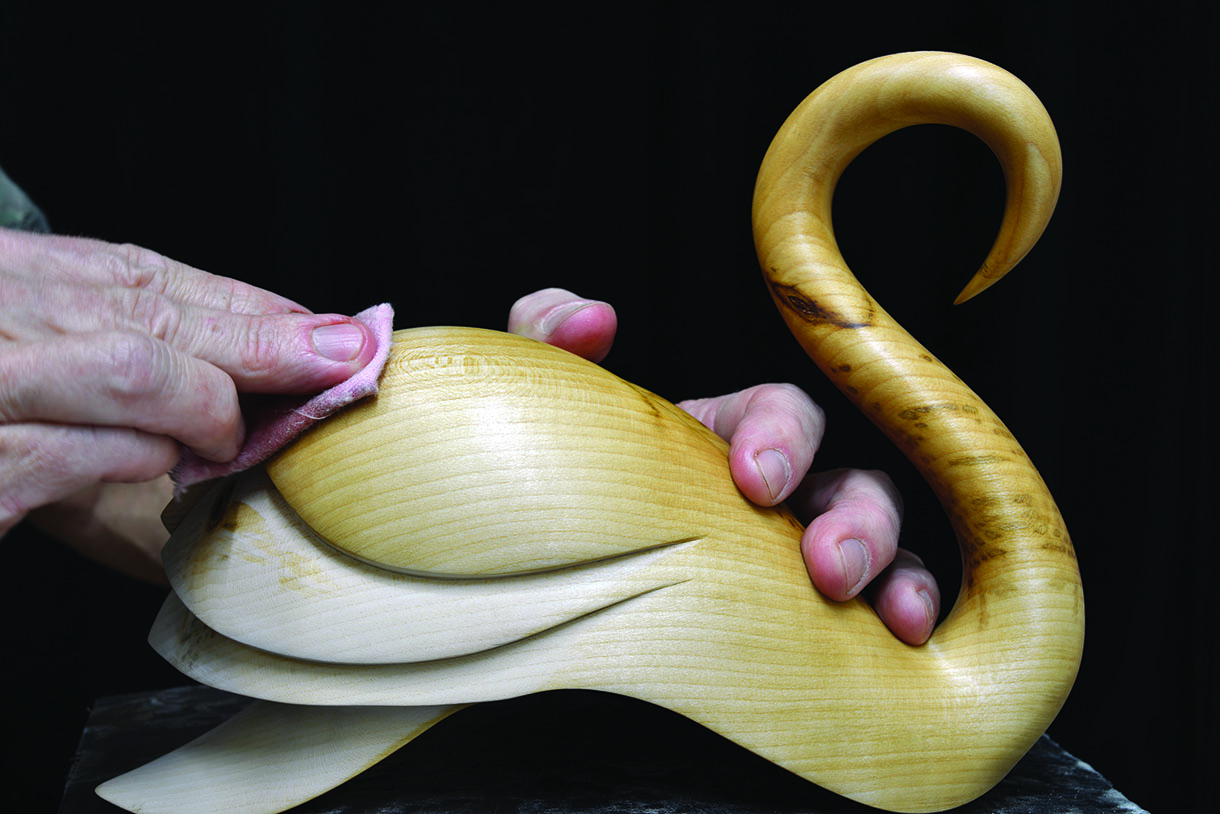
28. Use, if you wish, one good application of boiled linseed oil, which will beautifully enrich the natural colour of the grain. Leave this for a week or so to dry before applying several coats of dark wax polish, which will seal the grain and give it a wonderful sheen


