Decorative Rustic Reindeer:
Our grizzled, rosy cheeked old Editor gets festive with wood – oh dear…
Our grizzled, rosy cheeked old Editor gets festive with wood – oh dear…
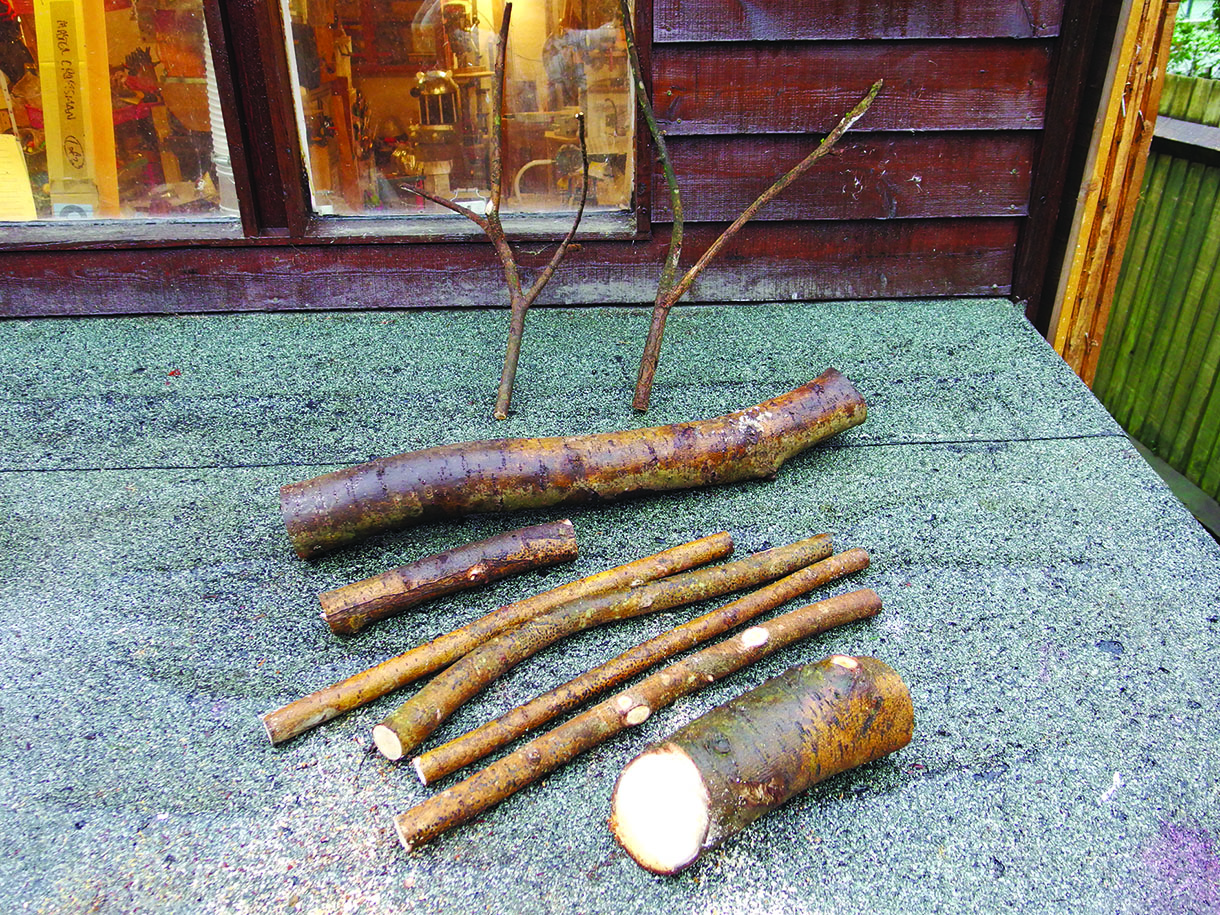
1. The first thing is to find some suitable logs and branches to use. The body and head are about 75mm in diameter while the legs, though much smaller diameter, need to support the weight of the animal. You need small diameter forked branches for the antlers
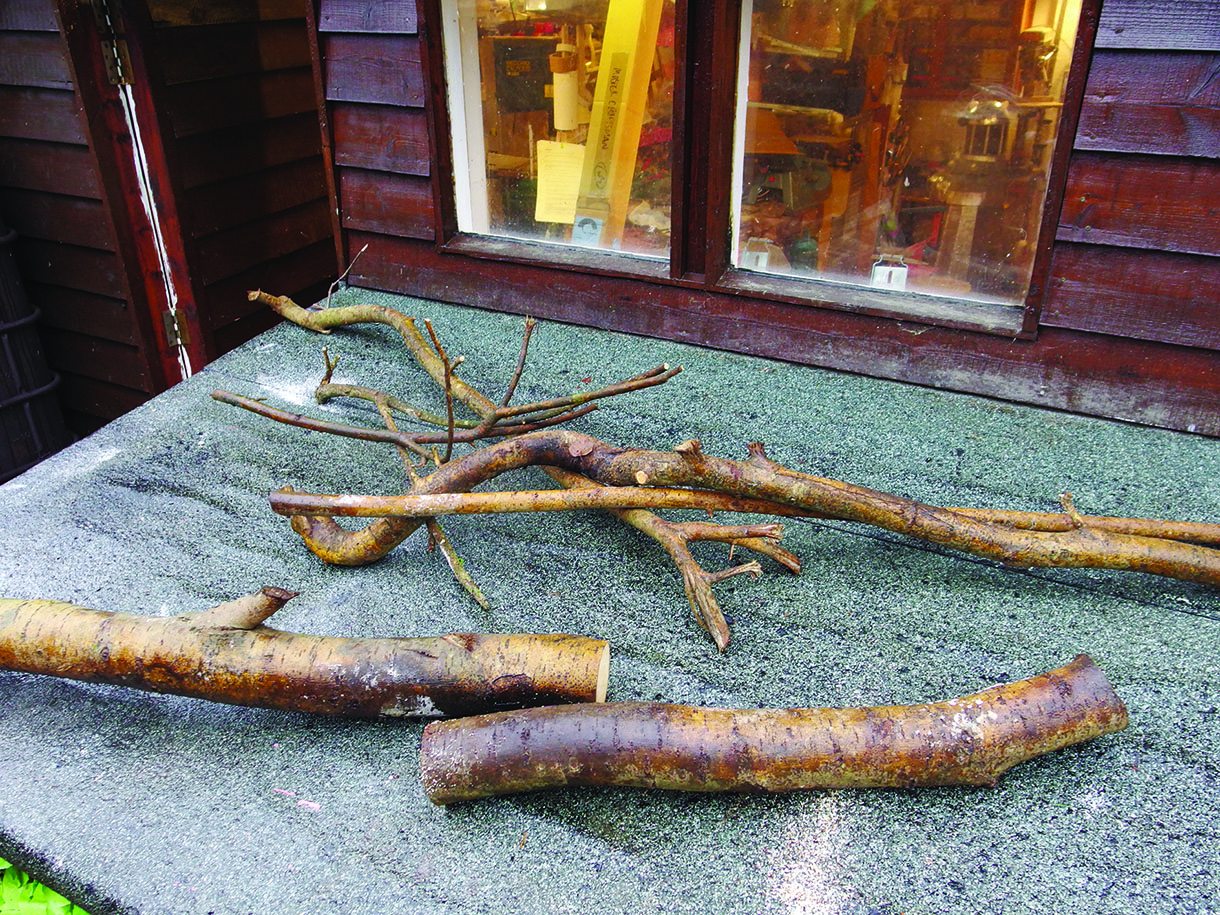
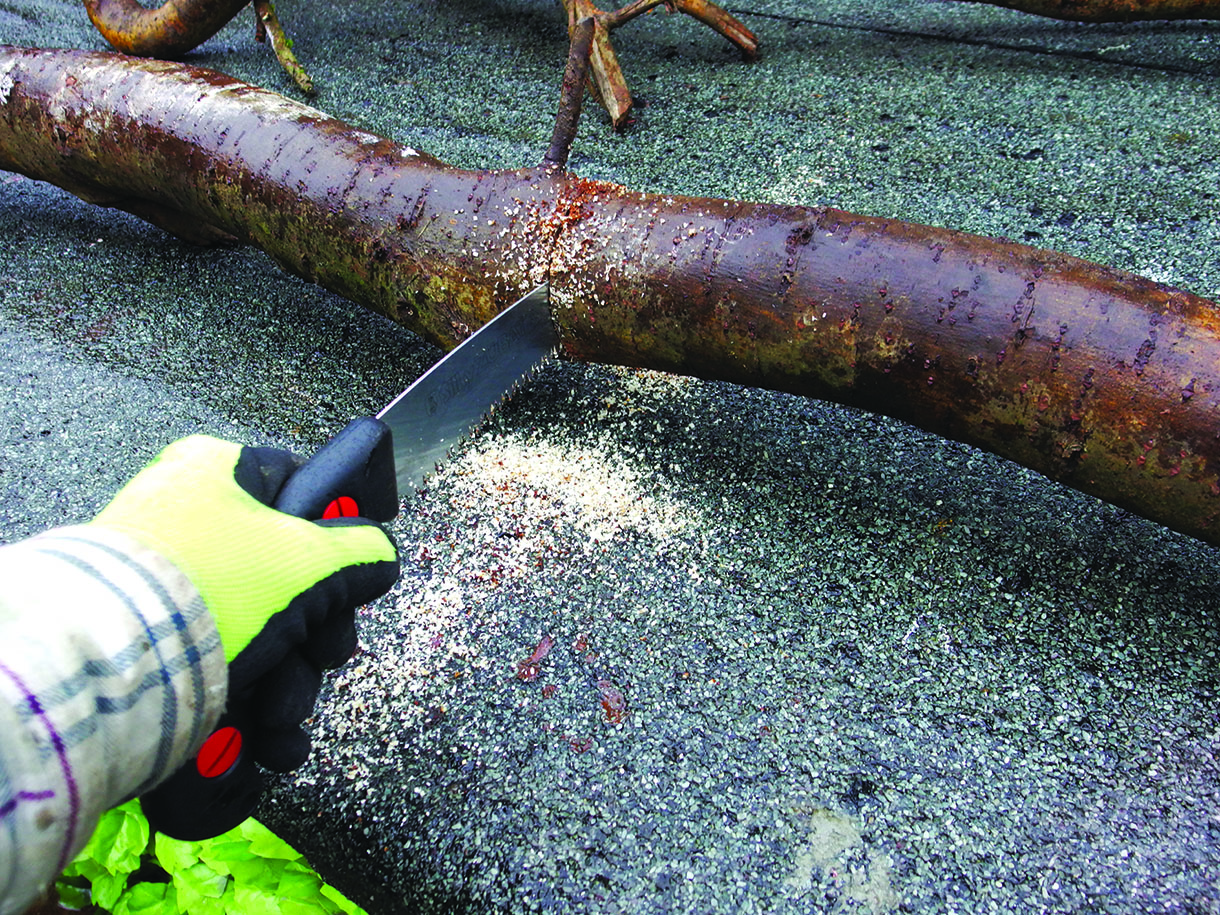
2. Here you can see the final selection of pieces I will be using to build my reindeer, the body now cut to length. I used a sharp pruning saw for all the cuts in this project
Silky
There are pruning saws and then there are superior saws like this, Silky Zubat, which comes in three different lengths 270, 330, 390mm, come in a plastic scabbard with a detachable belt loop. They cut on the pull stroke and are lethally sharp. They are my standard pruning saws, which I wouldn’t do without.
Contact: Niwaki.
Web: www.niwaki.com

Silky Zubat pruning saw
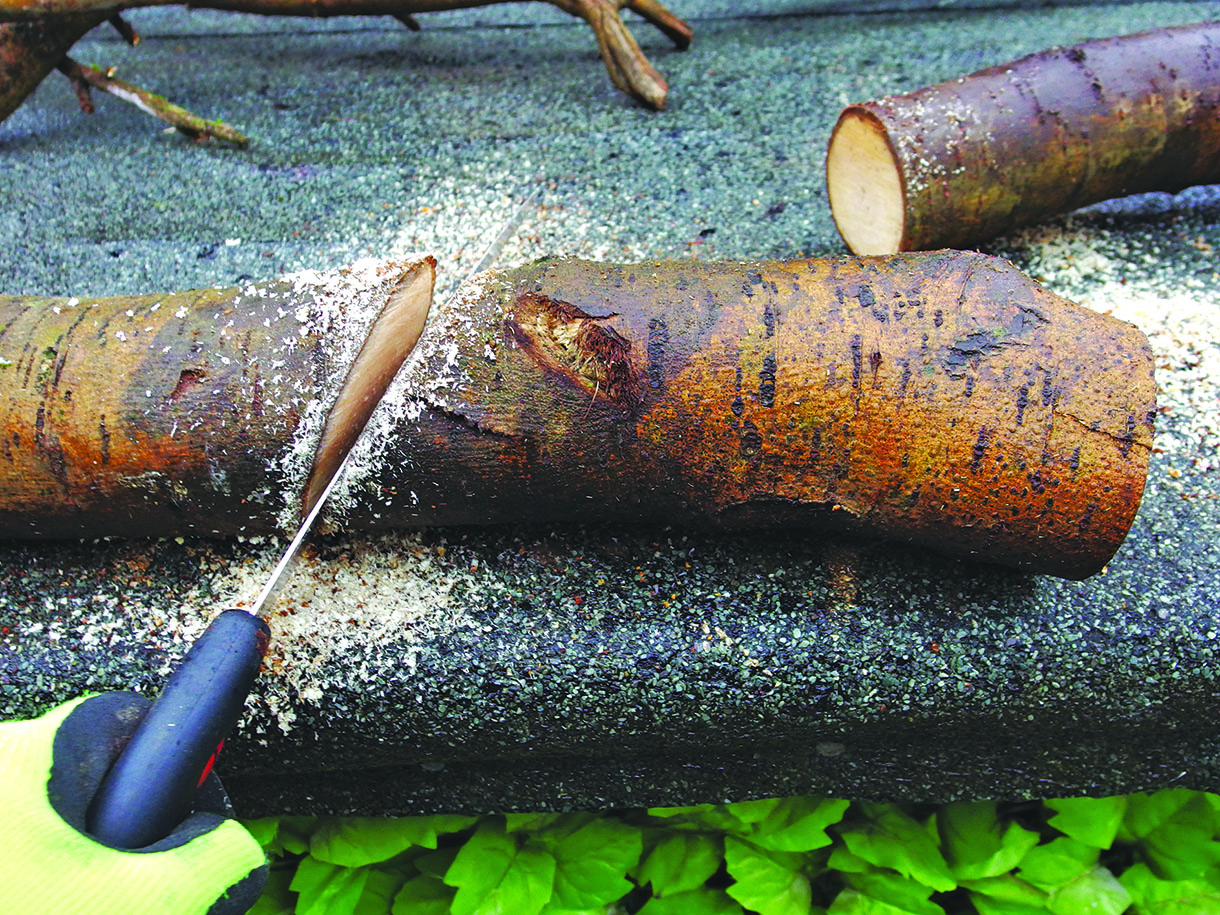
3. The head was made from the same log I used for the body, but this part needed an angled nose cut at the front end. Size is a matter of choice; you need to look at shape as it develops and have some spare pieces handy if you do need to remake anything
4. Here are all the parts cut to length including the antlers in the background. Note how the legs aren’t all exactly straight or equal in diameter. You just need to work with what nature provides

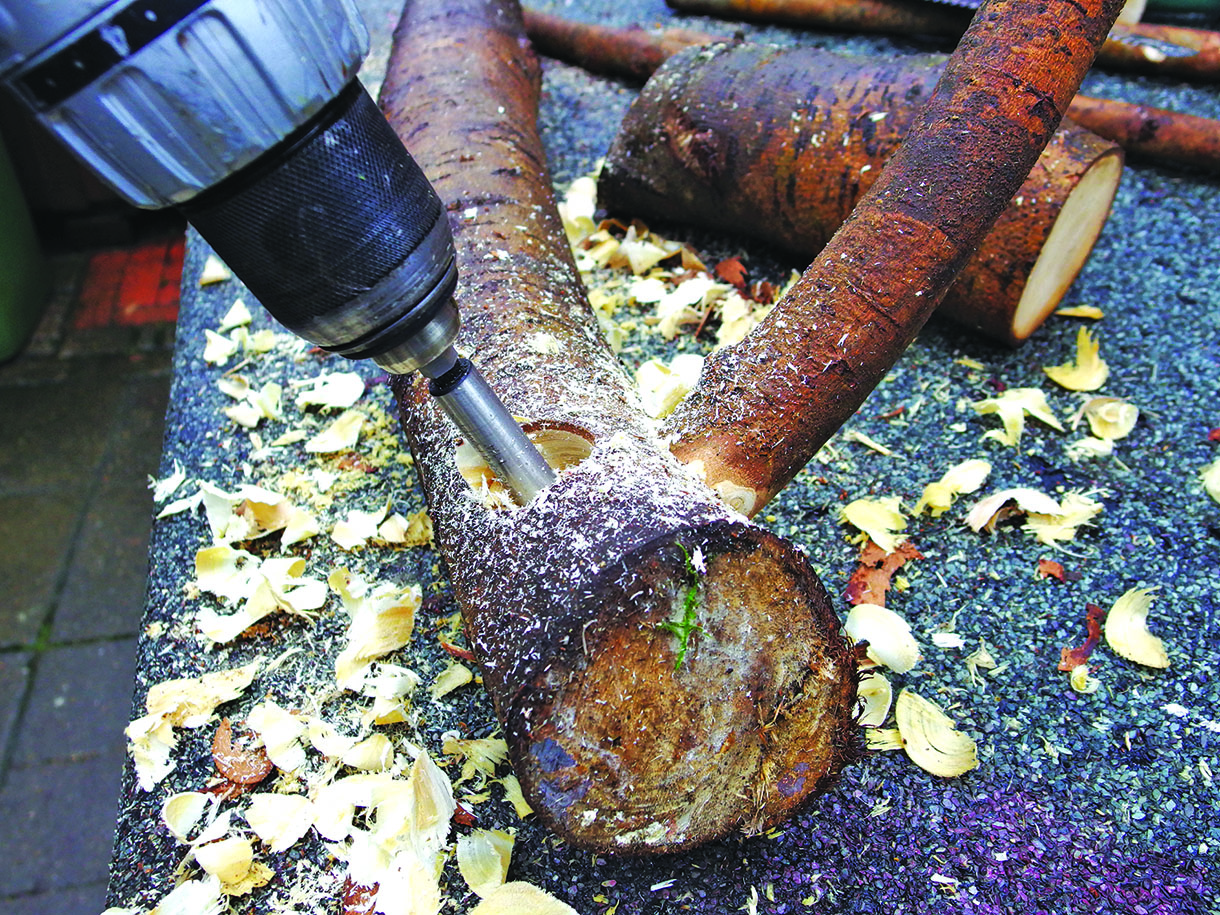
5. To drill leg holes I used several sawtooth Forstners in a cordless drill. I chose the diameters so they would be slightly smaller than the branches that would fit in the holes
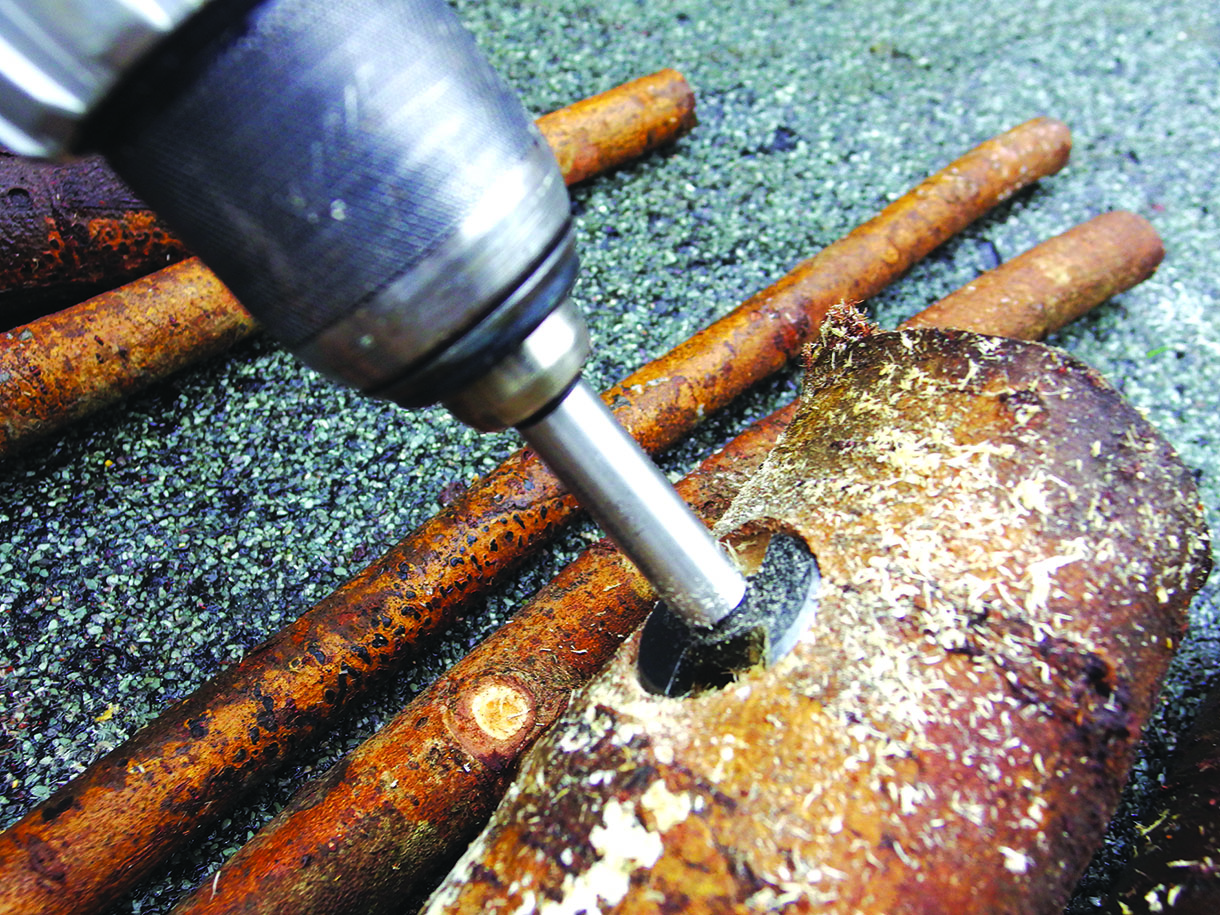
6. Unfortunately, new green wood can be very wet and fibrous and not cut very well. Spade bits would perform similarly, but good old-fashioned spiral augers would clear waste much better
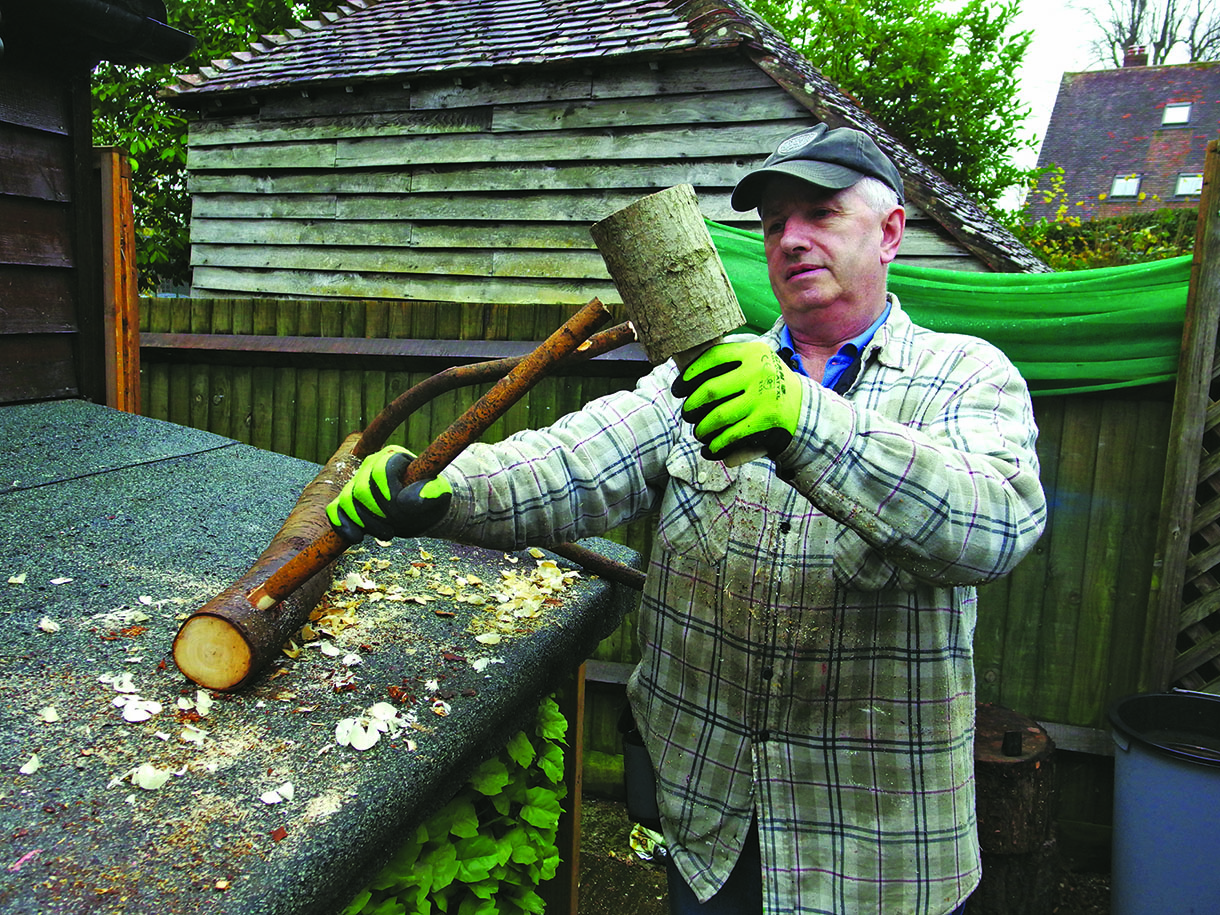
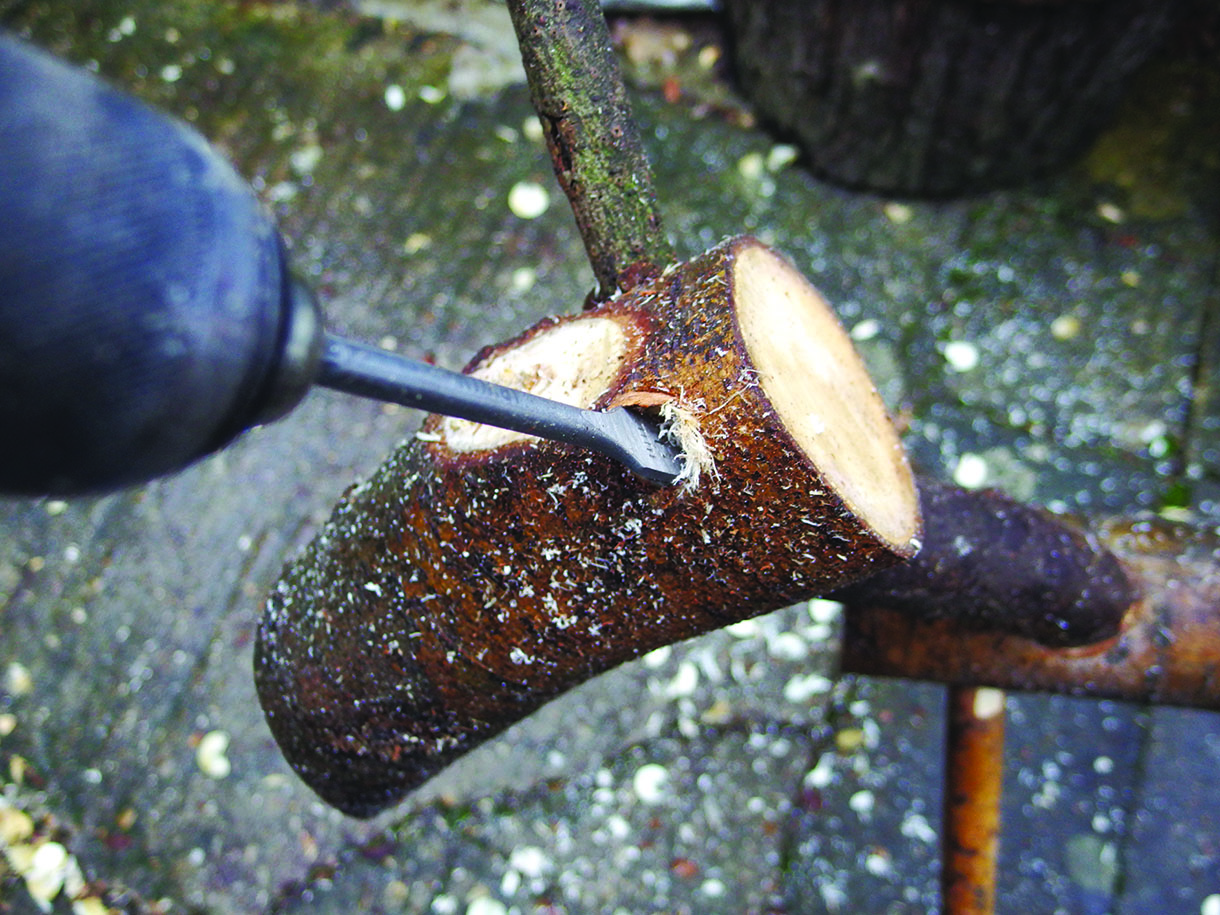
7. The end of the leg is shaped slightly with a spokeshave and then thumped tightly into the hole
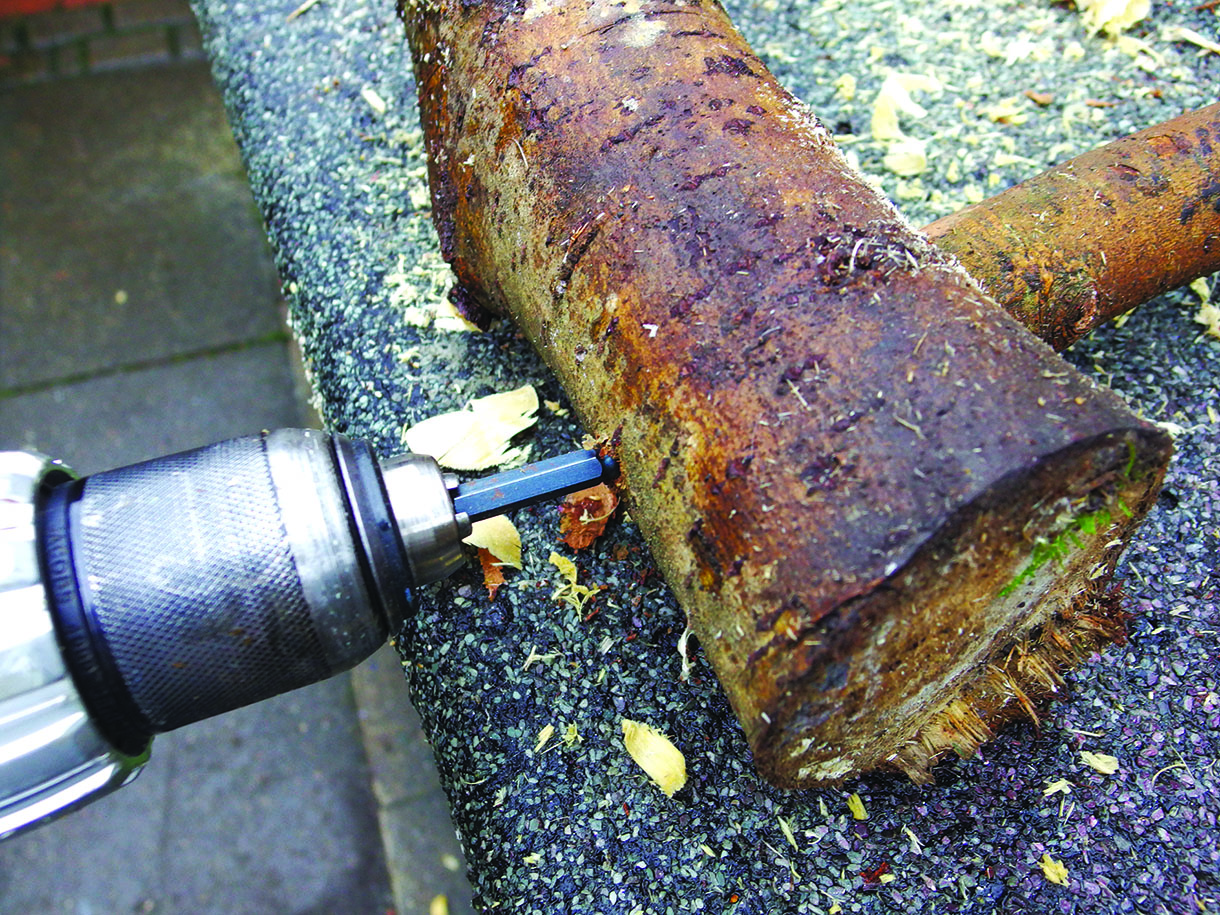
8. One leg is screwed into place using a 100mm twinfast screw. After that you can decide the correct position for
the adjacent hole
9. Be careful not to clash holes with the first one you made and make them deep enough for the legs to plug into. The next leg is fitted, then the other two legs at similar angles. The neck and head joints are the same, but drilled at an angle
10. Poor old Rudolf has to have his head drilled to take the antlers, which are too small a diameter to screw successfully, so they are just pushed into the holes
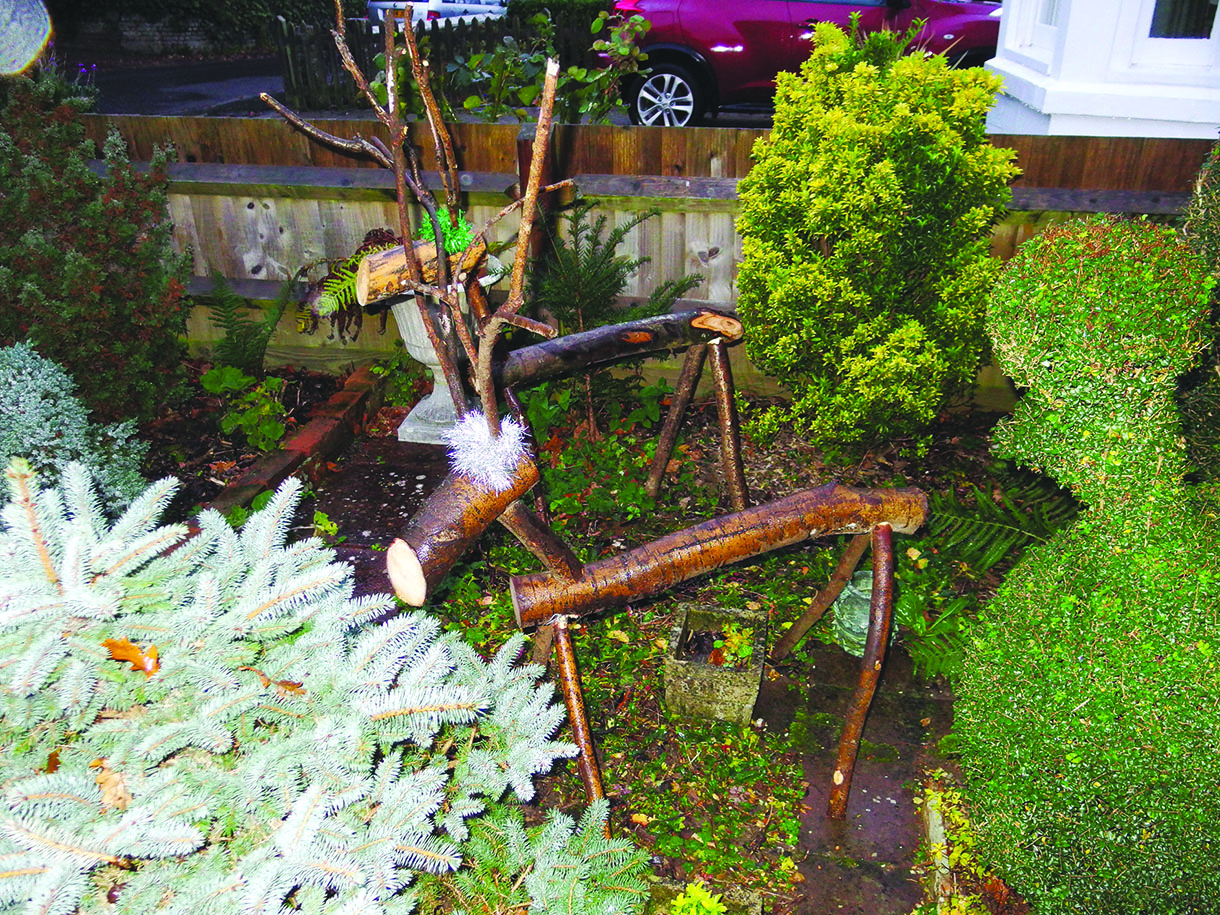
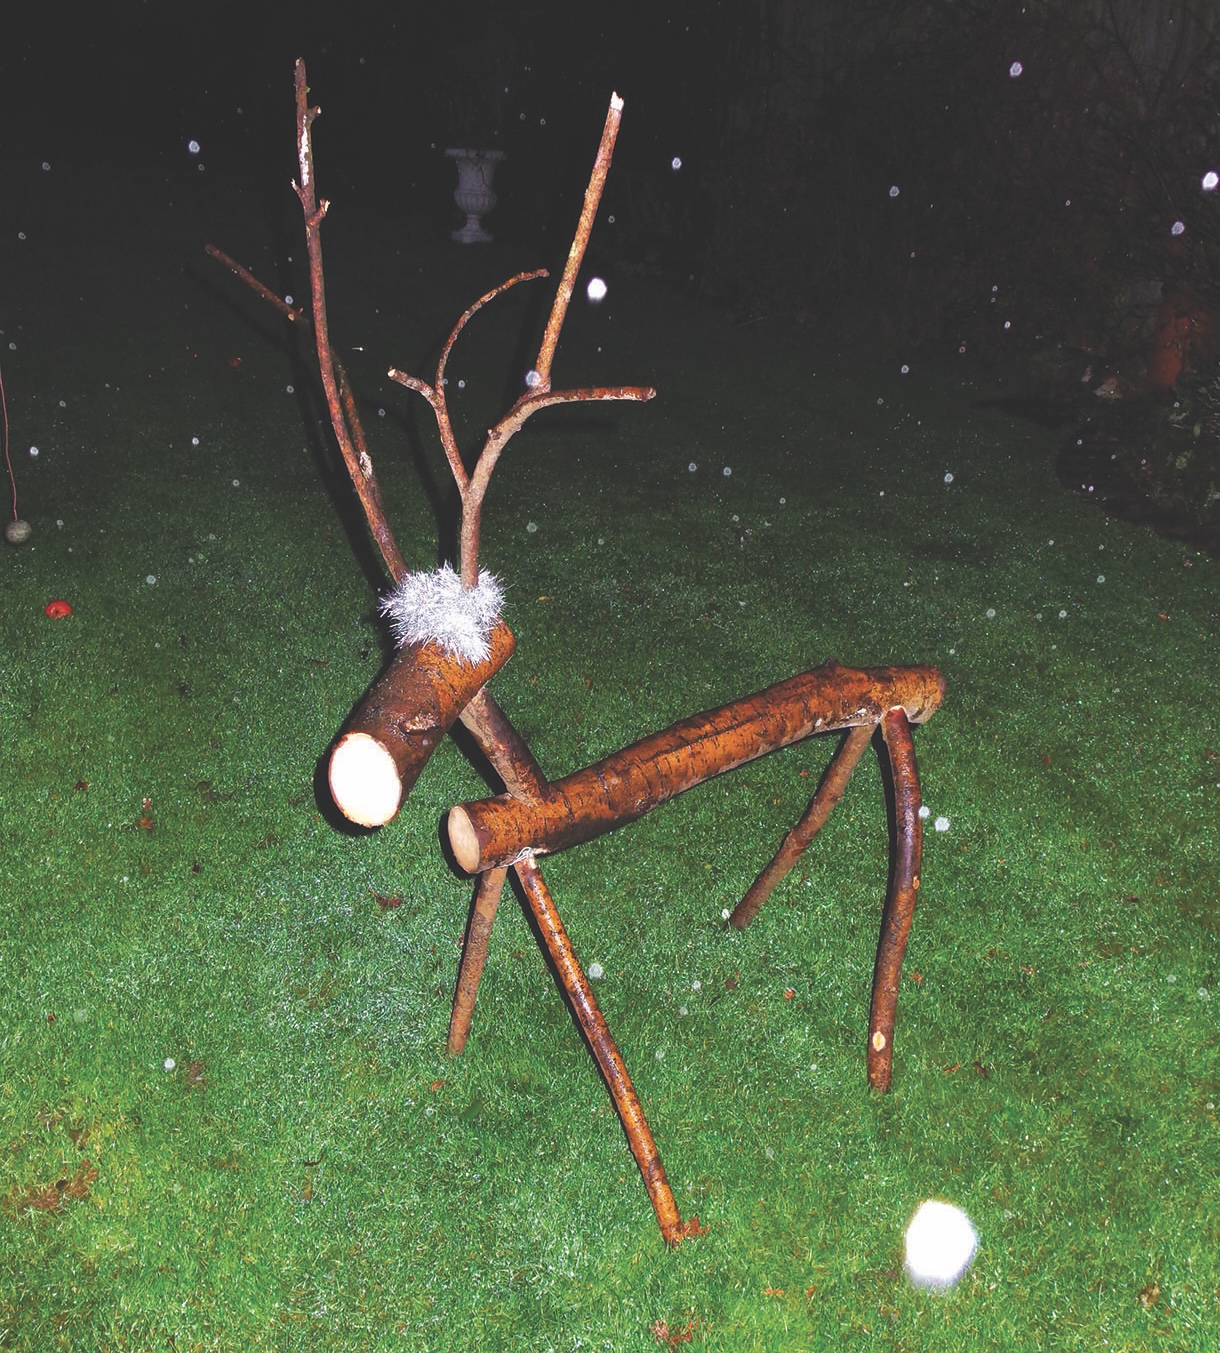
Rudolf and Dasher awaiting Santa’s Christmas Eve arrival


