Lyre-shaped Thumbstick:
Paul Purnell makes a lyre-shaped thumbstick.
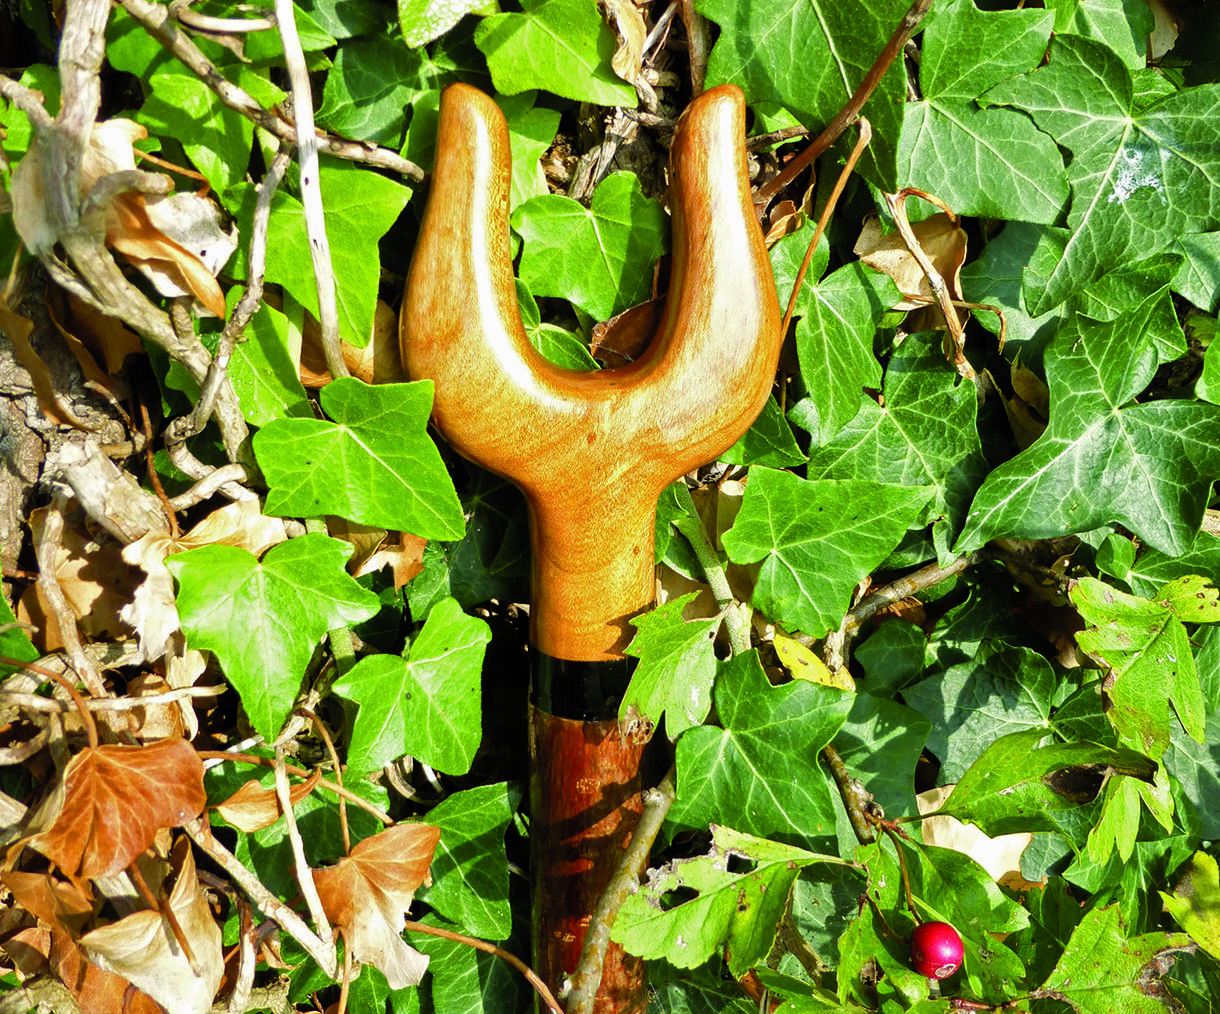
Paul Purnell makes a lyre-shaped thumbstick
Following on from last month’s article on joining a shank to a head, a basic thumbstick is an ideal project to practise those skills. For this project, I am using the metal rod method (issue 21) to secure the head to the shank.
Things you will need
• Rotary carving tool
• Coarse and medium burrs
• 8mm wood drill
• Carving knife
• Cushioned drum sander
• Cloth-backed abrasive 120–400 grit
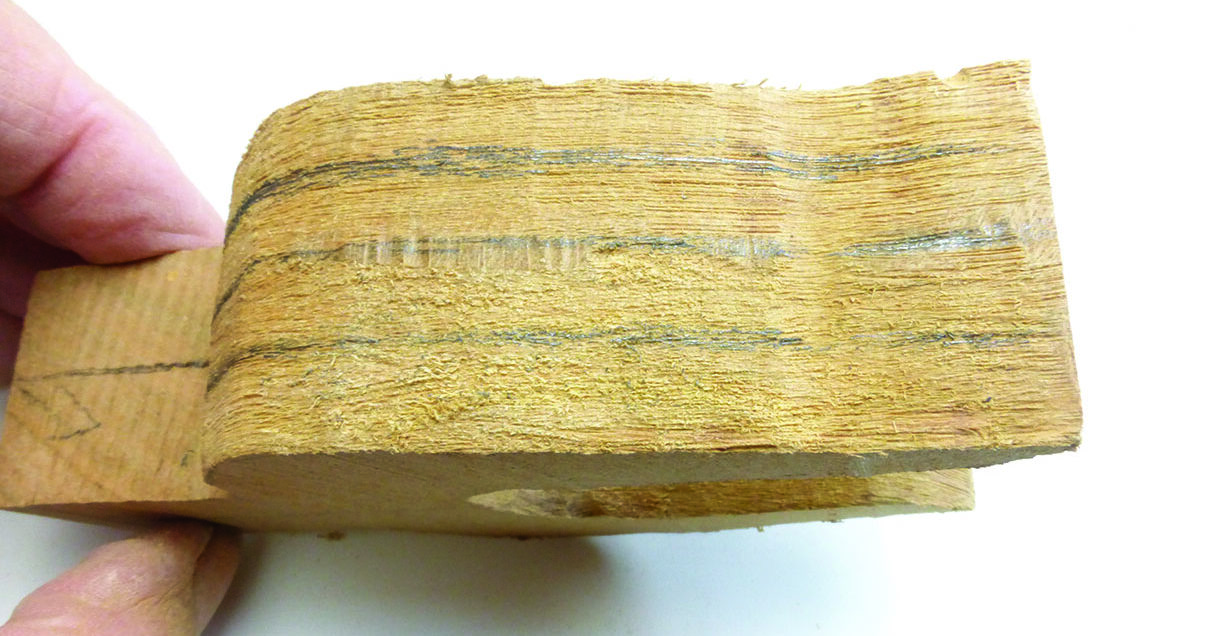
• Hazel (Corylus avellona) shank
• 127mm length of 8mm metal rod
• Buffalo horn spacer
• Brass ferrule
• Epoxy glue
• Finishing oil
Wood for the head
• Cherry (Prunus spp.), 115mm along the grain and 90mm across
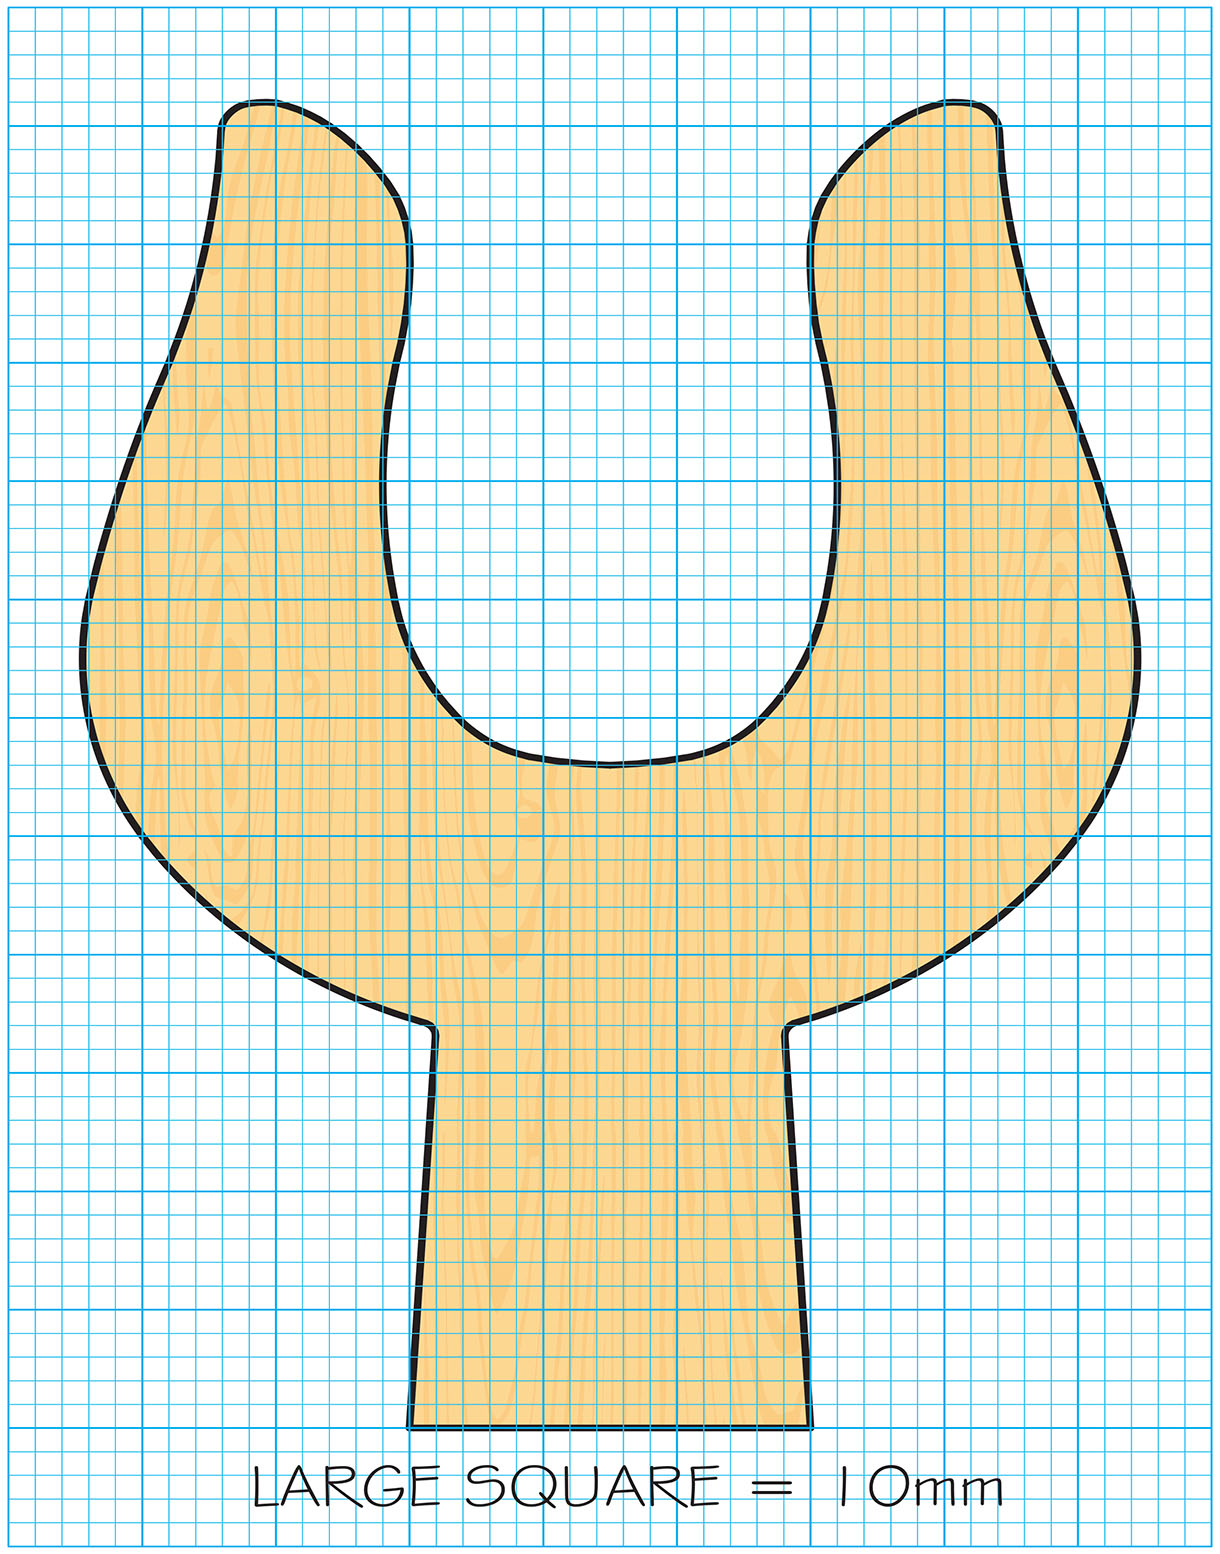
1. Measure the diameter at the top of the shank you are using. The diagram for this head is for a shank of 28mm with 2mm added as a buffer. Adjust the neck of the diagram according to the diameter of your stick. Make a cardboard template and use it to cut out the blank
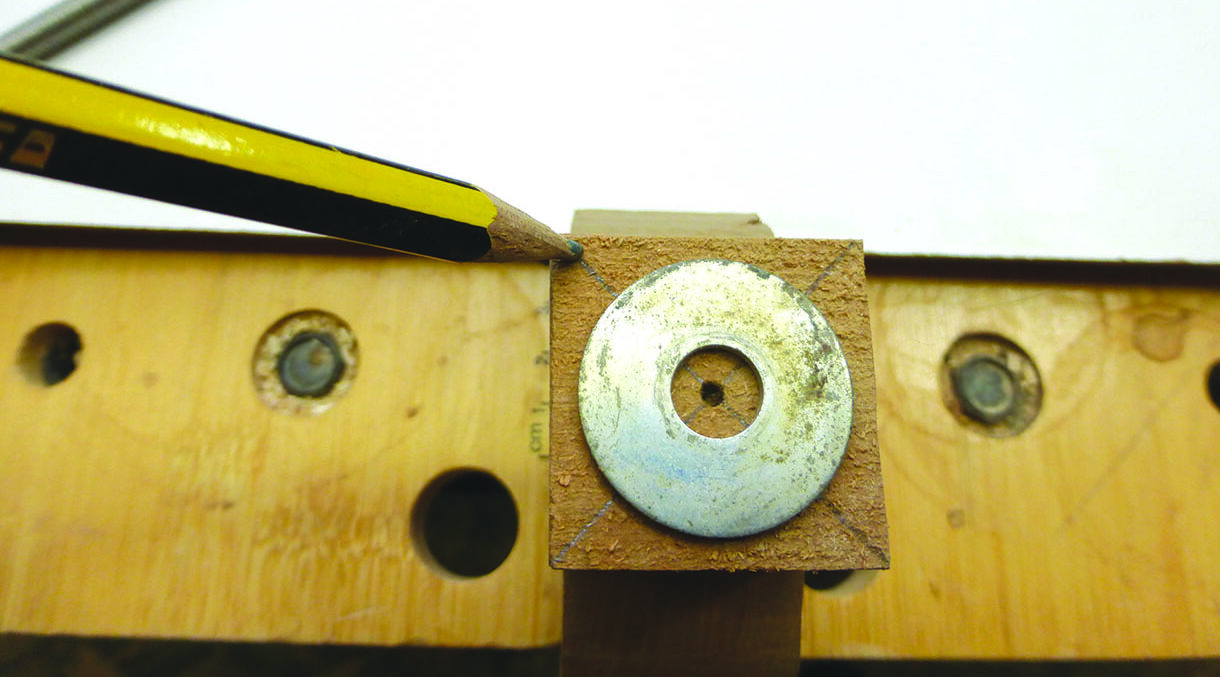
2. Find the centre point on the bottom of the neck of the blank. Use a washer to help find its location
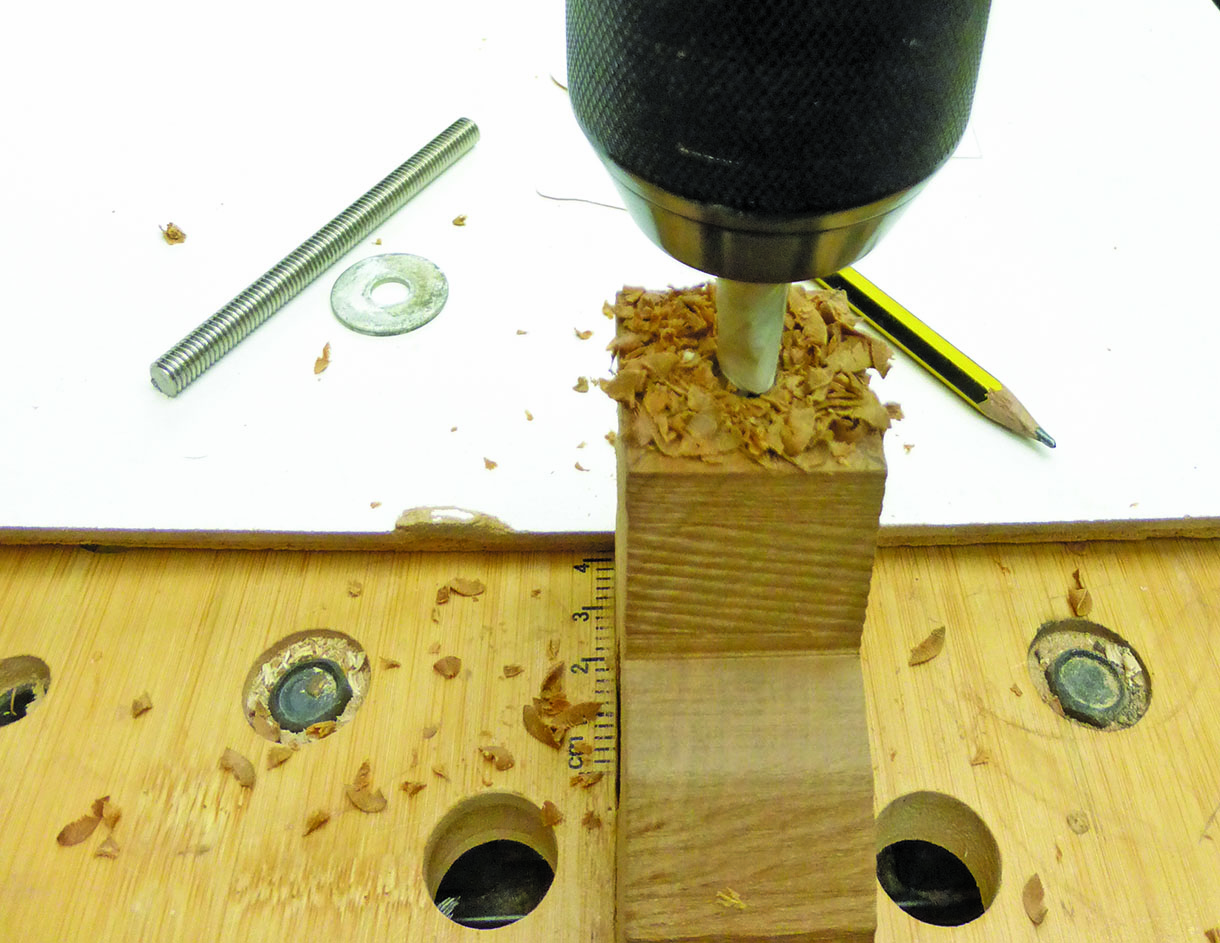
3. Clamp the head upside down in a vice or workbench. You want to achieve a final fit where approximately half of the metal rod is in the shank and half is in the head. Fitting a spacer, as with this project, effects the depth of each hole that you drill. In addition, the shape and style of the head may also dictate the depth, which applies to this head. The measurement of this head between the middle and bottom of the neck is 56mm. Half of a 127mm rod is not feasible, the safe maximum is 45mm. Drill an 8mm hole with a wood drill to this depth and use masking tape around the drill bit so you don’t drill too deep. I have used a 13mm buffalo horn spacer. Drill an 8mm hole in the centre
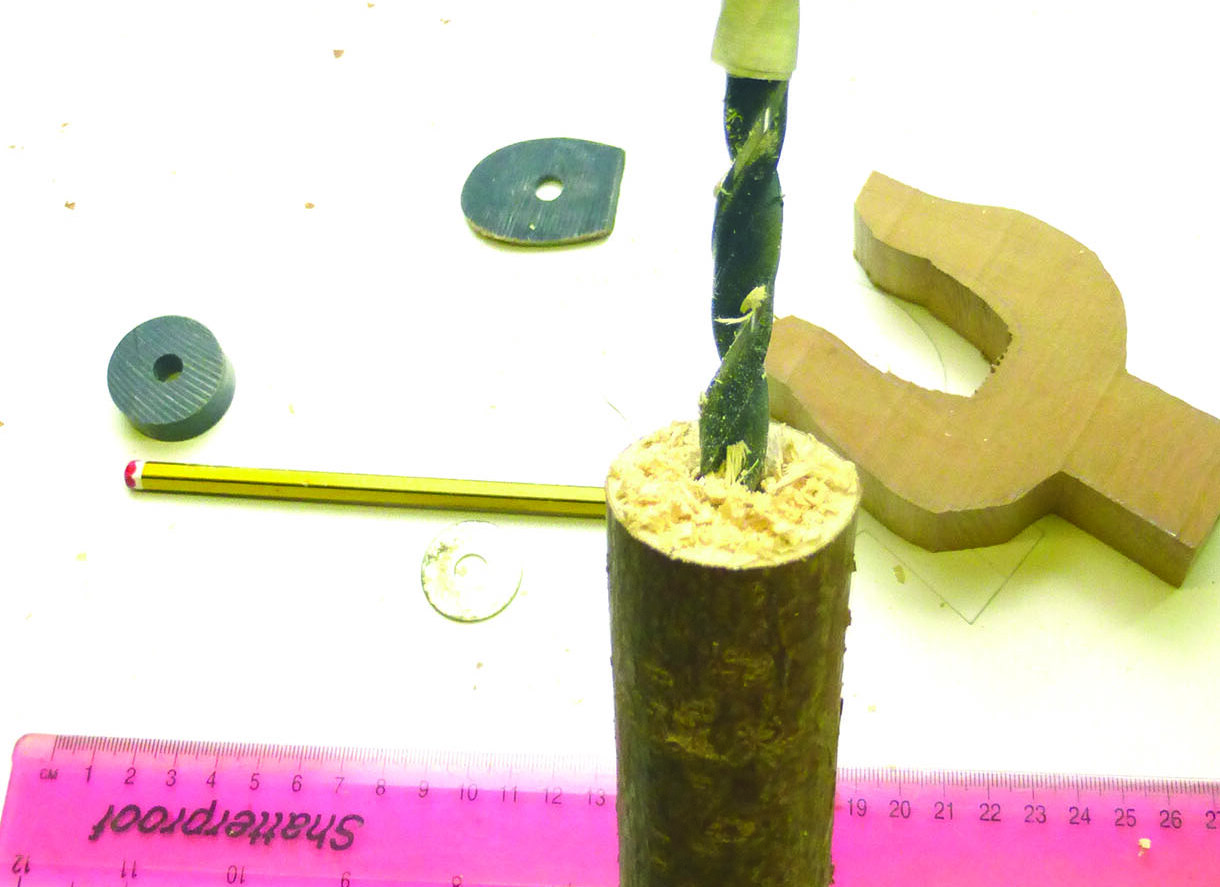
4. Drill an 8mm hole in the shank 69mm deep (127mm – 45mm – 13mm = 69mm). If your spacer is a different thickness, you will need to adjust accordingly
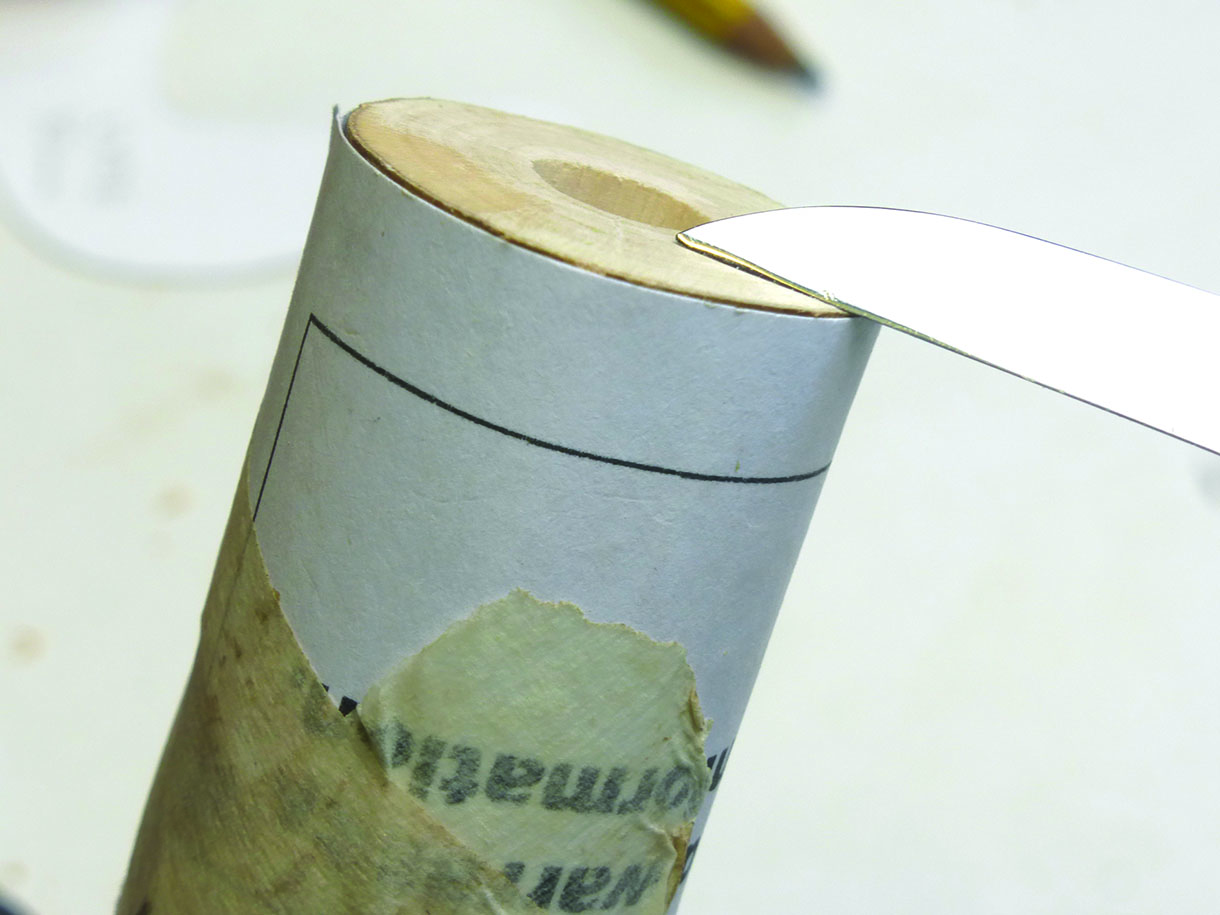
5. To ensure the top of your shank is flat, place an edge of a magazine around the top and secure with masking tape. Use a carving knife to pare away any high spots
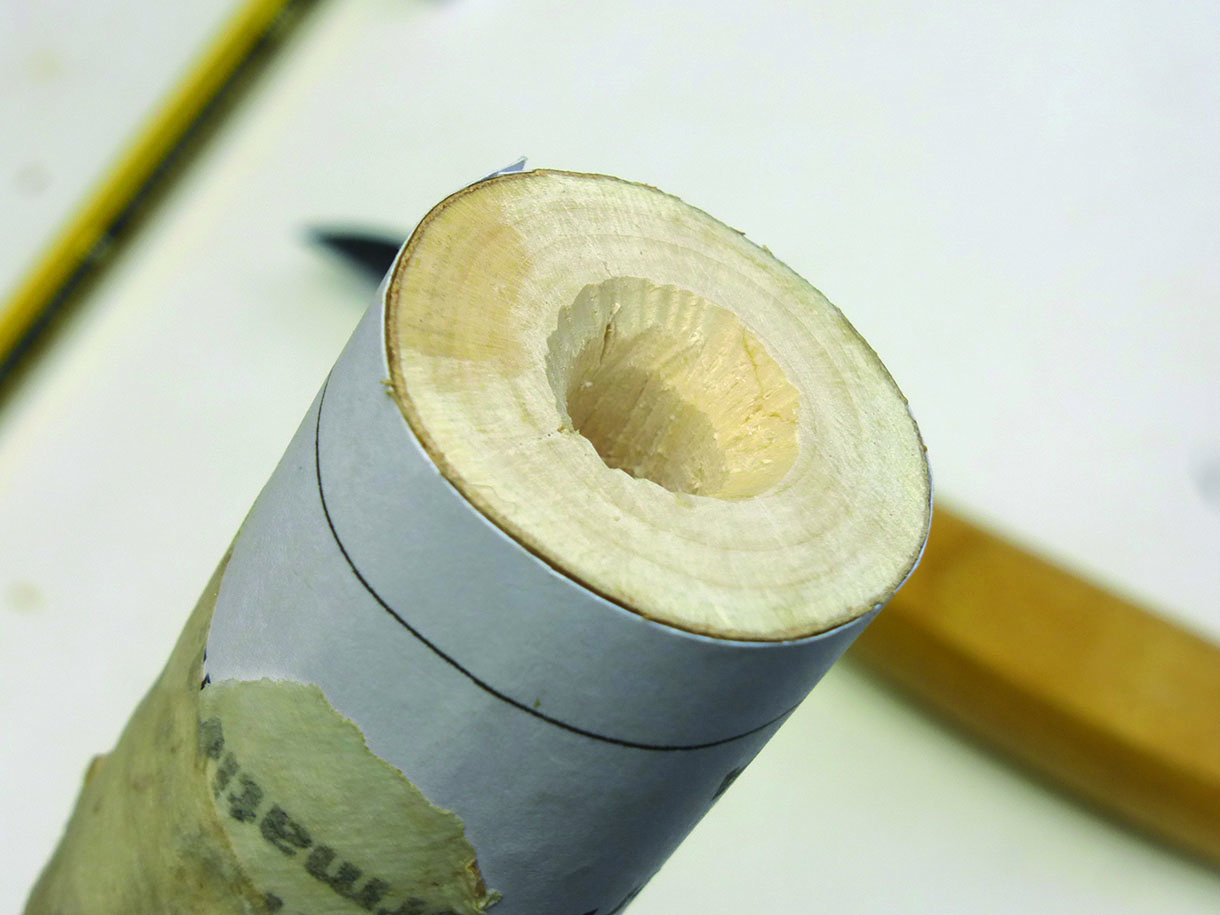
6. Carve a dish shape in the top of the shank, which will help with the seating of the spacer and collect excess glue
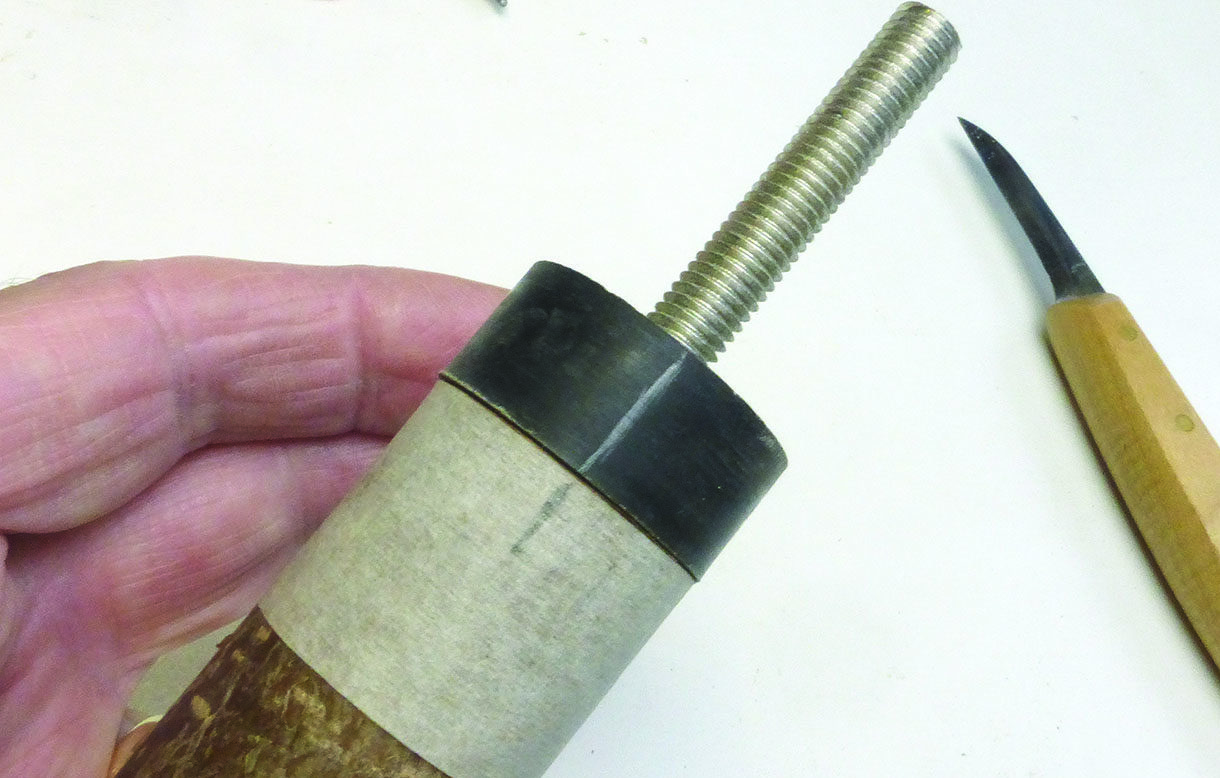
7. Dry fit the metal rod, spacer and shank and revolve the three pieces until you achieve the best fit. Mark all of the pieces at this alignment
8. Use epoxy glue to fit the metal rod and spacer to the shank. Make sure you hold the pieces together until the epoxy sets. Sometimes an air pocket can slowly push up the rod. Alternatively, you can hand tighten a washer and bolt on top of the spacer. Leave for 24 hours to dry properly
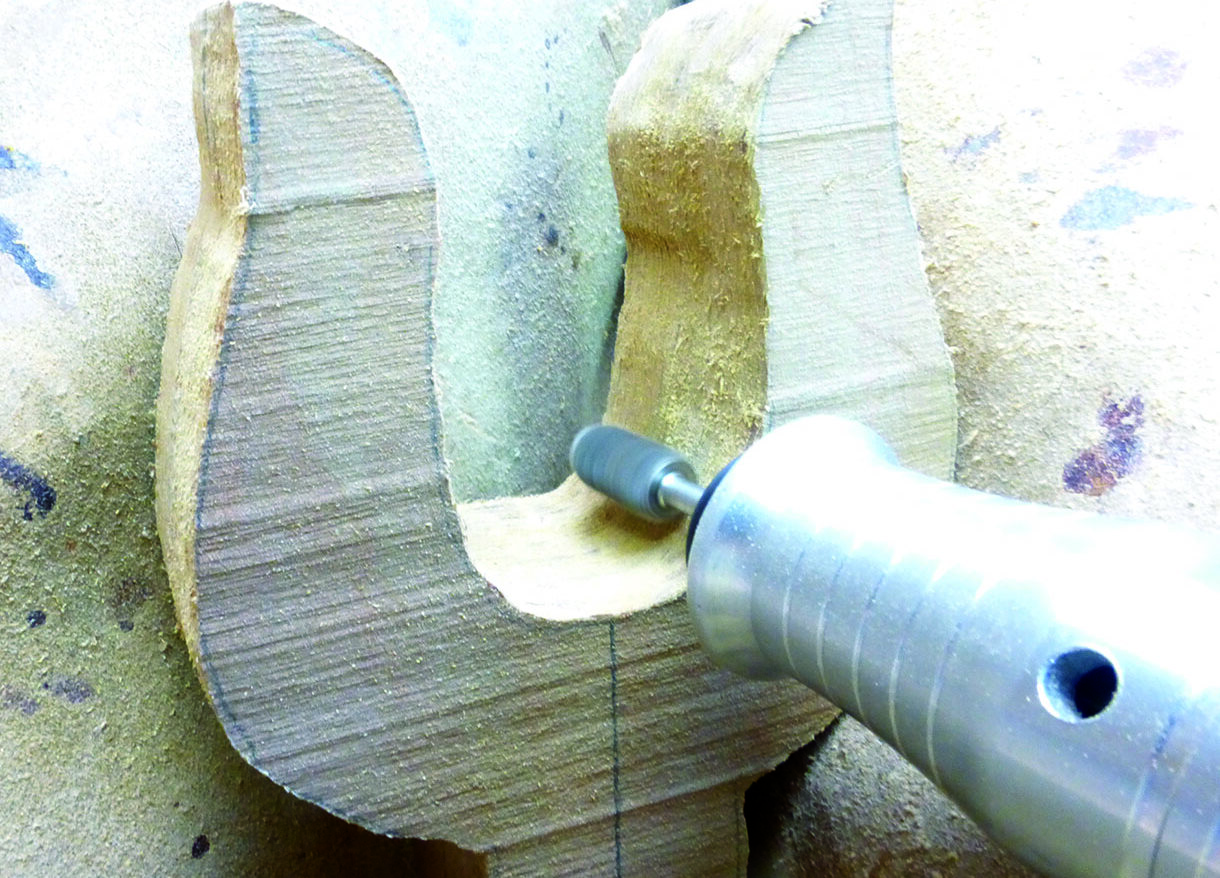
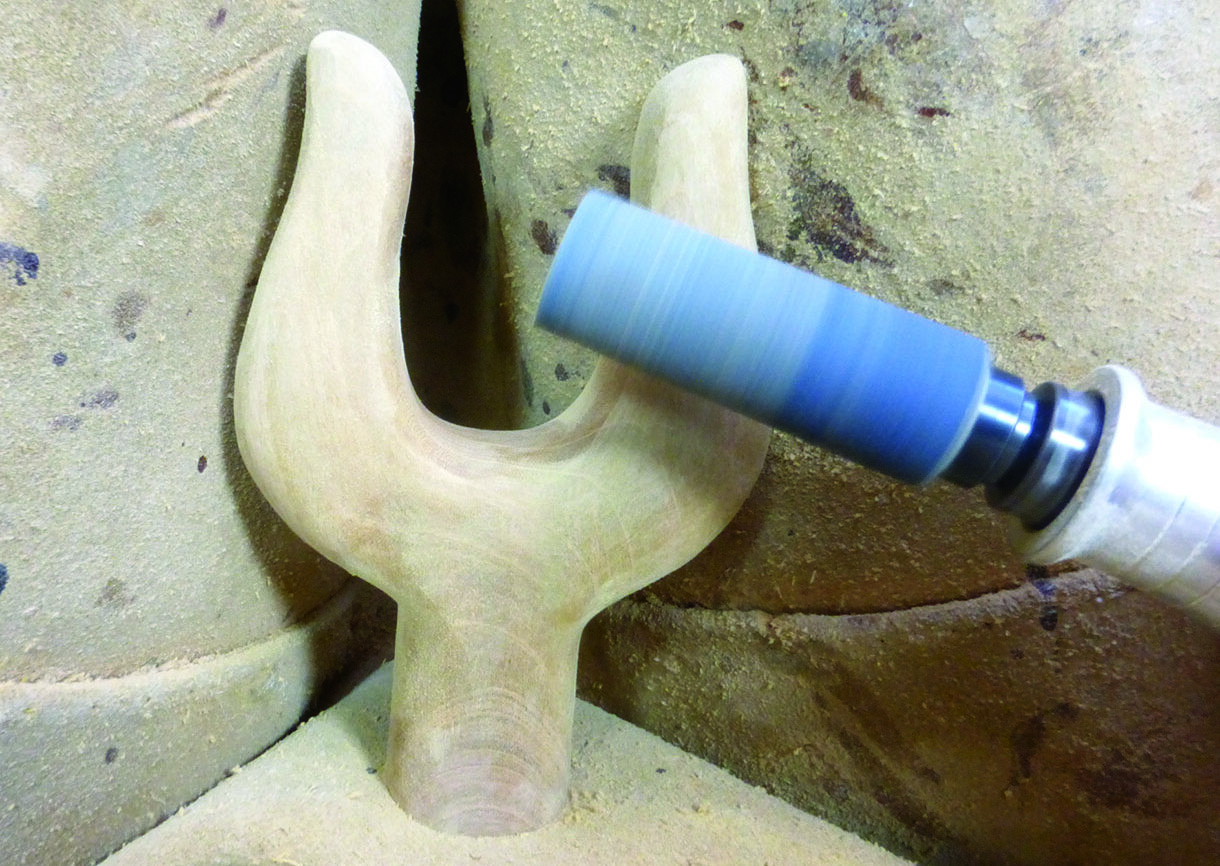
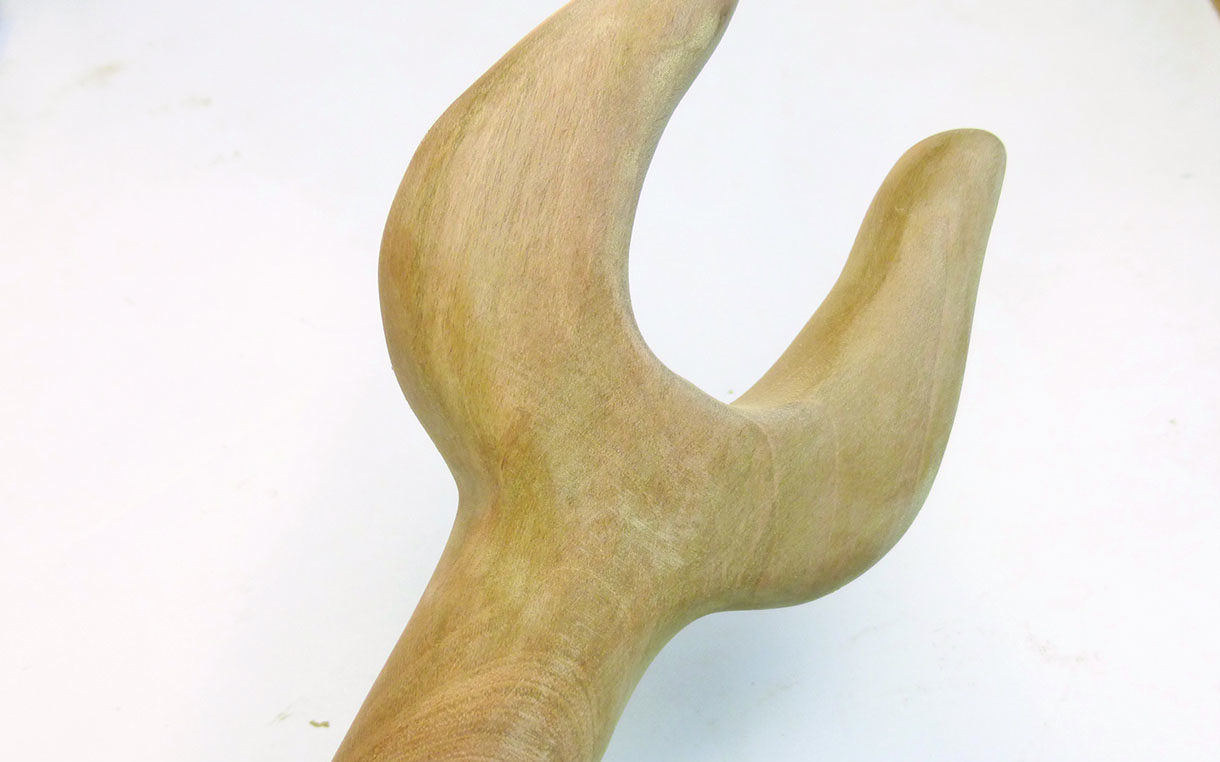
9. Now for the head. With a coarse bullnose burr, tidy up the side profile to match the template
10. Divide the outside edges of the two arms into quarters and pencil on the lines
11. Using the same burr, taper both arms from the bottom to the top. Using the lines as a reference, aim for the top to be equal to half of the overall width. Do not touch the neck
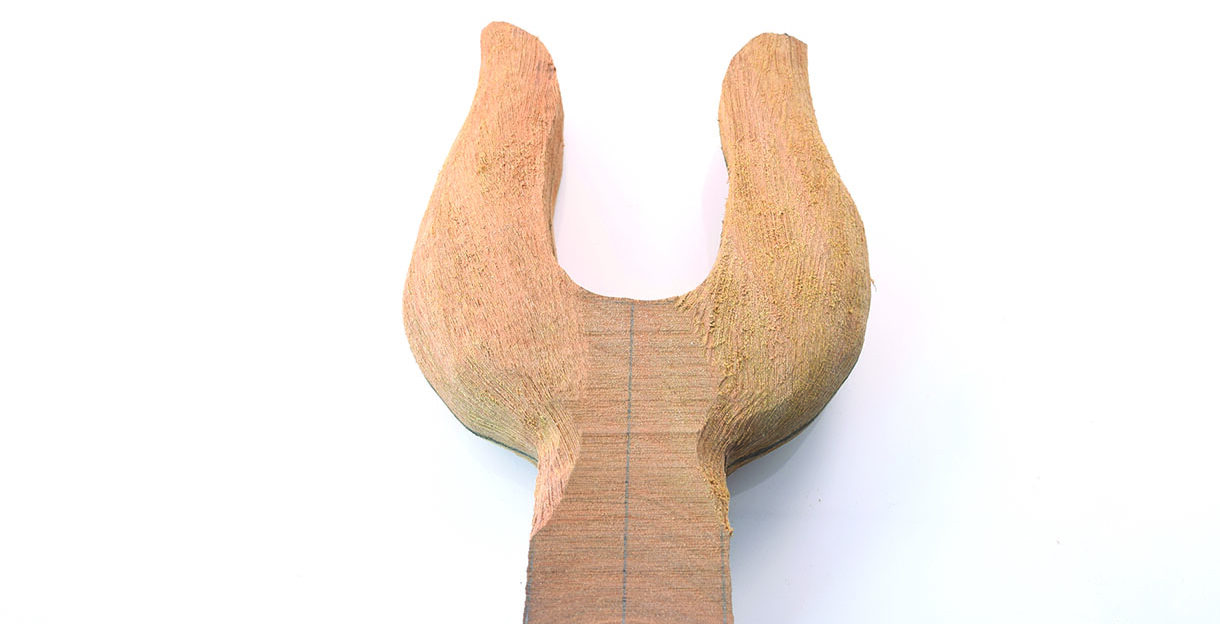
12. Round over the outside edges of the arms with the coarse burr using the centre line for reference
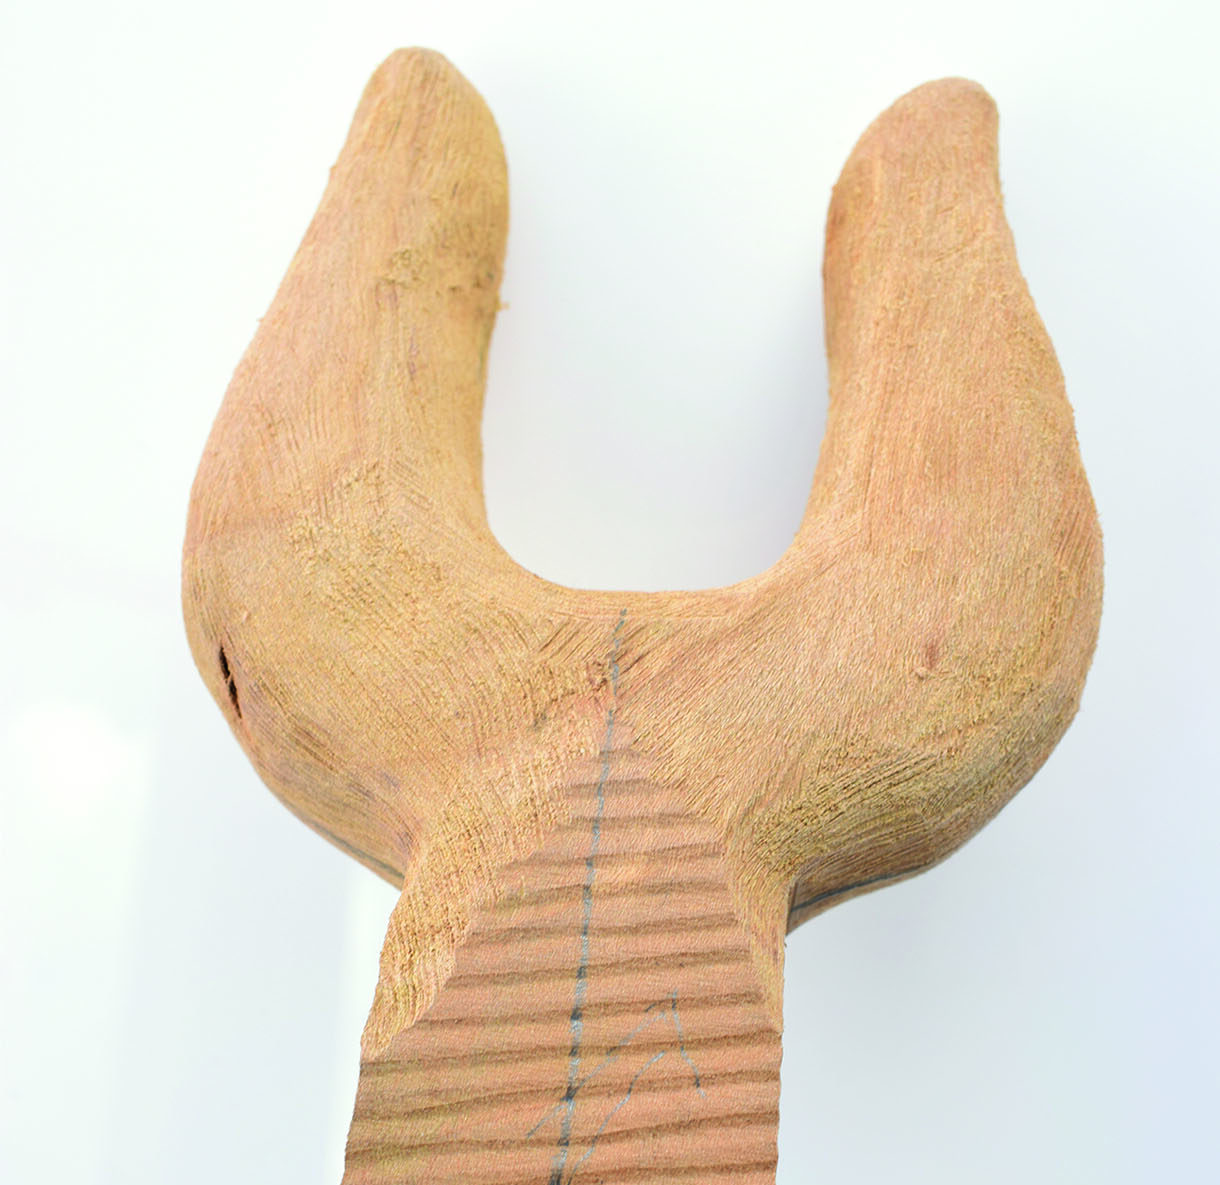
13. Draw the centre line on the inside faces. Round over the edges as above
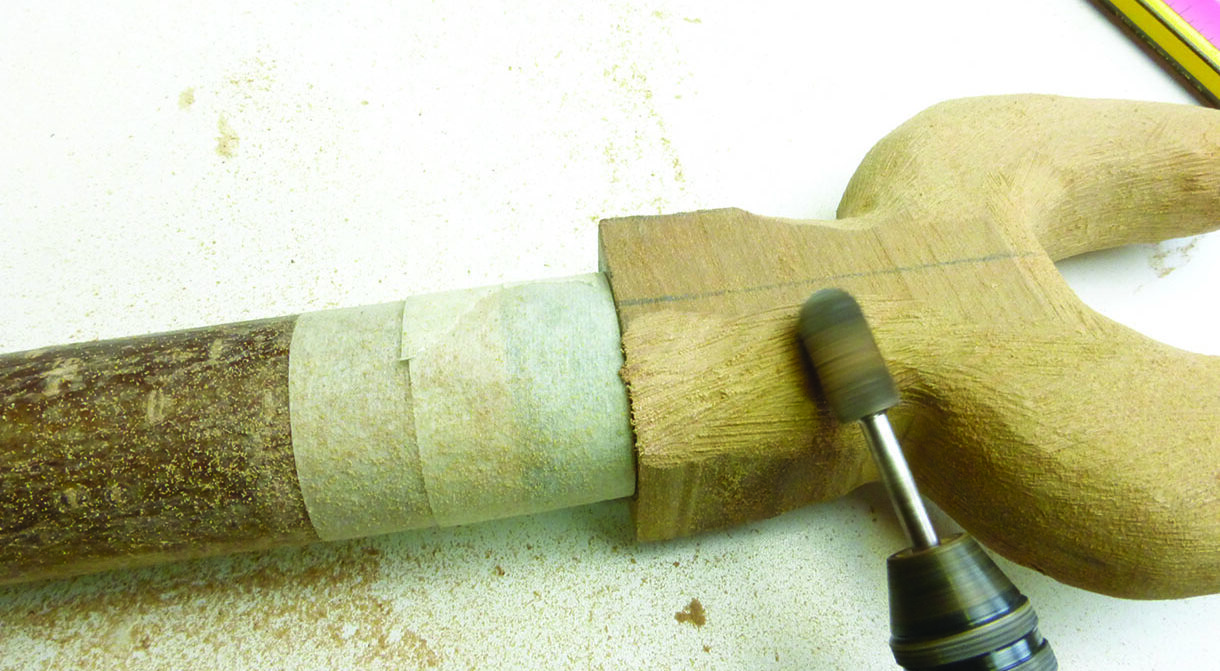
14a. Wrap masking tape around the top of the shank to protect it. Remove some of the tackiness or the tape may pull away some bark when it is removed. Now you need to match the neck to the profile of the spacer and shank. Place the head on the metal rod and to stop it spinning as you work, wrap several layers of masking tape around the rod until the head is firmly in place. An alternative is to glue the head at this time. I prefer not to, as it is easier to finish the head while it is off the shank. Use the coarse burr to remove wood from the neck. You are aiming for a straight line along the outside edges of the shank, spacer and neck. Leave enough material for final sanding
14b.
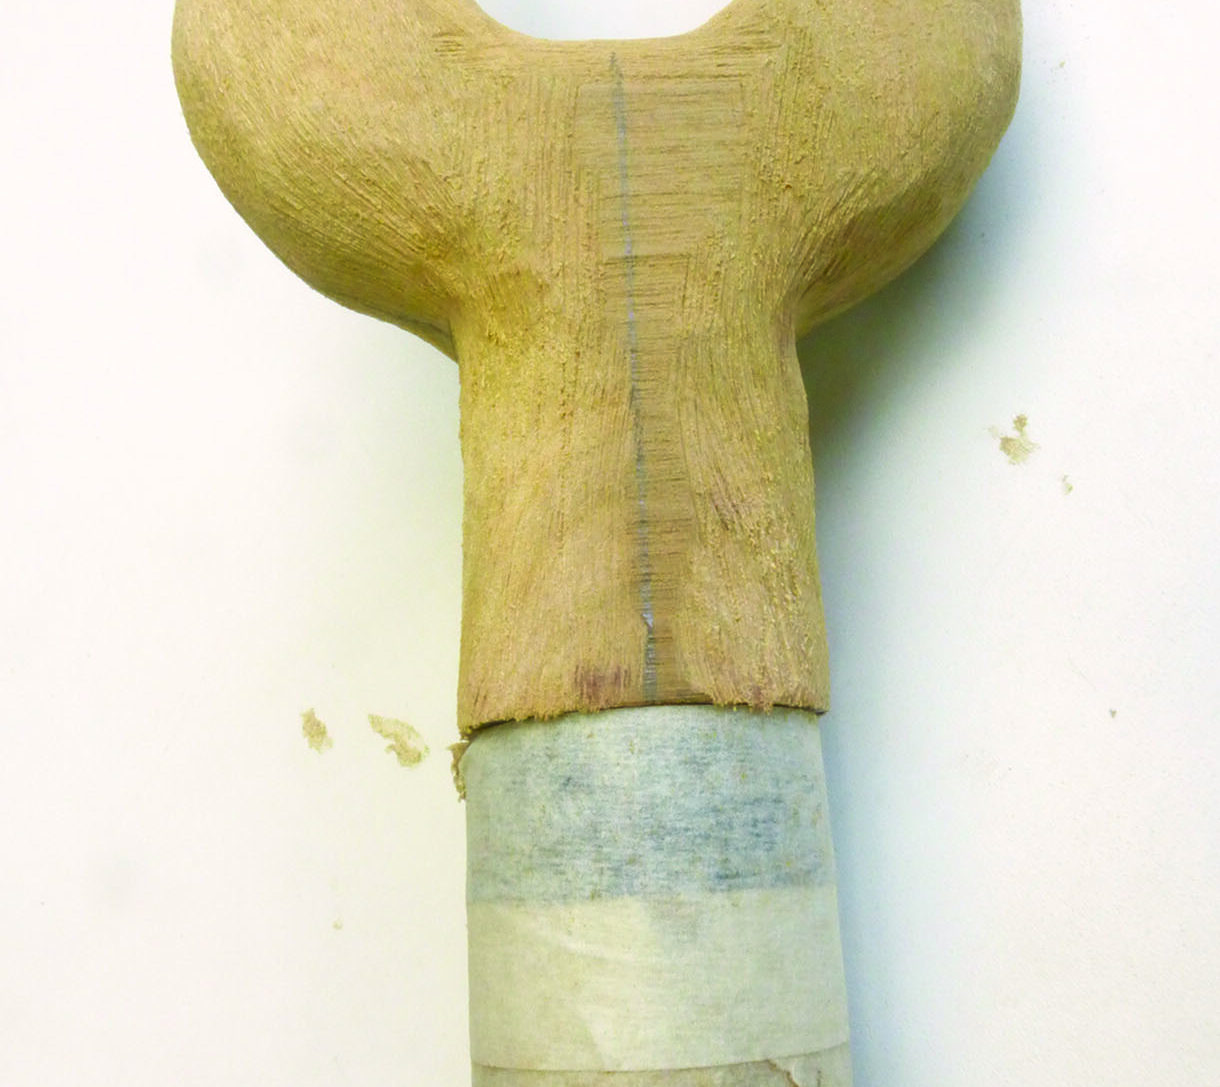
15. Remove the head from the shank. Sand with 120 and 180-grit abrasive on a sanding drum
16. Finish the sanding of the head by hand with 240, 320 and 400-grit abrasive. Place the head on the shank and remove the masking tape to finish sanding the neck. Take care not to sand any of the bark off the shank. The use of a spacer is the best way to cater for the differences in the shapes of the shank and the head
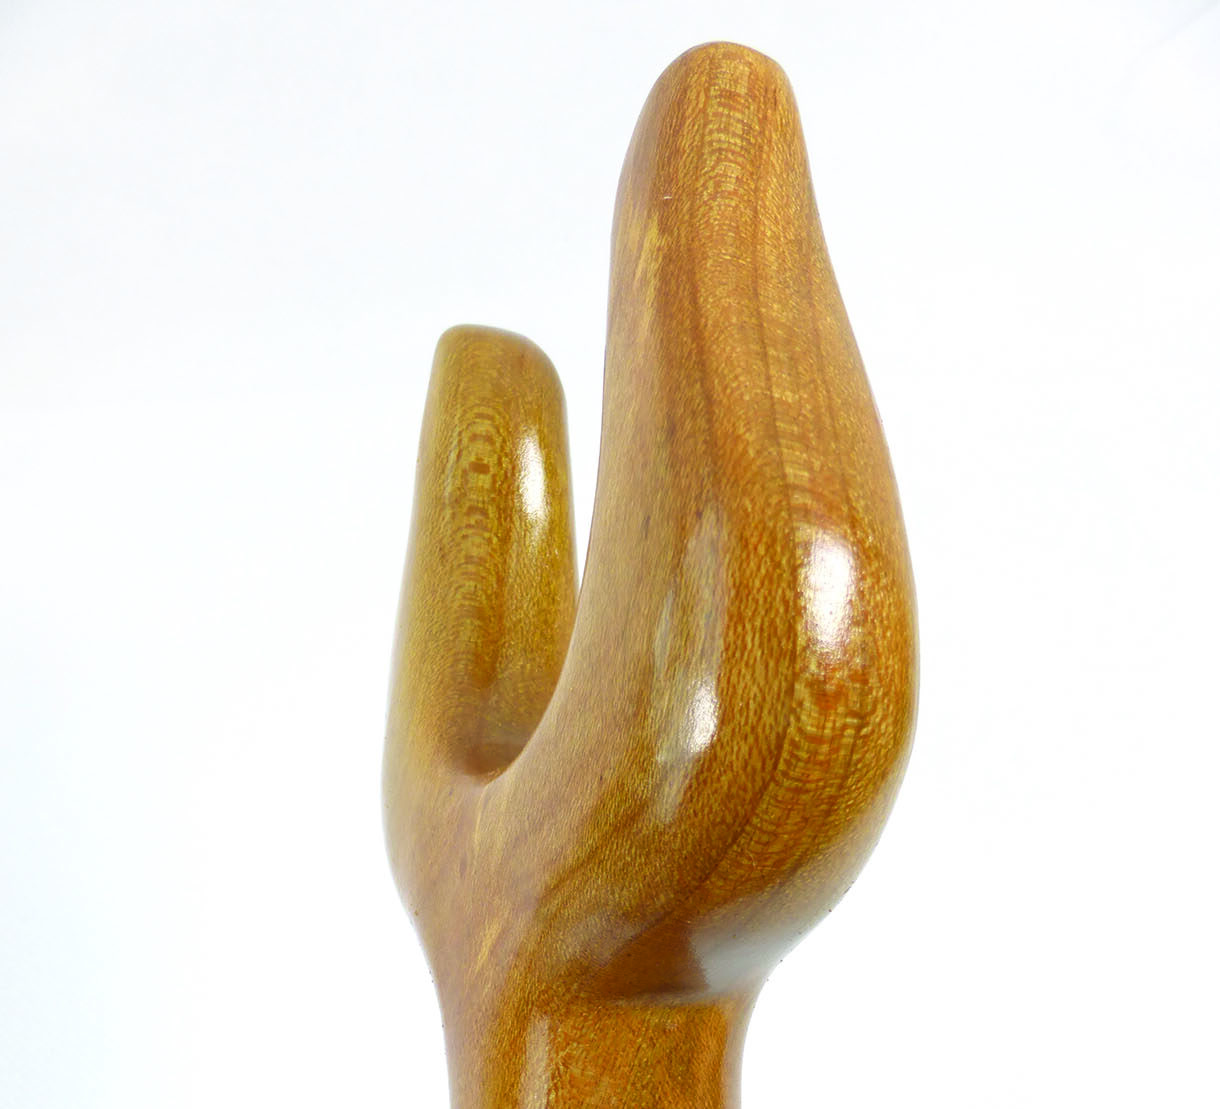
17. If you wipe white spirit across the head and hold it to the light, it will reveal any remaining blemishes. When you are happy with your finish, use epoxy glue to secure the head on to the shank and spacer. Use a cloth with a dab of white spirit to remove any excess glue that oozes from the joint. Carve the tip of the shank to receive the brass ferrule, but do not glue

18. Apply several coats of your choice of finishing oil to the head and stick including the bare wood of the ferrule placement. A thumb stick used for shooting is jammed into the mud. This method will ensure the business end of the stick is as waterproof as possible
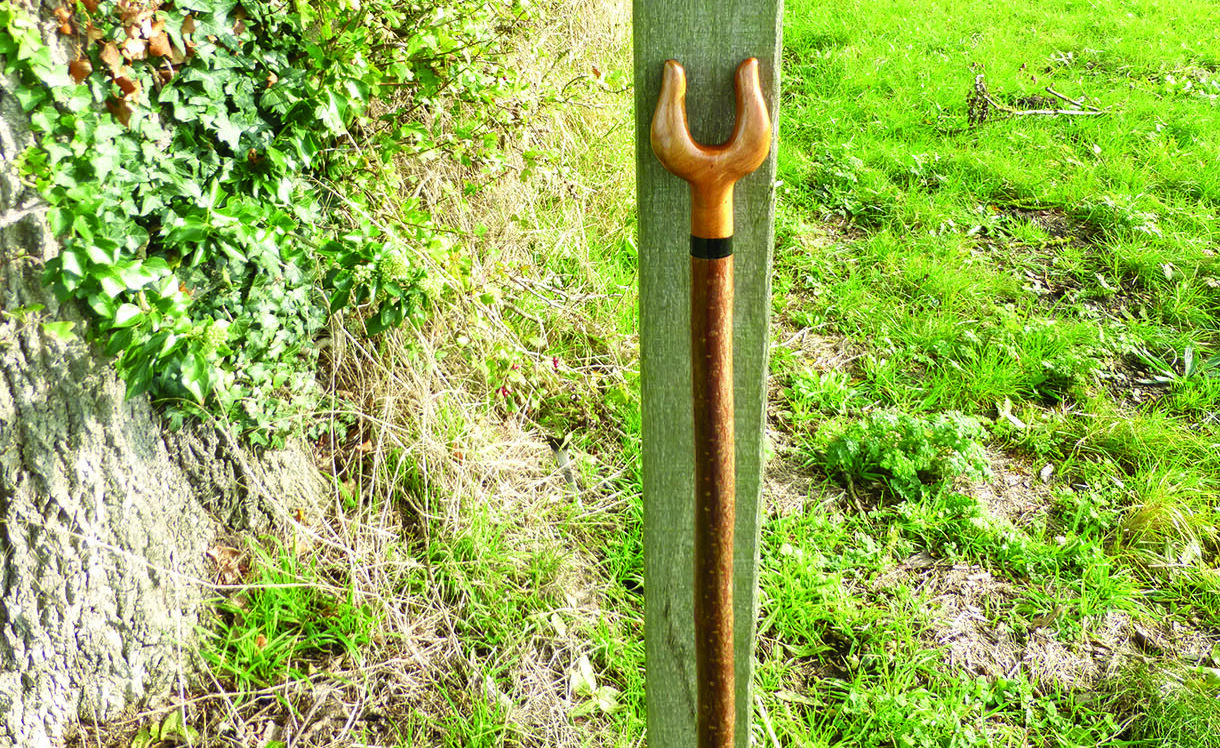
19. When the final coat of oil has dried, secure the ferrule with epoxy glue
Repairing cracks
As I removed wood from the head, I came across a small crack and a hole – probably woodworm. There are several ways to repair these small faults:
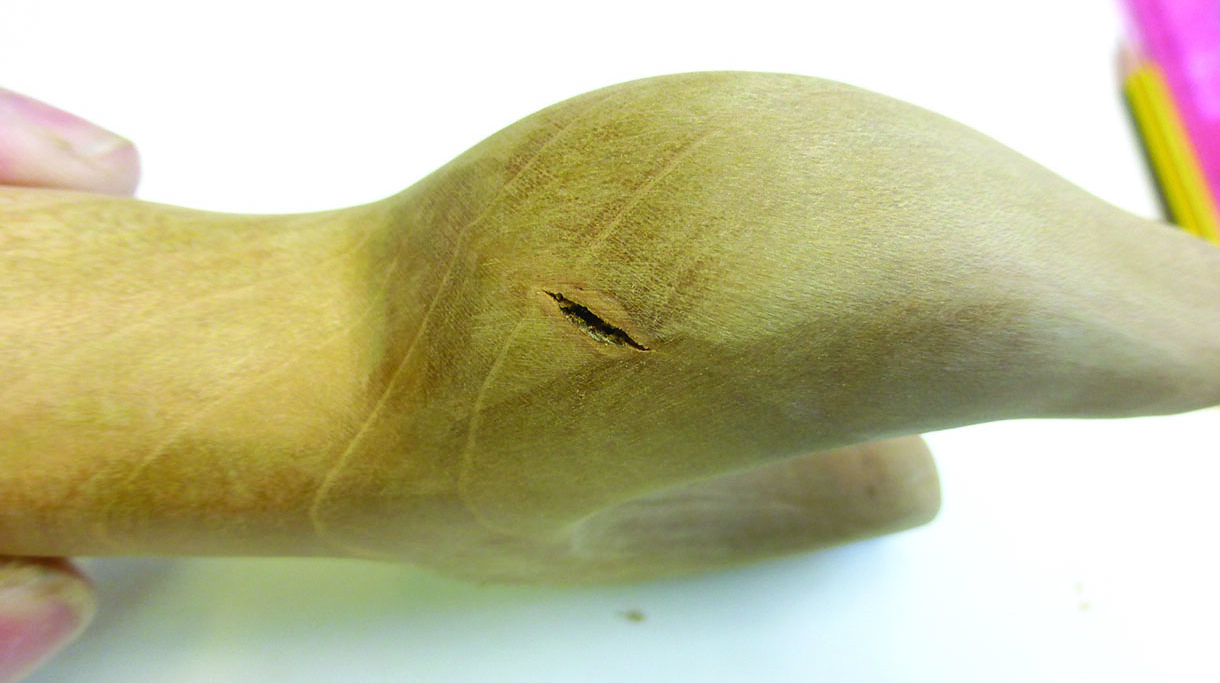
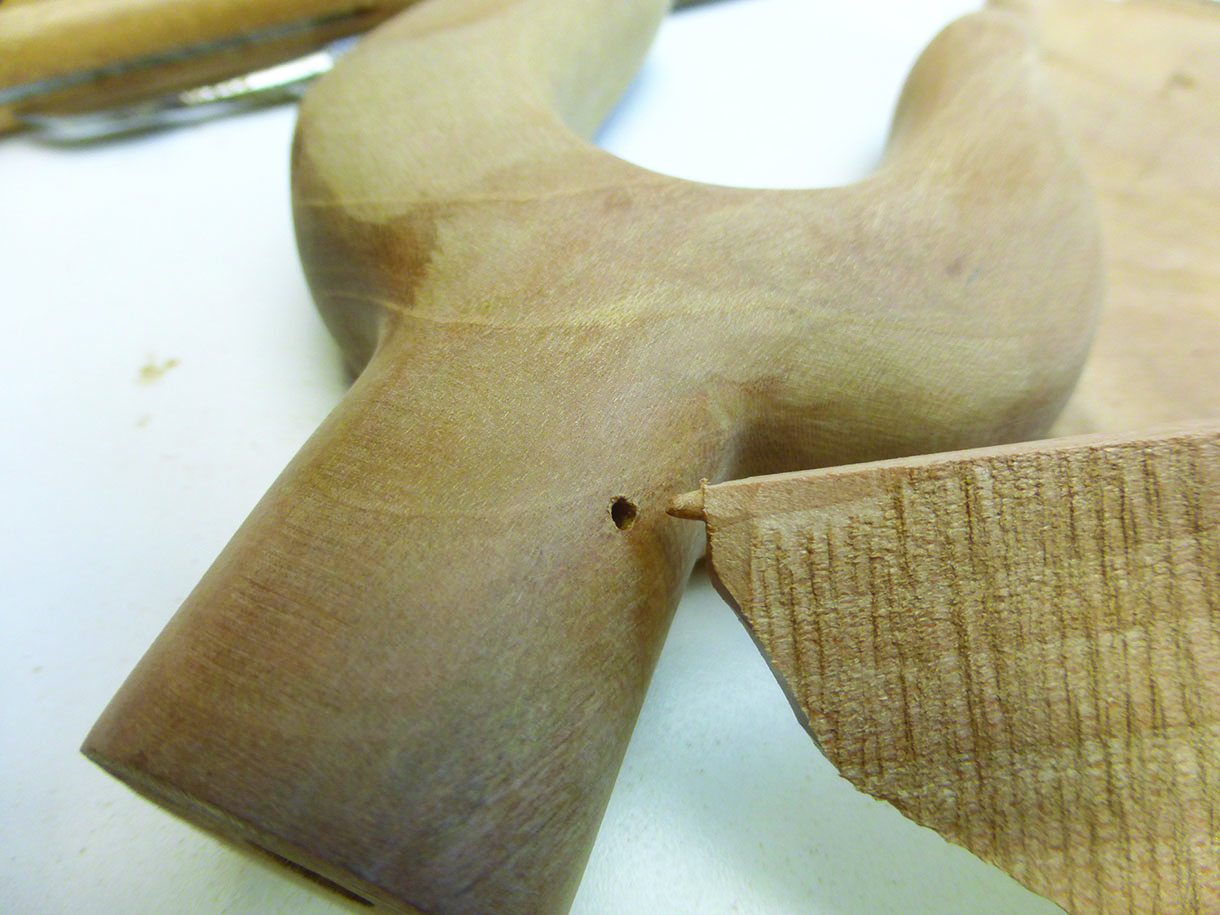
Crack found during carving
The first method
Mix sawdust with wood glue to a thick consistency. Apply to the crack and allow to dry, then sand.
The second method
Press sawdust into the crack and apply superglue over the top. Quickly sprinkle over a touch more sawdust as the mixture will undoubtedly sink. Allow time to dry and sand.
The final method
Use a piece of wood from which you cut the blank. If you are working with a piece of spalted wood, or similar, that you think may contain the odd hole, keep a few small pieces and some sawdust to hand. Shape a sliver of wood to the shape of the defect. Keep testing the fit until you achieve a tight fit. When repairing a woodworm hole in a hardwood such as this cherry, whittle the piece to the approximate size, place it in the hole and turn it several times and it will take on the shape of the hole creating a neat repair. When you are happy with the fit, apply wood glue to the hole and then force in the piece of scrap wood. When dry, cut
the excess wood close to the surface of the carving and sand.
Repair of woodworm hole
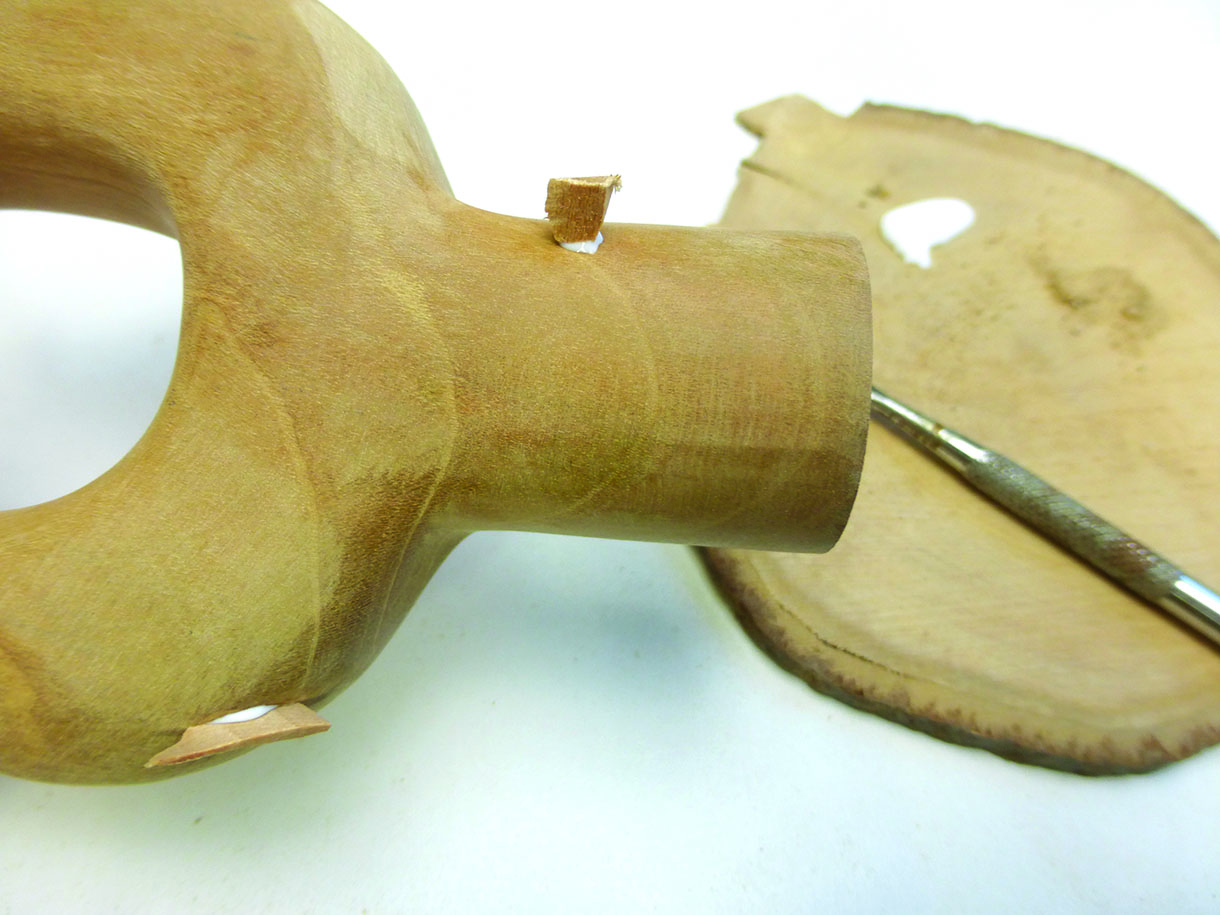
Glue repair wood into hole
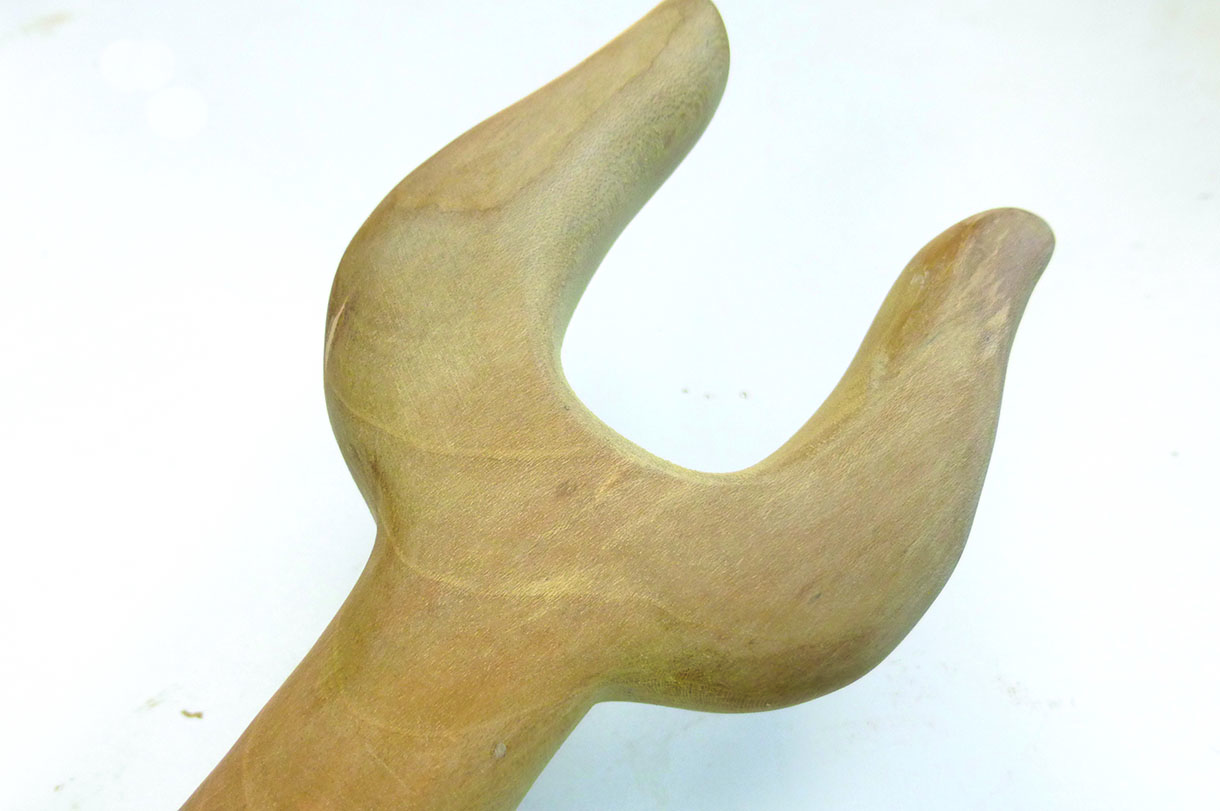
Repairs finished


