Butterfly Relief Carving:
Andrew Thomas demonstrates how to produce a low-relief carving of a butterfly on a leaf.
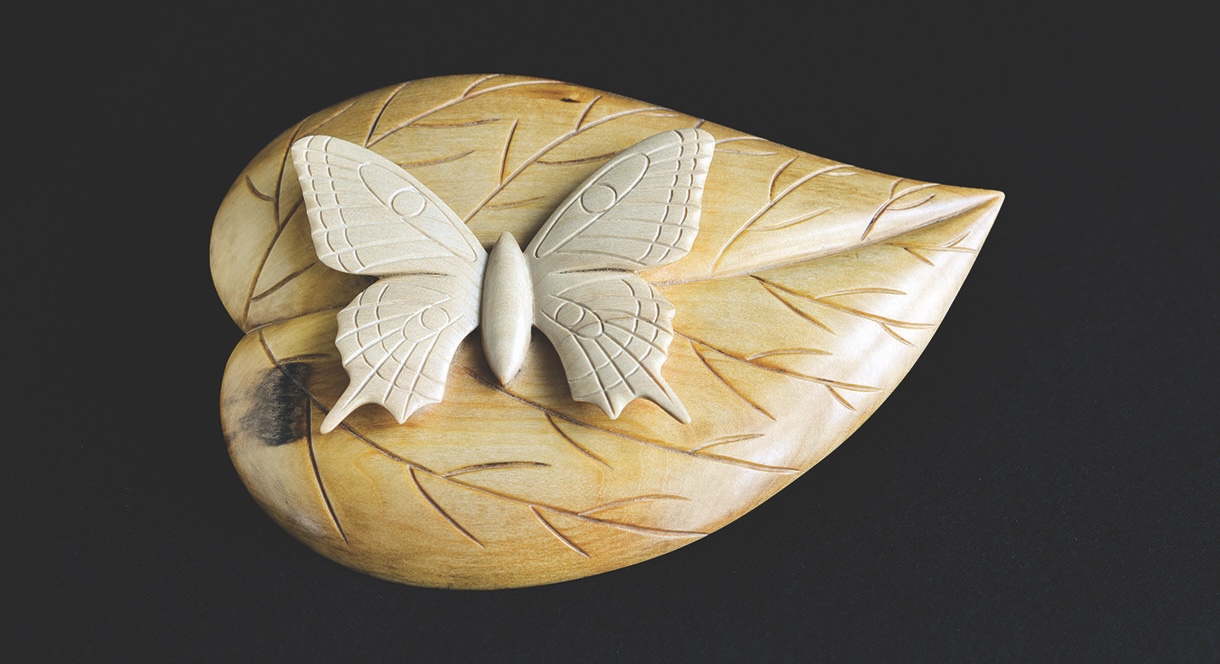
Andrew Thomas demonstrates how to produce a low-relief carving of a butterfly on a leaf
The butterfly is arguably one of the most beautiful flying insects on the planet that lend their delicate form elegantly to the art of relief carving. The real-life creature differs slightly from the example in this article as it has three body sections – the head, chest and abdomen, plus the antennae, which can be applied to the design if you wish to add these details.
This project is aimed at both beginner and intermediate levels of ability and is a great exercise in learning the principles of relief carving and practising the technique of working with the direction of the grain, swapping the cutting direction from one side to the other along the curved edges of both butterfly and the leaf. The main objective is to make the form structurally strong, but give the appearance
of the very fine delicate wings, as if it were about to take flight.
The project is completely adaptable to the reader’s own design ideas, as both butterfly and leaf can be of any species. Before you start working on the project, please read the complete step guide and study the stage and finished images to see how the project develops.
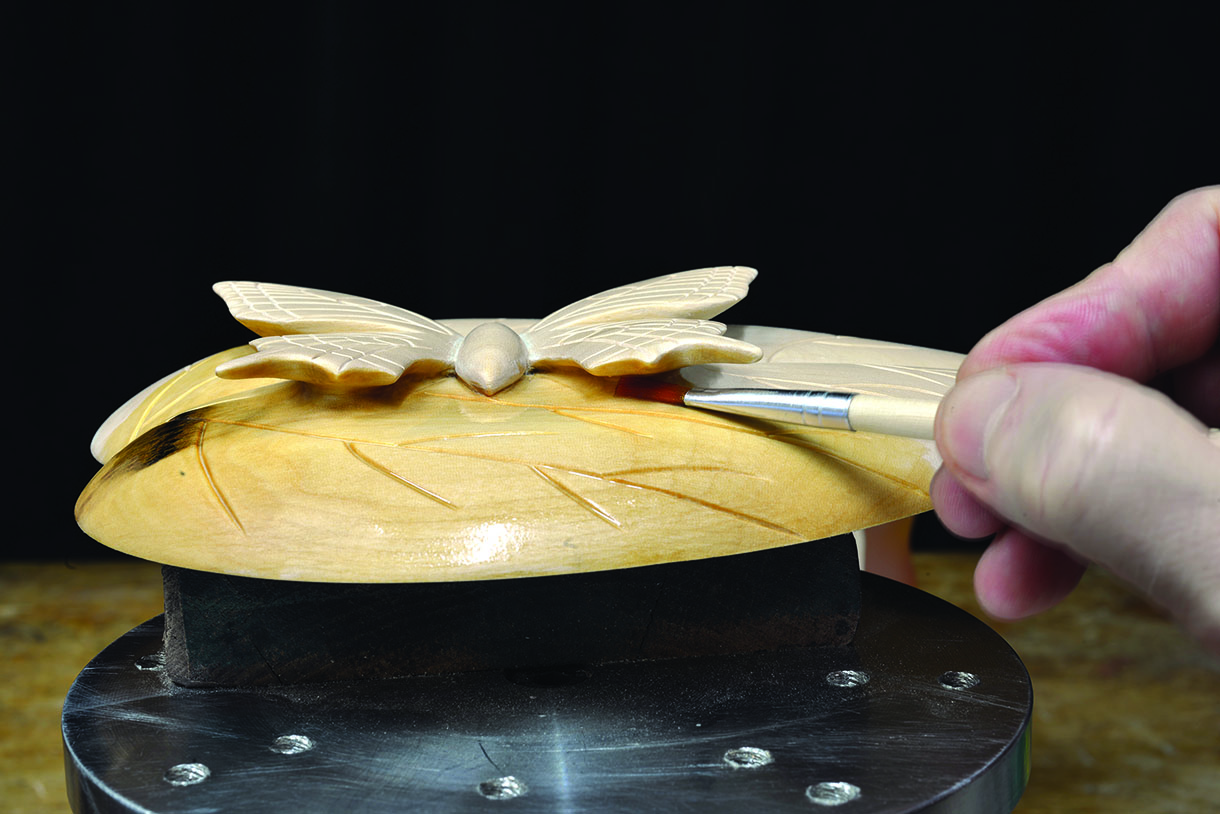
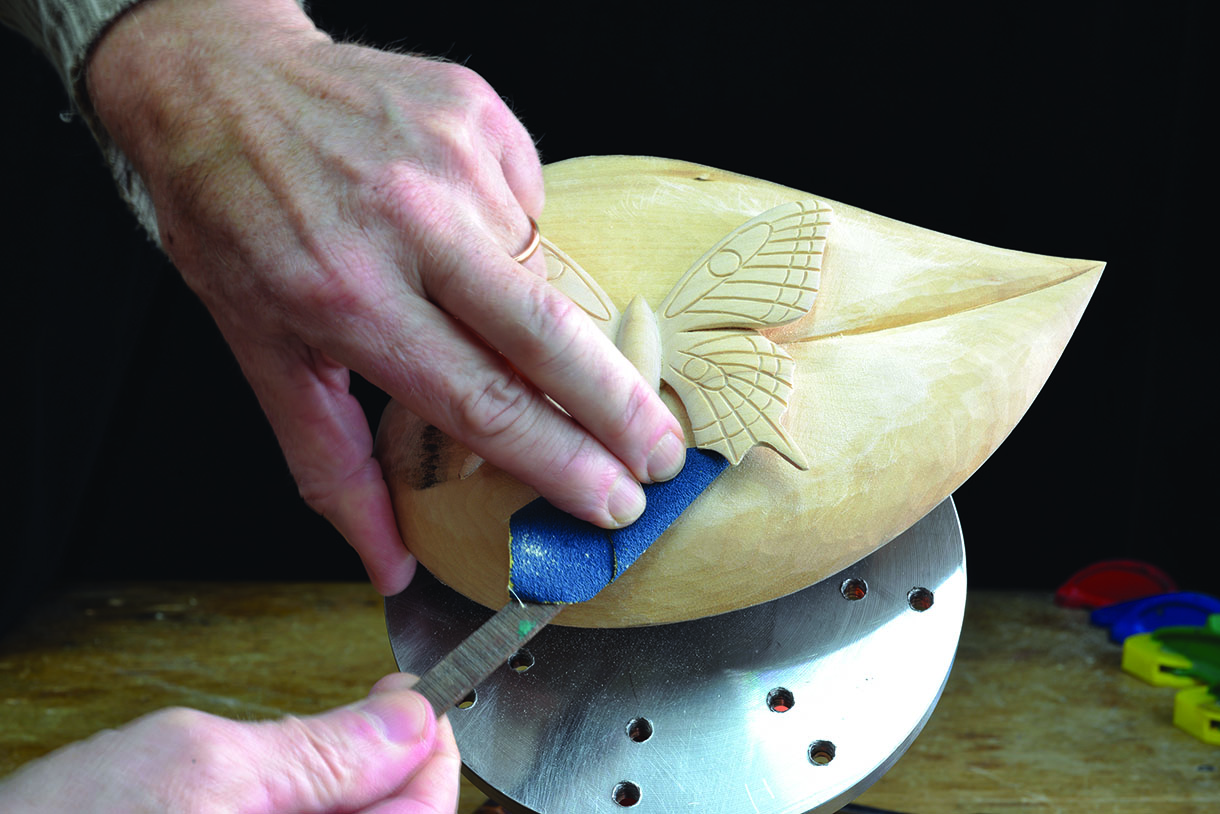
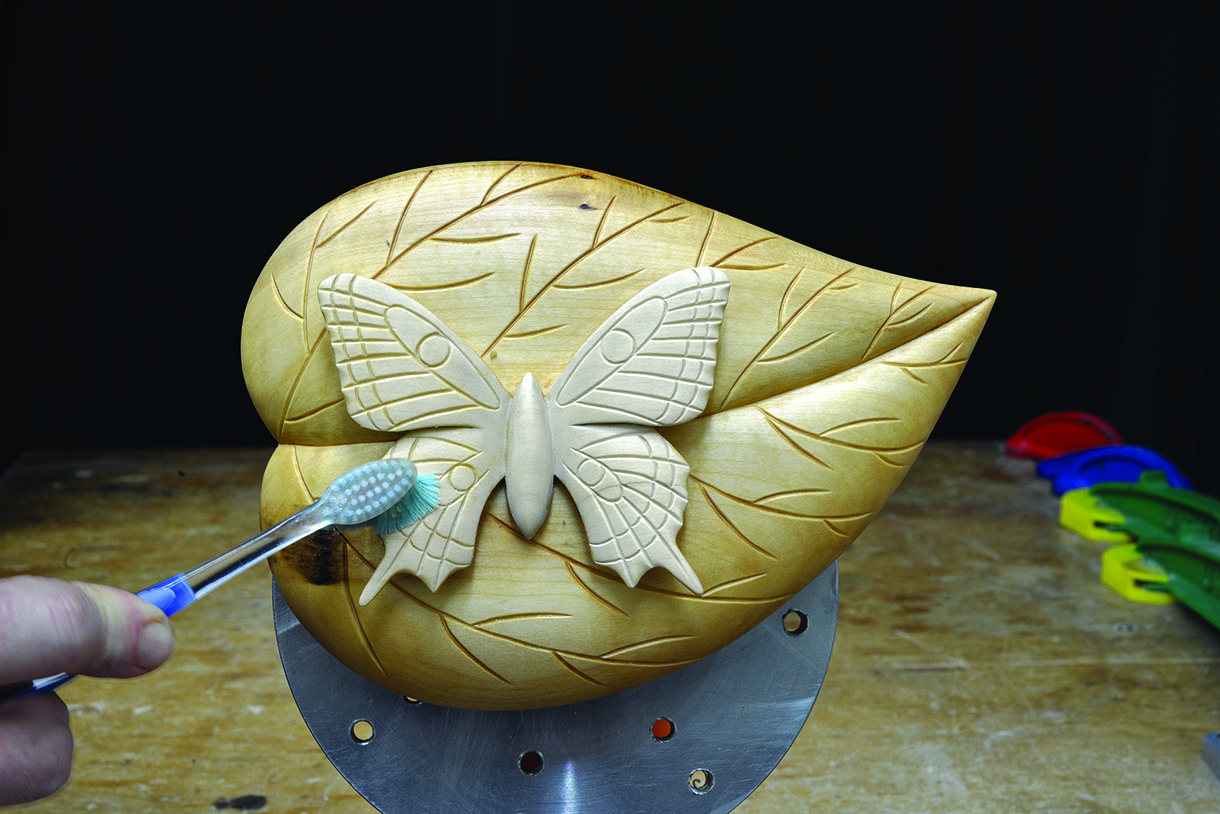
Sanding
When sanding into awkward areas such as the undercuts, it is effective to use appropriately shaped pieces of wood to brace the sandpaper, which can then be used with a good amount of pressure to aid the process.
Things you will need
Tools:
• Swiss gouges
• No.2, 5, 10 & 20mm
• No.5, 20mm
• No.7, 6mm
• No.8, 4mm
• No.11, 1, 2 & 3mm
• No.12, 6mm
• No.16, 1mm
• Knife
Materials:
• Timber: Lime (Tilia europea) 200 x 140 x 25mm
• Boiled linseed oil
• Clear wax
• Medium brown wax
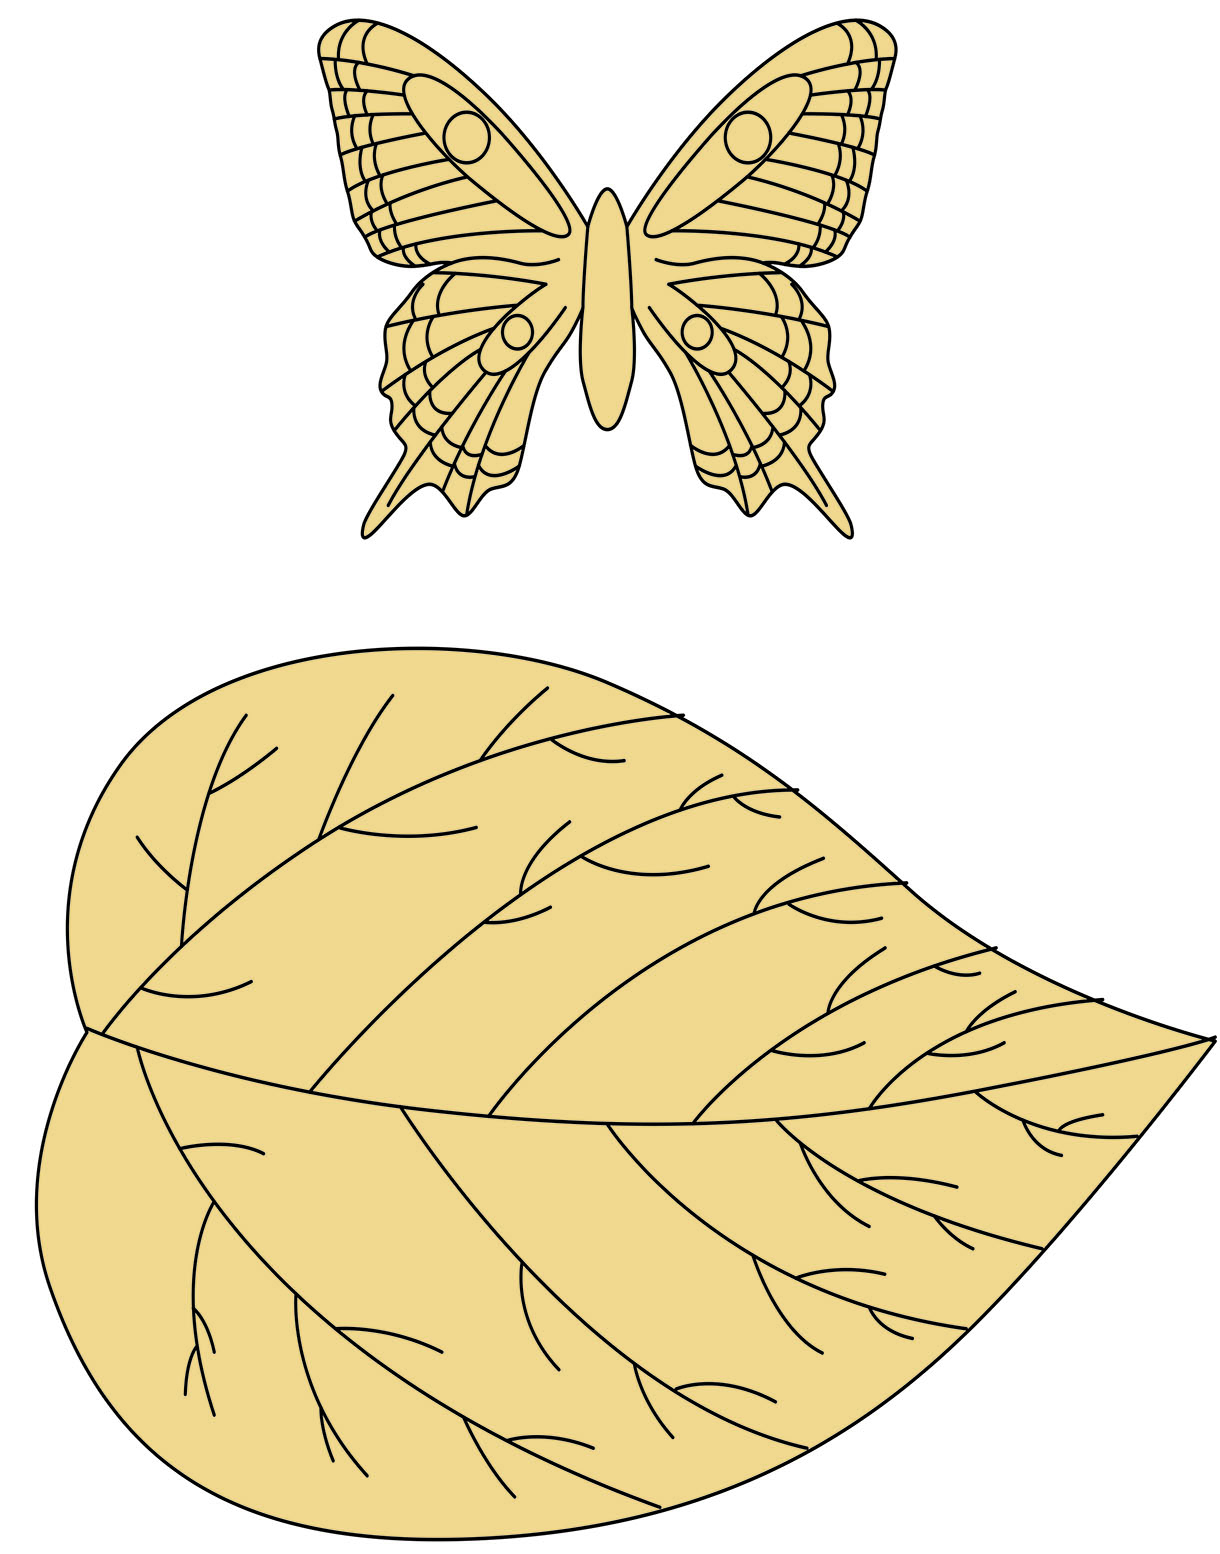
Drawings and how to resize them
To enlarge or reduce the size of drawings right click on the image to download it and then go HERE to watch a video on how to use paper with a grid to do exactly that.
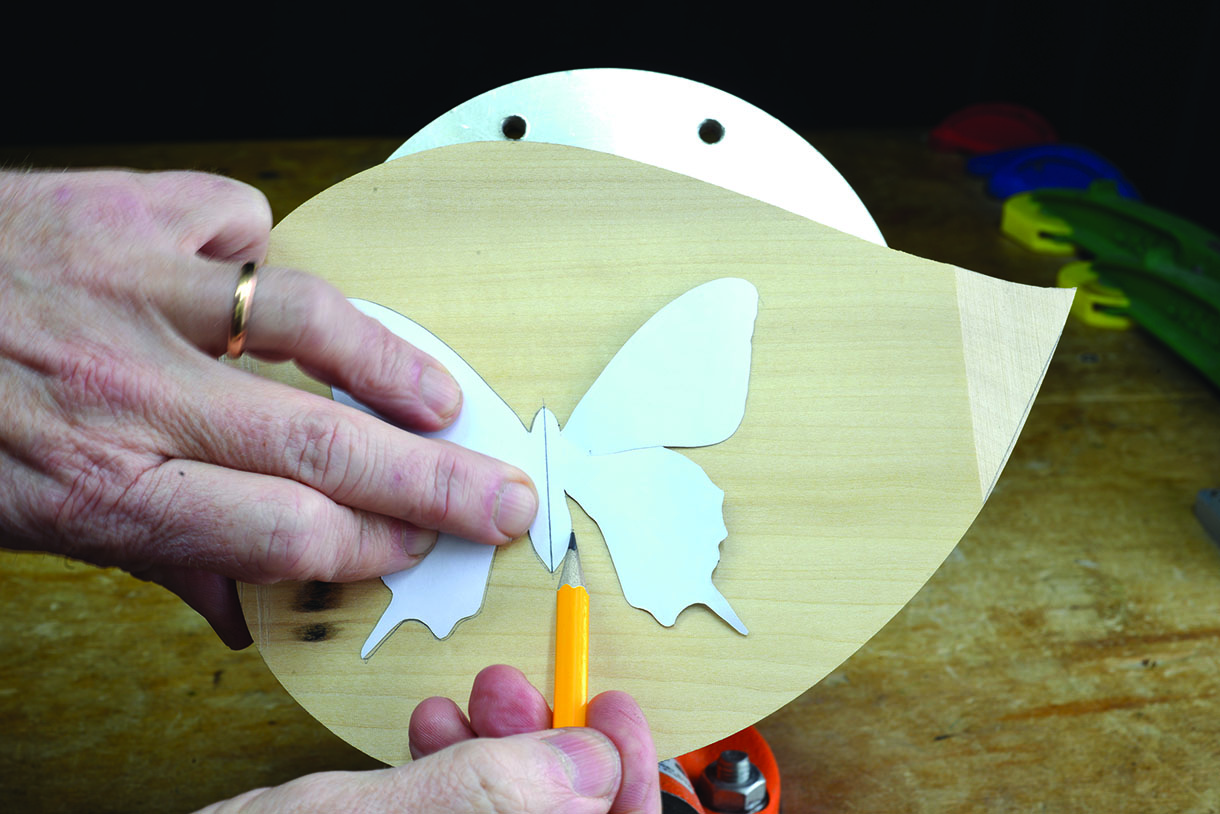
1a. Scan or photocopy the scale drawings, enlarging them to the correct size for your wood, and print them out on to card to use as a template and reference. Transfer the design of the leaf and butterfly on to your block of wood, ensuring that the grain direction is running horizontally through the block, then cut it out. It is advisable to attach a smaller piece of timber underneath the leaf blank so that it raises it slightly from the vice faceplate, allowing the edges to be carved more easily, and without any concerns of the gouges coming into contact with the metal faceplate. Secure this safely to your vice
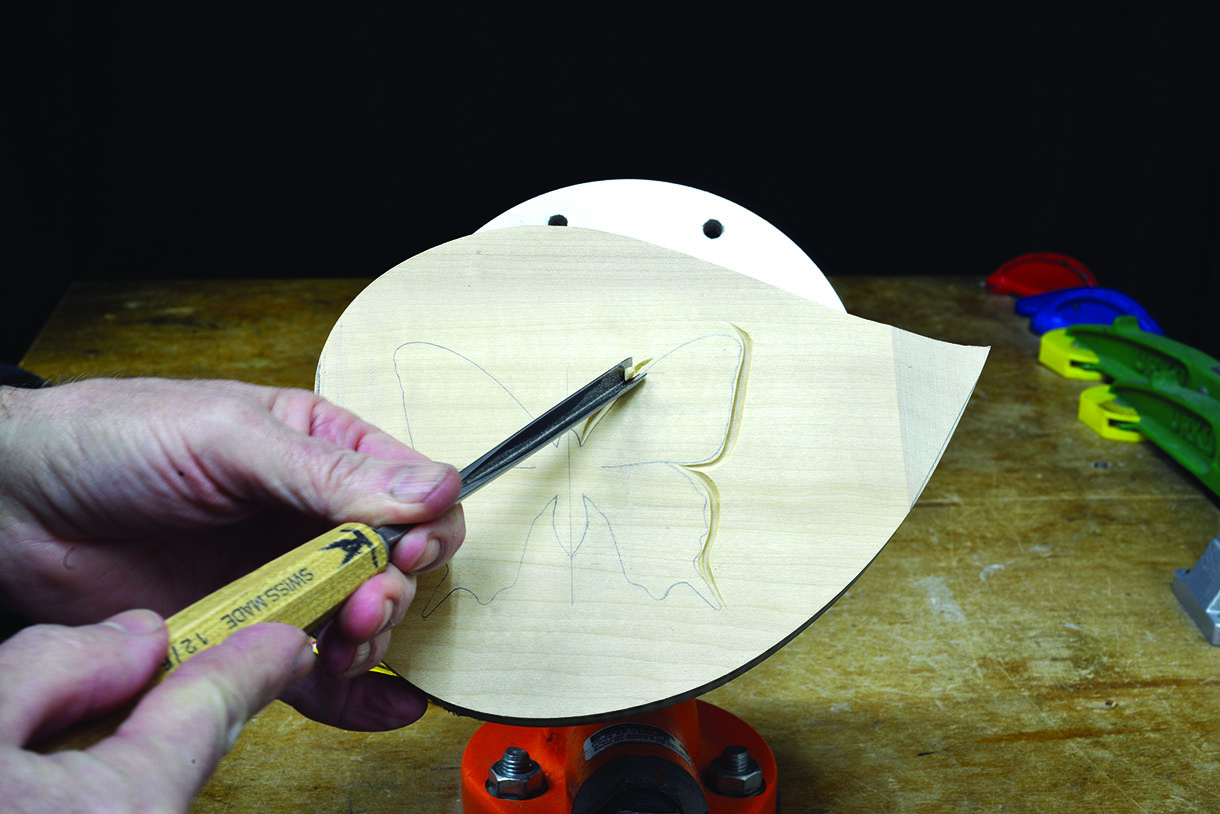
1b. The first stage of the carving is to separate the outline of the butterfly from the background. Make the initial cut using a No.12, 6mm V-tool, working carefully along the very outside of the design line
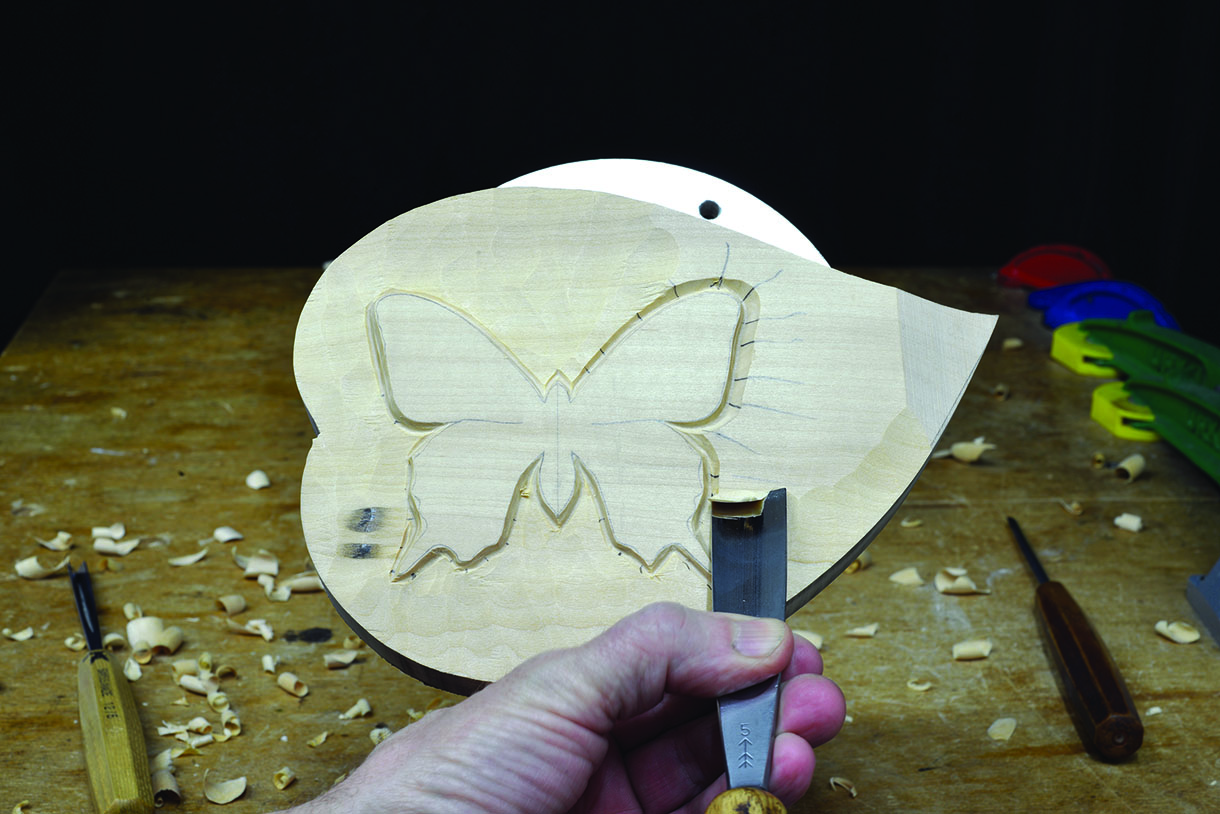
2. Use a No.5, 20mm to pare away the wood adjacent to the V-tool cut, across the entire surface, lowering the background evenly and neatly to the depth of the V-tool cut
3. The area on the lower edge of the wings has several tight curves that are difficult to work around effectively with the V-tool and No.5. Use a No.8, 4mm in this area, working from the surface downwards on to the background
Top tip:
To ensure the background is being reduced evenly across the surface, a line, or several lines, can be drawn around the edge of the leaf at 5 or 10mm intervals, from the top or bottom edge. The surface can then be pared back neatly to these lines.
4. Repeat steps 1 to 3 until you have reached a depth of approximately 10mm. You can, if you wish, add more depth to the butterfly, especially if your original piece of timber was thicker than the suggested size of 25mm. This will only enhance the finished effect of the detail, definition and shadow
5. Due to the shape of the V-tool’s blade angles, it is normal for the cut to gradually creep away from the original design line as depth is gained. The deeper you work into the background, the further away from the original design line you find yourself. This now needs to be brought back in square to the line again, ready for the undercutting later. Hold the V-tool on its side with either the right or left edge flat on the surface, and make a cut back in towards the original outline of the butterfly
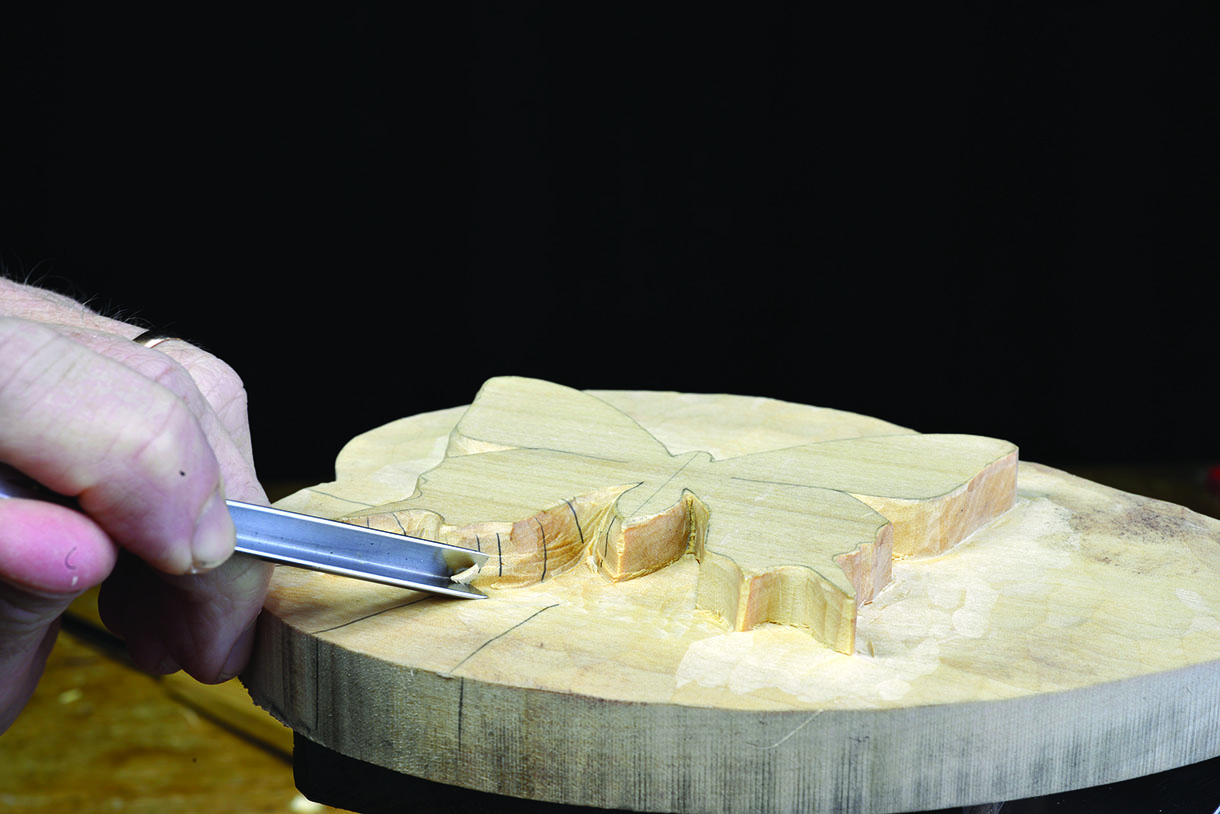
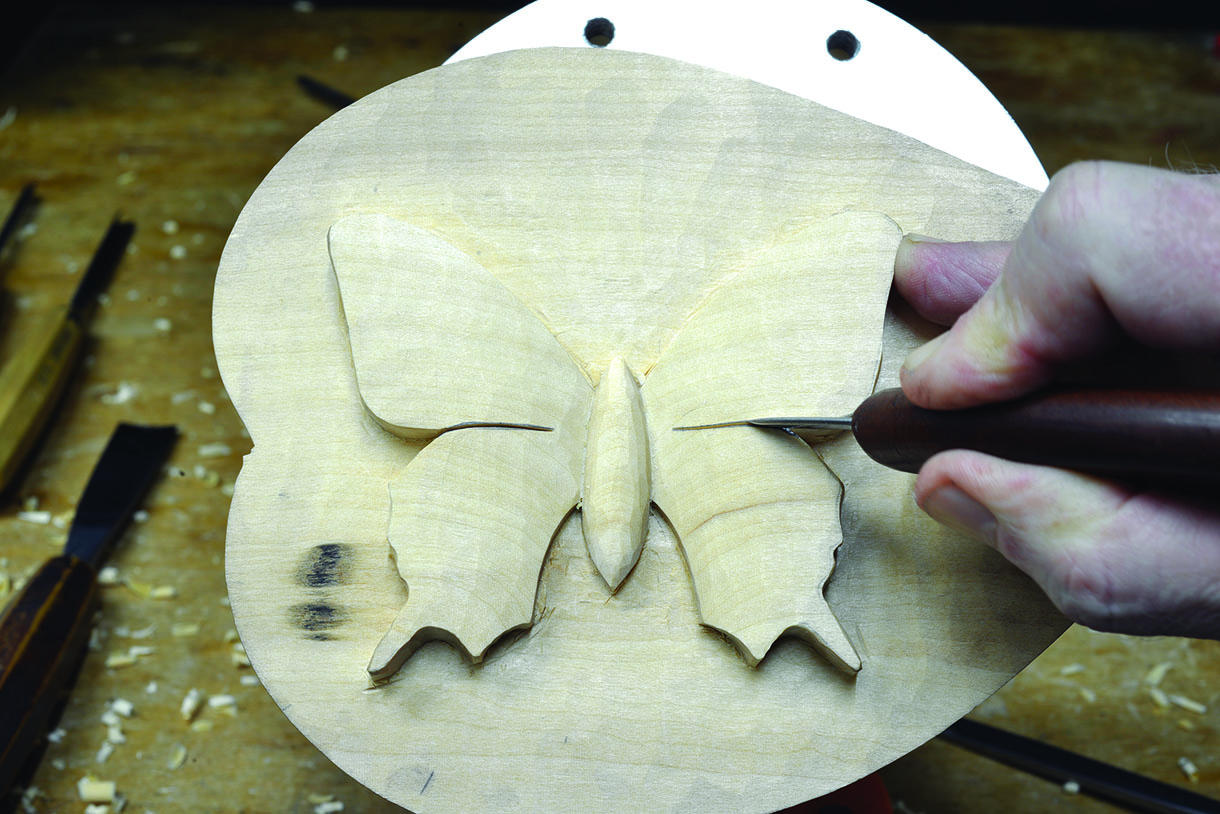
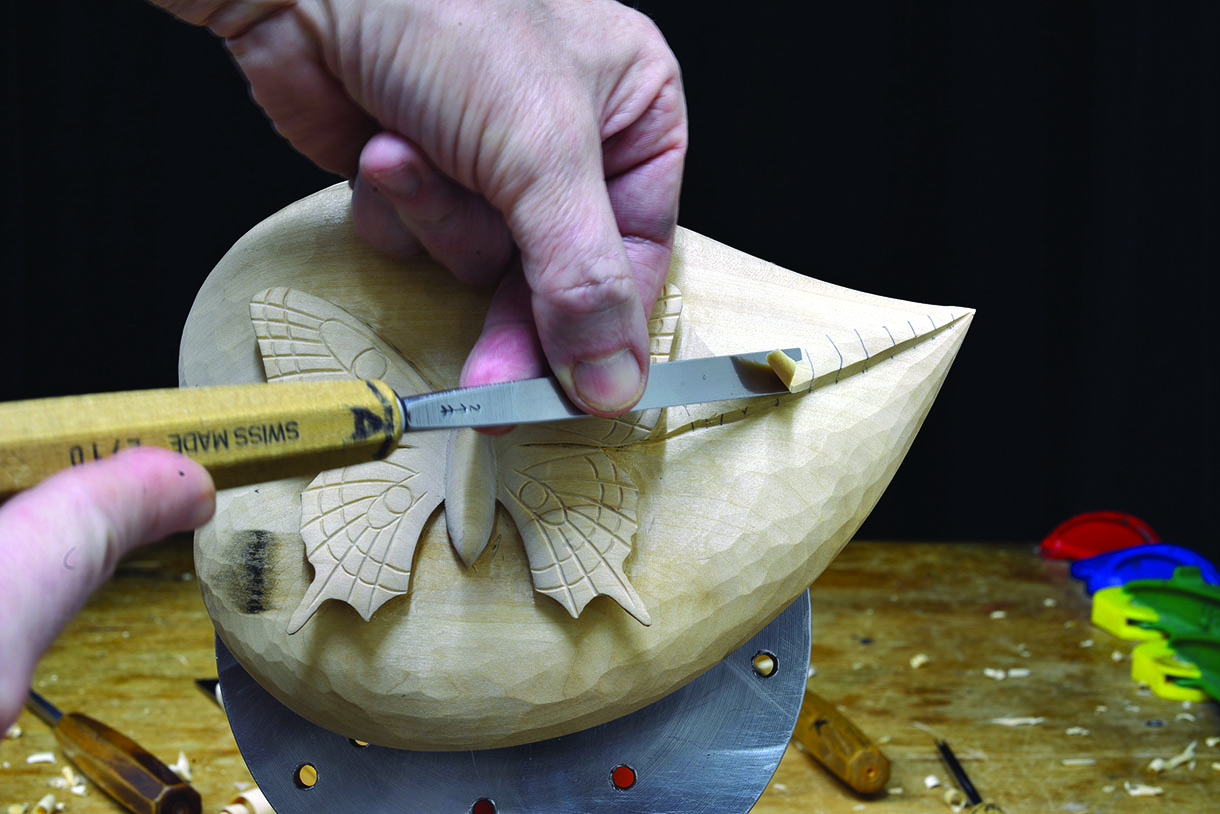
6a. Use a No.2,10mm to pare the wood back along the edges until you reach the depth of the V-tool cut. Repeat until the edges are square and level with the original outline. The position between the lower body and wings is impossible to straighten with the V-tool, but a razor-sharp knife will access this tight area. Use the tip of the blade to make a cut along the line of the body and wings
6b. Then turn the knife on its side and slice into the vertical cut to remove the chips. Repeat until you reach the depth of the background
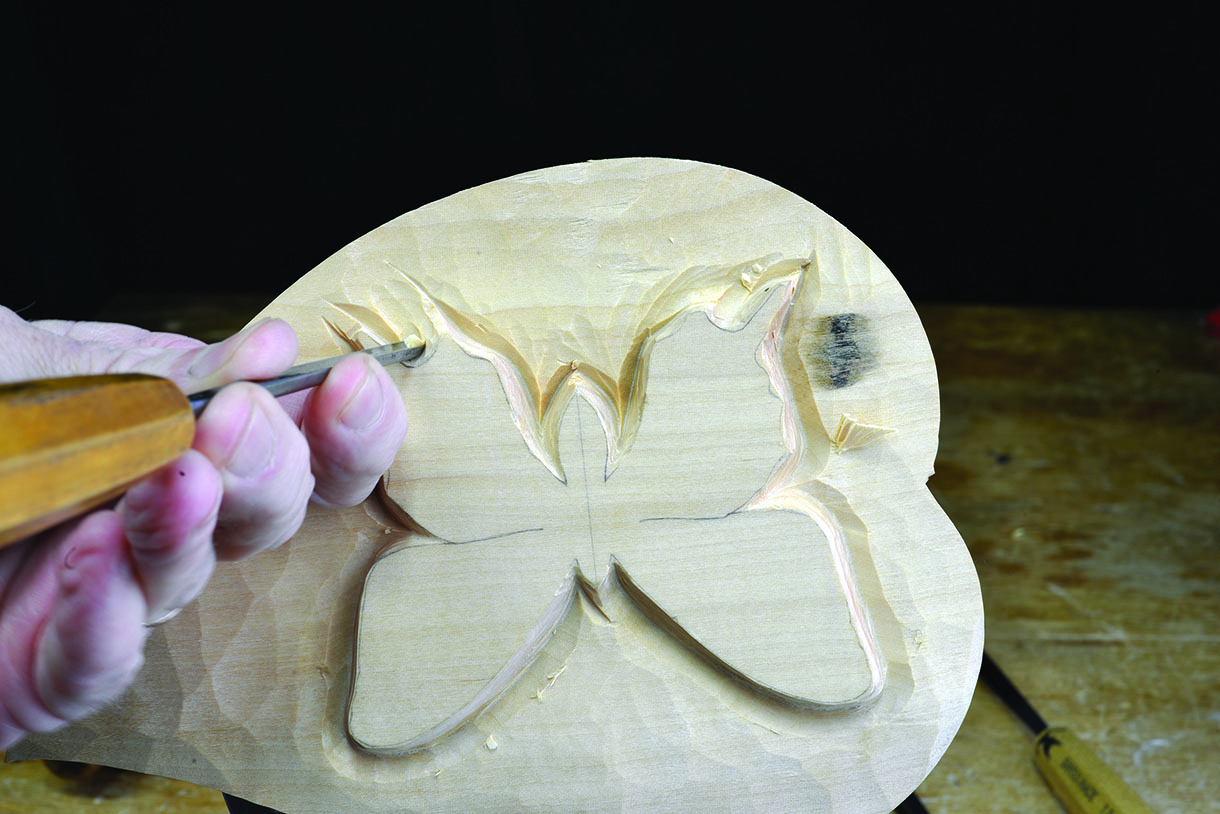
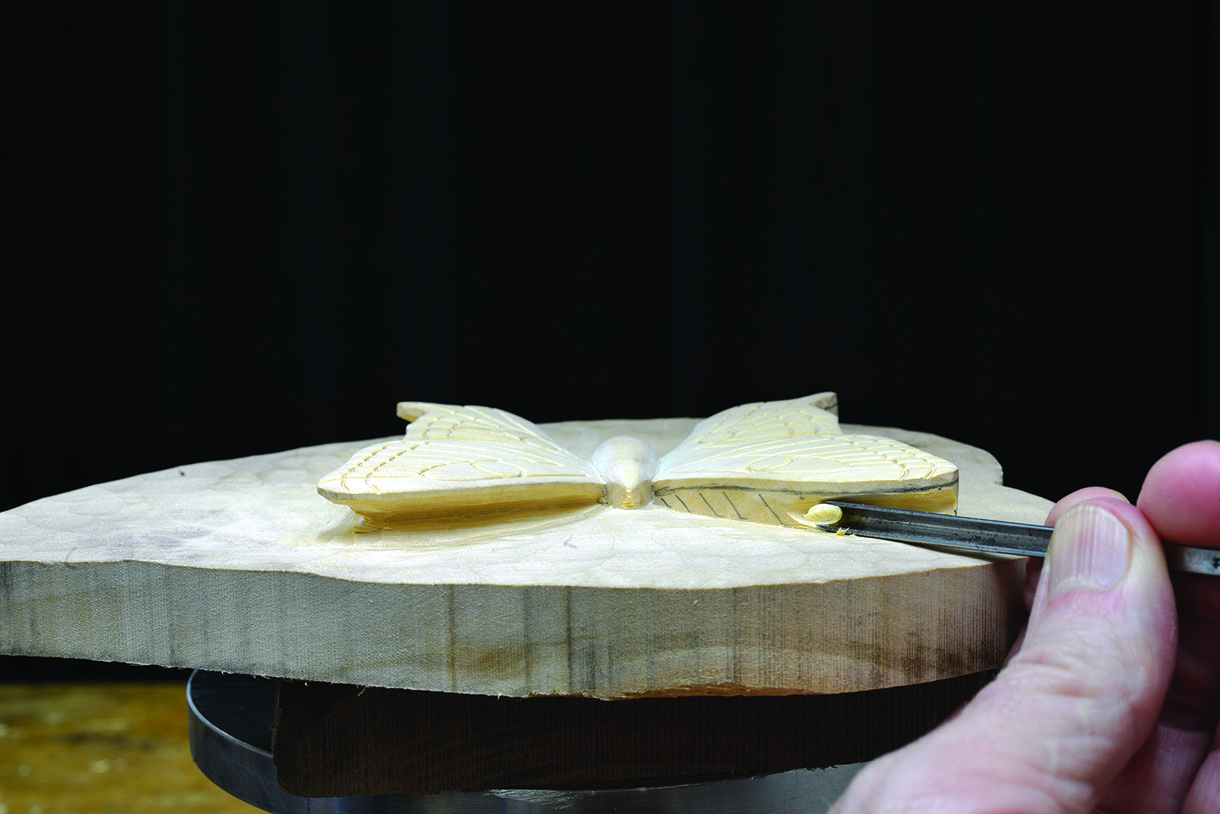
7. Now to move on to the modelling of the butterfly and leaf. The first job is to create the visual effect of the wings emerging outwards from the body. The objective is to lower the level of the body and blend this depth up to the tip of the wings. Use a No.7, 6mm to reduce the depth of the body by approximately 4-5mm
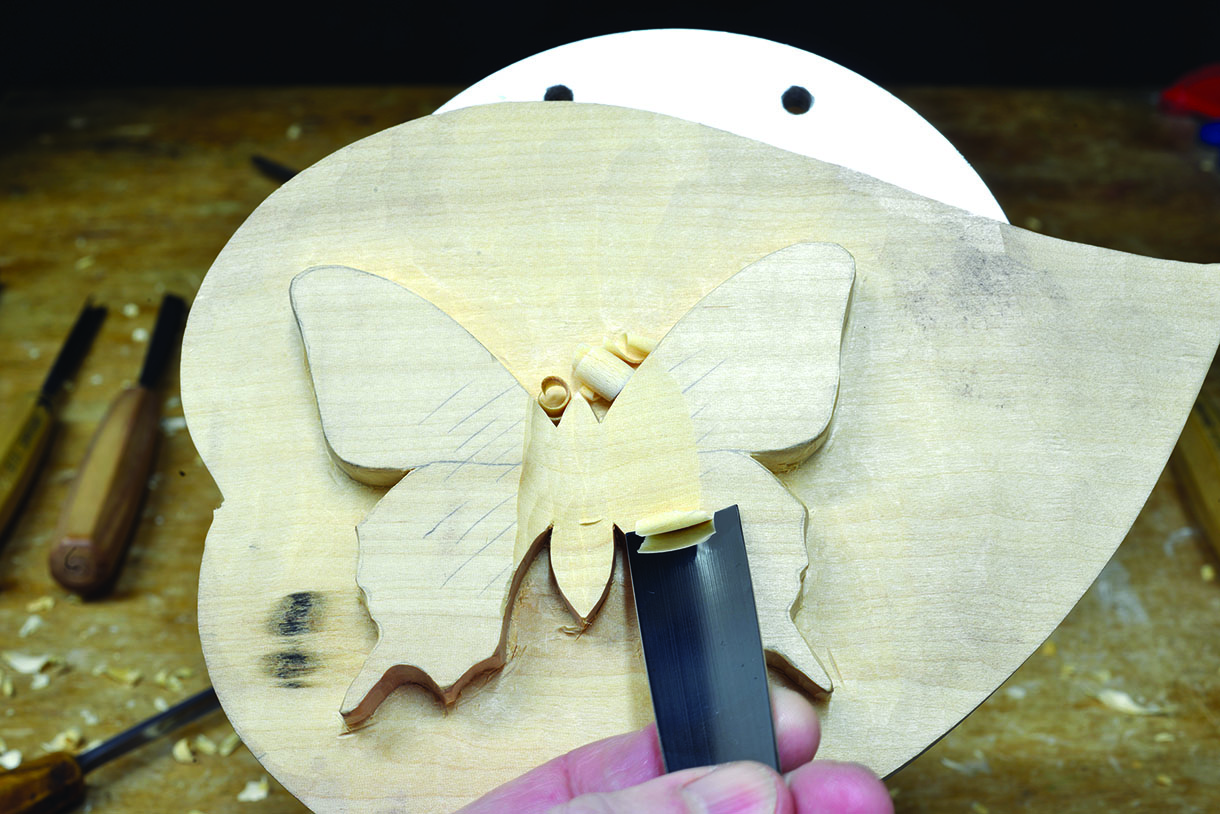
8. Now use a No.2, 20mm to blend the depth upwards and out to the level of the wing tips
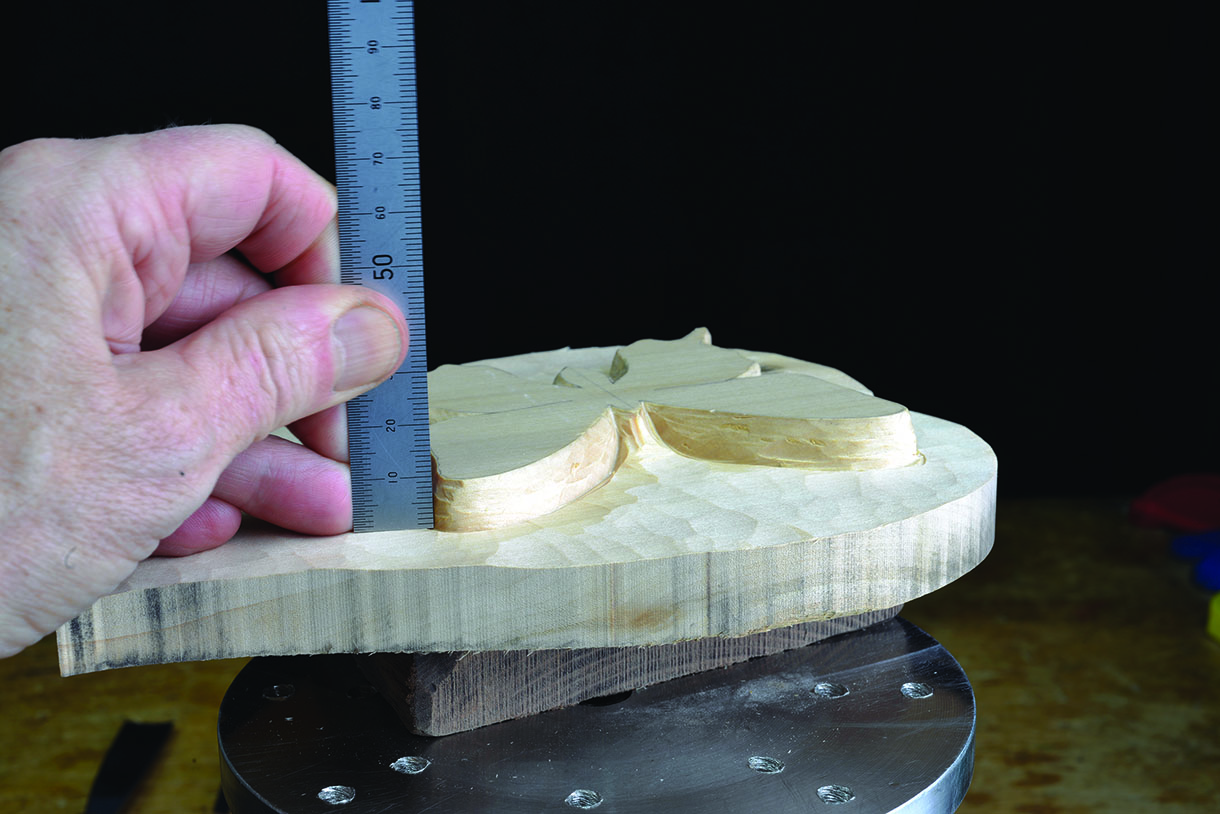
Top tip:
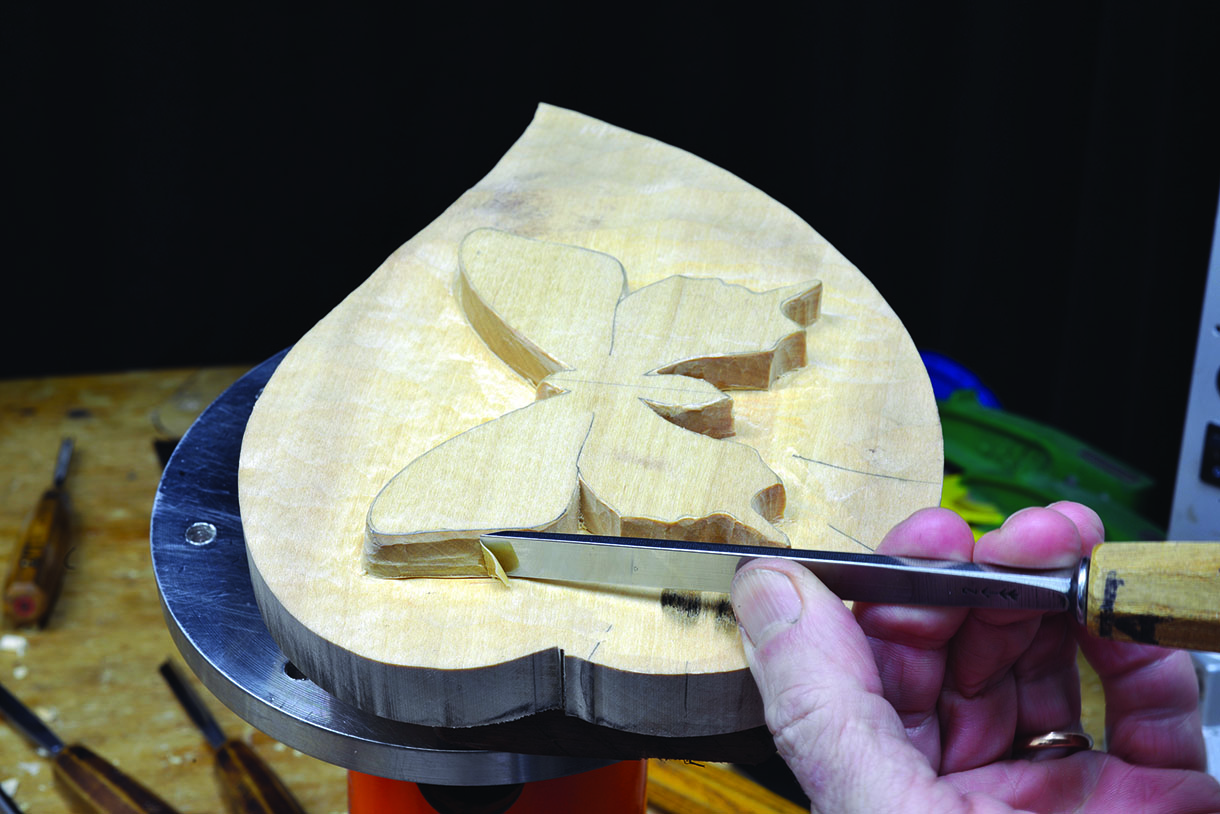
To verify the depth of the body and the symmetry of the wing curves, a straightedge is placed between the wings to enable the measurement of depth, and to visually verify the symmetry of the wing curvature.
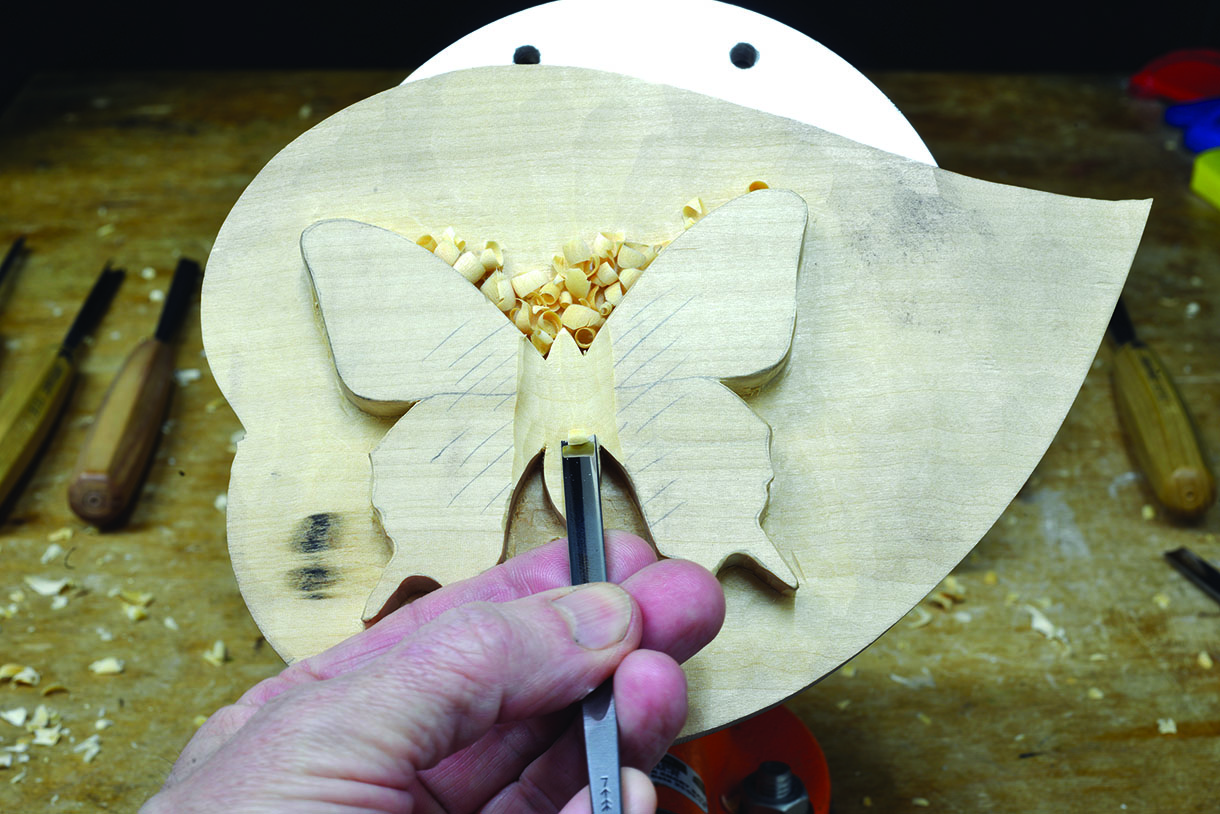
9. Using the template as a reference to help you, draw the line of the body in its correct position. Use the V-tool to ‘sketch’ directly along the outer edge of this line
10. Now use the No.2 gouge to blend the V-tool cut up and over the wings to their outer tips. Repeat steps nine and 10 until the inner edge of the wings are approximately 3mm lower than the body where they join
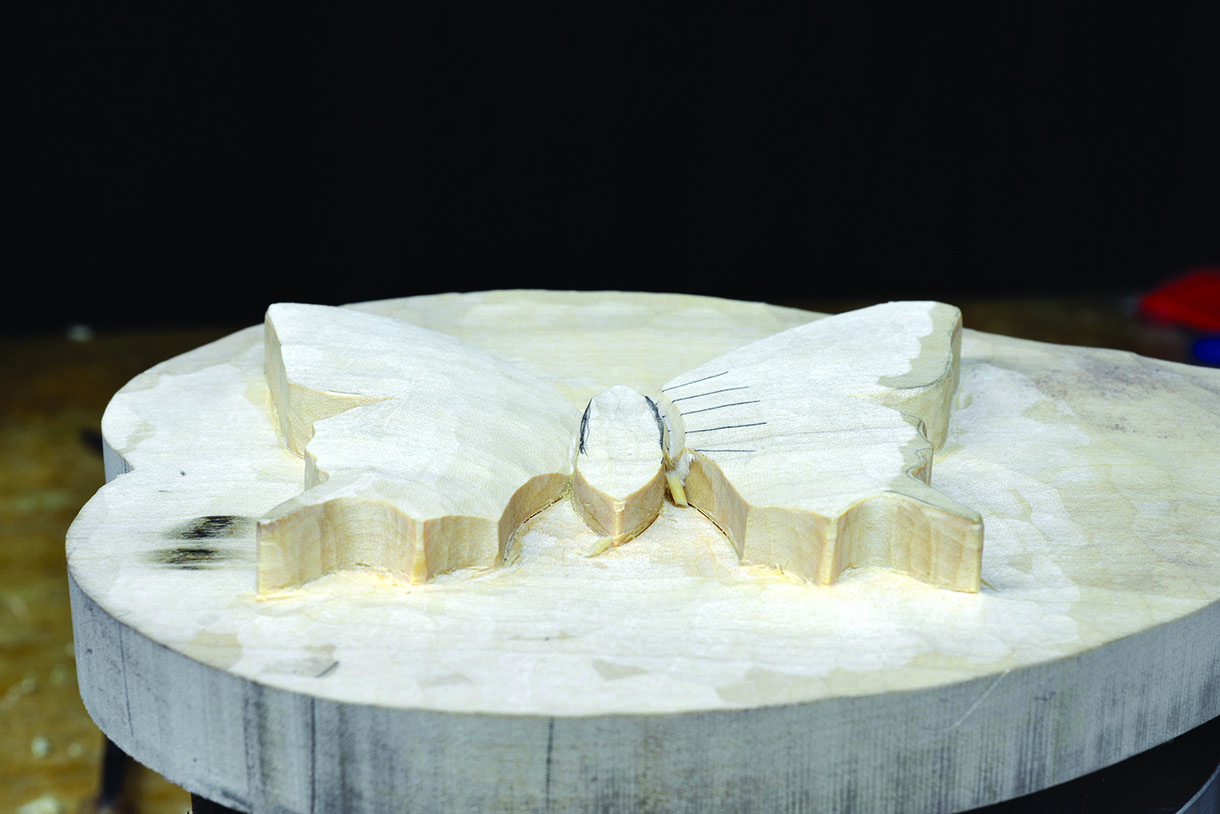
11. Now use a No.2, 5mm to curve over the straight edges up to the centre of the body from both sides
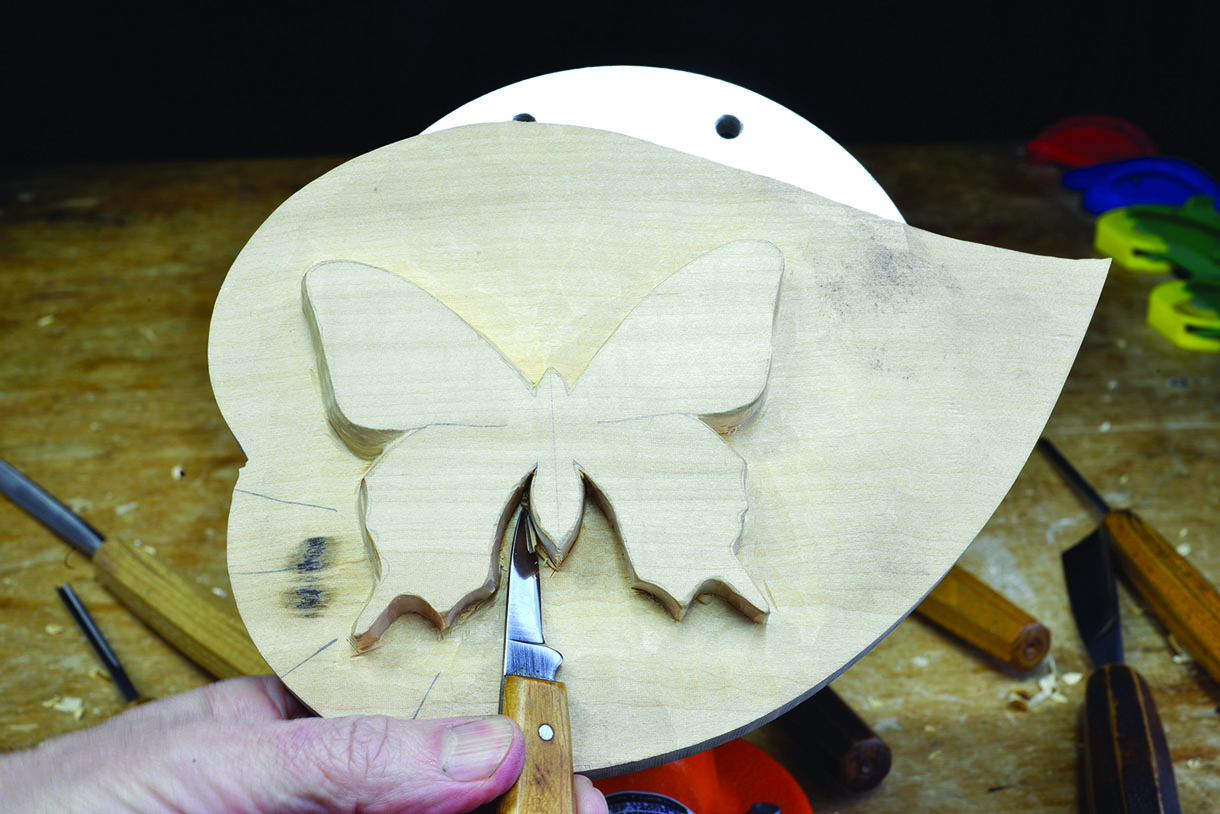
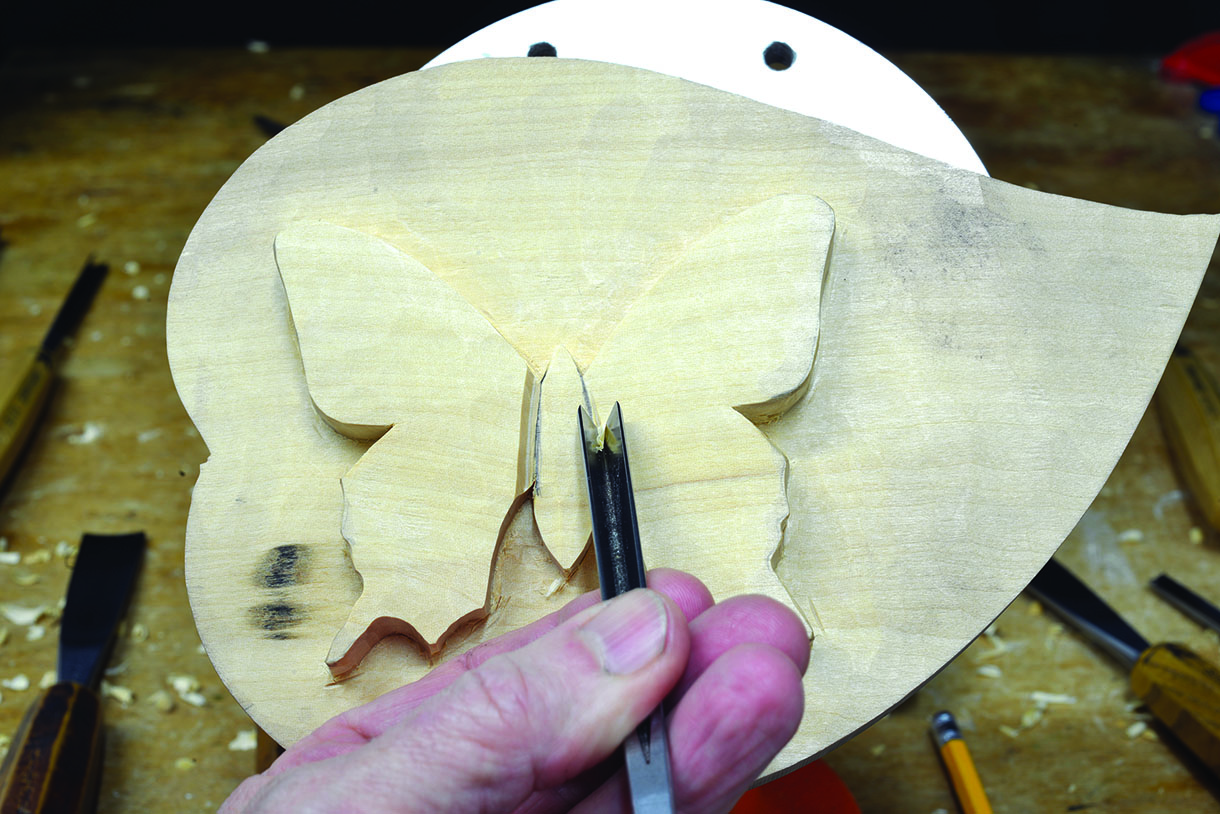
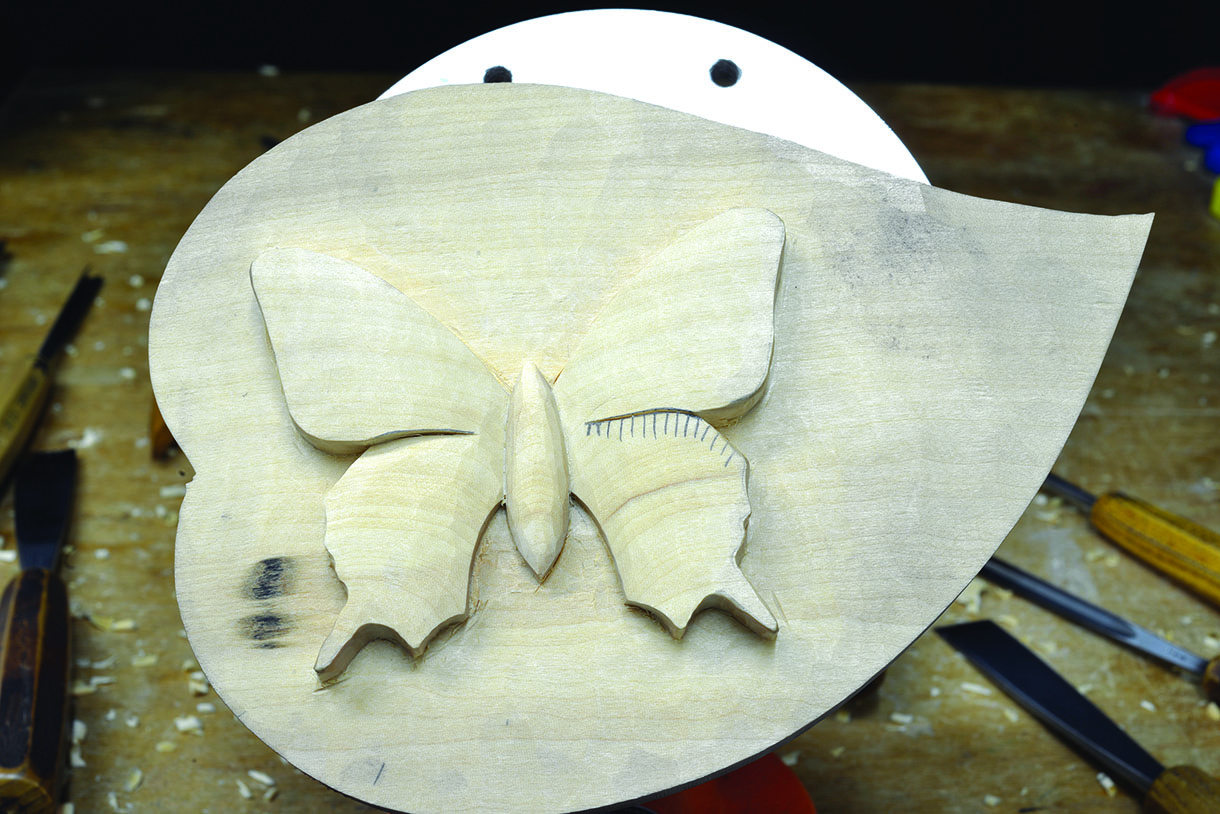
12. Unless you have studied these beautiful creatures, you would be forgiven if you had not noticed that butterflies actually have four wings – two forewings and two hindwings. Consequently, the next job is to separate these two areas. Using the template to assist you, draw the line of separation accurately in position on both sides and check for symmetry. Use a sharp knife to cut a slice along this line
13. Use the No.2, 10mm and No.2, 20mm to pare the hindwing into the knife cut, naturally defining the two different depths of the wings. Repeat this procedure until you reach a depth of approximately 3mm on the outer edges where the forewing and hindwings join
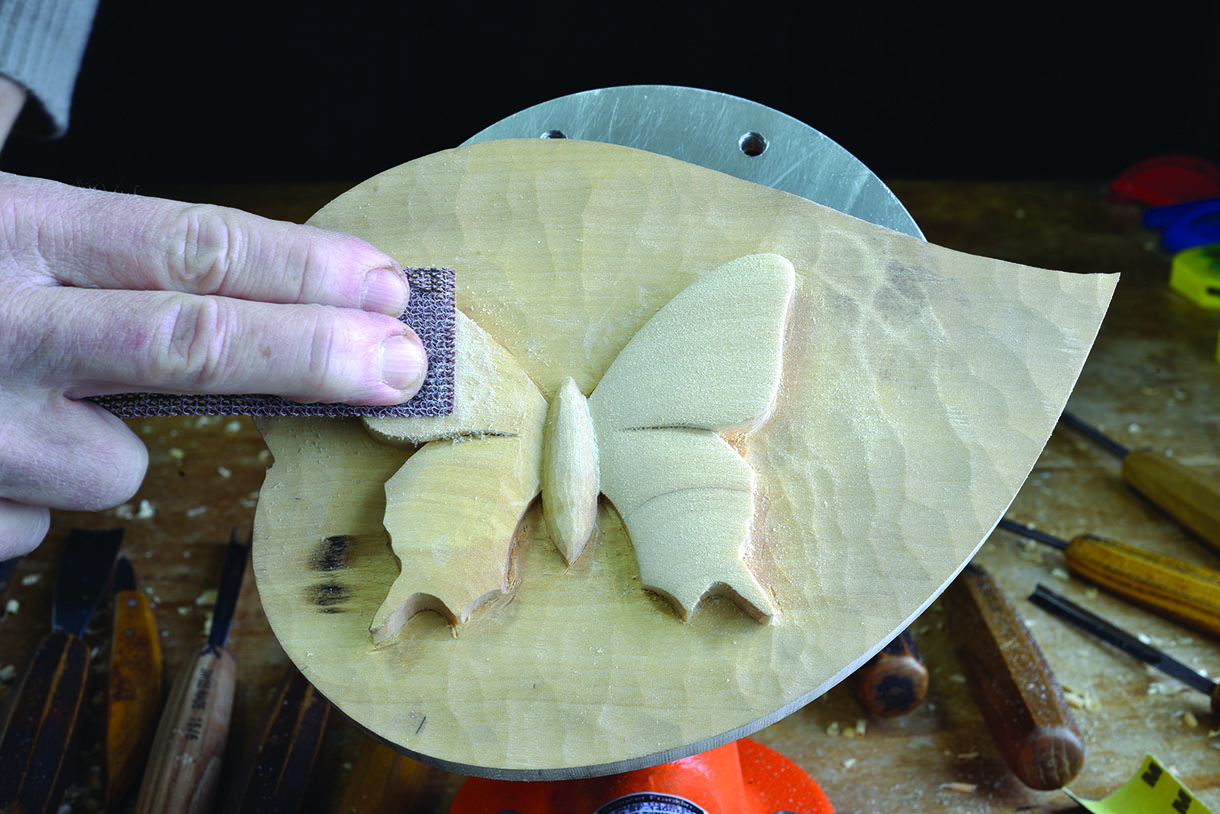
14. Before the next stage of the detail is applied to the butterfly, the complete form must be sanded through 100-240 grit to produce a flush, smooth finish on the surface
Top tip:
When sanding, always try to work in the direction of the grain, which lessens the risk of producing deep scratch marks that are difficult to remove with the subsequent abrasive grits. You may have to initially sand across the grain to remove the gouge marks, but can be finished off afterwards by following the grain to remove the scratches.
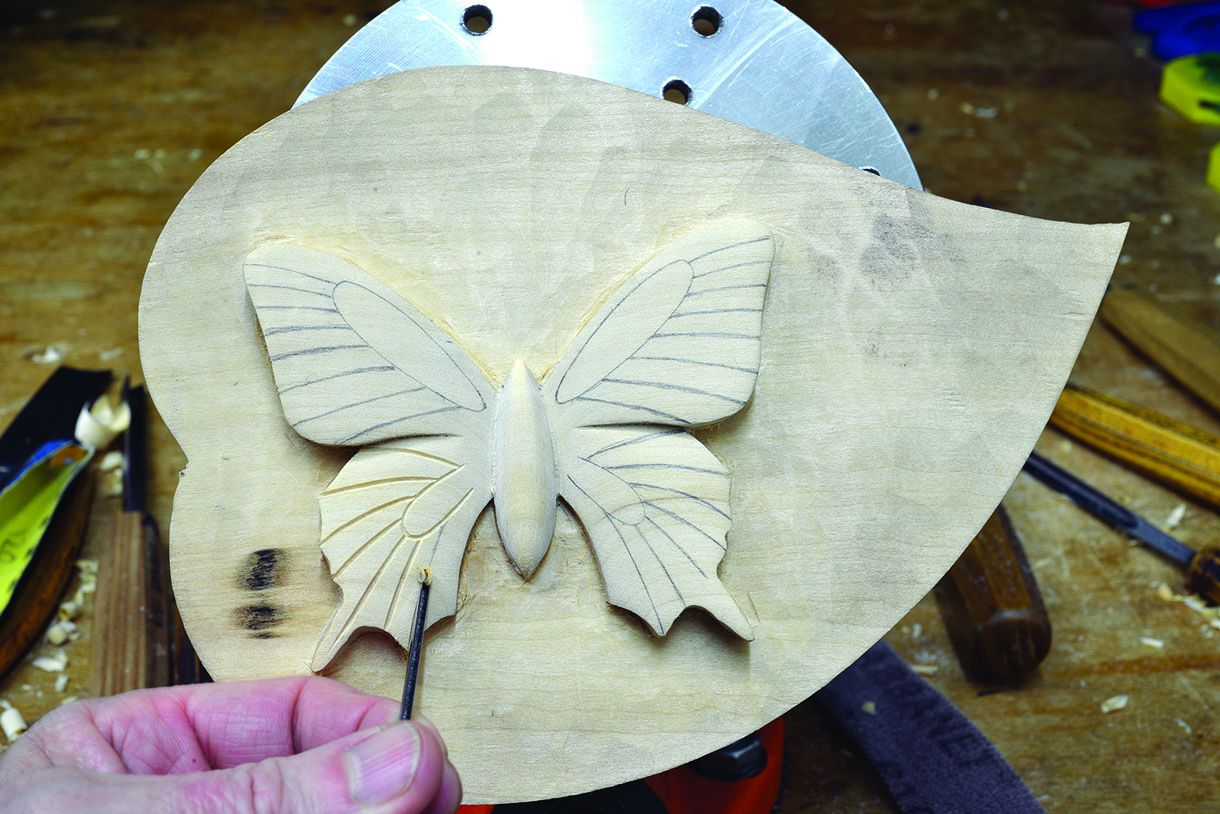
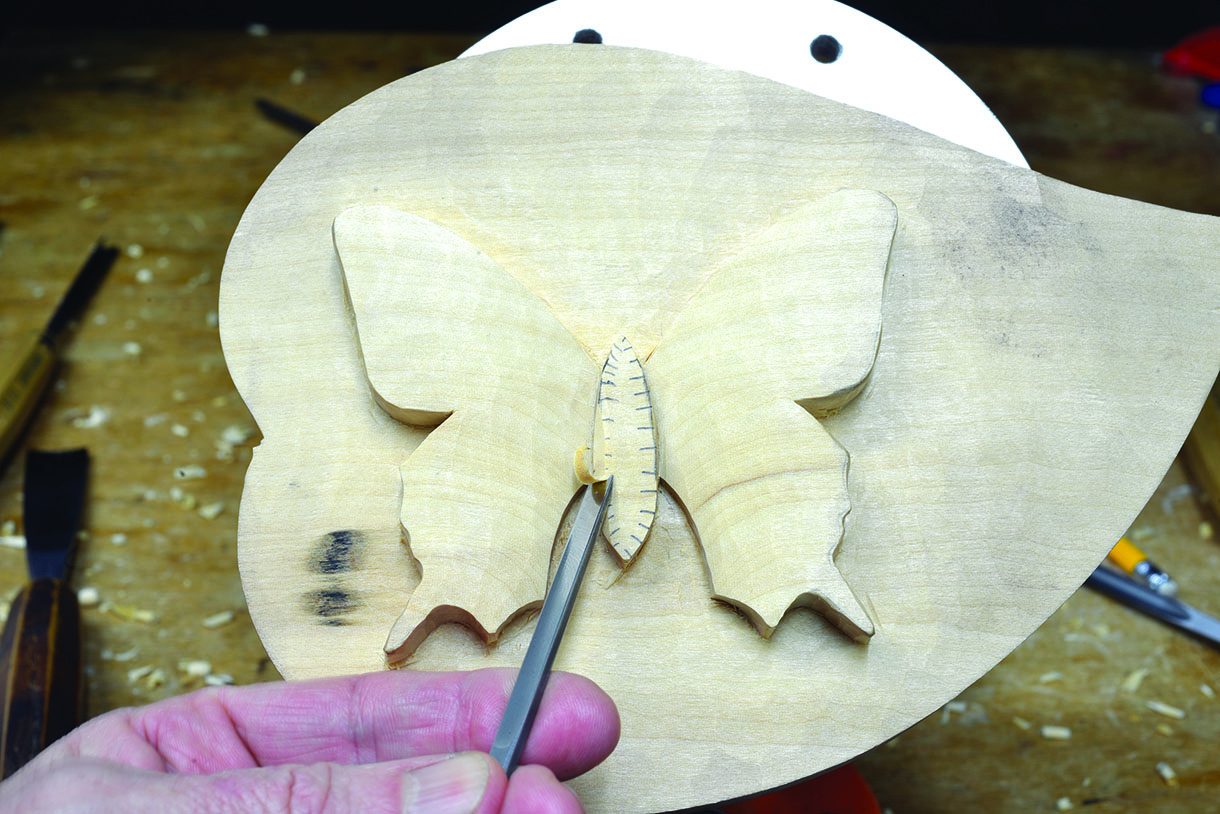
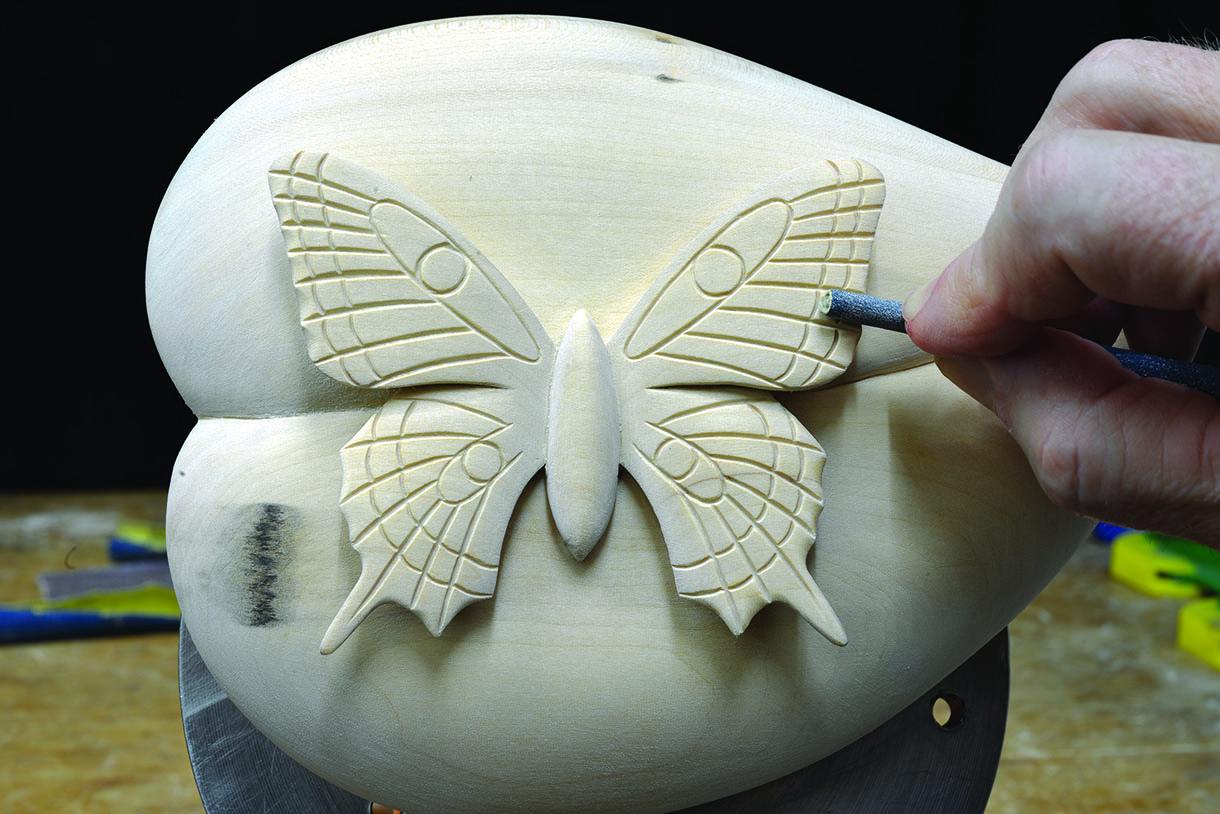
15. There is scope for incorporating your own design ideas for the wing detail. Using the template as a reference, draw these details on to both wings and check them for symmetry. Use a No.16, 1mm V-tool to carve a groove along each of the lines
16. Draw the finer details up through the wingtips and the little circles inside the elliptical areas of the wings. Carefully carve these, ensuring all of the grooves are as even in width and depth as possible. Use a piece of 240 grit to sand through each of the grooves, but do not smooth over the edges as this will lessen the important effect of the shadow
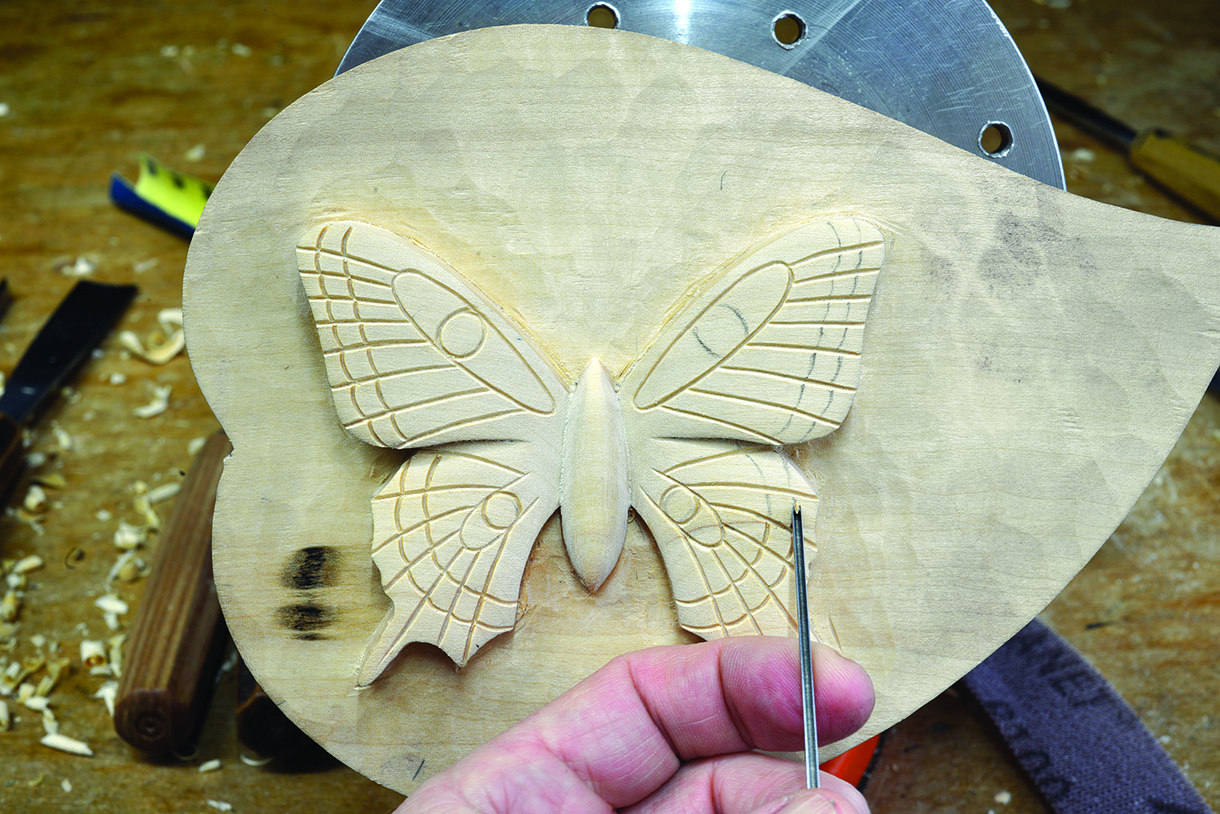
17. Now it’s time for the undercutting. This has to be performed very carefully so as not to risk snapping off any parts of the wingtips, especially the lower, thin, pointed parts. Measure and mark a 1mm line around the edge of the butterfly. Using a No.11, 3mm veiner, make the initial groove underneath the wings, and then again to deepen this groove. When the tool starts to stick instead of cut, swap down to a No.11, 2mm to cut further underneath, and finally a No.11, 1mm. Continue around the edges, swapping to the smaller No.11 where necessary, creating a good, deep channel between the surface and the 1mm line
Undercutting
The objective of the undercutting is to add shadow underneath the carving, creating the appearance that the subject and background are two separate volumes.
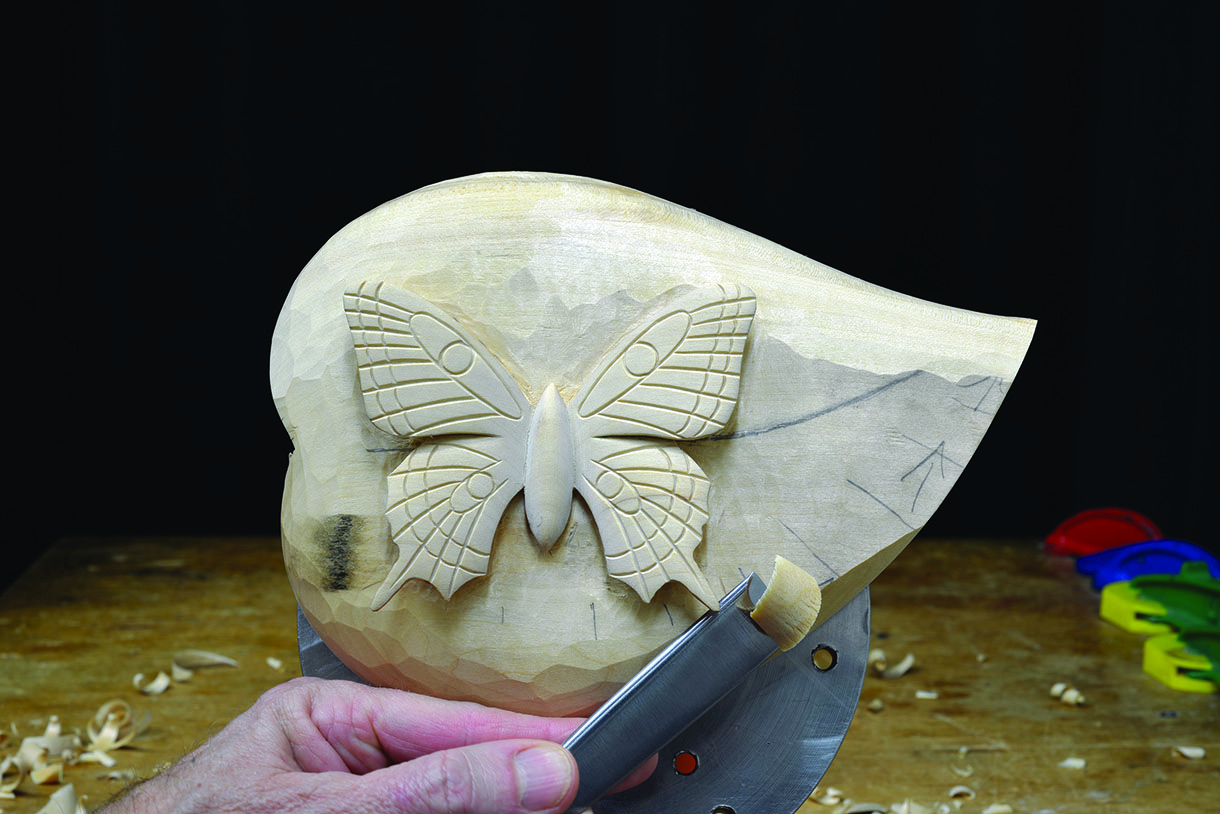
18. Now to work on the leaf. The objective is to create a natural curve around the edge, across the surface and into the centre groove. Starting with the outer edge, use the No.2, 20mm to produce the curve from the bottom edge up on to the surface and under the wings, blending it evenly into the undercuts
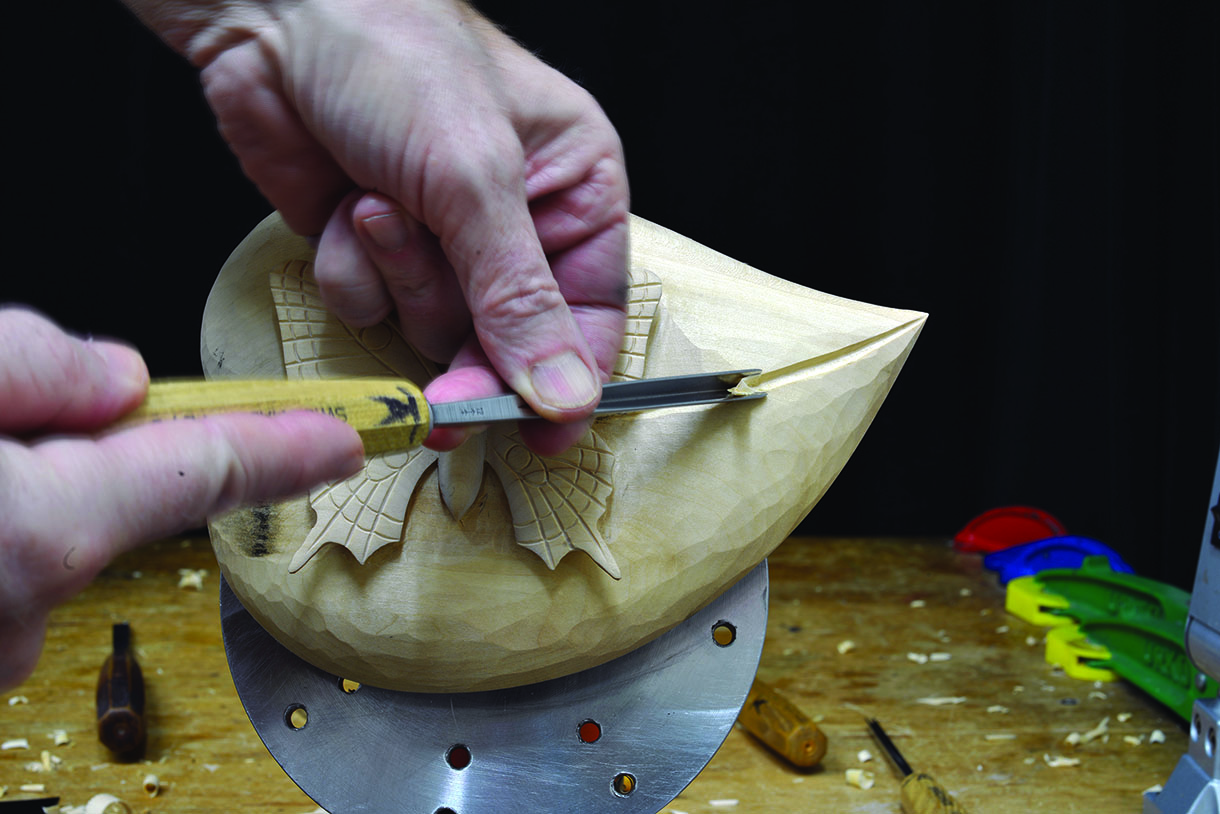
19. Using a No.12, 6mm V-tool, carve a deep groove along the centreline of the leaf, ensuring that this terminates neatly on the surface before it reaches the solid area underneath the butterfly
20. Now pare the adjacent areas naturally into the V-tool cut. Repeat steps 19 and 20 until enough depth is gained to produce an effective and balanced appearance
Top tip:
A knife can be used to cut a deep slice along the V-tool channel to produce a sharp finish in the centre of the leaf, as opposed to the wider groove left by a V-tool
21. The surface of the leaf and the butterfly undercuts can now be sanded through all grits. Start with 100 grit to remove tool marks and to sharpen the edge of the underside of the wingtips, creating their delicate appearance
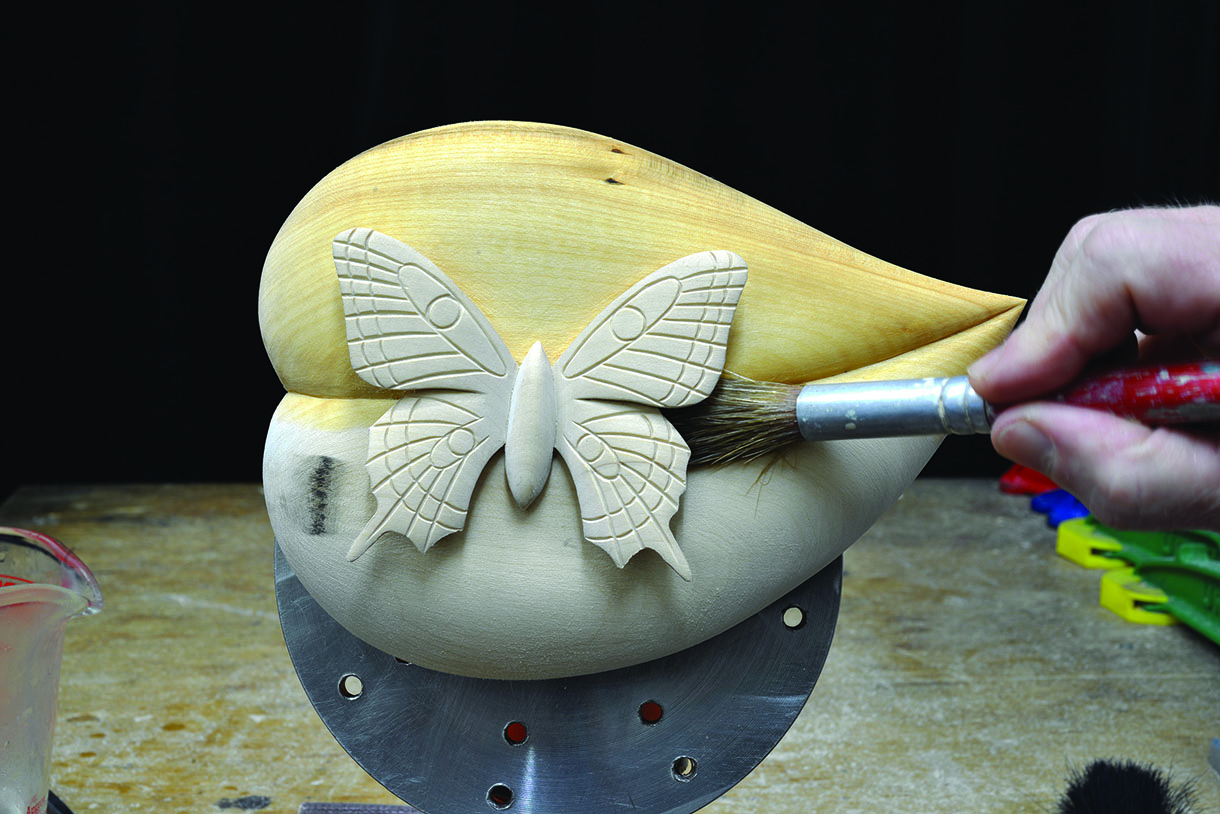
22a. Dust off the wood then brush or pour hot water over the leaf and leave it to dry. Next, work through grits 150, 240 and 400, removing all the scratches from each previous grit and repeating the hot water process in between each grit grade used. Next use 400 grit to sand all the details and to refine the shape of the wingtips
22b. Use a small section of the abrasive, rolled up tightly, and shape each section of the tips, from the outer groove to the edge, creating a slight curve between each section and a very sharp edge

23. The pattern on the leaf can be detailed as in the example, adapted or simply left smooth. Draw the detail onto the surface. Use the No.16m, 1mm V-tool to carve the small channels evenly along the design line. Sand the channels with 400 grit
24. I used two different finishes to create two different colour tones on the piece to visually separate the butterfly from the leaf. Boiled linseed oil was applied over the surface of the leaf, and brushed around the undercuts and the underside of the butterfly. This lowered the natural colour tone of the lime and added shadow. The oil was left to dry for a week or so before several coats of medium brown wax polish were applied to seal the grain and leave a fine finish. Clear wax was applied to the butterfly with a clean toothbrush, which sealed the wood and retained the original lighter colour of the lime