How to Make a Lectern
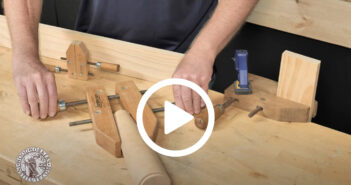
Michael T Collins makes an easily adjustable lectern. Dale Carnegie once said ‘there are always…
Submissions now open for the Mark Baker Woodturner of the Year Competition. Enter HERE for a chance to win prizes
Michael T Collins makes an easily adjustable lectern. Dale Carnegie once said ‘there are always…
In honour of our much missed and respected former Editor Mark Baker, we have launched…
Dennis Zongker talks you through the steps for bending wood for curved furniture Furniture makers have…
We show you how to do it right! Marking out components for cutting and shaping…
Peter Benson explores size and scale of carvings In this world where fashions seem to…
When building a woodworking toolkit, there are several essential power tools that make the process…
Mark Palma looks at expanding the use of wax in woodturning. Wax has been used…
Louise Biggs shows us you can have your cake and eat it too. This cake stand is made of quartersawn London plane (Platanus hybrid) also known as ‘lacewood’. My customer had made the cake stand at sixth-form college, with all the parts being produced between his woodwork and metalwork classes. Some decades later the frame sections had warped and twisted. Eager to keep it complete we embarked on a journey to try straightening them. I felt there was little we could do with the twist even if we succeeded in straightening them. Assessment Tool list For the turning Stages of Restoration Attempting to straighten the uprights Further reading
Lee Stoffer weaves the seat for his stool. To ensure the seat weave was of the highest standard, I visited my friend and basket maker extraordinaire, Martin Hazell. He’s developed his own method for chair seating with willow, which is reasonably simple to achieve, incredibly strong and comfortable. The finished stool should give many years of reliable service. Martin has a 15-year-old example that is still in great condition with regular use. You can also modify the frame, adding stretchers to give extra support to taller versions if you wish. Further reading
Steve Bisco carves a jewellery dish in the Arts & Crafts style The craftsmen and craftswomen of the Arts & Crafts movement liked to produce objects that were both beautiful and useful, and they took their inspiration mainly from the flora and fauna of the countryside around them. Some of the plants, birds and animals they depicted were in a stylised form closely related to Art Nouveau, and others were portrayed in their natural form. This dish is a depiction of a water lily leaf and flower in a stylised form, but with a nod and a wink to the natural plant. In nature, the lily leaf and the lily flower grow on separate stems and are only seen united when the flower drifts into the deep ‘inlet’ at the back of the leaf, which does occur often enough for us to use it as a decorative motif. The flower
Peter Benson looks at keeping tools sharp for carving figures. For this article on queries I received at the European Woodworking Show at Cressing Temple Barn, I will deal with a third general area that visitors were worried about: how to deal with carving figures in the round – animal and human. For figures in general, it is most important to study the basic skeleton first, and then look at as many pictures of your subject as possible to get an idea of what sort of pose and position is typical of that subject. Many carvings of animals and humans are basically accurate but don’t sit right. The balance and centre of gravity are all wrong. How many carvings of birds have you seen that are falling backwards off their perches, or people that are supposed to be moving but look like statues? Such errors are nothing to do with
In this article we will be looking at the polissoir. These were commonly used tools for applying finishes to furniture and musical instruments. The polissoir, by Roubo A wax finish does not necessarily denote a matt finish. The late 18th-century portrait paintings by the American John Singleton Copley often depict a sitter next to a table or a piece of furniture. In the majority of Copley’s paintings, the sitter’s image is reflected in the furniture’s top, suggesting that the furniture was finished to a high level of gloss. It is generally believed that the primitive nature of 18th-century materials would have precluded a wax finish. However, the practice of achieving gloss on 18th-century furniture may have been much greater than first assumed. Anyone experimenting with wax will know that it is a difficult finish to apply; for a successful application, you must first consider how much to apply, and how
Chris Grace makes an improvement to his banjo and tailstock. Have you ever suffered a sticking banjo or tailstock, when it just won’t slide freely and you need to jiggle it or use two hands to move it? I have experienced this problem on several lathes. Sometimes it’s a minor irritation, and other times it can get quite annoying. When I get fed up with it I usually slide the offending item off, clean it, lube it and the lathe bed, and off we go with a nice smooth and freely positionable banjo and tailstock again. The bolt that holds the banjo and tailstock on simply dangles down from the cam when loose, and is free to pendulum. When you suddenly move it, the plate at the bottom can catch on the underside of the lathe bed causing a sudden increase in friction. This results in its inability to move
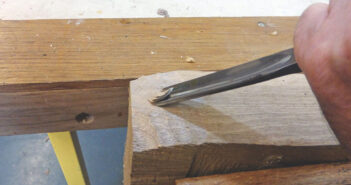
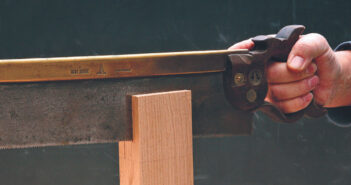
Never heard of the ‘Gottshall Block Test’? It is an exercise for beginning woodworkers included in Making Antique Furniture Reproductions by Franklin H. Gottshall, a period furniture writer. The key value of this exercise lies in understanding that grain directions play a critical role in how you use a chisel. Your goal is to keep the chisel edge from digging in and splitting the wood. After teaching classes modelled after Gottshall’s exercise to woodworkers who are not beginners, I can safely say that the Gottshall exercise is a worthy pursuit for the average traditional woodworkers as well. The modified exercise and the tools When I teach, I follow a slightly different approach from Gottshall’s as our focus is on the chisel. First, I replace the round and mitre corners with a tail (see diagram). Second, the only cutting tools we use are the handsaw and chisels – no drill or
Looking for a fun woodcarving project for the weekend? Johan Roudy carves a ready-to-leap mouse that perches neatly on any 90° corner. This precarious pet makes a fun little feature to place around your house, or to give as a gift to a friend or family member. A few basics This mouse is a fun project to carve. The base is left during almost all the carving process to allow the piece to be clamped on the bench more easily. Once the carving is done, it is carefully cut so that the mouse can rest, for example, on the edge of a shelf – as if being pursued by a fervent cat. My Japanese saw was quite handy for that step. A clean and accurate cut can be achieved both along and across the grain. It is important to carve the body large enough compared to the head to achieve